Crochet A Pocket Shawl
Crochet A Perfectly Pretty Pocket Shawl
Hello my lovely crochet friends! Today I am bringing to you a new crochet tutorial, on how to crochet a Perfectly Pretty Pocket Shawl.
I was inspired to do this design after seeing so many beautiful pocket shawl creations over the internet. This truly has been a strong trend this Summer. I love the effect adding simple pockets can give a simple shawl. I hope you enjoy this project as much as me! Let me know if you created a pocket shawl, I would love to see it!
You can find my Youtube tutorial if you follow this link: Crochet Pocket Shawl Video Tutorial
Crochet A Perfectly Pretty Pocket Shawl: the design
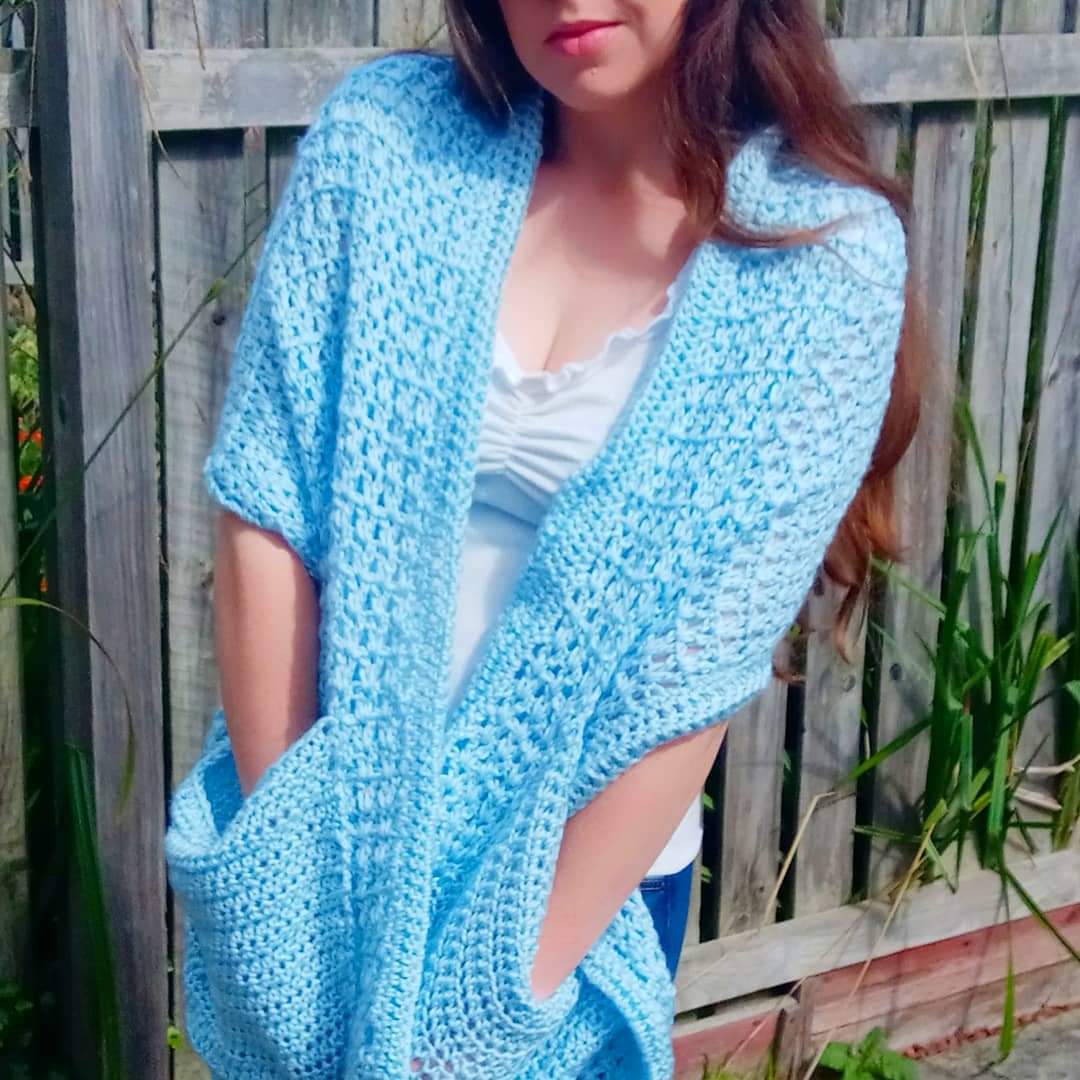
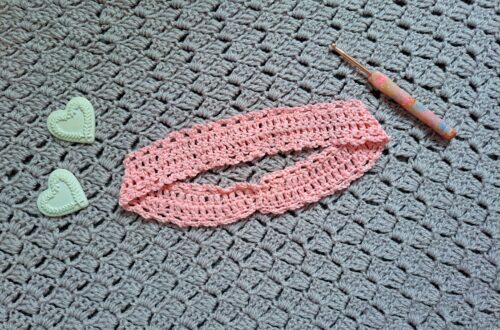
I started my Pocket Shawl by making a long wrap made out of V stitches. I love the effect the V stitch can give any garment. Also, I use my own version of a V Stitch, which I call the “Vintage V Stitch”, as I believe this is quite an old fashioned way to crochet a V stitch. If you are wondering what my “old fashioned V stitch” is, check out the pattern, you won’t be disappointed! It’s a super easy stitch.
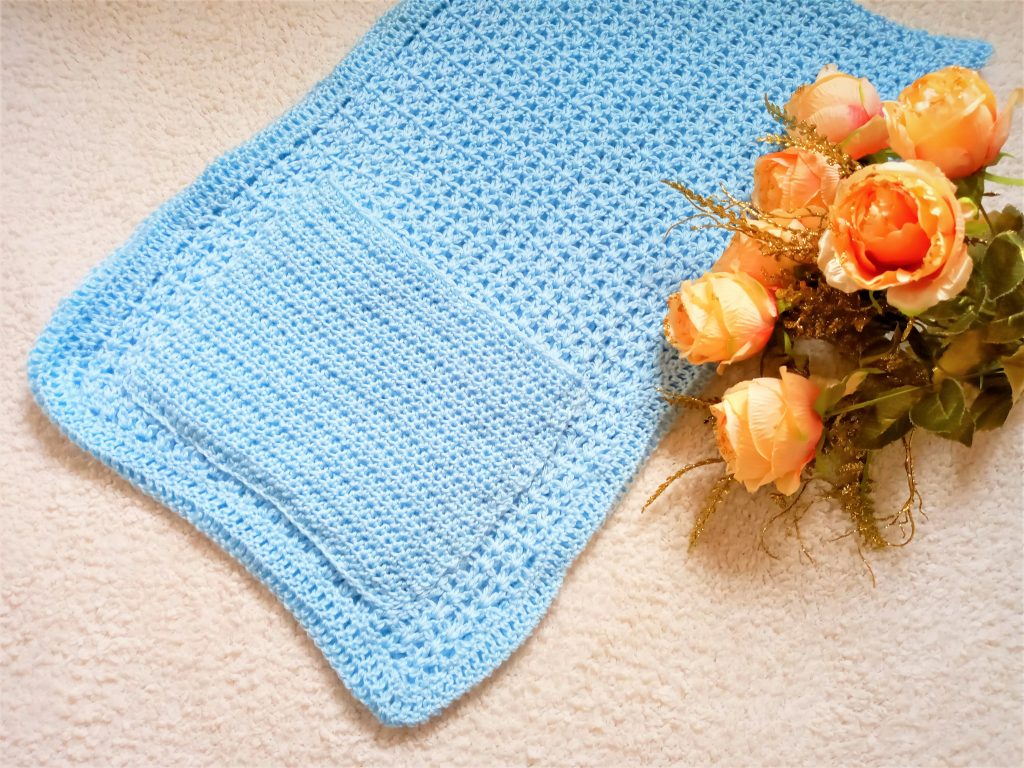
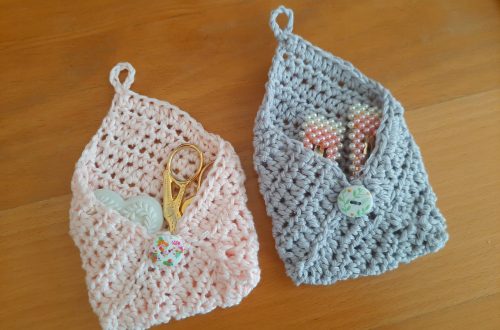
After I created my wrap, I made the pockets. These pockets are created by crocheting rows of Half Double Crochets. This created extra texture on this wrap, which I love! After that, I made my border all around my wrap.
These are very easy steps to crochet the perfect pocket shawl. You can make it too. This project is very beginner friendly. This is the perfect first time project for any crocheter. The pockets create such an interesting look!
Crochet A Perfectly Pretty Pocket Shawl: the yarn
I used Caron Simply Soft to crochet my pocket shawl. You can use any Aran weight yarn for this project (size 4 yarn). You could use any colour you prefer too. This is the best part about this project! It really is versatile!
As I said, I used Caron Simply Soft yarn in shade Light Blue. This yarn has such a lovely hue to it. It really is the most lovely shade of baby blue. I thought this colour was perfect for a Summer wrap.
The Pocket Shawl: A must have accessory for this Summer
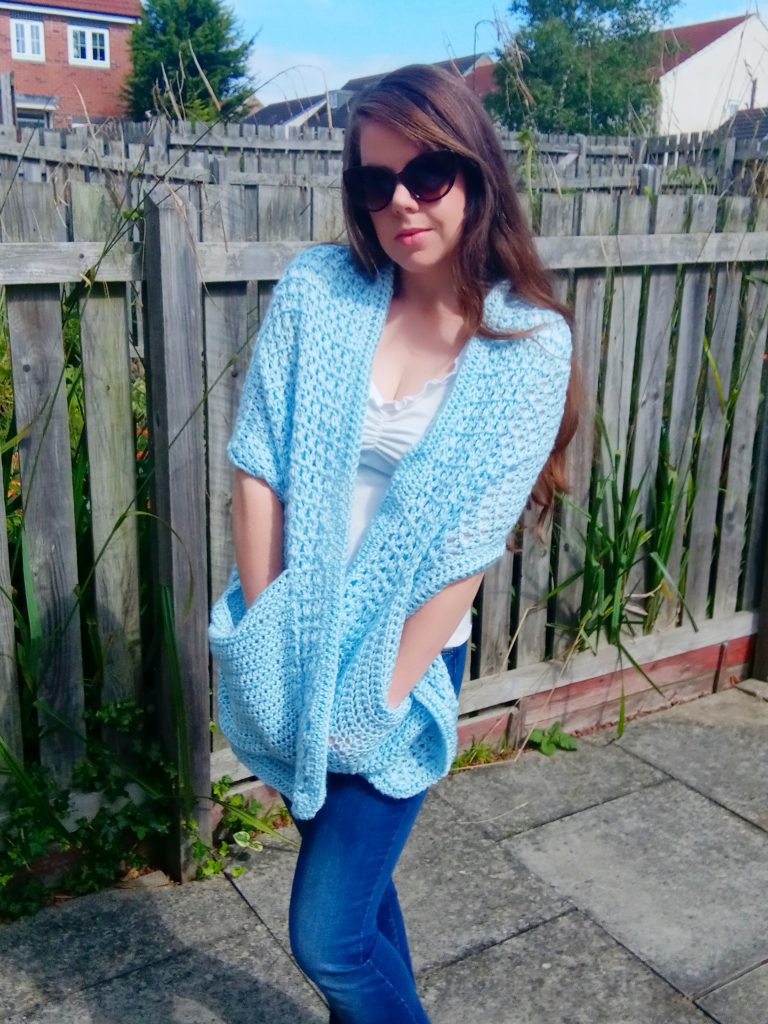
A pocket shawl truly is the must have accessory for this Summer. It really is on trend, and looks the pretty and feminine. It is also super convenient to tuck in your hands if it gets a bit chilly.
I am already planning on making another version for the Autumn. I am so in love with this design! My Autumn version of a pocket shawl will definitely have fringes I think.
The pocket shawl: A highly requested project
This project has been highly requested on my Facebook group. If you are not yet a member, please consider joining here My Facebook group to connect
This group is for like minded people to join and chat on our favourite subject (crochet).
The pocket shawl has been highly requested on all of my Social Media platforms. So I thought I would create my own version of it. I hope you like it! Let me know in the comments. Your questions and input concerning my future projects are so important to me.
Connecting with you
I love connecting with my Crochet Community through my blog and Social Media. You can find me on Youtube, Instagram, and Pinterest. I would love to connect with you on these platforms.
You can also join my private Facebook group to connect.
Join my exclusive and fun Patreon community, a haven for feminine crochet and so much more!
You can subscribe to my weekly newsletter here. You will then be the first to hear about my new free patterns, video tutorials, and give-aways.
Take care my lovely crochet friends,
Xoxo Selina.
Crochet A Perfectly Pretty Pocket Shawl Pattern
You can purchase the ad free, large print, PDF pattern on my Etsy shop here: Crochet The Perfectly Pretty Pocket Shawl PDF Pattern
You can purchase the ad free, PDF, large print pattern from my Ravelry store here: The Perfectly Pretty Pocket Shawl Pattern
You can purchase my Pocket Shawl Pattern Bundle here: The Pocket Shawl Pattern Bundle
Level: Easy +
Notes: I will be writing in US terms
Gauge: 4” (=10 cm) = 5 V stitch repeats
4” (=10 cm) =6 rows
Please note gauge is not crucial for completion of this project.
Sizes of finished Pocket Shawl: 63”x19” (160 cm x 48 cm)
Materials:
3 skeins of Caron Simply Soft in shade Soft Blue (or any other Aran weight 4 yarn)
6 mm crochet hook
Tapestry needle
Pair of scissors
Abbreviations:
ch: chain
sk: skip
SP: space
SC: Single Crochet
DC: Double Crochet
HDC: Half Double Crochet
Sl st: Slip stitch
EOR: End of row
Pattern starts here:
Ch 44 (pattern calls for a multiple of 2 + 2 for base chain)
Note: 2 DC into 1 st=V stitch
Complete rows as follows:
1: Place 2 DC into 4th ch from hook, [sk 1 ch, place 2 DC in next ch] until last 2 ch; sk 1 ch, 1 DC into last ch.
2: Ch 3 (=DC), turn your work. Place 2 DC (=V stitch) into next V stitch from previous row until eor, finishing off row by placing a DC into the ch 3 from previous row.
3-88: repeat row 2.
Fasten off, tidy up your loose ends.
Pockets:
Ch 35
1: HDC into 3rd ch from hook (first ch 2 counts as a HDC), and place a HDC into each st until eor.
2: ch 2 (=HDC), turn your work, HDC into 2nd st and every st until eor.
3-23: repeat row 2
Fasten off, leaving a long tail for sewing your pocket onto your shawl.
Sew your pockets onto your shawl:
Place your 1st pocket onto the right side of your shawl, making sure you are placing it as follows. Measure 1 inch (=2 cm) from the bottom edge, and place your pocket there, making sure you place it at the center. With long tail of yarn, sew in your pocket onto project.
Repeat this onto the other side of shawl.
Border of shawl:
Now add border to your shawl.
Attach your yarn to any st of your shawl.
1: Ch 1, and place a SC into each space all around your shawl, as equally as you can. There isn’t a specific amount of SC you have to place, just make sure you place enough SC all around the edge. Sl st to 1st ch sp.
2: Ch 3 (=DC), place a DC into each SC from the previous row, sl st to ch 3 from beginning of row.
3: repeat row 2.
Fasten off, tidy up all loose ends.


47 Comments
Joanne
Hi.
I love your pocket shawl pattern.
However I can see you are petite while I am a plus size XXL and over 170cm tall.
I understand how to make the shawl longer but also think perhaps I should make it wider. I would appreciate your opinion & suggestions.
Thanks in advance
Joanne
Selina Veronique
Hello and thank you for your comment! I am so glad you like this pocket shawl. Yes I am quite small 5 foot 2, so you could make maybe a few extra rows if you are taller (maybe 7/8 extra rows). You can measure it accross your shoulders as you go along. And you could chain 10 more at the beginning to make it wider. I hope this helps! Let me know how you get on, and have a lovely day!
Angela Trude
When you start on your second row are we supposed to crochet into the chain of the v stitch or into the v stitch itself. Also, do we not skip a stitch?
Selina Veronique
Hello, yes when you start on the second row you directly put the v stitch into the v stitch from previous row. You can check out my video tutorial here for more details https://www.youtube.com/watch?v=lWxGkMmWkFc
Lynn
Did you make this? I would like to make one for my mother, but she too is an XXL. Did the suggestions help and if so, did you need more yarn? Thank you.
Selina Veronique
Hello and thank you for your comment. Yes you can make it larger and longer, you will need to add some chains on your base chain (it’s a multiple of 2+add 2 for base chain). And you can add some rows (I am 5 foot 3). Also you will need more yarn, possibly 4 skeins.
Hope this helps!
Jennifer
I’m making this shawl for my mom for Christmas. I’m confused about the 2nd row.. Are we to put 2 DC all the way across? Or skip every other one as on the 1st row? Thank you ahead of time for answering my question
Selina Veronique
Hello and thank you for your comment. So for the second row goes like this: ch 3 to begin, than go directly into the V stitch from previous row and place 2 DC into this stitch (=V stitch). Then just go into each V stitch along this row and place 2 DC, ie V stitch, into these until the eor.
You can watch my video tutorial for this project here https://www.youtube.com/watch?v=lWxGkMmWkFc
I hope this helps!
Selina.
Darlo
Is this pattern available on Utube, I can’t read a pattern and would love to make this for my sister
Selina Veronique
Hello and thank you for your comment, yes this pattern is available on Youtube if you follow this link https://www.youtube.com/watch?v=lWxGkMmWkFc&feature=youtu.be
Sonnie
Hi! This is a beautiful pocket shawl wrap. You did a great job! I want to make one. Question: about what size are the pockets? Thanks so much.
Selina Veronique
Hello and thank you so much for your comment! The pocket measures 9.5″x11″, hope this helps, have a lovely day!
Sonnie
Thanks for your reply. I got some Caron Simply Soft in the colorway Country Blue. I would like to send you a pic when I’m done.
Terri
Isn’t a v stitch a double crochet chain then another double in the same space. Unless I’m misreading your instructions are missing the chain in between the doubles?
Selina Veronique
Thank you for stopping by! There are two different types of V stitches, either DC, ch 1, DC, or 2 DC together in one stitch. So yes that is the pattern you are reading correctly.
Vredie Viljoen
Good day Selina, thank you so much to make use of your pattern. It is easy, pretty and usefull to crochet. I look forward to see my end result of your pattern.
Look forward to see mire easy, usefull patterns from you.
Enjoy your day and weekend.
God Bless, ????????????????
Selina Veronique
Hello and thank you so much for your lovely kind words. I am so delighted you enjoy my patterns, God bless!
JANET Hanley KEY
I have looked at many pocket shawls with interest but this one is so cozy and pretty looking. Thanks for sharing.
Selina Veronique
Thank you so much! I am so happy you like this pattern.
Sharron
People on Facebook are asking about pocket shawl patterns
Selina Veronique
They are so popular for sure!
Laurie
I started my foundation chain with 44 like your pattern says. How many v stitches should there be in rows to follow?
Selina Veronique
Hello, there should be 20 V stitches in the following rows
Susan McClain
I love the pattern. I just can’t understand why my shawl is so much shorter. I crocheted 88 rows and it is only about 50 inches. Could my stitches not be tall enough?
Selina Veronique
Hello, thank you for your message. Yes it could simply be because your gauge is tighter than mine. Also I am a very petite person, so you may need to crochet more stitches to reach the right size for you. Hope this helps!
Ilene
Thank you for such a great pattern! I just finished mine and I used Patons Decor in the colorway Bronze. This yarn has some wool in it which will make it nice and extra cozy for fall. I’ll be making a few more as gifts as the pocket shawl is quite the rage this year! Love your version and thanks again for sharing!
Selina Veronique
Hello and thank you so much for your comment! I am so pleased you like this pattern and shawl, and are planning to make more. I love these pocket shawls, I will be releasing another pattern for one tomorrow, a Fall version. Wow Patons Decor is a gorgeous yarn! Take care, xoxo Selina.
Pingback:
D
Hi great pattern, do you think a hood would work with this? I use a mobility scooter and have made one long enough so I can use my controls and have my hands covered.
Just a thought, any ideas how to go about making a hood would.
Thank you for your hard work
Regards.
Dawn
Selina Veronique
Hello and thank you for your comment! I think a hood is a great idea!
Nancy
Hi, I was wondering how many yards are in one of the skeins of yarn that you bought for your pocket shaw. I would like to use a different brand of yarn. Thank you
Selina Veronique
Hello, I think I used approximately 700 yards of yarn. I hope this helps! I am quite small so if you make it for a taller person then you may need more yarn.
Nancy
Thanks for the info. Yes I saw you are 5’2”. I making it for a 5’6” sister and a 6’ sister. So thanks for the info. Will do the measurements on them and add to your pattern.
Selina Veronique
Hello, I am so glad you found this information useful. Yes we are not all the same height so it’s important for these types of projects to state these details. Take care!
Nancy
Hi Selina , love your pattern . I am also small 5ft 1in but the starting chain of 44 doesn’t fit across shoulders. I’m using Red Heart Aran Fleck. Could that be my problem? Need help!
Selina Veronique
Hello and thank you for your comment. Yes Red Heart Aran Fleck should be fine, don’t forget there is a border that will be added and will make the shawl wider later on. Also, have you made a sample to check your gauge? Hope this helps!
Esther
Great minds think alike and all that…I too am using Red Heart Aran fleck lol I just read your post.
Therese Tuckness
Nice project. I have my own stitch, I named it TERRI stitch.had it since 2008
Row: 1
Length in x number in ch and do Terri stitch in 2 ch from hook and skip on ch and repeat, skip 1 ch and repeat unto then end ch 2 turn.
Row 2: Terri stitch in space in between the cluster from the row before. That’s it. Then I add an edging but is can be whatever. Thanks for your version.. 🙂
Selina Veronique
Thank you for your comment!
Pingback:
Pingback:
Esther
Wow not quite getting the dimensions for the stitches, you had 20″ with 44 chain start, I started with 54 chain and only have a 17″ width. Using #4 ww yarn with 6.0mm hook. Hmm. Looks nice so far though, going to use a lot more yarn than expected. 🧶
Selina Veronique
Amazing! Glad you are enjoying the pattern, and thank you for stopping by!
Beth
Selina, thank you for this pattern! It is a very relaxing and enjoyable to crochet. Did you block the shawl when you were done?
Selina Veronique
Hello and thank you so much! No I did not block this shawl after crocheting it, however you can block it if you wish. Hope you have a lovely day!
Donnie Marshall
I love the pocket shawl – very pretty! I haven’t crocheted in many years but it looks like an easy pattern to start with.
Thank you for sharing.
Donnie
Selina Veronique
Hello, thank you for stopping by! So glad you enjoyed this pattern