Crochet The Maiden Hooded Shawl
Crochet The Maiden Hooded Shawl
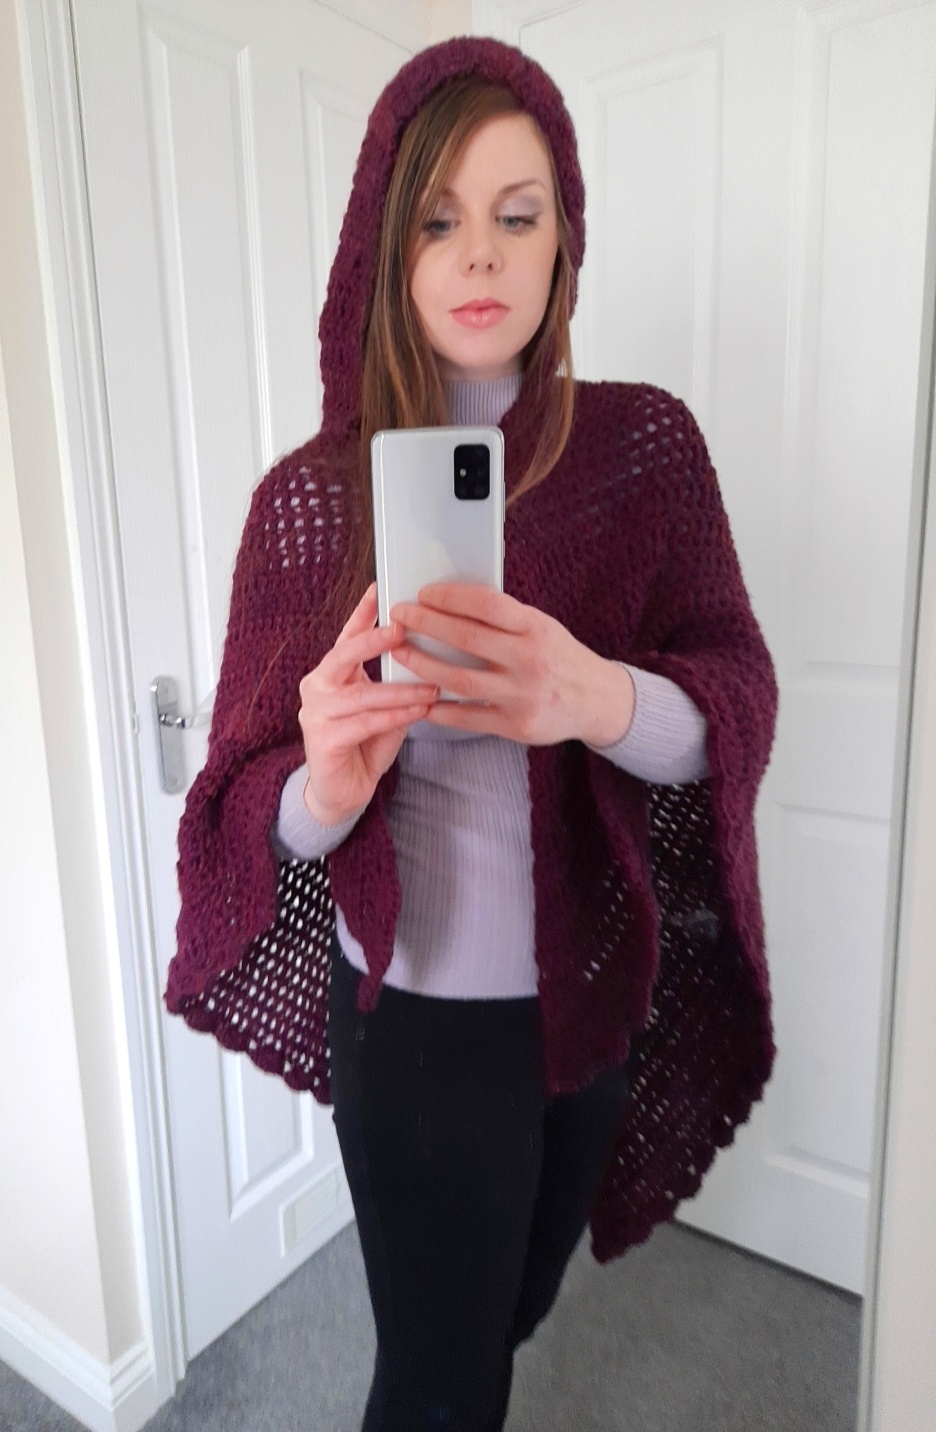
Hello everyone! This week I am bringing to you a brand new project, on how to crochet The Maiden Hooded Shawl. This is a super easy project that looks absolutely stunning.
This is a beautiful and very autumnal crochet pattern that I have been meaning to make in a long time. It’s surprisingly easy and quick to make, and I do hope you enjoy this tutorial!
The Youtube video tutorial can be found here: Crochet Hooded Shawl Video Tutorial
Crochet The Maiden Hooded Shawl: a very easy pattern
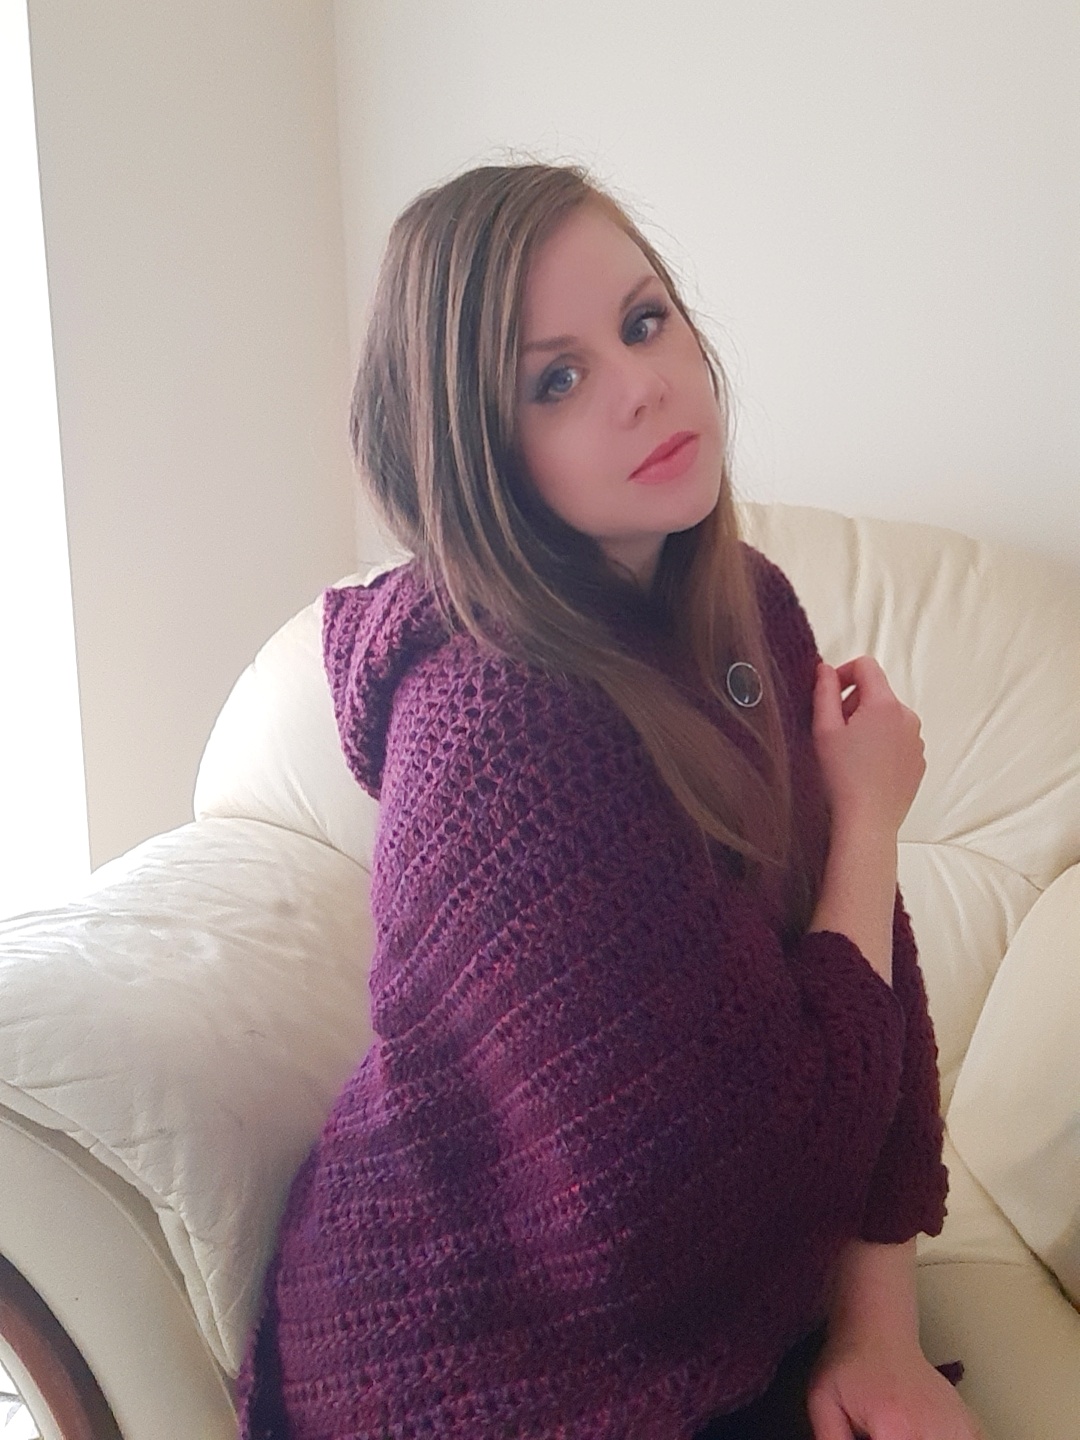
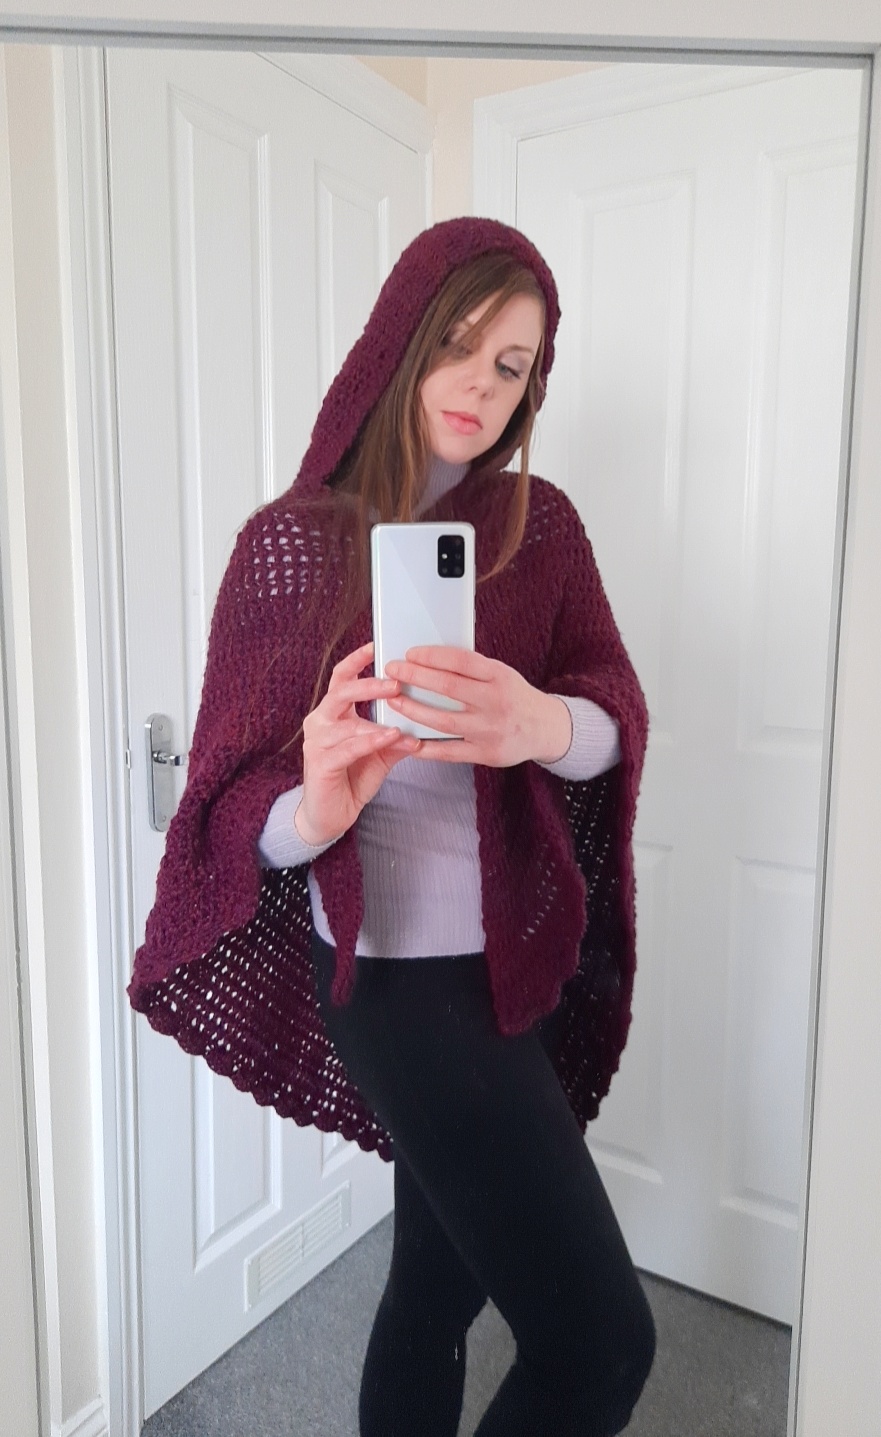
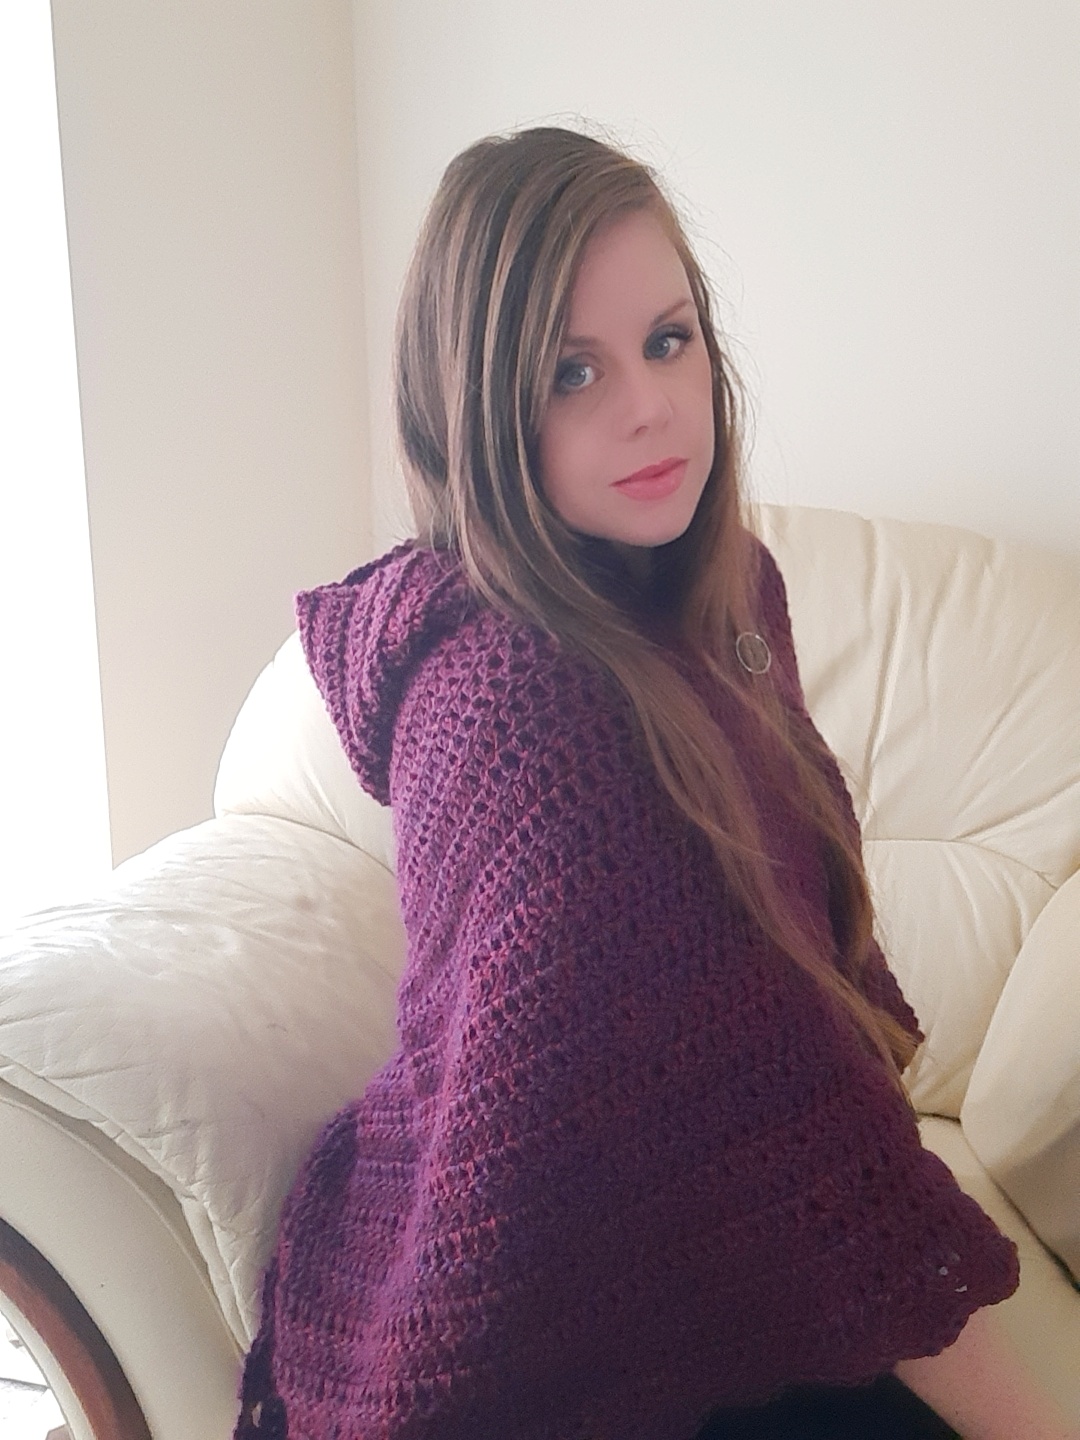
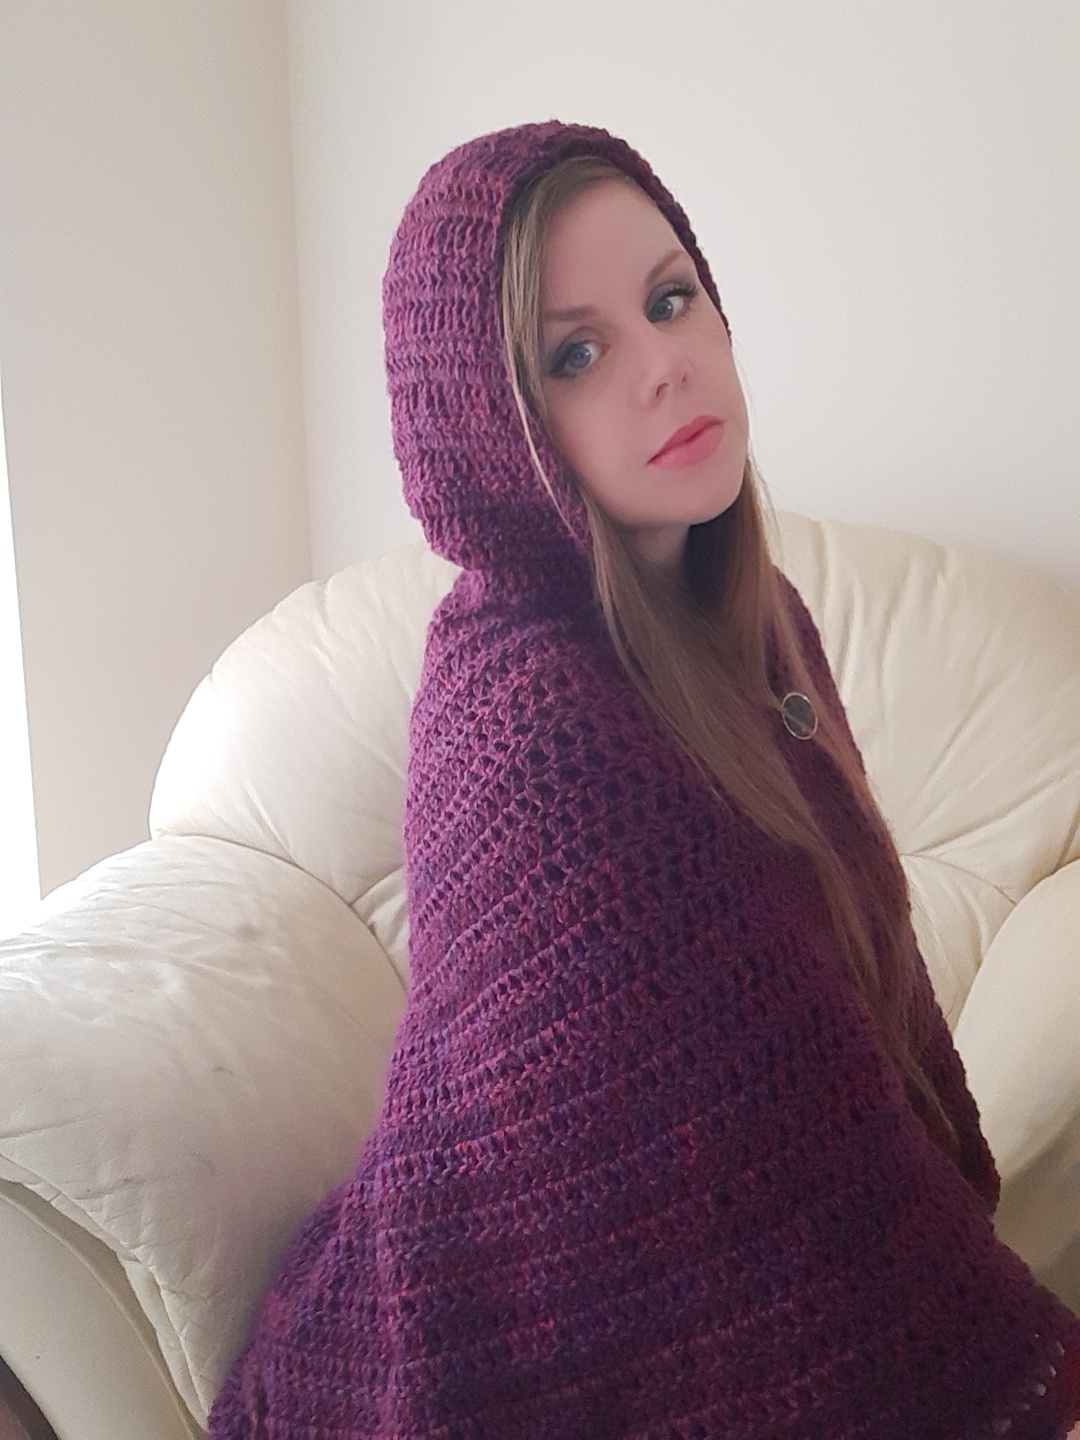
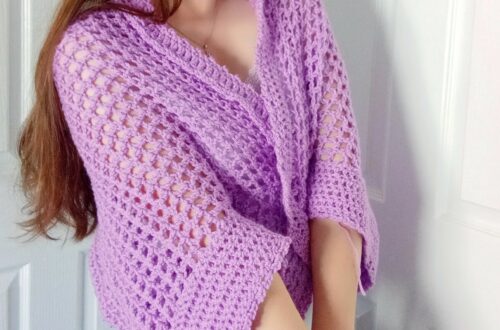
The Maiden Hooded Shawl is a very easy pattern to crochet. It is created with a simple Double Crochet repeat in a V shaped shawl. Once we have crocheted it to the size we wish, we then add the shell border. This gives this wrap a very soft and feminine look. After this, we add the hood onto this project, and voilà, we have a lovely hooded shawl.
The hood is very easy to create too. It is also a repeat pattern of Double Crochets, that we then sew at the top to create a hood shape. The whole process is of course detailed in the video tutorial and free pattern.
I had been wanting to create a hooded shawl similar to a cape for a long time. I am so delighted with the result! Do you like hooded shawls as much as me? I think they are very classy and elegant.
Crochet The Maiden Hooded Shawl: the yarn
For this pattern I used one of my favourite yarns, Lion Brand Heartland in shade Isle Royale. This is a very beautiful colour which is a blend of purple and burgundy, giving this project a deep and mysterious vibe. It’s absolutely stunning, and adds beauty to any crochet project.
Lion Brand Heartland is one of my favourite yarns, simply because it is so easy to crochet. The quality is as always impeccable, and I do love an Aran/size 4 yarn, as it works up fairly quickly. I love a warm, rich colour and yarn for a shawl when the weather gets more chilly, and this fit my needs perfectly.
Do you enjoy working with Lion Brand Heartland as much as me? Let me know in the comments, I always love to have your opinion on this.
I previously my 1940s inspired shawl with this yarn last year. You can find this wonderful and easy project here: Crochet a French 1940s Wrap
Connecting with you
I love nothing more than to connect with you! You can follow me on Social Media on Youtube, Instagram, Pinterest and Facebook. My user name is always Selina Veronique Crochet, and the links can be found on my Home page.
I would also be delighted if you wanted to subscribe to my weekly newsletter. You will then be updated when I release a new crochet video and free pattern, as well as my give aways.
I hope you enjoyed this tutorial. It was really fun to create, and until next week, take care,
Xoxo Selina.

Crochet The Maiden Hooded Shawl: the pattern
You can purchase the Ad free PDF pattern from my Etsy store here: Crochet The Maiden Hooded Shawl PDF pattern
You can purchase the ad free PDF pattern from my Ravelry store here: Crochet The Maiden Hooded Shawl PDF Pattern
Level: Easy/beginner
Gauge:
4“x4” (10 cm x 10 cm)= 3 rounds of DC pattern
Notes :
I will be using US terms (British terms in brackets)
You will need :
4 skeins of Lion Brand Heartland yarn in shade Isle Royale
A 6,5 mm crochet hook
A pair of scissors
A tapestry needle
2 stitch markers
Abbreviations :
St: Stitch
Ch : chain
Sl st : slip stitch
DC: Double crochet (UK Treble)
SC: Single crochet (UK Double)
To begin:
To start, make a slip knot. Ch 4, sl.st. through 1st stitch to from a ring.
Row 1: Ch 3 (=DC), 5 DC in ring, ch 2, 6 DC in same ring
Row 2: Ch 3 (=DC), turn your work, DC into same 1st stitch, DC into each DC until center ch 2 space. Place 2 DC, ch 2, 2 DC into space. DC into every DC until eor, 2 DC in last stitch (ch 3 from previous row).
Row 3-39: repeat row 2
Border: (to be done along the V part of the shawl):
Ch 3 (=DC), place 5 DC into same 1st st, [sk 3 stitches, place 6 DC into next st] until eor.
Hood:
Place your shawl flat, and measure the top of the shawl from the center. Measure 23 cm (=9”) from the center, on both sides of the center stitch (= the beginning of the shawl). Place each of your 2 stitch markers on those measured stitches.
R 1: Ch 1 (=SC), and place SC all along the top of the shawl from one stitch marker to the other. This is the “wrong” side of the stitches, so make sure you place these SC at equal intervals. Make sure you have the same amount of stitches on each side of the center. I placed 52 stitches total.
R 2: Ch 3 (=DC), place a DC into each SC from the previous row until eor.
R 3-15: Ch 3 (=DC), place a DC into each DC from the previous row until eor.
Fasten off, leaving long tail for sewing the hood seam.
Once you have finished your 15 rows of DC, take your hood and fold the top in half, so that you can sew this using the mattress stitch to create the hood.
Fasten off, tidy up all loose ends.


14 Comments
Georshun D Whidbee
Very interested in doing this pattern but need the pattern and how much yarn I need for a xlarge, I’m just a beginner? Thank you
Selina Veronique
Thank you for your comment! I am so glad you like this pattern, for an extra large you could probably add a skein, maybe a skein and a bit? I hope this helps!
Marilyn Gray
I used different yarn worsted weight for an Teen size. What should the width of the hood be approximately?
Selina Veronique
Hello, the width of the hood should be about 20 inches. Hope this helps
Marilyn Gray
Thank you it does. 14 rows has made 9 inches. I’m excited to do the entire pattern for my other adult daughter. It’s beautiful. Thank you again!!!
Deloris Hunt-Kornya
Hi, I am finishing this pattern, and was wondering, is the hood 15 rows or 15 inches? 15 rows, doesn’t seem long or tall enough for an average head and neck. I did use a 3 light weight yarn and a 6.00 MM hook. I have a width of 18 inches. Yet, I am finding, I need at least 20 rows, high, for the length/height, of the hood from neck to seam.
Thanks,
DJH-K
Selina Veronique
Hello, thank you for your comment. Yes that sounds fine to me, indeed if you used a finer yarn then you would need more rows. Hope this helps!
Ann Smith
When you say dc in same 1st stitch which stitch is that the first dc or 1st stitch of ch 3
Ann Smith
When you say crochet on 1st stitch which stitch is that the 1st dc or 1st of ch 3
Selina Veronique
Hi, I mean DC into the 1st DC. Hope this helps!
Sarah George
Just recently completed this pattern and it turned out beautifully! Thank you so much for sharing! So simple to follow and works up quickly! I already have several more I plan to make for gifts for upcoming birthdays!
Selina Veronique
Amazing! Thank you so much for sharing this! Glad you enjoyed this pattern, xoxo Selina
Linda Englerth
I am so excited to try this!! Do you have a photo that shows what it looks like laying flat? Thank you!!
Selina Veronique
Thank you! All the photos I took at the time are up on the blog post, hopefully they will help!