Crochet Easy Scarlet Jumper
Crochet Easy Scarlet Jumper
Hi everyone, I hope you are well. This week I am bringing to you a tutorial on how to Crochet The Easy Scarlet Jumper.
I am especially proud of this pattern, it took me a few weeks to create and then film. The Crochet Scarlet Jumper is the first crochet sweater pattern that I have written.
As always, my video tutorial is available on my Youtube channel here: Crochet Scarlet Jumper Video Tutorial
A beginner friendly project to crochet
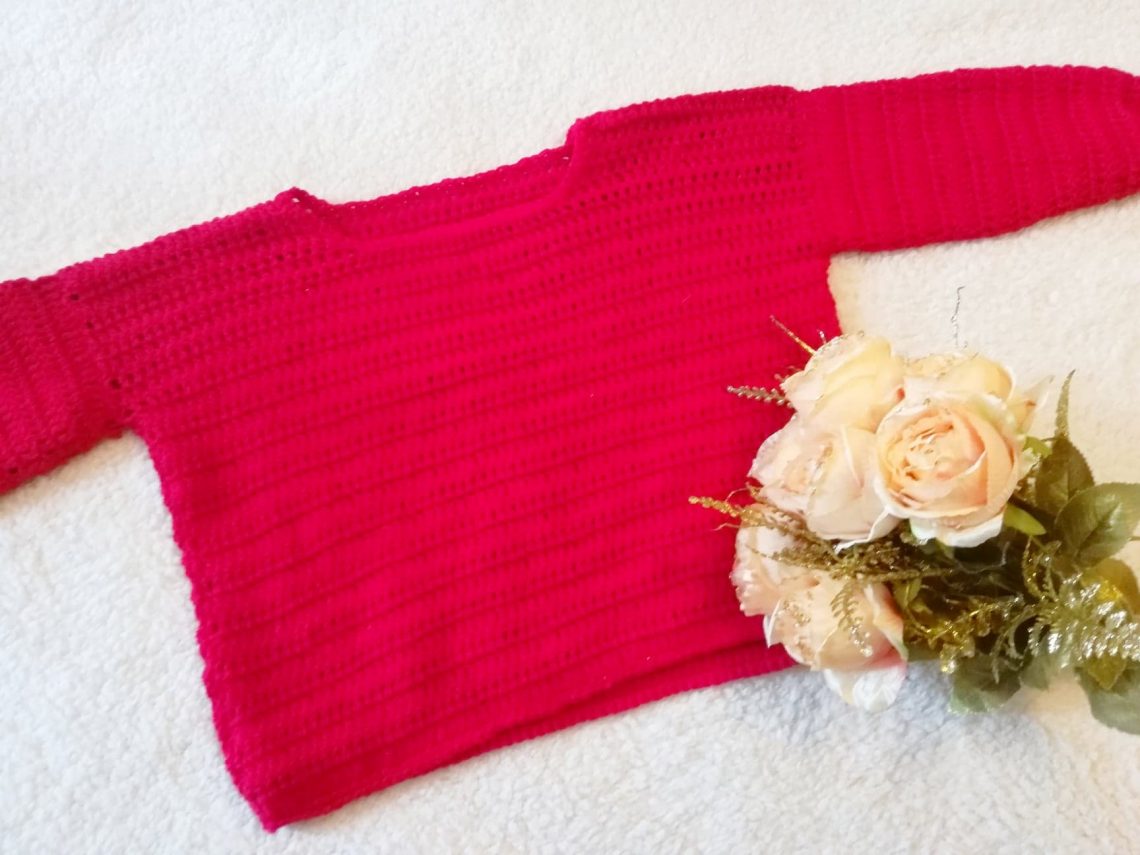
It is a very easy and beginner friendly crochet project, and is very quick to make, as well as being extremely budget friendly. Indeed, all these were requirements that I wanted to make sure I respected when making my first crochet sweater tutorial, and I am really happy with the result! It is a jumper which can be made in a size S, M, or L, and I cannot wait for you to let me know what you think in the comments.
Stylecraft Special Aran in shade Lipstick
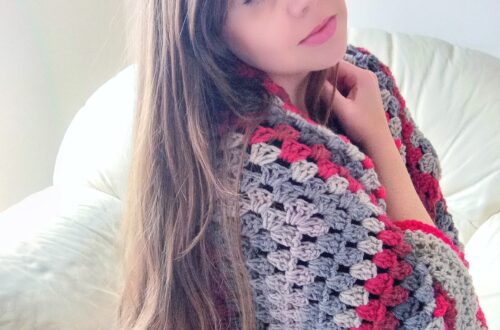
Using only balls of Stylecraft Special Aran in shade Lipstick, this project is made with almost only Double Crochets following a very easy pattern repeat. You know my love of this shade which I have used a few times already in past projects.
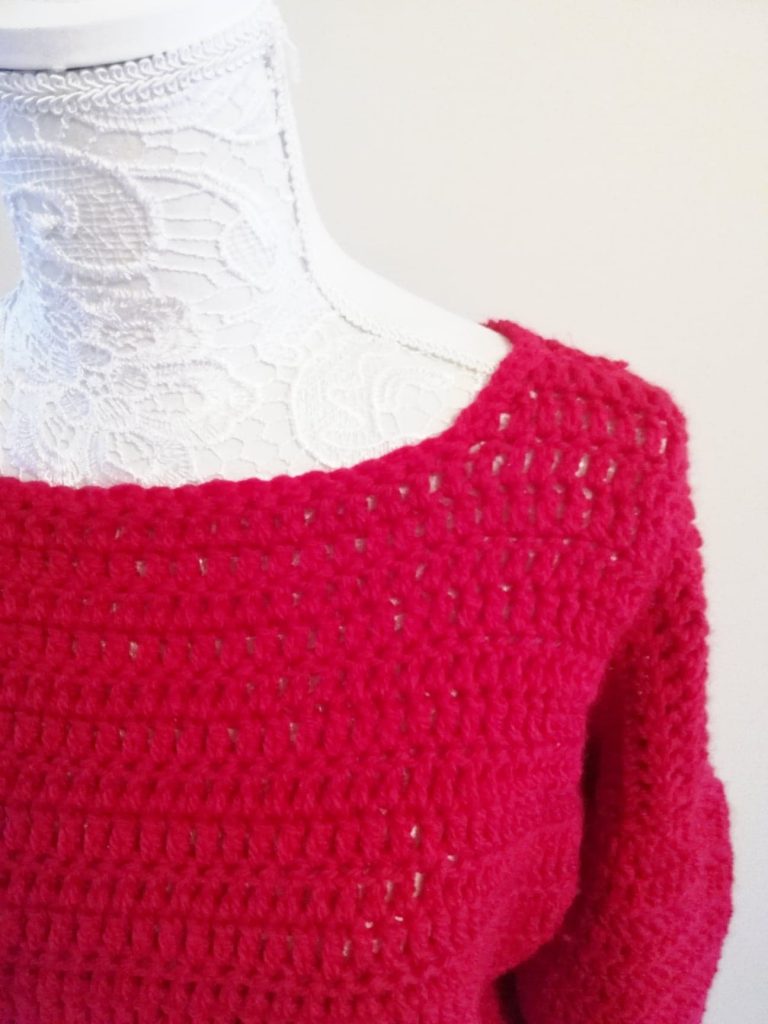
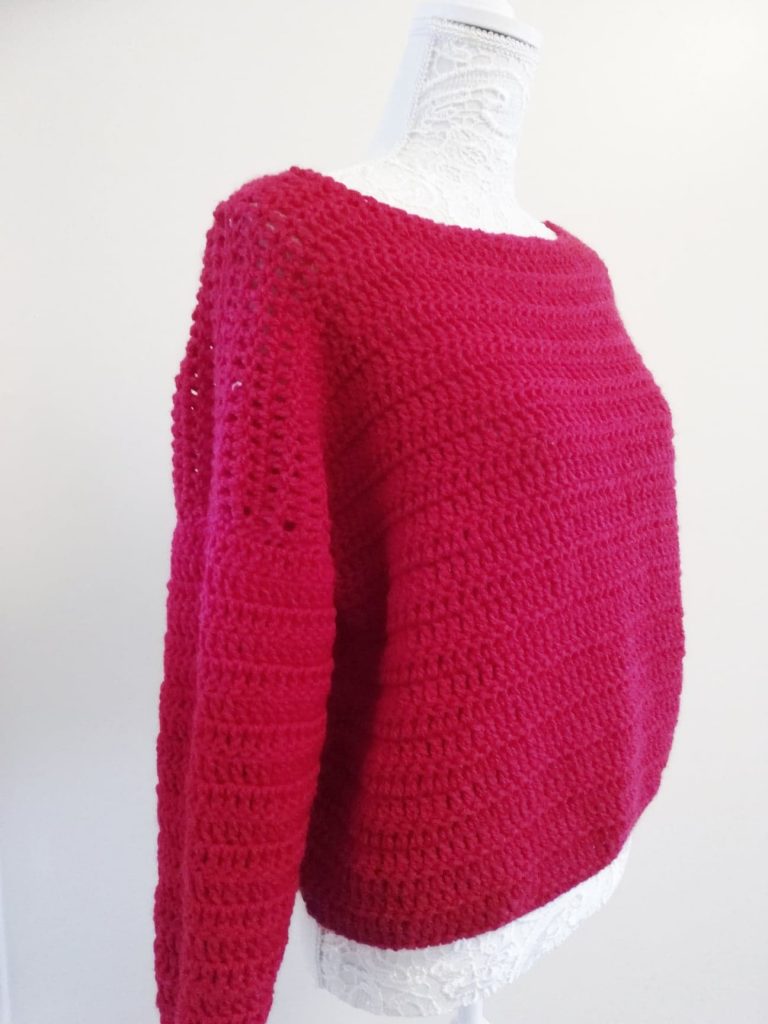
The colour is absolutely delightful, and makes the most perfect Christmas jumper, which is always a bonus during this season. The slouchy shape of this sweater is very trendy as the moment. Also, the boat neck is extremely feminine and flattering, something that was very important to me whilst creating this jumper.
A therapeutic pattern
I loved creating this very simple crochet pattern, as it really was easy to create, and is the perfect beginner project. If you are looking to crochet your first garment, then this is the perfect project for you! It is very simple to assemble too, and the Double Crochet repeat pattern is very soothing and therapeutic.
I hope you enjoy making it as much as I enjoyed making it, and I would love to hear what you thought of this project. As always, I am delighted when you tag me in Social Media, so don’t hesitate to do so, and you can also follow me on Instagram and my Facebook page (at Selina Veronique). I also have a Facebook group to connect, so please feel free to join our crochet family there, the name of the group is Selina Veronique’s Crochet Corner.
The pattern:
You can purchase the ad free, PDF version of this pattern here: Crochet The Scarlet Jumper PDF Pattern
You can also find the free version of this pattern down below.
All in all, I am very proud of this project, and I hope to be releasing more crochet garments and accessories for everyday wear very soon, so watch this space. In the meantime, take care my lovely crochet friends.
Thank you again for stopping by,
Lots of love,
Xoxo Selina.
Pattern for The Crochet Easy Scarlet Jumper
Level: Easy/beginner
Gauge: 10 x 10 cm (4”x4”) = 11 st across and 8 rows
Notes:
I will be using US terms (British terms in brackets)
Pattern written for size S, size M written in ( ) and size L in [ ]
The fit of the sweater is slightly slouchy
Materials:
4/5 skeins of Stylecraft Special Aran in shade Lipstick (depending on size)
5 mm crochet hook
Pair of scissors
Tapestry needle
Abbreviations:
Sl st : slip stitch
SC: Single crochet (SC)
DC: Double crochet (UK Treble)
Ch : chain
Begin pattern here:
For The Crochet Easy Scarlet Jumper:
You will be making the front, then the back, and 2 identical sleeves before sewing your jumper together, and making the neck edging.
Front body:
chain 65+3 (75+3) [85+3]
Complete rows as follows:
1: DC in 4th chain from the hook, DC into each ch sp until end of row (=66/76/86 DC)
2: ch 3 (=DC), DC 2nd DC from previous row, DC into each DC from previous row
3-26 (28) [30]: repeat row 2
For size S
27: ch.3, DC until 21st DC from previous row (=21 DC)
28: ch 3, turn your work, DC into each DC from previous row
29-31: repeat row 28, fasten off, leaving long tail to sew
For Size M
29: ch.3, DC until 26th DC from previous row (=27 DC)
30: ch 3, turn your work, DC into each DC from previous row
31-33: repeat row 28, fasten off, leaving long tail to sew
For Size L
31: ch.3, DC until 31st DC from previous row (=32 DC)
32: ch 3, turn your work, DC into each DC from previous row
33-35: repeat row 28, fasten off, leaving long tail to sew
Attach yarn onto other side of this front panel:
For Size S
27: ch.3, DC until 21st DC from previous row (=21 DC)
28: ch 3, turn your work, DC into each DC from previous row
29-31: repeat row 28, fasten off, leaving long tail to sew
For Size M
29: ch.3, DC until 26th DC from previous row (=27 DC)
30: ch 3, turn your work, DC into each DC from previous row
31-33: repeat row 28, fasten off, leaving long tail to sew
For Size L
31: ch.3, DC until 31st DC from previous row (=32 DC)
32: ch 3, turn your work, DC into each DC from previous row
33-35: repeat row 28, fasten off, leaving long tail to sew
Back Body:
chain 65+3 (75+3) [85+3]
1: DC in 4th chain from the hook, DC into each ch sp until end of row (=66/76/86 DC)
2: ch 3 (=DC), DC 2nd DC from previous row, DC into each DC from previous row
3-29 (31) [33]: repeat row 2
For Size S
30: ch.3, DC until 21st DC from previous row (=21 DC)
31: ch 3, turn your work, DC into each DC from previous row
For Size M
32: ch.3, DC until 26th DC from previous row (=27 DC)
33: ch 3, turn your work, DC into each DC from previous row
For Size L
34: ch.3, DC until 31st DC from previous row (=32 DC)
35: ch 3, turn your work, DC into each DC from previous row
Attach yarn onto other side of this front panel:
For Size S
30: ch.3, DC until 21st DC from previous row (=21 DC)
31: ch 3, turn your work, DC into each DC from previous row
For Size M
32: ch.3, DC until 26th DC from previous row (=27 DC)
33: ch 3, turn your work, DC into each DC from previous row
For Size L
34: ch.3, DC until 31st DC from previous row (=32 DC)
35: ch 3, turn your work, DC into each DC from previous row
Sleeves (make 2):
Ch. 47 (55) [63]
1: DC into 4th ch from the hook, DC into each ch until end of row
2: ch 3 (=DC), DC into each DC until end of row
For Size S
3-10: repeat row 2
11-12 (decrease row): ch 3 (=DC), [yarn over, pull up a loop, go into the next stitch, pull up a loop, yarn over and pull through 2 loops, yarn over and pull through three loops], DC into each DC until last 3 stitches, [yarn over, pull up a loop, go into the next stitch, pull up a loop, yarn over and pull through 2 loops, yarn over and pull through three loops], DC into last stitch
13-14: ch 3 (=DC), DC into each DC until end of row
15-18 (decrease row): ch 3 (=DC), [yarn over, pull up a loop, go into the next stitch, pull up a loop, yarn over and pull through 2 loops, yarn over and pull through three loops], DC into each DC until last 3 stitches, [yarn over, pull up a loop, go into the next stitch, pull up a loop, yarn over and pull through 2 loops, yarn over and pull through three loops], DC into last stitch
19-20: ch.1 (=SC), SC into each SC from previous row
21 (decrease row): ch. 1 (=SC), [go into next st, pull up a loop, go into st after that, pull up a loop, yarn over pull through 2 loops, yarn over, pull through 2 loops], SC into each SC until last 3 stitches, [go into next st, pull up a loop, go into st after that, pull up a loop, yarn over pull through 2 loops, yarn over, pull through 2 loops], SC into last st
22: Repeat row 19
For Sizes M-L
3-13: repeat row 2
14-15 (decrease row): ch 3 (=DC), [yarn over, pull up a loop, go into the next stitch, pull up a loop, yarn over and pull through 2 loops, yarn over and pull through three loops], DC into each DC until last 3 stitches, [yarn over, pull up a loop, go into the next stitch, pull up a loop, yarn over and pull through 2 loops, yarn over and pull through three loops], DC into last stitch
15-16: ch 3 (=DC), DC into each DC until end of row
16-20 (decrease row): ch 3 (=DC), [yarn over, pull up a loop, go into the next stitch, pull up a loop, yarn over and pull through 2 loops, yarn over and pull through three loops], DC into each DC until last 3 stitches, [yarn over, pull up a loop, go into the next stitch, pull up a loop, yarn over and pull through 2 loops, yarn over and pull through three loops], DC into last stitch
21-22: ch.1 (=SC), SC into each SC from previous row
23 (decrease row): ch. 1 (=SC), [go into next st, pull up a loop, go into st after that, pull up a loop, yarn over pull through 2 loops, yarn over, pull through 2 loops], SC into each SC until last 3 stitches, [go into next st, pull up a loop, go into st after that, pull up a loop, yarn over pull through 2 loops, yarn over, pull through 2 loops], SC into last st
24: Repeat row 19
Fasten off, leaving long tail for sewing
To sew your jumper:
With wrong side facing, assemble all the parts of your jumper onto a flat surface, start by sewing the shoulder seams, working all the way down to the bottom of the jumper. Do this on both sides of the jumper.
Fasten off, tidy up all loose ends.
Neck Edging:
Attach yarn, ch 1 (counts as a SC), SC into every stitch until end of row, sl st to first ch 1 to attach and fasten off.
Bottom edging:
Attach yarn, ch. 1 (counts as a SC), SC into every stitch until end of row, sl st to first ch 1 to attach and fasten off.
Tidy up all loose ends.


You May Also Like

Crochet Something Blue Infinity Scarf
Crochet Easy Cocoon Cardigan Free Pattern