Crochet Feminine Scrunchie Free Pattern
Crochet Feminine Scrunchie Free Pattern
Hi everyone, this week I am bringing to you this crochet feminine cotton scrunchie free pattern. I absolutely love crochet scrunchies, as they are always so delicate and feminine. They also have a Coachella, vintage vibe to them which I love. I just love how feminine and dainty they are too!
The video tutorial for this project can be found here:
Crochet Feminine Scrunchie Free Pattern: a Summer staple
I just love crochet scrunchies, as they are so perfect for the Summer. Indeed, I find cotton yarn always looks so beautiful in the Summer months. Also, cotton yarns are perfect for Spring/Summer projects such as scrunchies, headbands, bags and bralettes. I have myself crocheted lots of these items, including the romantic lilac headband, and this super popular feminine scrunchie. All Spring and Summer projects I have made in the past are some of my favorites to date, so don’t hesitate to go through my blog posts to see them.
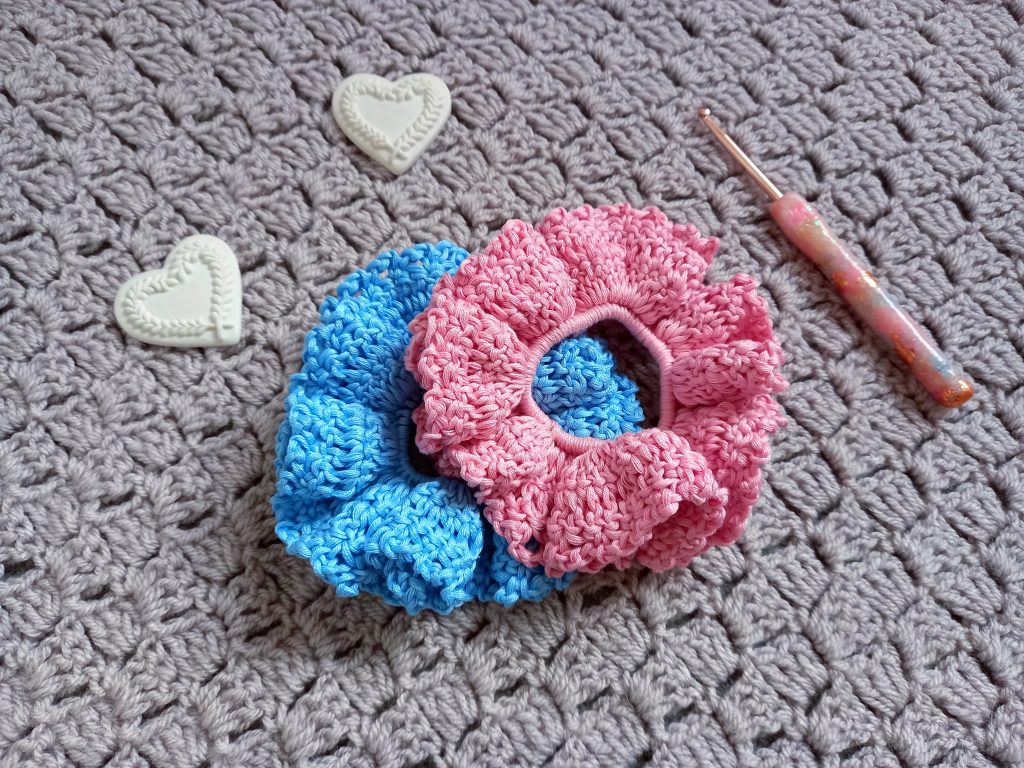
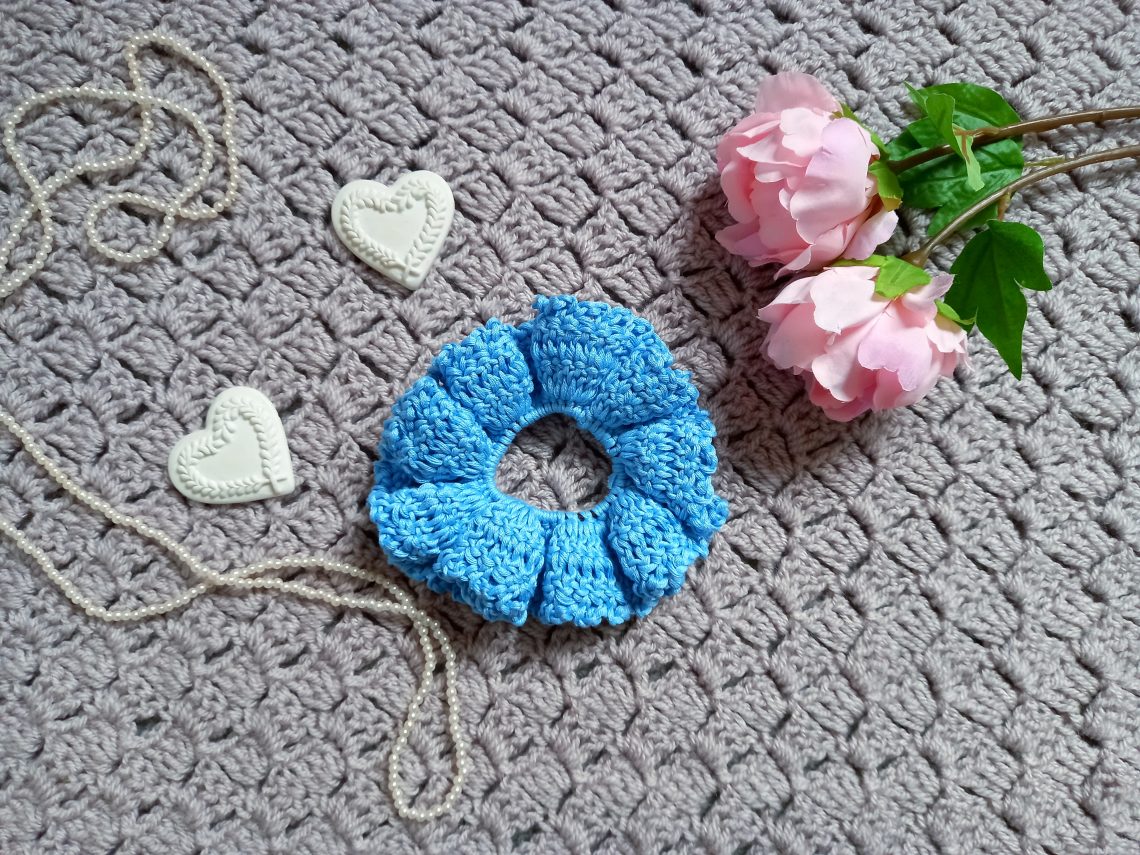
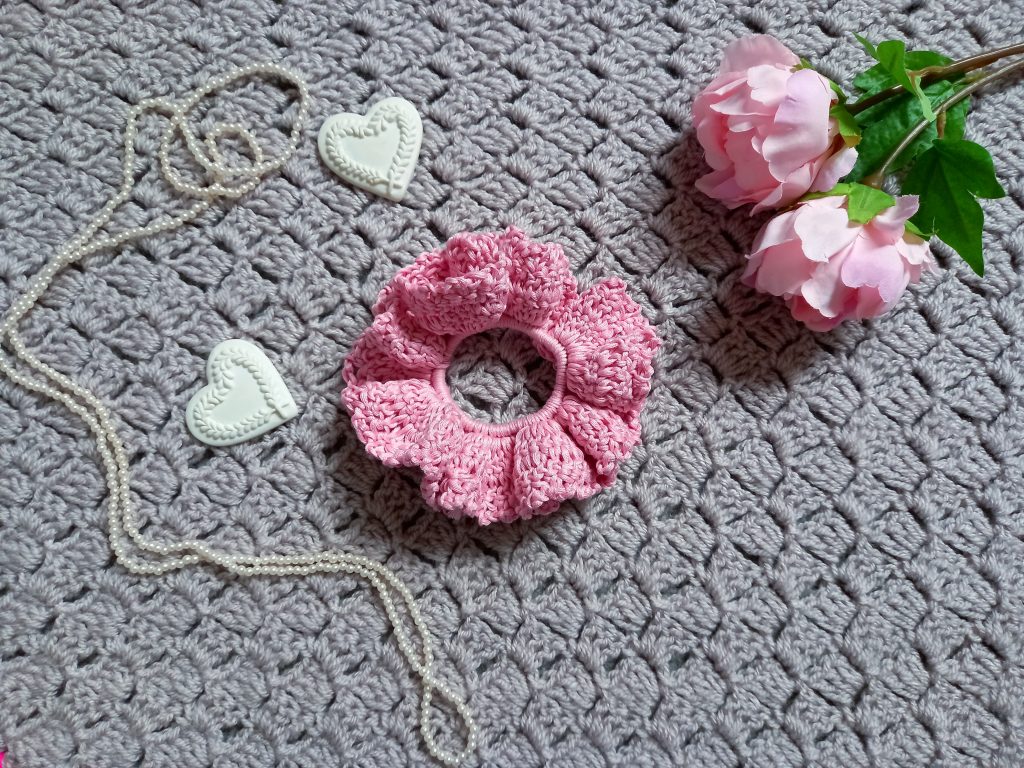
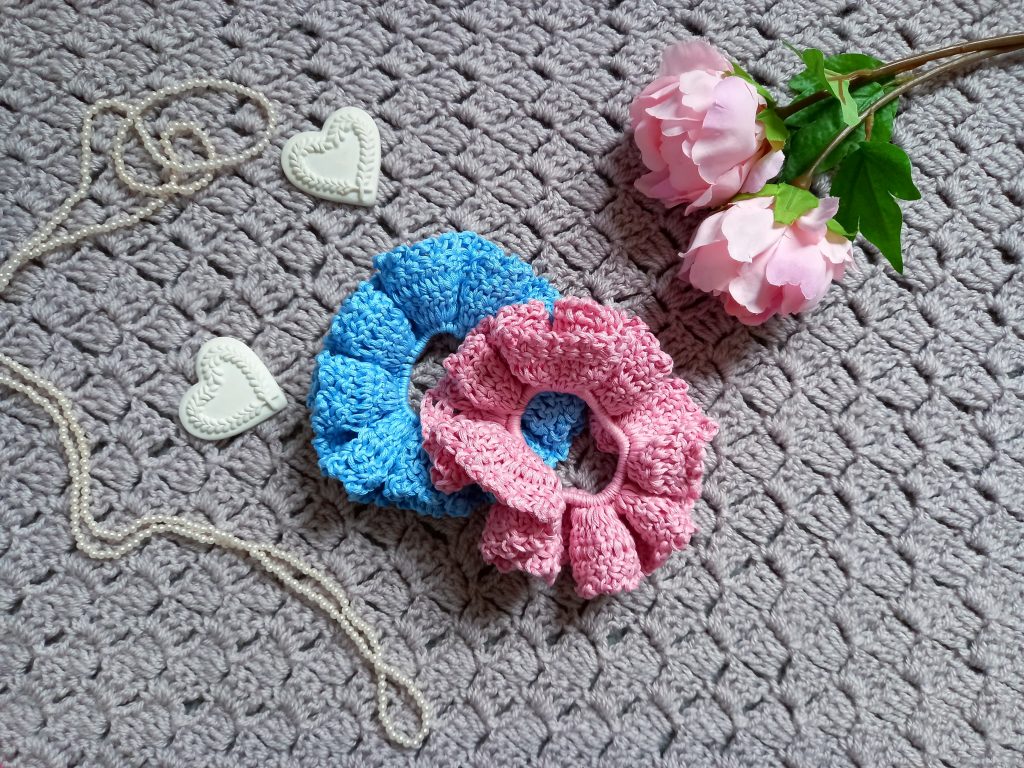
This new scrunchie pattern is beautiful and feminine. It looks pretty and light too, and has a lacy, dainty look to it too. This is achieved by the frills that are created whilst making the project, before adding a chain arch edging. Fine and dainty are definitely words we could use to describe this project. I have made it in two colors for now, pink and blue. However, I do know I will be making this scrunchie in many more colors too. This is the beauty of crochet: you can make your favorite items over and over in all of the colors that you want.
Let me know if you enjoy crocheting scrunchies as much as I do. And let me know if you have ever made some of my designs, I would love to know!
Crochet Feminine Cotton Scrunchie Pattern: the yarn
For this project, a 100% cotton yarn in a DK/light 3 yarn is necessary. The good news is you can use your favorite yarn and color, and crochet to your heart’s content. I have used Drops Muskat for this project, one of my favorite 100% cotton yarns out there. Indeed, this is a beautiful and high quality yarn, that is also very affordable and easy to find both on the American and European continents. So this yarn is definitely a winner for me!
I have already made a few projects using this yarn, including some of my most recent projects. These include this traditional French beret and this delicate and feminine clutch bag. These crocheted projects are also some of my favorites to date, and are perfect for the coming warmer Winter months.
I hope you enjoy creating this easy scrunchie. Please do let me know if you do, in the meantime, thank you for stopping by my blog, and check out my links down below to connect on Social Media.
Connecting with you
I love connecting with my Crochet Community through my blog and Social Media. You can find me on Youtube, Instagram, and Pinterest. I would love to connect with you on these platforms.
You can also join my private Facebook group to connect.
Crochet Feminine Cotton Scrunchie: the pattern
You can purchase the ad free, large print, PDF pattern from my Etsy store here: Crochet Feminine Scrunchie PDF Pattern
Level: Easy
Notes: I will be writing in US terms with British terms in brackets
Gauge: Gauge is not crucial for completion of this project
Materials
1 skein of Drops Muskat yarn (or any other 100% cotton yarn in DK/Light 3 yarn)
A 4 mm crochet hook
A tapestry needle
A pair of scissors
1 Basic Elastic Band (Medium thickness)
Abbreviations
Ch: Chain
Sl st: Slip stitch
SC: Single Crochet (UK Double Crochet)
DC: Double Crochet (UK Treble Crochet)
EOR: End of row
Start pattern here
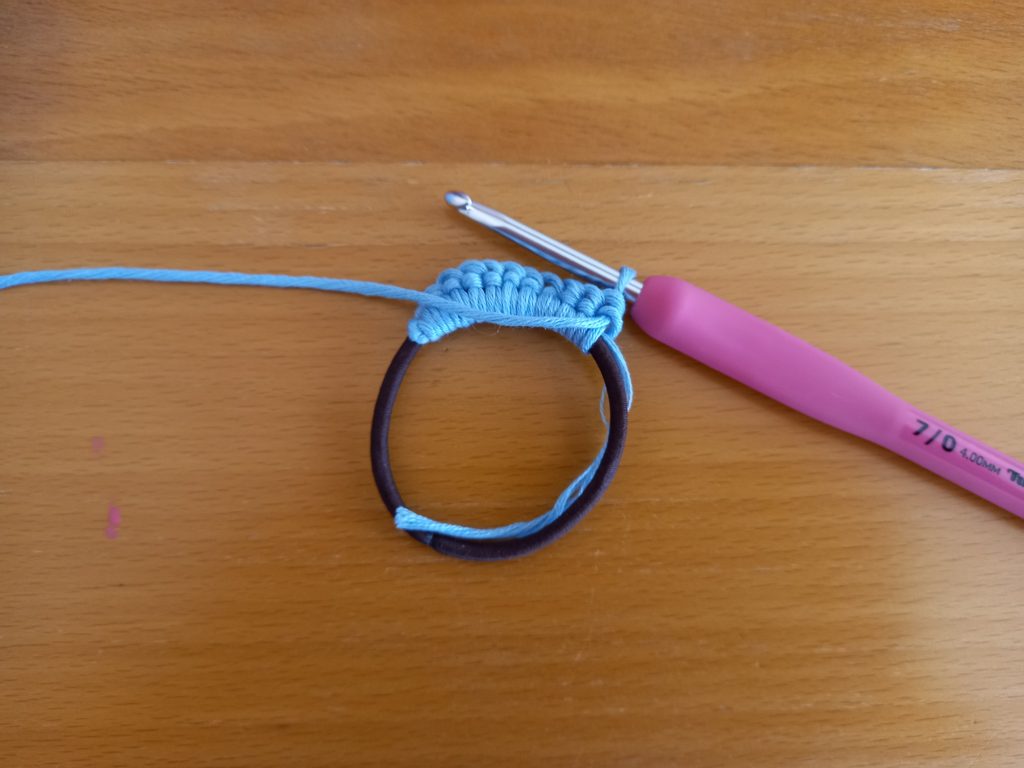
Attach yarn with a double knot to any place on the elastic band. You will be placing your crochet stitches around the elastic band.
Complete rounds as follows:
1: ch 1 (does not count as a SC), place approximately 64 SC onto elastic band, tightening the SC together as you go along. Sl st to 1st ch 1 to finish off round. The number of SC you place around the elastic band is not crucial for completion of project.
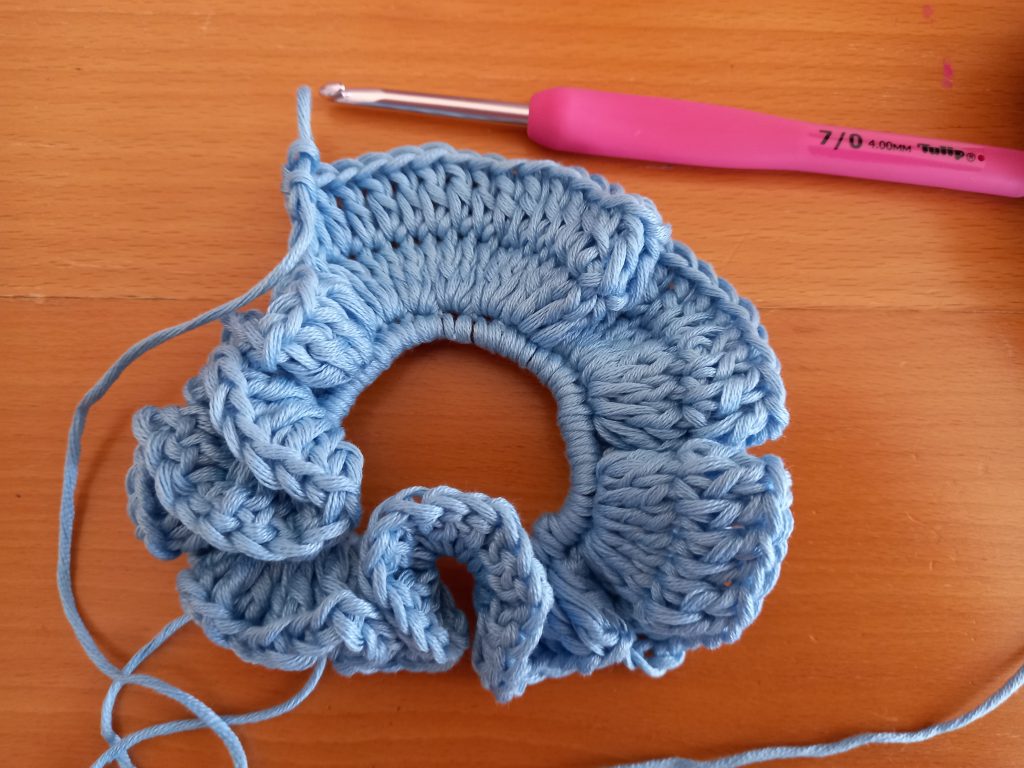
2: ch 3 (=DC), place 2 DC in 1st stitch (=3 DC together), place 3 DC into next SC from previous row and into every SC until eor.

3: Ch 3 (=DC), place DC into every DC from previous round until eor.
4: (chain arch edging round): [ch 3, sk 1 stitch, SC into next stitch] until you reach the end of this round.
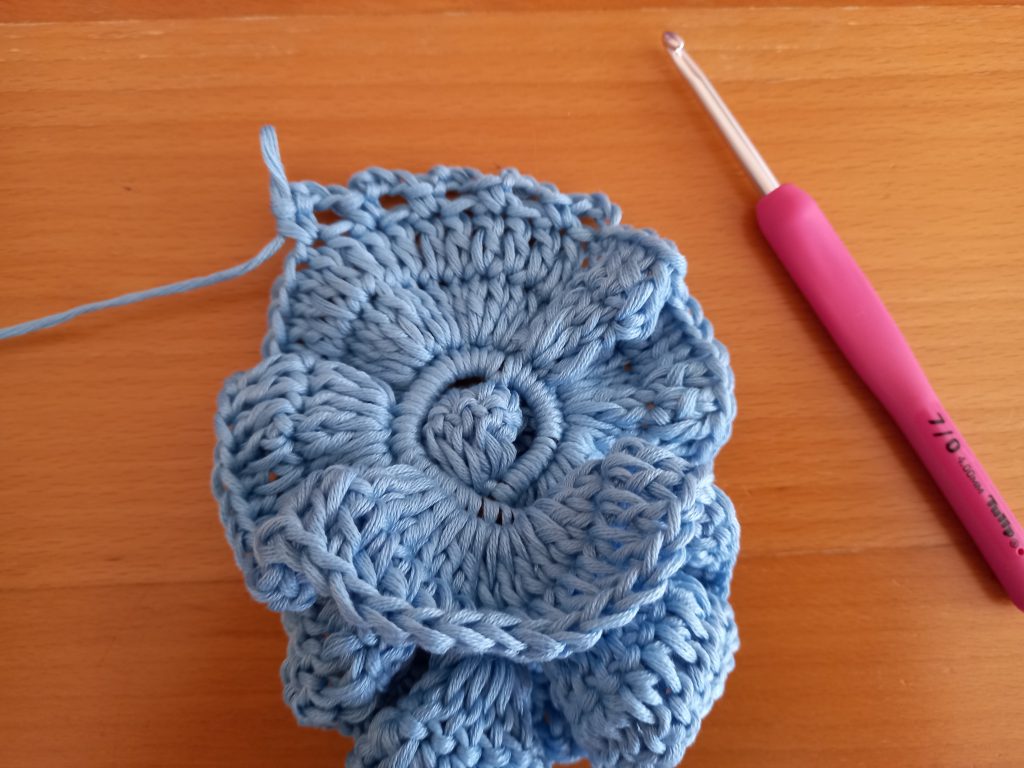
Fasten off, tidy up all loose ends.


You May Also Like

Crochet The Harvest Moon Pocket Shawl Pattern
Crochet Hook & Pencil Case Free Pattern