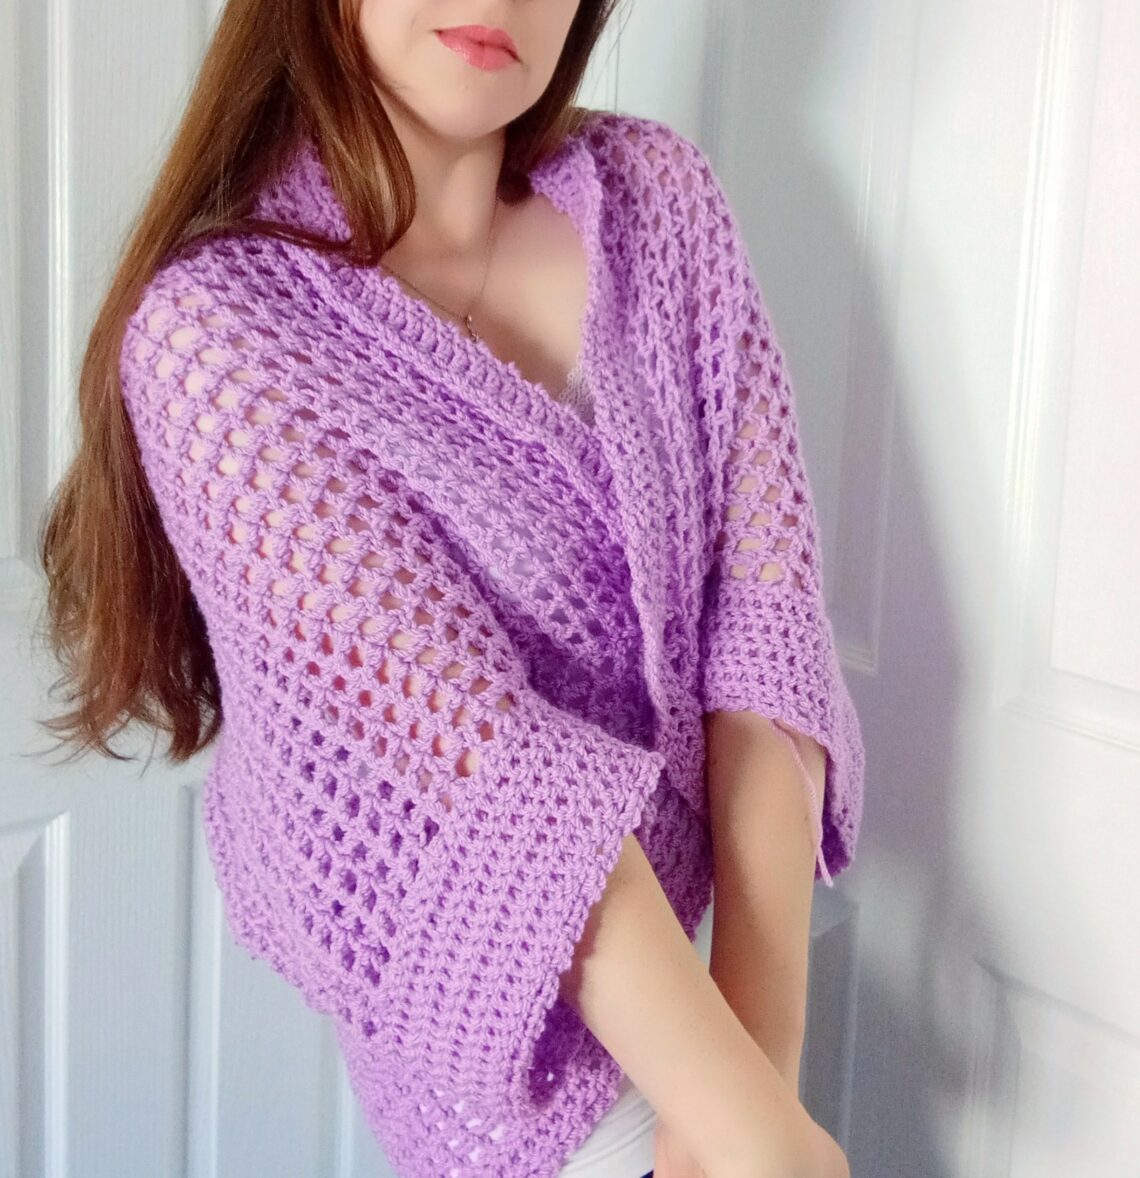
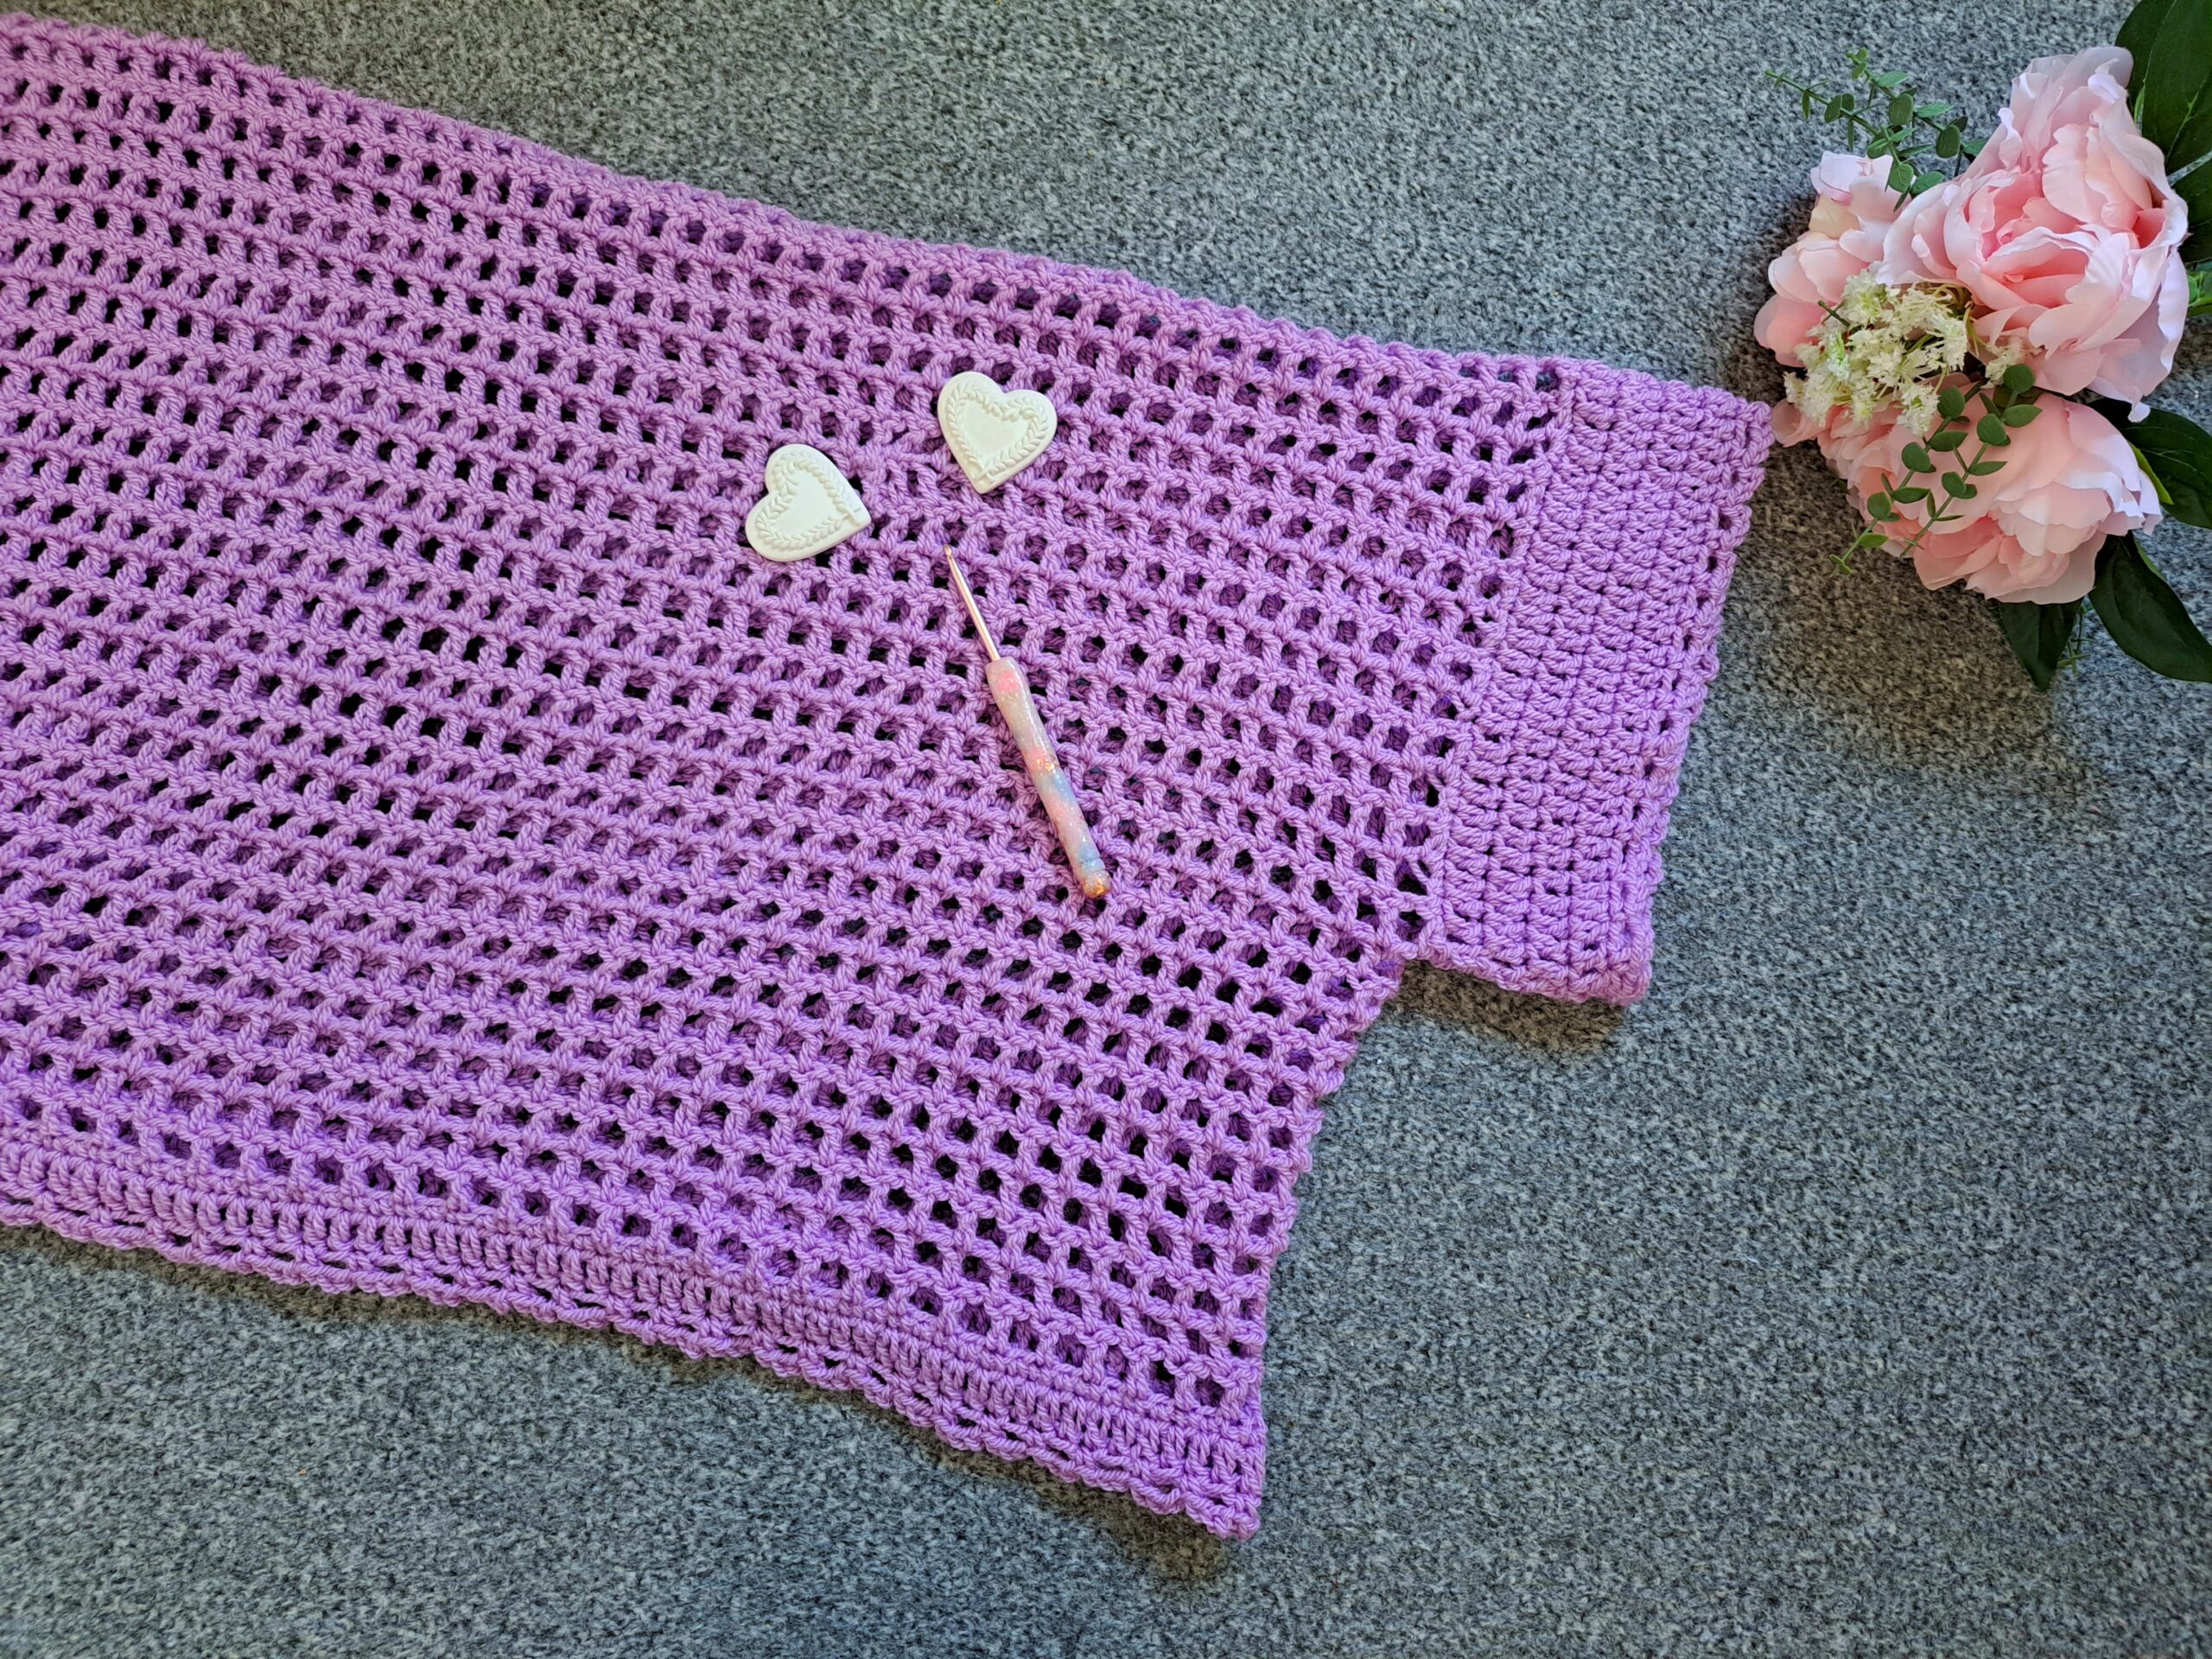
Crochet Lavender Cocoon Cardigan Free Pattern
Crochet Lavender Cocoon Cardigan Free Pattern
Hi everyone, this week I am bringing to you the Crochet Lavender Cocoon Cardigan Free Pattern. This is a great project for Spring and Summer. It features lovely filet crochet design that looks very feminine and lovely. Also, this crochet pattern is inclusive and comes in sizes S to XXXL. Let me know if you make it, and if you enjoyed this simple yet lovely design!
The video tutorial for this project can be found here:
Crochet Lavender Cocoon Cardigan Free Pattern: The Inspiration
If you recall, I had crocheted The Beatiful Lilac Shrug with a ribbed edging in April 2020. This crochet design is to this day one of my favorites! I wanted to crochet similar, with a different edging, and in more sizes too. Indeed, I love filet crochet projects so much!
If you also enjoy filet crochet designs, don’t forget to check out my recent Spring and Summer cardigan design. This newest cardigan project is so lovely, and features not only a filet crochet patter, but also delicate pockets that elevate this otherwise simple cardigan. This Summer pink poncho is also perfect if you enjoy filet crochet.

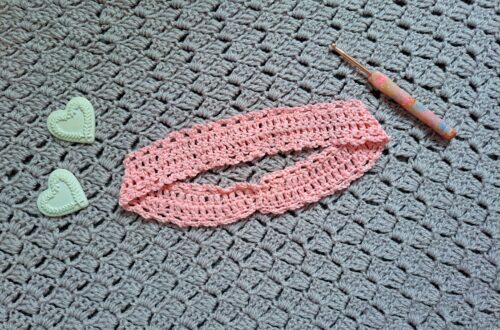
This Boho festival inspired headband also features a filet crochet design, just like this romantic lacy headband from a few Summers ago. I admit I love these designs, as they are so perfect for the warmer months. Indeed, these crochet projects are so feminine and look perfect year after year.
A few weeks ago, I figured it was high time I crocheted a new Spring Summer cocoon cardigan. When I went through my yarn stash, this new lilac yarn from Paintbox yarns stood out to me. It seemed perfect for this new project!
Crochet Lavender Cocoon Cardigan Free Pattern: The Design
A few weeks ago, I was inspired to crochet a new filet crochet design shrug, inspired by the beautiful lilac shrug I crocheted in 2020. Indeed, I love this crochet design so much still! It is both easy and perfect for the warmer weather. I love the filet crochet design so much, and decided to recreate a new version.
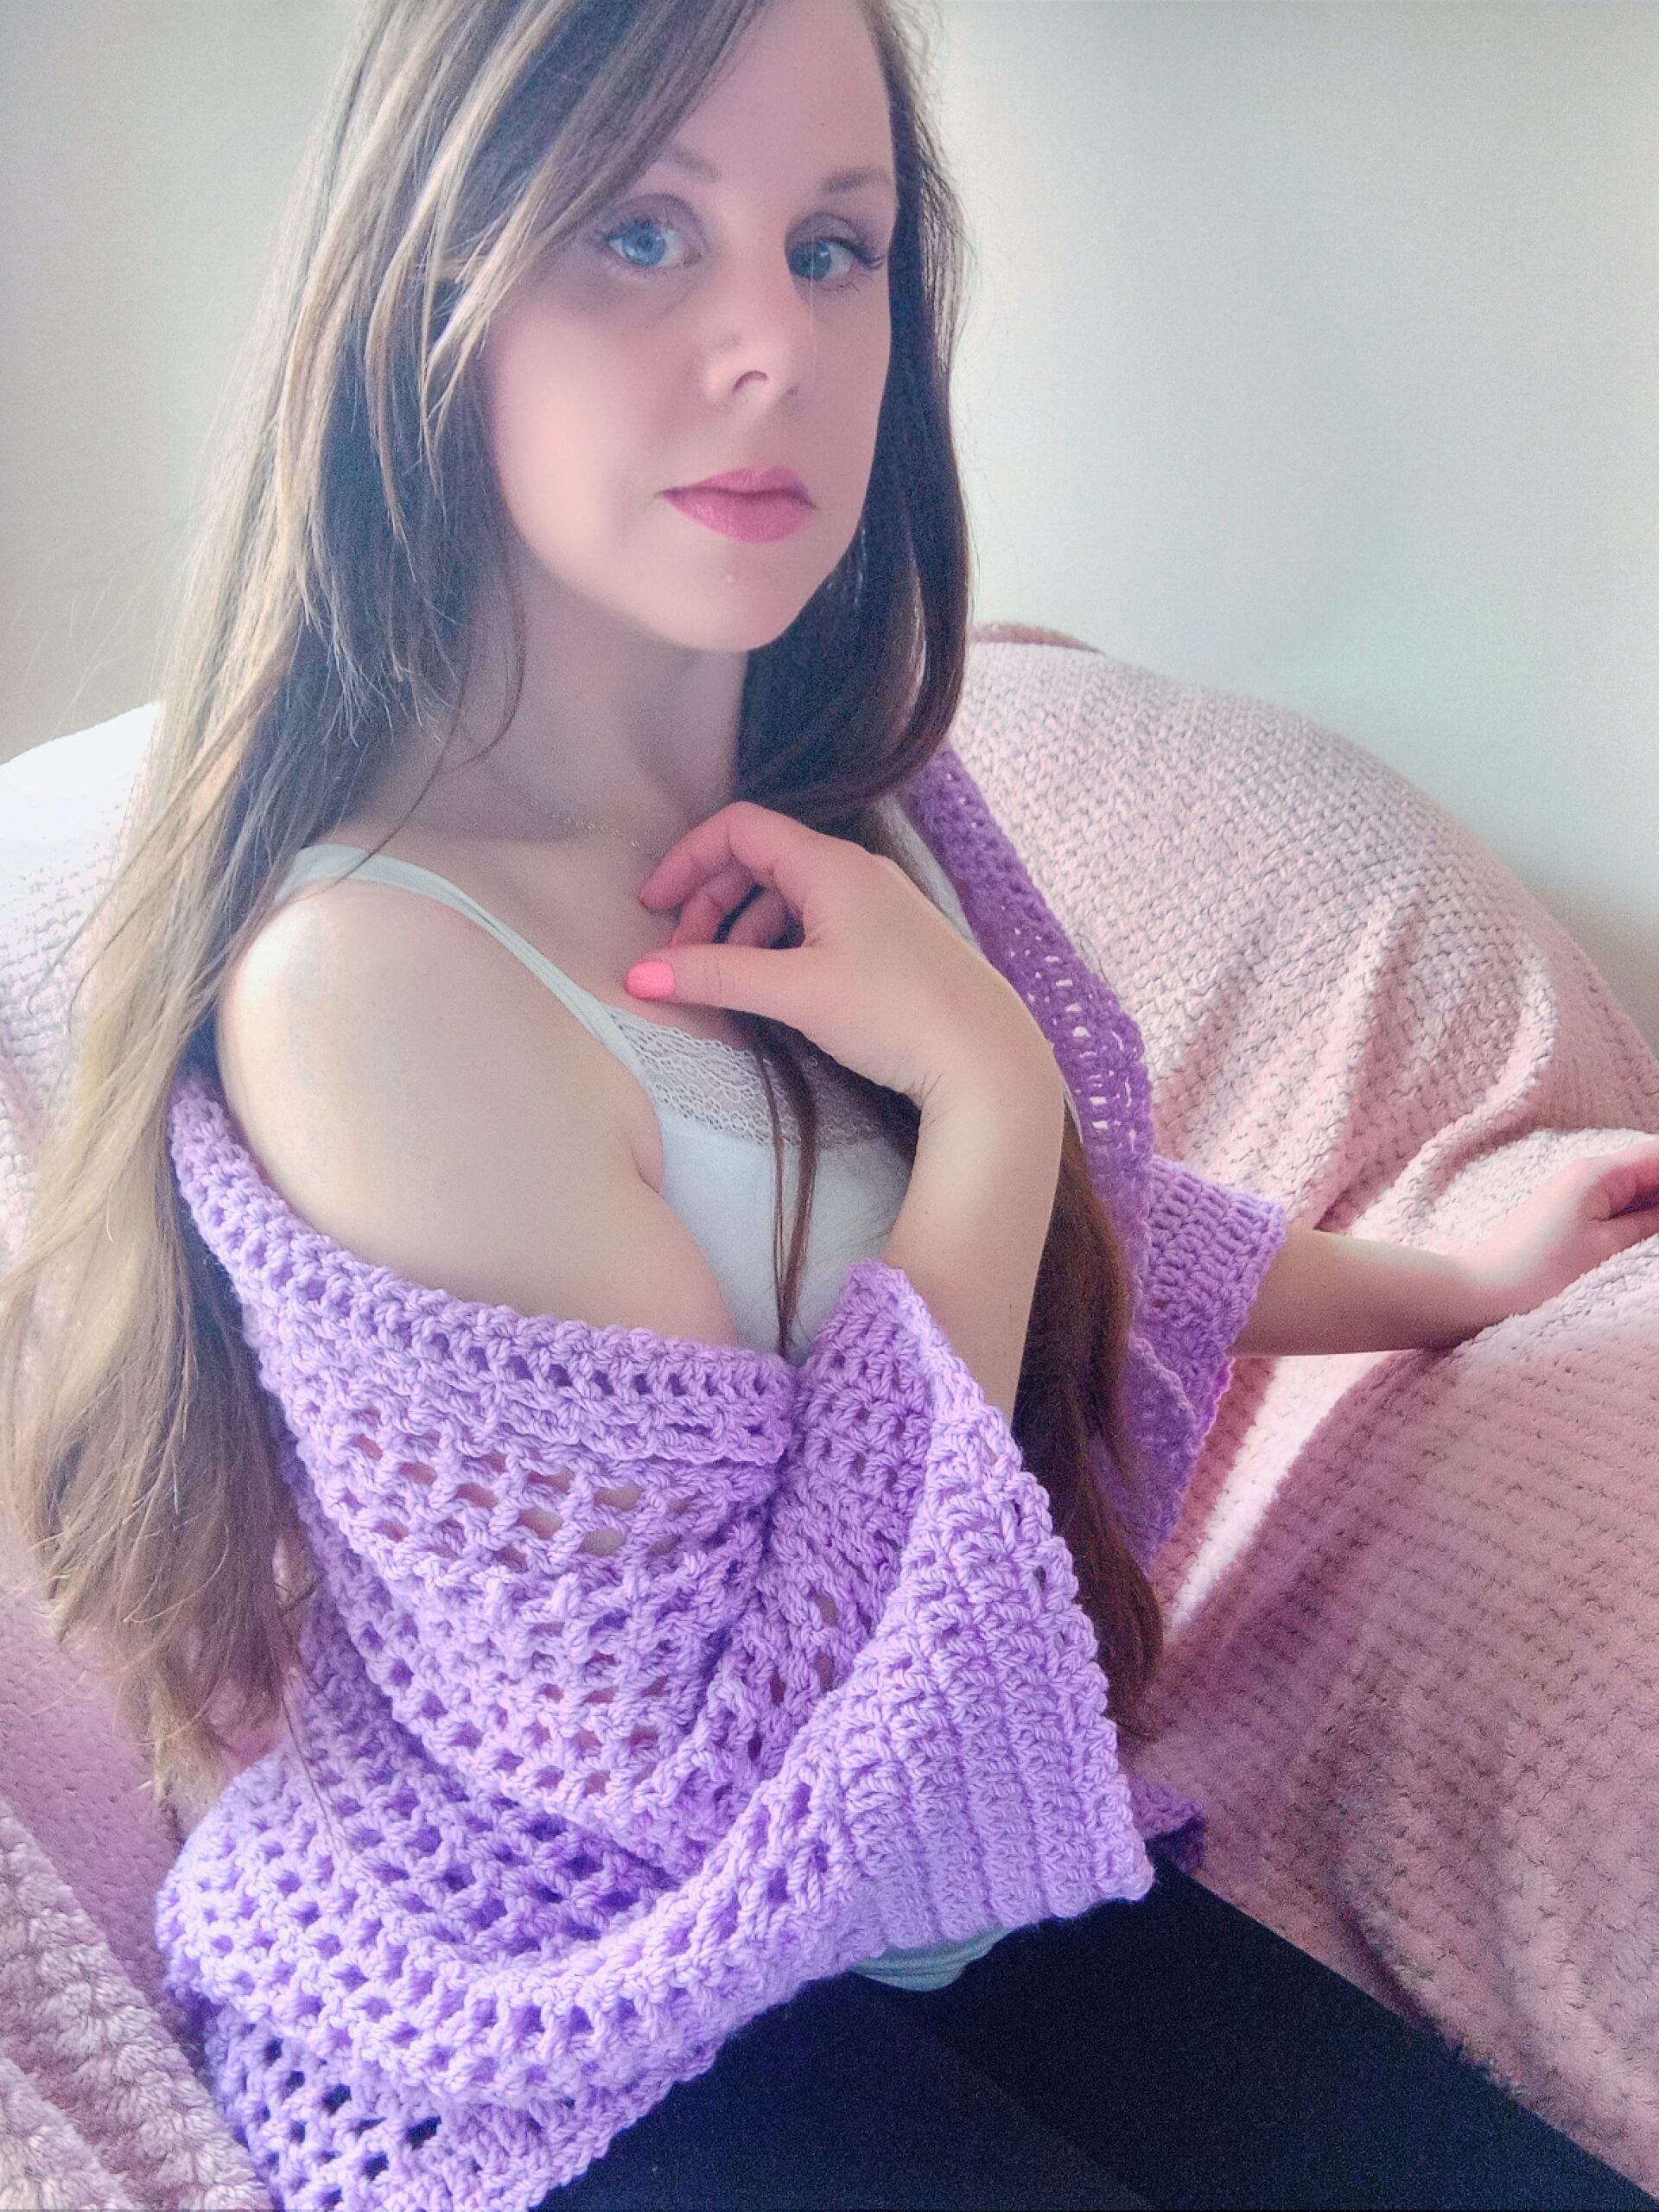
This time, this crochet project comes in sizes S to XXXL. It also features a very feminine and delicate chain arch edging on the sleeves and front opening, which I love! At the moment, I am definitely in the mood to recreate some of my earlier projects. I am planning on recreating a newer version of this delicate and romantic headband with flowers. This recreation will be available on both my Youtube channel and blog in the coming weeks, so watch this space!
I hope you enjoy this new crochet project! Let me know in the comments if you like it. Don’t forget to subscribe to my weekly newsletter so that you never miss a stitch!
Connecting with you
I would like to take a moment to thank every single one of you, for supporting me and my crochet journey. Indeed, If you want more exclusive crochet content from me, please do consider subscribing to my Patreon page. Thank you!
I love connecting with my Crochet Community through my blog and Social Media. You can find me on Youtube, Instagram, and Pinterest. I would love to connect with you on these platforms.
If you are on Ravelry, you can find my Ravelry page here. This is a great way to connect with me and have access to all of my PDF patterns. You can also find my Etsy shop by clicking here.
You can also join my private Facebook group to connect.
Crochet Lavender Cocoon Cardigan: The Pattern
You can purchase the ad free, large print, PDF pattern from my Etsy store here: Crochet Lavender Cocoon Cardigan Shrug PDF Pattern
You can purchase the ad free, large print, PDF pattern from my Ravelry store here: Crochet Lavender Cocoon Cardigan Shrug PDF Pattern
Level: Easy
Notes
I will be using US terms (British terms in brackets)
Gauge
4” (10 cm)= 6 rows
4” (10 cm)= 13 stitches
Materials
5 skeins of Paintbox Simply Aran yarn in shade 242 Tea Rose (5 skeins for sizes S, M; 6 skeins for sizes L, XL, XXL, 7 skeins for sizes XXXL).
A 6 mm crochet hook
Tapestry needle
A pair of scissors
Stitch marker (optional)
A measuring tape
Abbreviations
ch: chain
sk: skip
Sl st: Slip stitch
St: stitch
SC: Single Crochet (UK Double Crochet)
DC: Double Crochet (UK Treble Crochet)
EOR: End of row/End of round
Sizes & Measurements table
Measurements given are for the finished initial square before the project is folded over and border is added
S: 33,5” x 33,5” (85 cm x 85 cm)
M: 36,5” x 36,5” (92,5cm x 92,5 cm)
L: 40” x 40” (100 cm x 100 cm)
XL: 43” x 43” (107,5 cm x 107,5 cm)
XXL: 46” x 46” (115 cm x 115 cm)Size XXXL: 49” x 49” (122,5 cm x 122,5 cm)
Sizes will be referred to as follows on the pattern: S, M, L, (XL), [XXL], XXXL
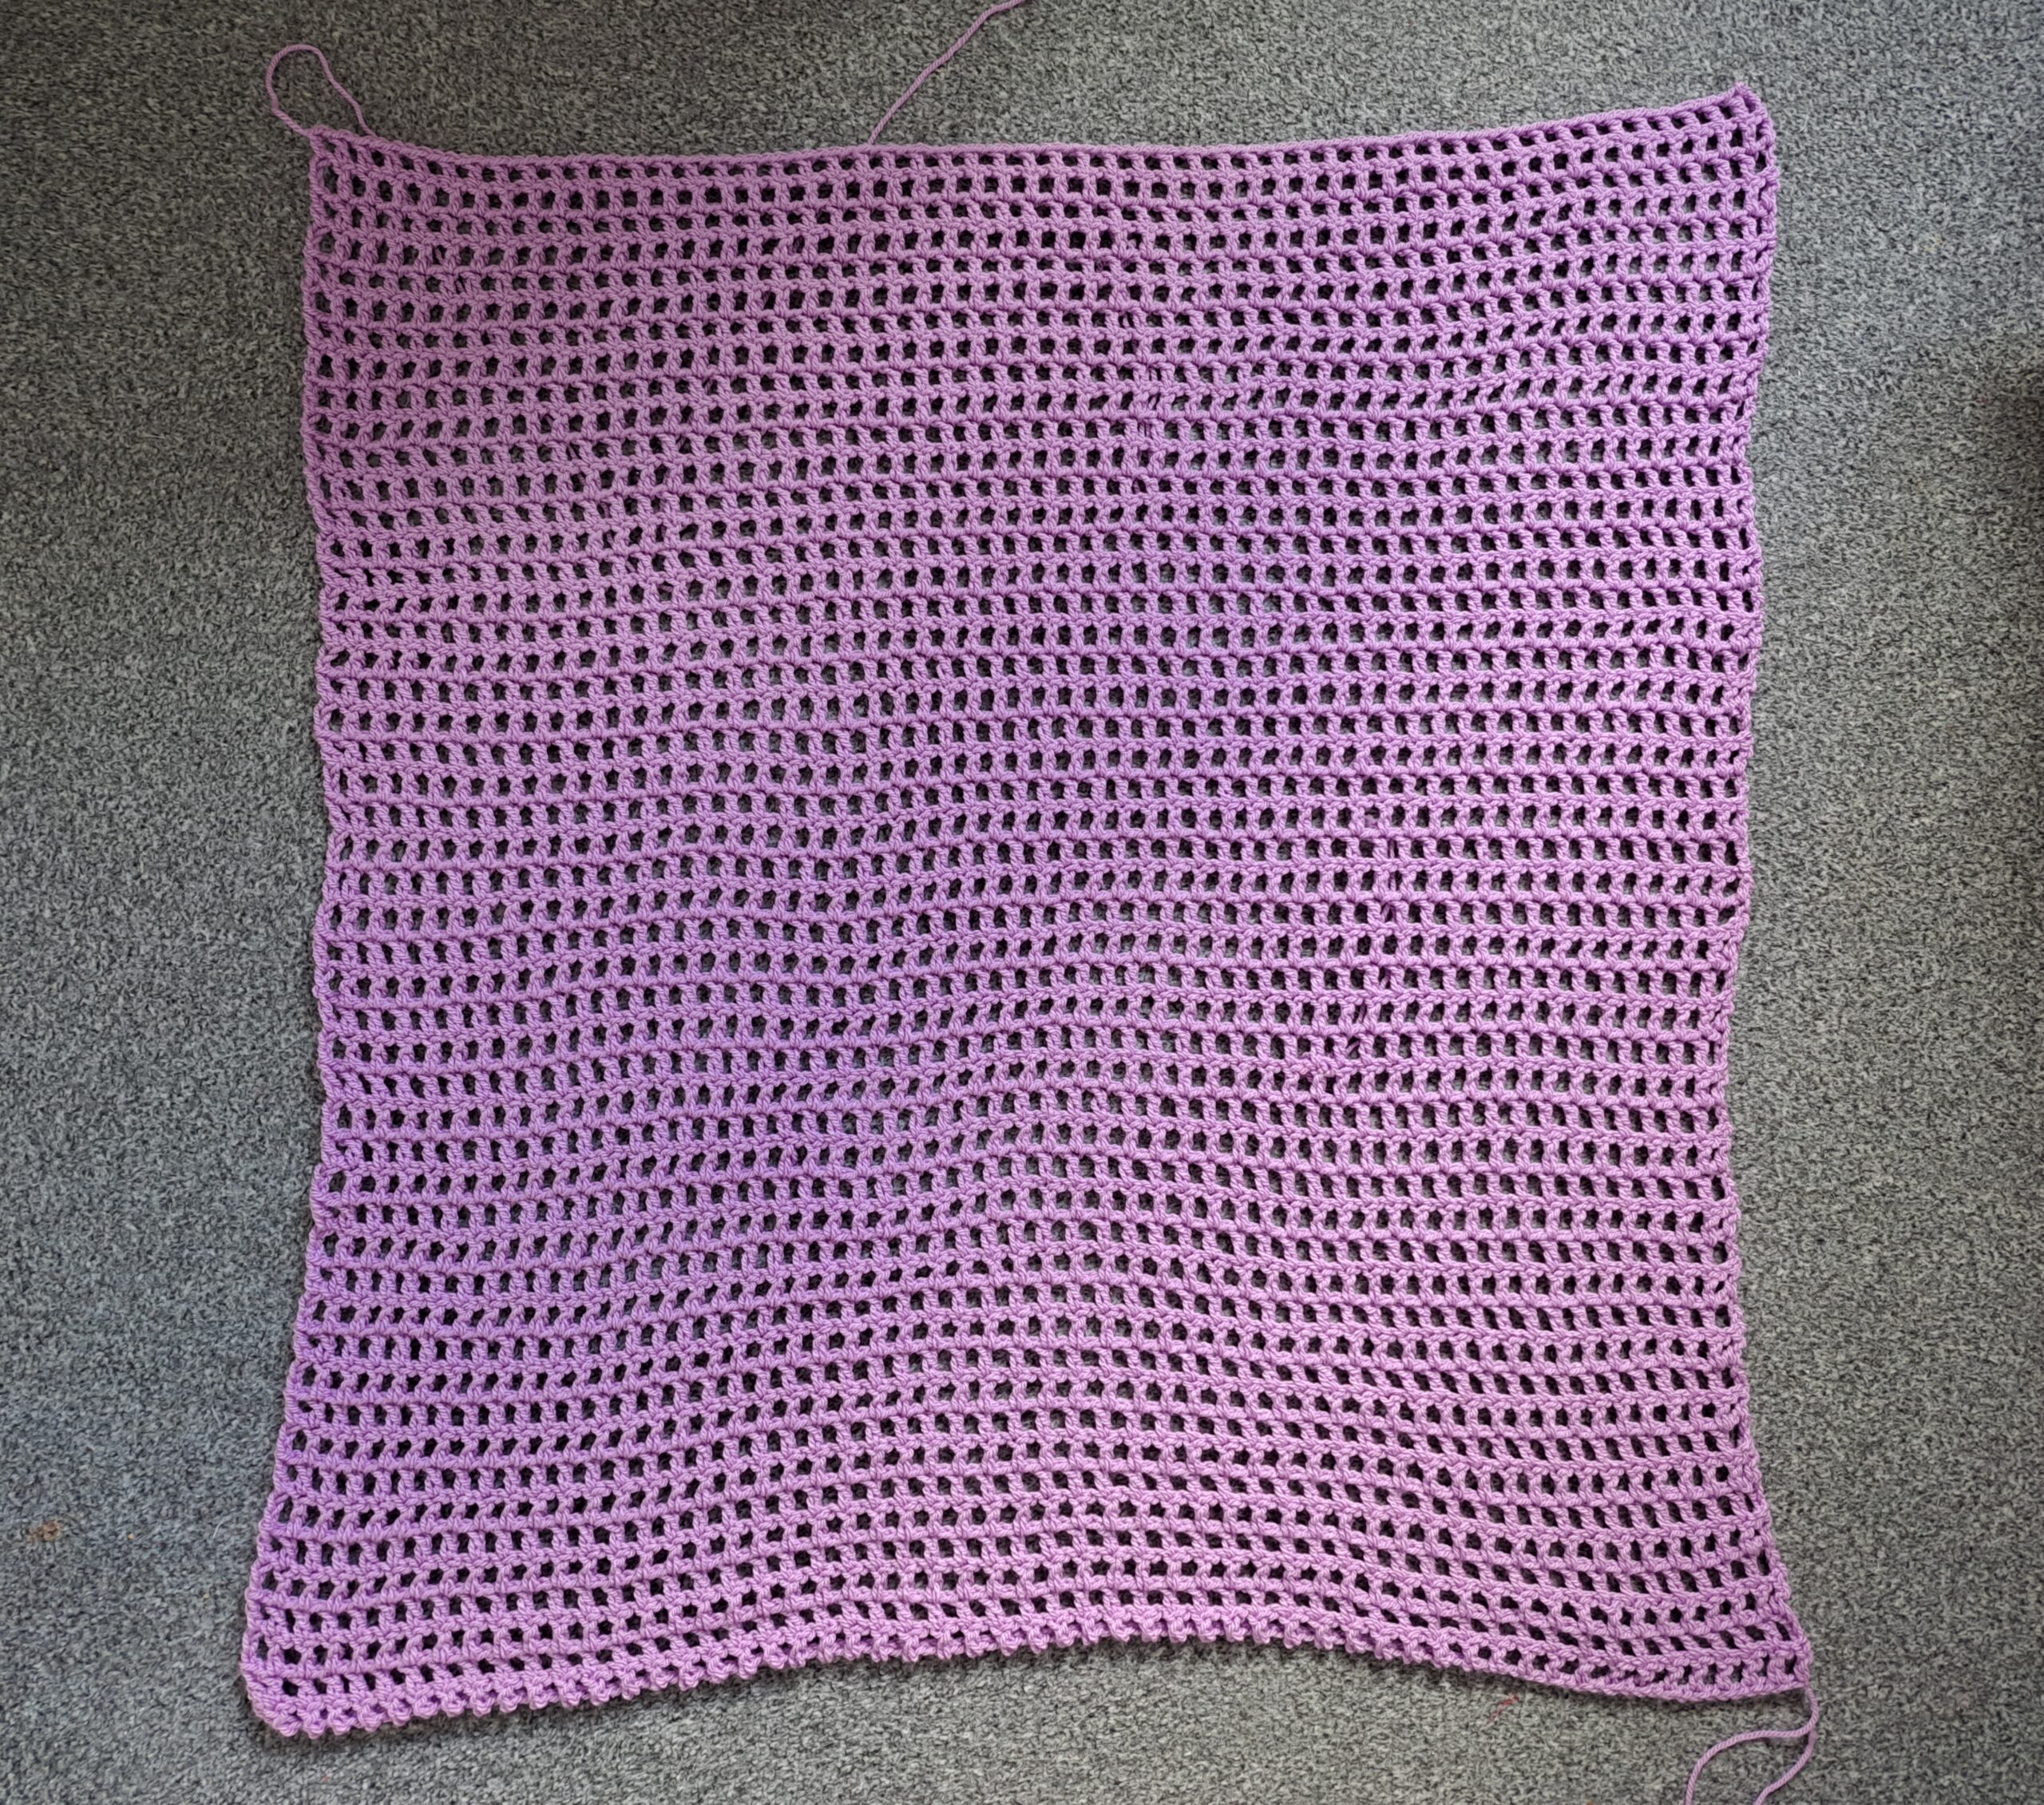
Pattern begins here
Ch 112, 121, 130, (139), [148], 157
Repeat rows as follows:
1: DC into 6th ch from hook, *sk 1 ch, ch 1, DC into next ch* until eor (first 5 ch=1 DC and ch sp)
2: Ch 4 (=DC + 1 ch), *sk 1 ch, ch 1, DC into next ch* until eor
2-46, 52, 58, (64): repeat row 2
When your square is complete, fasten off, leaving long tail for sewing.
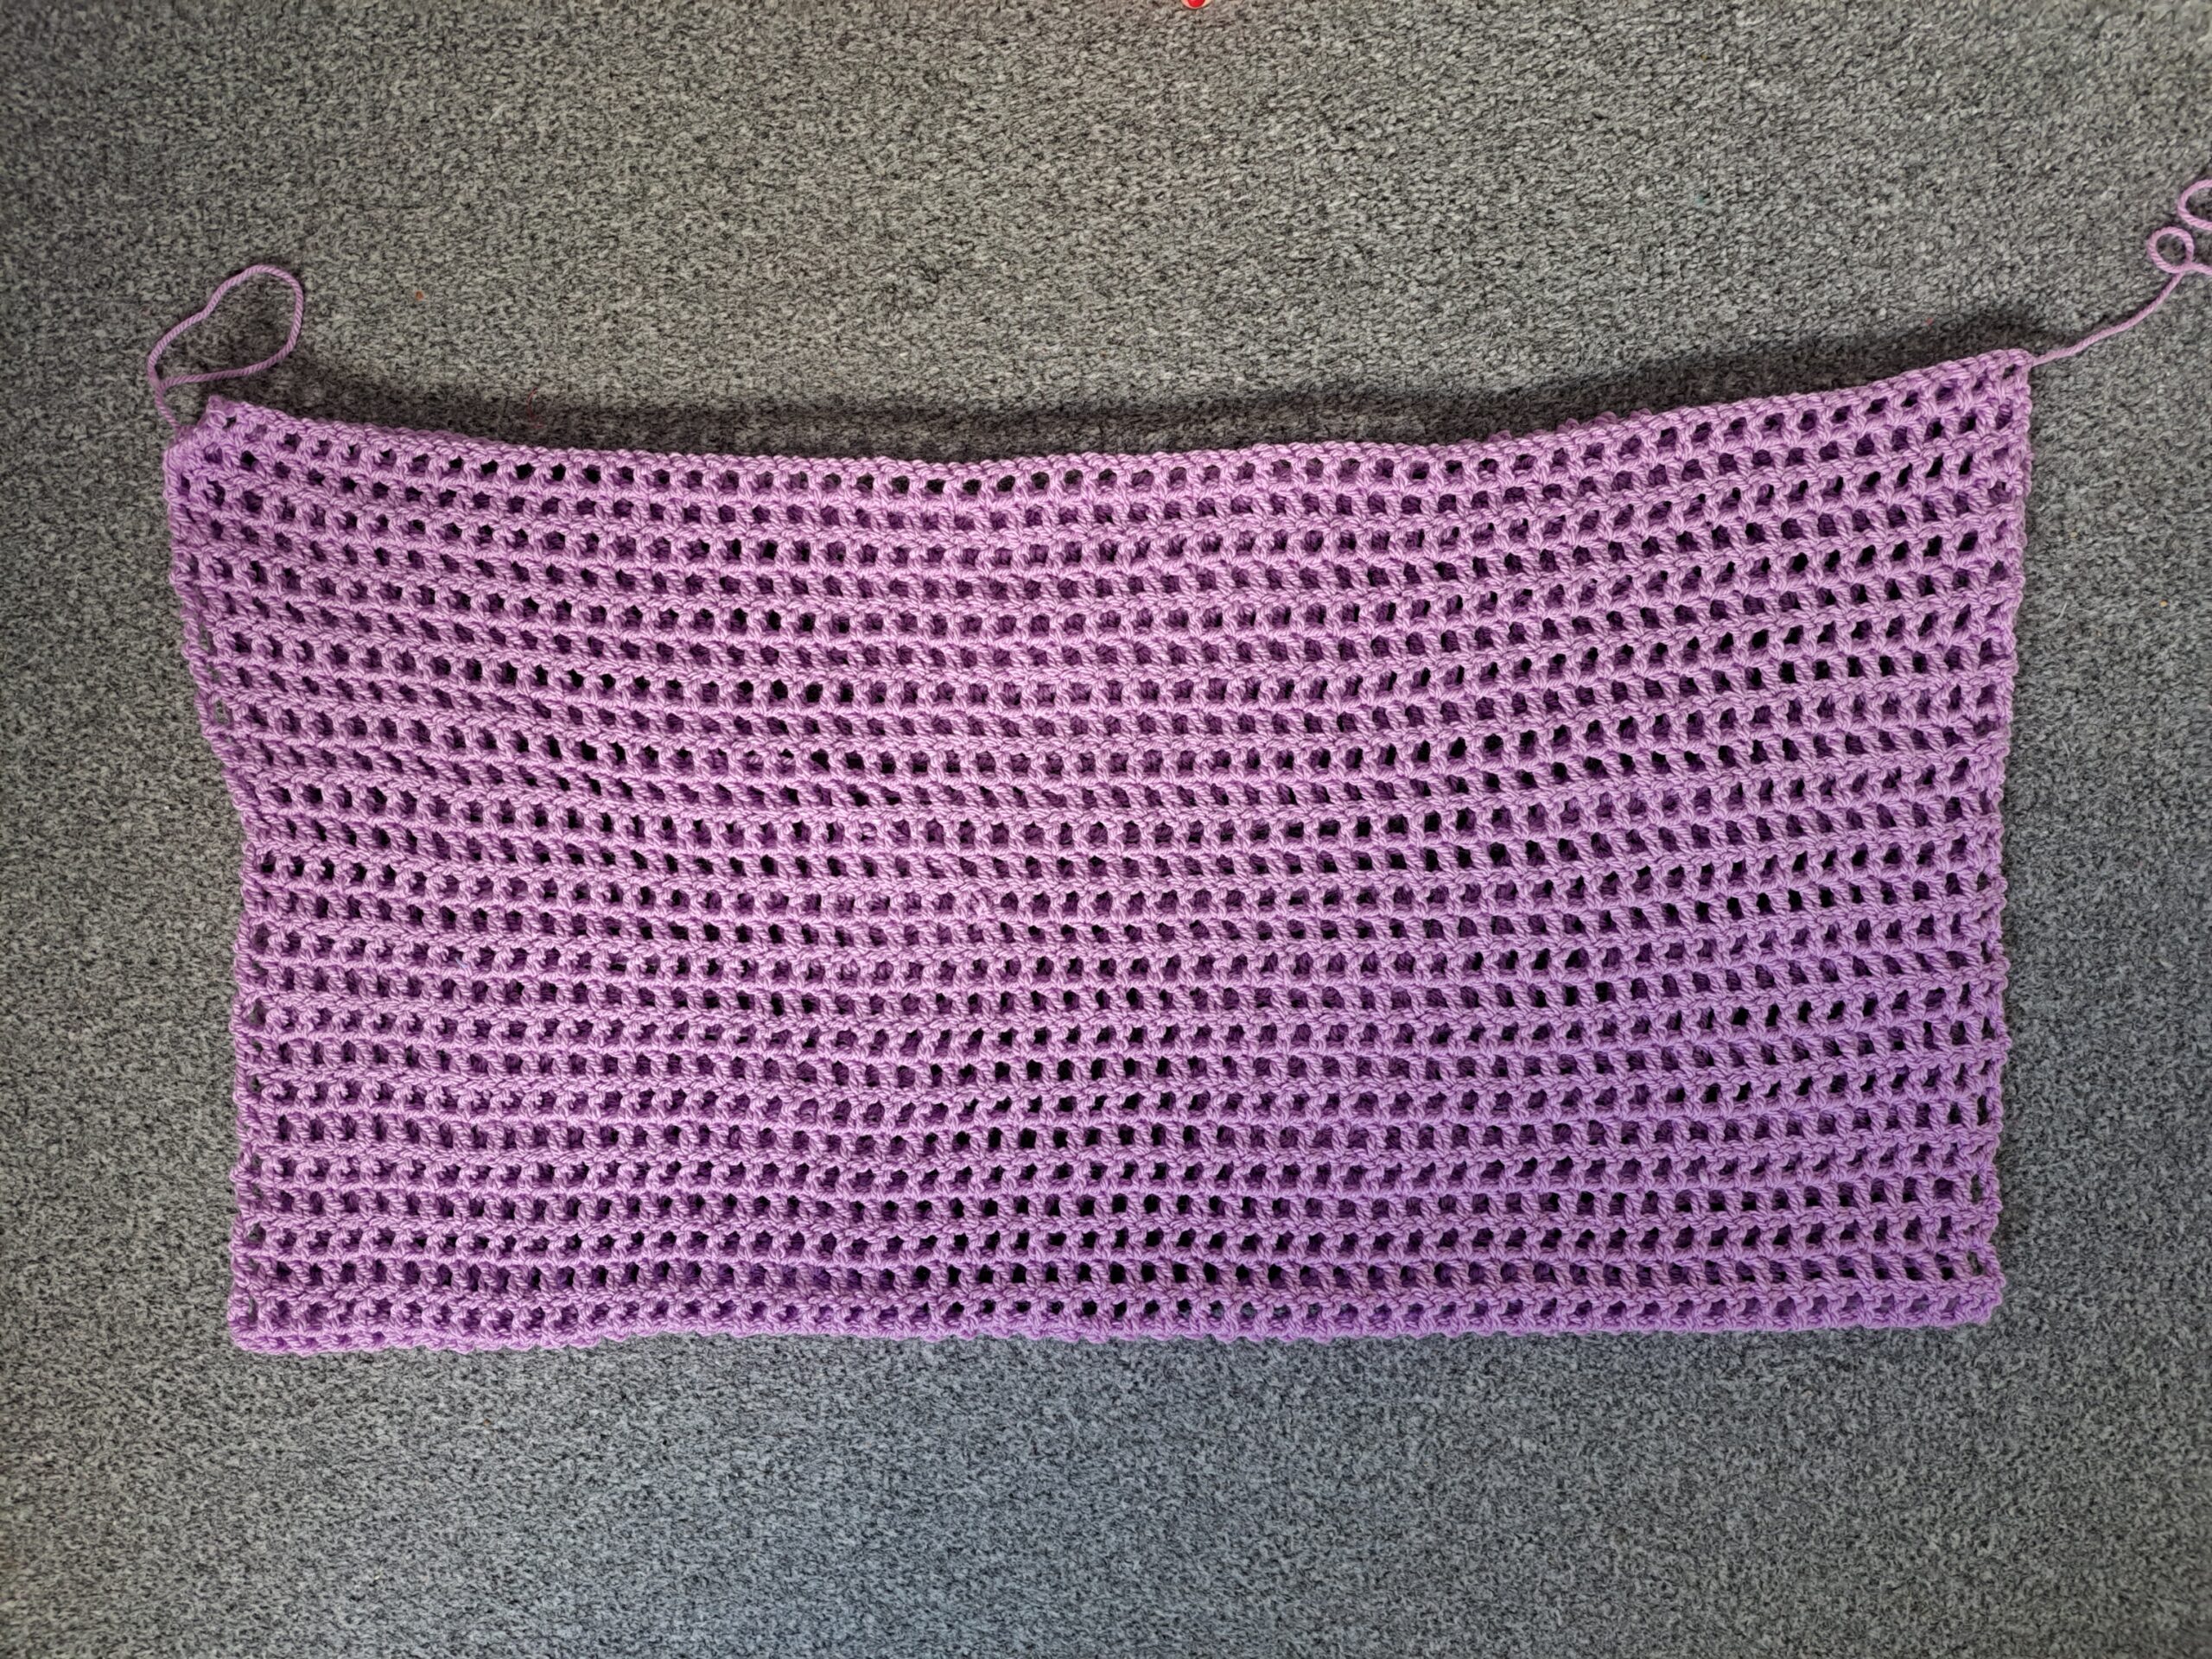
Once you have finished your DC square, fold in half and:
For sizes S/M: measure 23 cm/9 inches from the center fold (inside of cardigan) to form arm pit and hole, place stitch marker.
For sizes L/XL: measure 27 cm/10,5 inches from the center fold (inside of
cardigan) to form arm pit and hole, place stitch marker.
For sizes XXL/XXXL: measure 31 cm12 inches from the center fold (inside of cardigan) to form arm pit and hole, place stitch marker.
Use long tail of yarn and tapestry needle to sew seam from stitch marker to end of cardigan, make a double knot, sew in loose ends. Repeat on the other side, attaching a piece of yarn to sew that edge of cardigan. Fasten off and tidy all loose ends.
Arm edging (repeat process on both sides for each sleeve)
You will be placing your arm border and edging in the space you created previously when sewing your project together. This is the space between the center fold and the beginning of the stitches you just made.
You will be working in the rounds for this section.
Attach yarn to any stitch of this section (I attached my yarn to a stitch close to the seam).
Round 1: Attach yarn onto any st. of sleeve hole, ch. 1, SC into every st. around, sl.st. to 1st ch.1 to close off round.
Round 2: Ch. 3 (counts as 1st DC of round), DC into every stitch from previous row, sl. st. to first ch. 3 to close off round.
Round 3-4: Repeat round 2.
Round 5 (chain arch edging): [Ch 3, sk 1 st, SC into next stitch] until eor. Place your last SC into the same stitch where we began this round.
Front edging
We will be working in the rounds for this section; we will attach the yarn to any stitch across the front opening.
Round 1: Attach yarn onto any st. of sleeve hole, ch. 1, SC into every st. around, sl.st. to 1st ch.1 to close off round.
Round 2: Ch. 3 (counts as 1st DC of round), DC into every stitch from previous row, sl. st. to first ch. 3 to close off round.
Round 3 (chain arch edging): Attach yarn onto any st. of sleeve hole, ch. 1, SC into every st. around, sl.st. to 1st ch.1 to close off round.


You May Also Like
Crochet Boho Festival Bag

Crochet The Marissa Dainty Wrap