
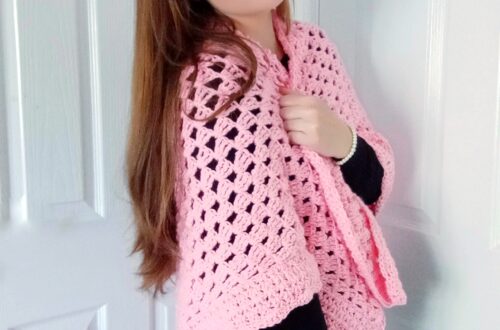
Crochet Lavender Hexagon Cardigan Free Pattern
Crochet Lavender Hexagon Cardigan Free Pattern
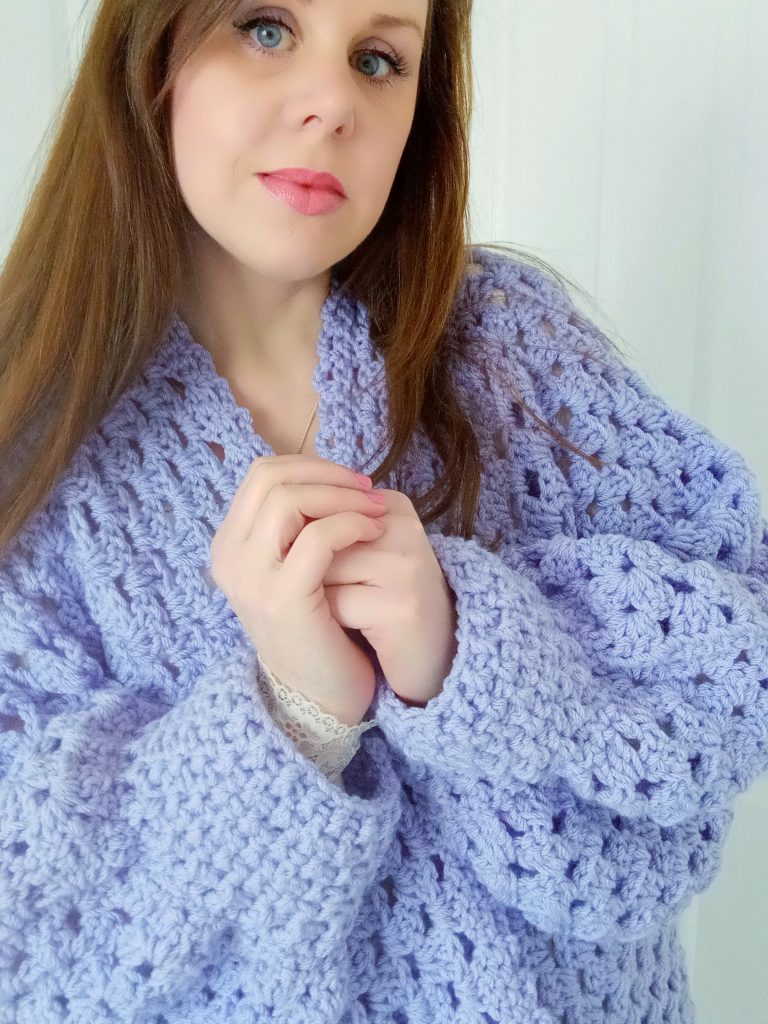
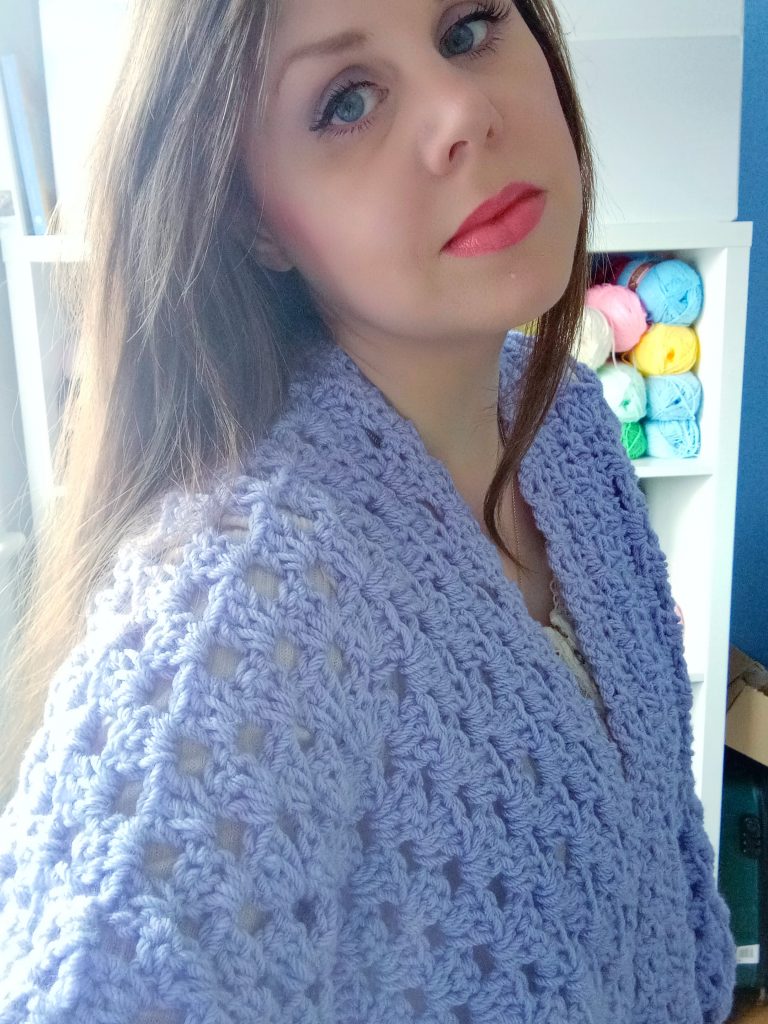
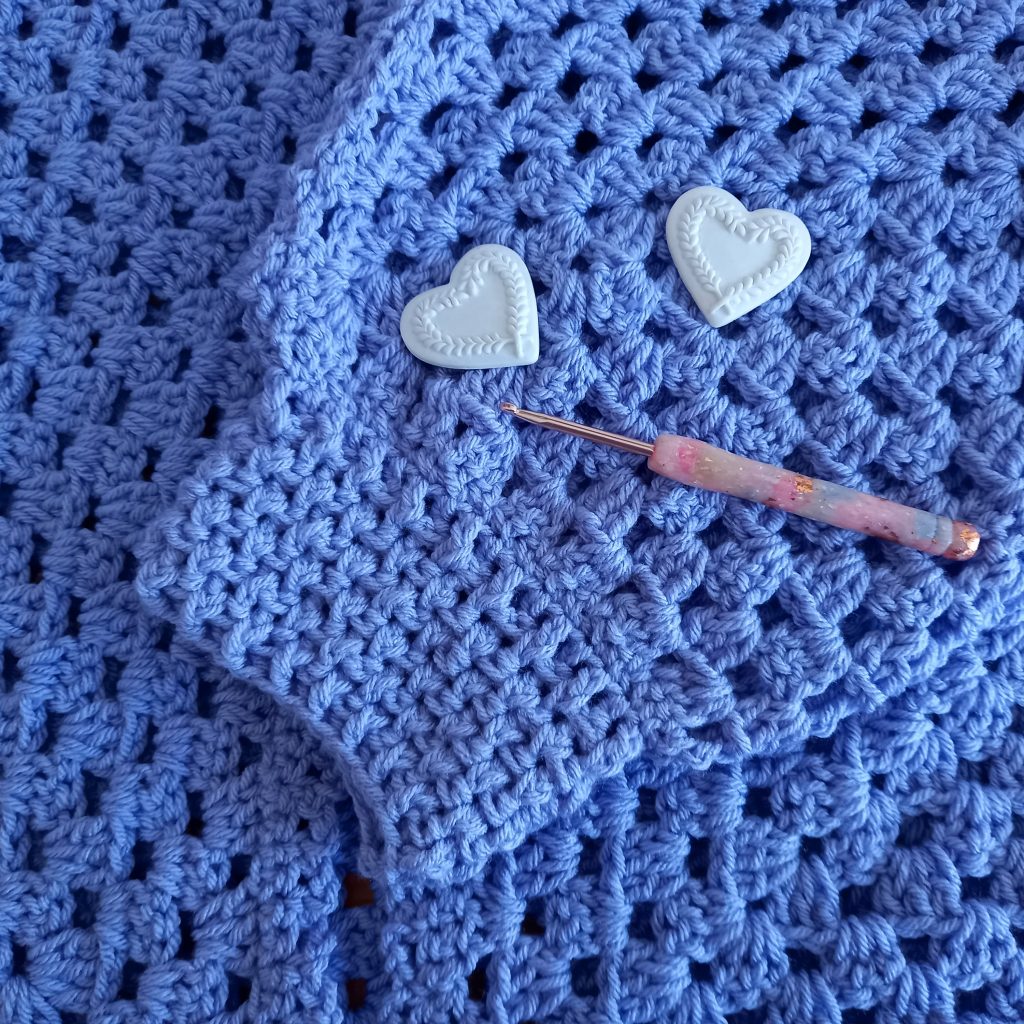
Hi everyone, this week I am bringing to you the crochet Lavender Hexagon Cardigan free pattern. This is a great project to relax with, and is very easy to crochet. Crocheted with a beautiful chunky lavender colored yarn, this cardigan is perfect for beginners. It features delicately tapered sleeves and a chain arch edging at the front.
The video tutorial for this project can be found here:
Crochet Lavender Hexagon Cardigan Free Pattern: the inspiration
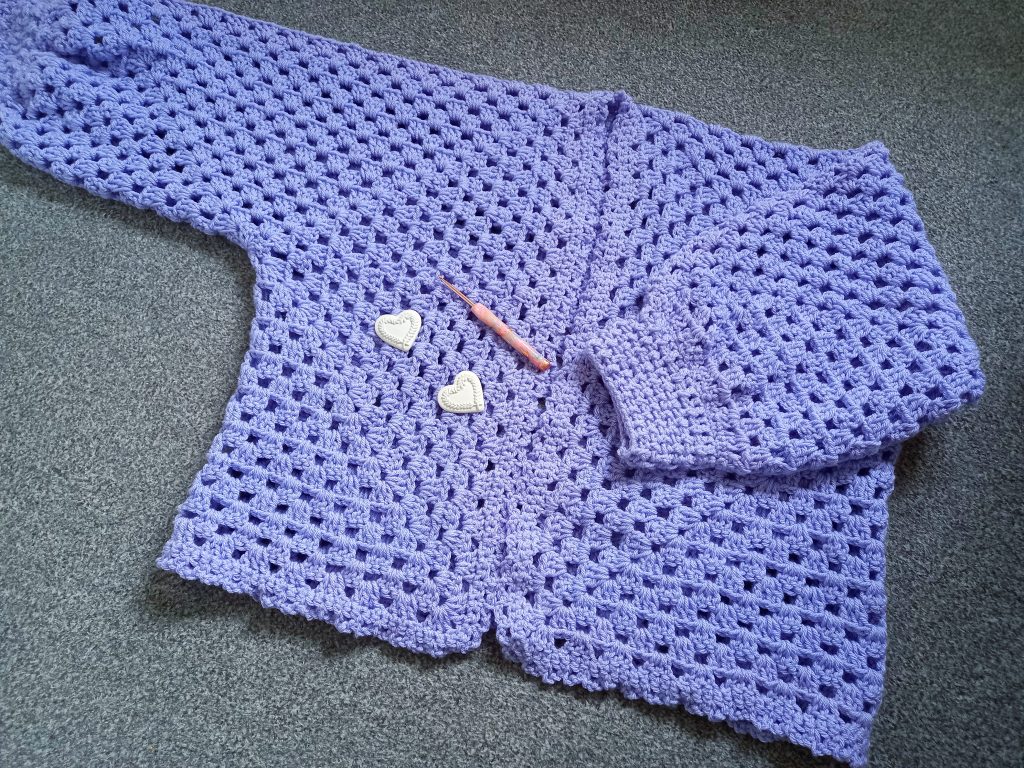
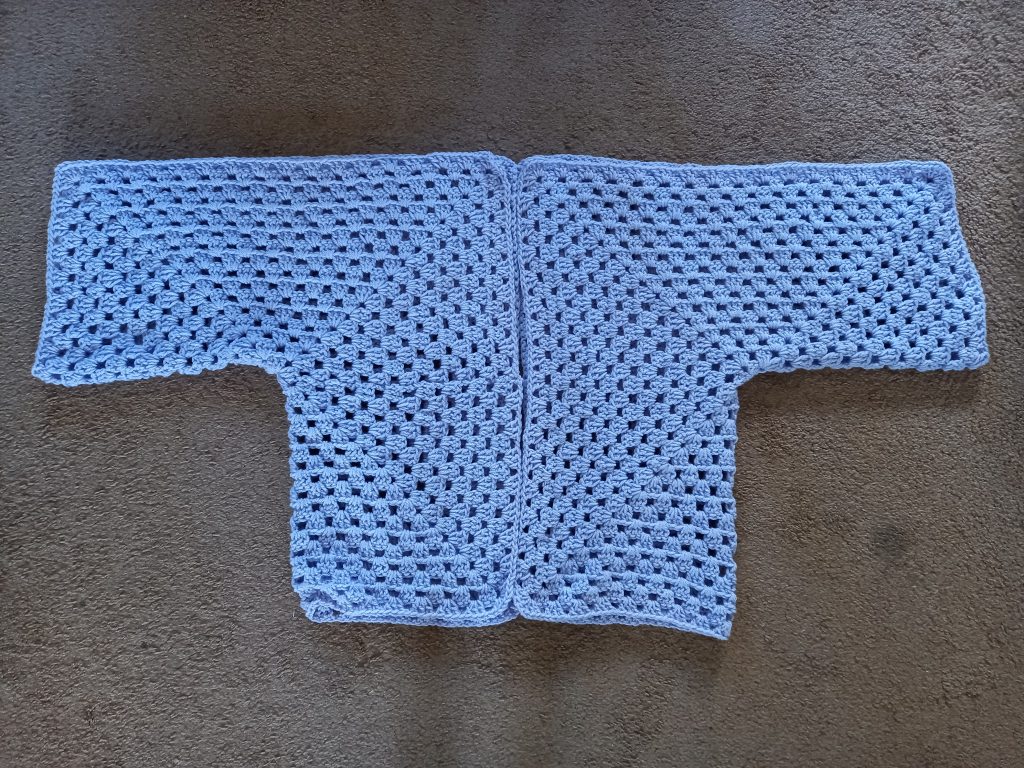
This cardigan is stunning. It is created with two hexagons which are later sewed together to form the basic shape of the garment. After that, the sleeve cuffs are added. These are tapered to add dimension to the cardigan. A lovely and feminine chain arch edging is then added to the front and bottom of the cardigan.
This was a true labor of love. Indeed, I had wanted to make a lilac hexagon for a long time. I had imagined how perfect it would be for Spring and Summer. It is so pretty and feminine! It also comes in different sizes, from size S to XXXL. Also, it can be worn with most outfits, and has a clear Boho vibe to it. You could definitely wear this cardigan at Coachella!
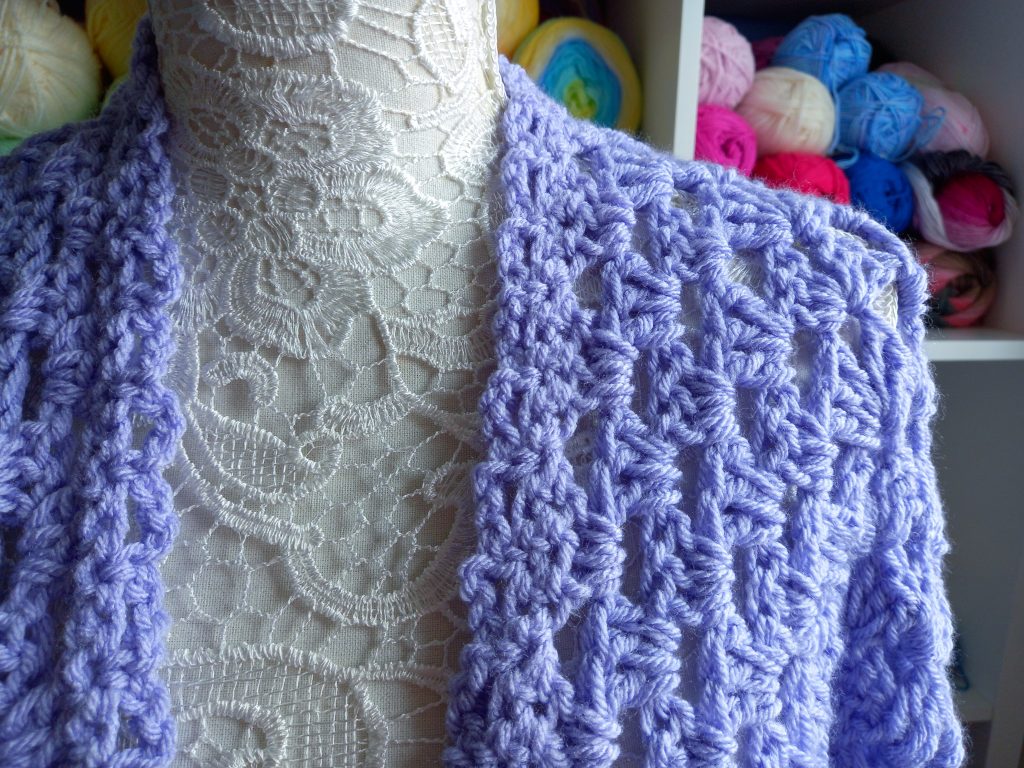
Hexagon cardigans are so much fun to crochet. I used the hexagon granny stitch for this project. To be honest, I do love the granny stitch so much, as it is both traditional and modern. This cardigan is slightly oversized, but remains very feminine because of the color, tapered sleeves, and chain arch edging. The chain arch edging is one of my favorite edgings because it really elevates a crochet project while being very easy to add on.
Crochet Lavender Hexagon Cardigan Free Pattern: a Boho look
I do love the Boho look this cardigan has. I have already crocheted hexagon cardigans before, and you can find The Sweet Dreams Hexagon Cardigan here. Indeed, I crocheted this cardigan last year, and it looks beautiful in every season. It is also very feminine, and I made mine in two contrasting colors, which looks fantastic.
As I said previously, this cardigan has a distinct Boho look to it. I used Paintbox Simply Chunky yarn to crochet this cardigan, along with a 5 and 6.5 mm crochet hook. The best news is you can use your preferred chunky yarn for this project, along with your favorite color too. So this a very versatile crochet project for you to make!
This crochet cardigan is also perfect for beginners. The 2 hexagons build up fast and easily using the granny stitch, and once this is done, assembling the cardigan is super fast too. The sleeves, which are made using Front and Back Post Double Crochets, may require a bit more attention, but again, this is a pattern repeat which is easy to get a hang off. Finishing off this cardigan with a chain arch edging is very easy too.
I hope you enjoy this project as much as me. It is perfect for beginners and expert crocheters alike.
Connecting with you
I love connecting with my Crochet Community through my blog and Social Media. You can find me on Youtube, Instagram, and Pinterest. I would love to connect with you on these platforms.
You can also join my private Facebook group to connect.
You can subscribe to my weekly newsletter here. Then, you will then be the first to know of a pattern release, new video tutorial, and my amazing giveaways!
Thank you so much for stopping by my blog,
Have a great week, xoxo Selina.
Crochet Lavender Hexagon Cardigan: the pattern
You can purchase my ad free, large print, PDF pattern from my Etsy store: Crochet Lavender Hexagon Cardigan PDF Pattern
You can purchase the ad free, large print, PDF pattern from my Ravelry store here: Crochet The Lavender Hexagon Cardigan Pattern
Level: Easy +
Notes: I will be writing in US terms (British terms in brackets)
Materials
7 (S/M), 9 (L/XL), 10 (XXL/XXXL) of Paintbox Simply Chunky in shade 345 Pale Lilac
A 5 and a 6,5 mm crochet hook
A tapestry needle
A pair of scissors
Gauge
4” (10 cm) x 4” (10 cm) = 4 hexagon rounds
Size of each hexagon before sewing
S/M: 36”x36” (93 x 93 cm)
L/XL: 39”x39” (100 x 100 cm)
XXL/XXXL: 42”x42” (107 x 107 cm)
Sizes of finished cardigan
These are the sizes measured once cardigan has been assembled, without the edgings and borders. Because this is a hexagon cardigan, the sleeves are wide for each size, and they are just worked up automatically while we crochet both our hexagon squares to form cardigan. Therefore, they automatically are bigger if you crochet a bigger size (ie add more rounds to each square).
Size S/M:
26” (67 cm) in length x 24” (61 cm) in width
Size L/XL:
29” (74 cm) in length x 27” (69 cm) in width
Size XXL/XXXL:
32” (81 cm) in length x 30” (77 cm) in width
Abbreviations
ch: chain
sk: skip
SP: space
SC: Single Crochet (= UK Double Crochet)
DC: Double Crochet (=UK Treble Crochet)
FPDC: Front Post Double Crochet (UK Front Post Treble Crochet)
BPDC: Back Post Double Crochet (UK Back Post Treble Crochet)
Sl st: Slip stitch
EOR: End of round
General notes concerning this pattern and crochet hexagons:
Hexagons do not lie flat whilst you crochet them, they are instead wavy. Please note this is completely normal and once have finished each hexagon (we will be crocheting 2), we will be placing them flat and folded in such a way that they will lie flat and create the shape of the cardigan.
The fact that each hexagon does not lie flat as you crochet it is not a mistake.
Corner spaces will always feature 3 chains, and the side spaces always feature 1 chain.
The chain 3 at the beginning of each round counts as a HDC throughout.
There will always be 6 corners per row for each hexagon. Each corner will be comprised of 3 DC, ch 3, 3 DC.
Pattern begins here
Use 6,5 mm crochet hook for this part.
Make 2 hexagon cardigans:
Ch 4, sl st to first ch to form a ring.
1: Ch 3 (=DC), 2 DC within the ring (=3 DC total); [ch 3, 3 DC] 5 times, ch 3, sl st to first ch 3 to close round.
2: Ch 3 (=DC), turn your work, work 2 DC in ch 3 sp from previous row (=3 DC total), ch 3, 3 DC into same sp; [ch 1, place 3 DC, ch 3, 3 DC into next ch 3 from previous row] until eor. Ch 1, sl st to 1st ch 3 to close round.
3: Ch 3, turn your work, work 2 DC into ch sp from previous row. Ch 1, [3 DC, ch 3, 3DC] into next ch sp (which is also the corner); [Ch 1, 3 DC into next ch sp, ch 1; 3 DC, ch 3, 3 DC into next ch sp], until eor. Ch 1, sl st to first ch 3 to close round.
4: Ch 3 (=DC), turn your work, 2 DC into ch sp from previous row (=3 DC total); *ch 1, 3 DC, ch 3, 3 DC into next ch sp (=corner); [ch 1, 3 DC into next ch sp 2 times] ** Repeat from * to ** 5 times; ch 1, 3 DC, ch 3, 3 DC into next ch space; ch 1, 3 DC into next ch space, ch 1, sl st to ch 3 from beginning of row to close of round.
Note
We are now starting to see this pattern being worked up more clearly. As the hexagon will grow, we will have more “side” clusters of 3 DC, and have 6 clusters of 3 DC, ch 3, 3 DC which are the corners (we will always have the same number of corners which is 6 throughout).
5-18 (S), 19 (M), 20 (L), 21 (XL), 22 (XXL), 23 (XXXL), 24 (XXXXL), 25 (XXXXXL): repeat row 4, always adding 1 cluster of 3 DC per side per round as you increase your rounds. Of course, there will always be only 6 corners per round as you go along, where you will be placing 3 DC, ch 3, 3 DC.
Round 5-17 (S/M), 21 (L/XL), 25 (XXL/XXXL): repeat row 4.
Assembling your cardigan together
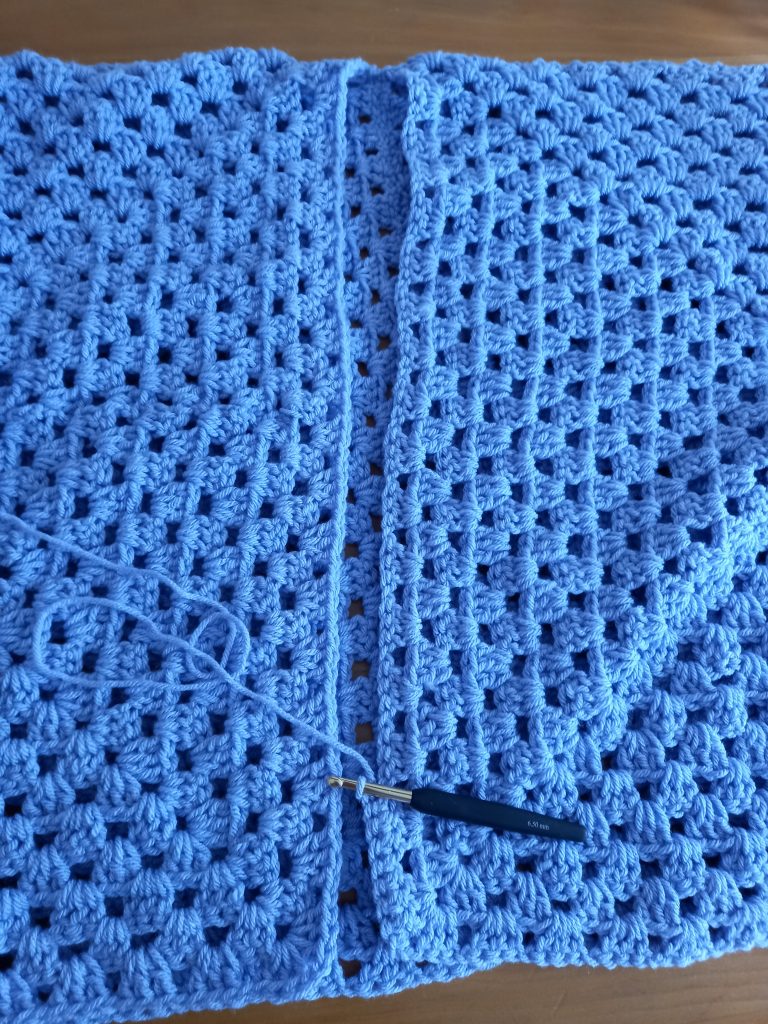
Once you have completed your 2 hexagons, fasten off, tidy up all loose ends. Sew in the center (where we began) of each hexagon to prevent unraveling.
Now place both hexagons side by side, folding them so as to form the shape of a cardigan.
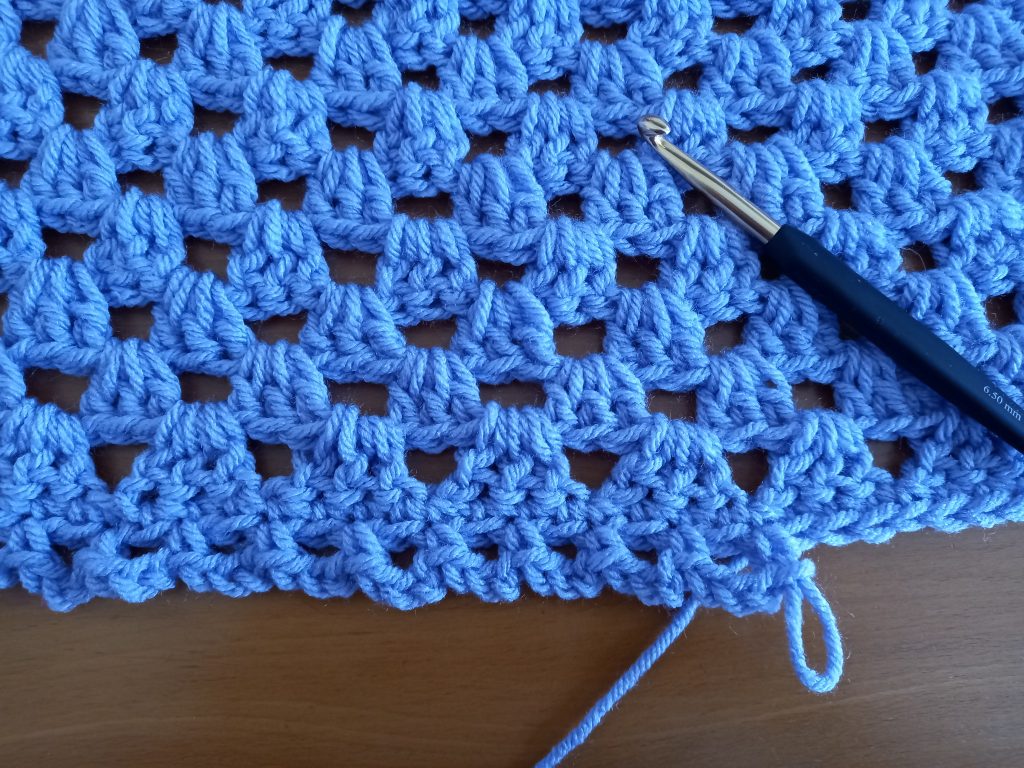
With piece of yarn and tapestry needle, start seaming the top part of the cardigan together as seen in photo. Sew the seam in straight across, using the mattress stitch.
Fasten off, tidy up all loose end.
Now sew in the back seam of your cardigan, using mattress stitch.
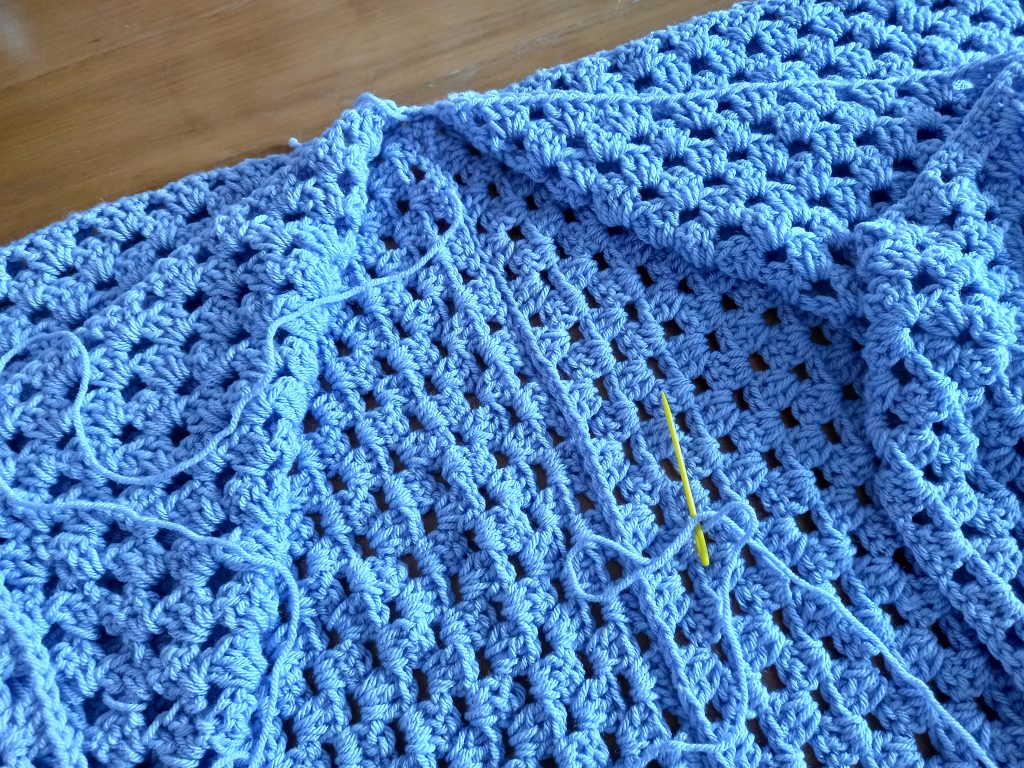
Fasten off, tidy up loose end.
Sleeve cuffs
Using 5 mm crochet hook, start making your sleeve cuffs.
Note:
Front Post Double Crochet: Wrap yarn around your hook, insert hook around the DC from previous row going from right to left in the front of stitch; pull up a loop, go through 2 loops, pull up a loop, go through 2 loops.
Back Post Double Crochet: Wrap yarn around your hook, insert hook around the DC from previous row going from right to left from the back of the stitch; pull up a loop, go through 2 loops, pull up a loop, go through 2 loops.
Attach yarn to cuff:
Round 1: Ch 1, SC into next stitch, [sk 1 stitch, 1 SC] until eor. Sl st to first ch 1 to close off round.
Round 2: Ch 3 (counts as a DC), place a DC into next stitch until eor. Sl st to 1st ch 3 at beginning of row.
Round 3: Ch 3 (counts as a BPDC), [Front Post Double Crochet into next DC from previous row, Back Post Double Crochet into next stitch] until you reach the first ch 3, sl st to 1st ch 3 to close off round.
Round 4: Ch 3 (counts as FPDC), [Back Post Double Crochet into the Front Post Double Crochet from previous row, Front Post Double Crochet into the Back Post Double Crochet from previous row] until eor. Therefore you will be alternating FPDC and BPDC from row to row, creating a ribbed effect.
Sl st to 1st ch 3 to close off round.
Round 5-8: repeat rows 3 and 4
Fasten off, tidy up all loose ends.
Front and bottom edging (chain arch edging)
With 6,5 mm crochet hook.
Attach yarn to either bottom corner of the front opening of the cardigan.
Round 1: Ch 1, SC into next stitch until eor, going all the way up the front opening of the cardigan, and then going all the way around the bottom of the cardigan. Once you reach the first ch 1, sl stitch to close off round.
Round 2: [Ch 3, skip next stitch, SC into next stitch] until eor. Once you reach the first ch 3, sl stitch to close off round.
Fasten off, tidy up all loose ends.


2 Comments
Glee
So lost on this, If I do the squares as many rounds as stated. The back is fine but the front , well there is no front it doesn’t even cover a boob ??? If I keep going to cover front the sleeves will be so big , it just won’t look good ? It looks like a good concept, but not doable.
Selina Veronique
Hi, thank you for stopping by. I am very confused as to where you are struggling with this pattern, as this is a very oversized project so even if you make the smallest size it should definitely cover your front. Have you made 2 panels? Let me know how I can help you, maybe you can join my private Facebook group Selina Veronique’s Crochet Corner so that I can give you advice directly.