Crochet Periwinkle Cocoon Cardigan Free Pattern
Crochet Periwinkle Cocoon Cardigan Free Pattern
Hi everyone, this week I am bringing to you the Crochet Periwinkle Cocoon Cardigan free pattern. This feminine and easy project is perfect for beginners. This crochet cardigan is great for Spring and Summer, and is a very fun project too.
The video tutorial can be found here:
Crochet Periwinkle Cocoon Cardigan Free Pattern: The Inspiration
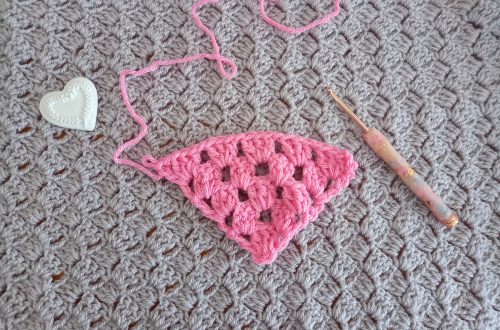
The inspiration for this pattern has been long in the making. I have wanted to crochet a new shrug design for a while now. To be honest, I have tried different types of stitches and patterns for weeks without ever being happy with the result. I was getting really disheartened when I decided to go with a simple granny square design, and then take it from there. And I am so happy I did that! I can in all honesty say I absolutely love this new design. It has come out even better than I expected, and I think there are a few reasons why.
I love granny square projects!
I have been super into granny squares lately. Indeed, last week I released The Sweet Dreams Vintage Baby Blanket, that has received quite a warm welcome. I am so grateful for this crochet community!
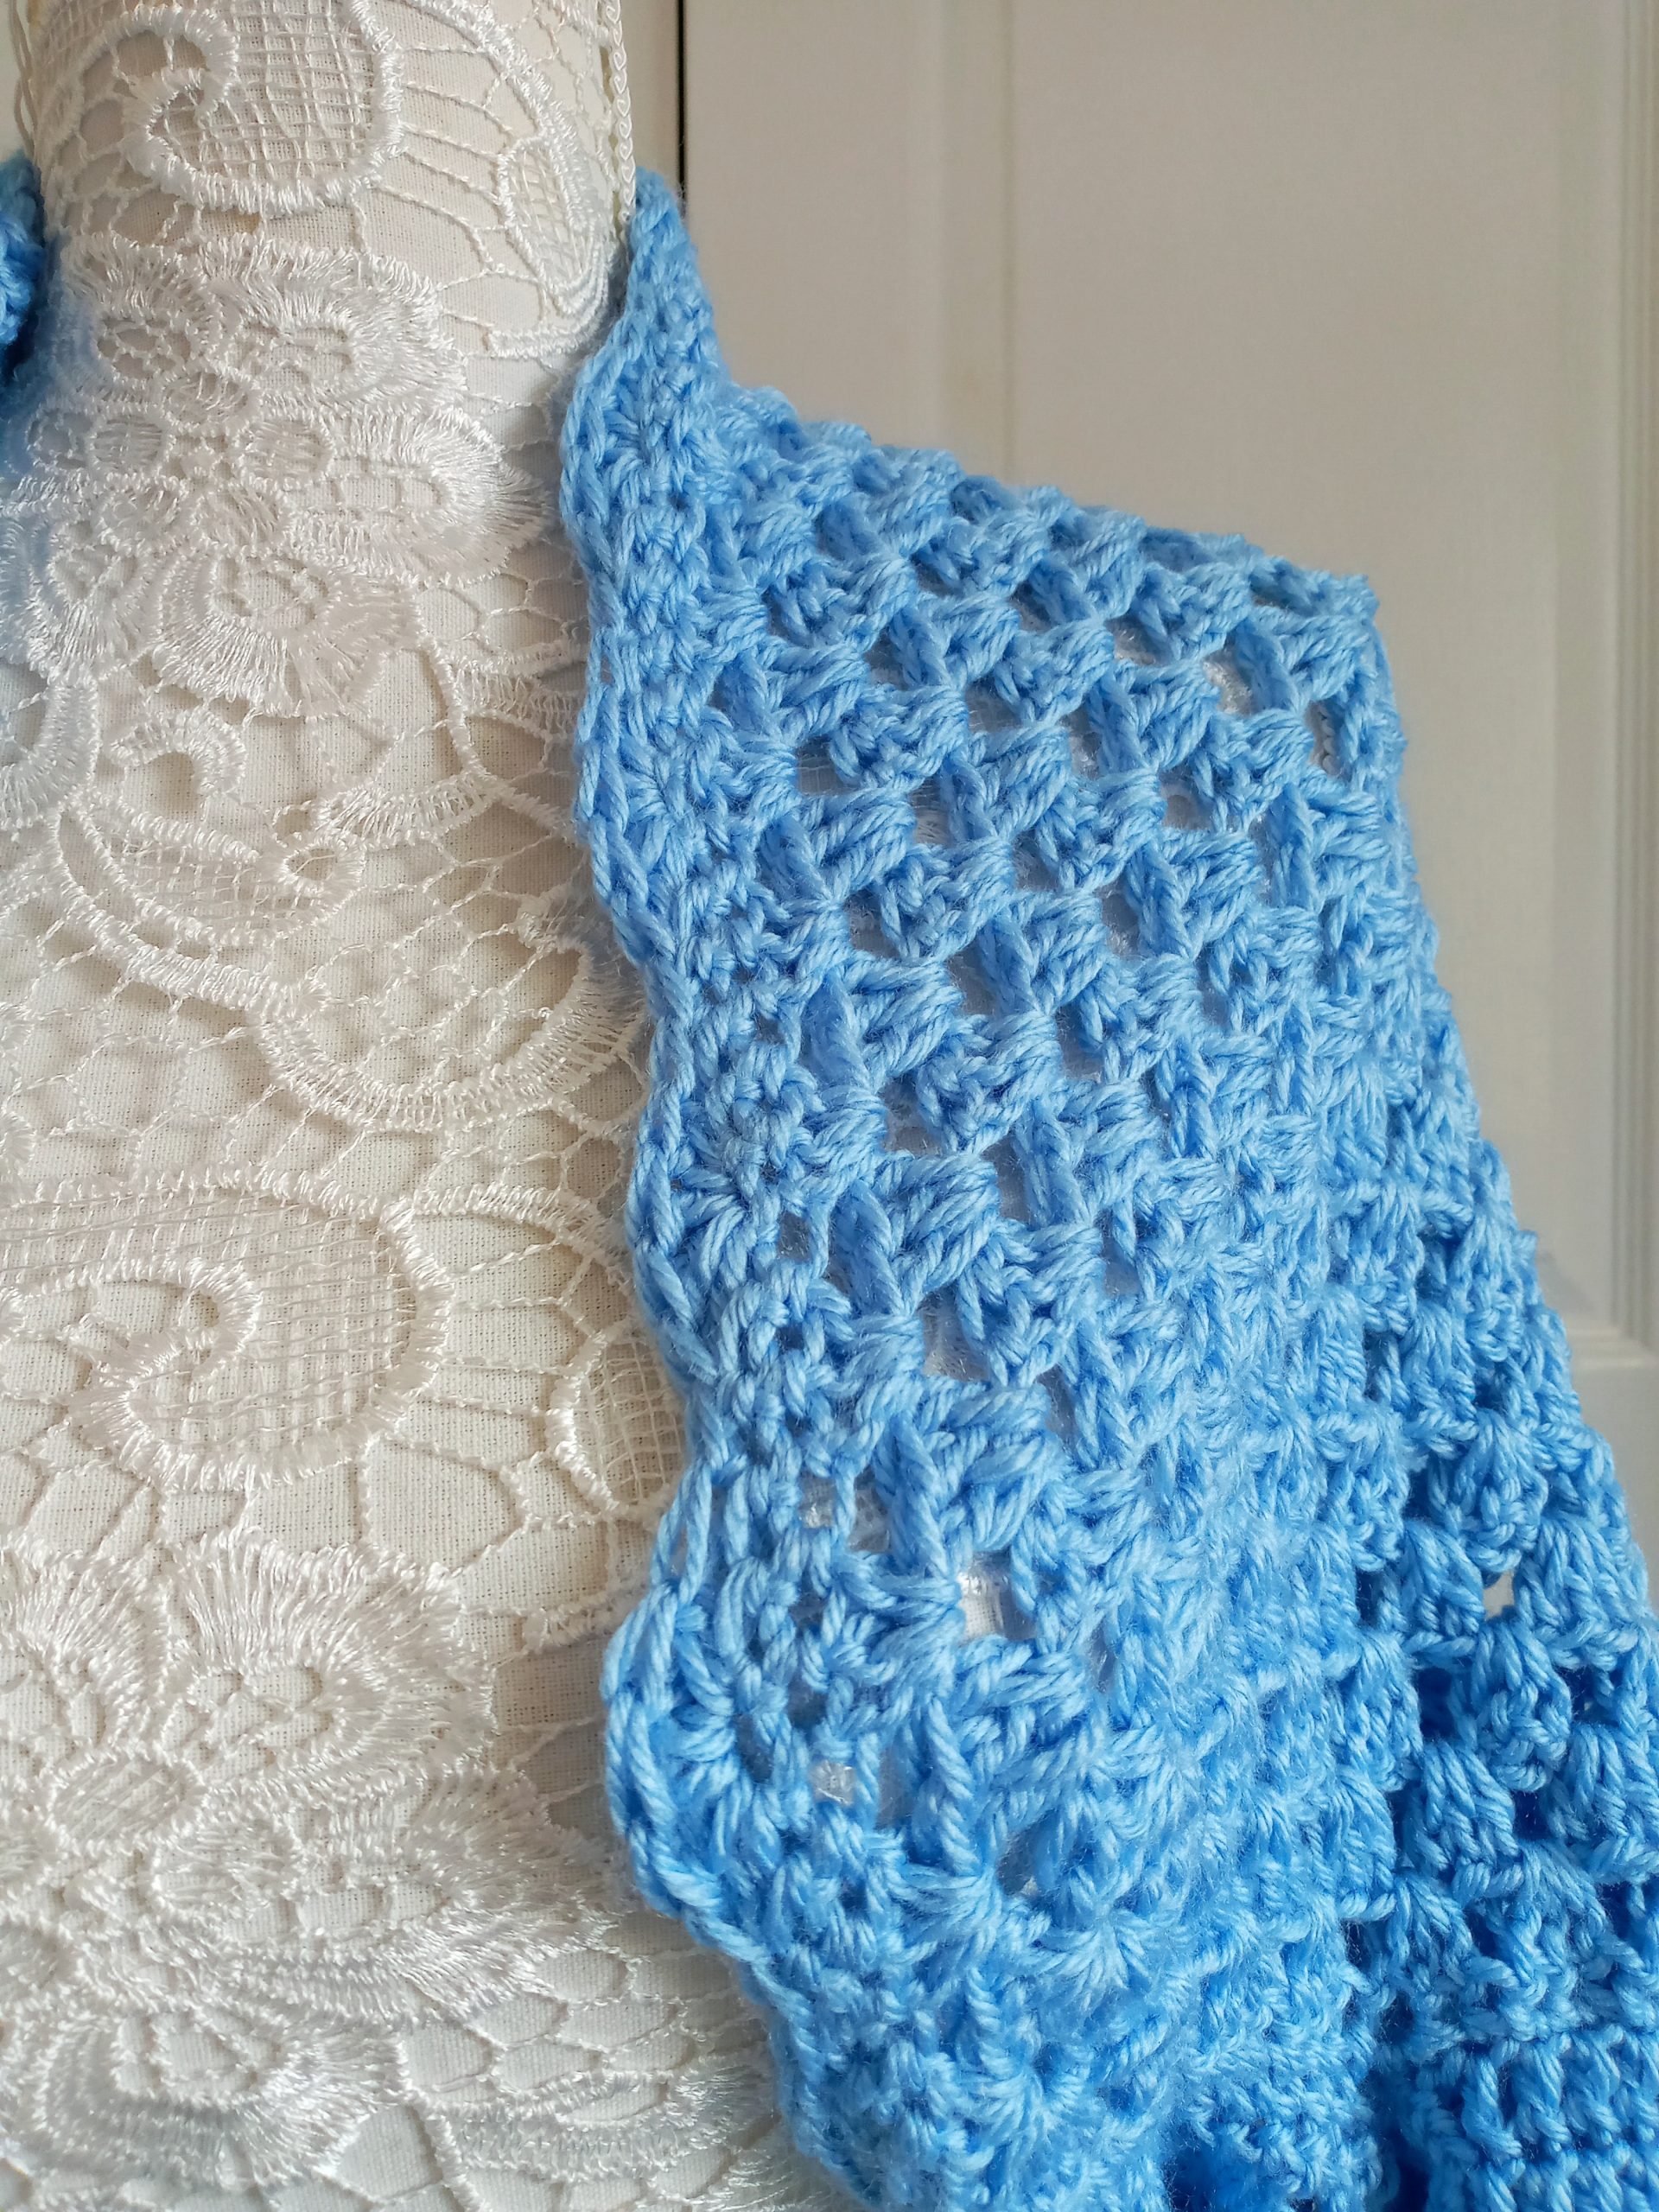
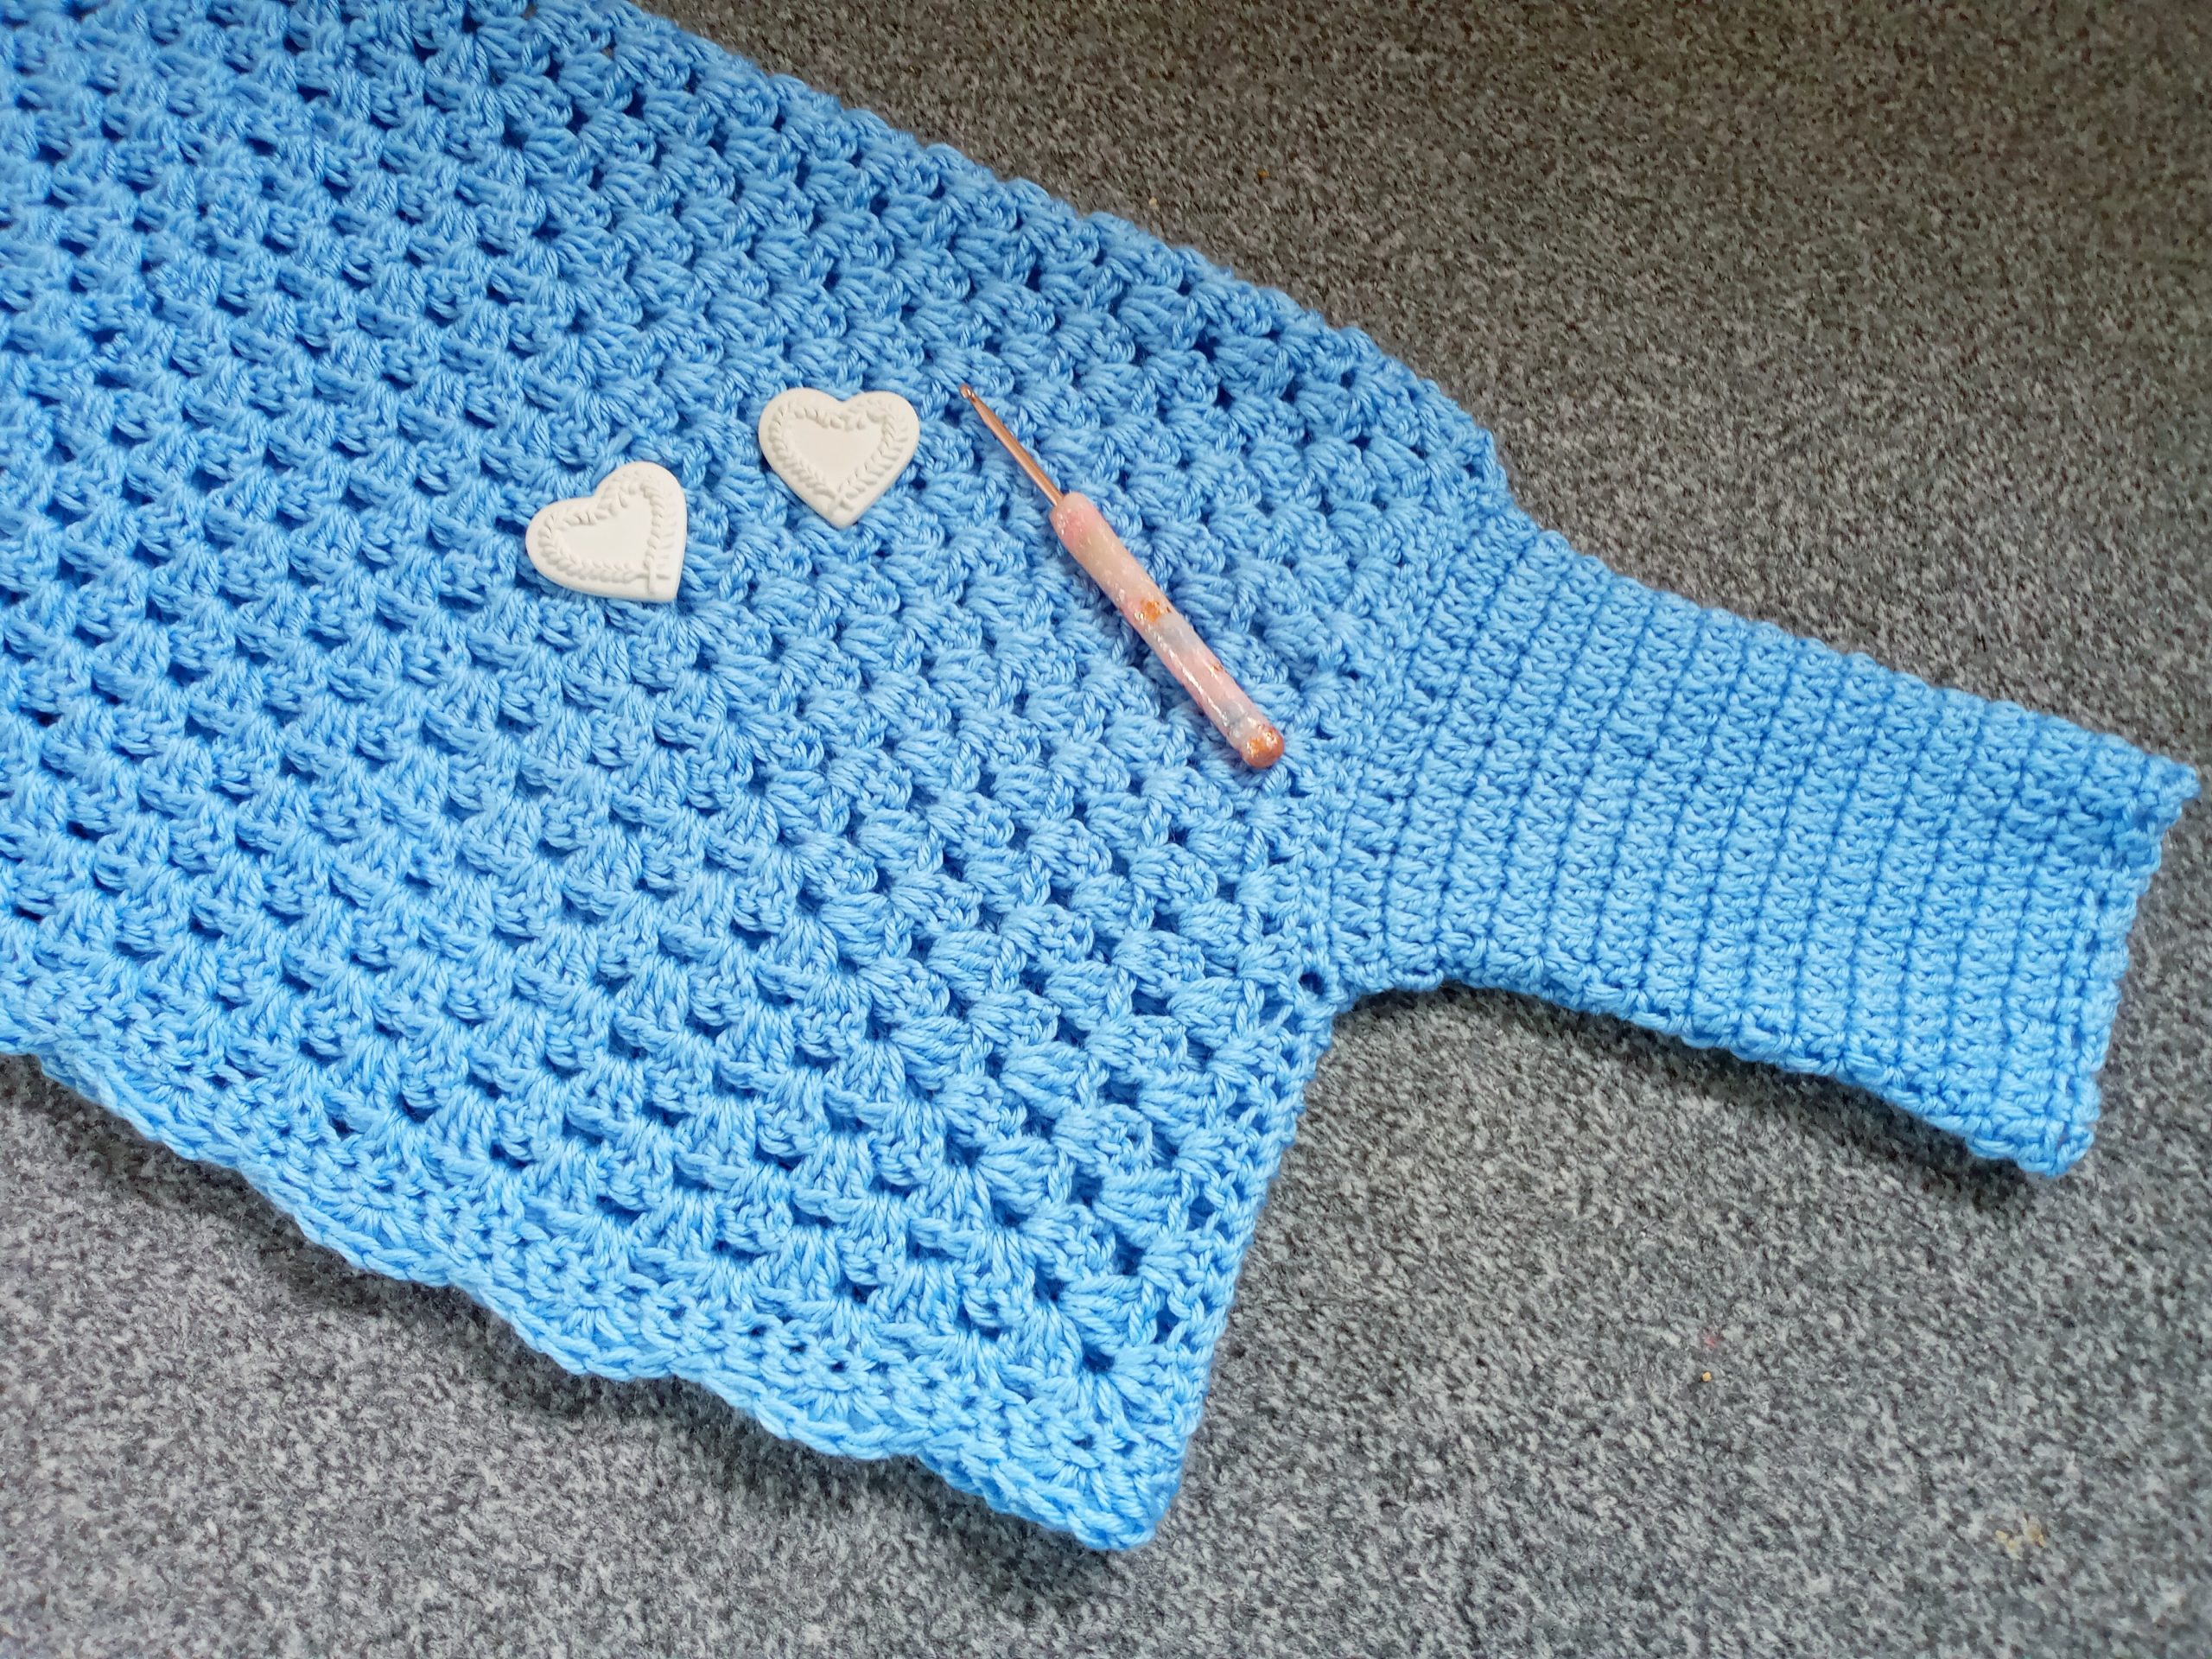
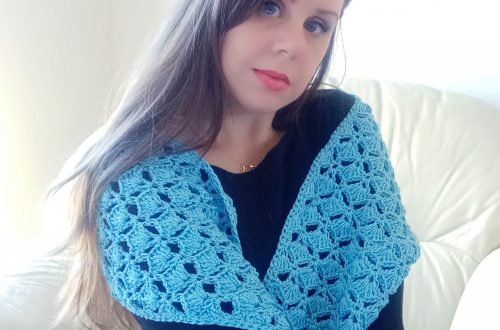
Firstly, the yarn is perfect for this crochet project. Indeed, I used Red Heart Soft Baby Steps for this cocoon cardigan. This was in fact a great choice, as this yarn is soft and supple, but is also very textured. The color is also very vibrant, which is perfect for a cocoon granny square shrug. Once I started making the granny square, I instantly fell in love with the design process of this project. I used this very yarn to crochet The Leopoldine Victorian Shawl a few months ago for my Vintage Crochet Series.
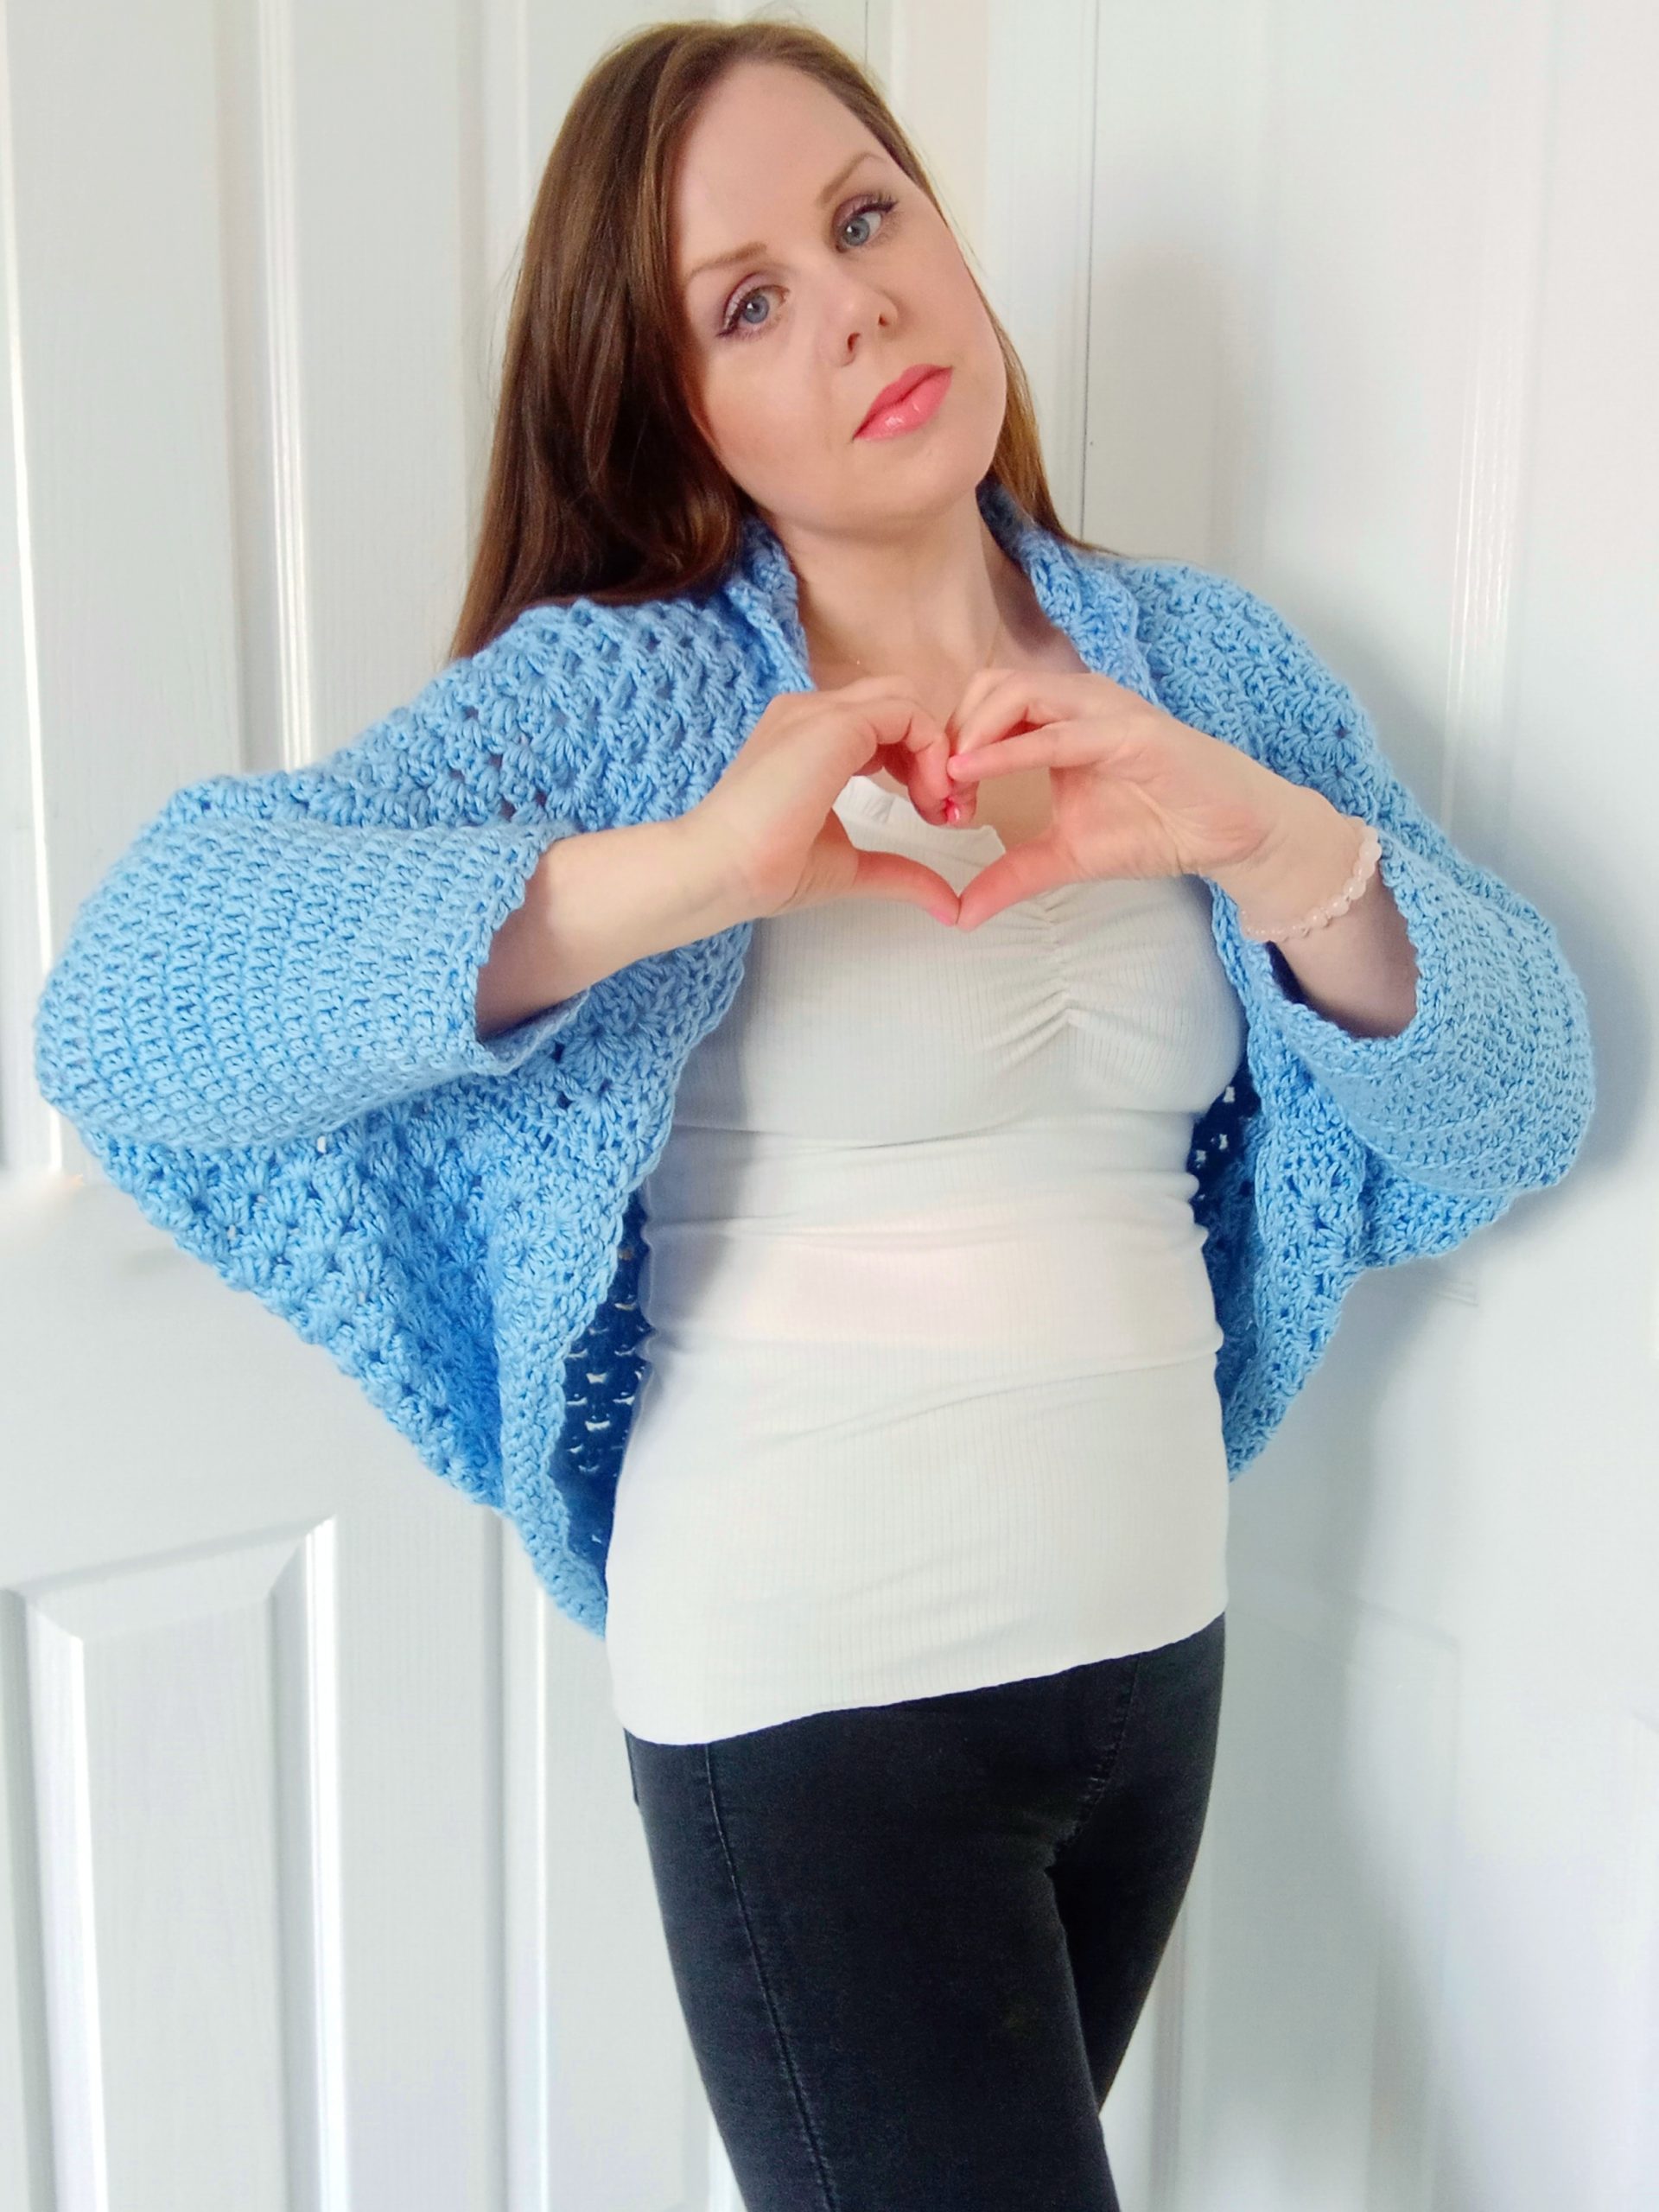
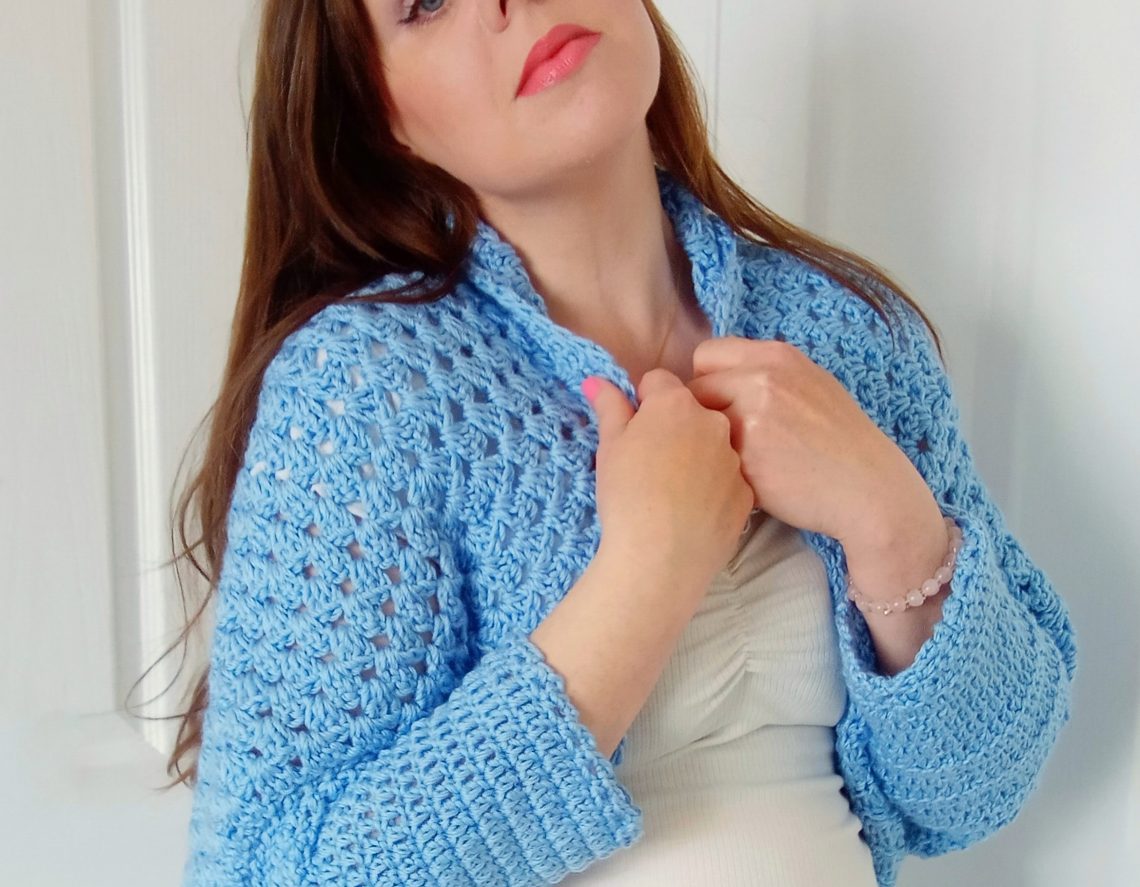
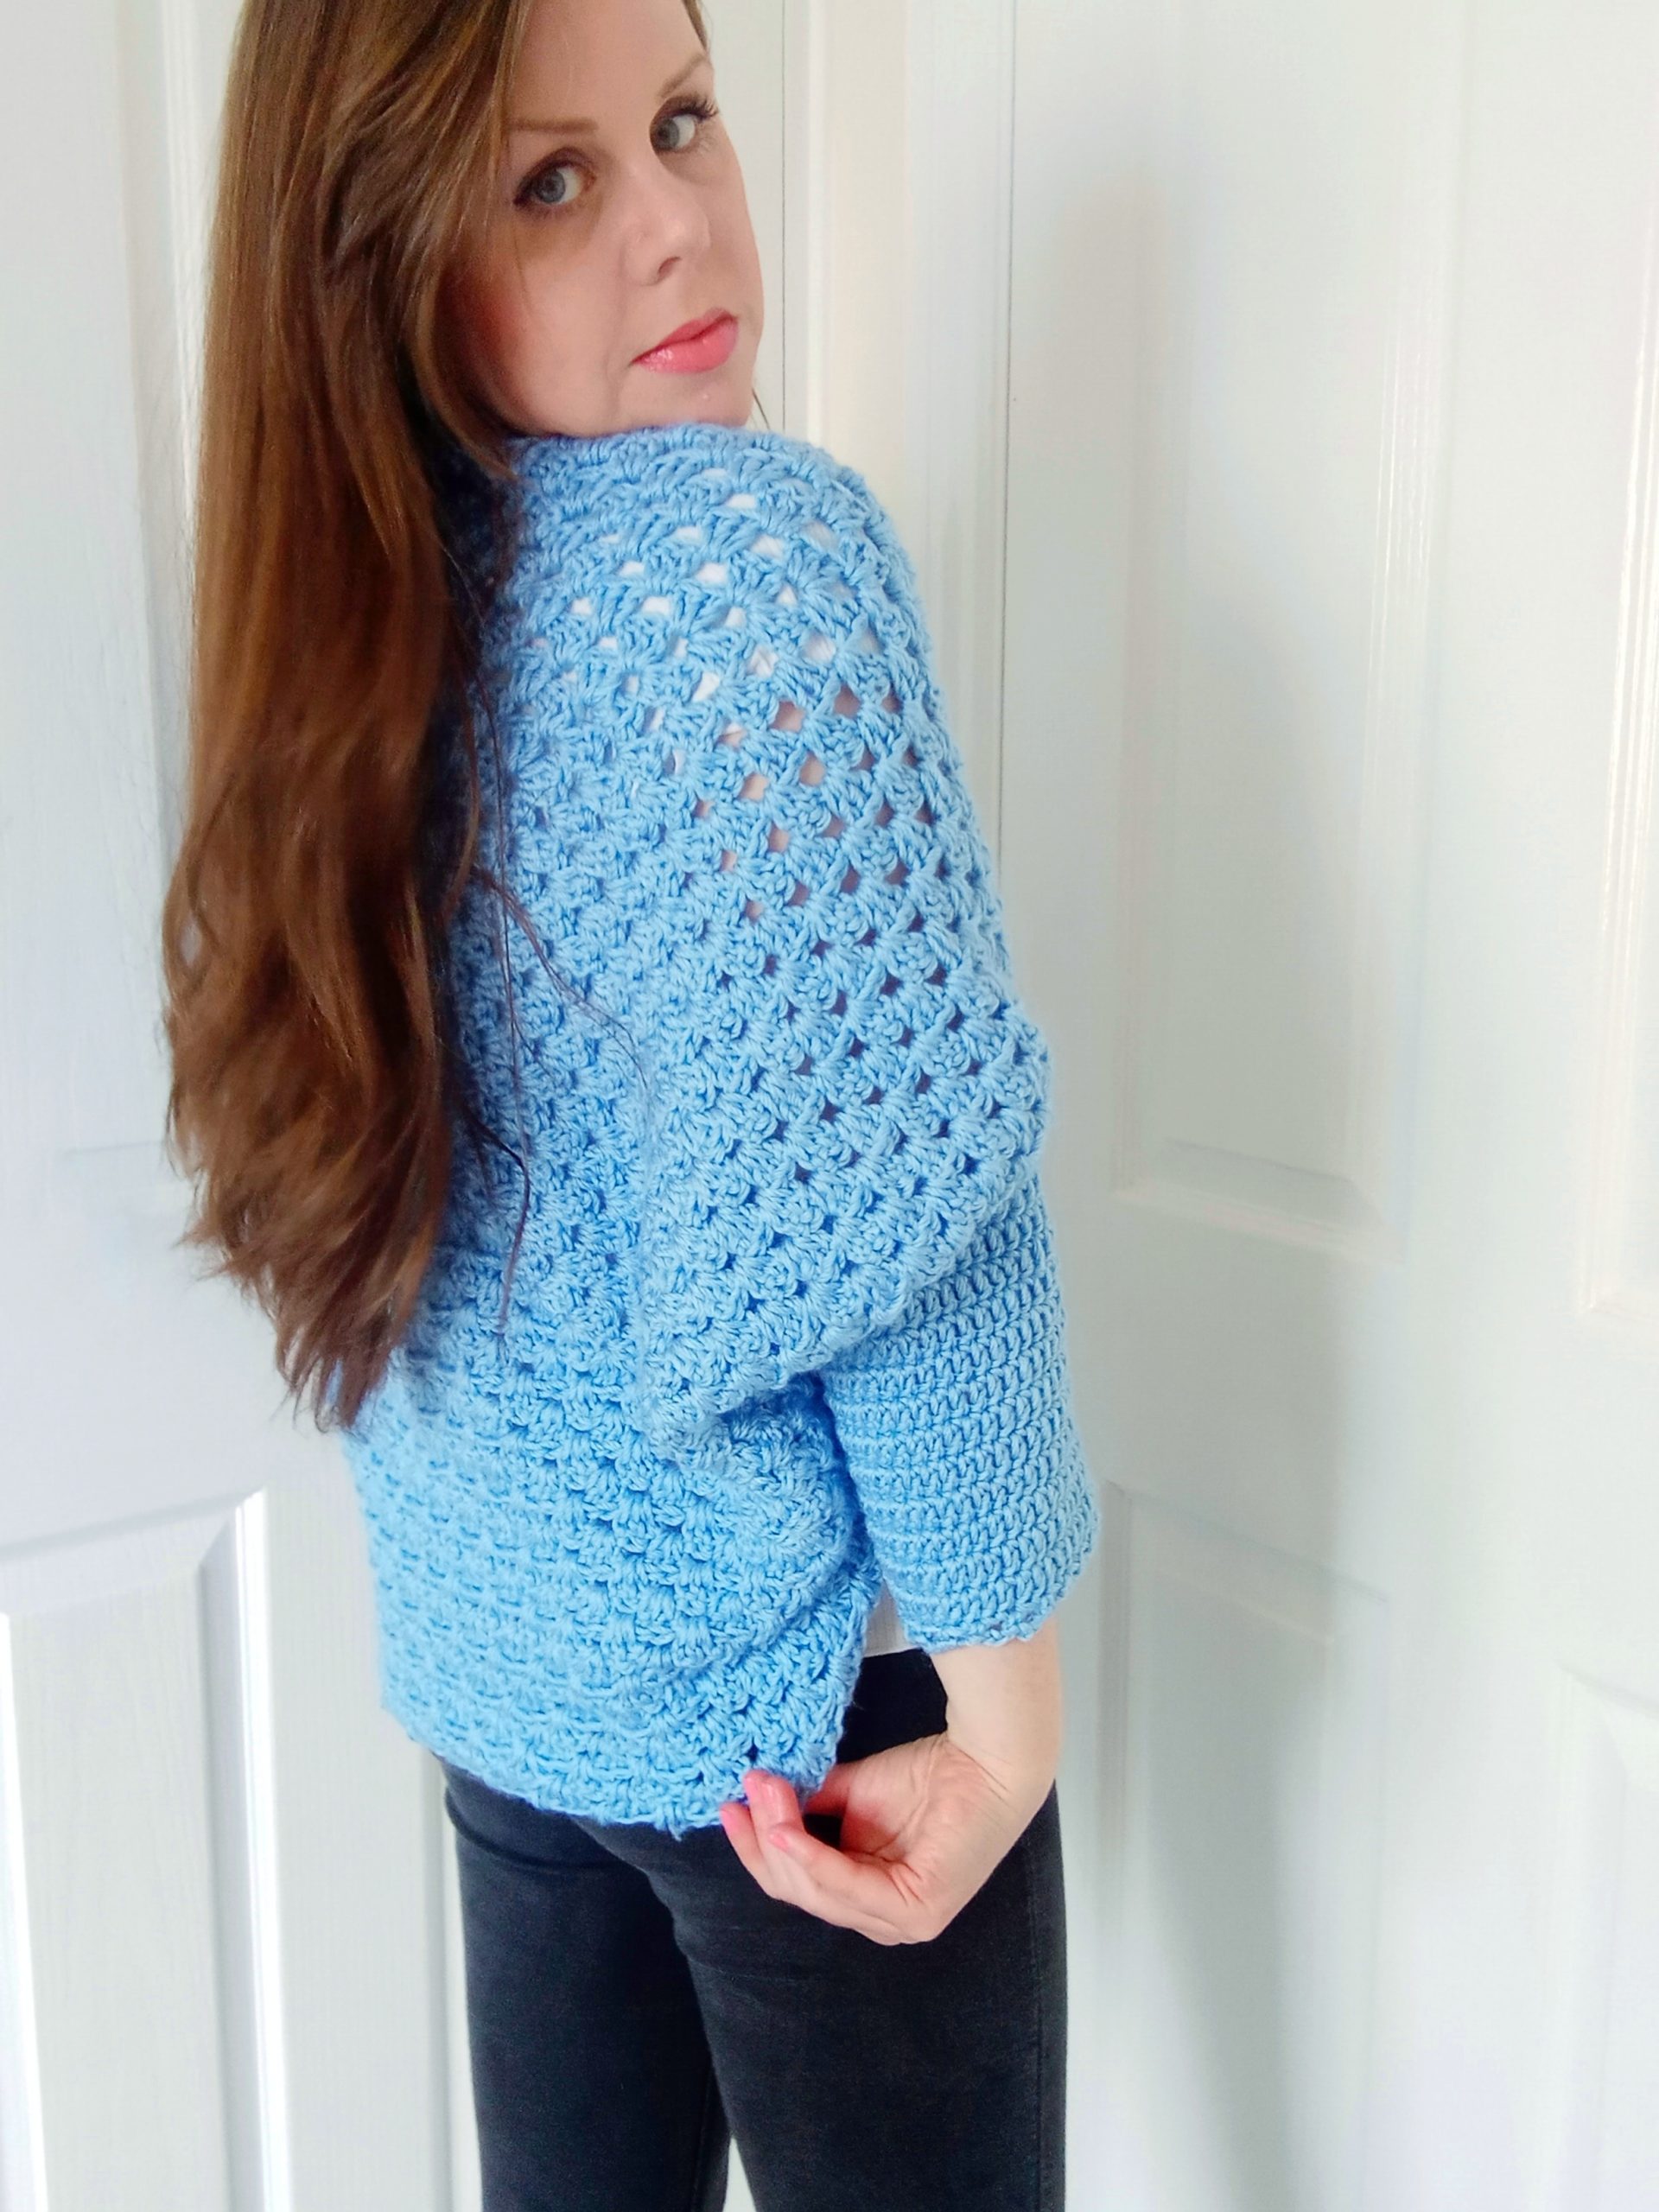
I also knew from the start that I would want to crochet sleeves onto this project. This was to give this project a more “snugly” vibe to it. And I am so glad I added these sleeves to this project! I believe they just elevate this cocoon cardigan so much. The fact that these are tapered sleeves, rather than oversized, really make all the difference.
Crochet Periwinkle Cocoon Cardigan Free Pattern: An Elegant Design
As stated previously, I believe this cocoon cardigan is very elegant. Due to the fact that it is not oversized (such as The Paige Cocoon Cardigan I designed a year ago), this is very defined cocoon shrug. Indeed, I didn’t make the initial granny square too large, as I wanted to have a snug, fitted silhouette to this project. And I think it has worked out so well! Let me know if you like a more oversized or fitted granny cocoon cardigan? I would love to know!
I hope you enjoy this easy and fun project. As I said earlier, the yarn is perfect for this project. Indeed, Red Heart Soft Baby Steps yarn is lightweight and airy, preventing the shrug from looking heavy and too chunky. Yet, it is still enveloping and snugly looking. So all in all, all my hard work and failed attempts have led me to this perfect project. And this makes me happy!
Connecting with you
I would like to take a moment to thank every single one of you, for supporting me and my crochet journey. Indeed, I absolutely am so touched by all your messages, comments, and every person who has become a patron of my work through Patreon. Thank you!
I love connecting with my Crochet Community through my blog and Social Media. You can find me on Youtube, Instagram, and Pinterest. I would love to connect with you on these platforms.
You can also join my private Facebook group to connect.
Join my exclusive and fun Patreon community, a haven for feminine crochet and so much more!
You can keep up to date with all my crochet news by subscribing to my newsletter. This way, you will be in the know whenever I release a new free pattern, video tutorial, or giveaway!
Crochet Periwinkle Cocoon Cardigan: The Pattern
You can purchase my large print, ad free, PDF pattern from my Etsy store: Crochet The Periwinkle Cocoon Cardigan PDF Pattern
You can purchase the ad free, large print PDF pattern from my Ravelry store here: Crochet The Periwinkle Cocoon Cardigan Pattern
Level: Easy/beginner
Gauge (measuring from center starting point of granny square horizontally):
4” (10 cm) x 4” (10 cm): 6 rounds of granny square
Please note the size of finished granny squares (before sewing and adding edges/border) is indicated below, in the dedicated table.
Notes
I will be using US terms (British terms in brackets)
You can find the video tutorial for this project here:
As this is a cocoon cardigan, the measurements given for each size will be that of the finished granny square before sewing garment together and the addition of sleeves/border. If you are unsure of which size to crochet, please just go ahead and make the square. Once the square is made, fold it in half, place some pins on it to measure this before sewing and finishing it off. You will then be able to gauge size and see if you need to add or reduce rounds before sewing.
This is a “snug” cocoon cardigan, meaning it is not over sized, but true to size. If you wish to make it a bit over sized, just go up a size.
You will need:
– 5 to 7 skeins of Red Heart Soft Baby Steps in shade 07 Light Blue (please see table below for how many you will need for each size)
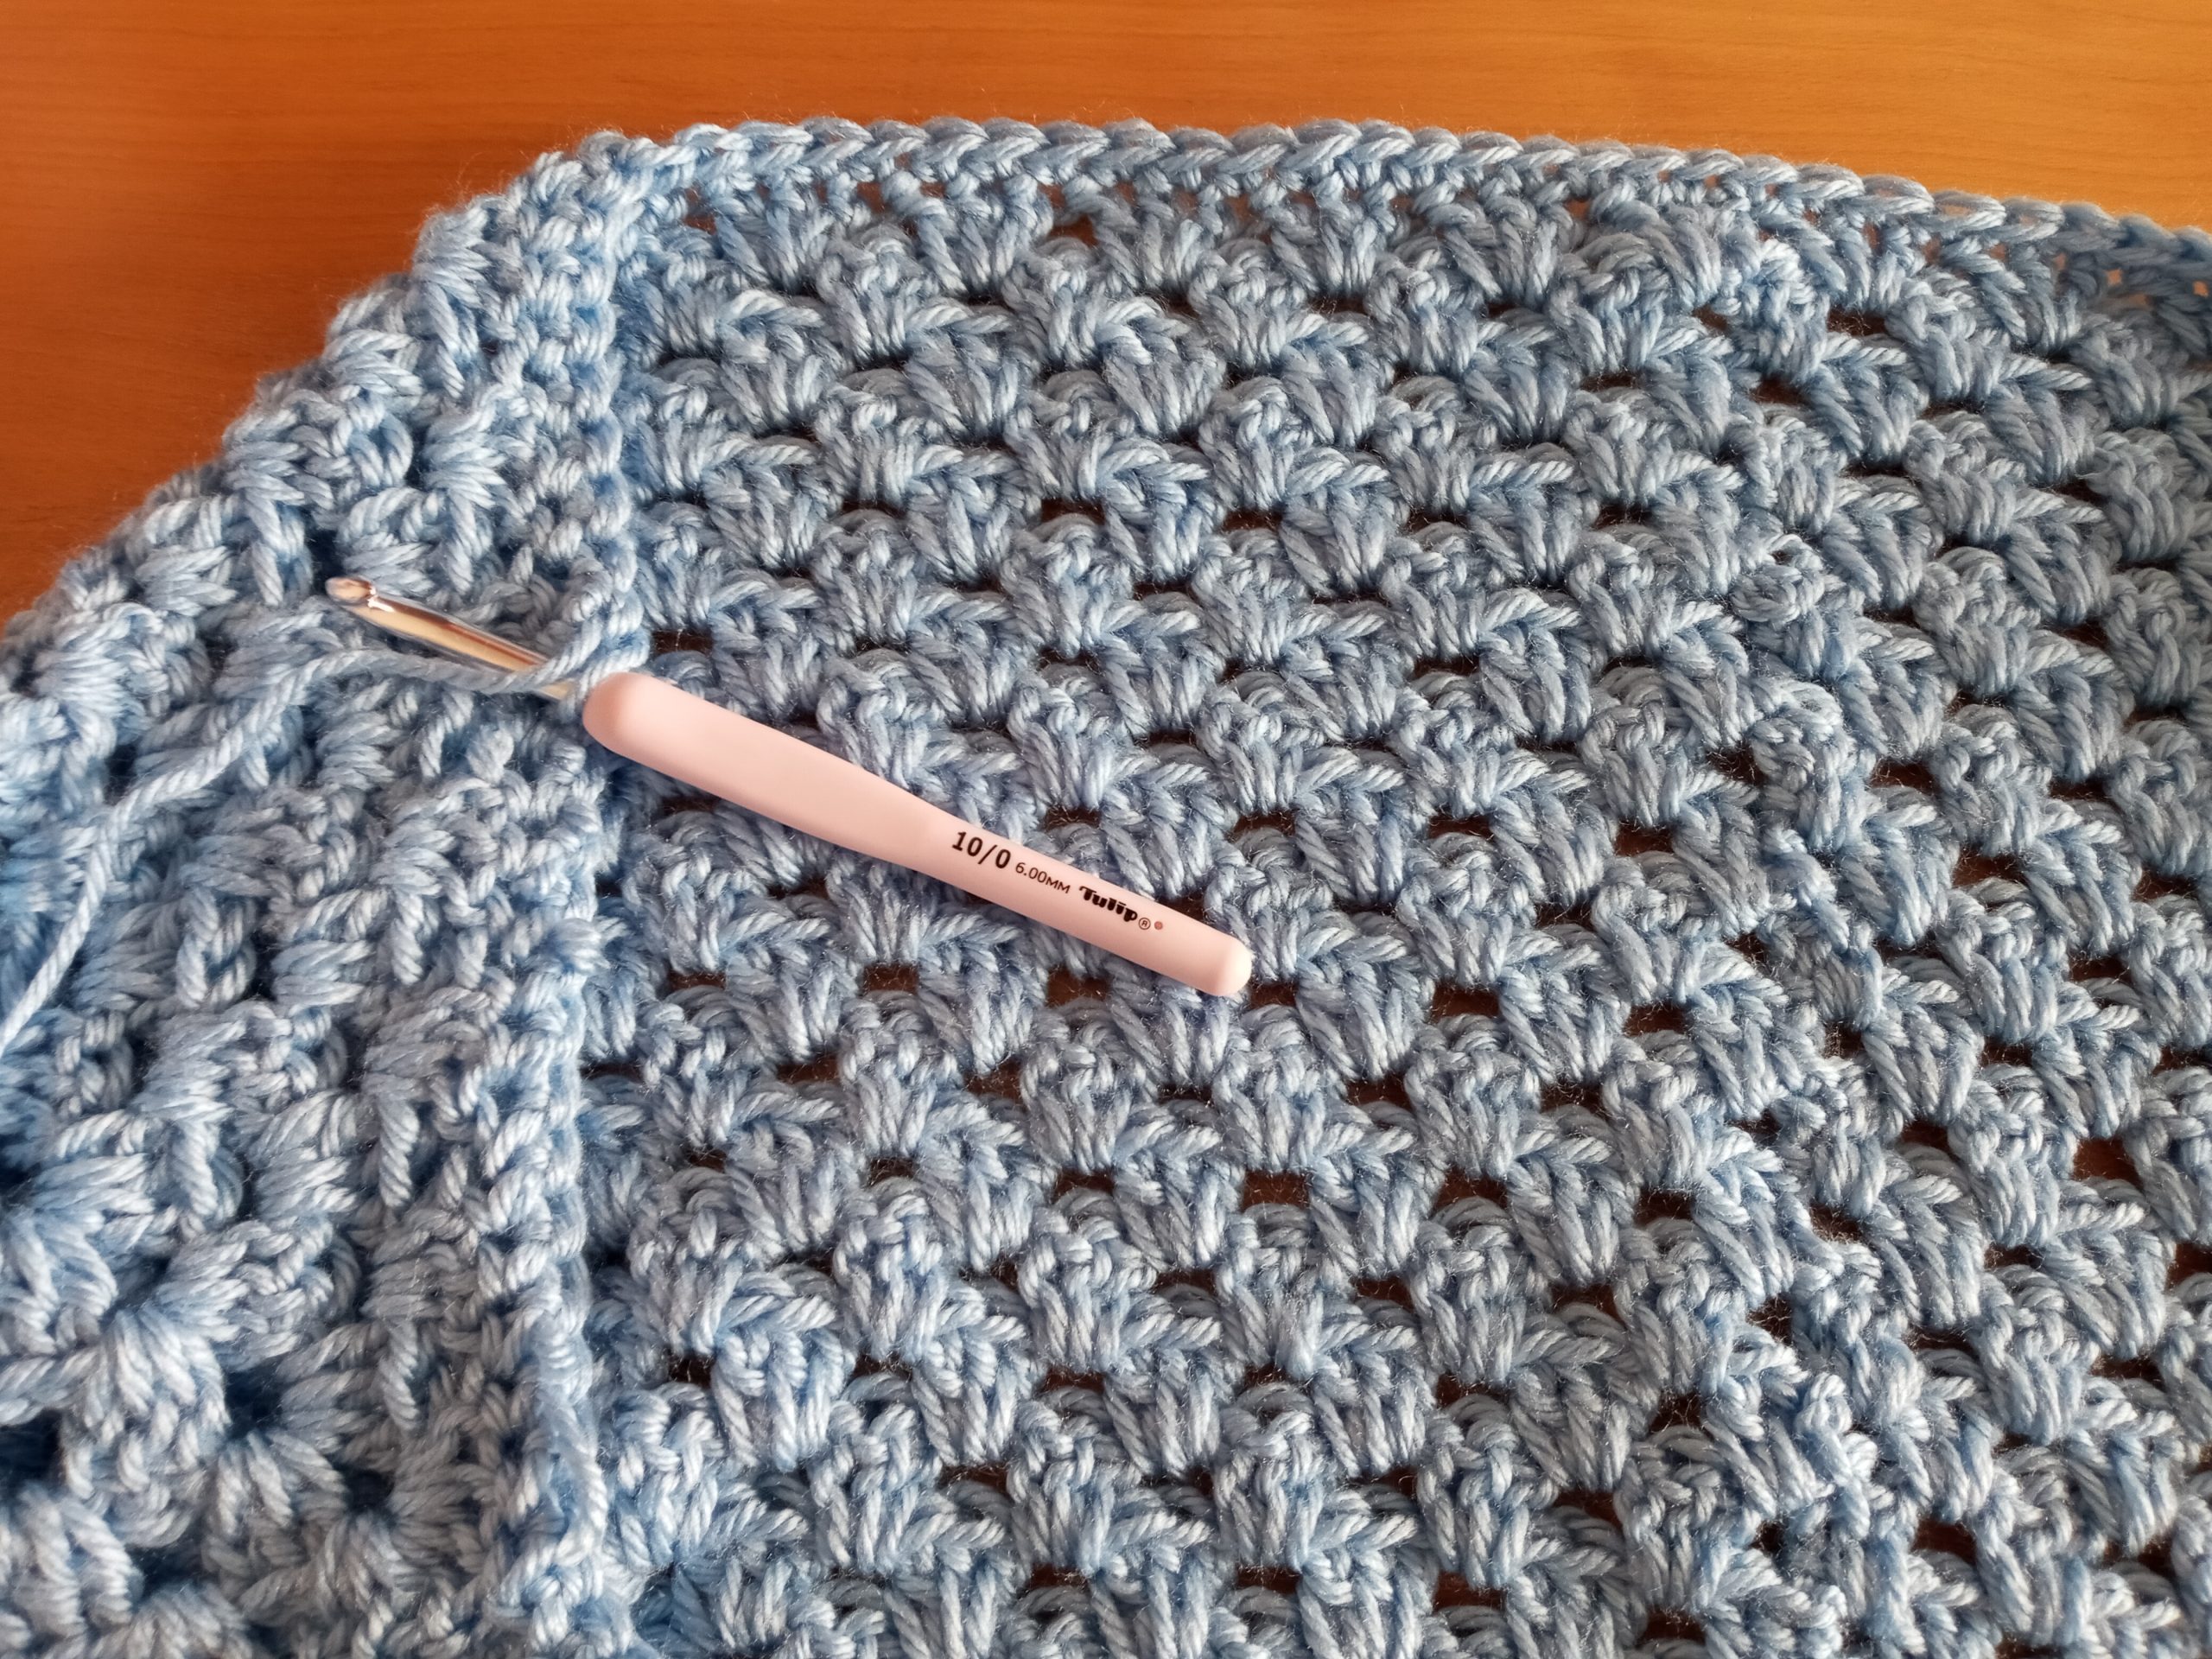
– 6 mm crochet hook
– 5 mm crochet hook
– A pair of scissors
– A tapestry needle
– Stitch markers
Abbreviations
Ch: chain
St: Stitch
Sl st: slip stitch
Sk: Skip
TC: Turning Chain
SC: Single Crochet (UK Double Crochet)
DC: Double Crochet (UK Treble Crochet)
EOR: End of round
Table for each different size
|
Number of skeins of yarn needed |
Size of finished granny square |
Number of granny square rounds needed |
Number of rounds for sleeves |
|
|
S |
5 |
77×77 cm 30,2”x30,2” |
27 |
14 |
|
M |
5 |
83×83 cm 32,6”x32,6” |
29 |
14 |
|
L |
6 |
89×89 cm 35”x35” |
31 |
15 |
|
XL |
6 |
95×95 cm 37,4”x37,4” |
33 |
16 |
|
XXL |
7 |
101×101 cm 39,7”x39,7” |
35 |
17 |
|
XXXL |
7 |
107×107 cm 42”x42” |
37 |
17 |
Begin pattern here:
For this part you will be using 6 mm crochet hook
To start, make a slip knot.
Ch 4, sl st through 1st stitch to form a ring.
Complete rounds as follows:
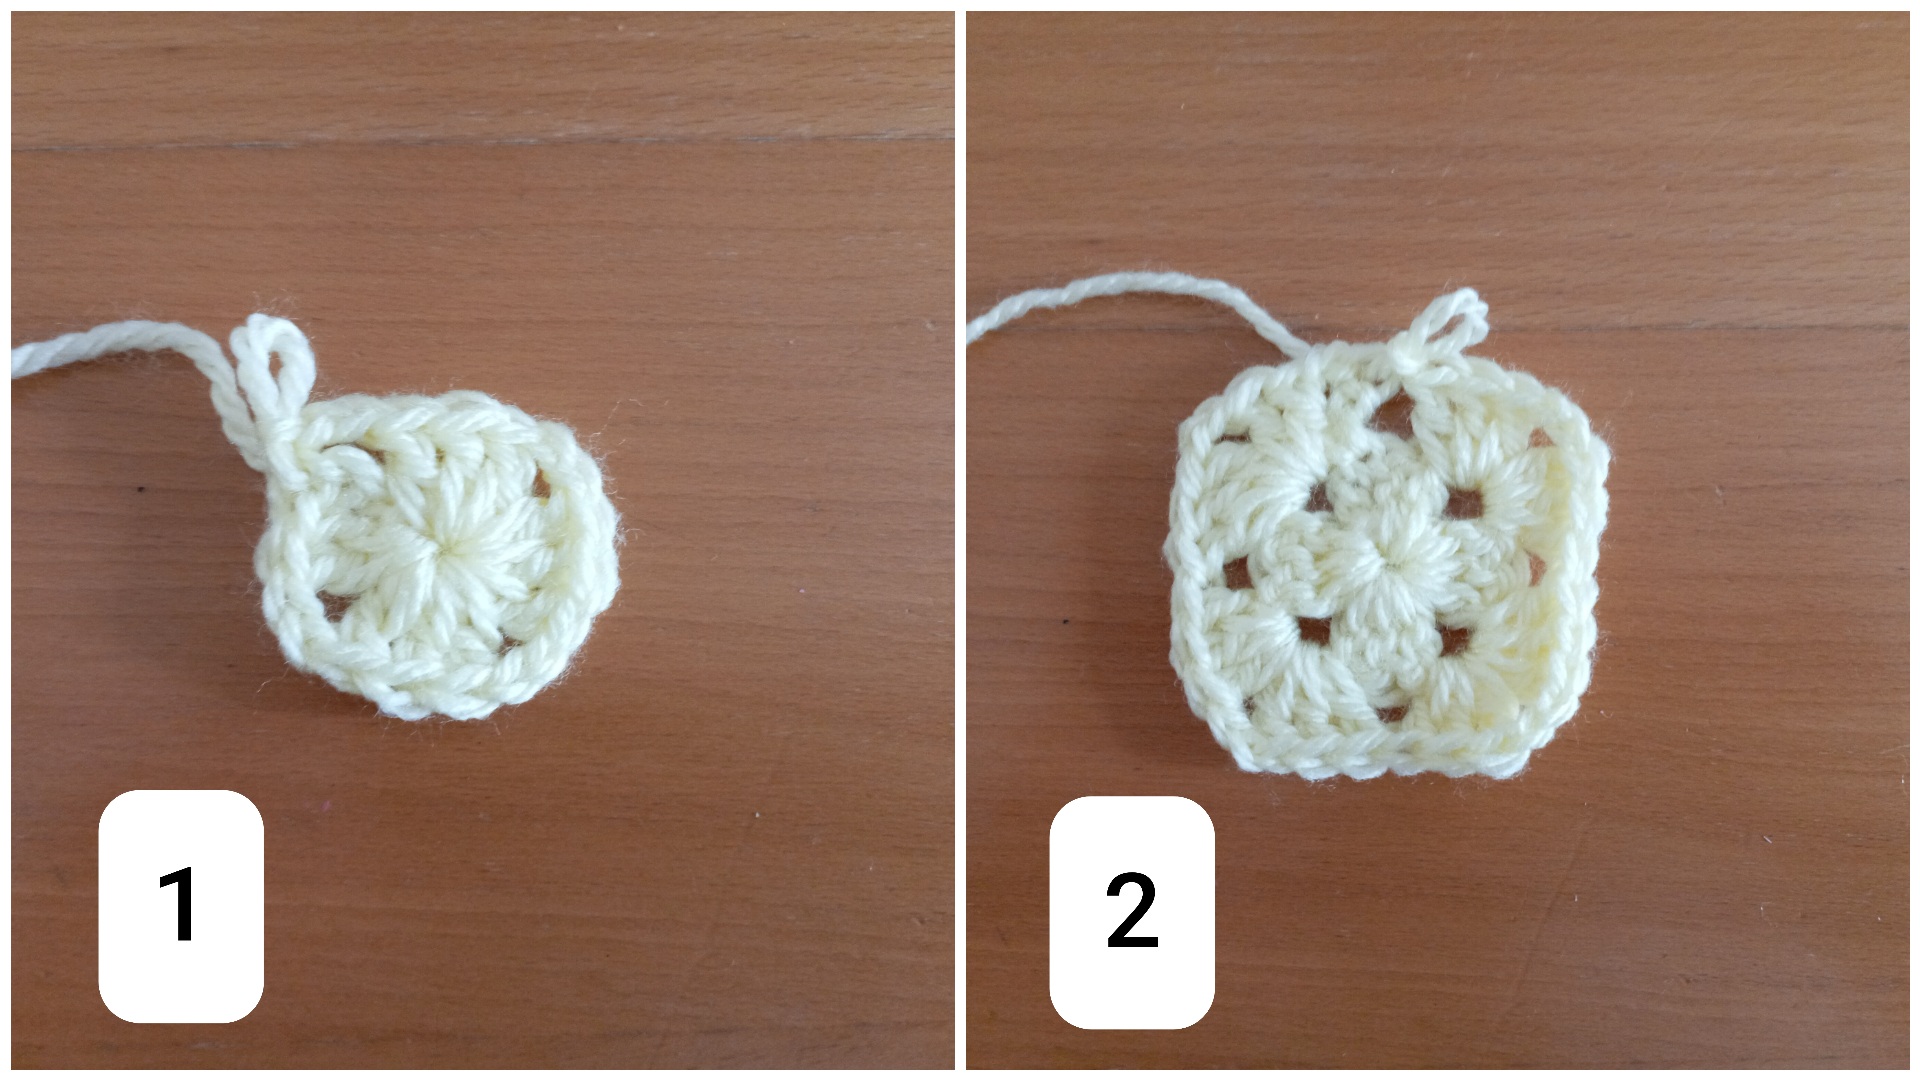
1: Ch 3 (=DC throughout), 2 DC inside ring; [ch 2, 3 DC] inside ring 3 more times, ch 2, sl st to beginning ch 3.
2: Now ch 3, turn your work, 2 DC into same space, ch 2, 3 DC inside ch sp from previous row (= 3DC, ch 2, 3DC which forms a corner). [Go directly into next sp, 3 DC, ch 2, 3 DC] 3 more times. Sl st to first 3 ch to join round.
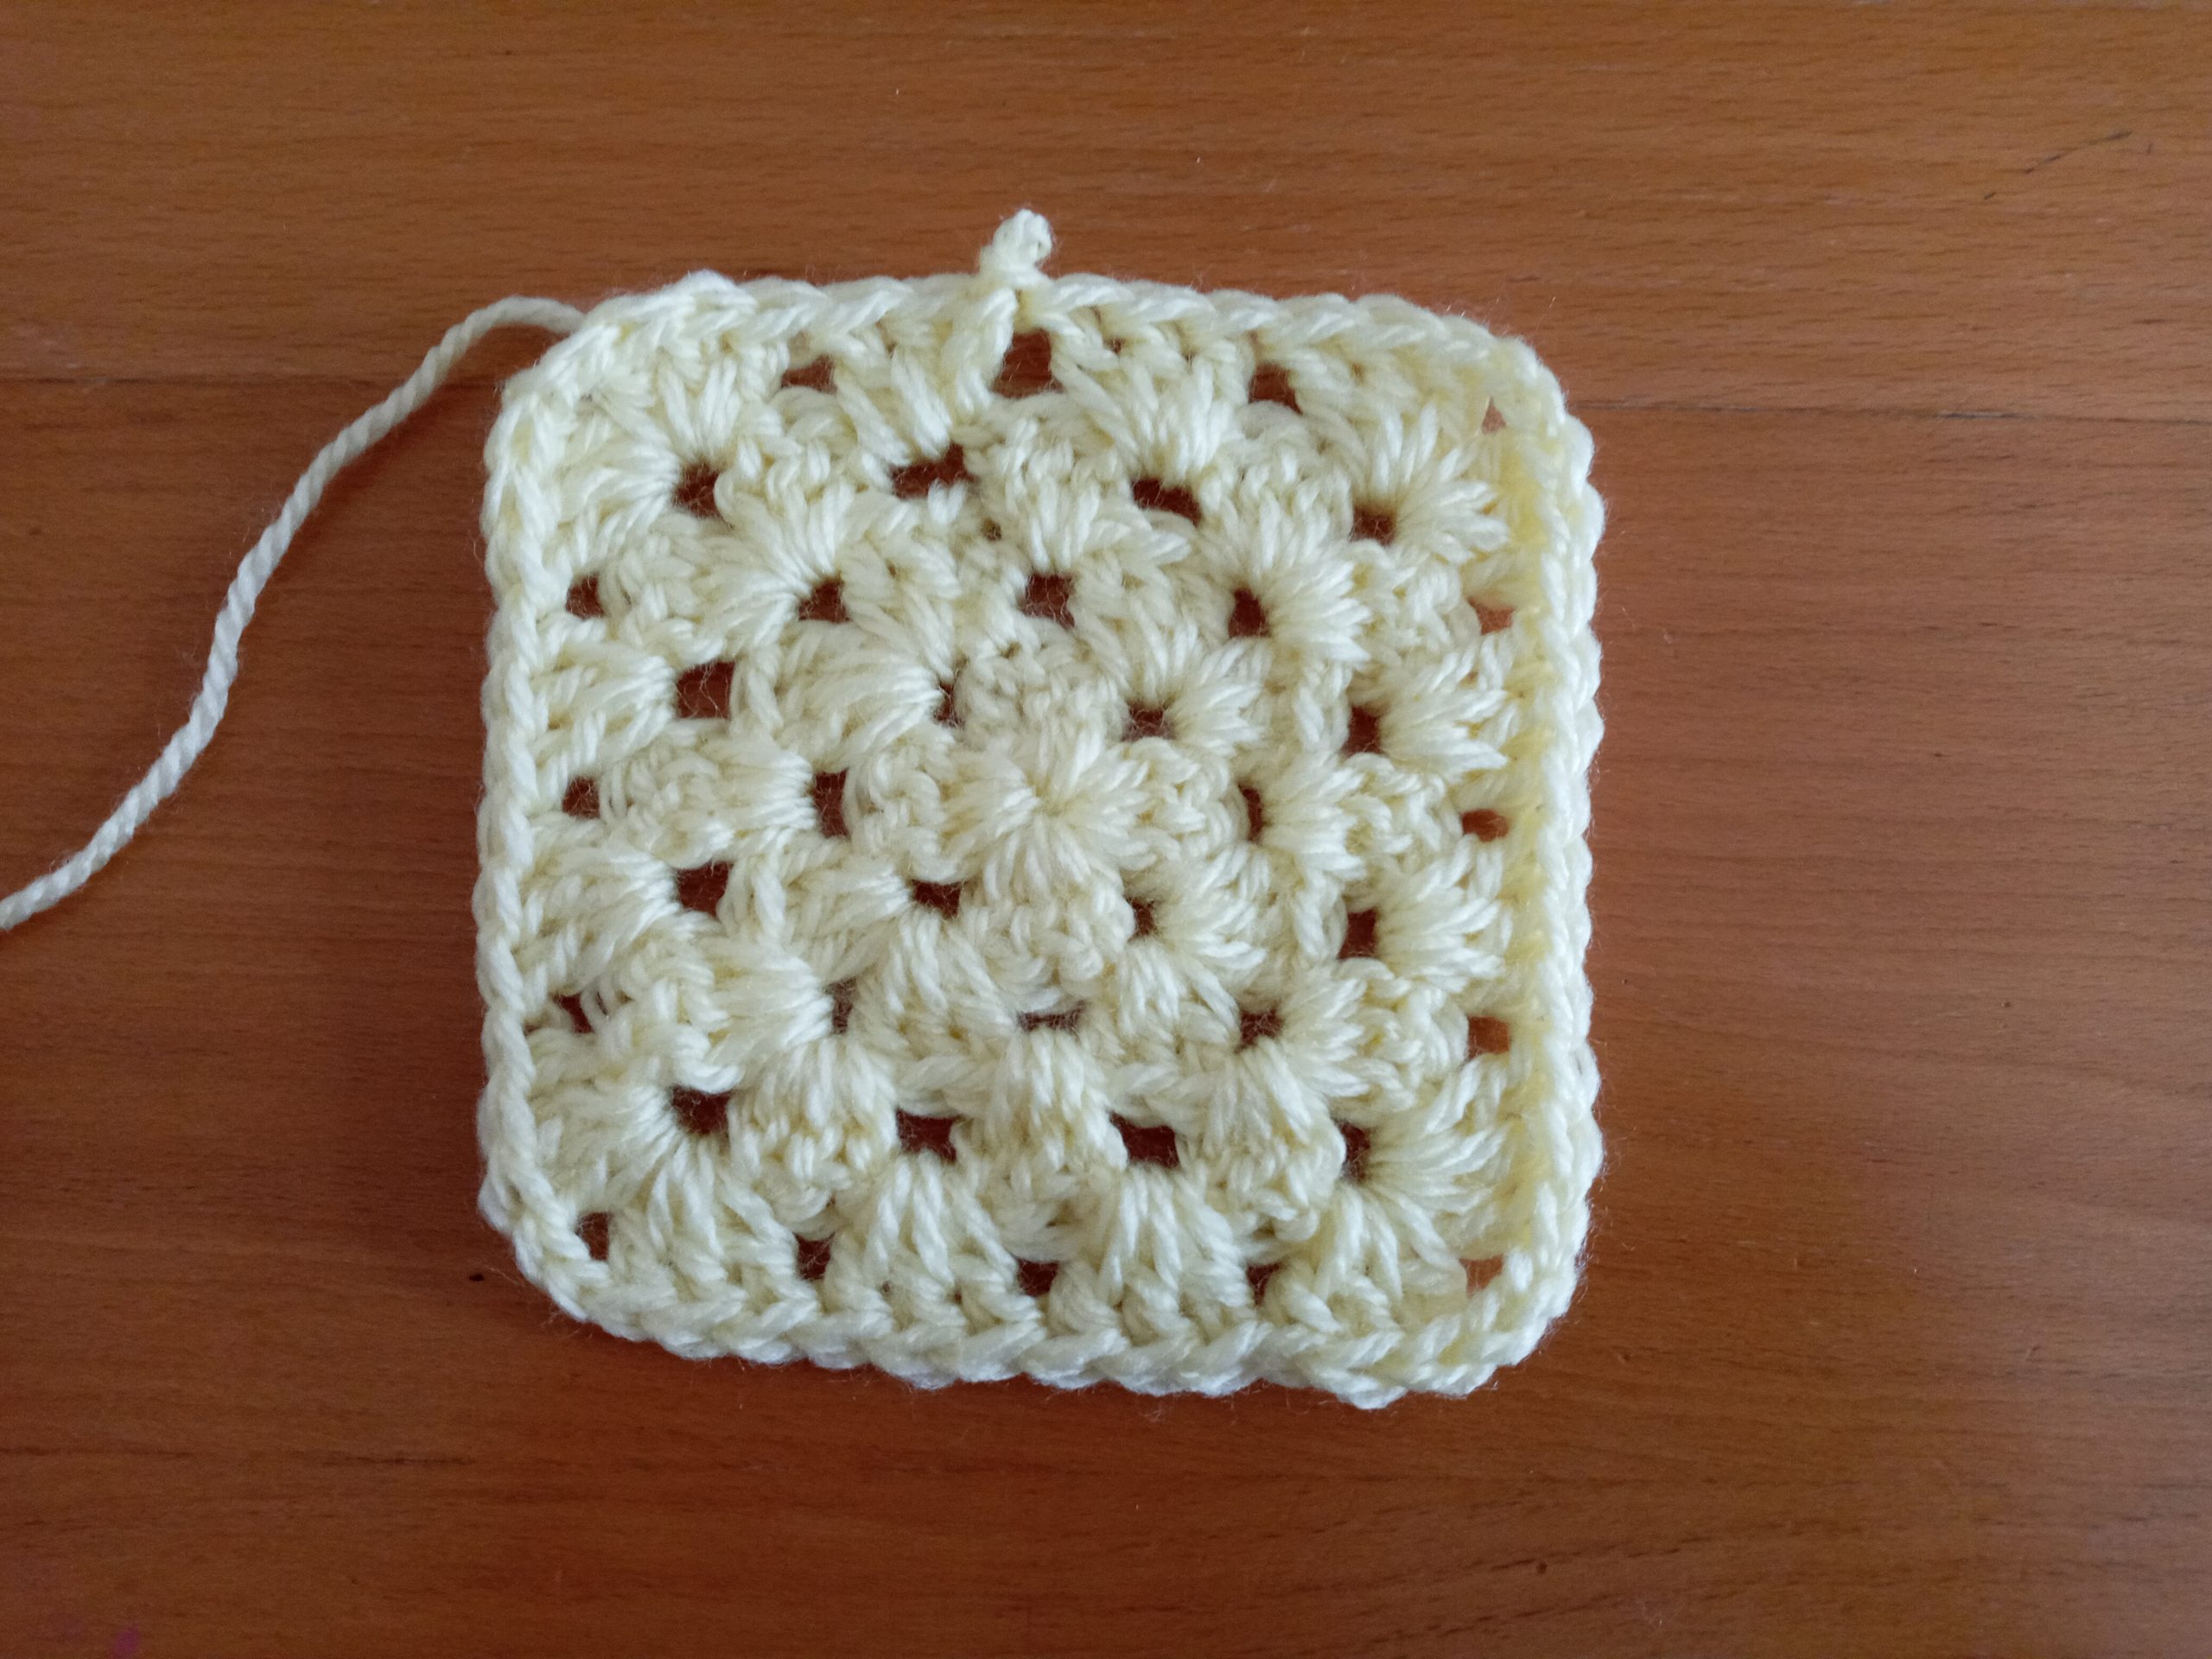
3: Ch 3, turn your work, 2 DC inside space (=3 DC). [Go directly into next sp with 3 DC, ch 2, 3 DC (=corner); 3 DC into the next space] 3 times. In last space place 3 DC, ch 2, 3 DC (corner). Sl st to close off round.
4: Now, ch 3, turn your work, [Go directly into next sp with 3 DC, ch 2, 3 DC (=corner); 3 DC into next two spaces] 3 times. In last space place 3 DC, ch 2, 3 DC (corner). Sl st to close off round.
5-end (number of rounds for each size indicated in table above): Repeat row 4, always placing 3 DC inside the simple “side” spaces, and 3 DC, ch 2, 3 DC into each corner (4 per round to form a square).
Fasten off.
Sewing your square together to create cocoon shape:
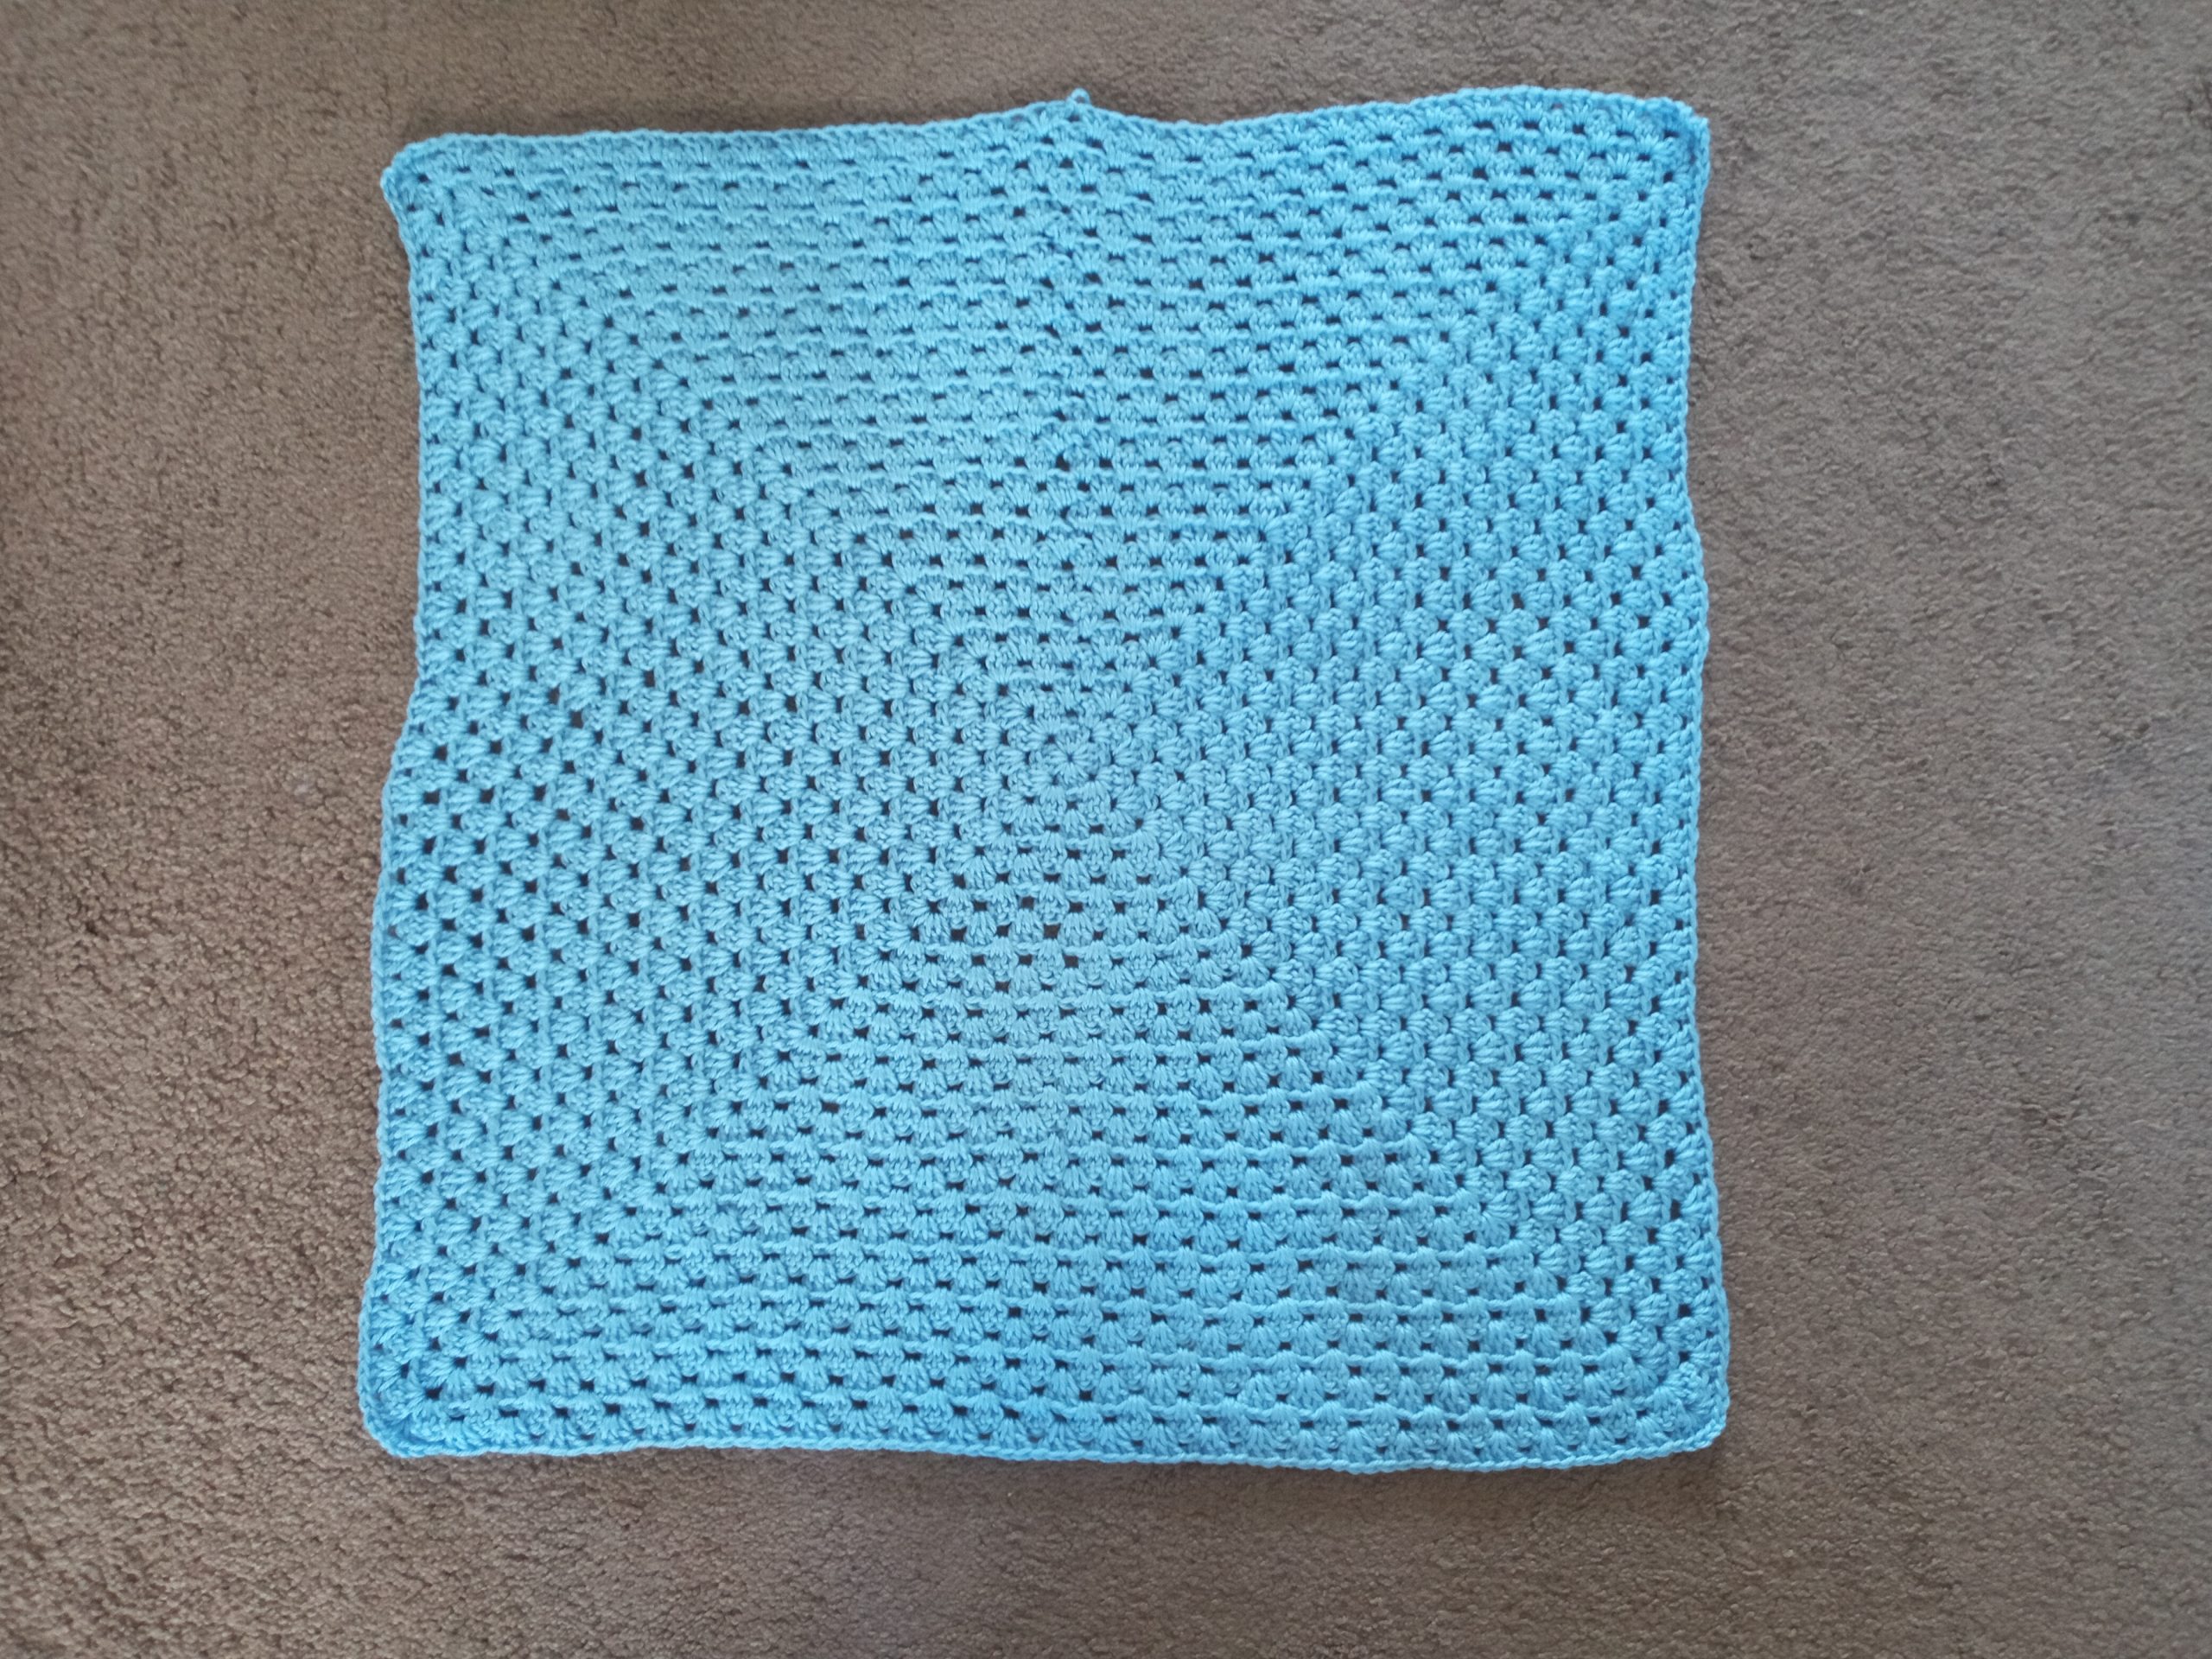
Place your square flat:
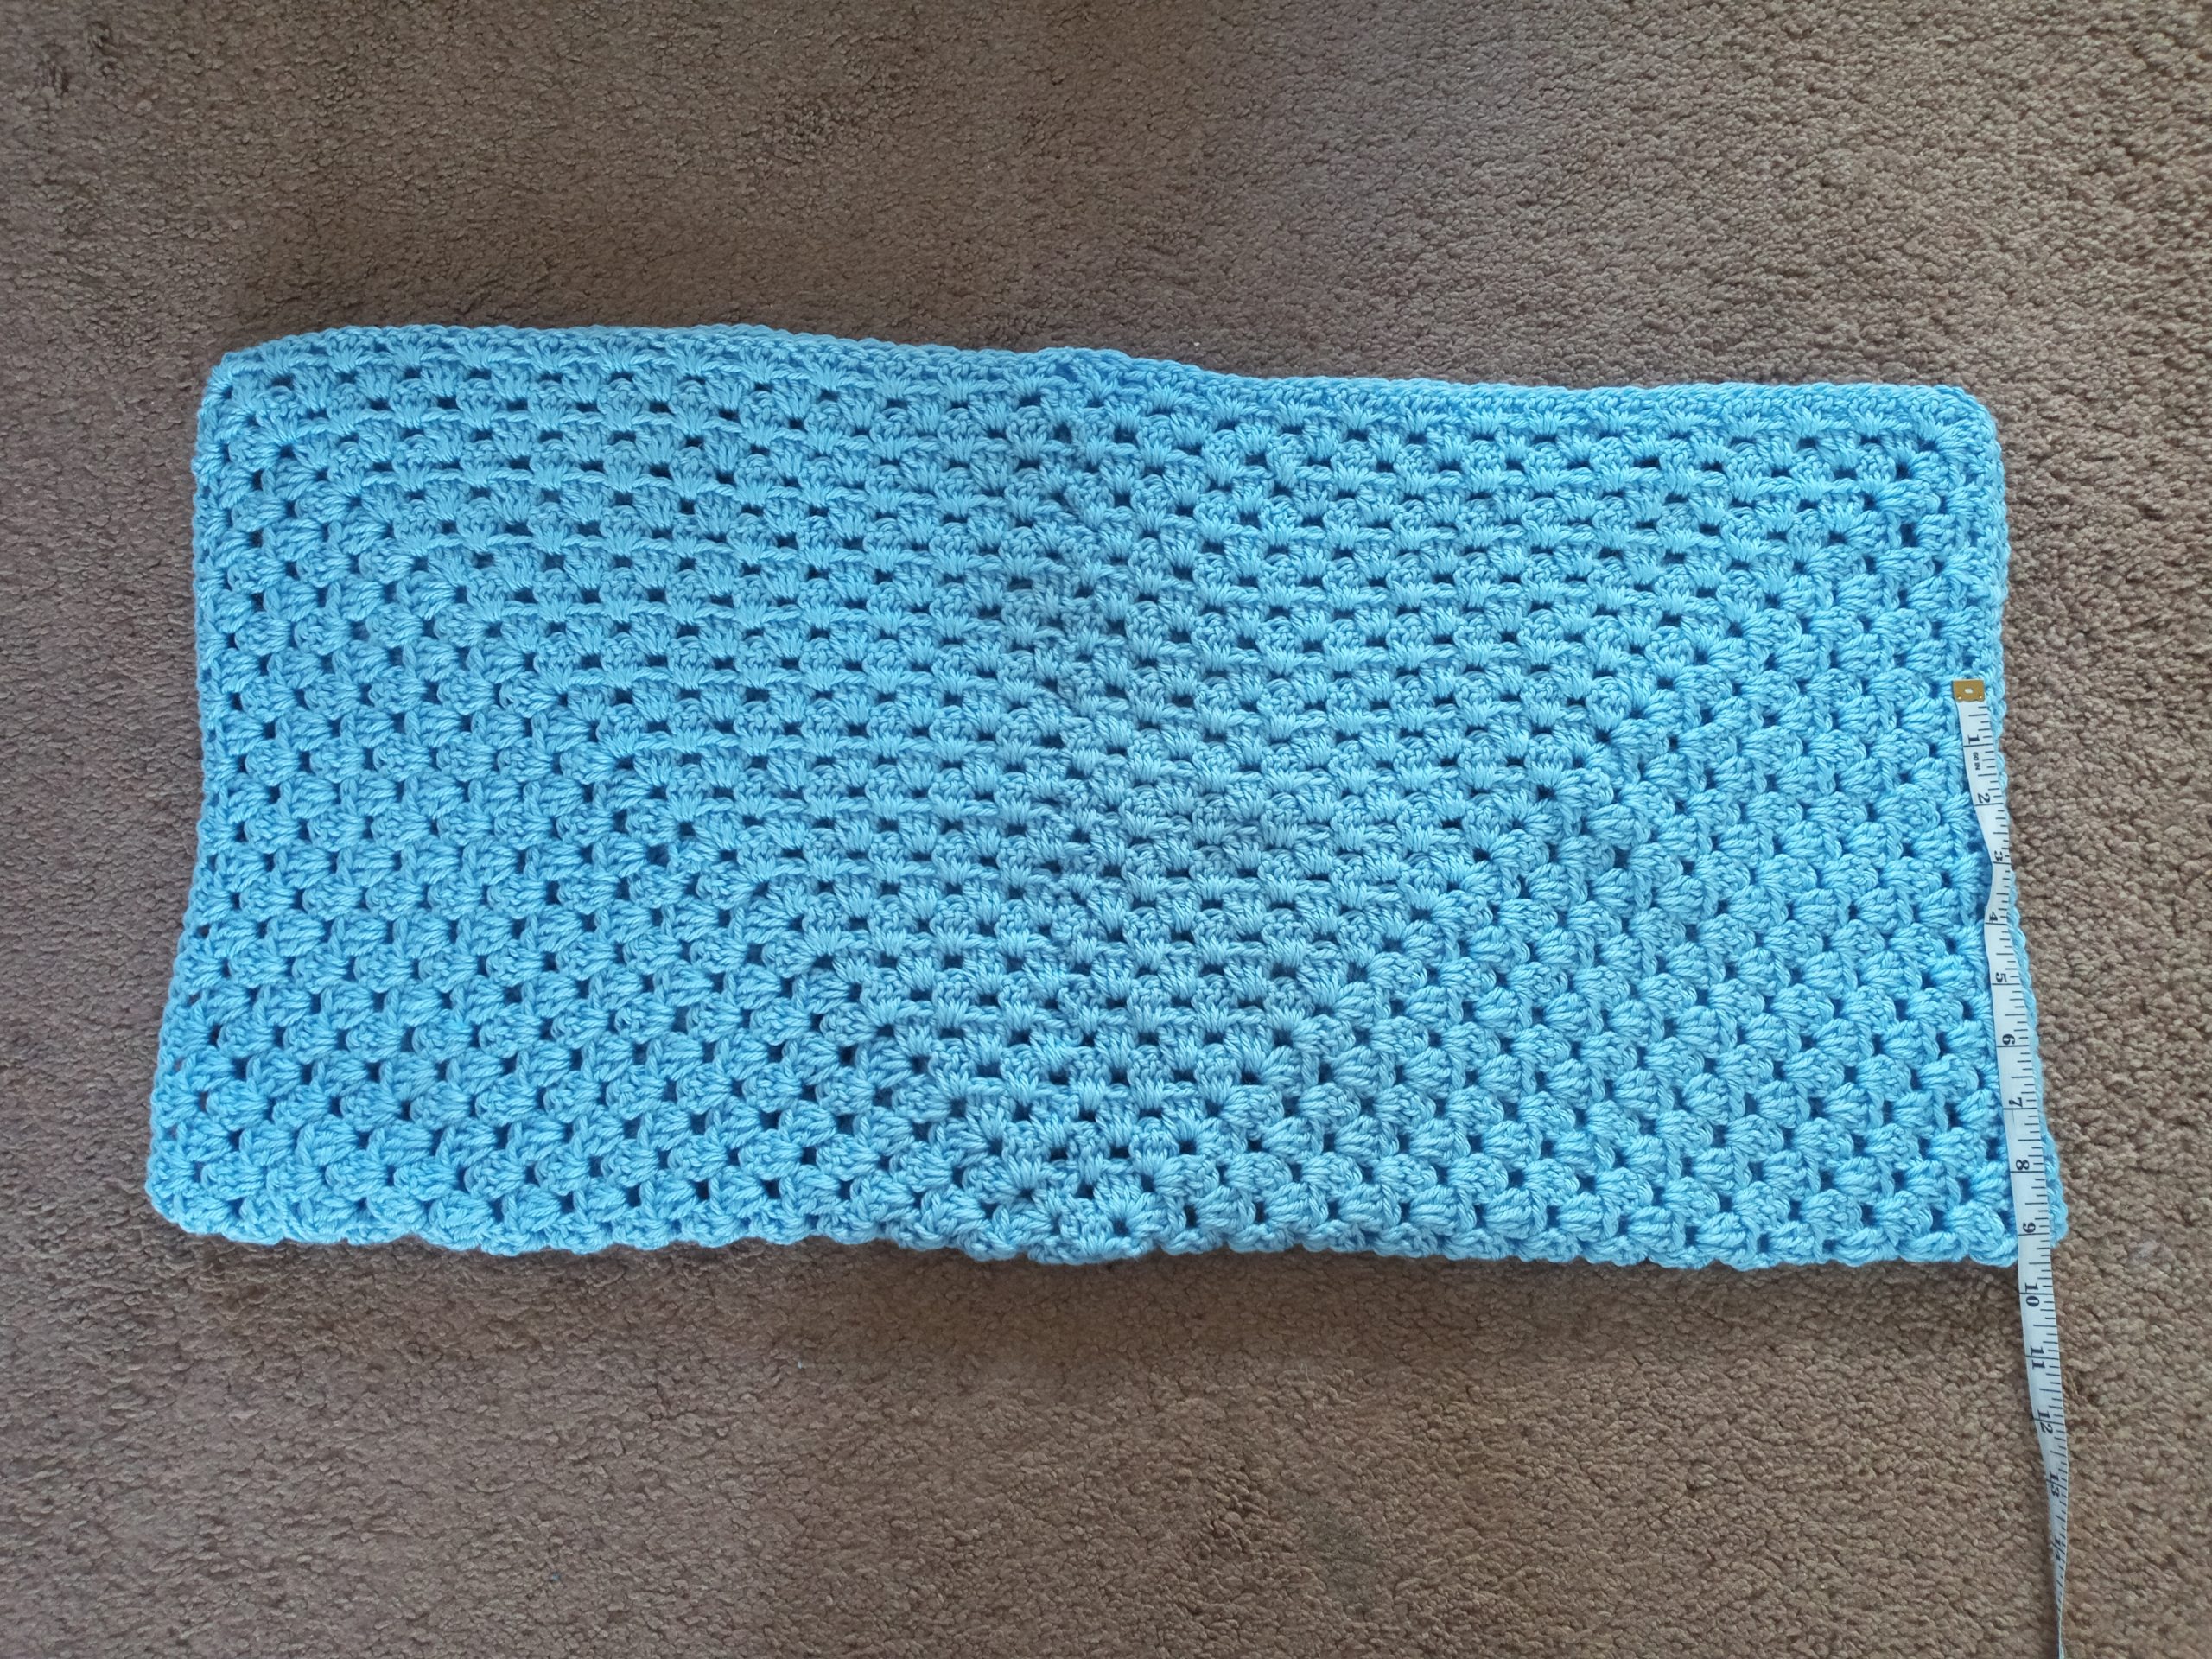
Fold your square in half symmetrically:Measure from the center fold (inside of cardigan):
– 23 cm/9 inches for sizes S & M
– 26 cm/10,2 inches for sizes L &XL
– 30 cm/12” for sizes XXL/XXXL
Measure from the center fold (inside of cardigan) to form arm pit and hole. Place stitch marker into stitch at measurement indicated for the size you are making.
Attach a piece of yarn to the stitch where you placed stitch maker, and with tapestry needle sew your cardigan seam from stitch marker to end of cardigan.
Make a double knot, sew in loose ends. Repeat on the other side, attaching a piece of yarn to sew that edge of cardigan. Fasten off and tidy all loose ends.
Create sleeves:
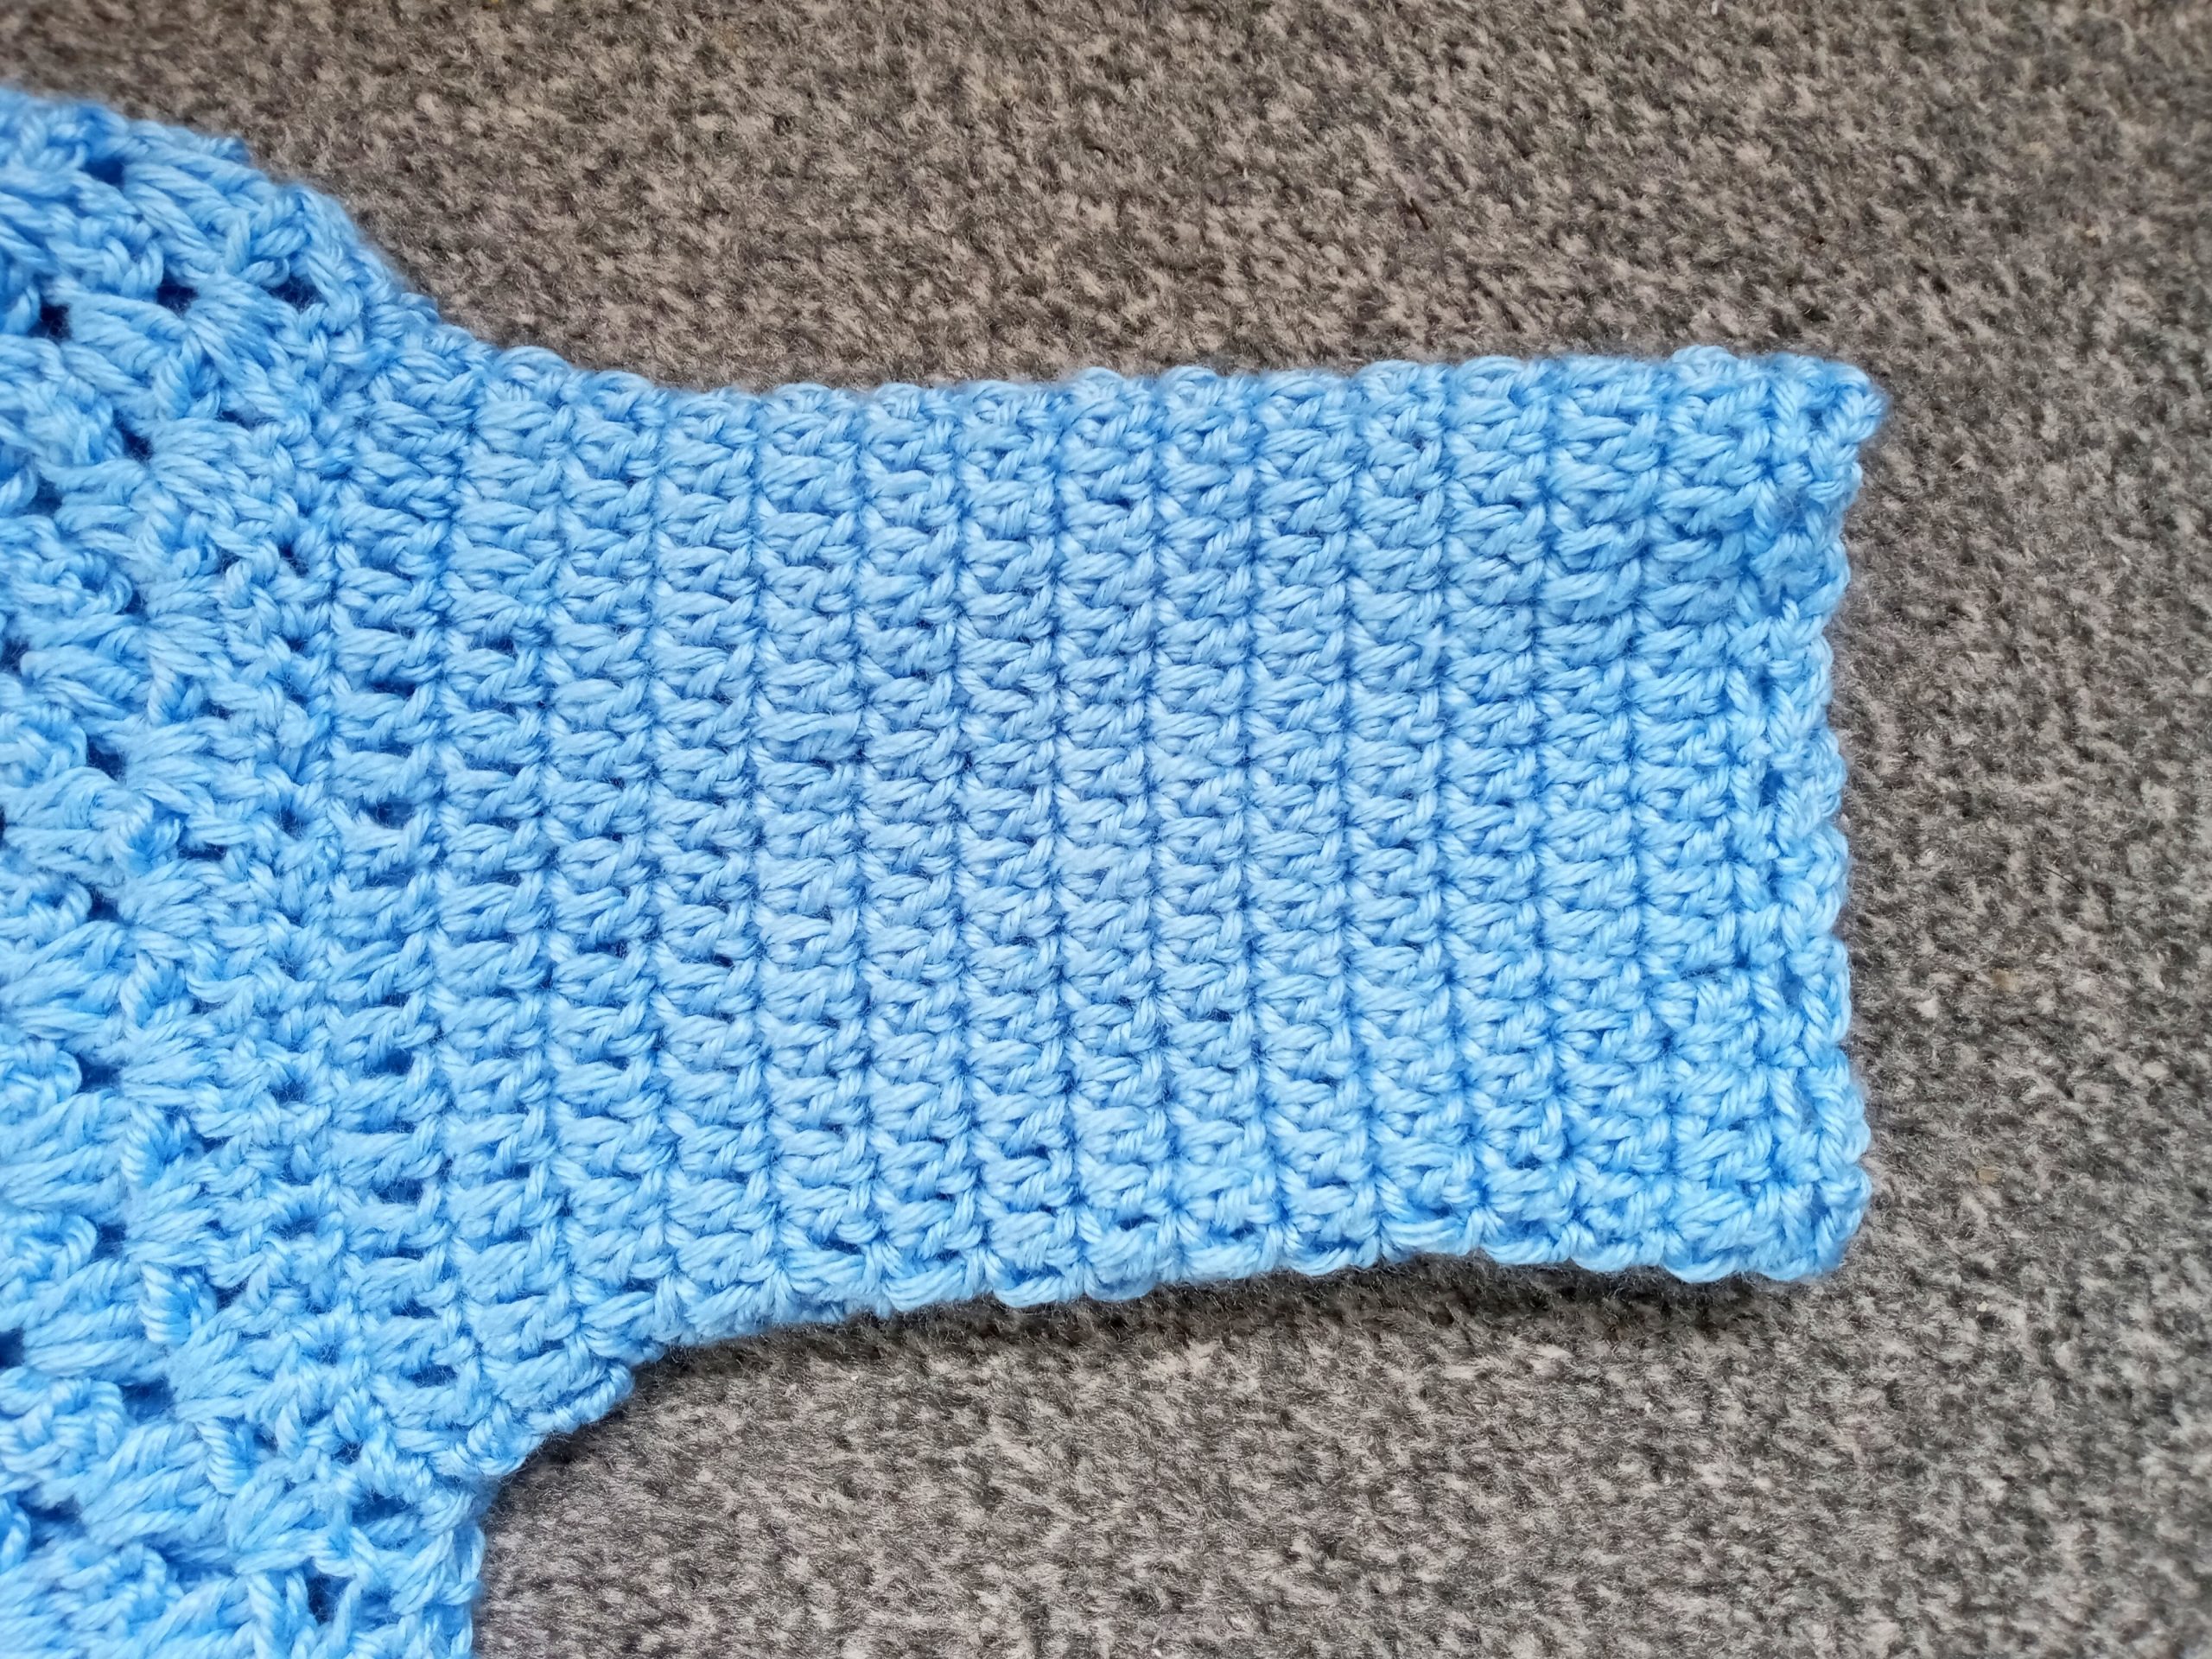
Once you have created your arm holes, you will be crocheting both your sleeves in rounds, one after the other.
To create your first sleeve, attach your yarn to any stitch across the arm hole you have just created. Now, with 5 mm crochet hook, you will be crocheting as follows:
1: Ch 1 (=TC), place a SC into 1st st, SC into next st, [sk 1 st, SC into 2 st] until eor.
2: Ch 3 (=DC), DC into next st until eor.
3-last round before chain arch edging (see table for different sizes): Repeat round 2.
Last round (chain arch edging): [Ch 3, sk 1 st, SC into next st] until eor.
Fasten off, tidy up all loose ends.
Please note you can make the sleeves longer (the sleeves for this project are ¾ sleeves). To make sleeves longer, just add as many rows as you wish until you are satisfied with length of sleeves, before you add the last round (chain arch edging round).
Front opening of the cardigan:
Please use 6 mm crochet hook for this part.
Attach yarn to any stitch on the front opening of the cardigan. You will be crocheting all around the front opening of the cardigan, in the round.
Round 1: Ch. 1, SC into every st around, sl st to 1st ch 1.Round 2 (shell stitch edging): Ch 3 (=DC), place 4 DC into same first st (=5 DC, and first shell stitch); now sk 2 st, SC into next st, *sk 2 st, 5 DC into next st, skip 2 st, SC into next st* until eor. Finish round with a SC.
Fasten off, tidy up all loose ends.


You May Also Like
Crochet Regency Era Shawl Free Pattern
Crochet Dusty Pink Cowl Pattern