Crochet The Asymmetrical Rainbow Shawl with Shell Border
Crochet The Asymmetrical Rainbow Shawl
I hope you are well. Today I will show you how to crochet The Asymmetrical Rainbow Shawl with Shell Border. It’s a very easy pattern.
I am doing good, although a bit tired because I have been working really hard on new patterns. Filming new videos for the coming Season is very exciting but has also taken a lot of my energy during this time.
However, I am pleased to say lots of Spring and Summer designs will be out soon. I will also be doing bonus videos and patterns releases on top of my weekly video and pattern turnout every Thursday. So very exciting times here on the blog and my Youtube channel!
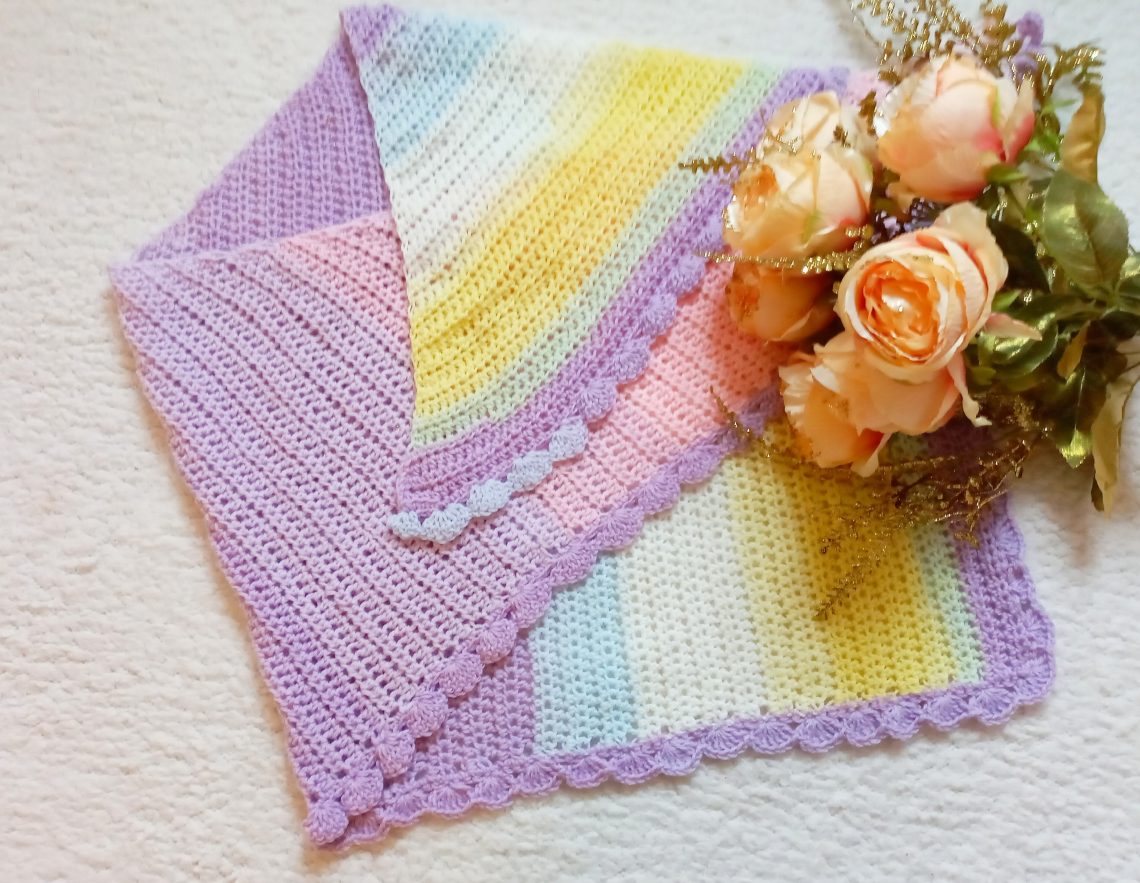
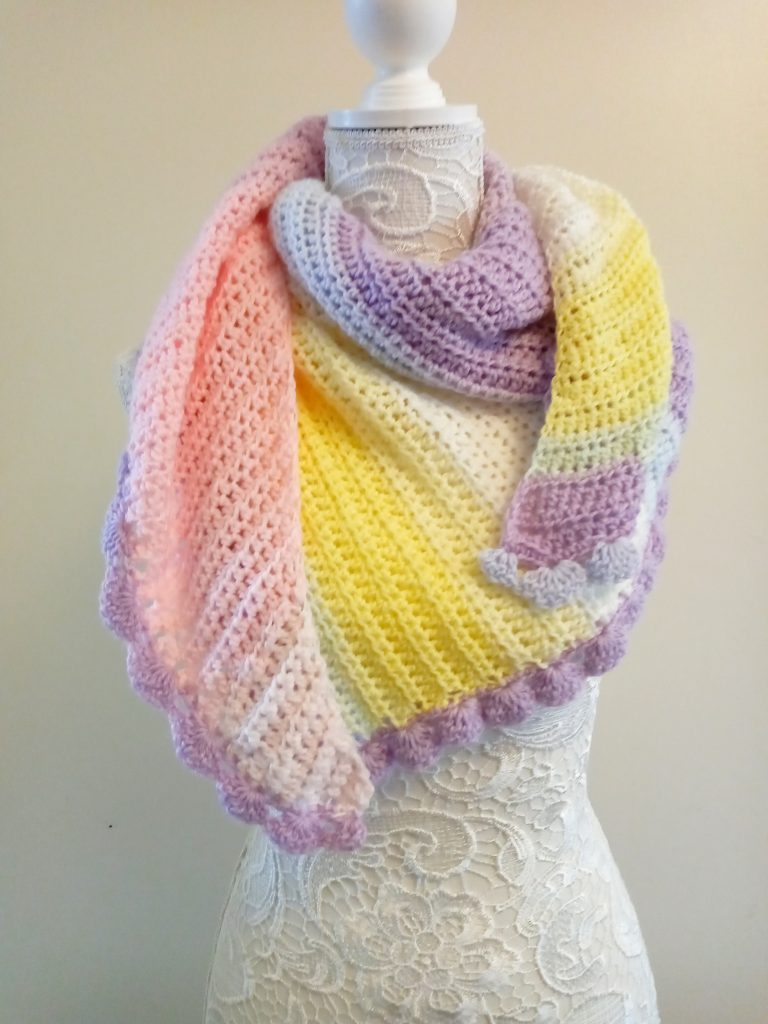
This week I am bringing to you a project that I loved working on. It is The Asymmetrical Rainbow Shawl with a Shell Border. This pattern is an absolute delight to crochet with Sirdar Pattercake.
The Youtube video tutorial can be found here:
Crochet The Asymmetrical Rainbow Shawl: the inspiration
The colors have really helped uplift my mood this week. It is a very therapeutic project to crochet. Let me know what you think of it in the comments. I really love the colors from the Sirdar Pattercake collection. They are they are soft and delicate, perfect for shawls, baby projects and also clothes. It seems like I am crocheting with the colors from a rainbow when I use this yarn. It definitely puts me in a happy mood. For this reason only I would recommend this collection!
Also, it seems that these same colors are present in Lion Brand’s Baby Mandala collection, so I will definitely be purchasing these in the future to see if they are as similar in real life as it seems on the photographs on the web. Let me know if you have ever used Lion Brand’s Baby Mandalas, I would love to know your opinion on these.
Crochet The Asymmetrical Rainbow Shawl: Tips and Tricks
This pattern is created as a simple Asymmetrical shawl, made up with Half Double Crochets. Once this part is completed, we then add a beautiful shell border on two sides of the shawl. It’s very easy, so if you are a beginner crocheter, please do not be afraid, you can make this pattern with no problem I am sure!
This is the beauty of The Asymmetrical Rainbow Shawl with Shell Border!
Reaching 1000 subscribers on Youtube
Also, I am very proud to announce I have reached over 1000 subscribers on Youtube this week, which is such a huge achievement for me. I am so happy about this, and want to thank all of you who follow me from the bottom of my heart.
I love creating my video tutorials and crochet patterns, and it means the world to me that people are either subscribing to my channel, or visiting my blog.
You can also follow me on Facebook or Instagram at Selina Veronique Crochet, and I would love it if you wanted to join my Facebook group called Selina Veronique’s Crochet Corner.

Staying home
In the meantime I hope you are staying safe and I hope you are doing ok during these times. Please know you can contact me for anything, even if it is just to talk. You can contact me either through my contact page, or at selina.veronique.b@gmail.com.
Take care and au revoir my lovelies,
Xoxo, Selina.
Crochet The Asymmetrical Rainbow Shawl: The Pattern
You can purchase the ad free, PDF pattern from my Etsy shop here: Crochet The Rainbow Shawl with Shell Border PDF Pattern
Level: Easy/beginner
Gauge: 10 cm (4”)=9 rows and 10 cm(4”)=14 HDC (gauge is not crucial for completion of this project)
Size of finished project: 150 cm (59”) long and 68 cm (27”) wide (at largest point from top to point of project)
Notes:
I will be using US terms (British terms in brackets)
Materials:
2 skeins of Sirdar Pattercake in shade 754 (or any other DK/Size 3 light yarn)
5 mm crochet hook
Pair of scissors
Stitch marker
Tapestry needle
Abbreviations:
Sl st : slip stitch
HDC: Half Double crochet (UK Half Treble)
DC: Double Crochet (UK Treble Crochet)
SC: Single Crochet (UK Double Crochet)
Ch : chain
EOR: End of row
Begin pattern here:
Shawl:
To start, make a slip knot.
Complete rows as follows
1: Ch 5, HDC in 3rd chain, HDC until eor
2: Ch 2 (counts as HDC throughout) and place your stitch marker on that side, turn work, HDC in same 1st stitch (=2 HDC together), HDC into 2nd st and into each st until eor
3: Ch 2 (=HDC), HDC into 2nd st and into each st until eor, place 2 HDC together in last stitch
4: Ch 2 (=HDC), turn your work, HDC into same stitch (=2 HDC together), HDC into 2nd st and each HDC until eor
5-112: Alternate rows 3 and 4
Fasten off.
Shell Border:
This border will be placed on the L (straignt sides) of the shawl (so not on the increased arched side of the project where our stitch marker was).
Fasten on yarn at the top of row 112 (at the beginning of this row, so the opposite side to which we finished and fastened off previously).
R 1: Ch 1, SC into first ch space, SC into 2nd HDC from previous row, placing a SC into each HDC until end of this row.
Once you reach the end of this row, turn your work so that the other straight edged side of the shawl is facing you and where you will be placing your next SC. Because this is the row side, place an equal amount of SC onto this edge, making sure your number of SC along this side is a multiple of 7. I placed 154 SC along this side.
R 2: ch 3 (=DC), place 3 more DC into this 1st stitch (=4 DC and half shell). *sk 3 SC, place 7 DC in next SC (=shell)* until last 4 SC of this side of border. Sk 3 SC and place 4 DC into the last SC (=half shell). Turn your work so that the other side of the L border of the shawl is facing us, place 4 DC into 1st SC. *sk 3 SC, place 7 DC in next SC (=shell)* until last 4 SC of this side of border; sk 3 SC and place 4 DC into the last SC (=half shell)
Fasten off, tidy up all loose ends


