Crochet The Harvest Moon Pocket Shawl Pattern
Crochet The Harvest Moon Pocket Shawl Pattern
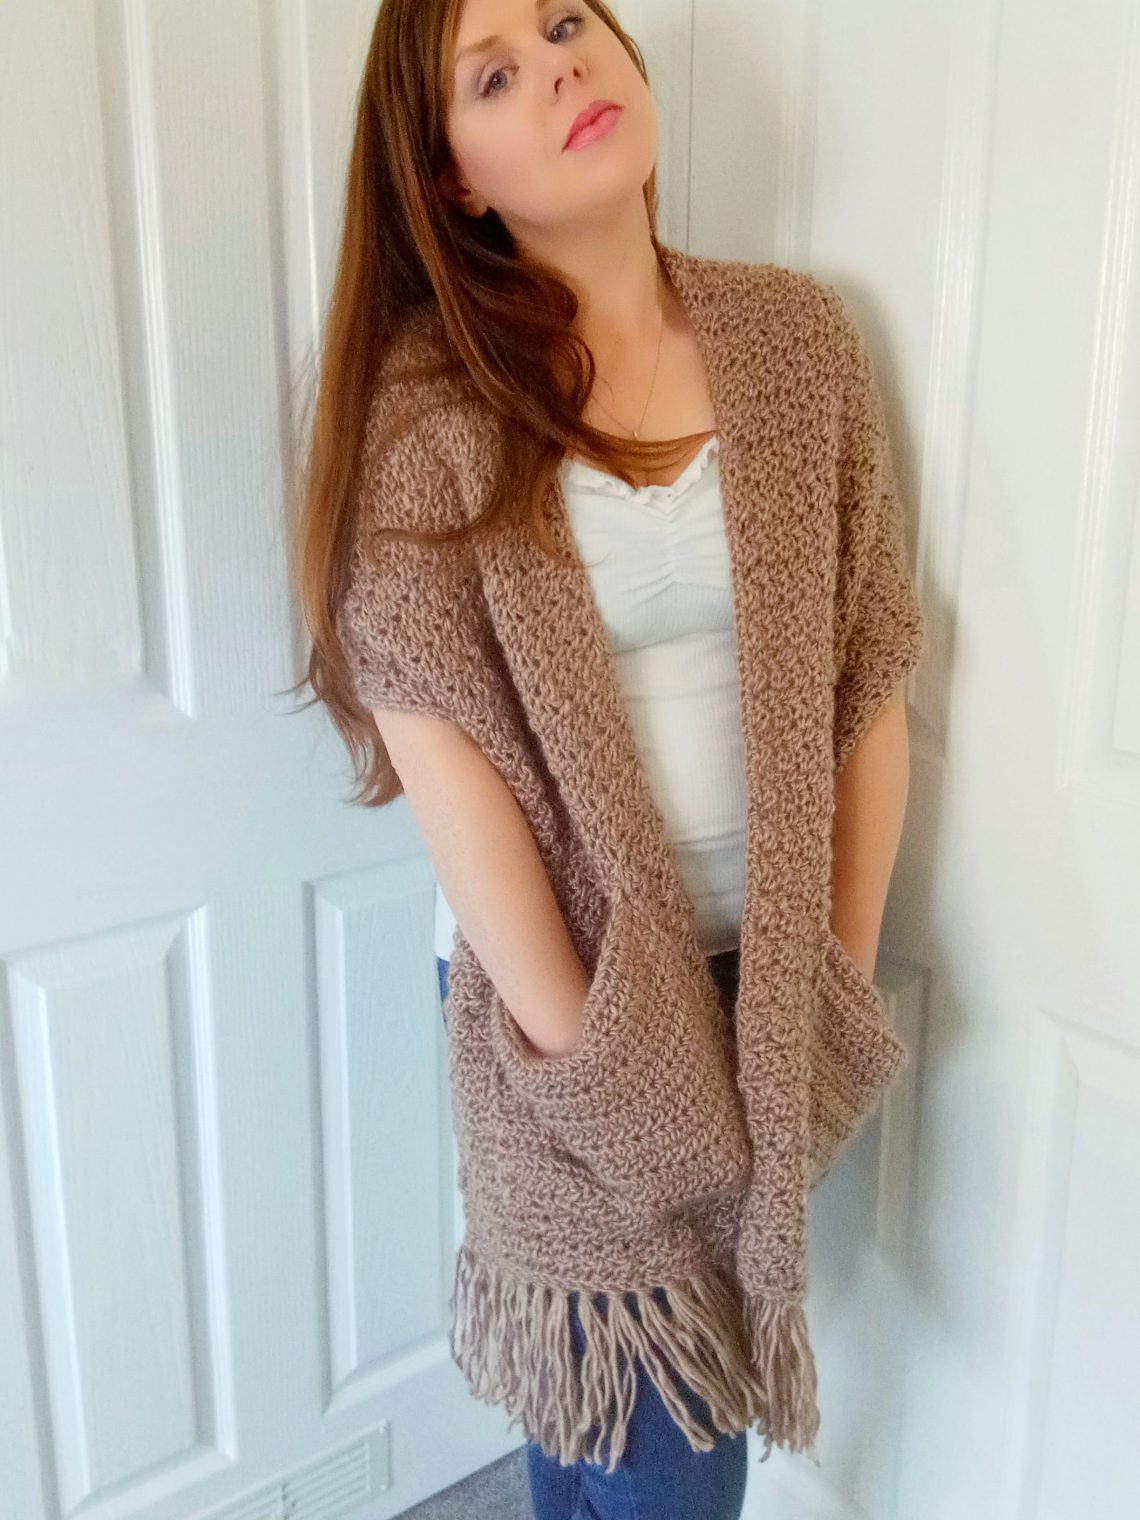
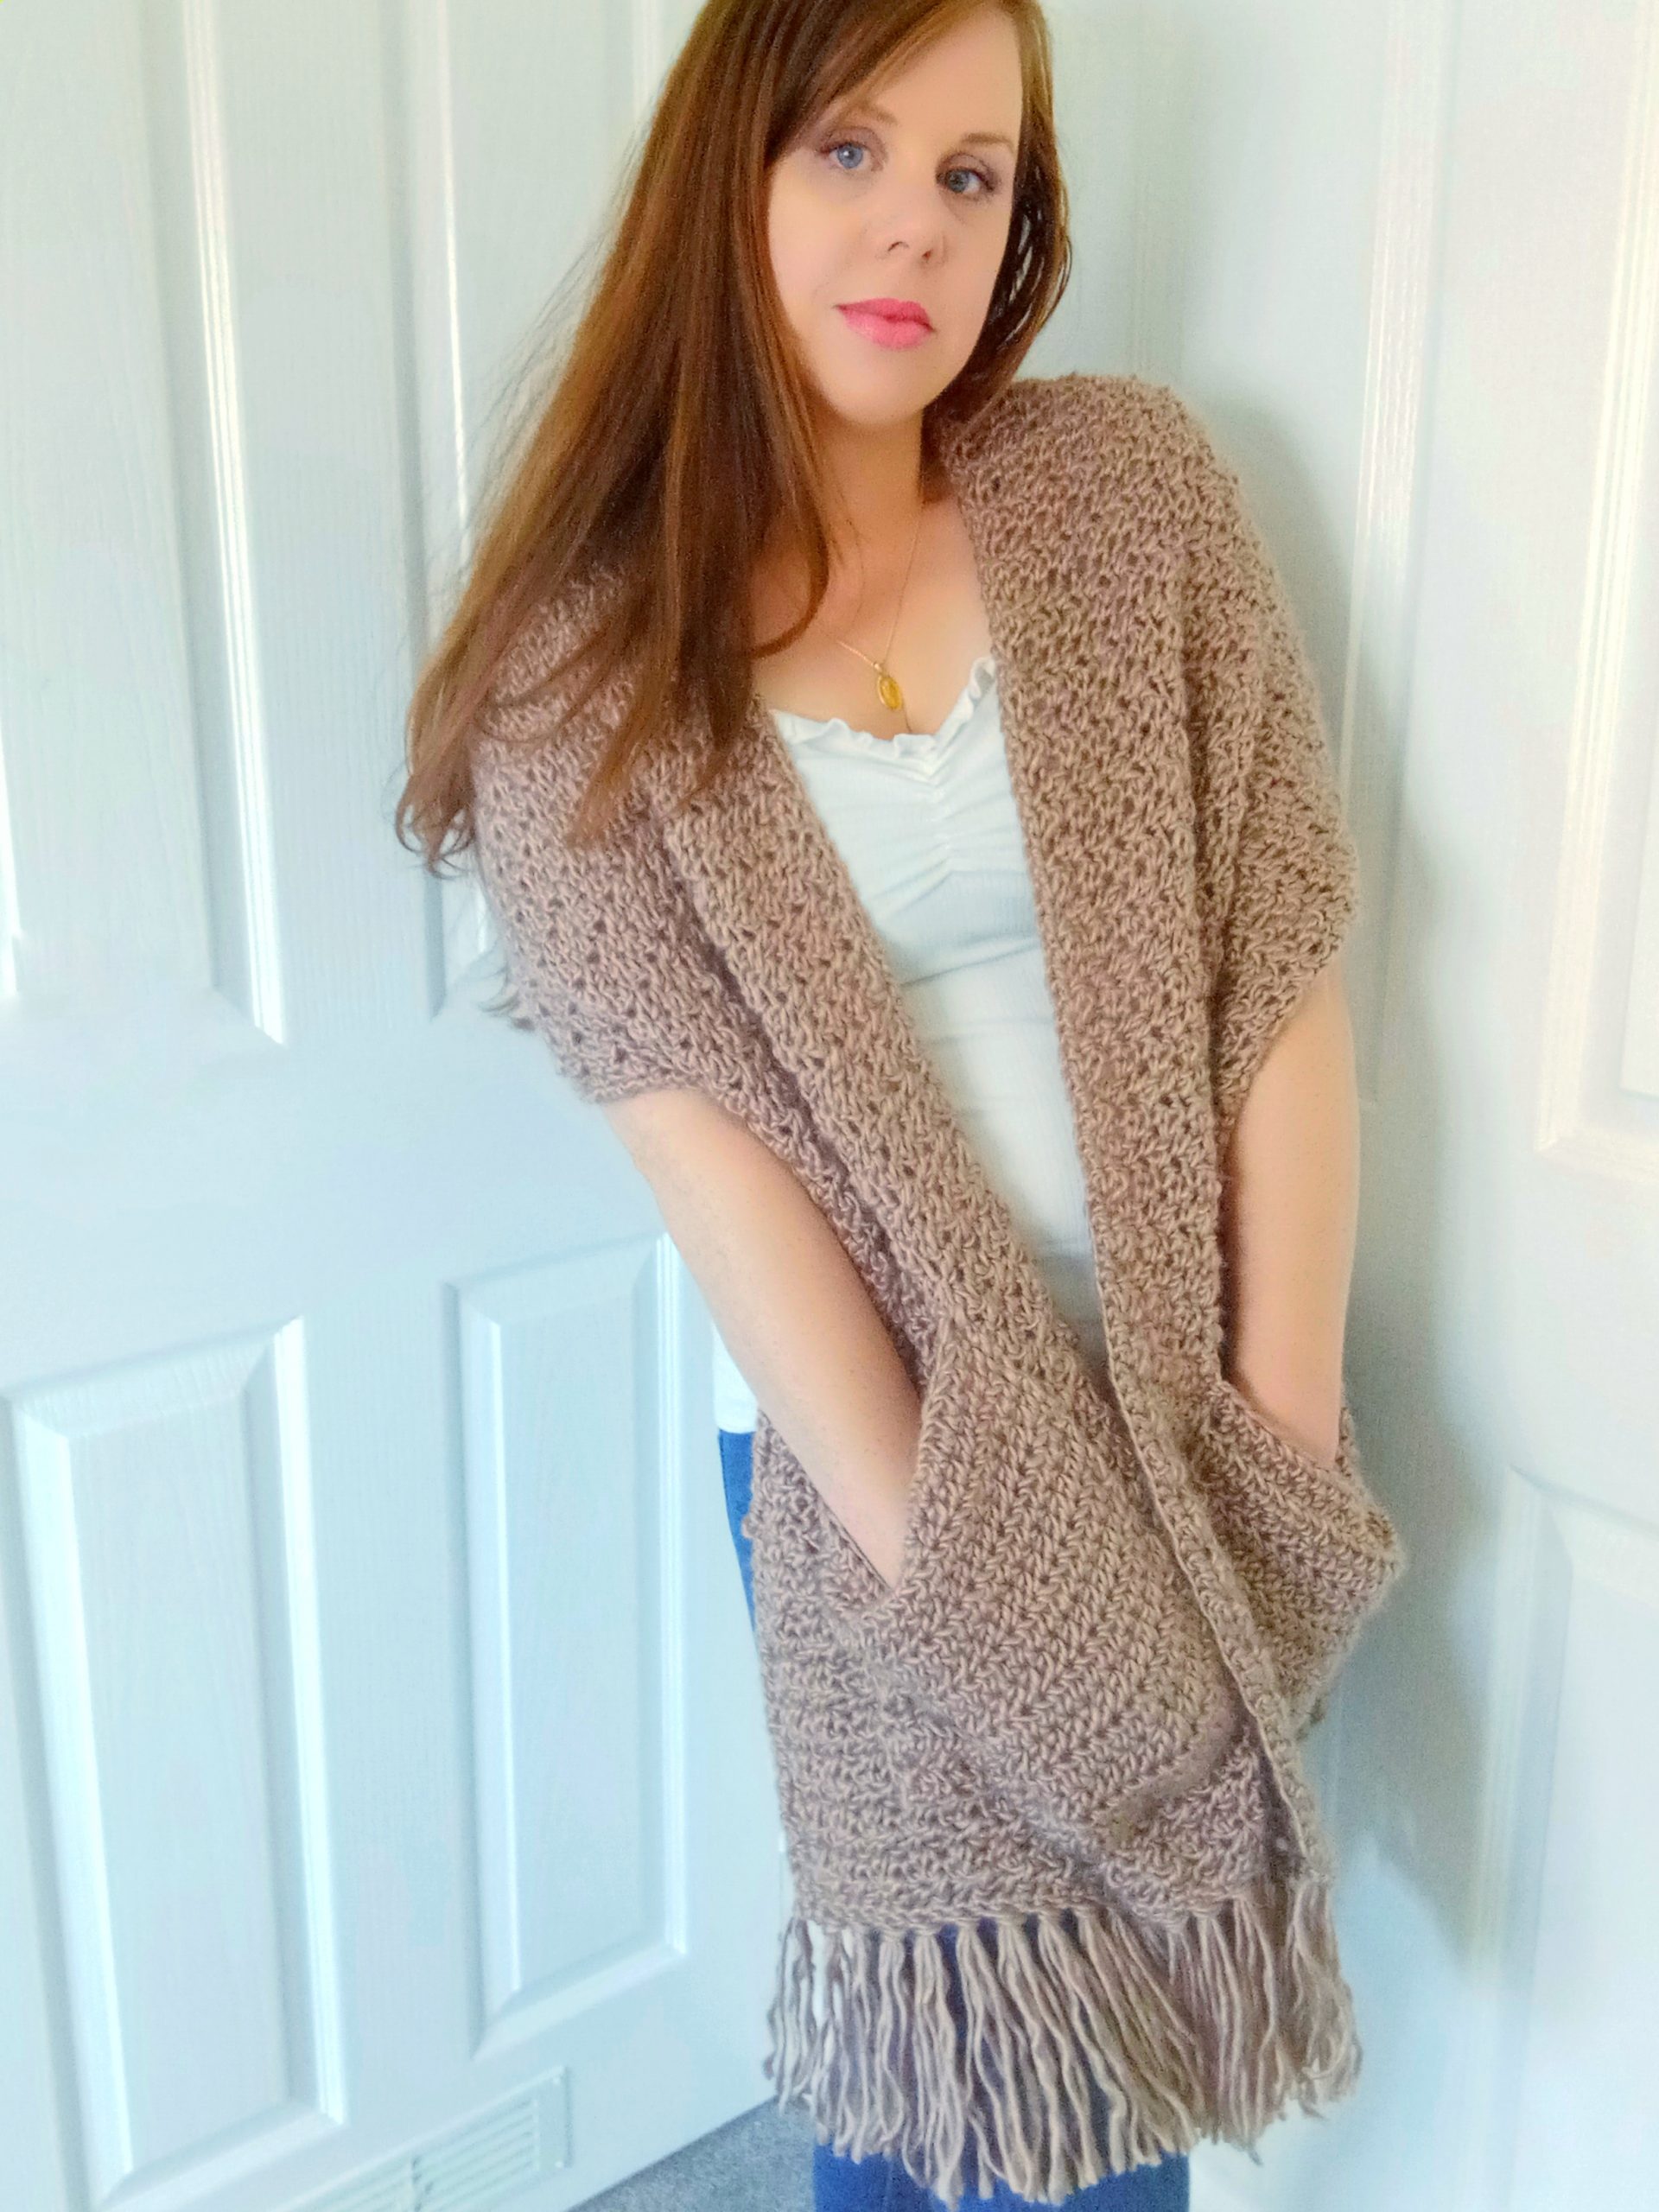
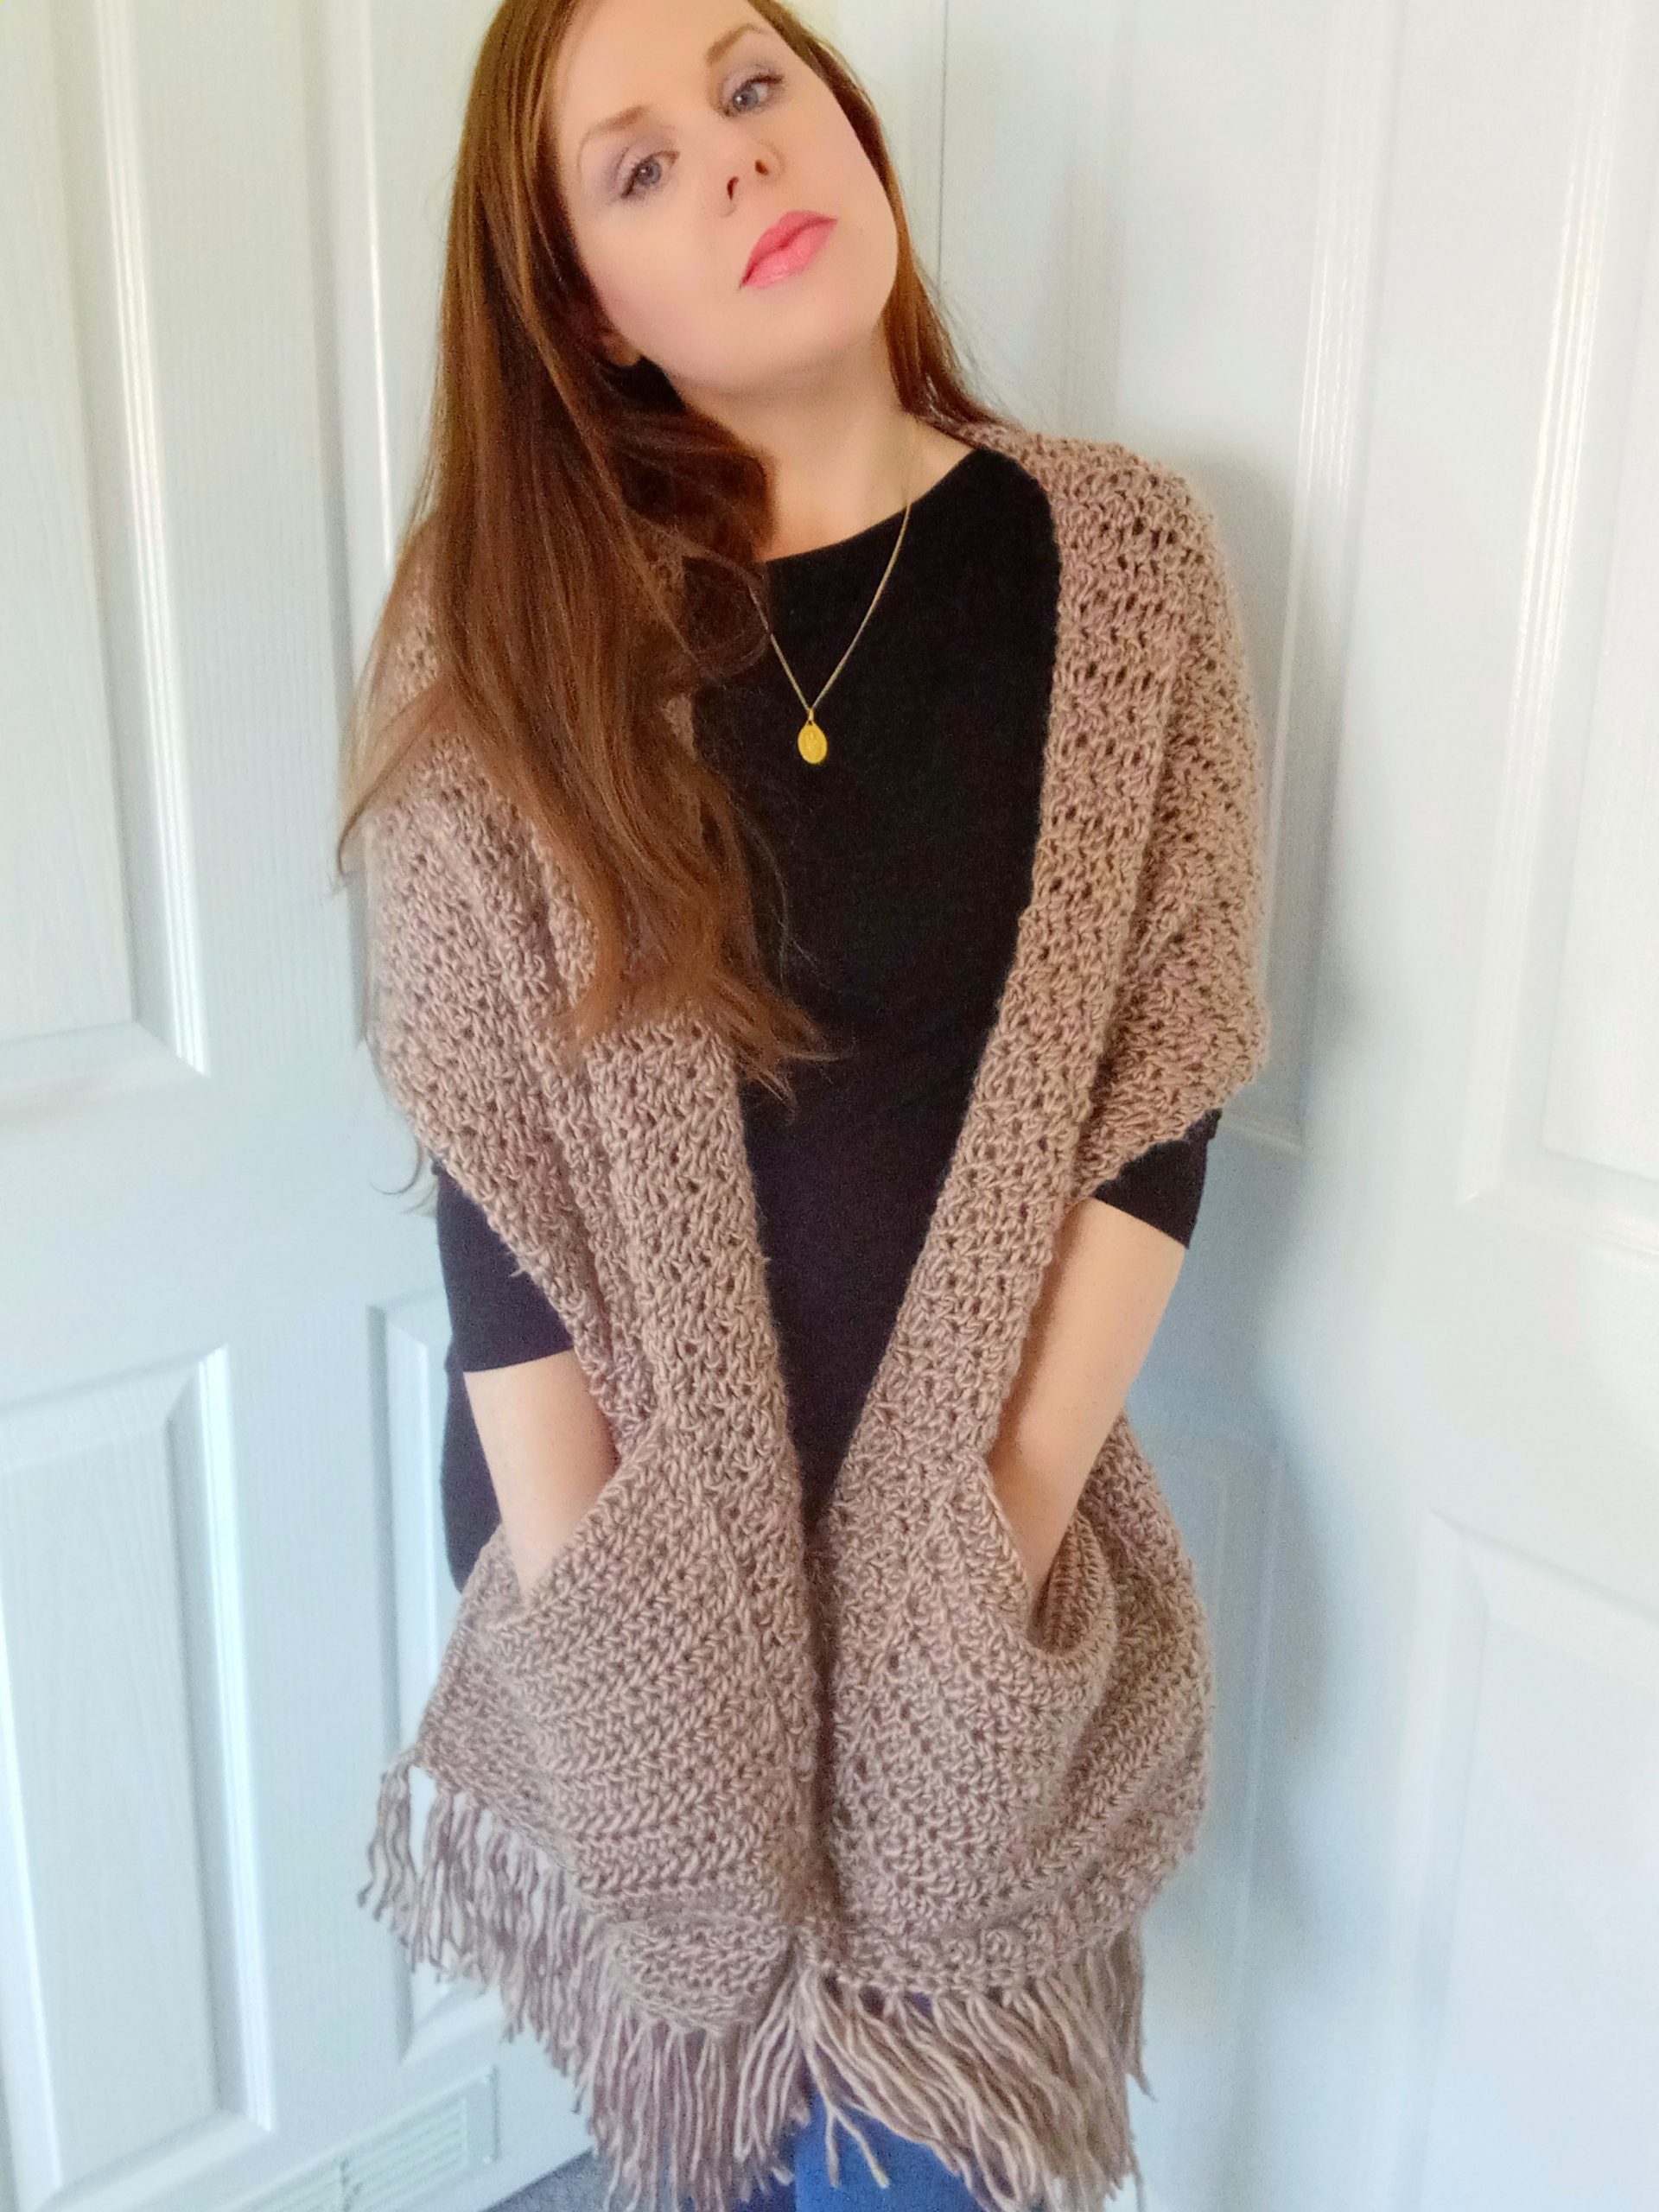
Hi everyone, this week I am bringing to you The Crochet Harvest Moon Pocket Shawl Pattern and video tutorial. This easy project is perfect for beginners. I love pocket shawls and wraps so much, and I am delighted to bring you a new crochet pocket shawl. Pocket shawls are perfect for the Autumn and Winter. They are warm and cozy, and look absolutely stunning.
The video tutorial for The Harvest Moon Pocket Shawl can be found here:
Crochet The Harvest Moon Pocket Shawl Pattern: the inspiration
I had wanted to crochet a new pocket shawl for a long time now. Summer projects have been in full swing these last few months, but now I am happy to say I am crocheting only Autumn Winter projects. Can you believe I am already thinking of crocheting Christmas gifts? This is going to be so much fun, and I can’t wait to get started. Have you started crocheting your Christmas gifts yet?
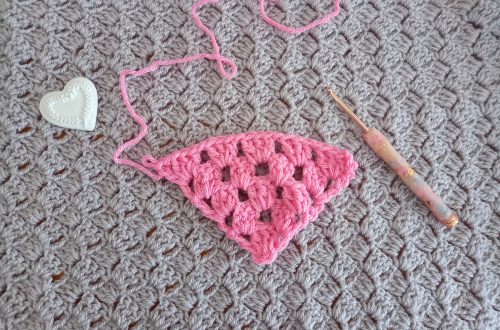
The Harvest Moon Pocket Shawl is perfect if you are a beginner crocheter. It is beautiful and looks perfect on a walk during the Autumn/Winter. It is elegant, yet cozy. I used Lion Brand’s Landscapes yarn in shade 122 Taupe for this project. This yarn is super soft and cozy, and is perfect to crochet a pocket wrap with. This yarn is 100% acrylic, but has a “wool” like feel to it, in the best way. It is soft and very easy to crochet with. This makes for a perfect Christmas gift, especially if you are unsure whether or not the recipient is allergic to wool or not. This high quality acrylic yarn makes it a great option!
Crochet The Harvest Moon Pocket Shawl Pattern: the design
As previously mentioned, this yarn is perfect for pocket shawls and scarfs. I wanted to create a new pocket shawl design perfect for the Autumn. Last year I designed the Perfectly Pretty Pocket Shawl, which was a hit in the crochet world. It is more airy and intricate than this year’s Harvest Moon Pocket Shawl design.
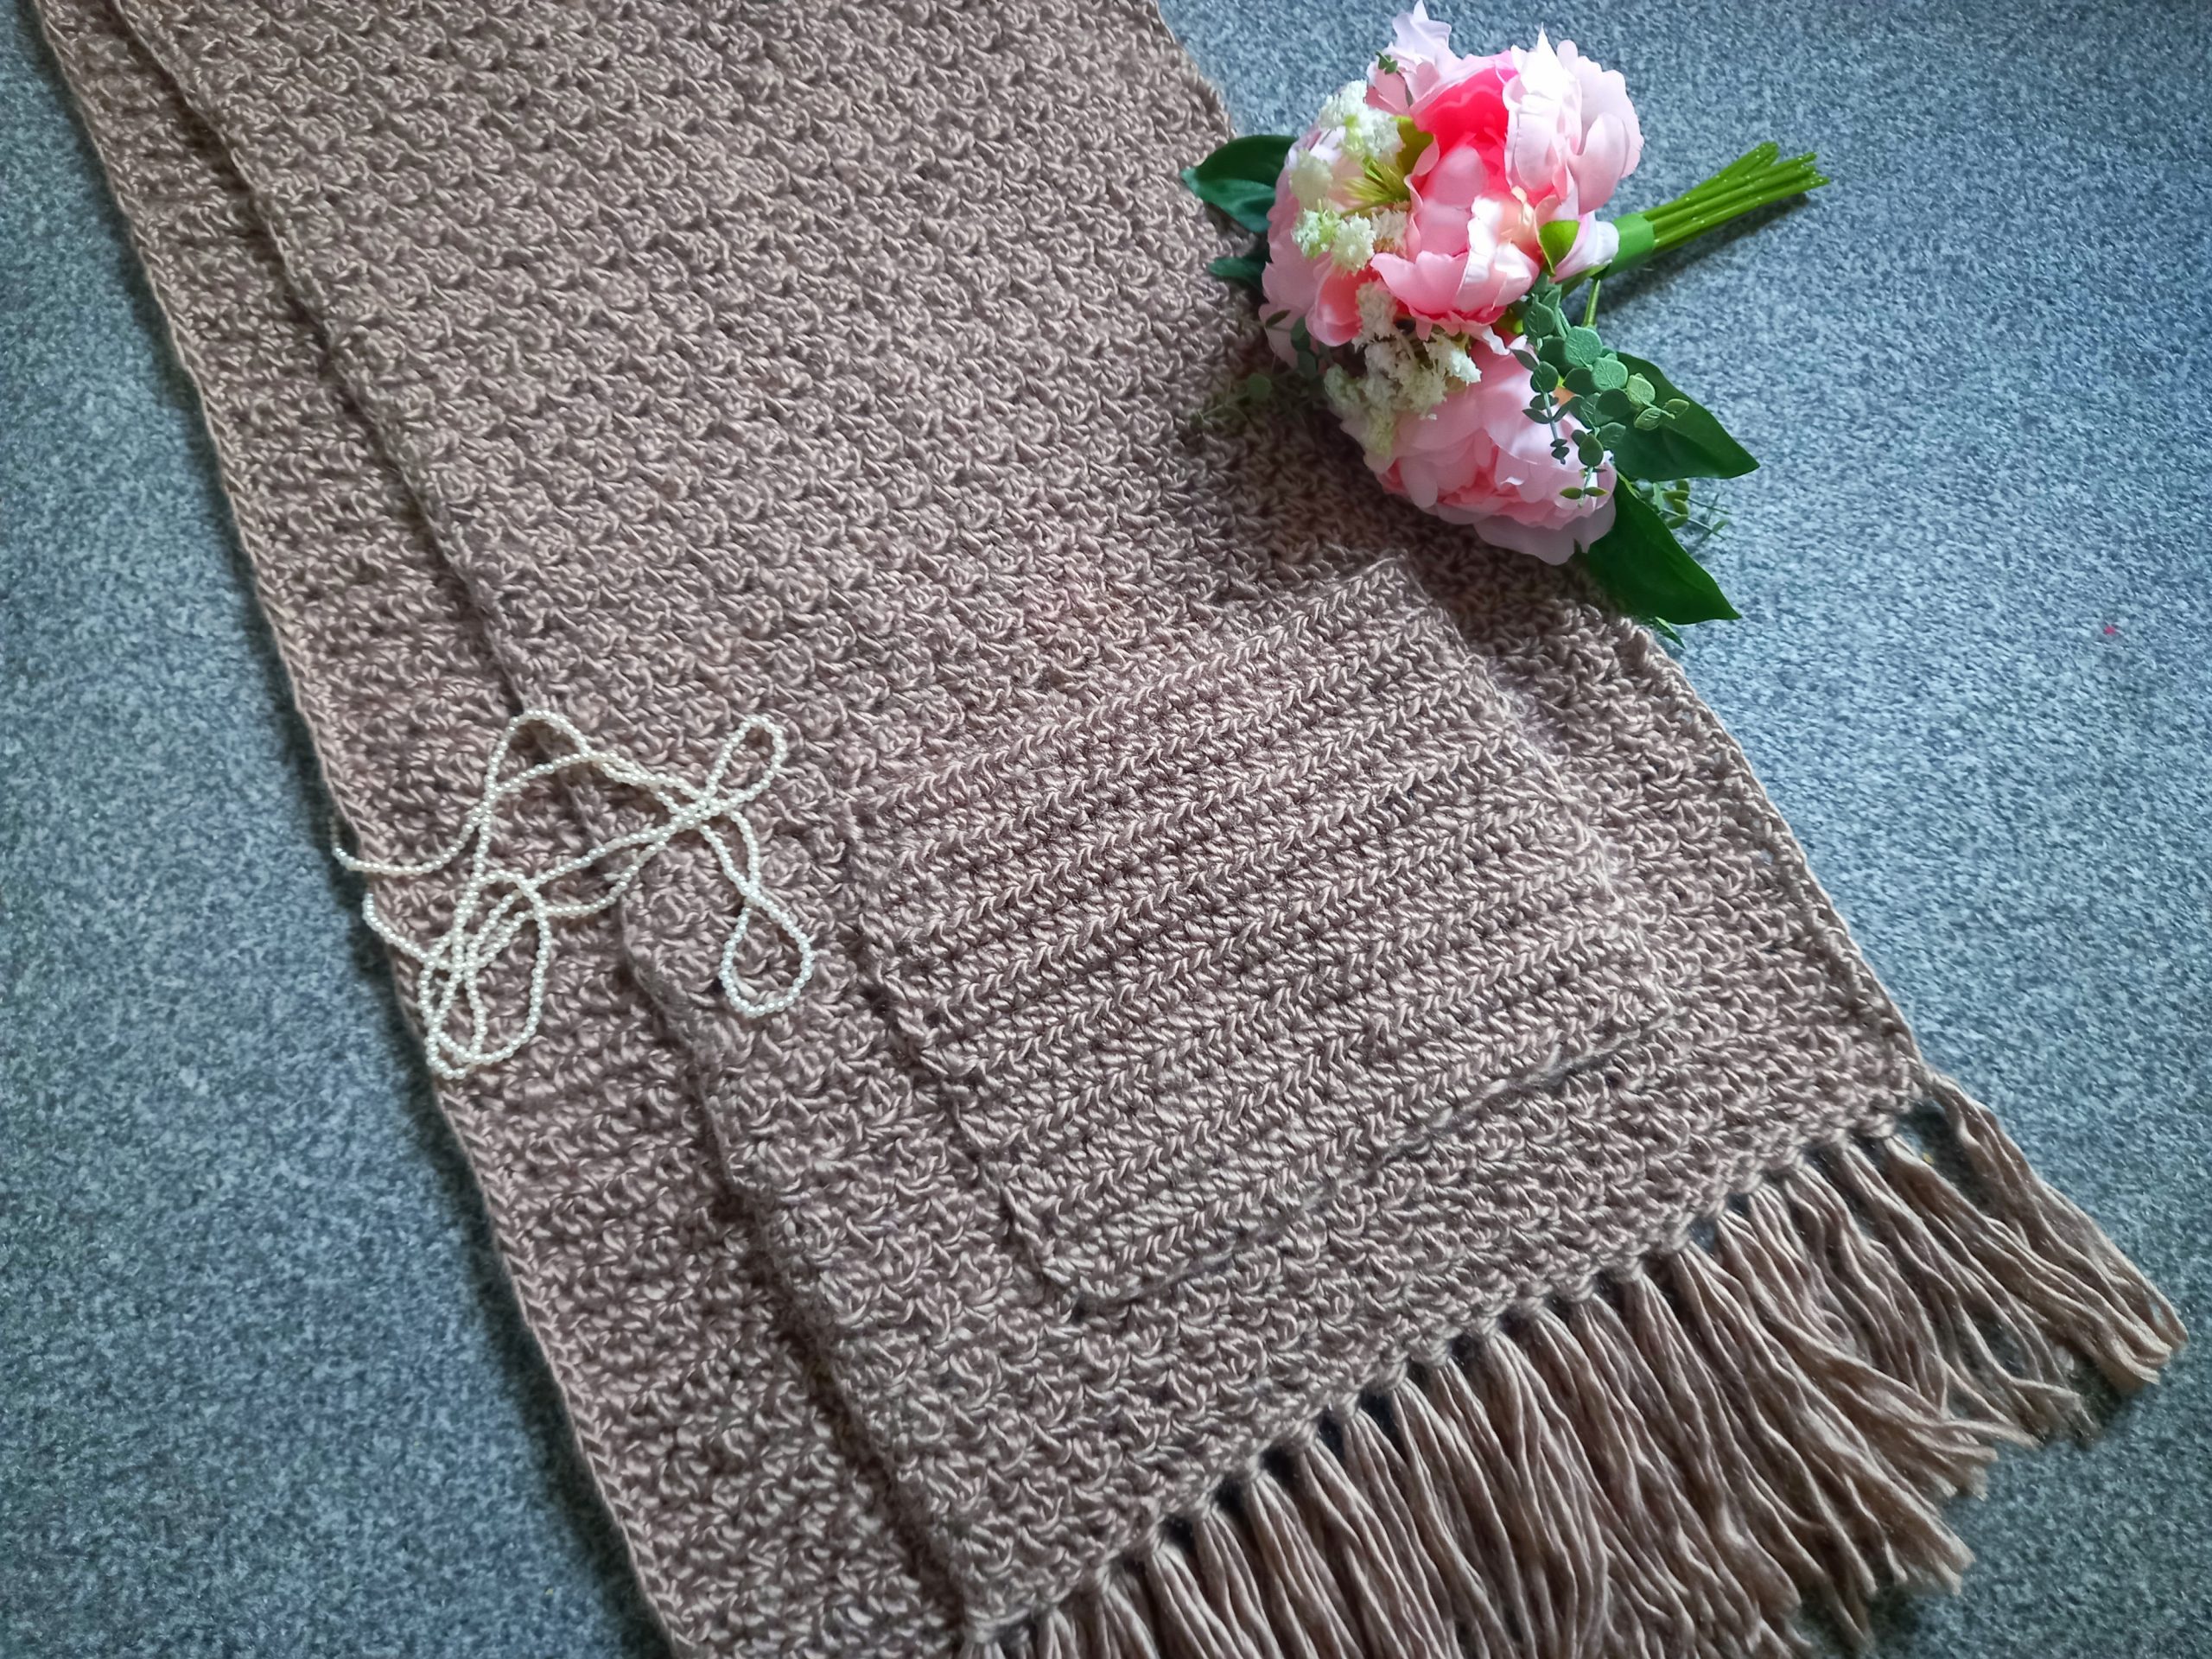
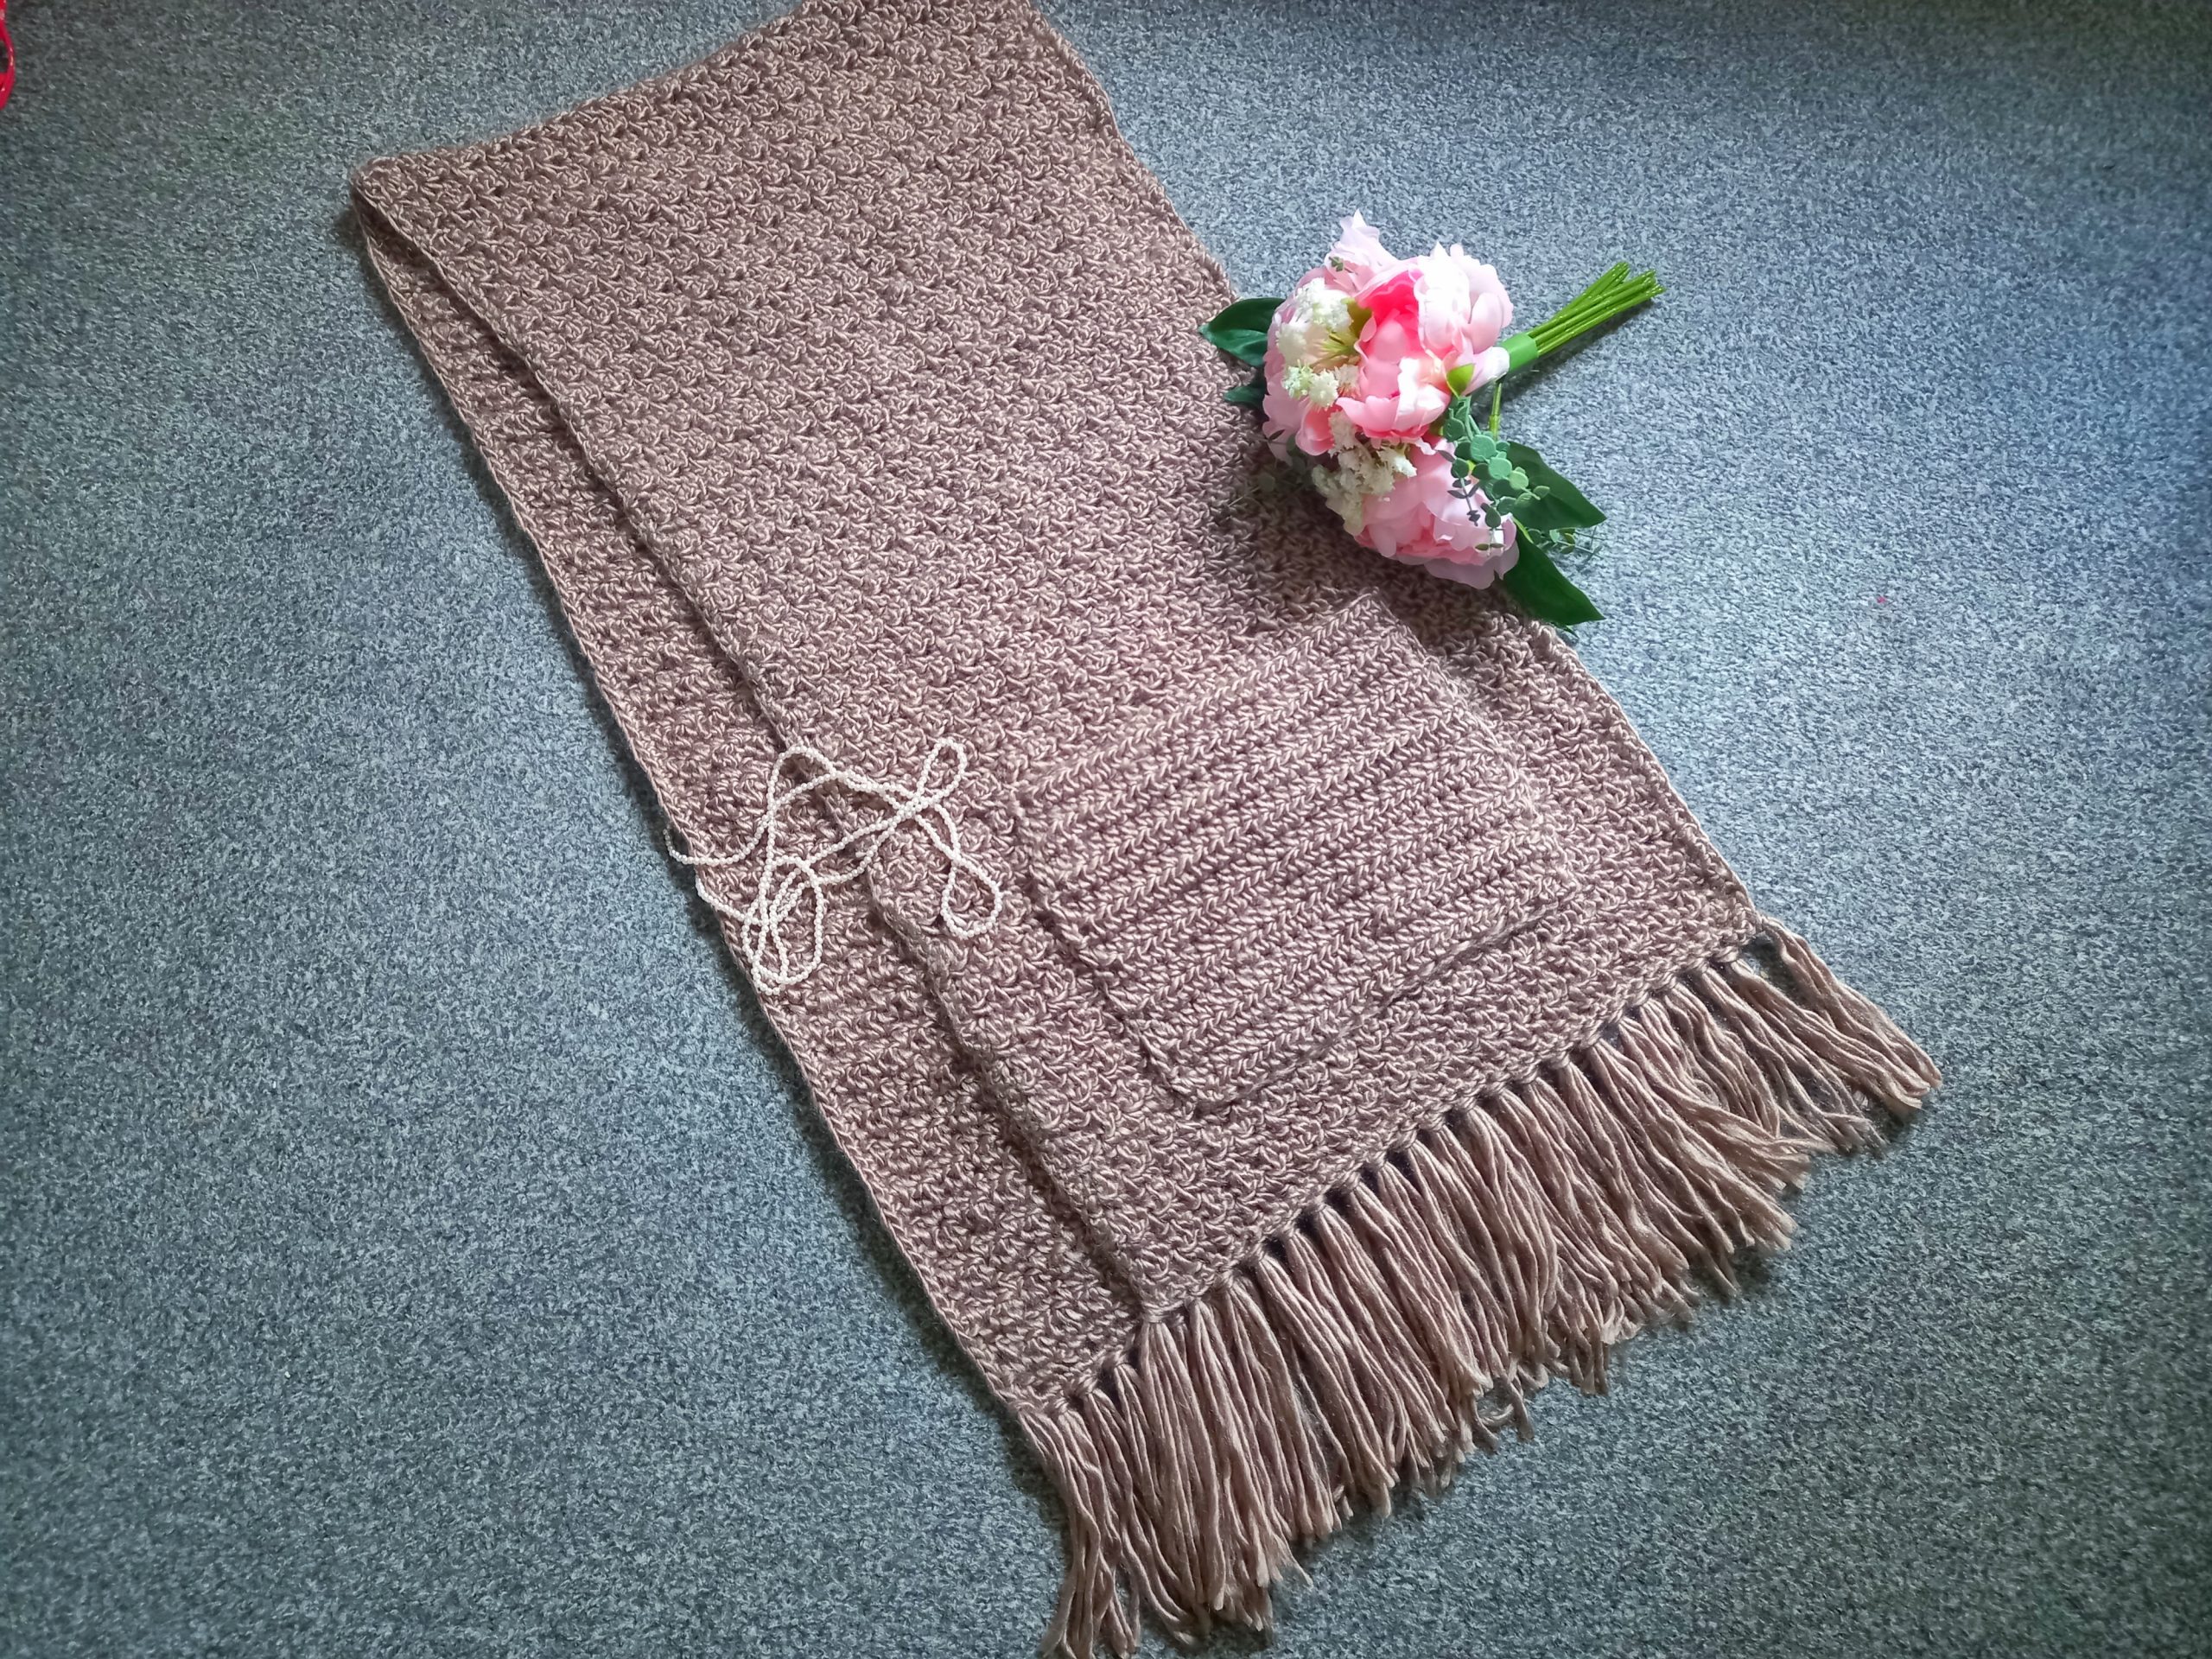
This year I wanted to create a more textured and cozy pocket wrap. The body of the shawl is made using the Lemon Peel stitch (sometimes known as the Griddle stitch too). The Lemon Peel stitch is very simply achieved by alternating Single Crochets and Double Crochets. This creates as beautiful textured stitch. This stitch is very beginner friendly.
Have you ever used the Lemon Peel Stitch? I have used this stitch many times for different projects, as it so beautiful yet simple. The Lemon Peel stitch was used for The Stylish and Easy Man Scarf from two years ago. This man scarf is still relevant today, as it is also a perfect gift for a man!
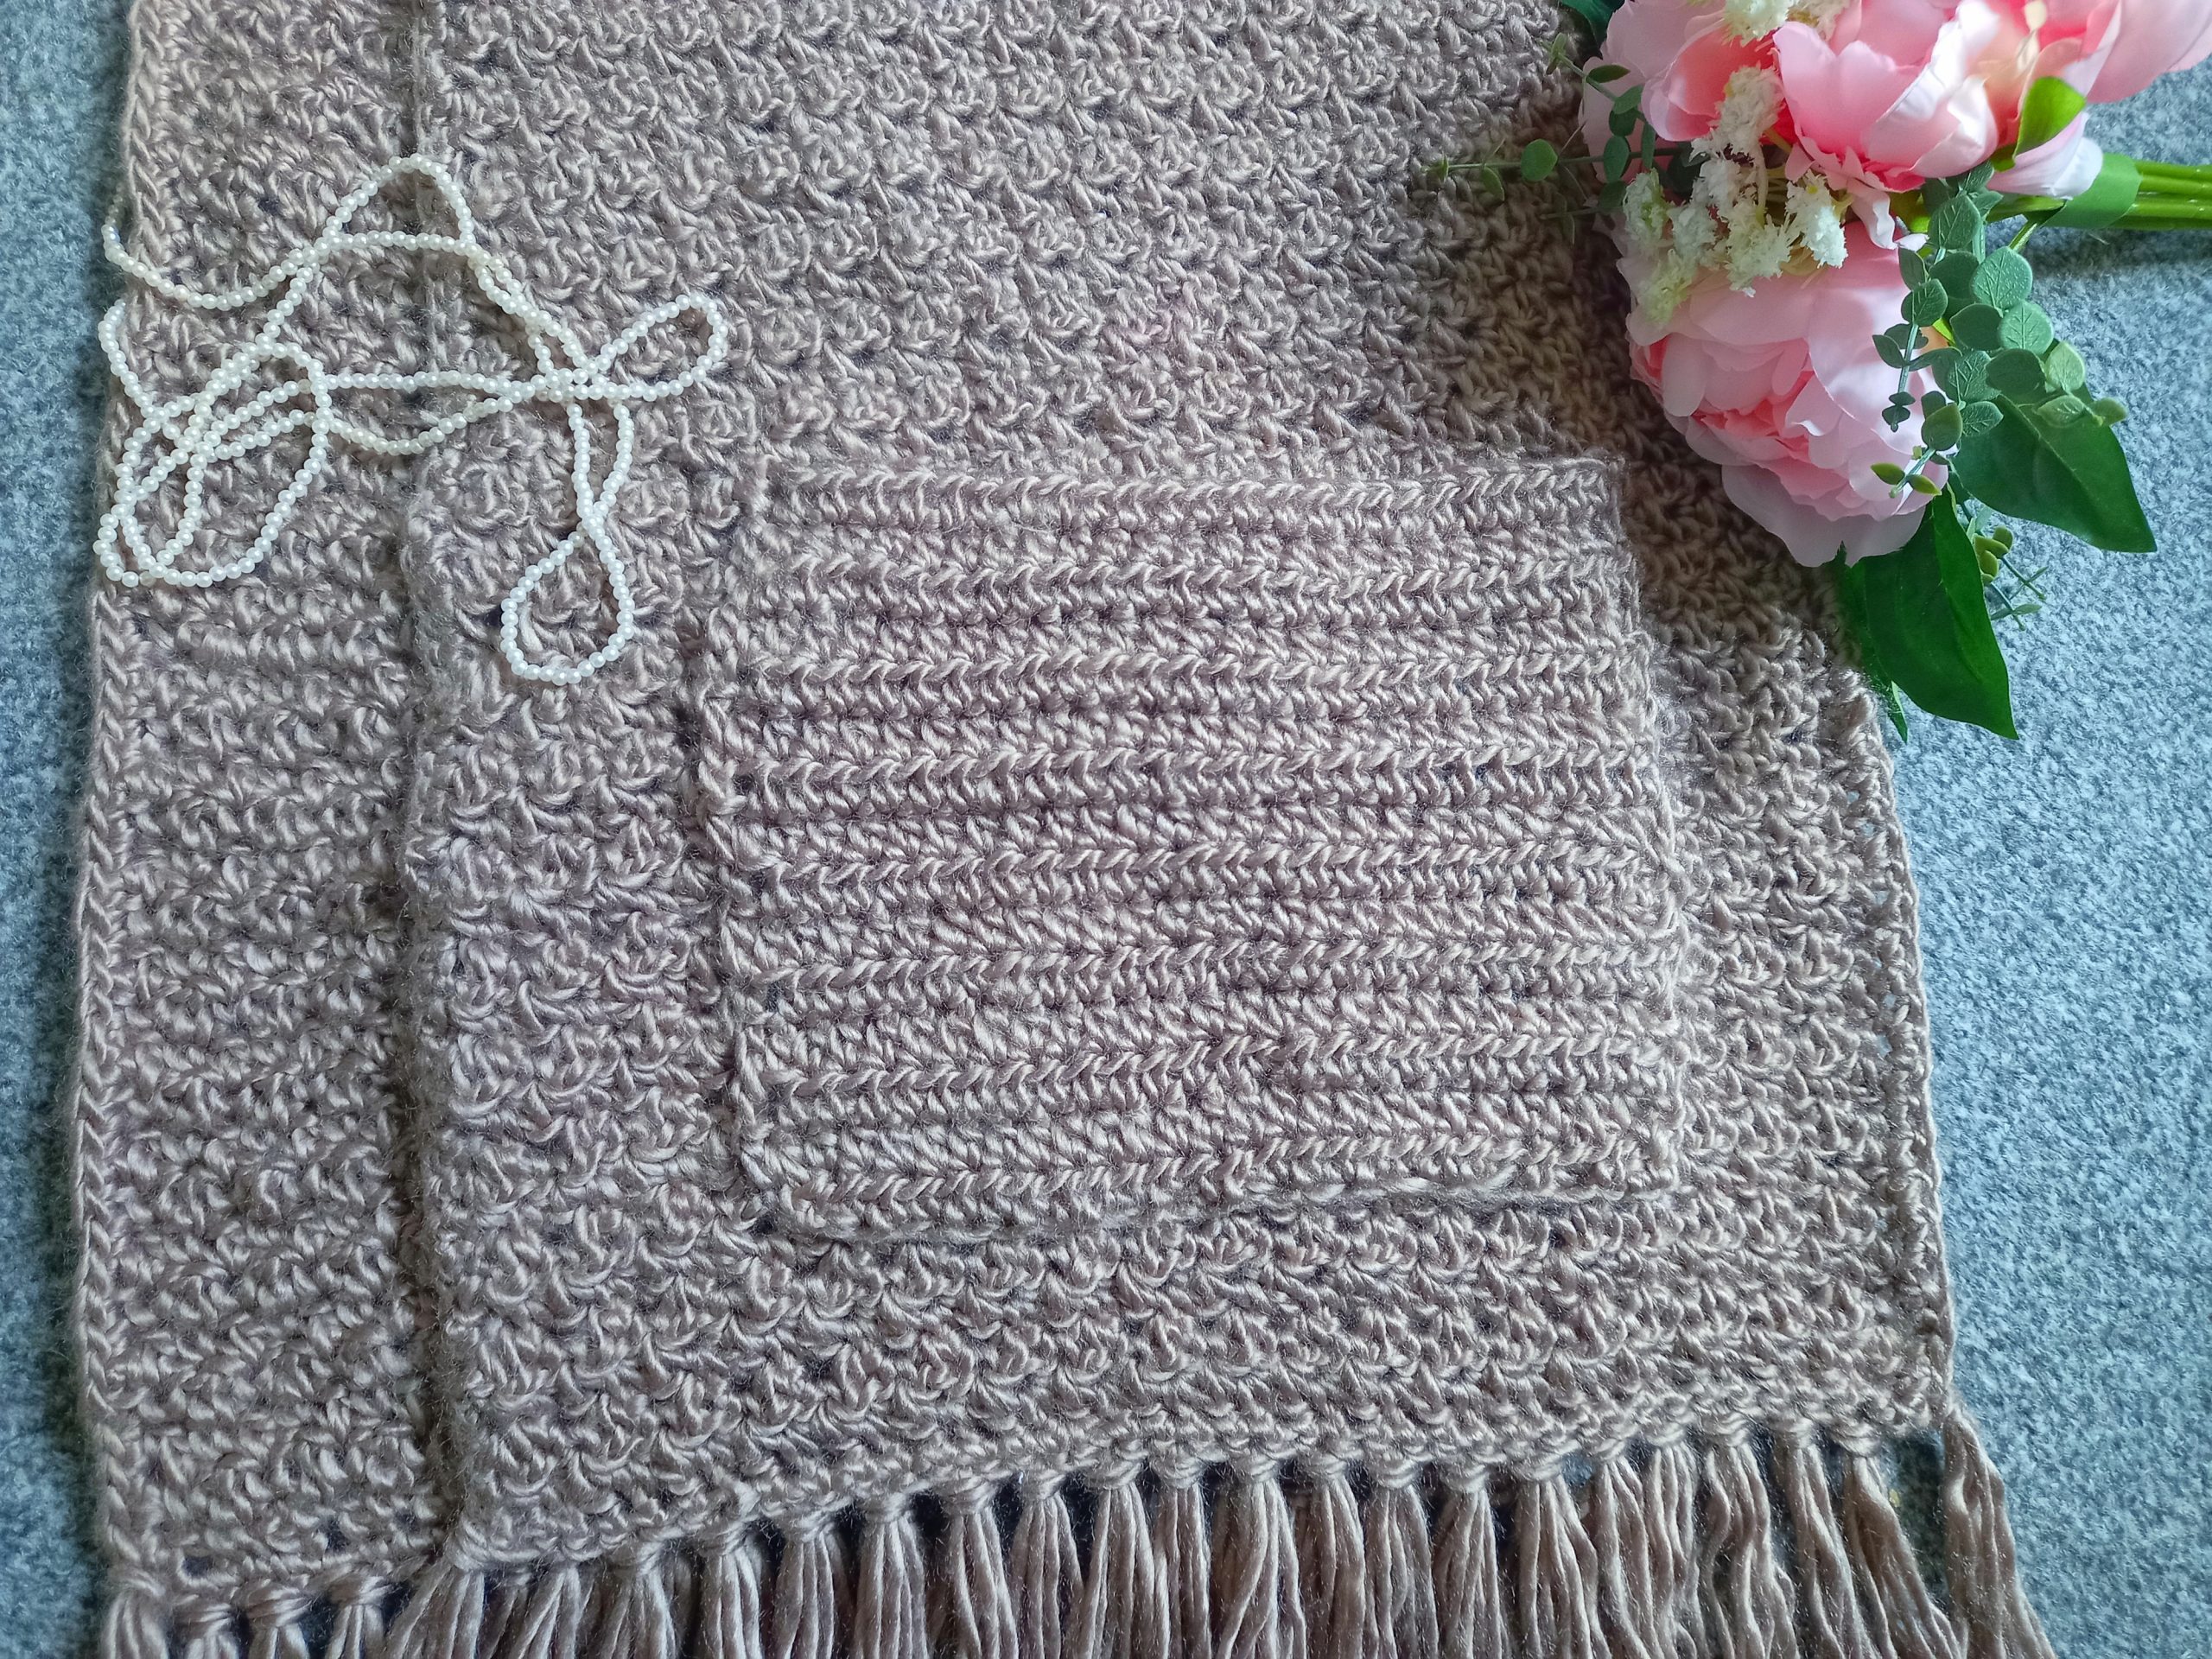
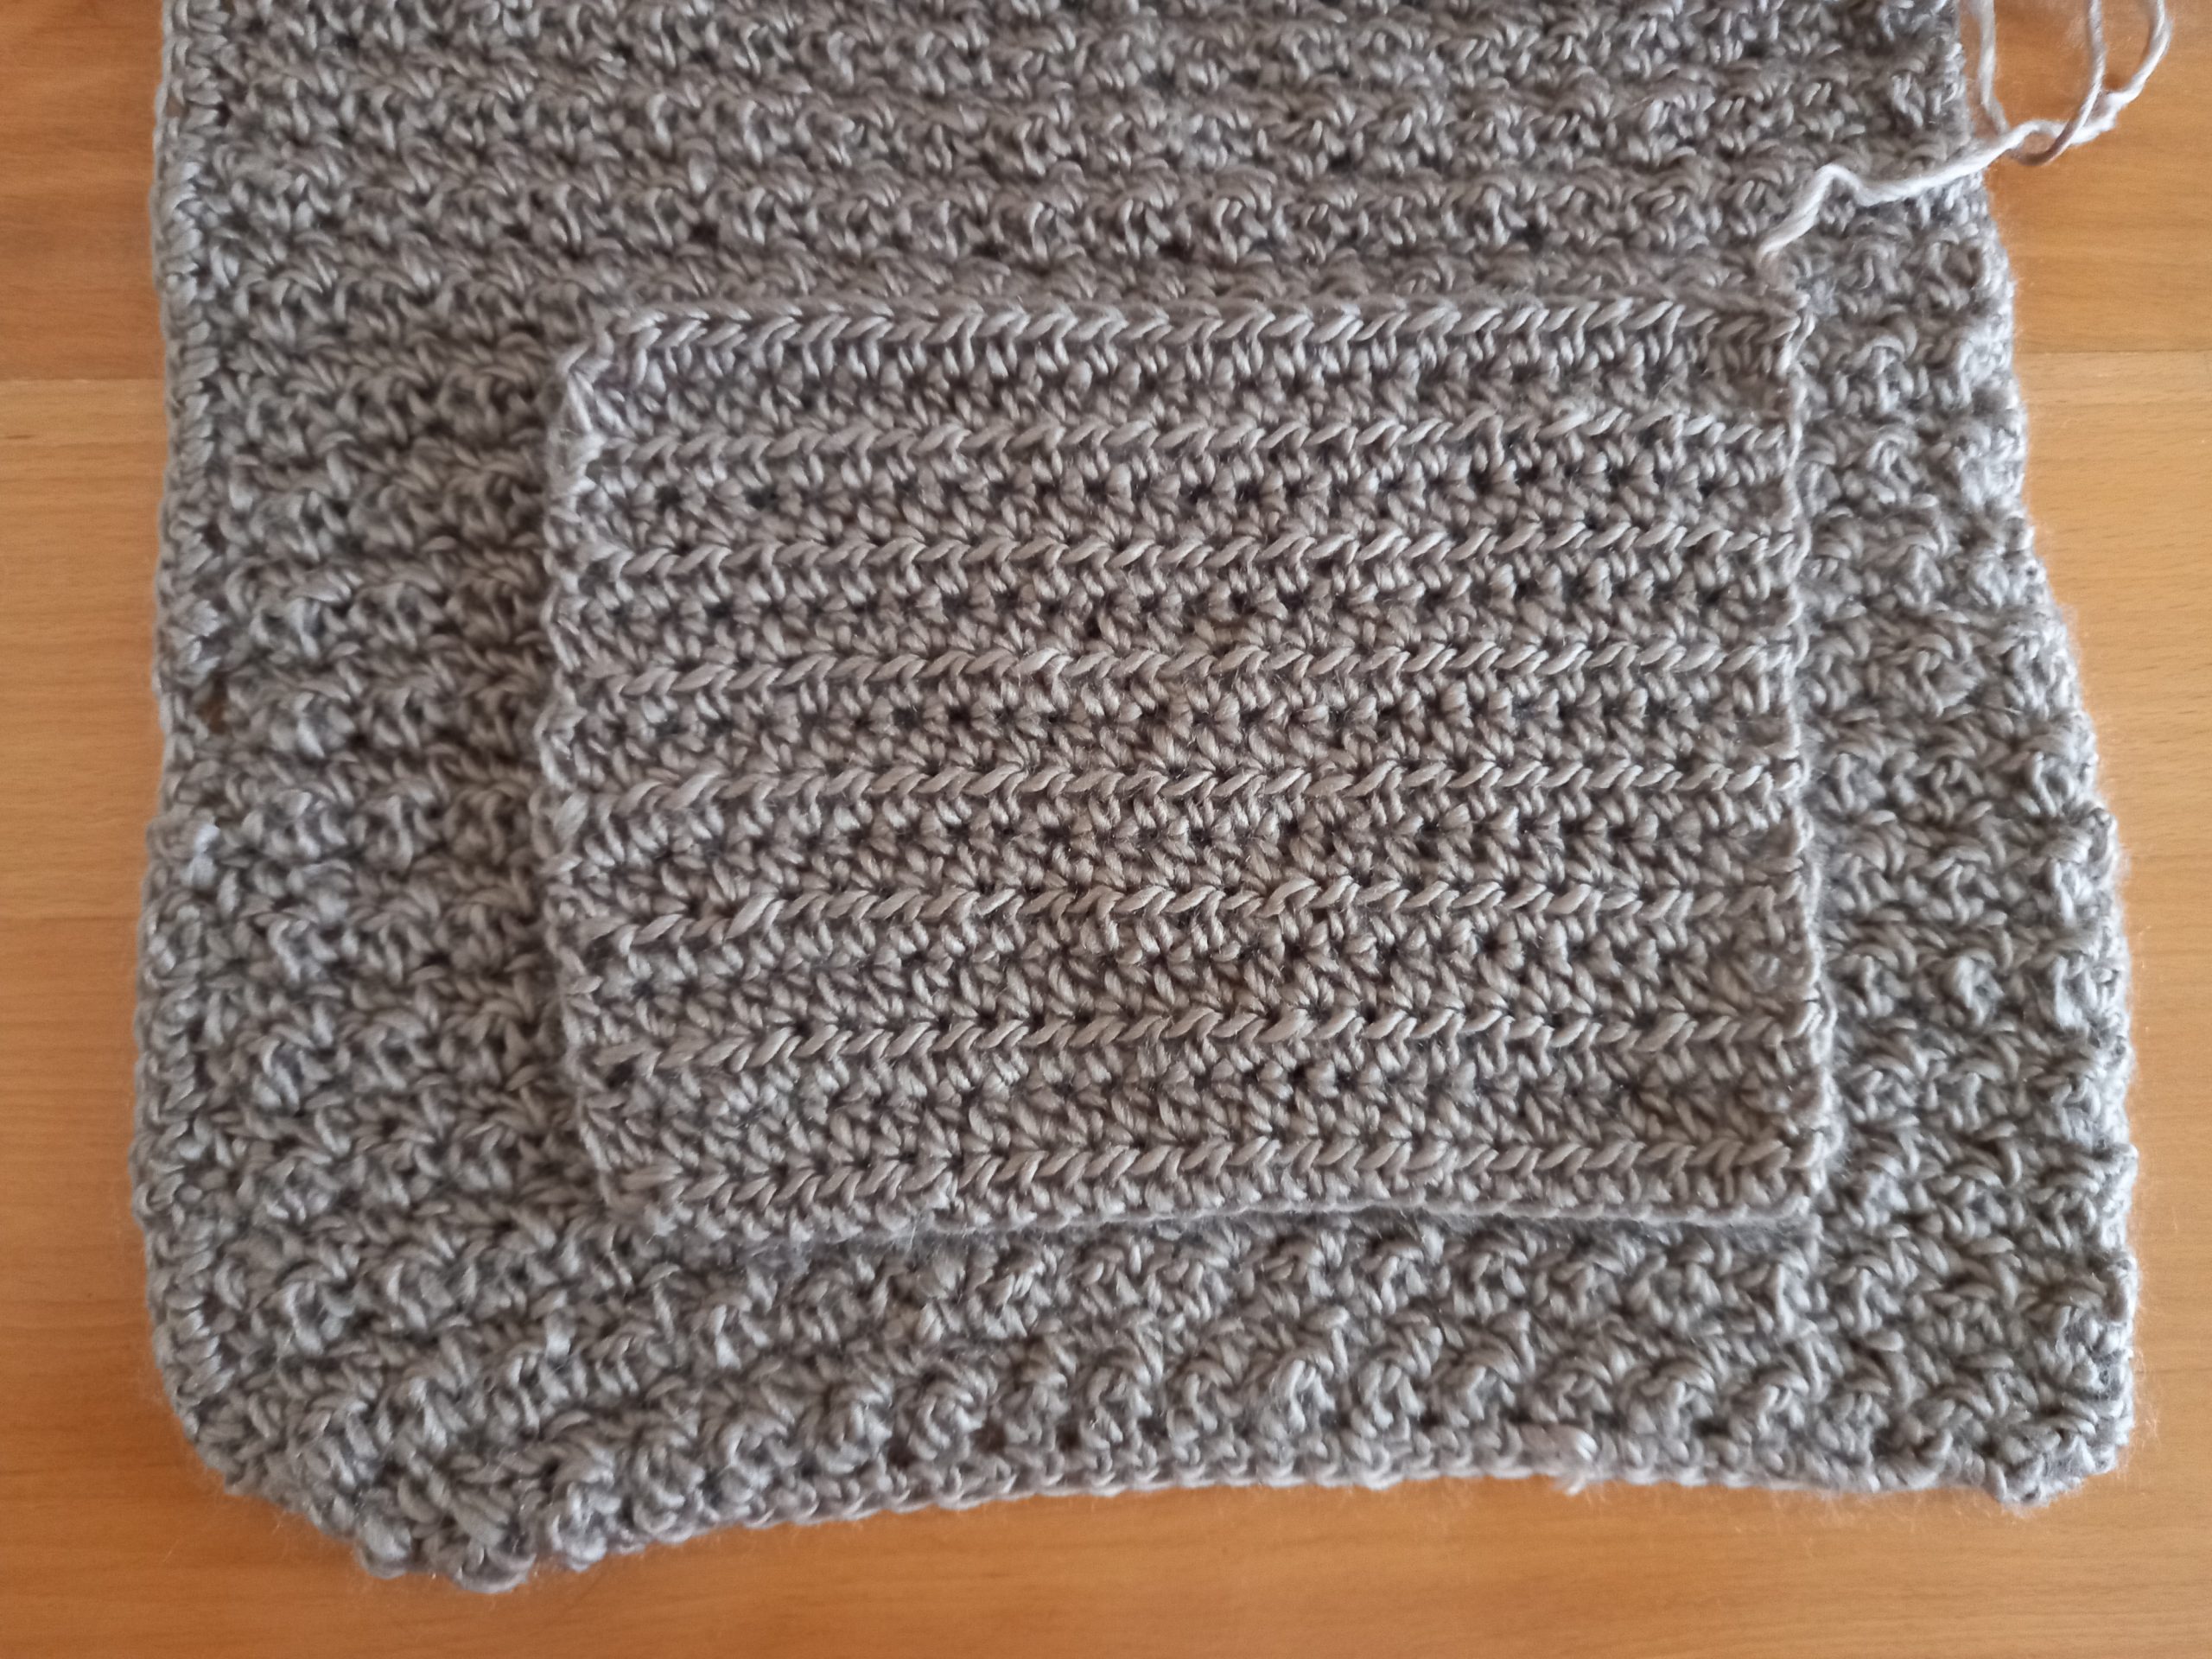
I gave this design even more texture by changing the crochet stitch for the pockets. Indeed, I do love a bit of contrast on my crochet projects. I therefore created pockets with simple Half Double Crochet repeats. To be honest I absolutely love this effect! It’s so pretty yet simple.
To finish off this project completely, I added fringes on either side of the pocket wrap. This gives The Autumn Moon Pocket Shawl even more beauty and detail. These fringes look perfect on this wrap, and it is the first time I have added fringes to any pocket shawl. Indeed, you can find all of my pocket shawl and wrap designs from last year in this blog post.
Crochet The Harvest Moon Pocket Shawl Pattern: behind the name
The name “Harvest Moon” came to me last week, when I was thinking of a name for this new design. Indeed, I wanted a name that was autumnal. A name that would put us in mind of all things cozy and autumnal: a warm crackling fire, a pumpkin spice latte, orange Autumn leaves, and of course Pocket Shawls!
Next week, on the 21st September 2021, will be the full moon called the Harvest Moon. I thought this was the perfect name for this new pocket shawl design! I hope you enjoy making it as much as I enjoyed designing it.
Let me know if you crochet this pocket shawl. I love to hear from you always, so don’t forget to connect with me.
Connecting with you
I love connecting with my Crochet Community through my blog and Social Media. You can find me on Youtube, Instagram, and Pinterest. I would love to connect with you on these platforms.
You can also join my private Facebook group to connect.
Please consider subscribing to my weekly newsletter, so that you never miss a stitch!
Thank you so much for stopping by my blog, and for all your support. I truly appreciate it.
Lots of love,
Selina.
Crochet The Harvest Moon Pocket Shawl Pattern: the pattern
You can purchase the ad free, large print, PDF pattern from my Etsy store here:
Level: Easy +
Notes: I will be writing in US terms (British terms in brackets)
Gauge
4” (=10 cm) = 12 stitches
4” (=10 cm) = 8 rows
Please note gauge is not crucial for completion of this project.
Size of finished Pocket Shawl
14.5” x 69” (35.5 cm x 175 cm)
Size of each pocket: 7.5”x10” (18 x 25.5 cm)
Materials
7 skeins of Lion Brand Landscapes in shade 122 Taupe (or any other Aran/weight 4 yarn, you will need 670 metres approximately)
A 7 mm crochet hook
Tapestry needle
Pair of scissors
One 6” x 4.5” book to create fringes
Abbreviations
ch: chain
sk: skip
SP: space
SC: Single Crochet (UK Double Crochet)
DC: Double Crochet (UK Treble Crochet)
HDC: Half Double Crochet (UK Half Treble Crochet)
Sl st: Slip stitch
EOR: End of row
Pattern starts here
Ch 42
Complete rows as follows:
1: SC into 4th ch from hook, [DC into next st, SC into next st] until eor (finish on a SC).
2: Ch 3 (=DC), SC into next st, [DC into next st, SC into the next st] until eor (finish on a SC).
3-140: repeat row 2.
Do not fasten off.
Edging
Ch 1 (=SC), place a SC evenly spaced out all along the edge of the shawl (across all 4 sides). When you reach a corner, place 2 SC together in that stitch (into each of the 4 corners).
When you reach the first ch 1, sl stitch through this stitch. Fasten off, tidy up all loose ends.
Pockets
Ch 28
Complete rows as follows:
1: HDC into 3rd ch from hook (first ch 2 counts as a HDC), and place a HDC into each st until eor.
2: ch 2 (=HDC), turn your work, HDC into next stitch and every stitch until eor.
3-15: repeat row 2
Fasten off, leaving a long tail for sewing your pocket onto your shawl.
Sew your pockets onto your shawl
Place your 1st pocket onto the right side of your shawl, making sure you are placing it as follows. Measure 2” (=5 cm) from the bottom edge (this is about 4 rows for me), and place your pocket there, making sure you place it at the center. With long tail of yarn, sew in your pocket onto project.
Repeat this onto the other side of shawl.
Fasten off, tidy up all loose ends.
Create Fringes
We will be placing fringes on each side of the pocket wrap (just below the pockets).
For this you will need yarn, your hook, scissors, and your book.
I will be placing 3 strands of fringes into every second stitch on both the bottom edges of the shawl as explained below.
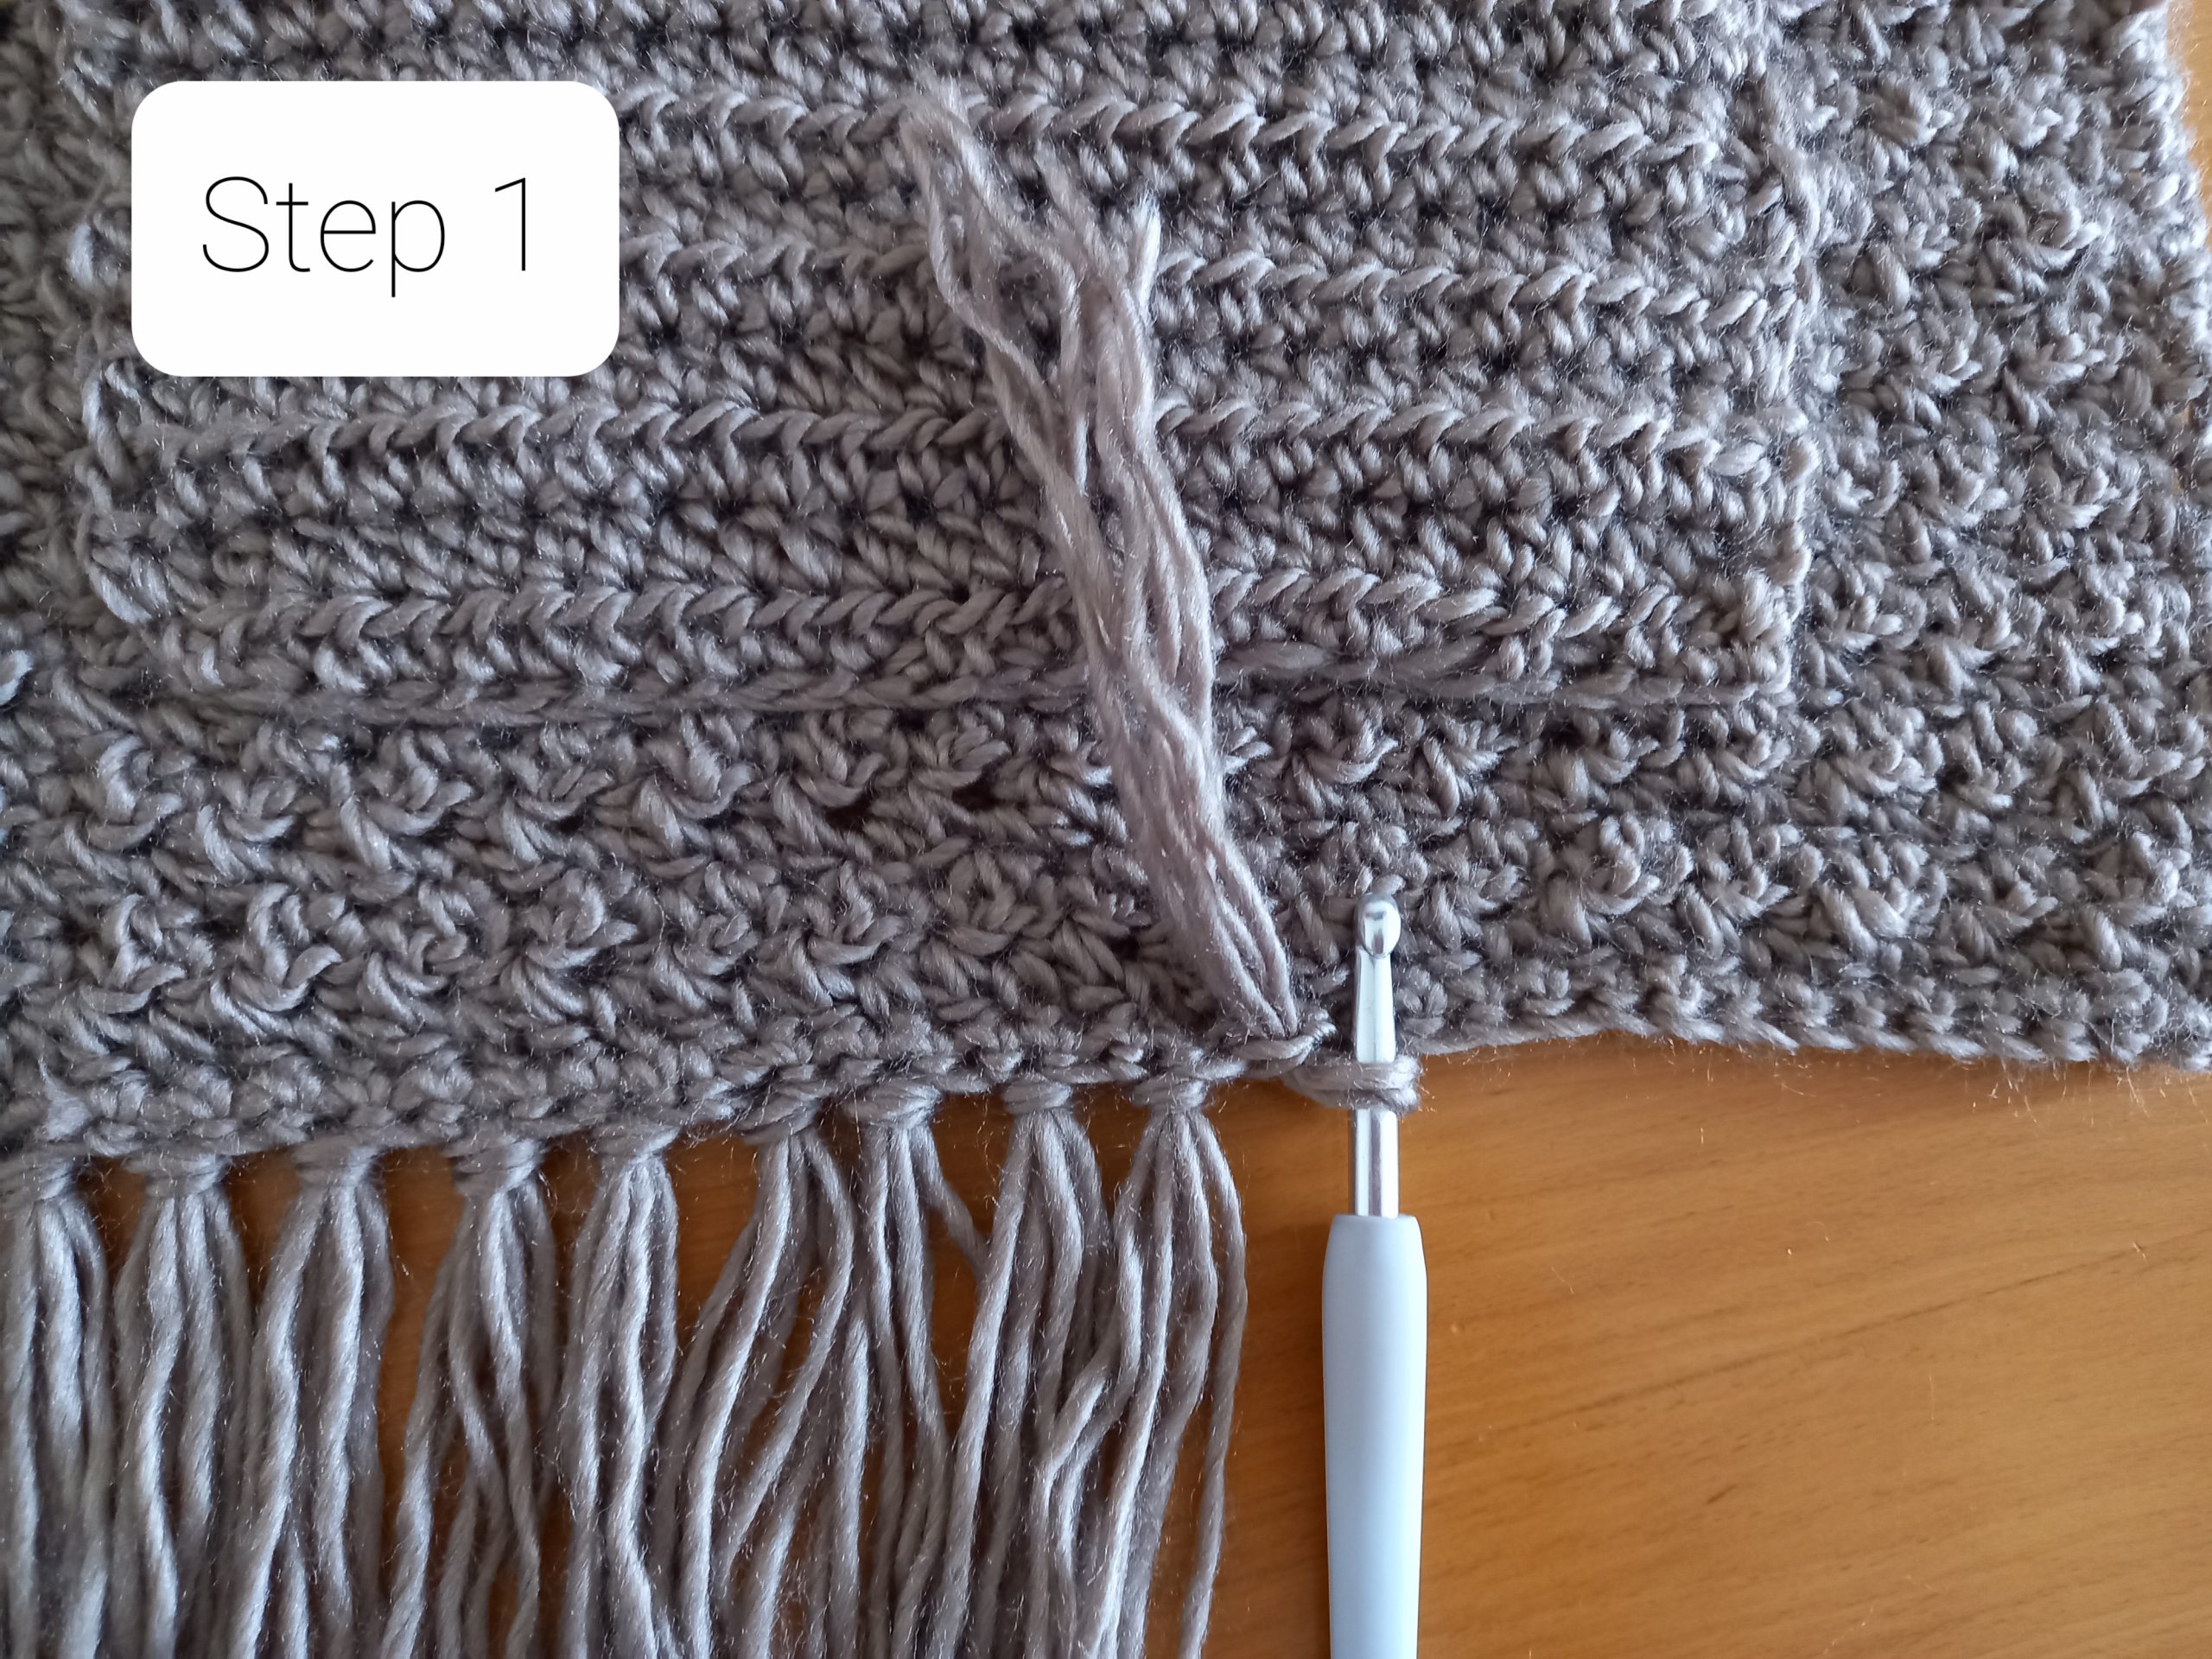
To create your fringe, you will be wrapping your yarn around your book (the vertical side of your book) 3 times.
Once you have done this, you will slide your yarn off the book and snip off your yarn on the bottom side of the strand with your scissors, creating 3 individual strands which are folded in half.
Delicately take your yarn, create an even looking fringe, keeping the strands folded (ie this will make 6 strands).
You will be placing your first fringe onto the bottom corner stitch of your wrap, before skipping one stitch, and placing the next strand into the next stitch.
To place your strand, you will need to use your crochet hook. With fringe strand evenly folded in half in one hand, place your crochet hook directly inside the stitch with the other. With your hook, grab the folded side of your strand, pulling it completely through the stitch. Once 2 cm are in, take your crochet hook and pull the bottom side of the strands though the fringe loop, the same way you would when creating a slip knot. This way you are fastening the fringe onto the project.
Gently pull the strands through all the way, pull on these to tighten the fringe, making sure the knot part on the edge of the wrap is nice and tight.
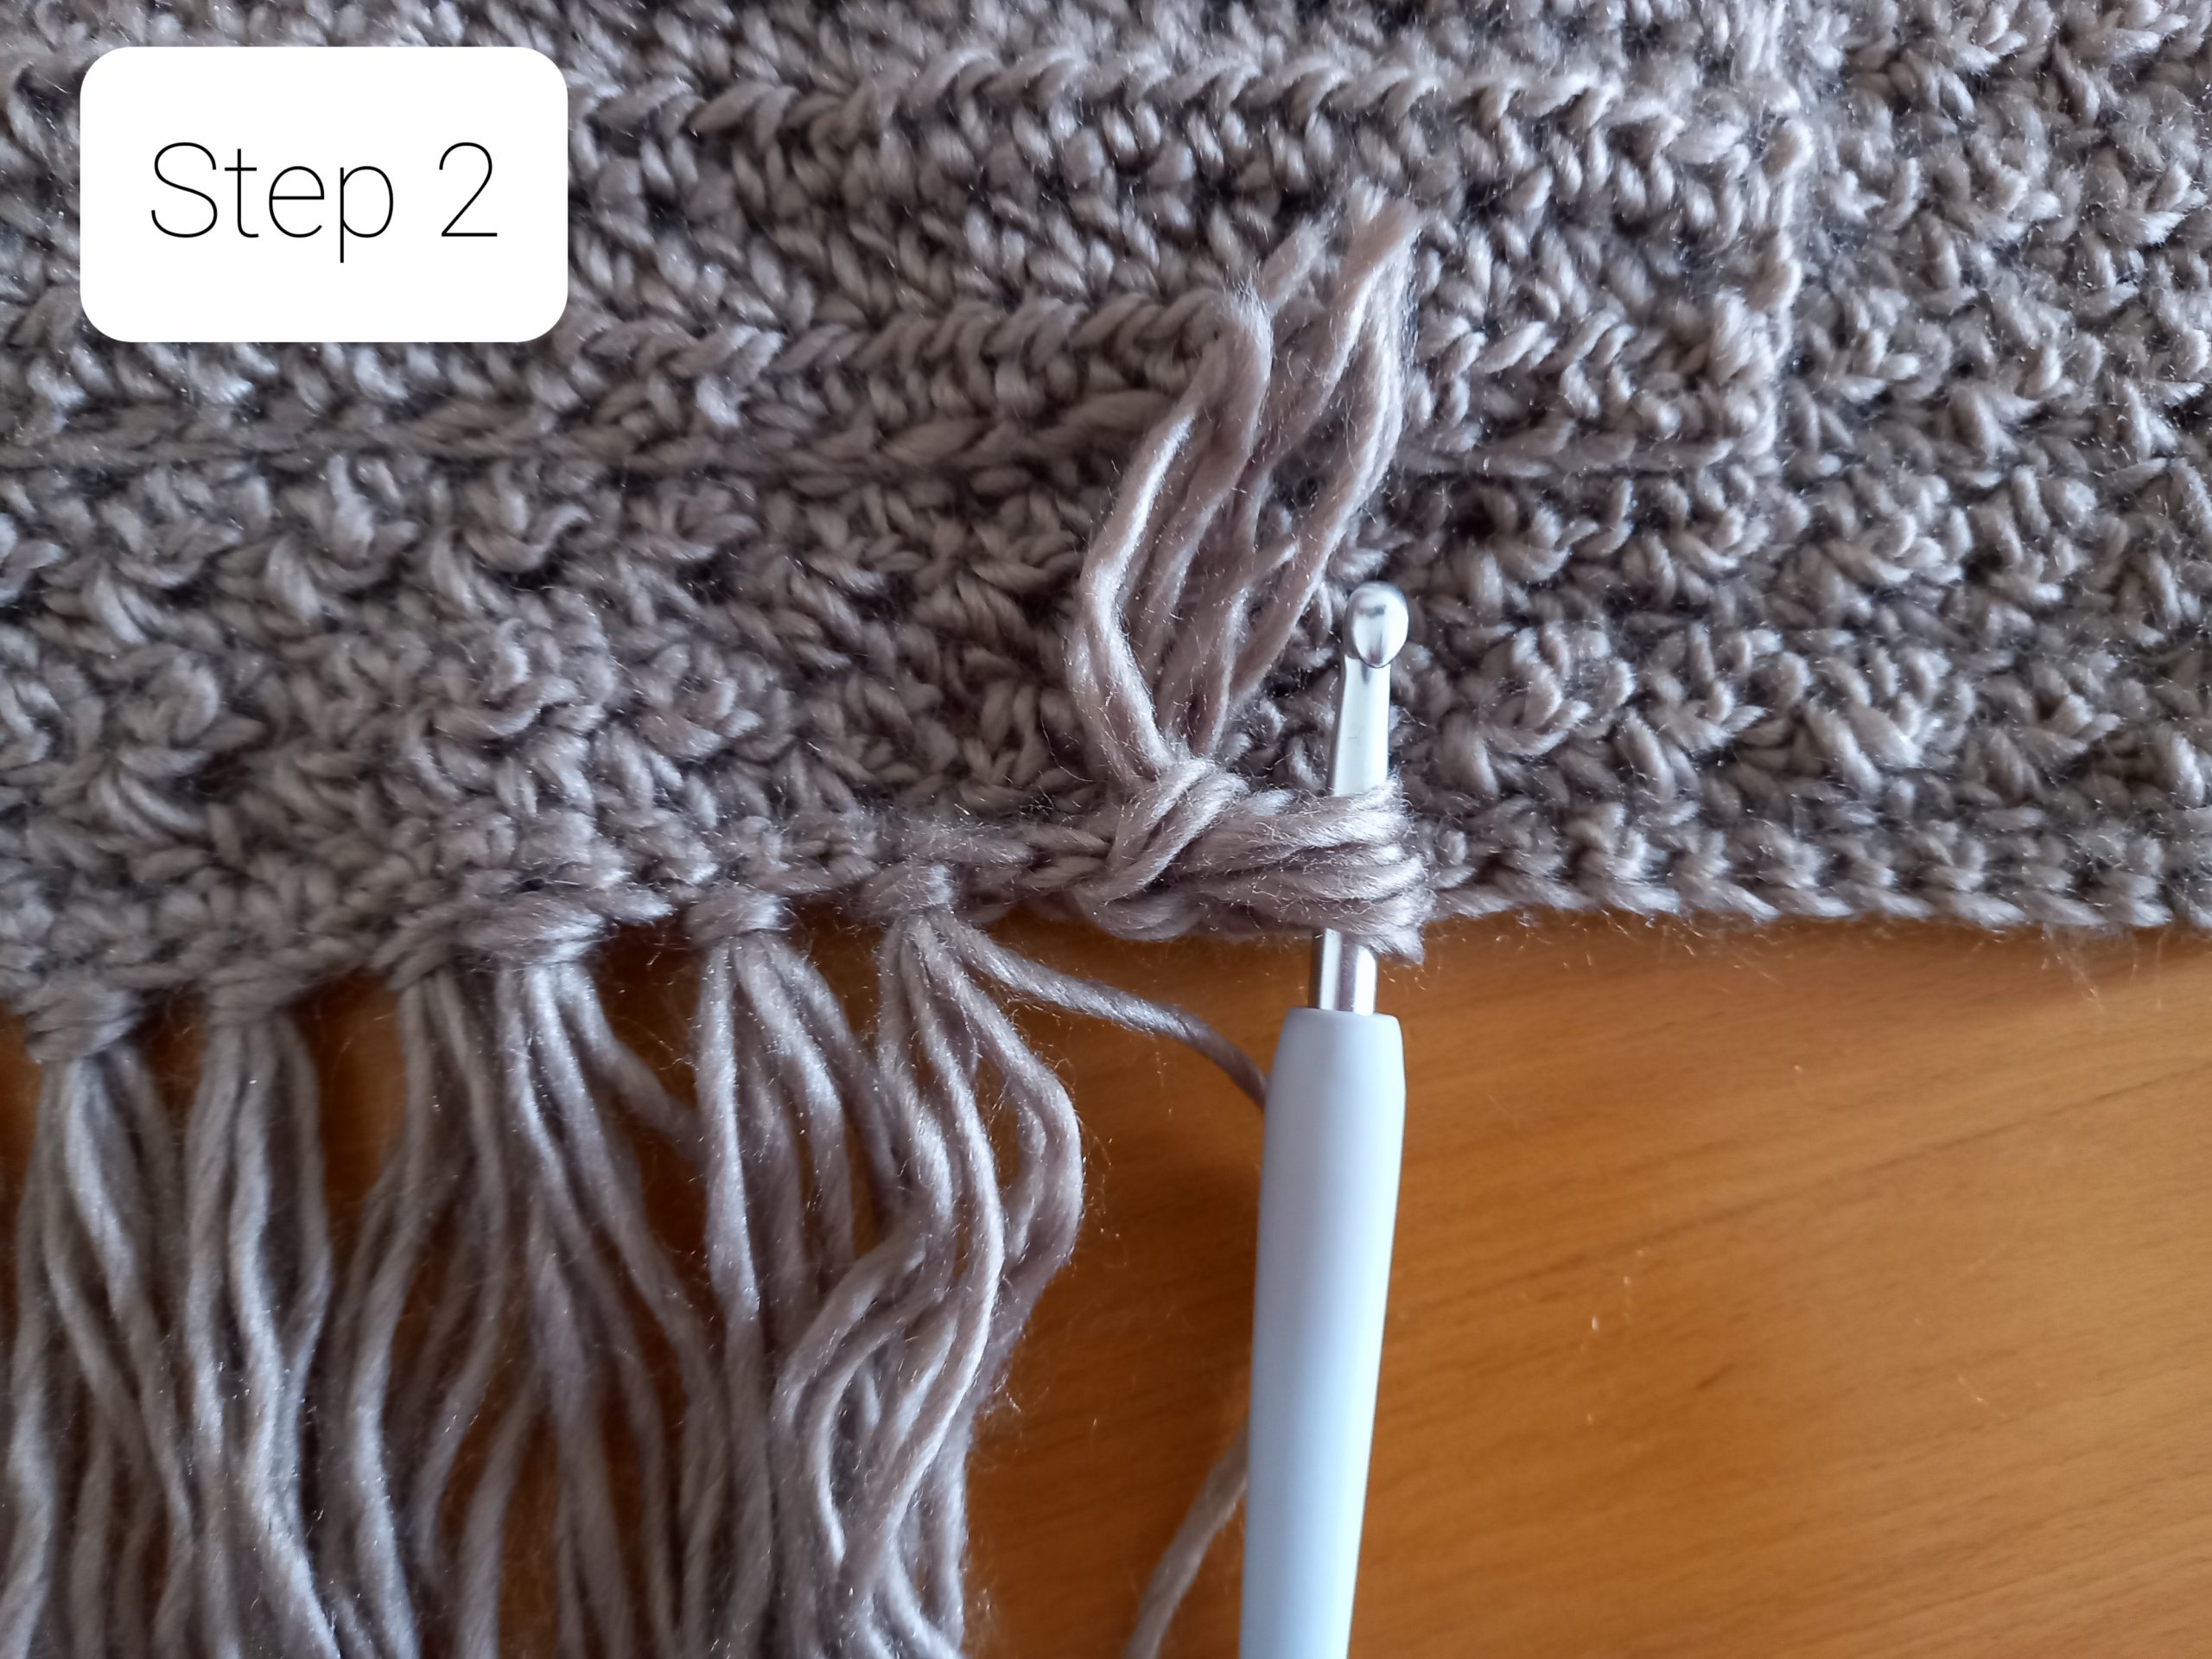
Proceed to do this with each fringe until you reach the end of the row, placing your last fringe into the side corner of the wrap.


2 Comments
Sherri
Do you have a problem with the Fringe coming off in the wash?
Selina Veronique
Hello, no I am not worried about that, if secured properly the fringes should not come off in the wash. I hope this helps!