Crochet The Rainbow Shawl
Beginner half granny shawl tutorial
Hello everyone! Today I am bringing to you a tutorial on how to crochet The Rainbow Shawl.
This week I wanted to share my newest pattern, The Rainbow shawl, which is a really beautiful project. It’s perfect for the beginner and expert crocheter alike.
I have filmed a YouTube tutorial to go with this pattern: Crochet The Rainbow Shawl video tutorial
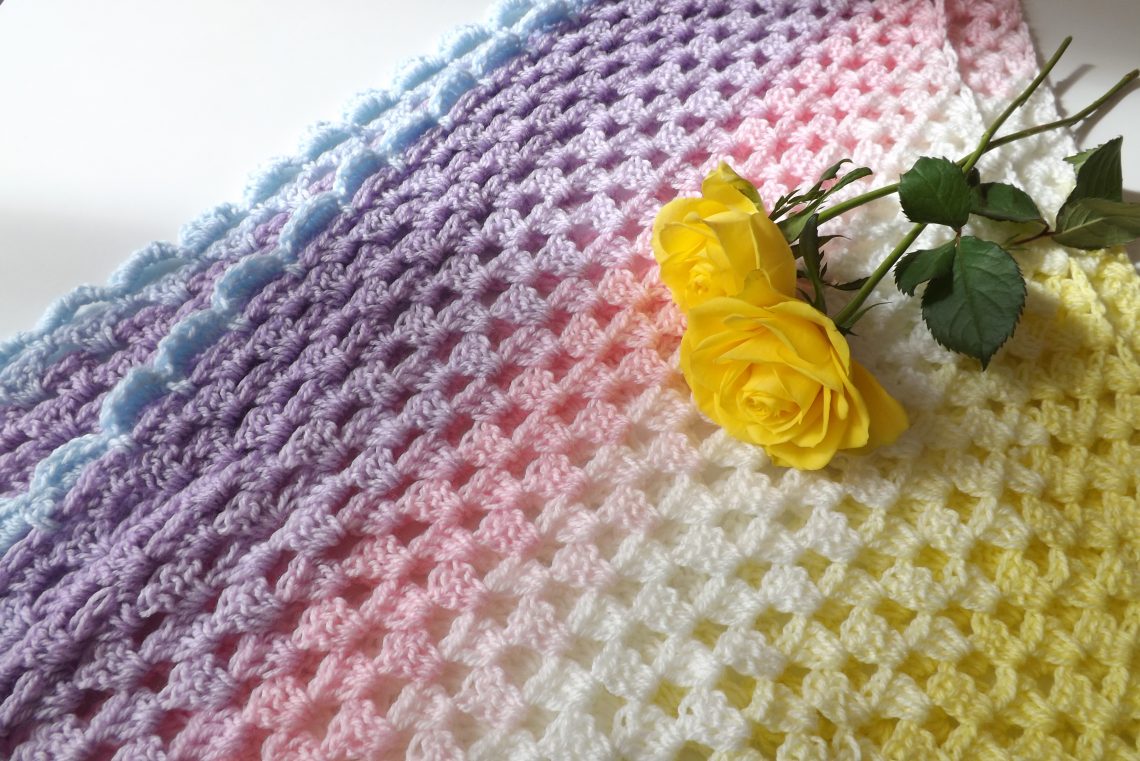
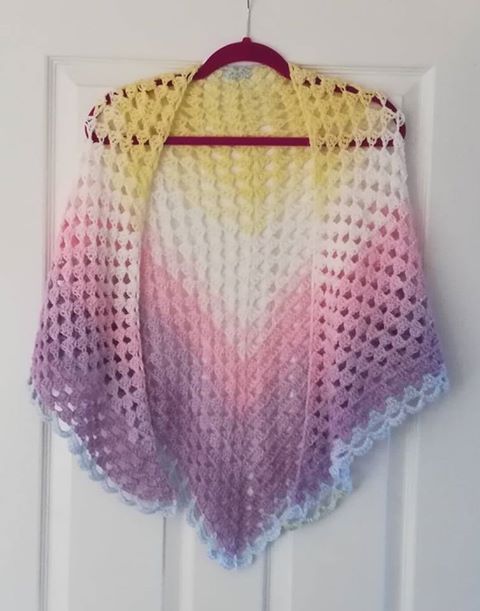
The Crochet Rainbow Shawl is based on the half granny pattern
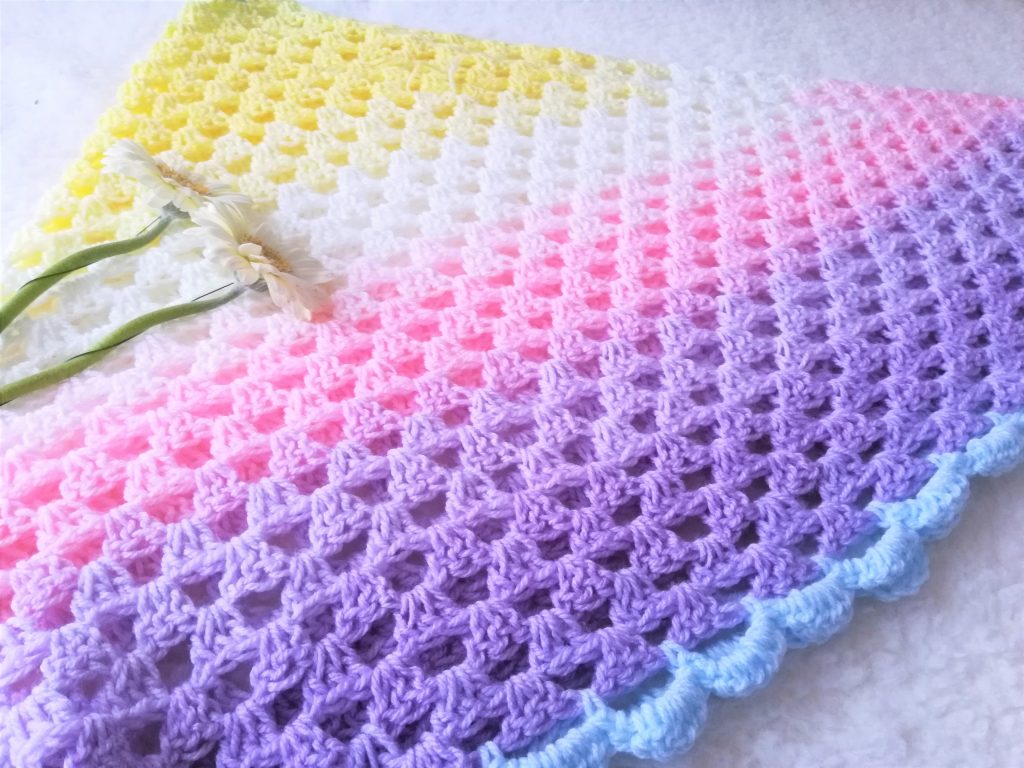
It is based on the half granny pattern, and is very easy to follow. So if you are looking for a relaxing, no stress kind of project, this one is just for you. It also makes for a wonderful item, which can be crocheted in any type of yarn that you prefer. I used Sirdar Pattercake for this design, and the result turned out very airy and delicate looking, which I love! It was a real joy to crochet this yarn. It so soft and good quality, and I often find myself going back to it for more projects.
The Pattercakes are similar to the Mandala Baby cake yarns
I love the colours that Pattercakes have to offer, and I think Lion Brand Mandala Baby yarns have very similar colour schemes. This could be a great option if you live in the US. I know I really enjoy crocheting with this yarn as it so fine and soft, and really glides onto the yarn very easily.
The Rainbow Shawl: a perfect project for beginners
If you are new to crochet, this could be a great pattern to get started. It uses the Granny Triangle stitch as it’s base, which is a very easy and therapeutic pattern that can picked up fairly quickly. After the large triangular shape is completed, the shell stitch border is added. This really completes this design in a feminine way, adding dimension to the simple Granny pattern. I know I love these types of projects when I want to crochet something, but not overthink or sweat it!
The pattern:
So without further ado, I will post the pattern to this lovely shawl. Please let me know in the comments section if you have any questions, I look forward to hearing what you thought of this tutorial.
I hope you enjoy this pattern as much as I enjoyed making it, and please do let me know if you made this either for yourself, or a loved one. These shawls work up quickly and are very simple to crochet, so make great last minute gifts for friends and family.
Take care of yourself, and until next week, au revoir my lovely crochet friends,
Xoxo Selina.
The free PDF pattern can be downloaded here: Rainbow shawl
The pattern for The Rainbow Shawl
Level: Easy
Notes: I will be using US terms (British terms in brackets)
You will need:
1 cake of Sirdar Pattercake in shade 754
4 mm crochet hook
Pair of scissors
Tapestry needle
Abbreviations:
Sl st : slip stitch
SC : Single crochet (UK double)
DC : Double crochet (UK Treble)
Ch : chain
Begin The Rainbow Shawl pattern here:
To begin, make a slip knot.
Chain 4 ; slip stitch to 1st chain to form a circle.
Complete rows as follows:
1 : 4 ch (DC + ch space) ; 3 DC in the circle ; 2 ch ; 3 DC in the circle ; 1 ch ; 1DC
2 : Turn your work ; 4 ch (1 DC + ch space) ; in next chain space from previous row, place 3 DC ; 1 ch ; for next space (which is also the center), 3 DC, 2 ch, 3 DC, 1 ch; in next ch space, 3 DC, 1 ch, 1 DC.
3 : Turn your work, 4 ch (1 DC +ch space), 3 DC in chain space, 1 ch; for next space, 3 DC, 1 ch; in next space (center) 3 DC, 2 ch, 3 DC, 1 ch; for next ch space, 3 DC, 1 ch; in next chain space, 3 DC, 1 ch, 1 DC.
4 to end : repeat row 2, repeating the augmentations each time, until piece measures the size you are happy with.
The Scallop Edging:
1 : single crochet in same space you attached yarn, chain 5, SC in next space, ch 5, SC in next space… Repeat pattern all along the edge of the shawl.
2 : Turn your work, SC, 4 DC, SC on the chain from previous row ; repeat pattern on all the chains from previous row to create the scallop edge ; fasten off.
And you’re done !
Thank you for visiting this website, I hope you enjoyed this tutorial.


2 Comments
Bonnie Cooper
Love the RInbow Shawl. Thank you very much.
Selina Veronique
Thank you so much!