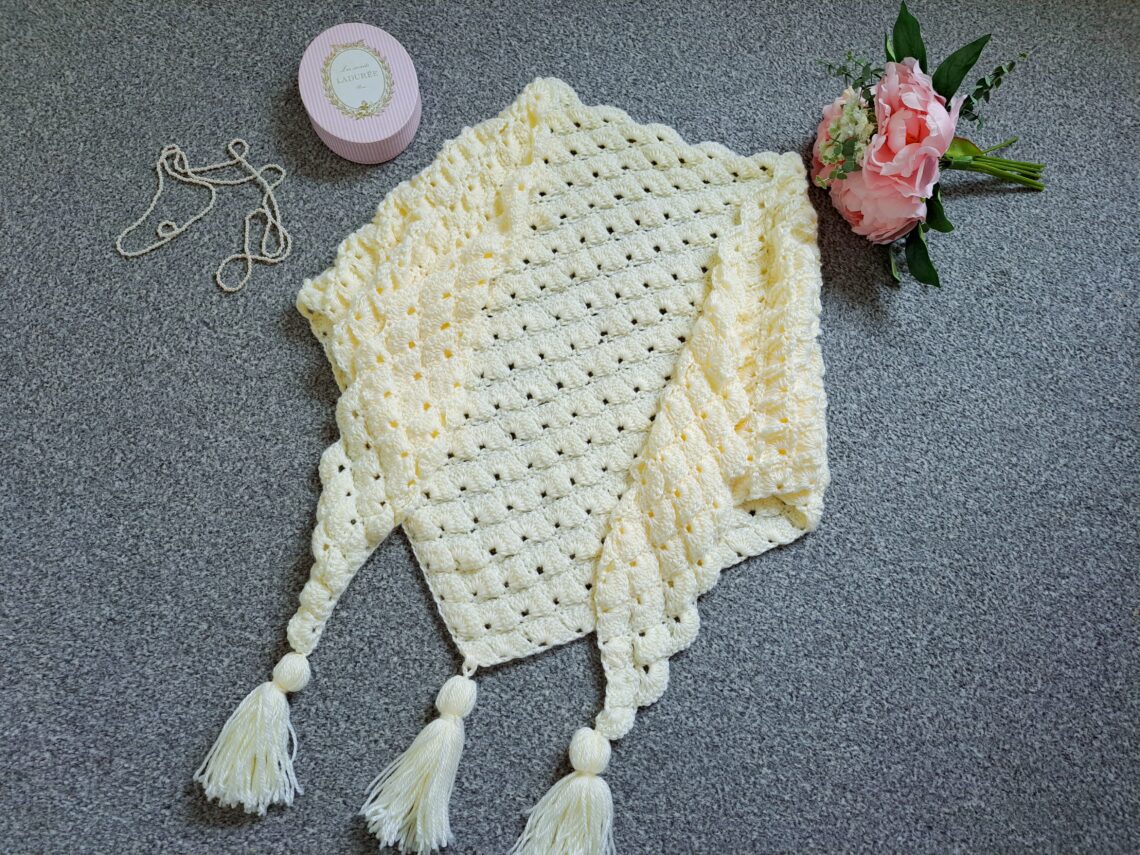
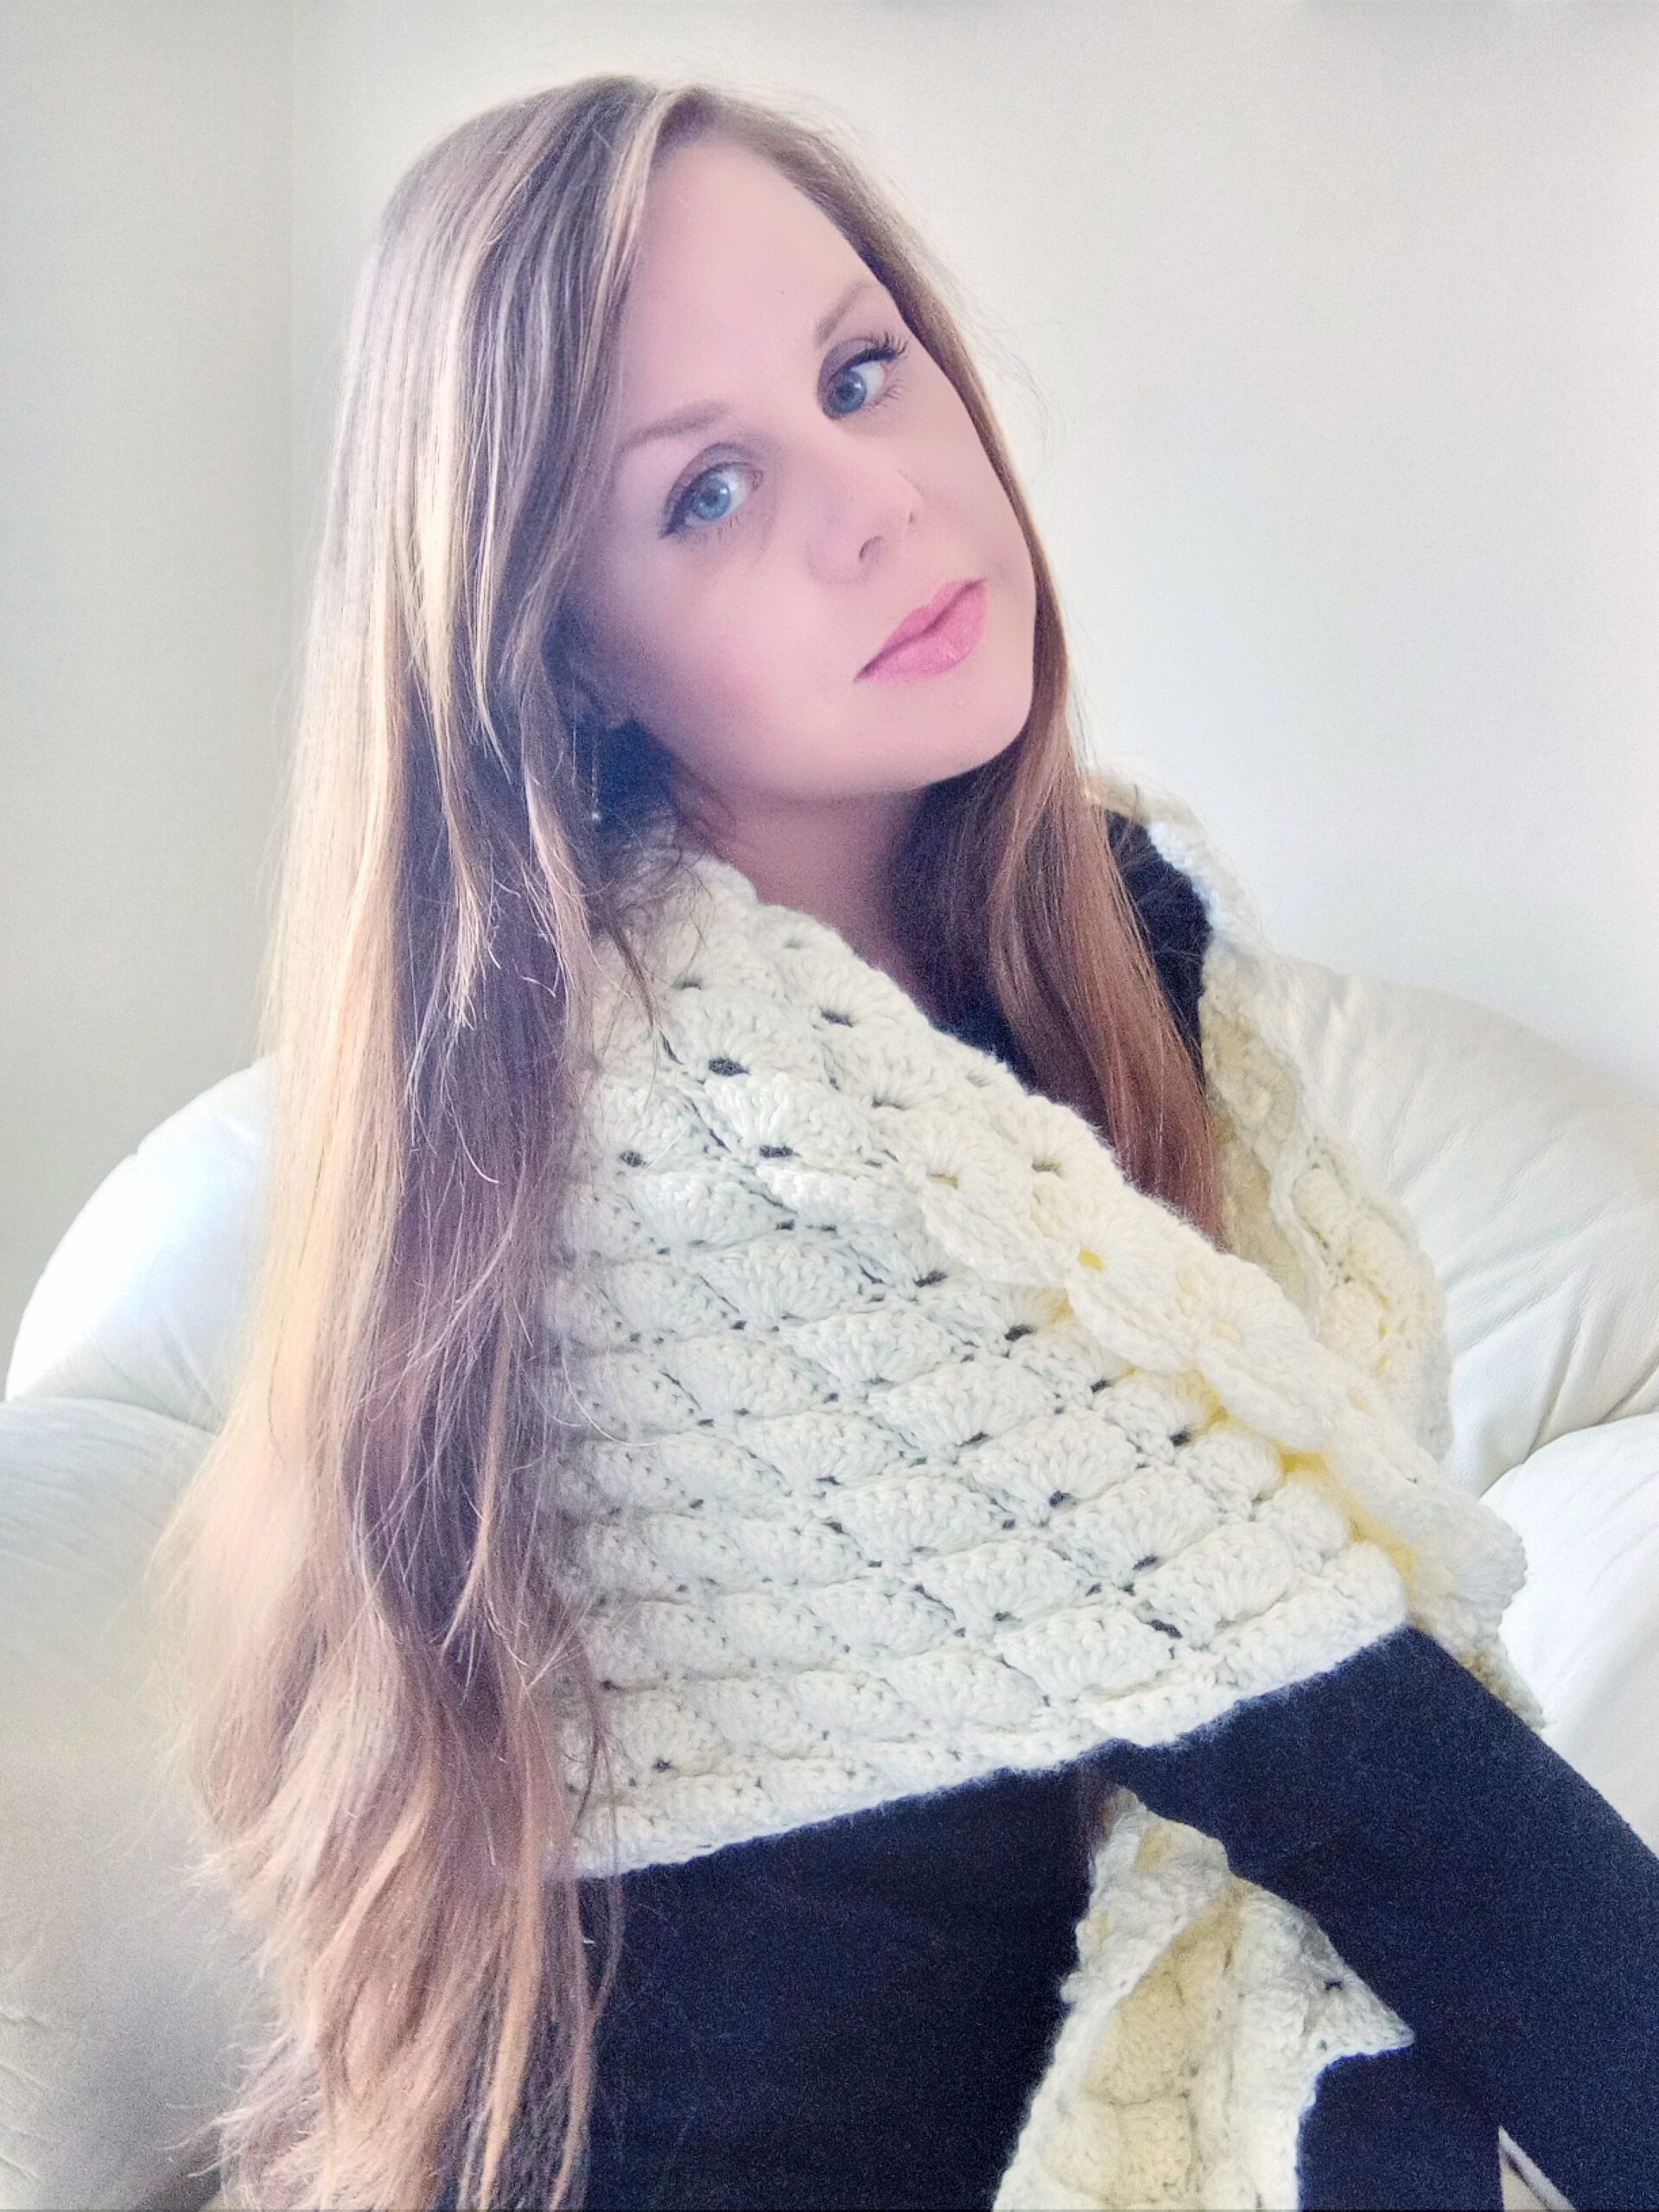
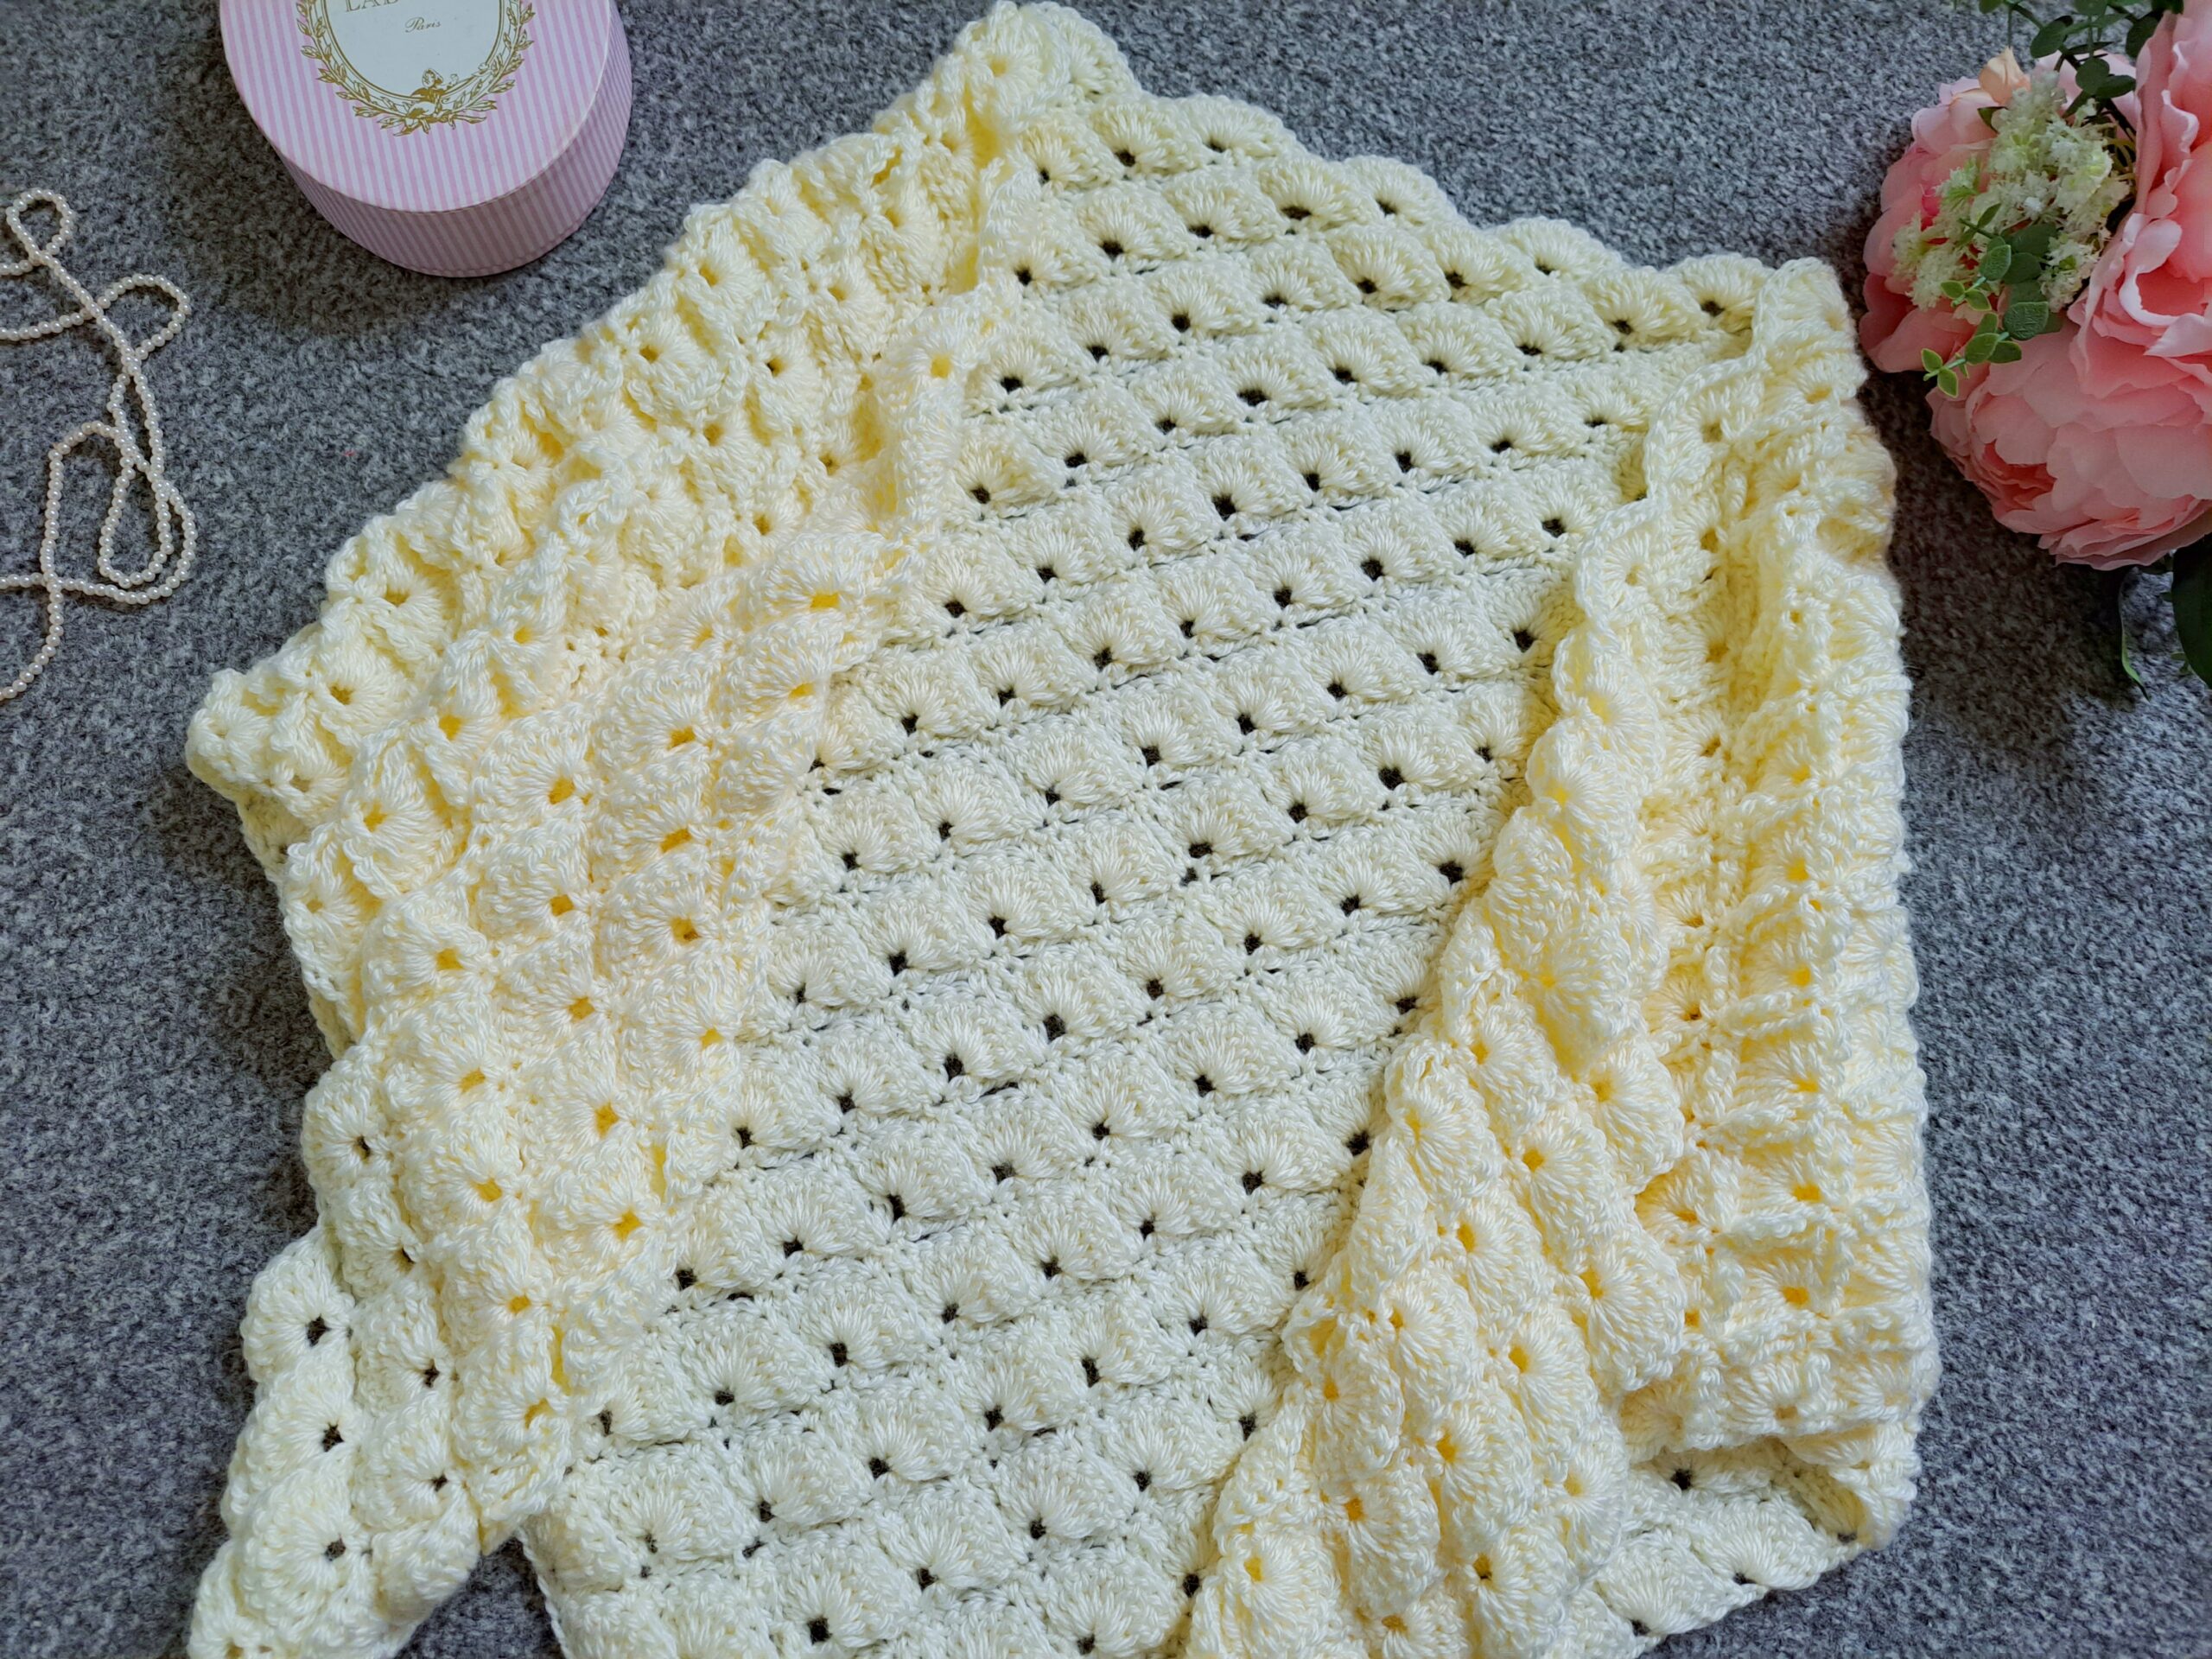
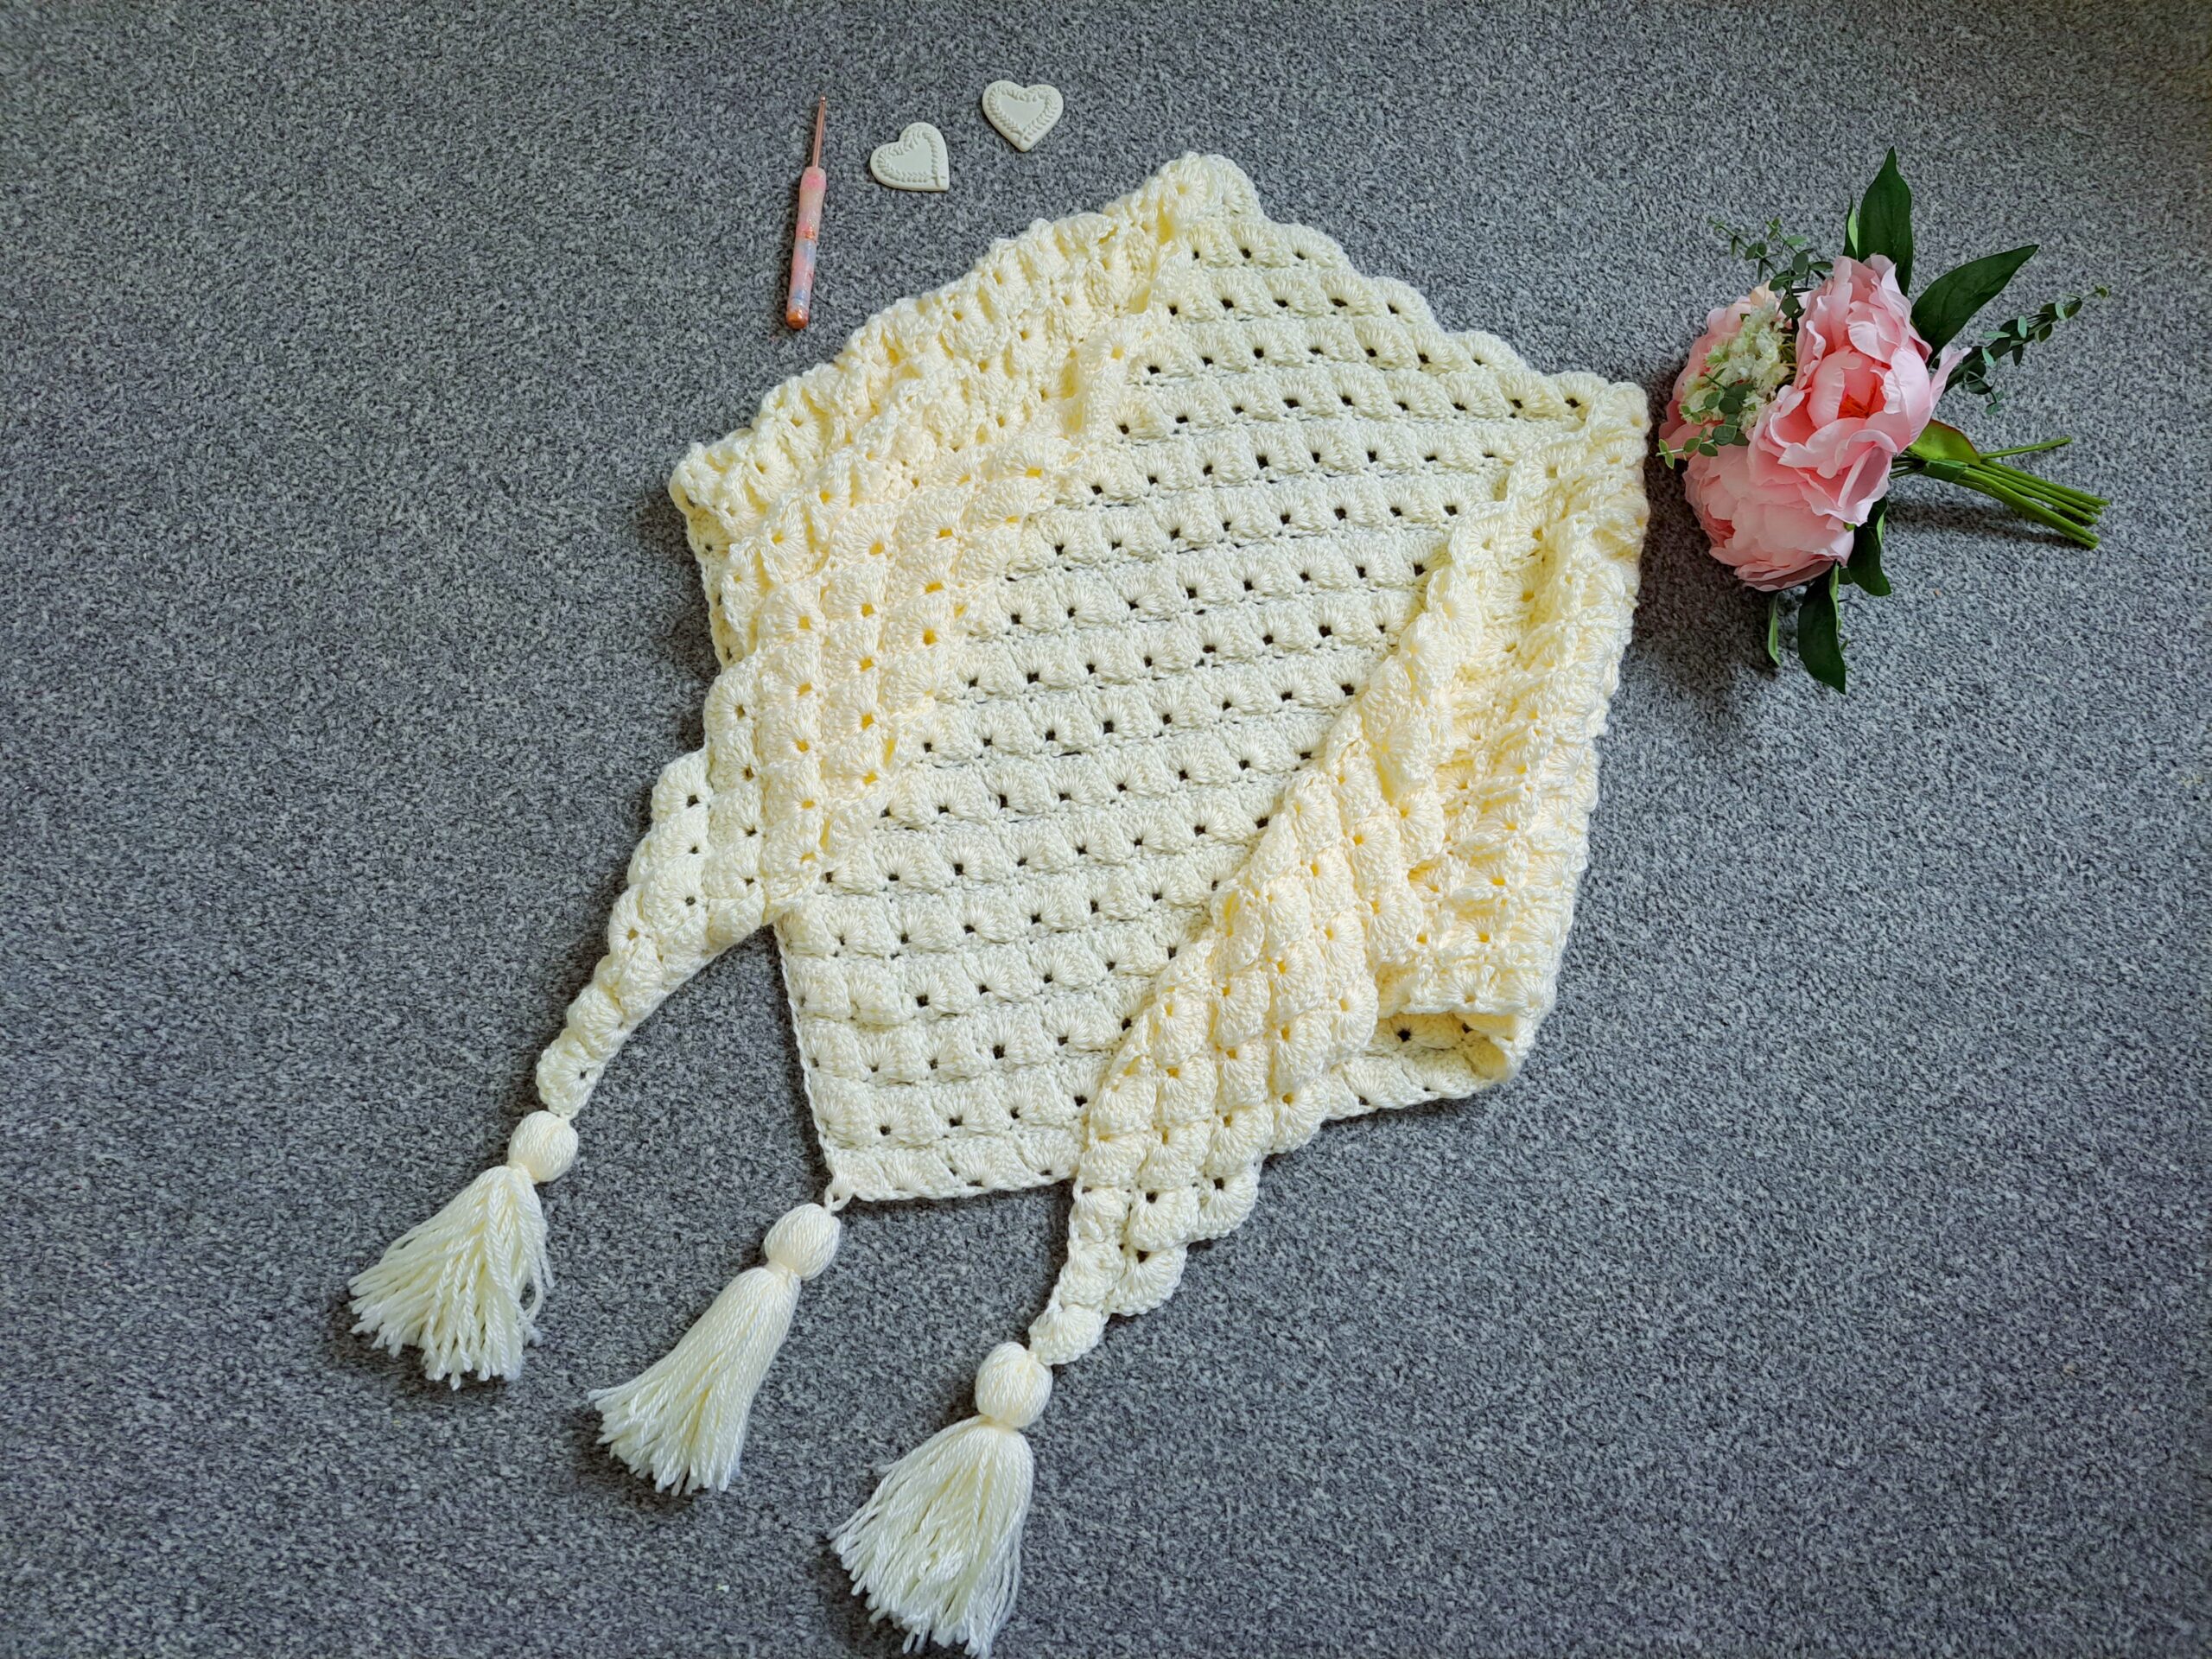
Crochet The Simple Purity Vintage Shawl Free Pattern
Crochet The Simple Purity Vintage Shawl Free Pattern
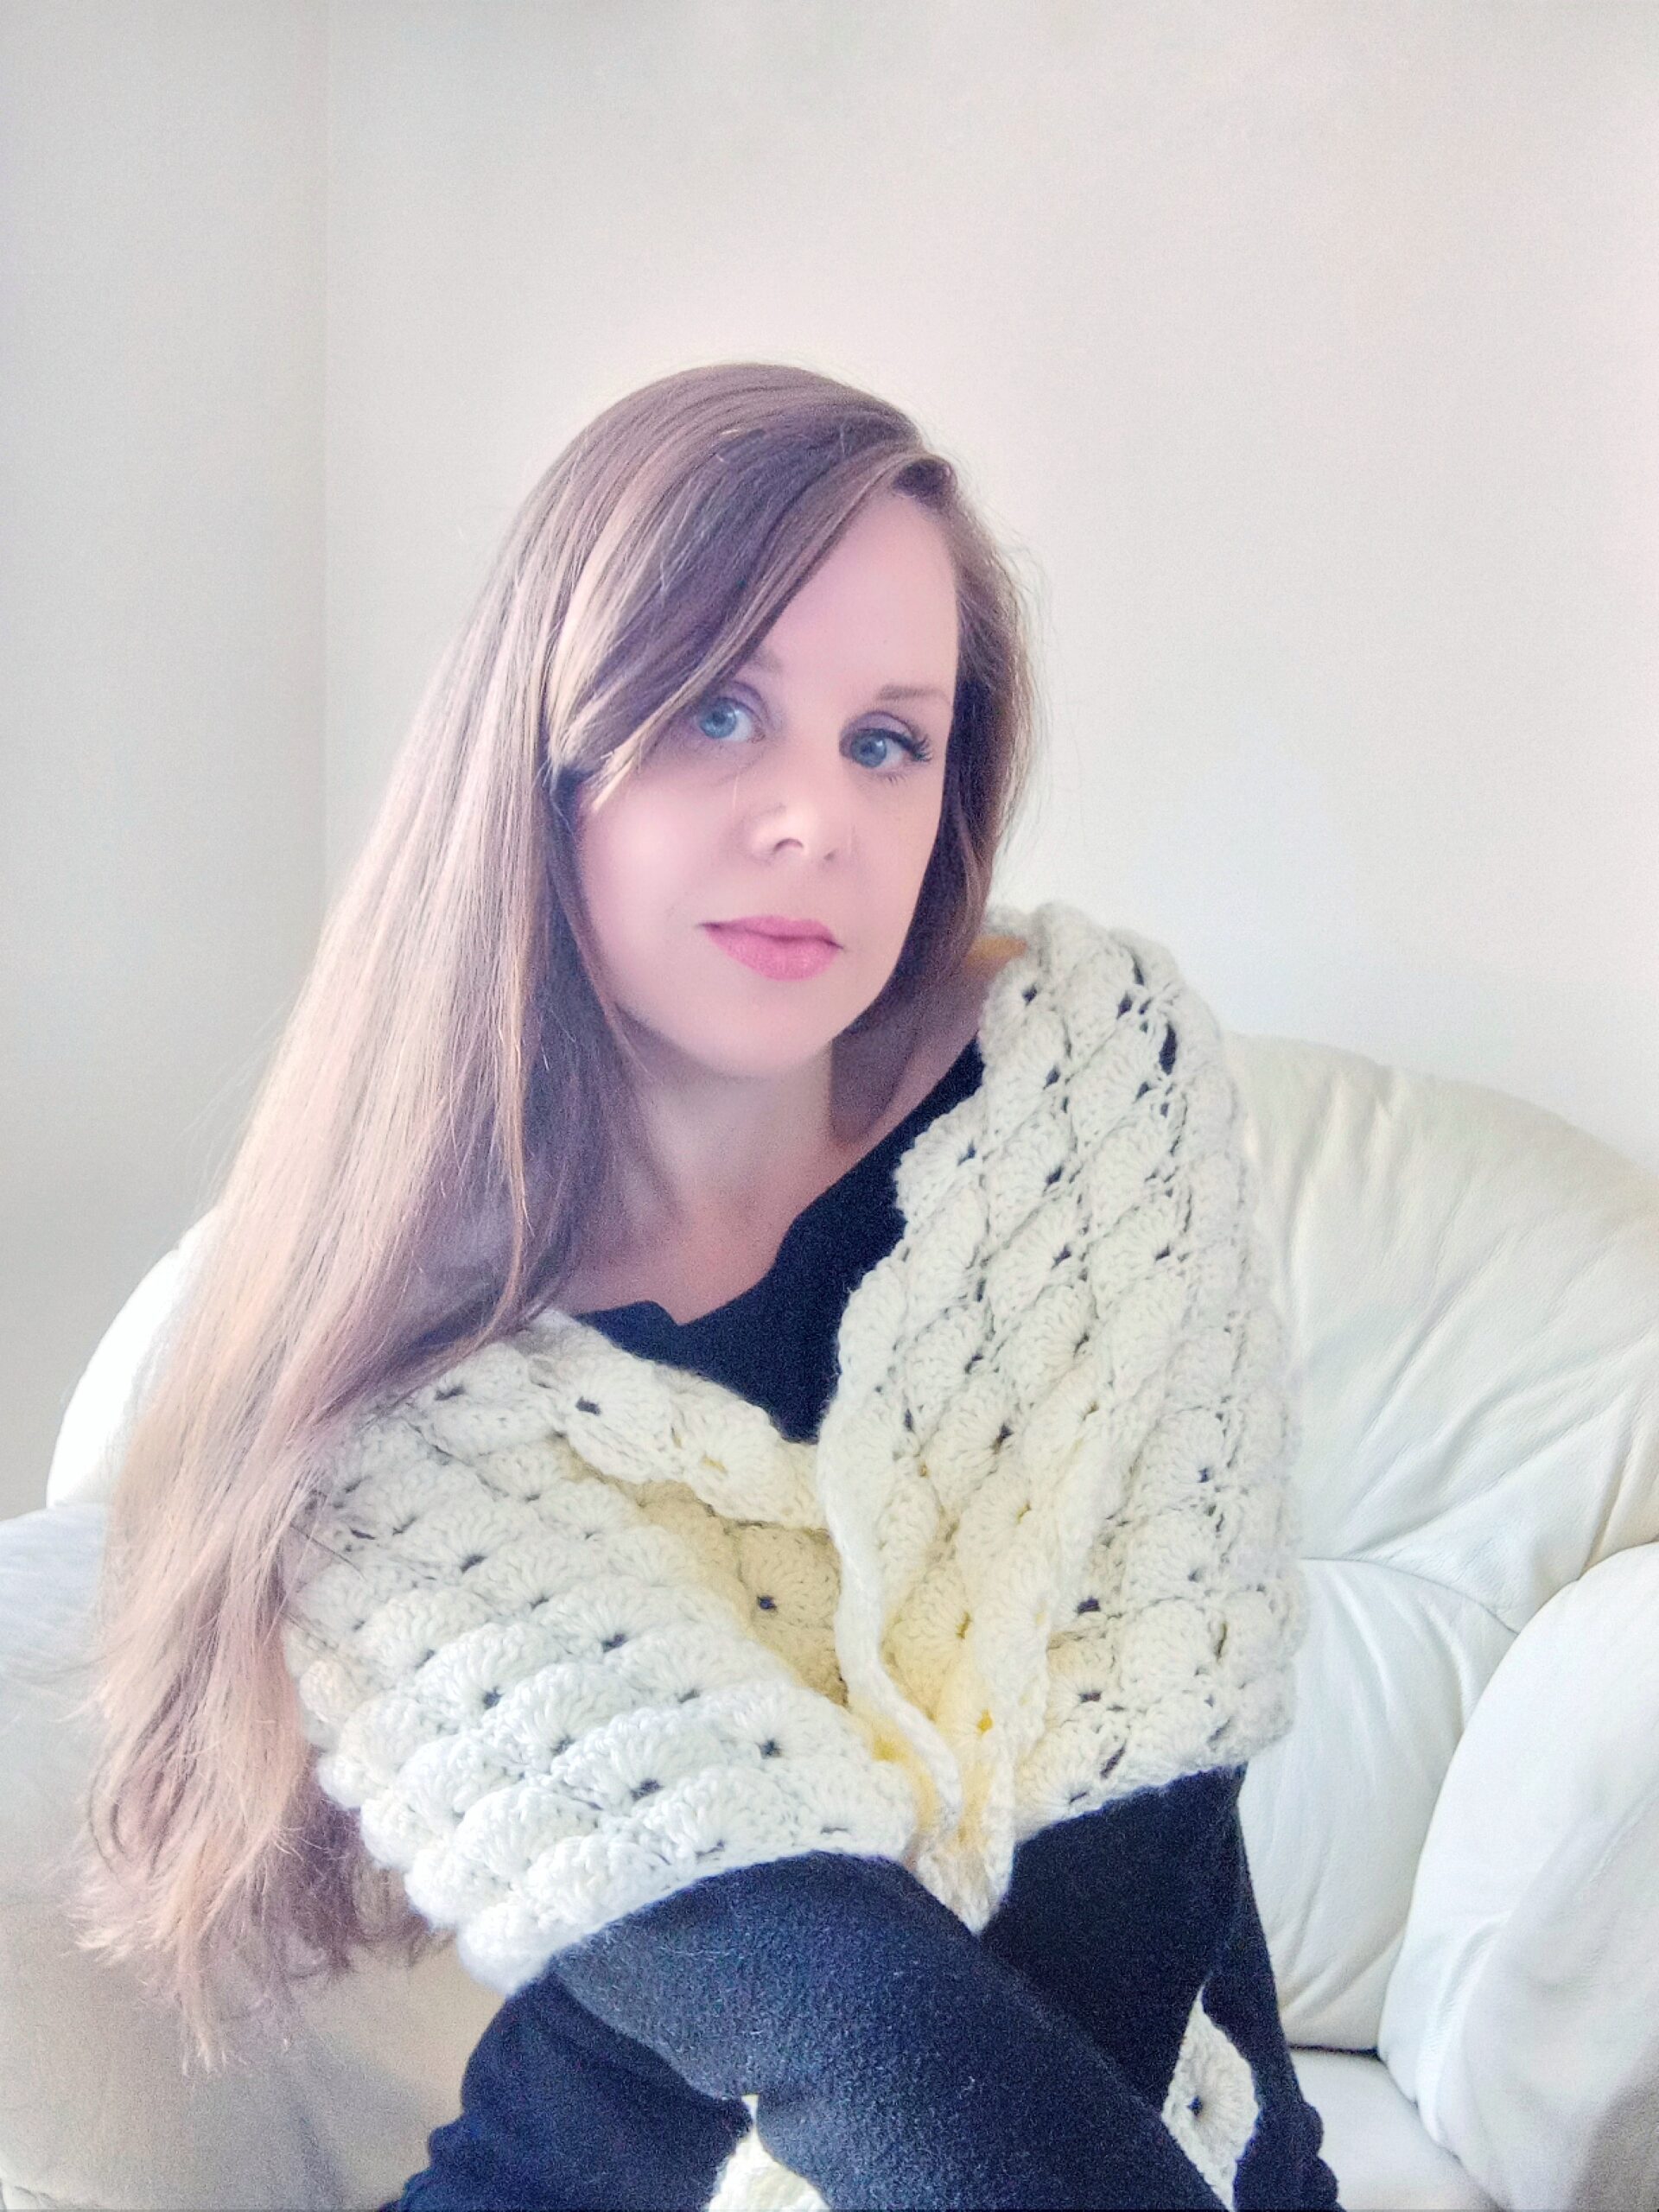
Hi everyone, today I am going to show you how to crochet The Simple Purity Vintage Shawl (free pattern). This is a great project for beginners, and looks beautiful in all seasons. The lacy and vintage large shell stitch is very delicate and feminine. The color (Antique White) is also lovely, and I absolutely adore this project.
The video tutorial for this project can be found here:
Crochet The Simple Purity Vintage Shawl Free Pattern: The Stitch
The stitch used for this vintage shawl is the large Shell Stitch. If you enjoy the shell stitch, this vintage Lavender shawl is perfect for you.
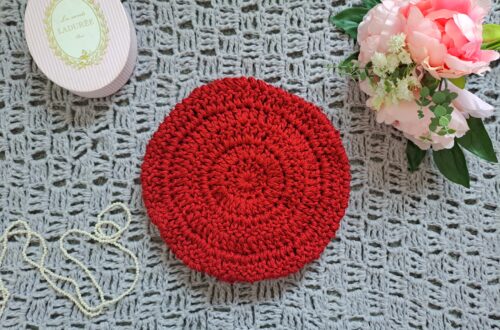
I have called it the large Shell Stitch because it consists of 9 Double Crochets forming one shell stitch. This is a very beautiful stitch, and looks very similar to the Fan stitch, which I also adore. If you enjoy the Fan stitch, you should have look, at this easy Regency Era Shawl, which features the lovely Fantail stitch. This shawl which I crocheted a few months ago is also part of my Vintage Crochet Series.
I absolutely love this shawl. The large shell stitch is so beautiful and feminine, and gives a very dainty look to any shawl. I think it looks very lovely with this particular yarn too. The mix of this soft color and dainty stitch is definitely beautiful.
Last year, I crocheted The Loretta Shawl, which is so dainty and beautiful. It features the shell stitch, but the smaller shell stitch. Crocheted with a much finer yarn, it also has it’s own special charm.
Crochet The Simple Purity Vintage Shawl Free Pattern: The Yarn
For this shawl, I used Bernat Softee Baby yarn in shade Antique White. As you may know, I absolutely adore this yarn, and have used it multiple times already. The Sweet Dreams Baby Blanket is crocheted using Bernat Softee Baby yarn. This is a very delicate and popular project, which also has a clear vintage vibe.
It is very soft, and the color is stunning. It definitely gives a vintage look to any project, and is so delicate too. This is also a great project for beginners, as it is just a simple 2 row repeat pattern. The shell stitch is an easy stitch to crochet. This makes this project one that is great if you want to relax.
Bernat Softee Baby is perfect not only for baby projects, but also for shawls and even garments, such as cardigans and sweaters. I am looking forward to crocheting more projects with this yarn.
Connecting with you
I love connecting with my Crochet Community through my blog and Social Media. You can find me on Youtube, Instagram, and Pinterest. I would love to connect with you on these platforms.
You can also join my private Facebook group to connect.
You can subscribe to my weekly newsletter here. Then, you will then be the first to know of a pattern release, new video tutorial, and my amazing giveaways!
Crochet The Simple Purity Vintage Shawl: The Pattern
You can purchase the ad free, large print, PDF pattern from my Etsy store: Crochet Easy Vintage Shawl PDF Pattern
Level: Easy/beginner
Gauge: 4”x4” (10×10 cm)= 6 rows (=3 rows of large shell stitches)
Size of finished shawl: 23” (58,5 cm) high x 63” (160 cm)
Notes
I will be using US terms (British terms in brackets)
You will need
3 skeins of Bernat Softee Baby yarn in shade Antique White
A 5 mm crochet hook
Pair of scissors
A tapestry needle
A book or piece of cardboard measuring about 6” across to create tassels
Abbreviations
Ch: chain
St: Stitch
Sl st: slip stitch
Sk: Skip
SC: Single Crochet (UK Double Crochet)
DC: Double crochet (UK Treble Crochet)
EOR: End of row
Begin pattern here
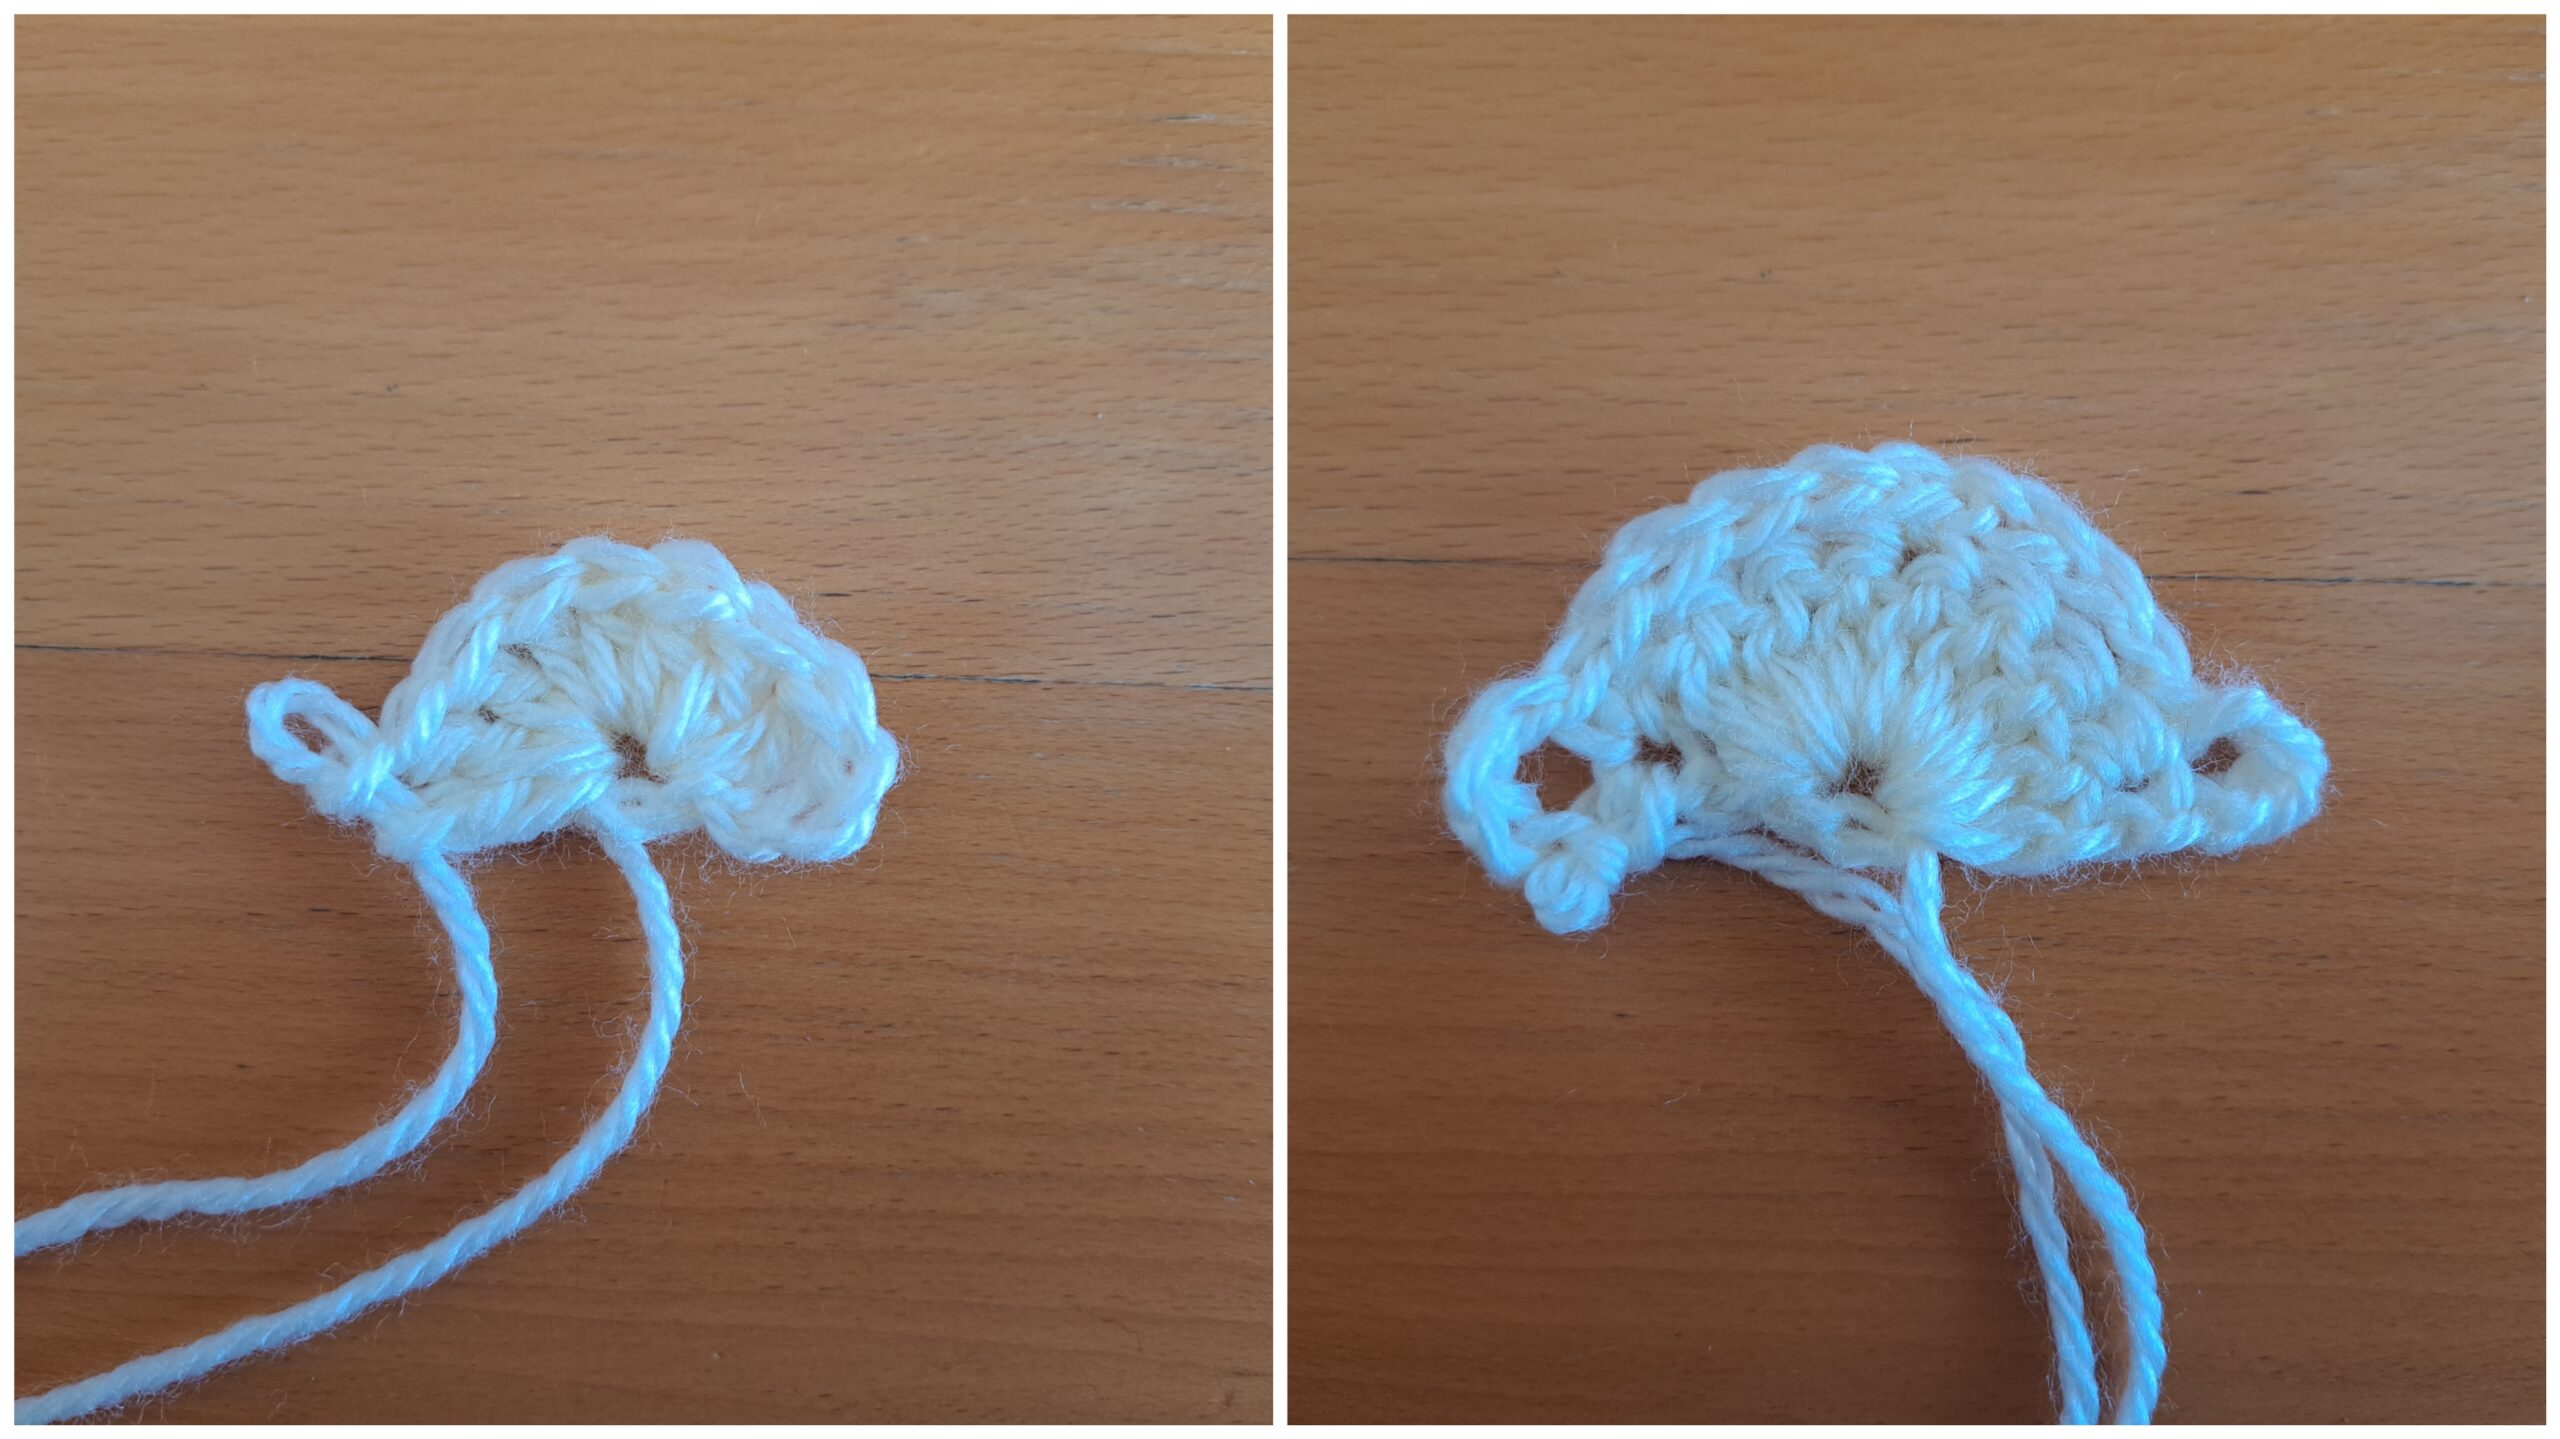
To start, make a slip knot. Ch 4, sl st through 1st stitch to form a ring.
Complete rows as follows:
1: Ch 3 (=DC), 8 DC into center of ring (=9 DC and 1st shell stitch).
2: Ch 4, turn your work, SC into 1st st to form a ring; ch 4, SC into 5th stitch of shell stitch from previous row, ch 4, SC into last st (which is also the ch 3 from previous row), ch 4 and SC once again in the same stitch to form a ring.
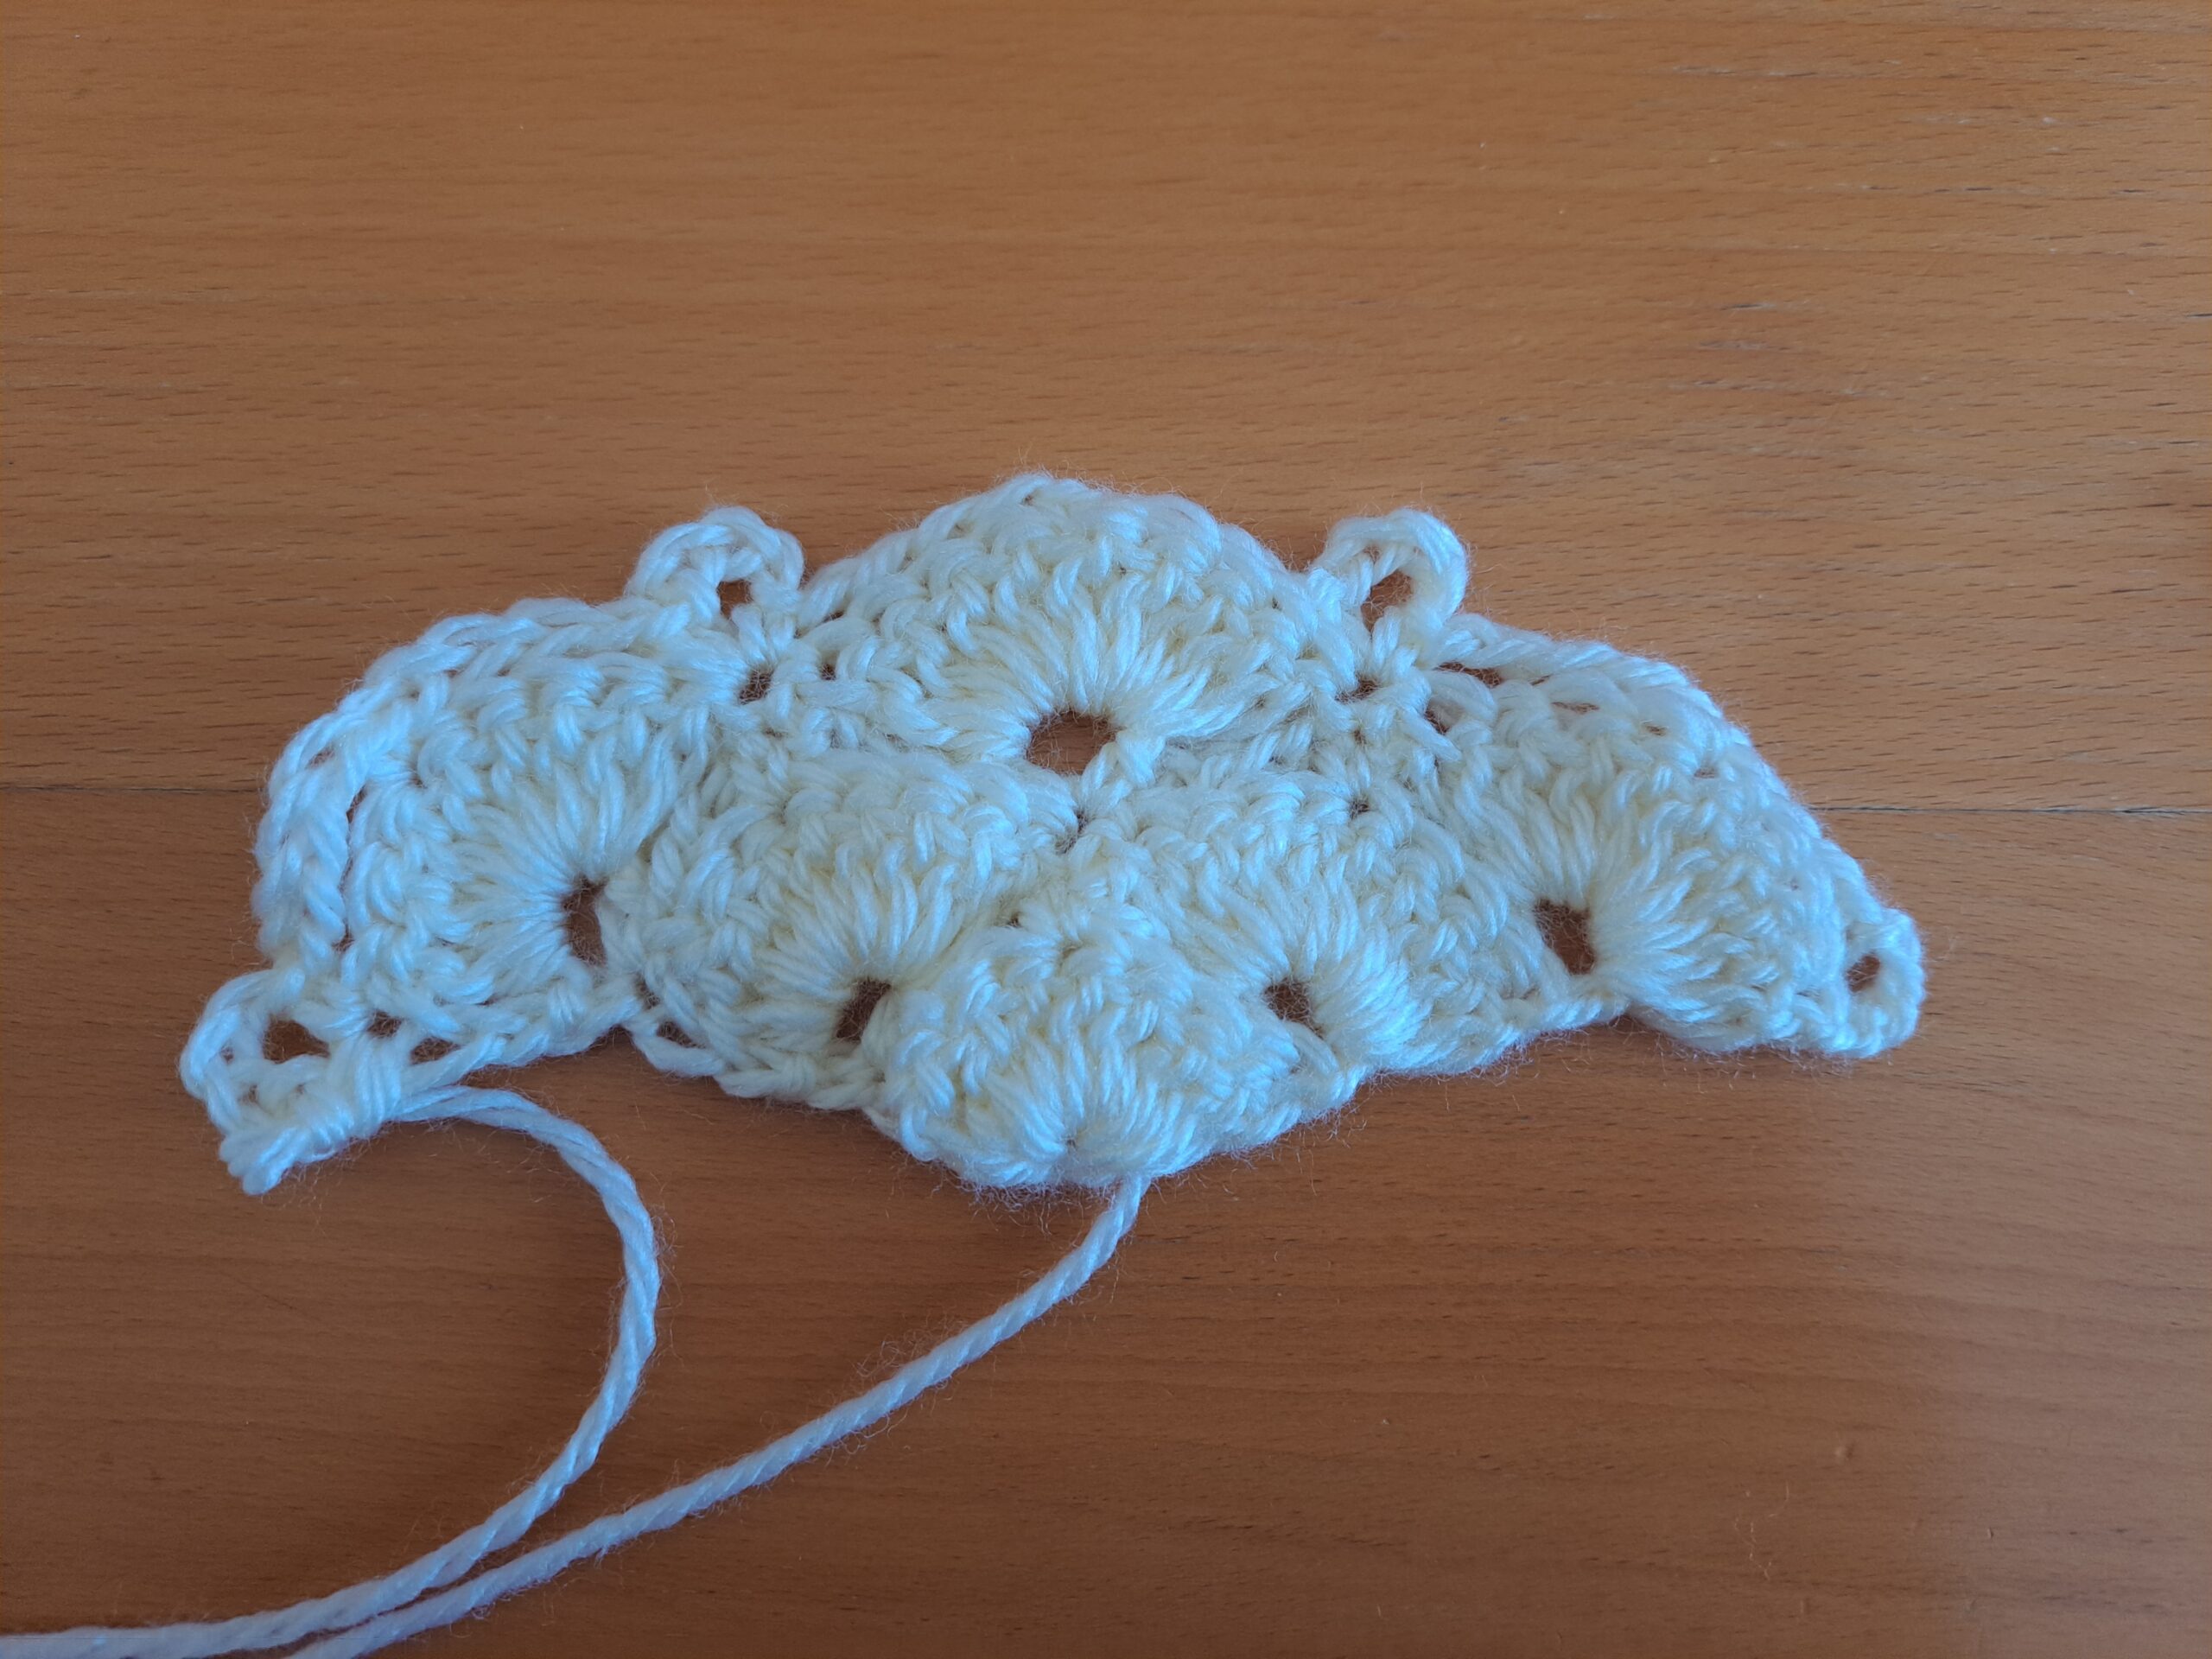
3: Ch 3 (counts as DC), turn your work, place 8 DC into center of chain 4 ring (=9 DC and shell stitch); sk ch 4 from previous row and SC into center SC from previous row. Sk ch 4 from previous row, and go directly into center of ch 4 ring with 9 DC (=shell stitch).
4: Ch 4, turn your work, SC into first st to form a ring; Ch 4, SC into 5th st of shell stitch from previous row, ch 4, SC into SC from previous row. Ch 4 and SC into same stitch to form a ring, ch 4 and SC into 5th stitch of the shell from previous row, ch 4 and SC into last stitch (which is also the beginning ch 3 from previous row); ch 4, SC into this same last stitch to form a ring.

Row 5
5: Ch 3 (=DC), turn your work, place 8 DC into the center of the ch 4 ring from previous row (=9 DC). Sk ch 4 from previous row and SC into center SC from previous row; sk ch 4 from previous row once more and go directly into next ch 4 ring and place 9 DC into this ring (=shell stitch). Sk ch 4 from previous row and SC into center SC from previous row. Sk ch 4 and place 9 DC into the last ch 4 ring center (=shell stitch).
6: Ch 4, turn your work, SC into first st to form a ring; ch 4, SC into 5th stitch of shell stitch from previous row, ch 4, SC into SC from previous row. Ch 4, SC into same stitch to form a ring, ch 4 and SC into 5th stitch of the shell from previous row, ch 4 and SC into SC from previous row. Ch 4 and SC into same stitch to form a ring, ch 4, SC into 5th st of shell stitch from previous row, ch 4 and SC into last stitch of shell stitch from previous row (which is also the first ch 3 from previous row). Ch 4 and SC into same stitch to form a ring.
Row 7
7: Ch 3 (=DC), turn your work, place 8 DC into ring (=9 DC and shell stitch). [Sk ch 4 from previous row and SC into center SC from previous row; sk ch 4 from previous row once more and go directly into next ch 4 ring and place 9 DC into this ring (=shell stitch)] twice. Sk ch 4 from previous row and SC into center SC from previous row. Sk ch 4 and place 9 DC into the last ch 4 ring center (=shell stitch).
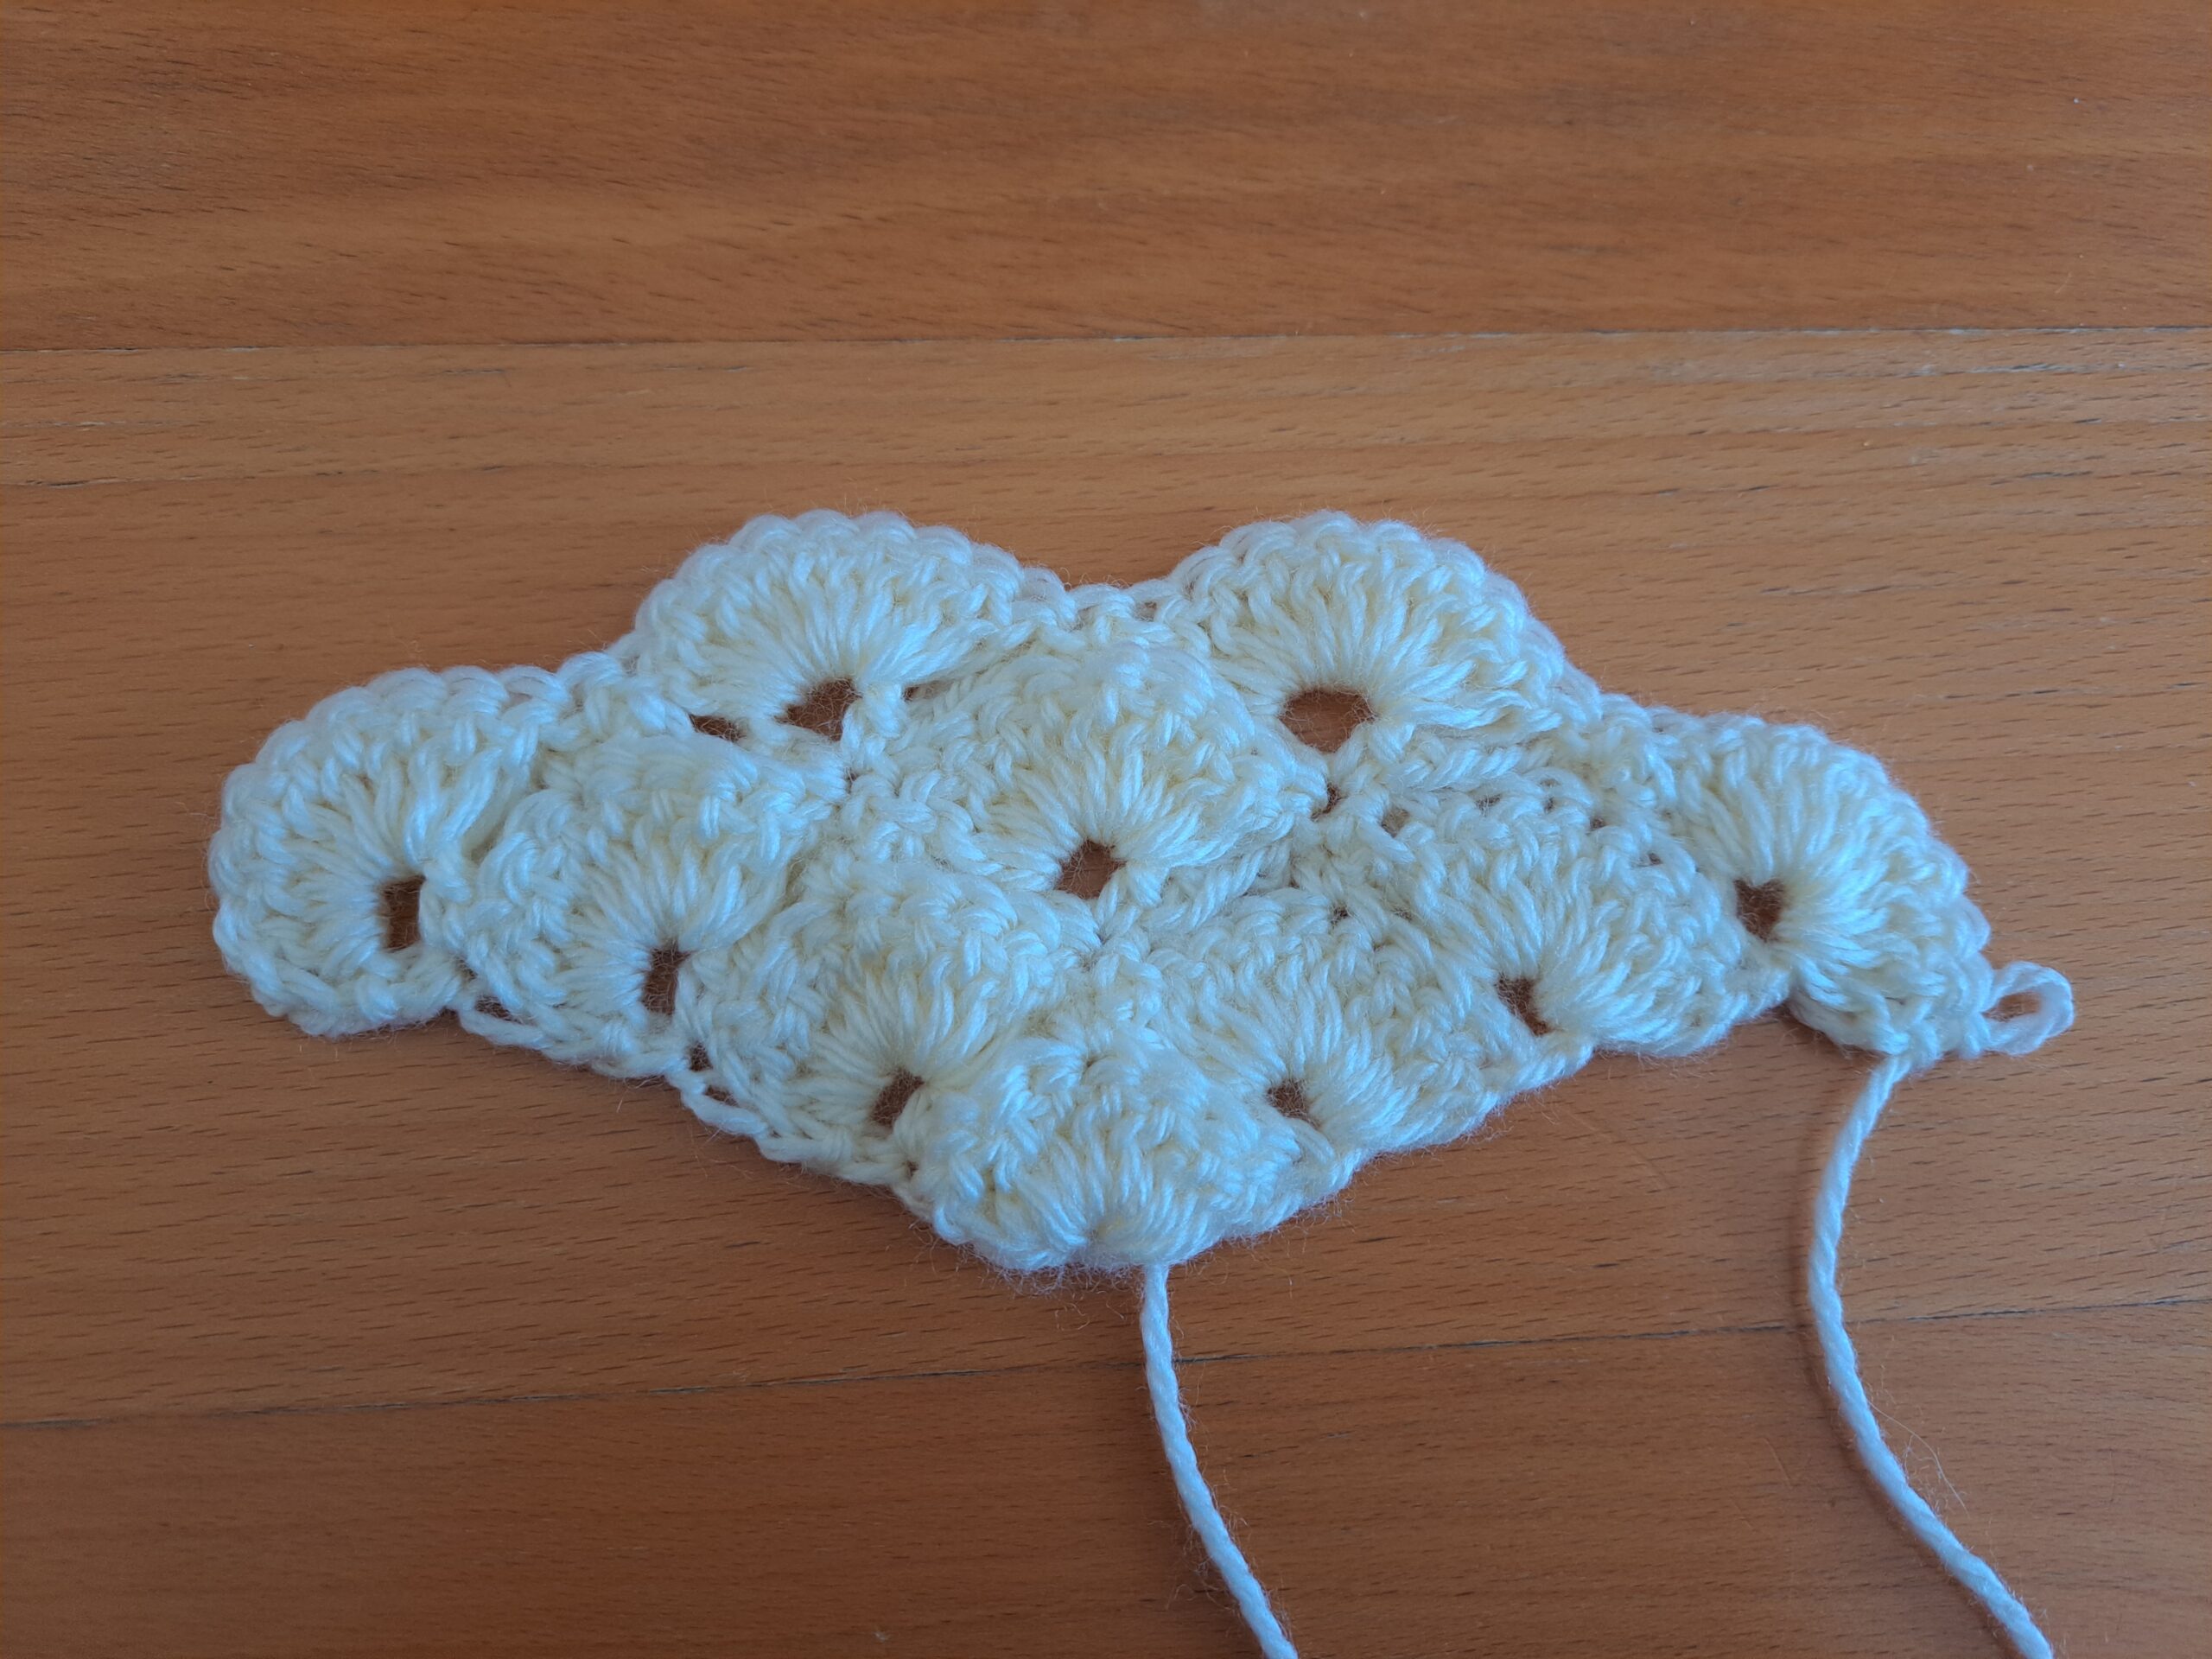
8-29: Repeat rows 6 and 7 (alternating them), making sure you add your shells as your shawl grows wider by following this simple pattern explained above.
Fasten off and tidy up all loose ends.
Tassels
Make 3 different tassels that you will be placing onto each corner of the shawl.
For this part of the project, you will be needing your book and yarn.
Cut out 2 pieces of yarn measuring about 10″ each, place them to the side.
Go round your book/cardboard about 45 times with your yarn. Once you are satisfied with the number of times you have gone around (this will be the fullness of your tassel), you will slide your wound up yarn off the book.

Now:
Lay it on a flat surface, and taking one of the 10” pieces of yarn you set aside previously, insert it through the center of the wound up yarn you just created.
Tie this piece of yarn tightly at the top, so as to secure all the strands of yarn together.
Take the second 10″ piece of yarn and place it horizontally on the flat surface. Place the tassel on top of this piece of yarn, making sure that your piece of yarn is placed approximately an inch below the top of the tassel. Gently tie a knot across the tassel, then go around the tassel once again with the piece of yarn, and make a second knot at the front. Fasten off piece of yarn
Pulling gently on the wound up yarn, take your scissors and cut the bottom pieces of yarn so as to create the tassels. Make sure all the tassel pieces are equal. Trim the pieces of yarn at the bottom if needed.
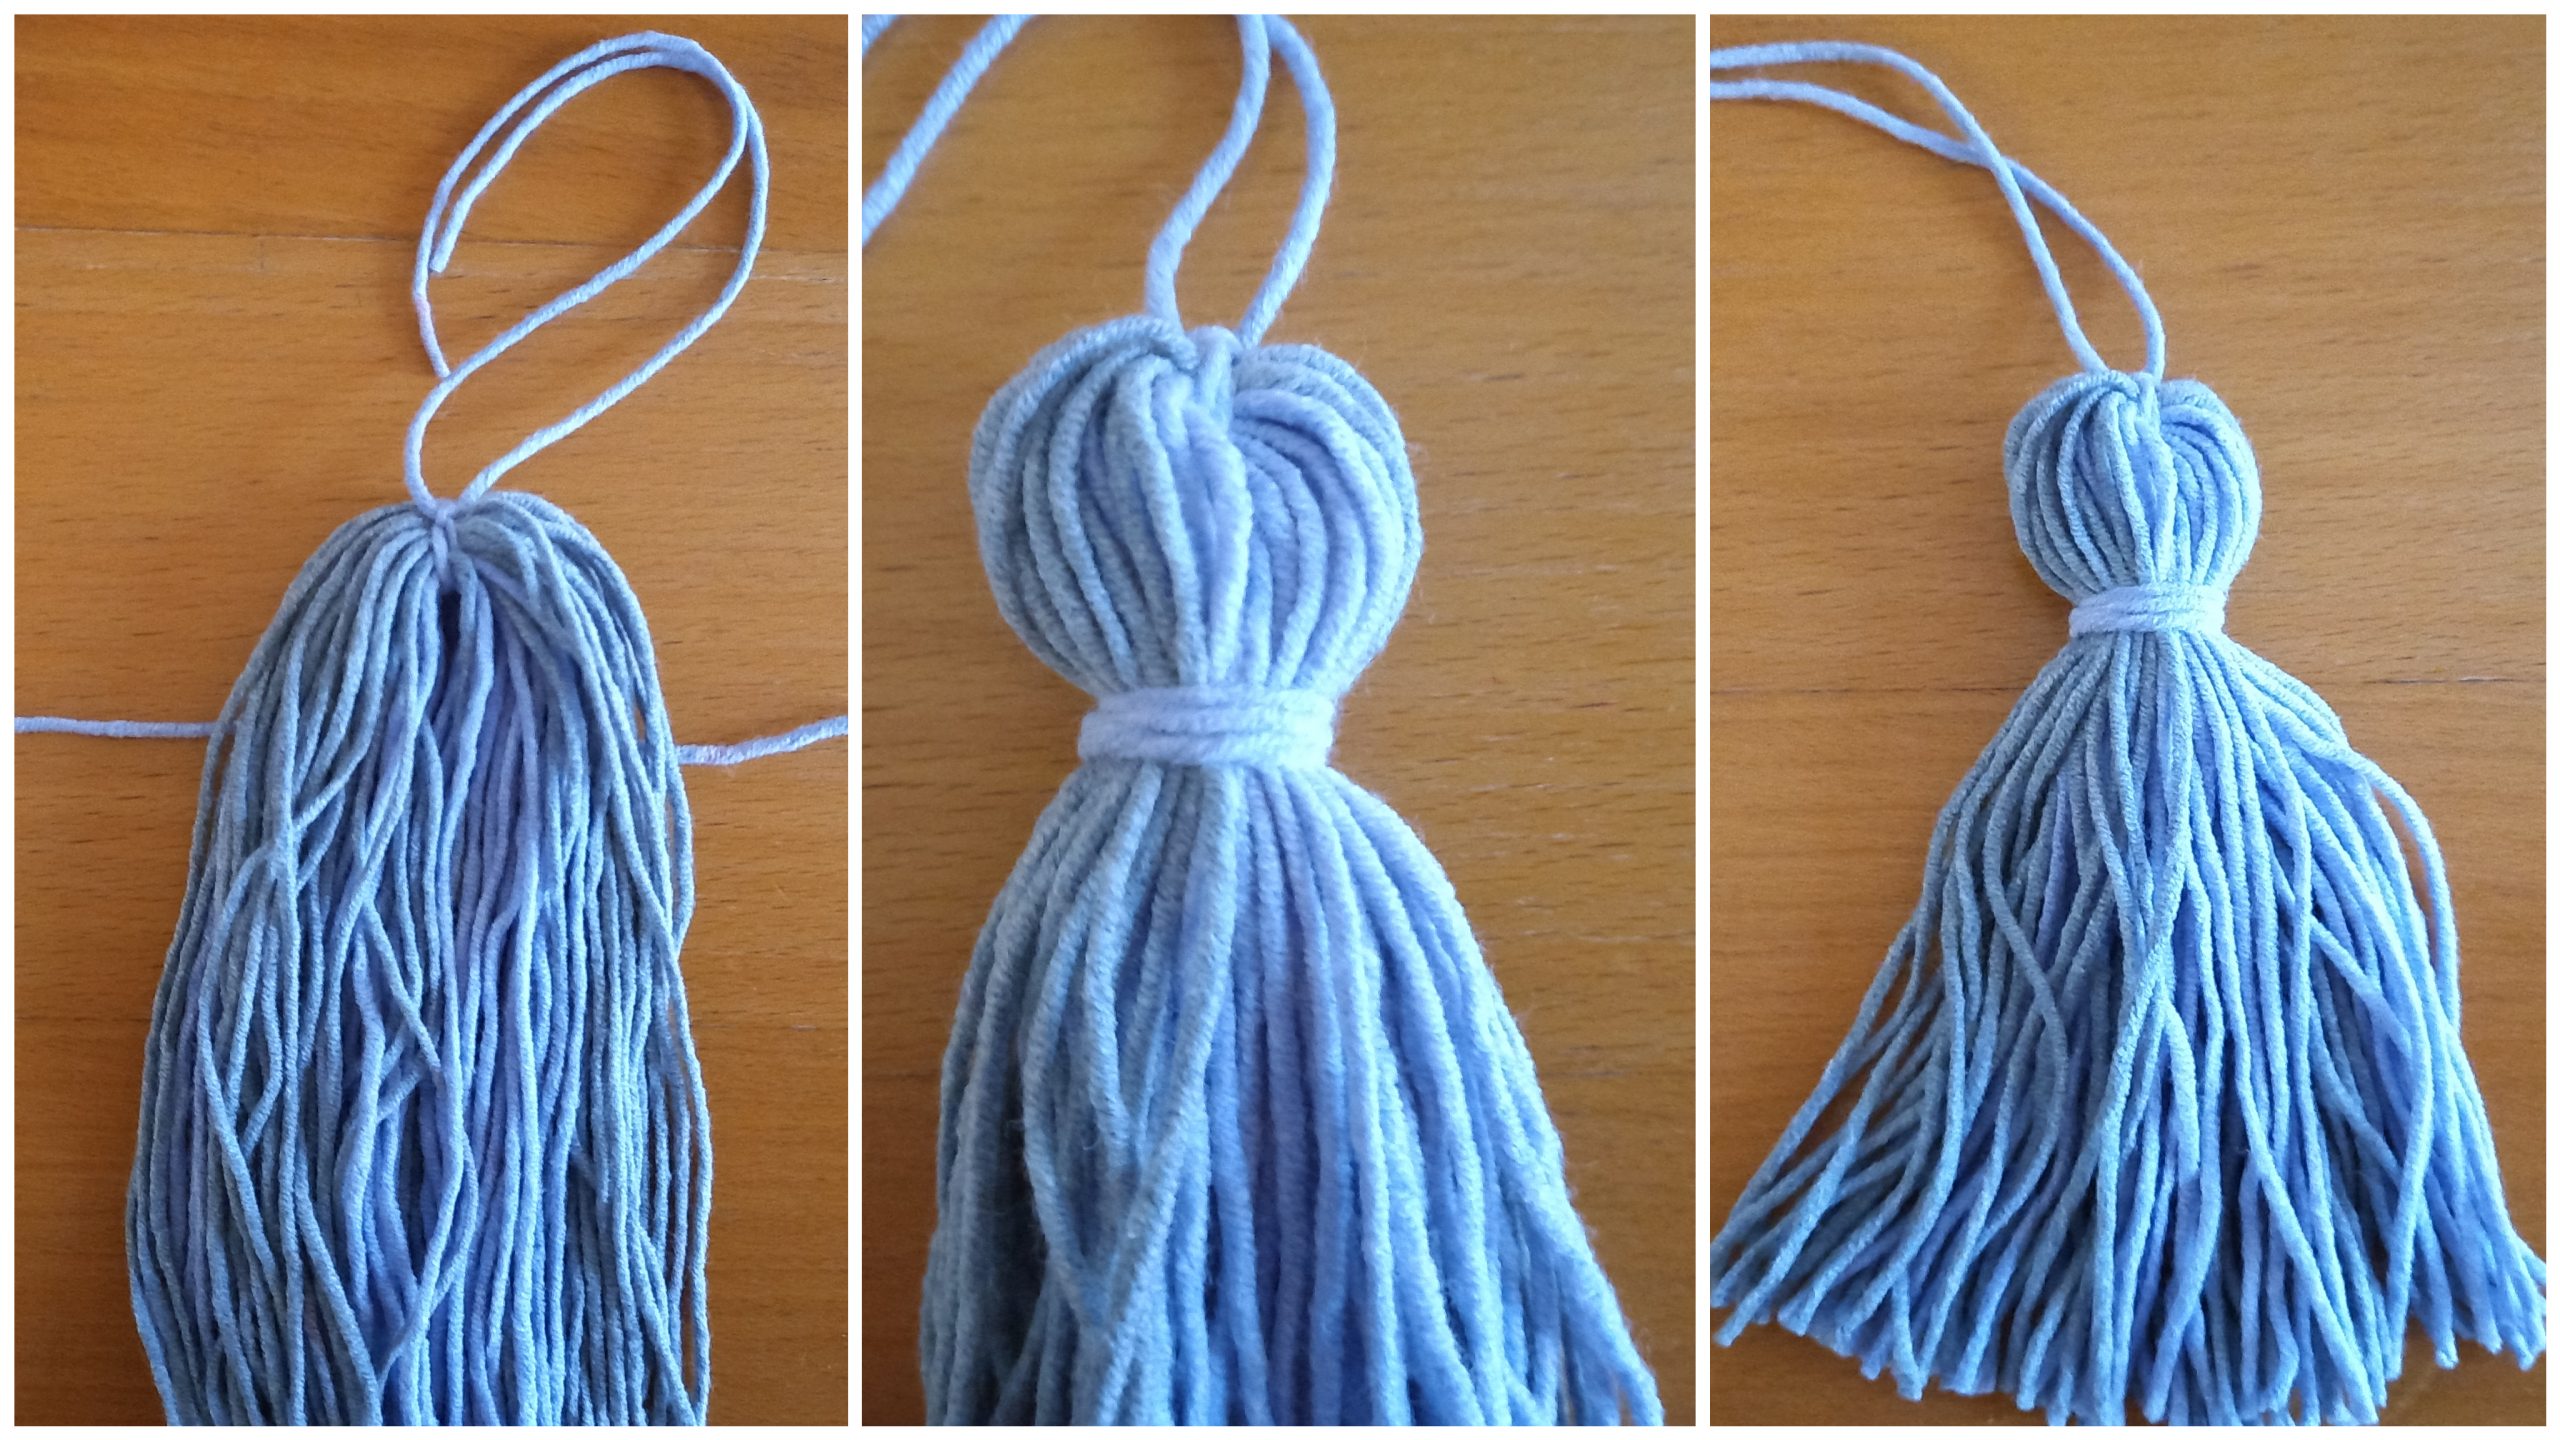
Attach tassel to each of the 3 corners of the shawl.
To fasten on tassel, use the piece of yarn we used at the beginning to secure the top of the tassel. You can use your crochet hook to help with securing the tassel.


You May Also Like
Crochet Classic Man Scarf Free Pattern
Crochet The Therese Shawl Free Pattern