Crochet The Sweet Dreams Hexagon Cardigan
Crochet The Sweet Dreams Hexagon Cardigan
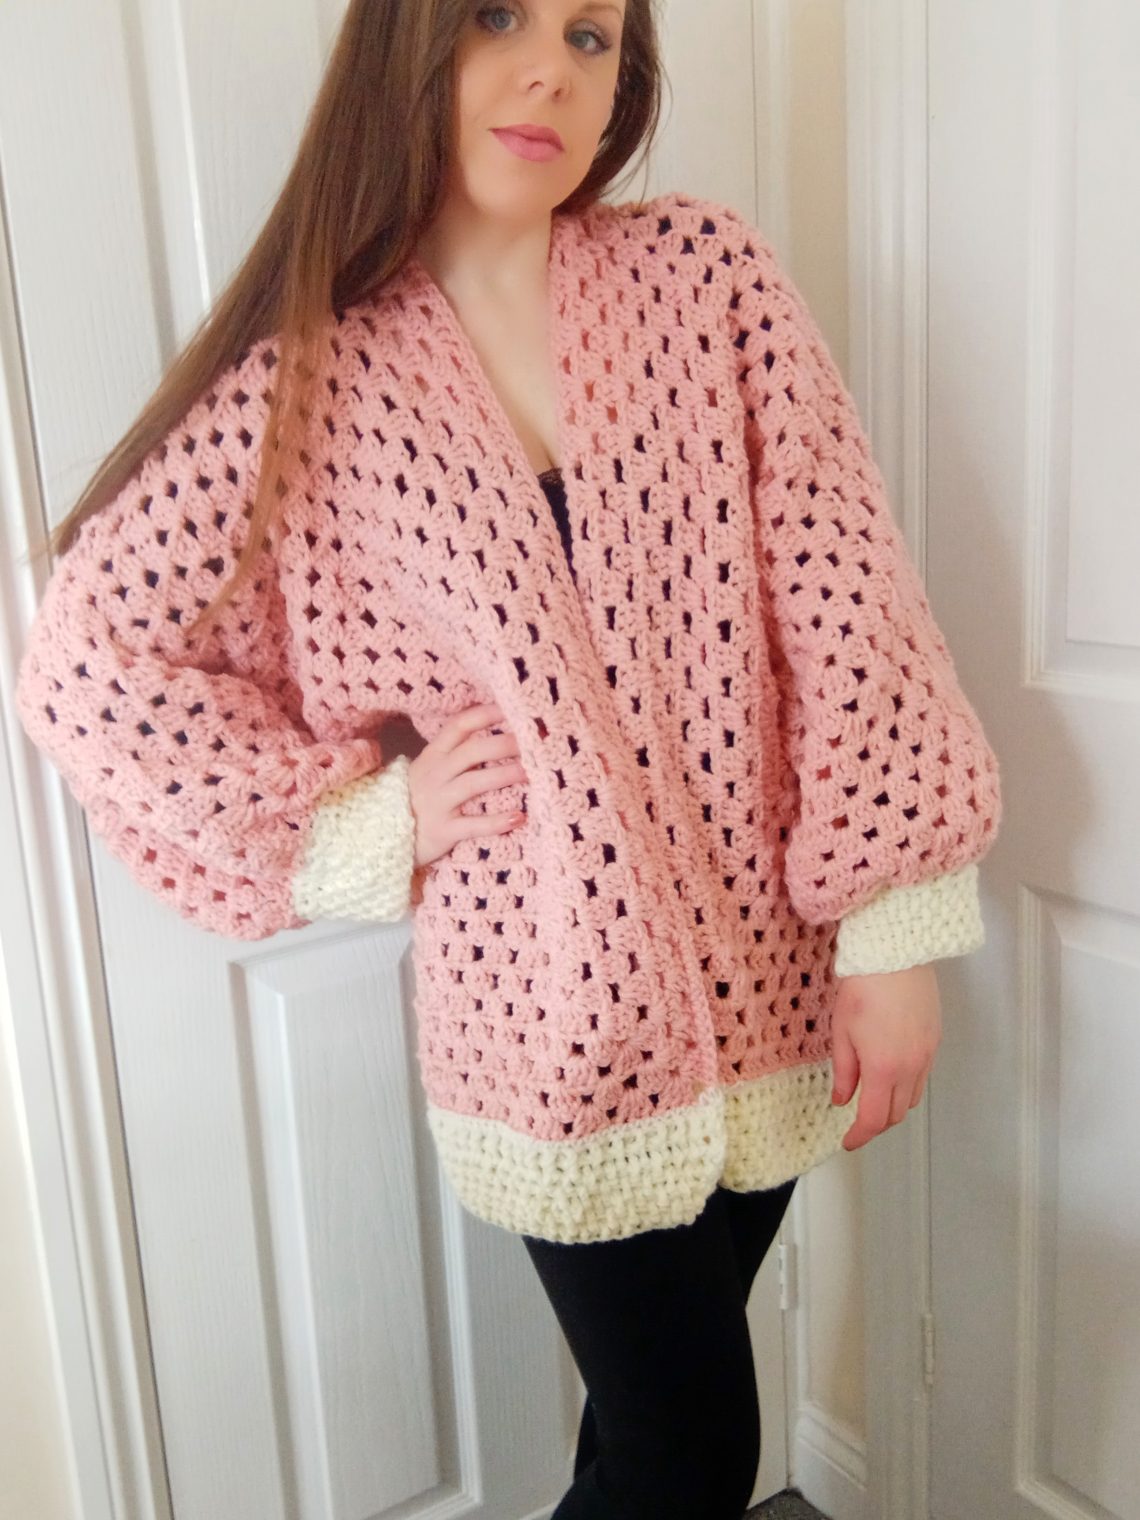
Hi everyone, this week I am bringing to you a tutorial on how to crochet The Sweet Dreams Hexagon Cardigan. This is a super easy and beautiful project. I love how perfect it will be for the coming Spring! This crochet cardigan is simple to make, using two hexagons as a base. My step by step tutorial is very beginner friendly too.
You can find my Youtube video tutorial for this project here:
Crochet The Sweet Dreams Hexagon Cardigan: the inspiration
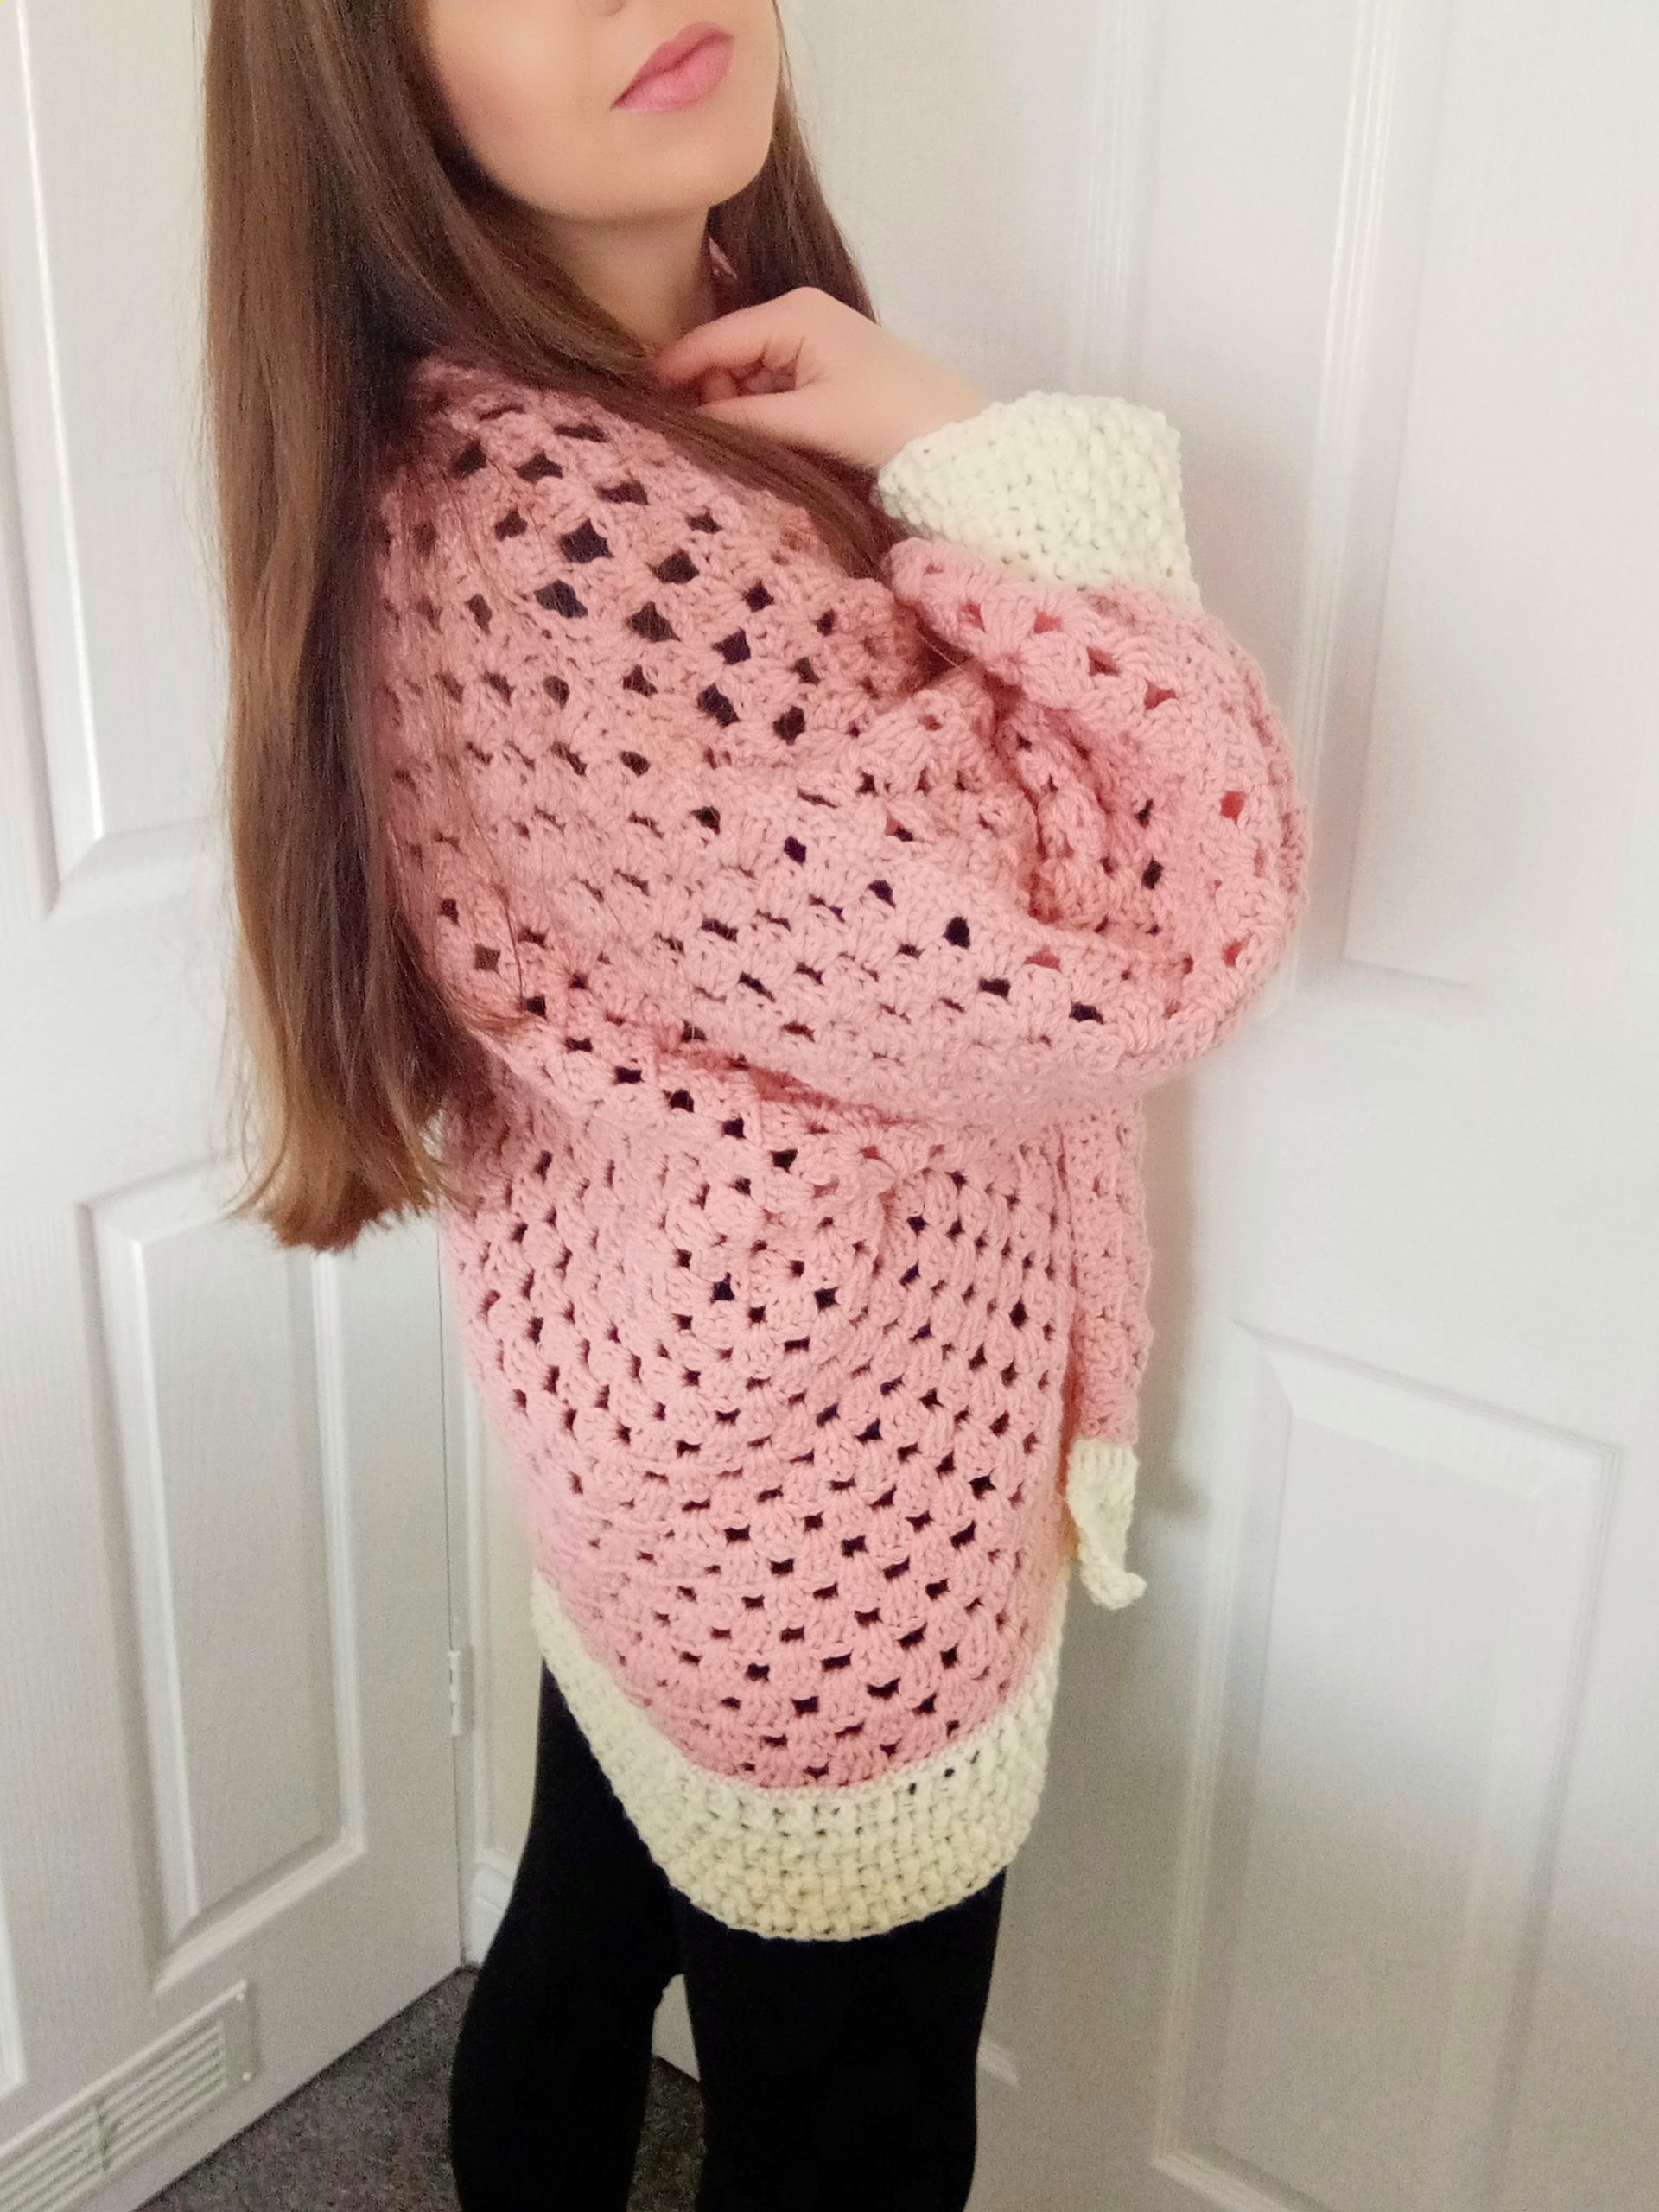
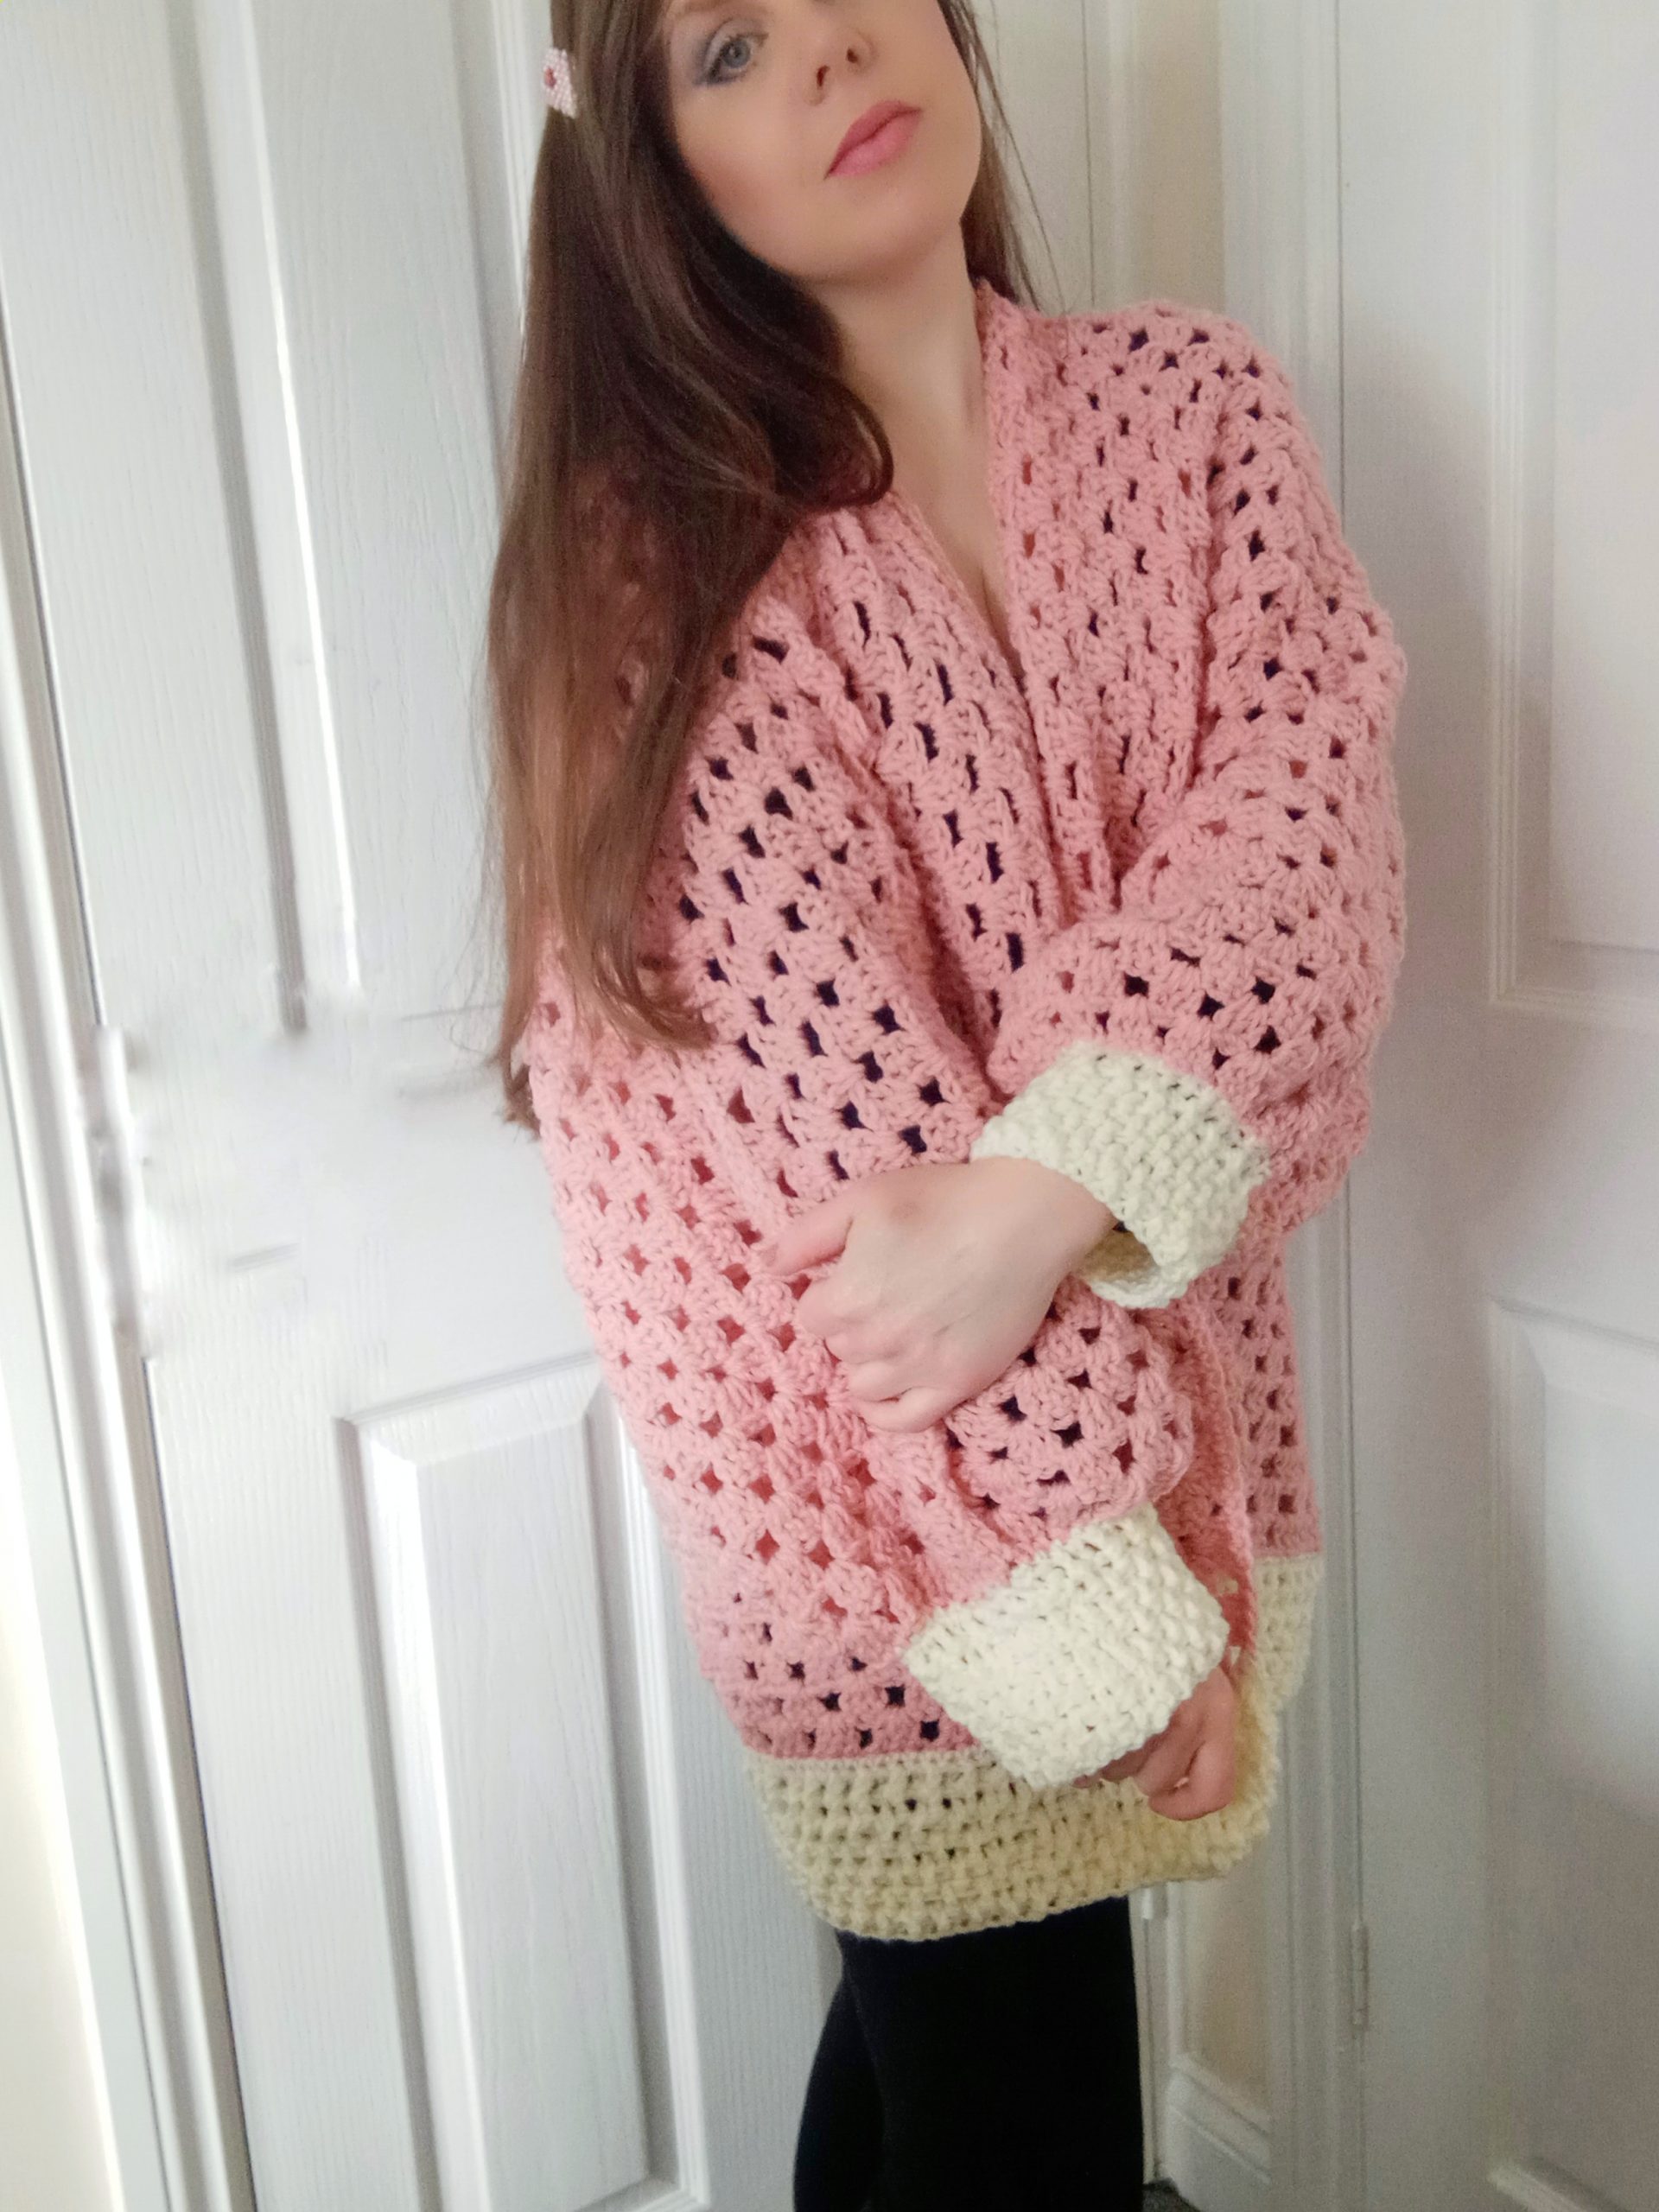
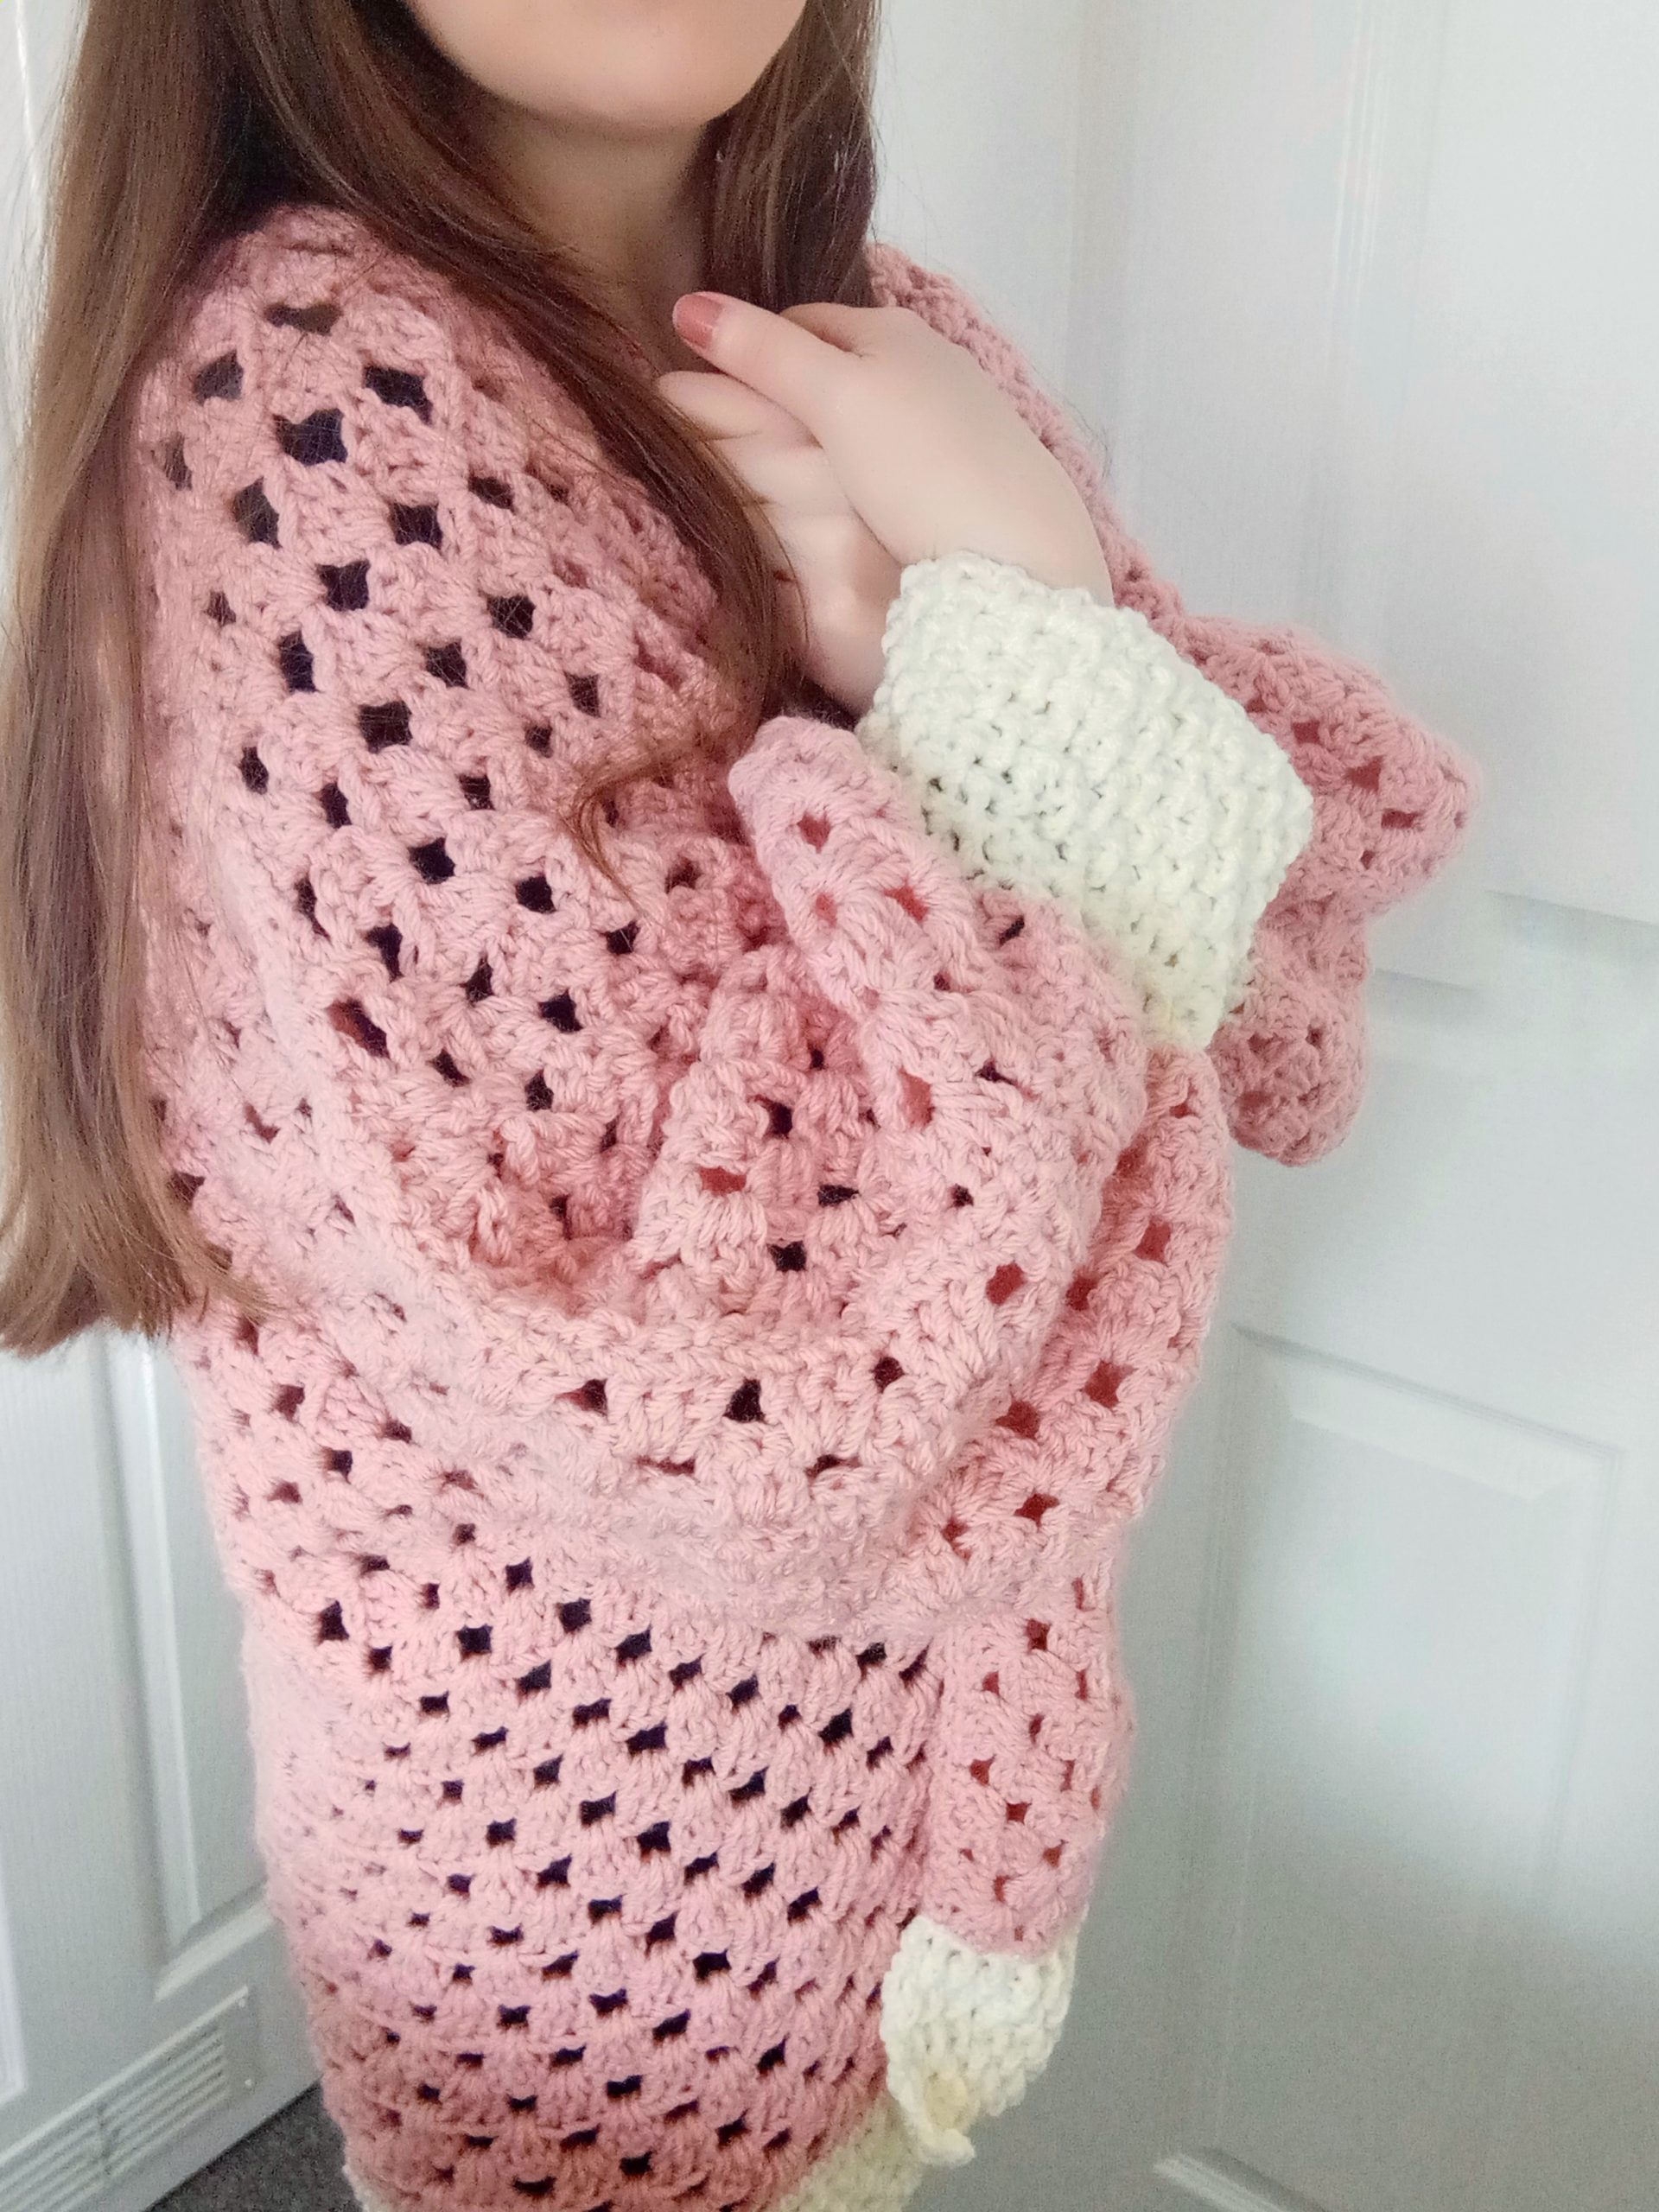
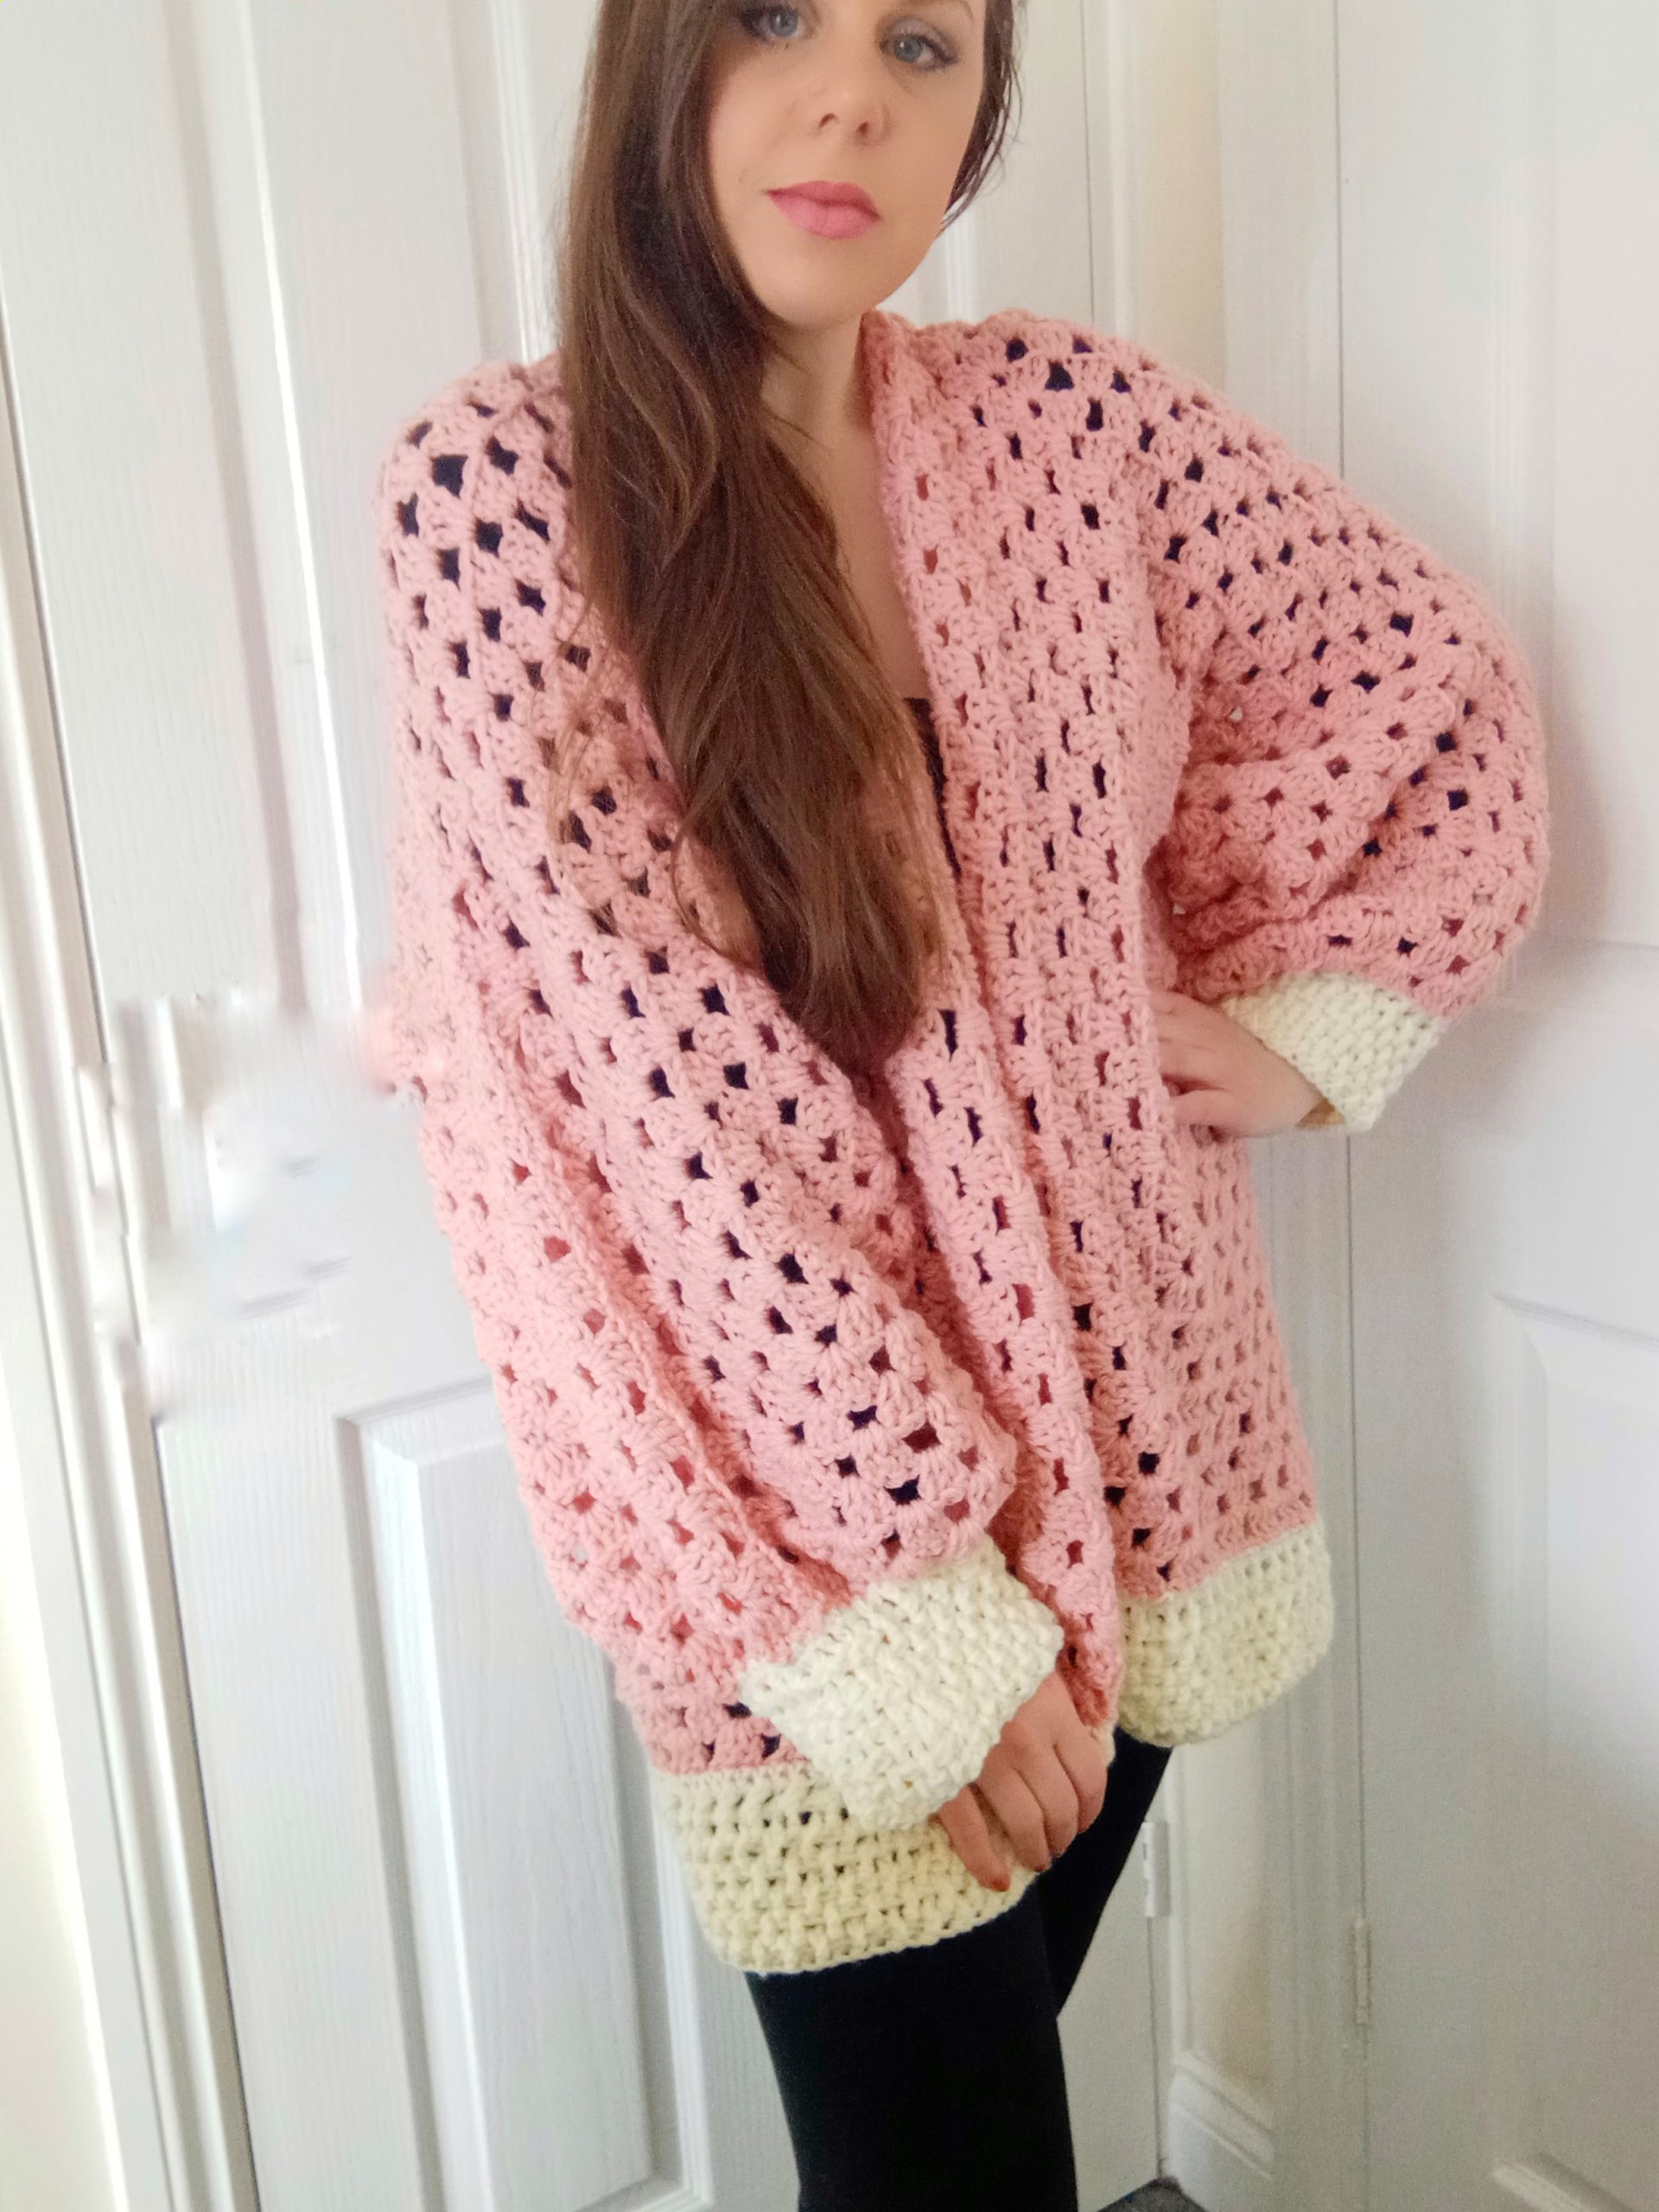
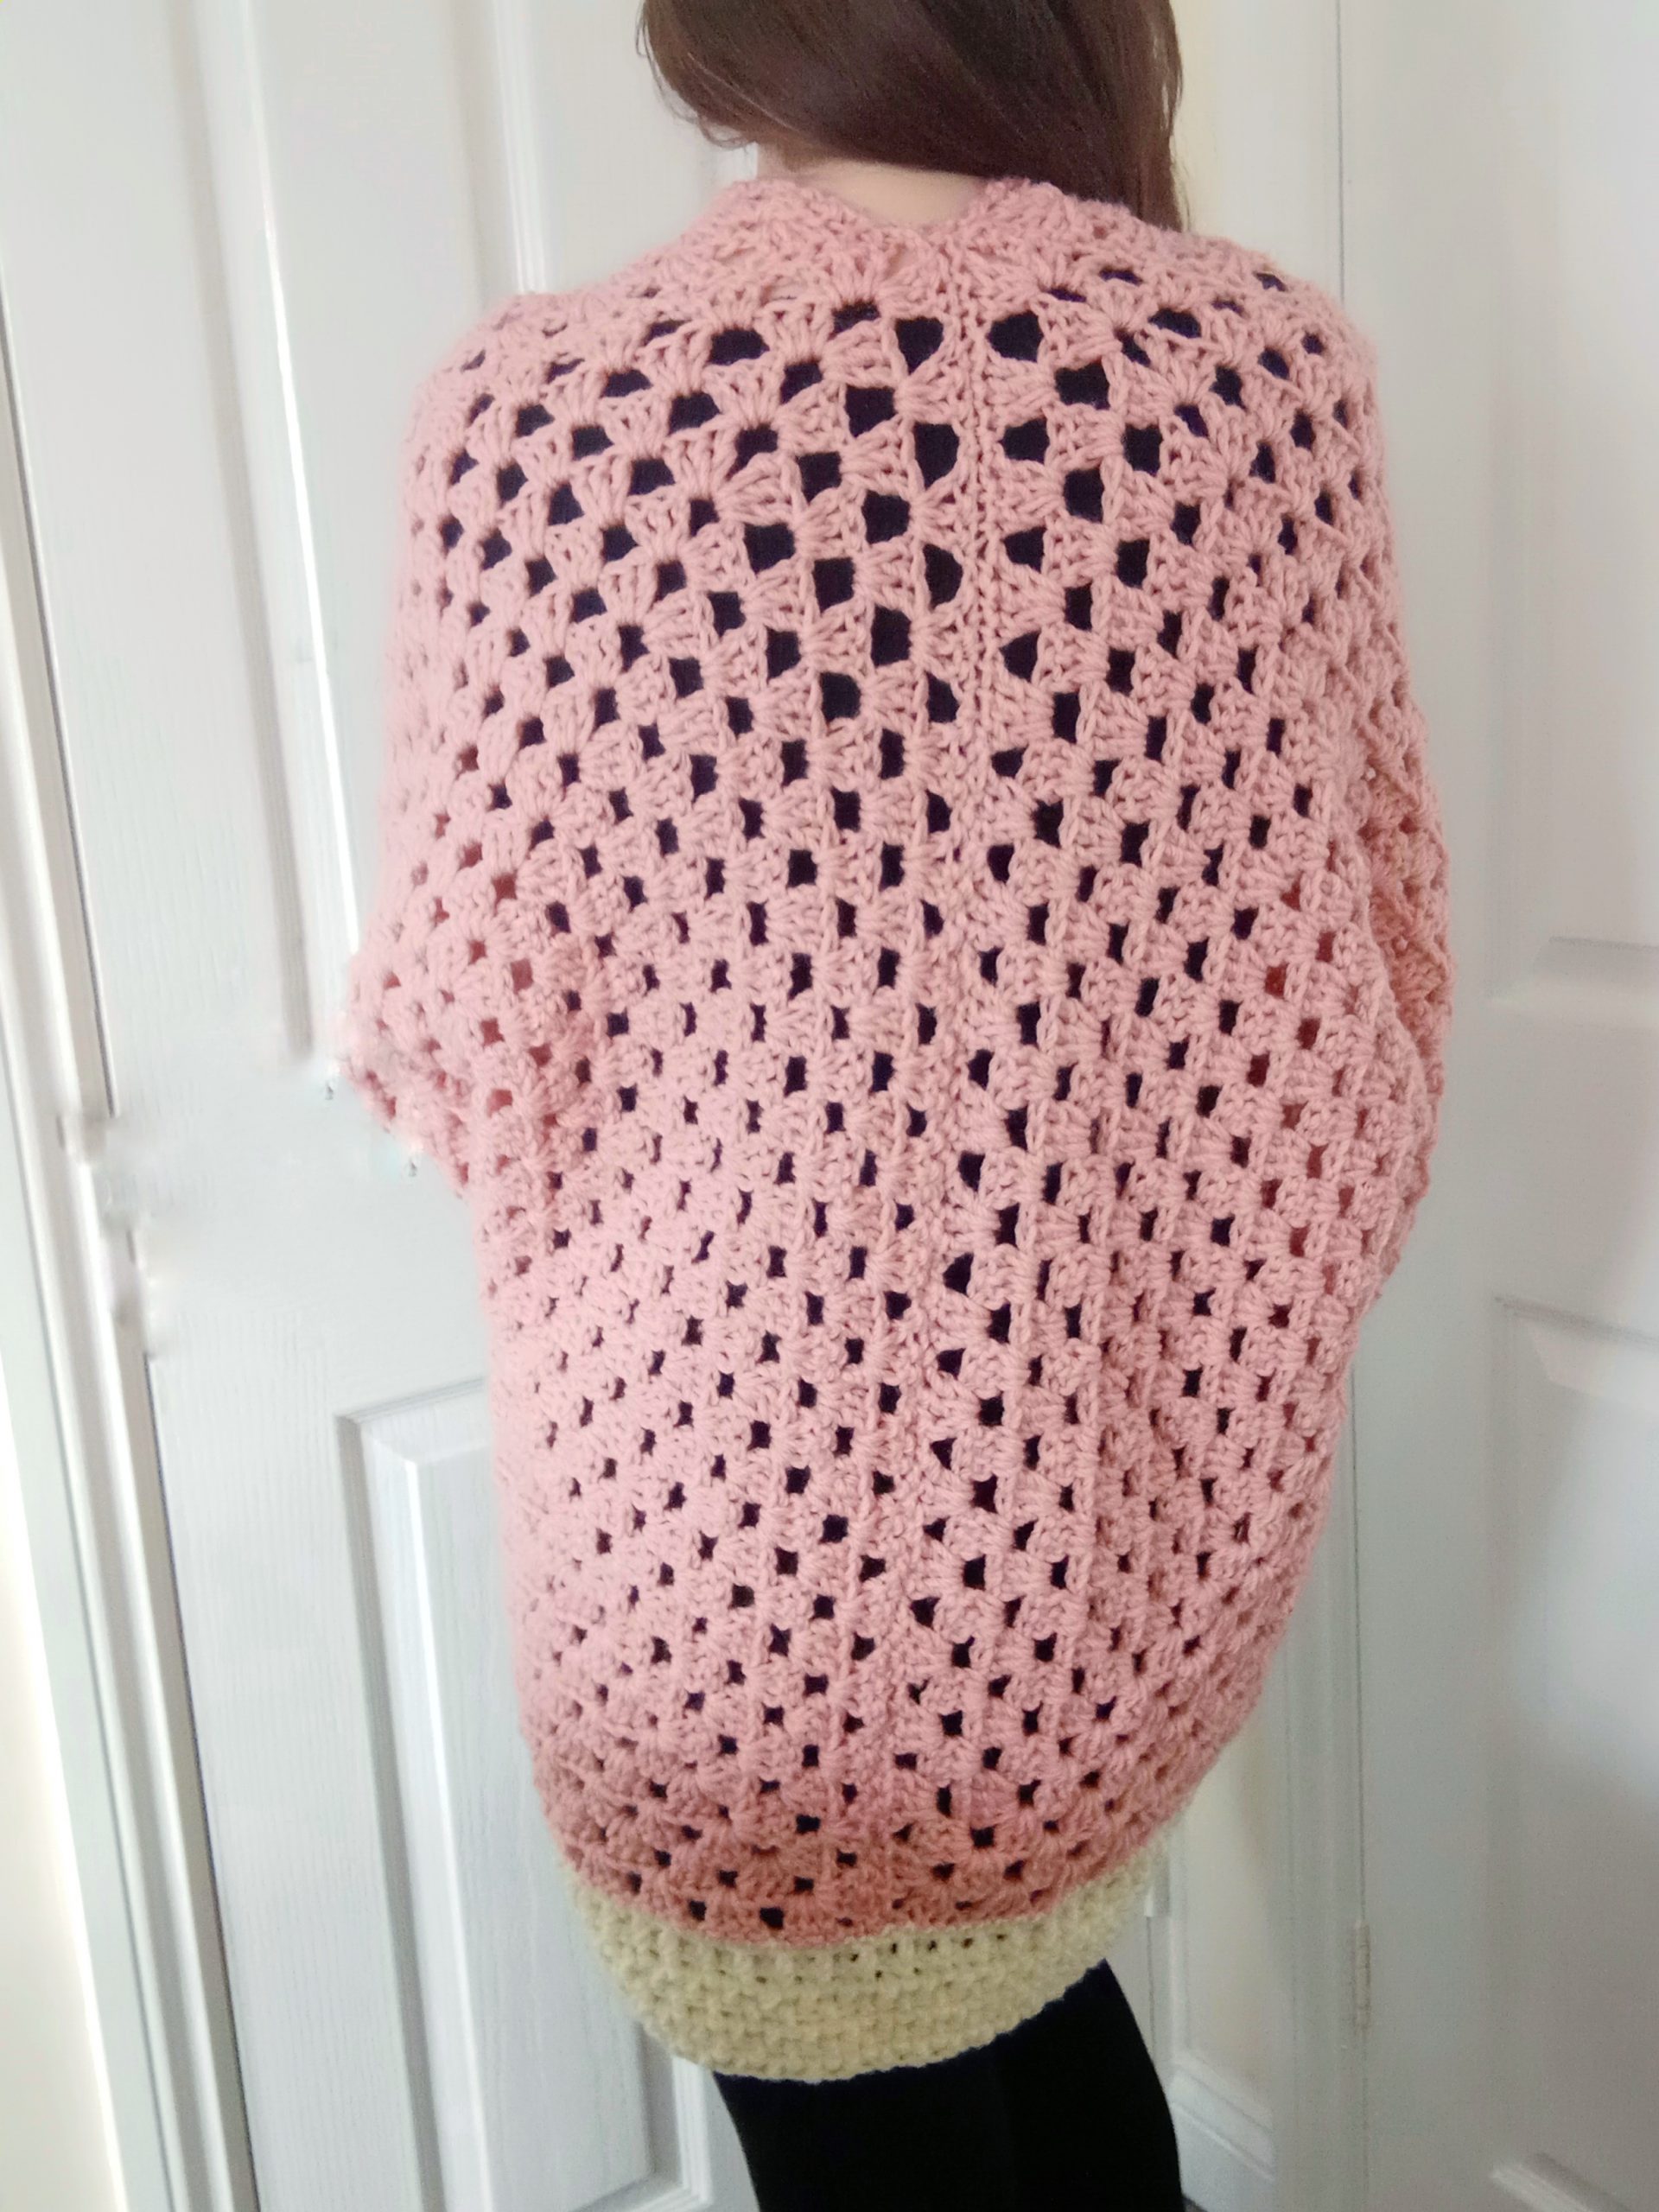
The Sweet Dreams Hexagon Cardigan is easy to crochet. Using Aran weight yarn, it also works up very quickly. I had wanted to create a hexagon cardigan for a long time now, and was waiting for the perfect yarn to do so. One day I ordered some skeins of Vanna’s Choice yarn in shade pink, and I knew it would be perfect for this cardigan. This yarn is beautiful, and the pale pink shade is very feminine.
This cardigan definitely had a Boho vibe to it. The granny square look it has is so perfect, and the fact it it so oversized it amazing!
Crochet The Sweet Dreams Hexagon Cardigan: inclusive sizes
You can make this cardigan in any size that you wish. I have created a free written pattern for sizes S to 5XL, however, you can make it any size you want. If you want to make a child version, it is very easy. You simply need to crochet less rounds than stated, and measure up your hexagon as you go along to one of your child’s garment. You will then be able to make this for a child very easily.
So this is a perfect project if you were looking to make matching garments for you and your child. This crochet project can be made to measure, and this is what makes it so special!
I had already used Lion Brand Vanna’s Choice yarn once before, for this beautiful baby blanket. I used a blue shade, and called this pattern An Angel’s Love Baby Blanket.
Connecting with you
You can connect with me on Social Media on Youtube, Instagram, Pinterest or Facebook. I love nothing more than connecting with you. My user name for these platforms is Selina Veronique Crochet, and the direct links to these platforms are on my Home Page. You can also join my private Facebook group to connect: My Facebook group to connect.
I would be delighted if you wanted to subscribe to my weekly newsletter. You will then know when I release a free pattern, video tutorial and host a giveaway.
Thank you so much for stopping by,
Let me know in the comments if you enjoyed this project,
Xoxo Selina.
Crochet The Sweet Dreams Hexagon Cardigan: the pattern
You can purchase the large print, ad free, PDF Pattern from my Etsy store here: Crochet The Pink Hexagon Cardigan Pattern
You can purchase the large print, ad free, PDF pattern from my Ravelry shop here: Crochet The Pink Hexagon Cardigan Pattern
Level: Easy +
Notes: I will be writing in US terms
Materials:
7 (S), 8 (M, L), 9 (XL), 10 (XXL, XXXL), 11 (XXXXL), 12 (XXXXXL) skeins of Vanna’s Choice in shade Pink
2 skeins of Stylecraft Special Aran in shade Cream (or any other Aran/Medium 4 yarn of your preference).
A 5 and 6 mm crochet hook
A tapestry needle
A pair of scissors
Gauge
4” (10 cm) x 4” (10 cm) = 5 rounds
Sizes of finished cardigan
These are the sizes measured once cardigan has been assembled, without the edgings and borders. Because this is a hexagon cardigan, the sleeves are wide for each size, and they are just worked up automatically while we crochet both our hexagon squares to form cardigan. Therefore, they automatically are bigger if you crochet a bigger size (ie add more rounds to each square).
Size S
Body of cardigan: 26” (66 cm) in length x 23” (59,5 cm) in width
Size M
Body of cardigan: 27” (69,5 cm) in length x 25” (64,5 cm) in width
Size L
Body of cardigan: 28” (71 cm) in length x 27” (69 cm) in width
Size XL
Body of cardigan: 29” (74 cm) in length x 29” (74 cm) in width
Size XXL
Body of cardigan: 30” (76 cm) in length x 31” (79 cm) in width
Size XXXL
Body of cardigan: 31”(79 cm) in length x 33” (84 cm) in width
Size XXXXL
Body of cardigan: 32” (82 cm) in length x 35” (89 cm) in width
Size XXXXXL
Body of cardigan: 33” (84 cm) in length x 37” (94 cm) in width
Abbreviations
ch: chain
sk: skip
SP: space
SC: Single Crochet (= UK Double Crochet)
DC: Double Crochet (=UK Treble Crochet)
FPDC: Front Post Double Crochet
BPDC: Back Post Double Crochet
Sl st: Slip stitch
EOR: End of round
General notes concerning this pattern and crochet hexagons:
Hexagons do not lie flat whilst you crochet them, they are instead wavy. Please note this is completely normal and once have finished each hexagon (we will be crocheting 2), we will be placing them flat and folded in such a way that they will lie flat and create the shape of the cardigan.
The fact that each hexagon does not lie flat as you crochet it is not a mistake.
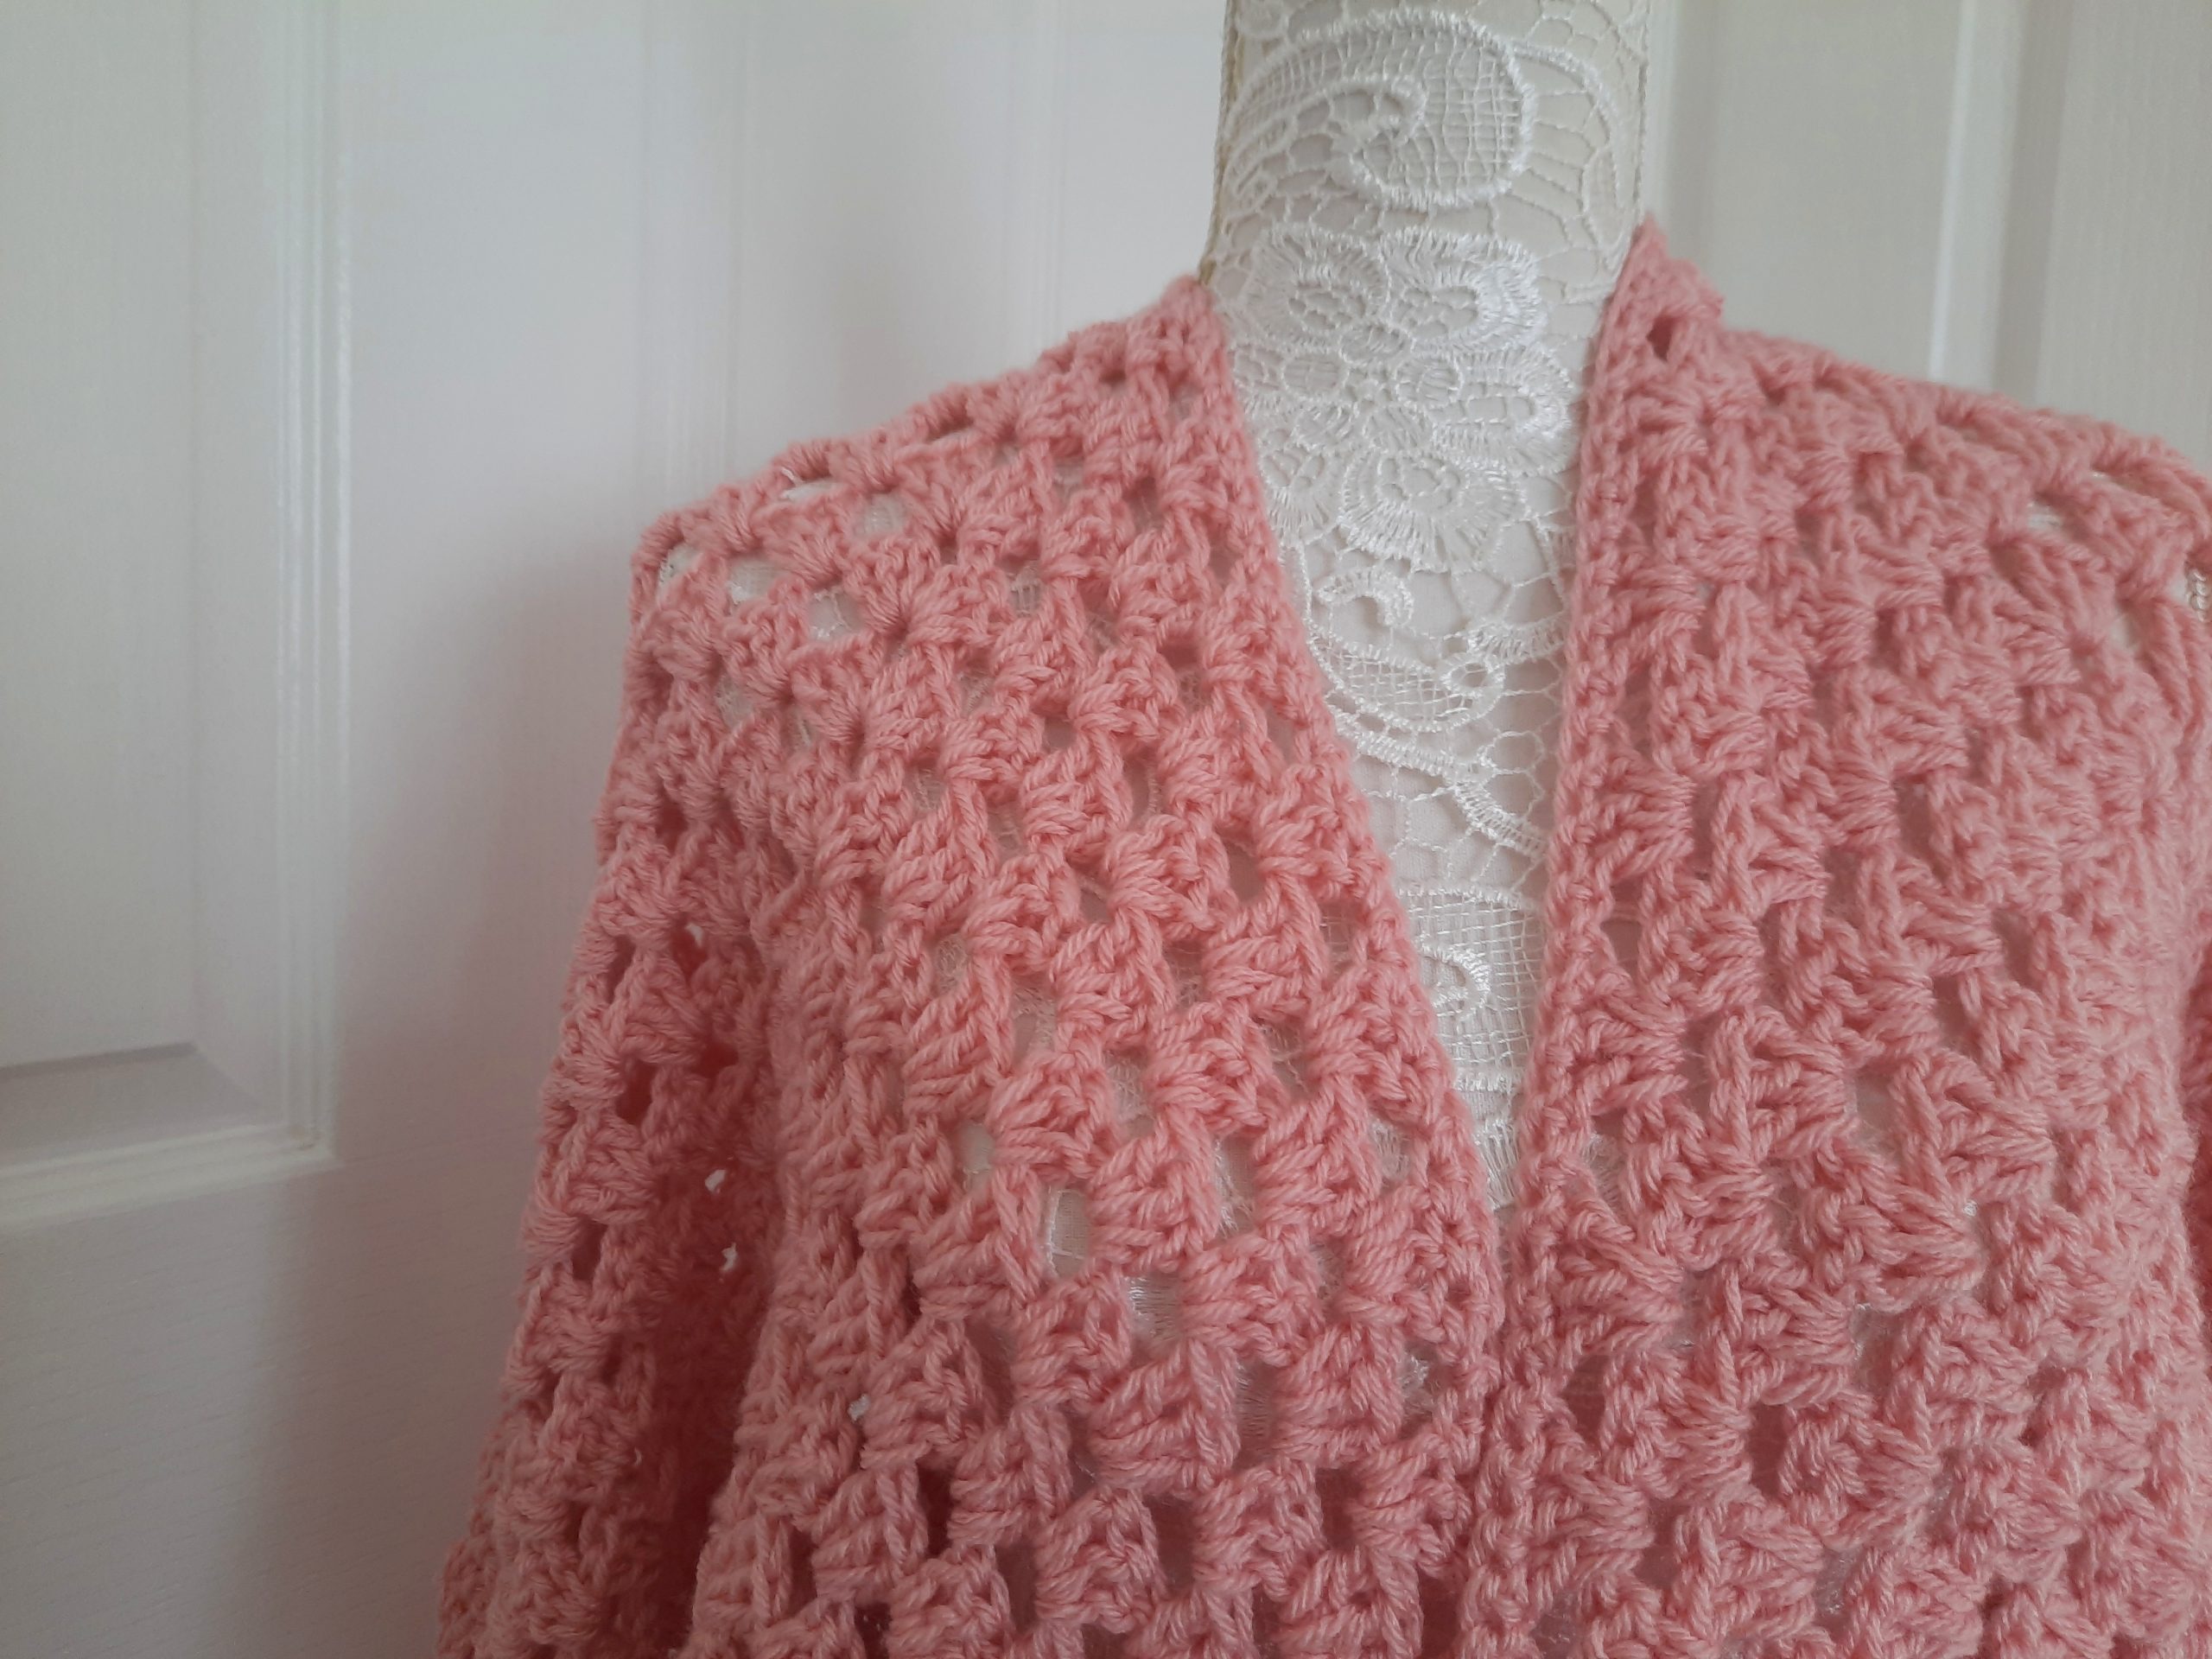
Corner spaces will always feature 3 chains, and the side spaces always feature 1 chain.
The chain 3 at the beginning of each round counts as a HDC throughout.
There will always be 6 corners per row for each hexagon. Each corner will be comprised of 3 DC, ch 3, 3 DC.
Pattern begins here
Use 6 mm crochet hook for this part, and Vanna’s Choice yarn.
Make 2 hexagon cardigans:
Ch 5, sl st to first ch to form a ring.
Complete rounds as follows:
Round 1: Ch 3 (=DC), 2 DC within the ring (=3 DC total); [ch 3, 3 DC] 5 times, ch 3, sl st to first ch 3 to close round.
Round 2: Ch 3 (=DC), turn your work, work 2 DC in ch 3 sp from previous row (=3 DC total), ch 3, 3 DC into same sp; [ch 1, place 3 DC, ch 3, 3 DC into next ch 3 from previous row] until eor. Ch 1, sl st to 1st ch 3 to close round.
Round 3: Ch 3, turn your work, work 2 DC into ch sp from previous row. Ch 1, [3 DC, ch 3, 3DC] into next ch sp (which is also the corner); [Ch 1, 3 DC into next ch sp, ch 1; 3 DC, ch 3, 3 DC into next ch sp], until eor. Ch 1, sl st to first ch 3 to close round.
Round 4: Ch 3 (=DC), turn your work, 2 DC into ch sp from previous row (=3 DC total); *ch 1, 3 DC, ch 3, 3 DC into next ch sp (=corner); [ch 1, 3 DC into next ch sp 2 times] ** Repeat from * to ** 5 times; ch 1, 3 DC, ch 3, 3 DC into next ch space; ch 1, 3 DC into next ch space, ch 1, sl st to ch 3 from beginning of row to close of round.
Note
We are now starting to see this pattern being worked up more clearly. As the hexagon will grow, we will have more “side” clusters of 3 DC, and have 6 clusters of 3 DC, ch 3, 3 DC which are the corners (we will always have the same number of corners which is 6 throughout).
Round 5-18 (S), 19 (M), 20 (L), 21 (XL), 22 (XXL), 23 (XXXL), 24 (XXXXL), 25 (XXXXXL): repeat row 4, always adding 1 cluster of 3 DC per side per round as you increase your rounds. Of course, there will always be only 6 corners per round as you go along, where you will be placing 3 DC, ch 3, 3 DC.
Assembling your cardigan together
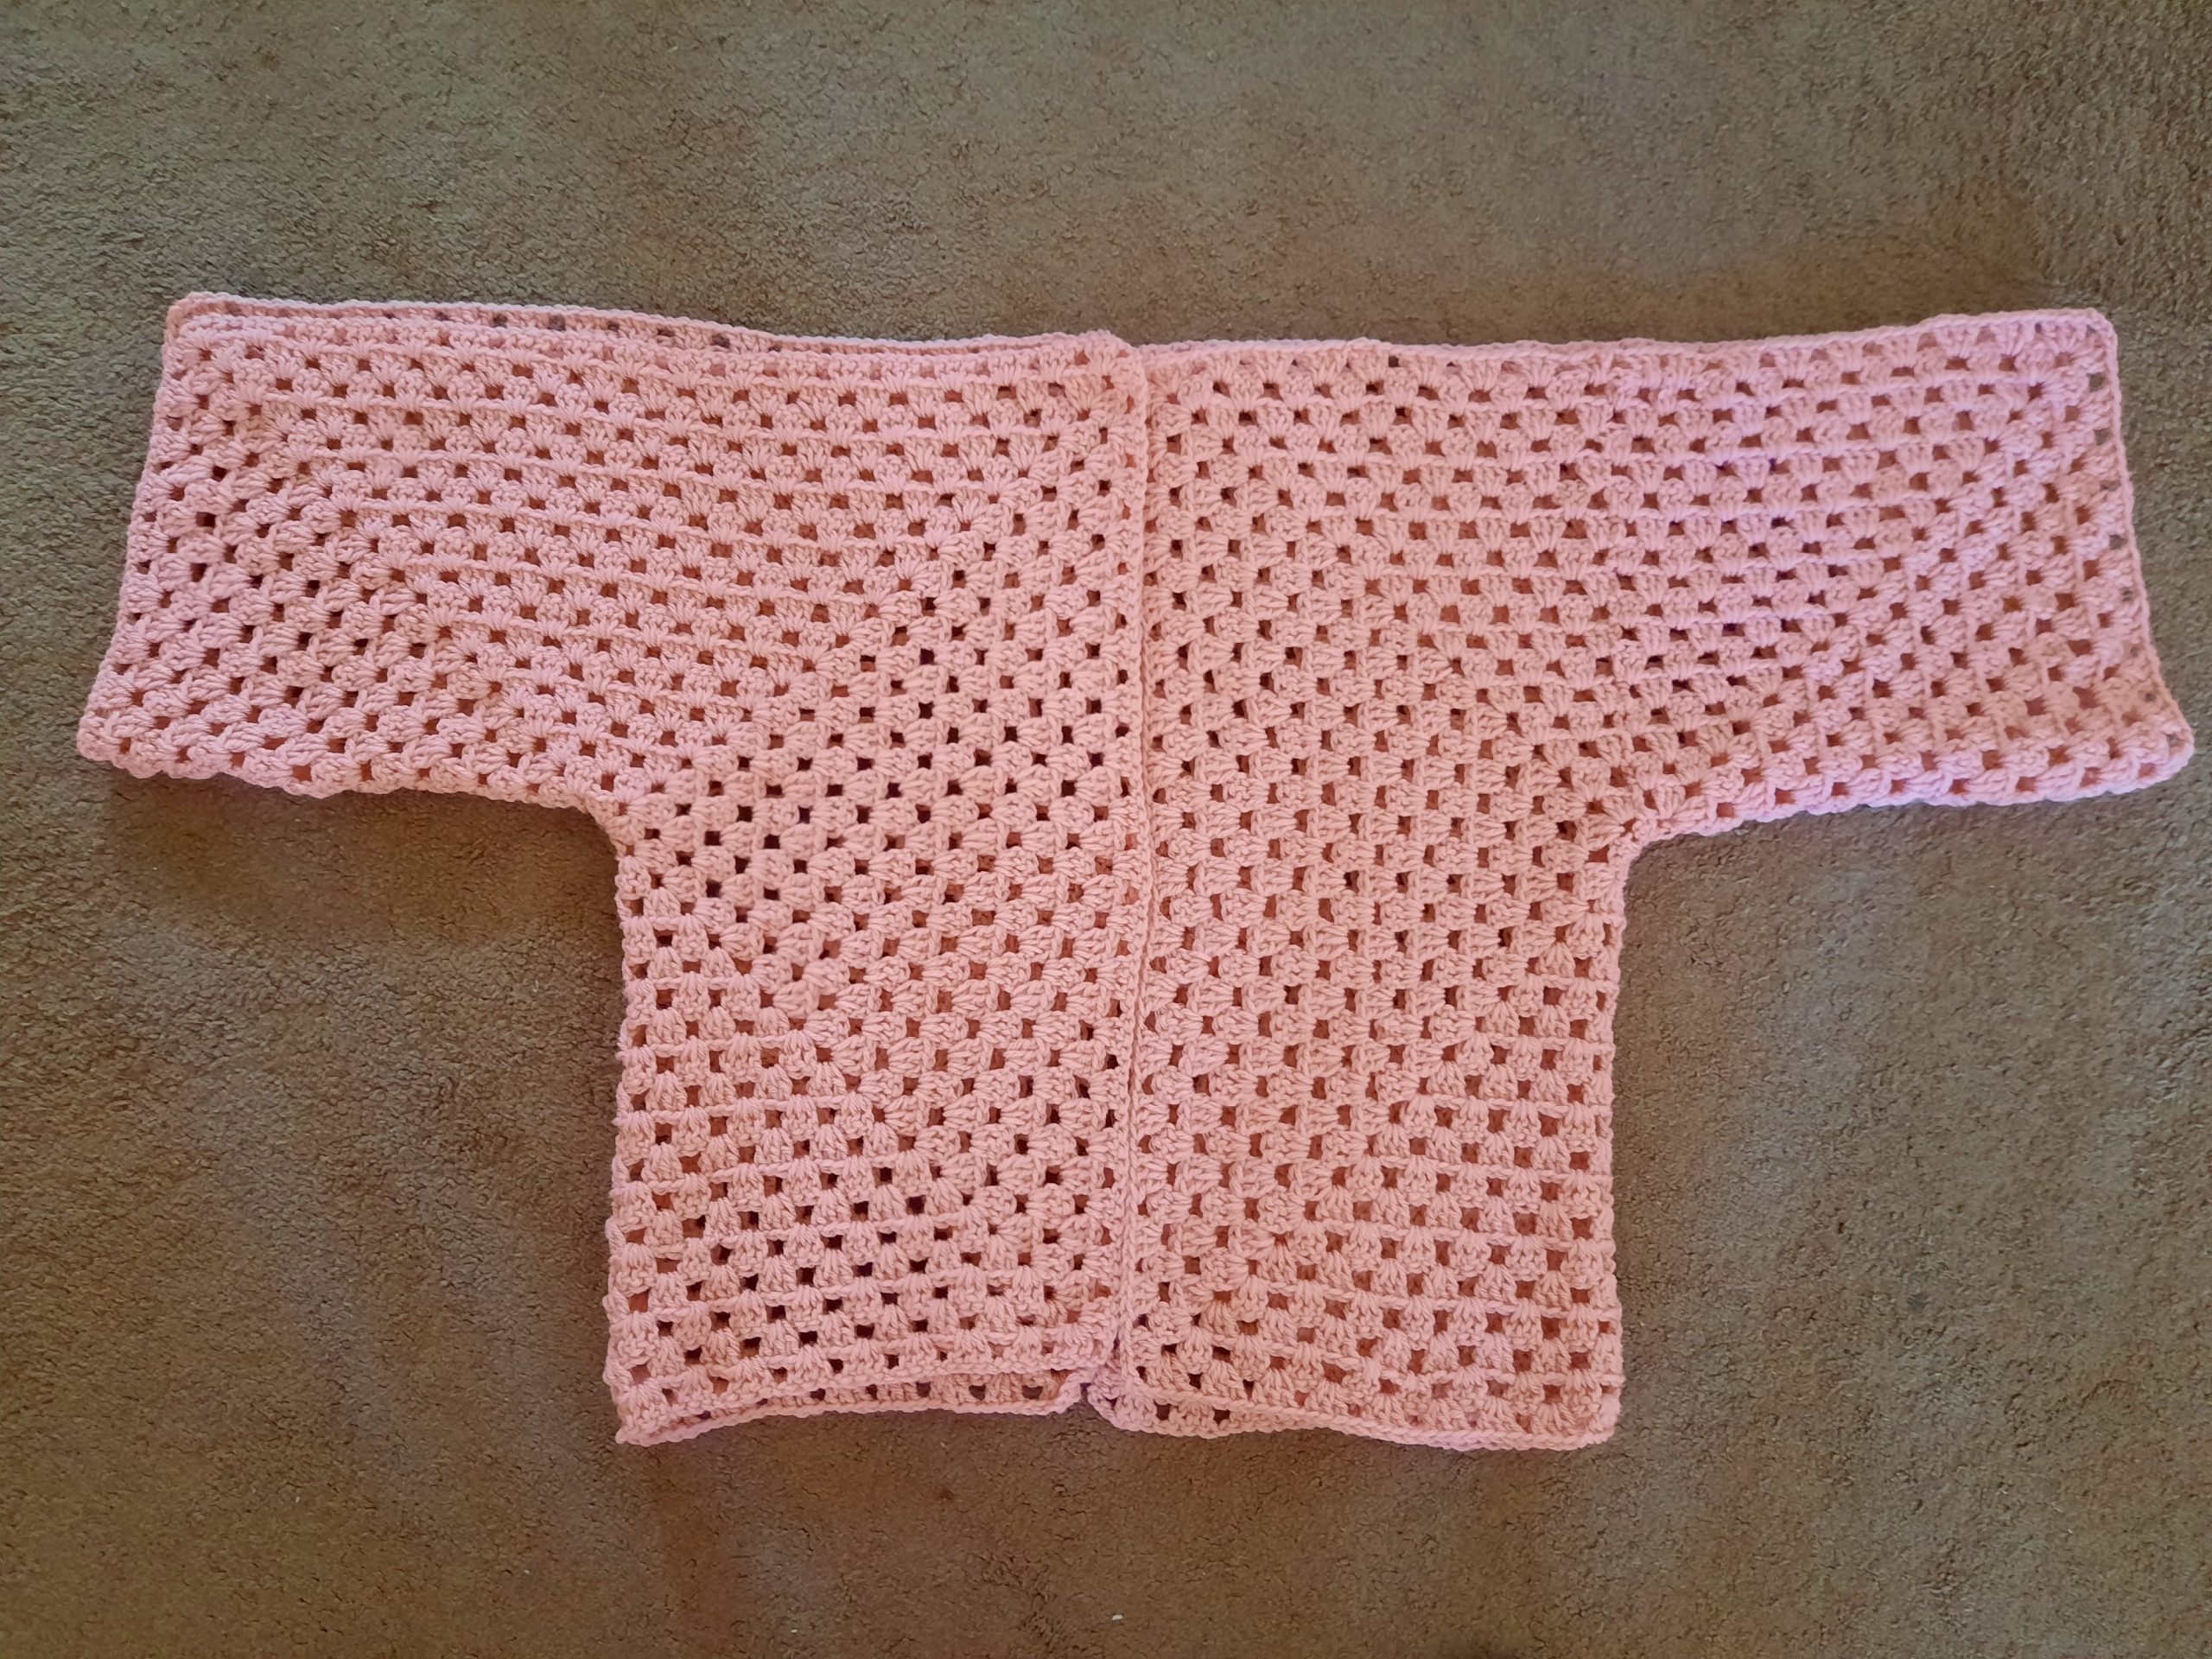
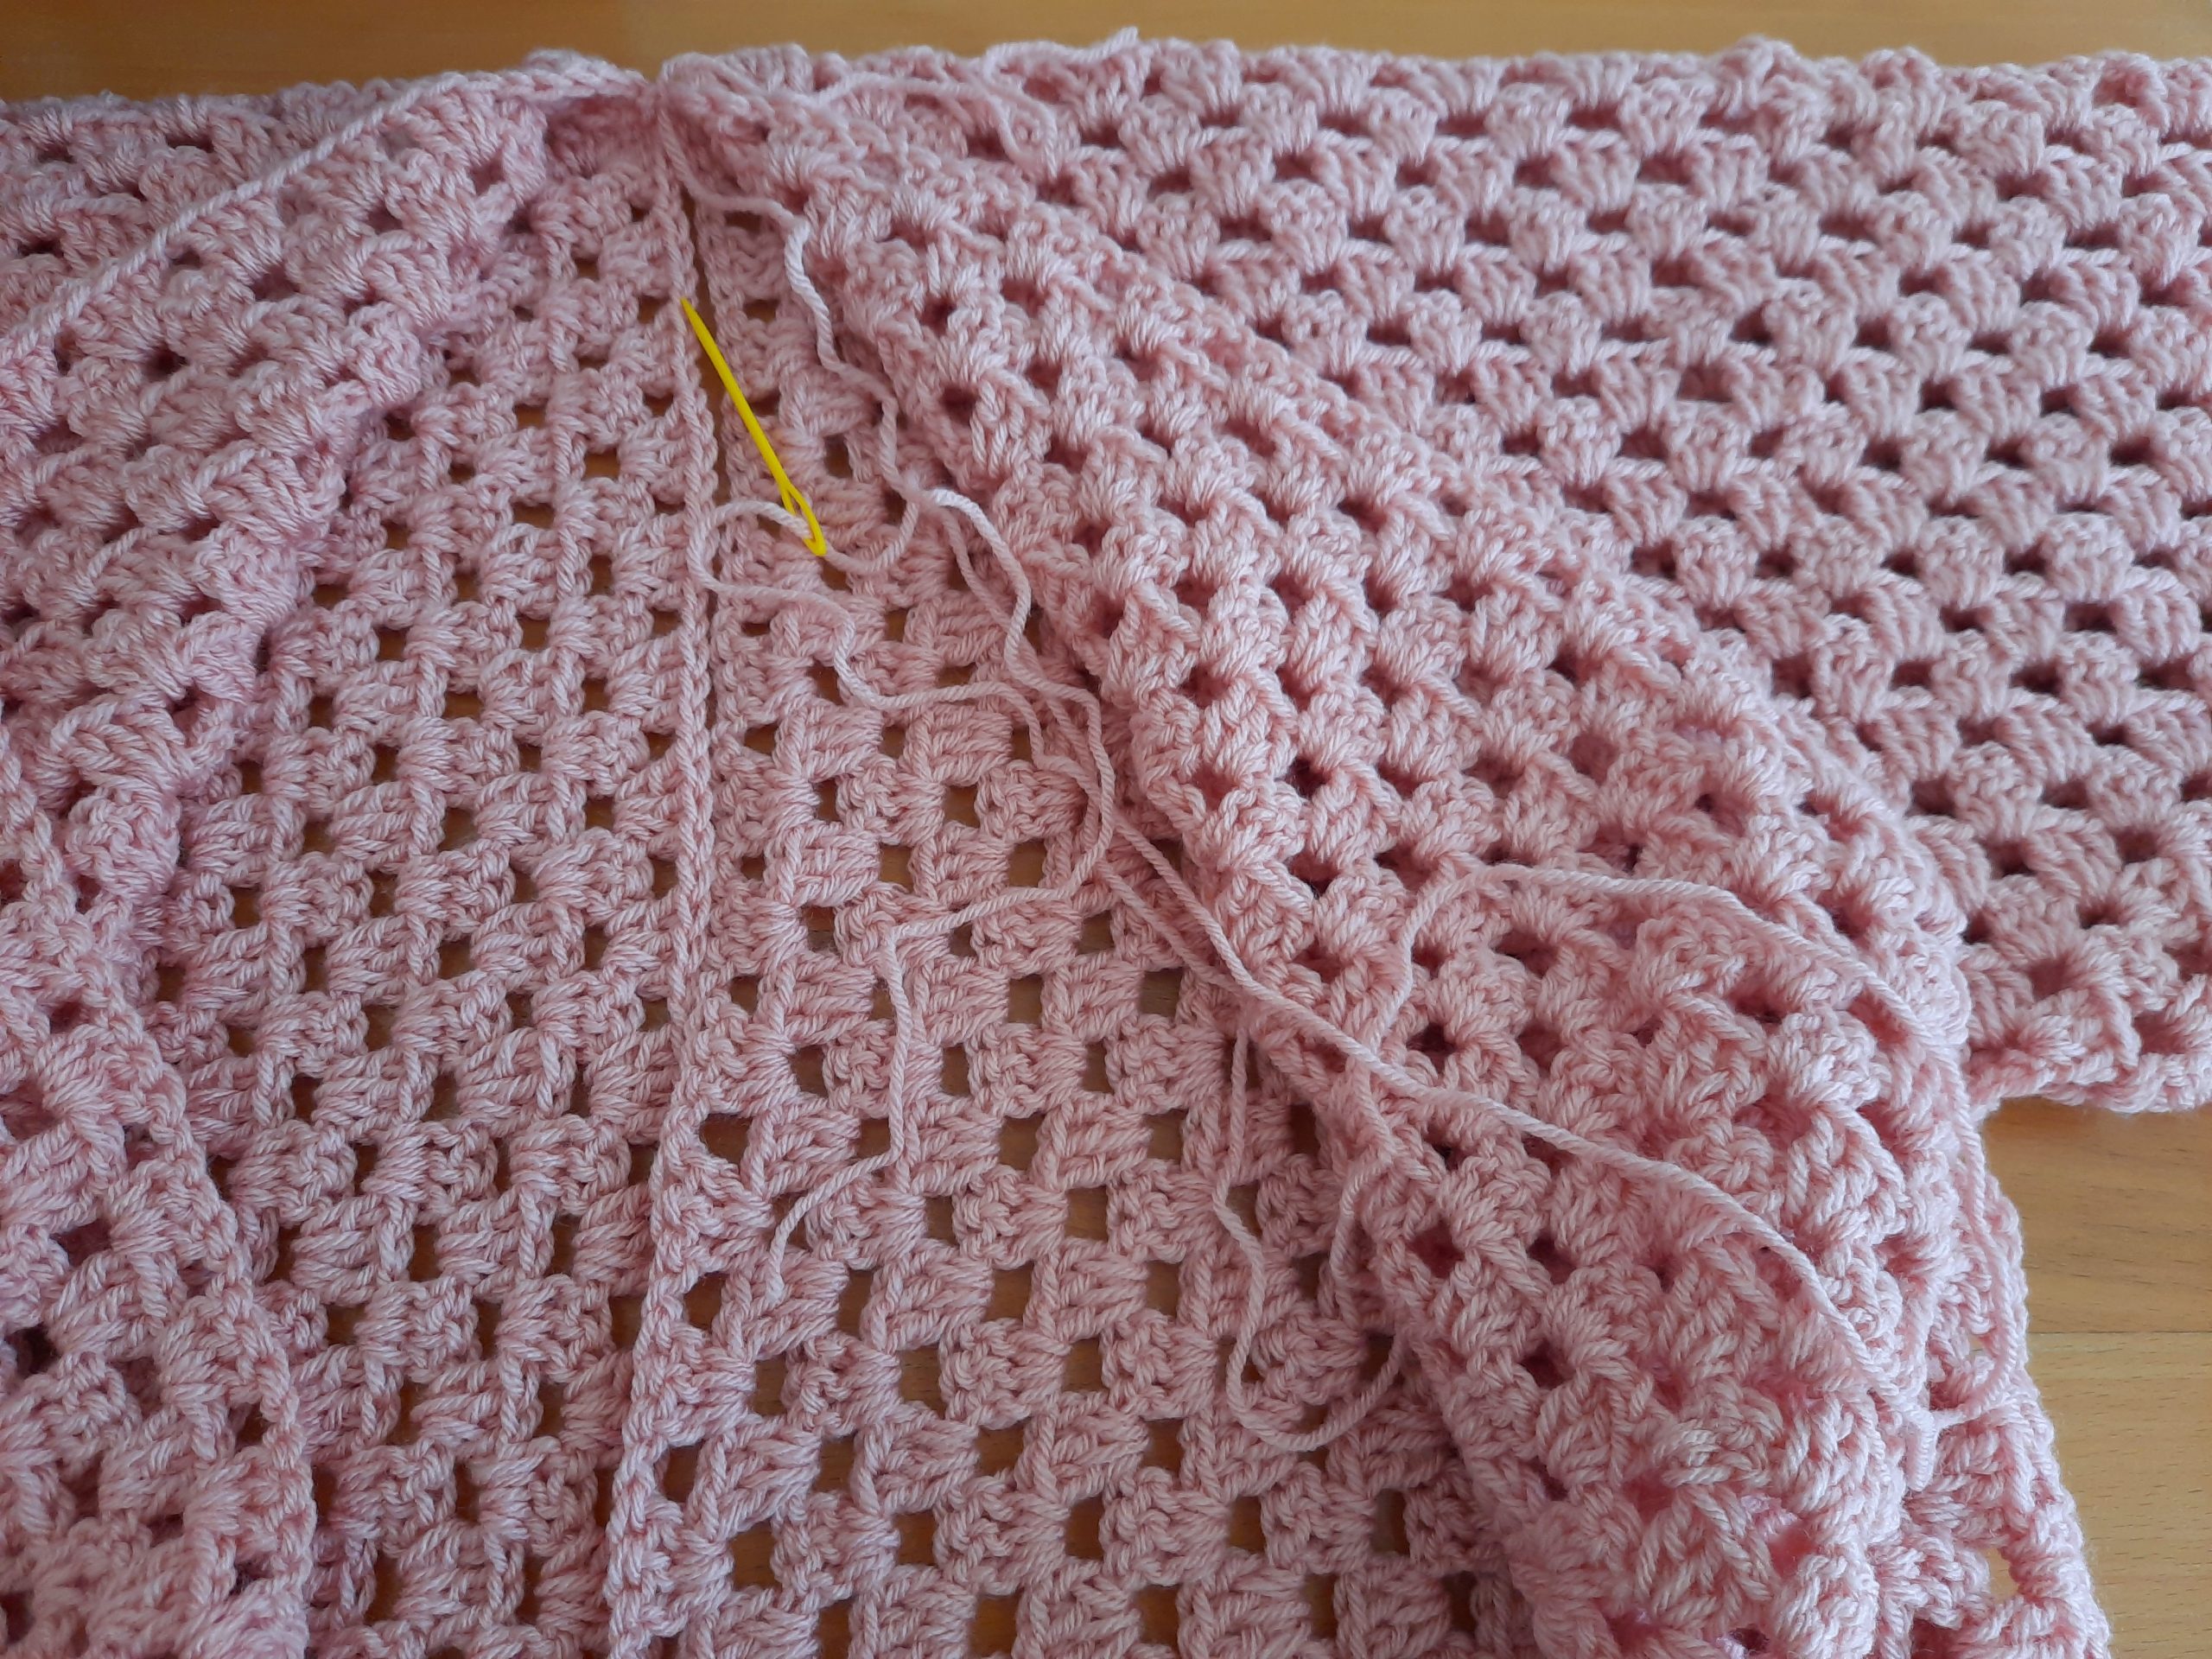
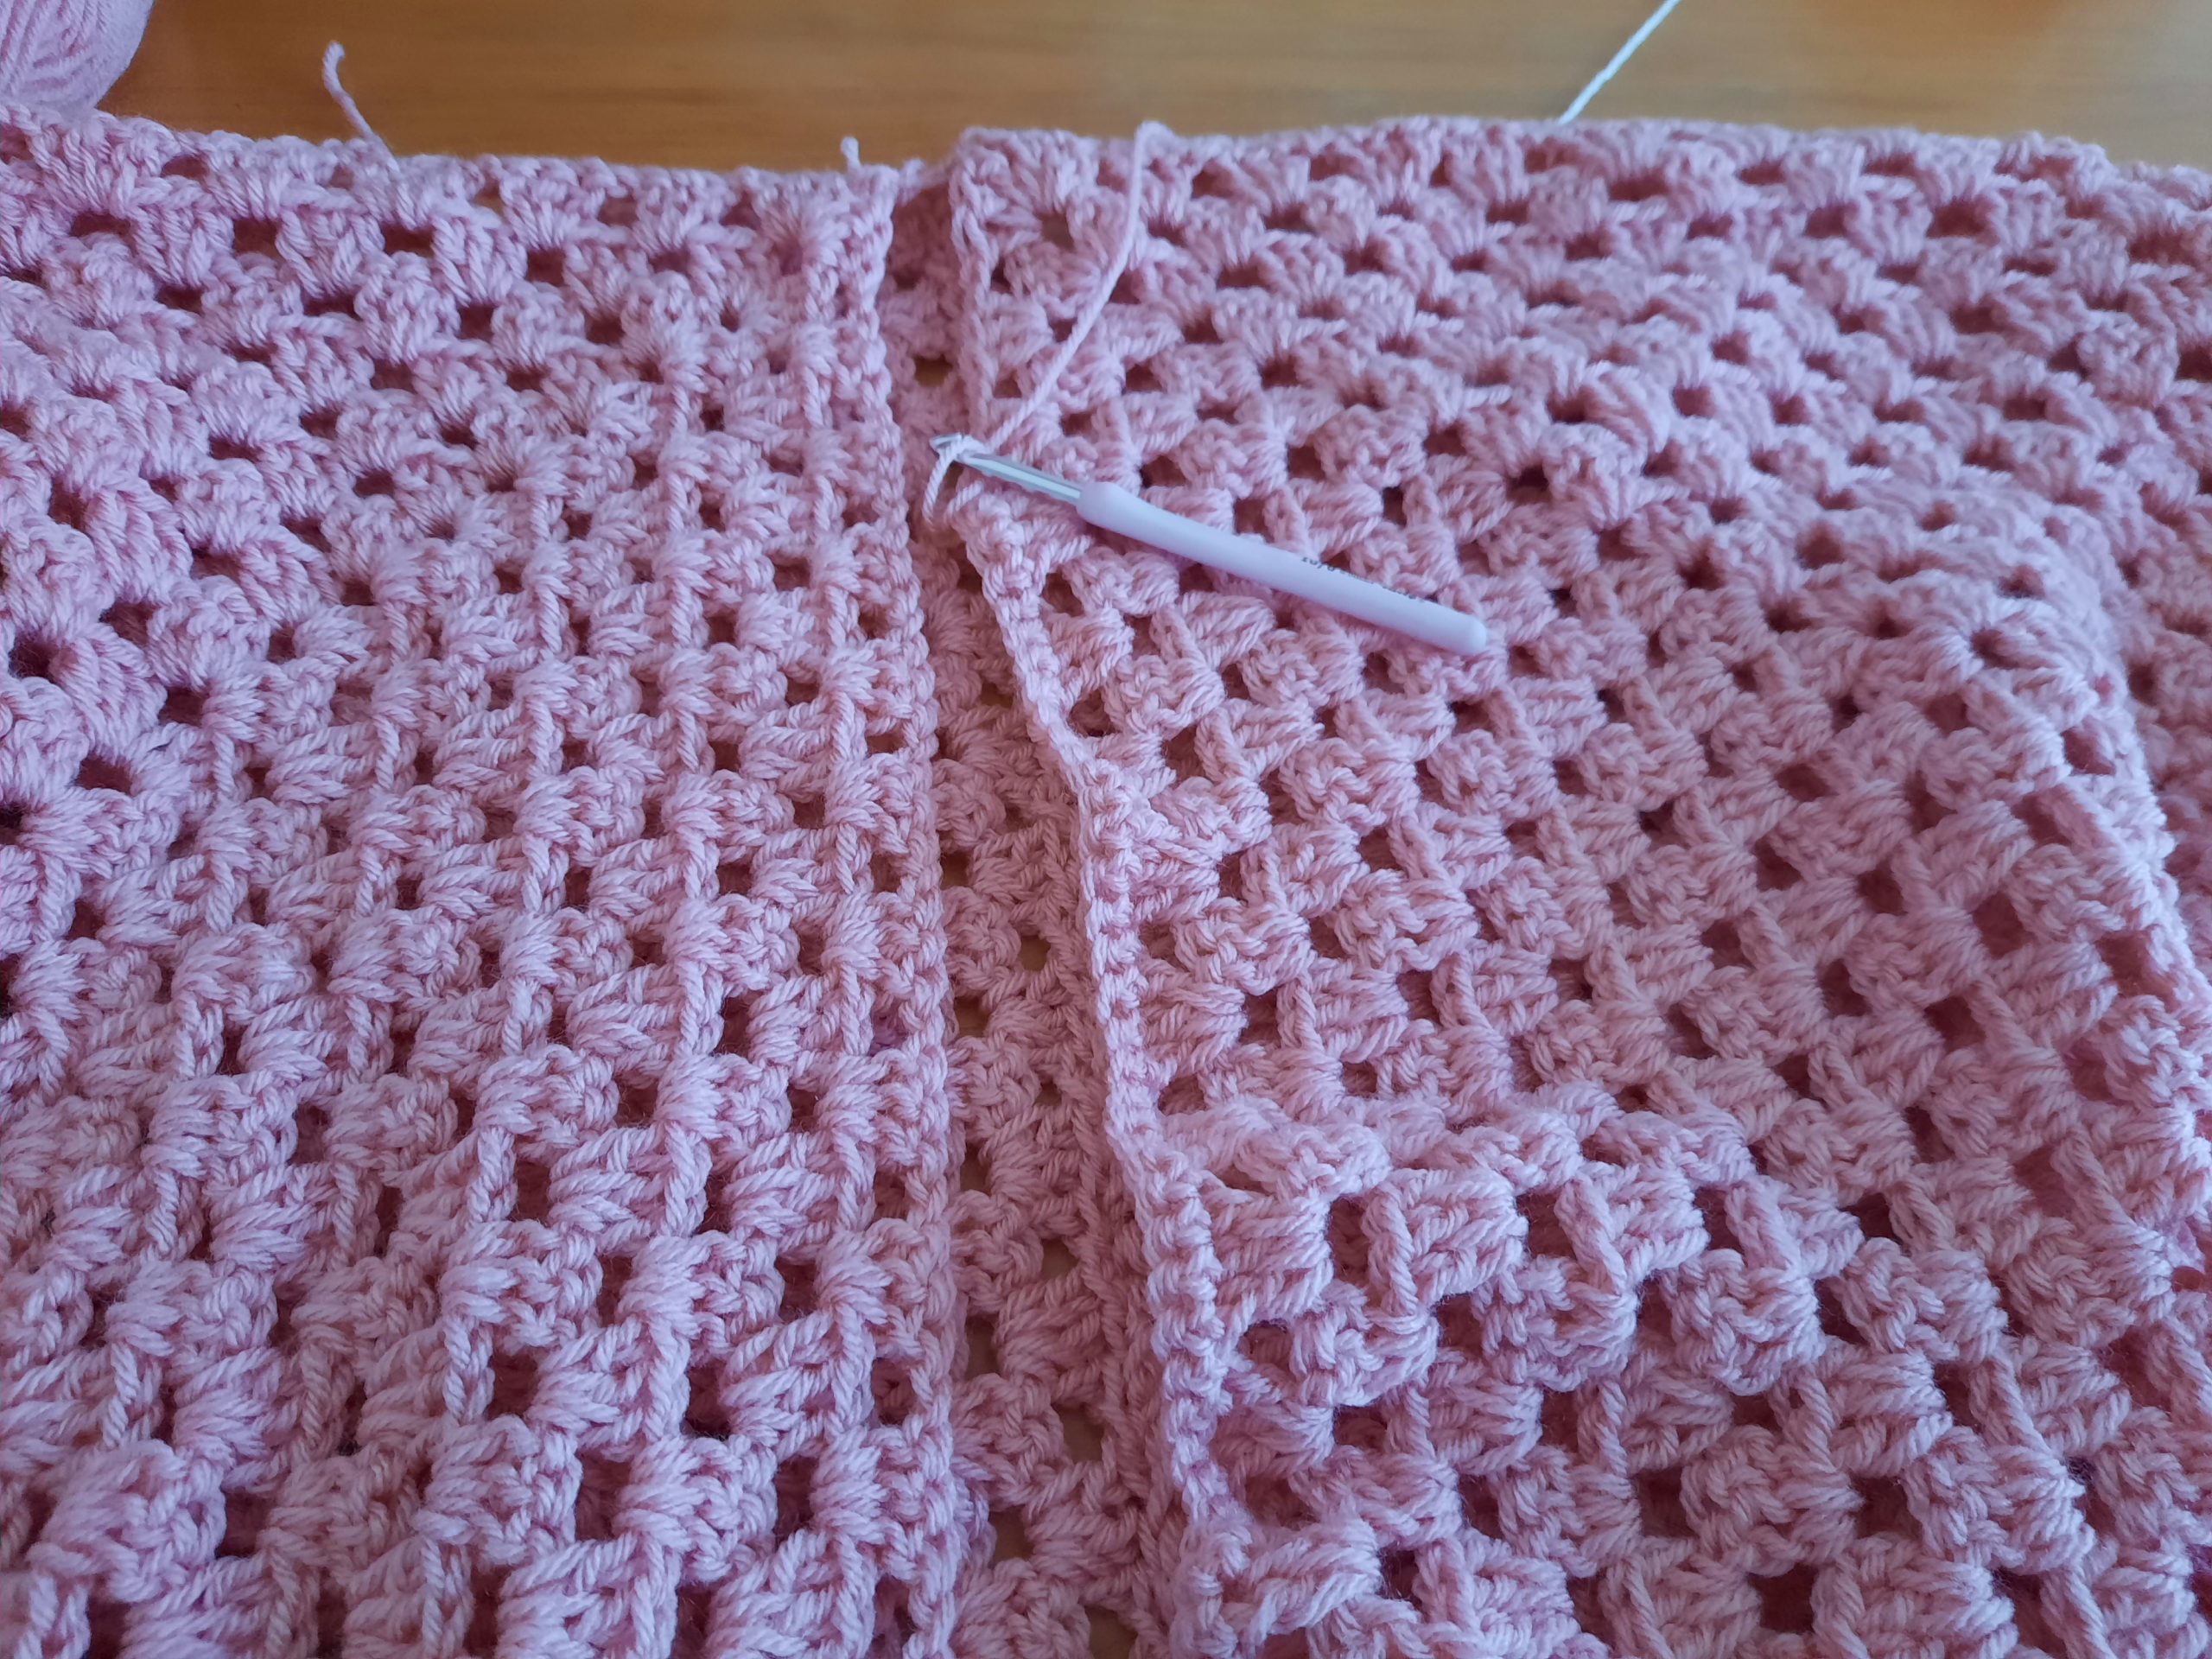
Once you have completed your 2 hexagons, fasten off, tidy up all loose ends. Sew in the center (where we began) of each hexagon to prevent unraveling.
Now place both hexagons side by side, folding them so as to form the shape of a cardigan.
With piece of yarn and tapestry needle, start seaming the top part of the cardigan together as seen in photo. Sew the seam in straight across, using the mattress stitch.
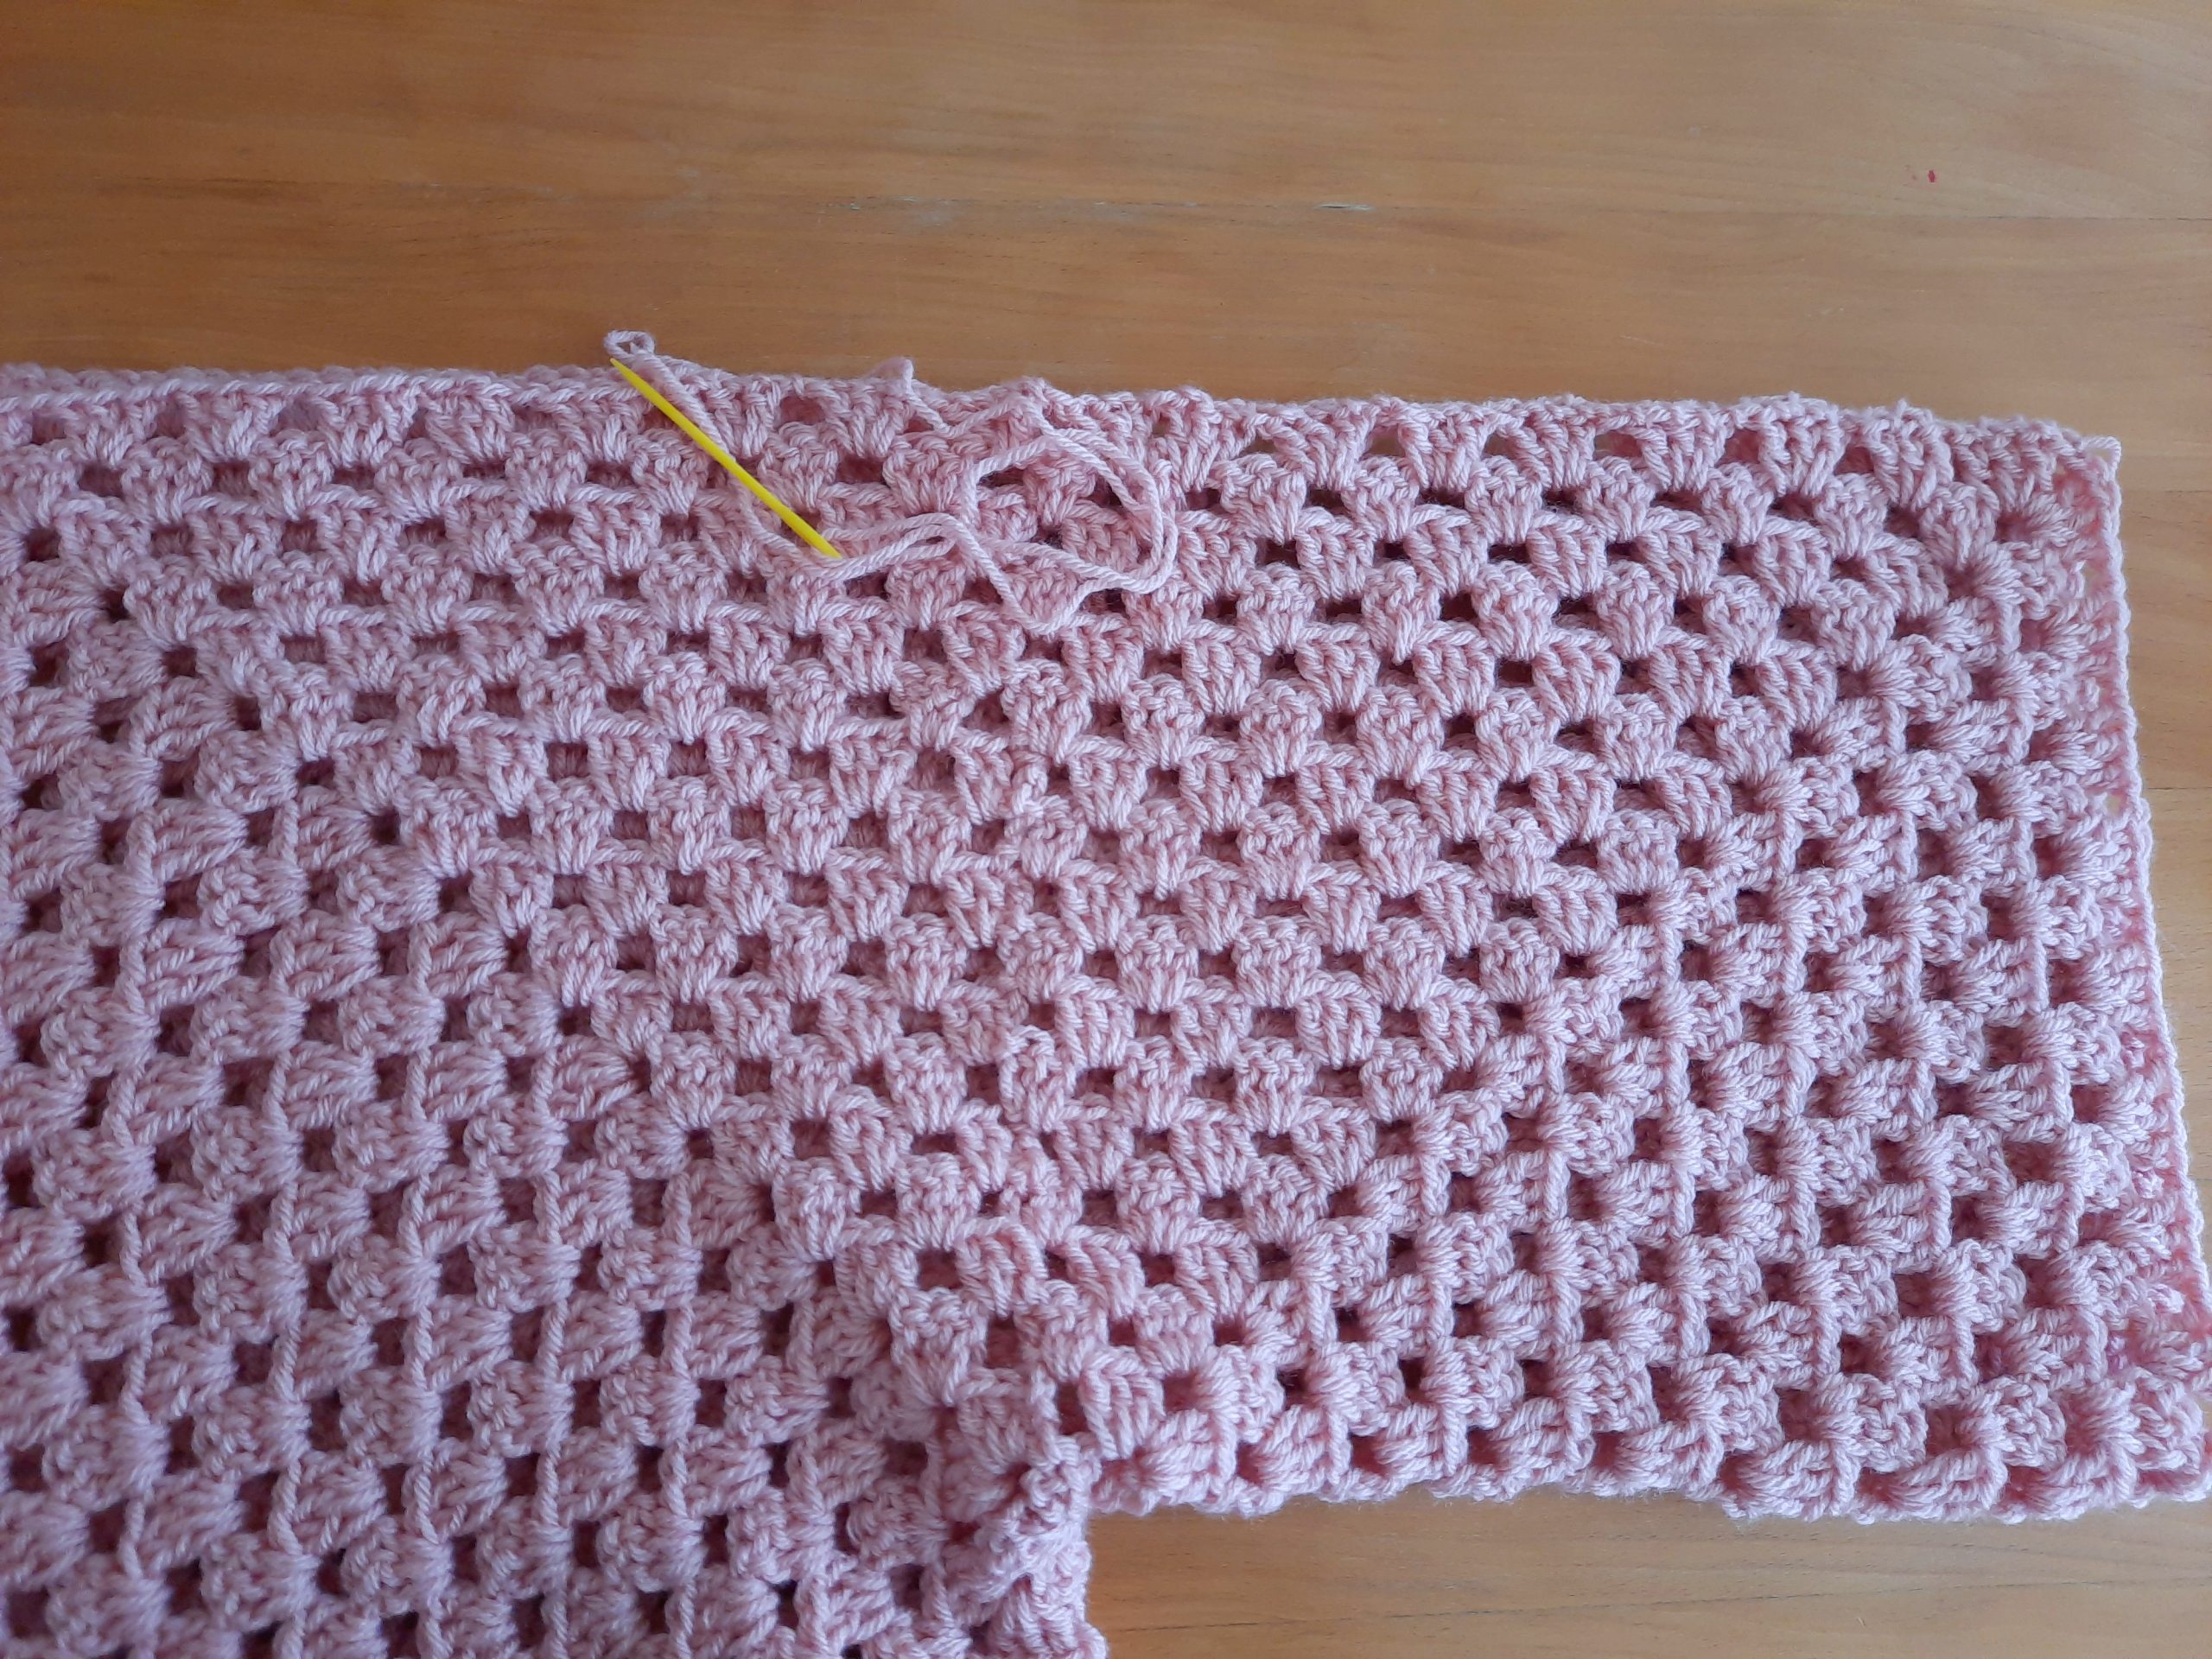
Fasten off, tidy up all loose end.
Now sew in the back seam of your cardigan, using mattress stitch.
Fasten off, tidy up loose end.
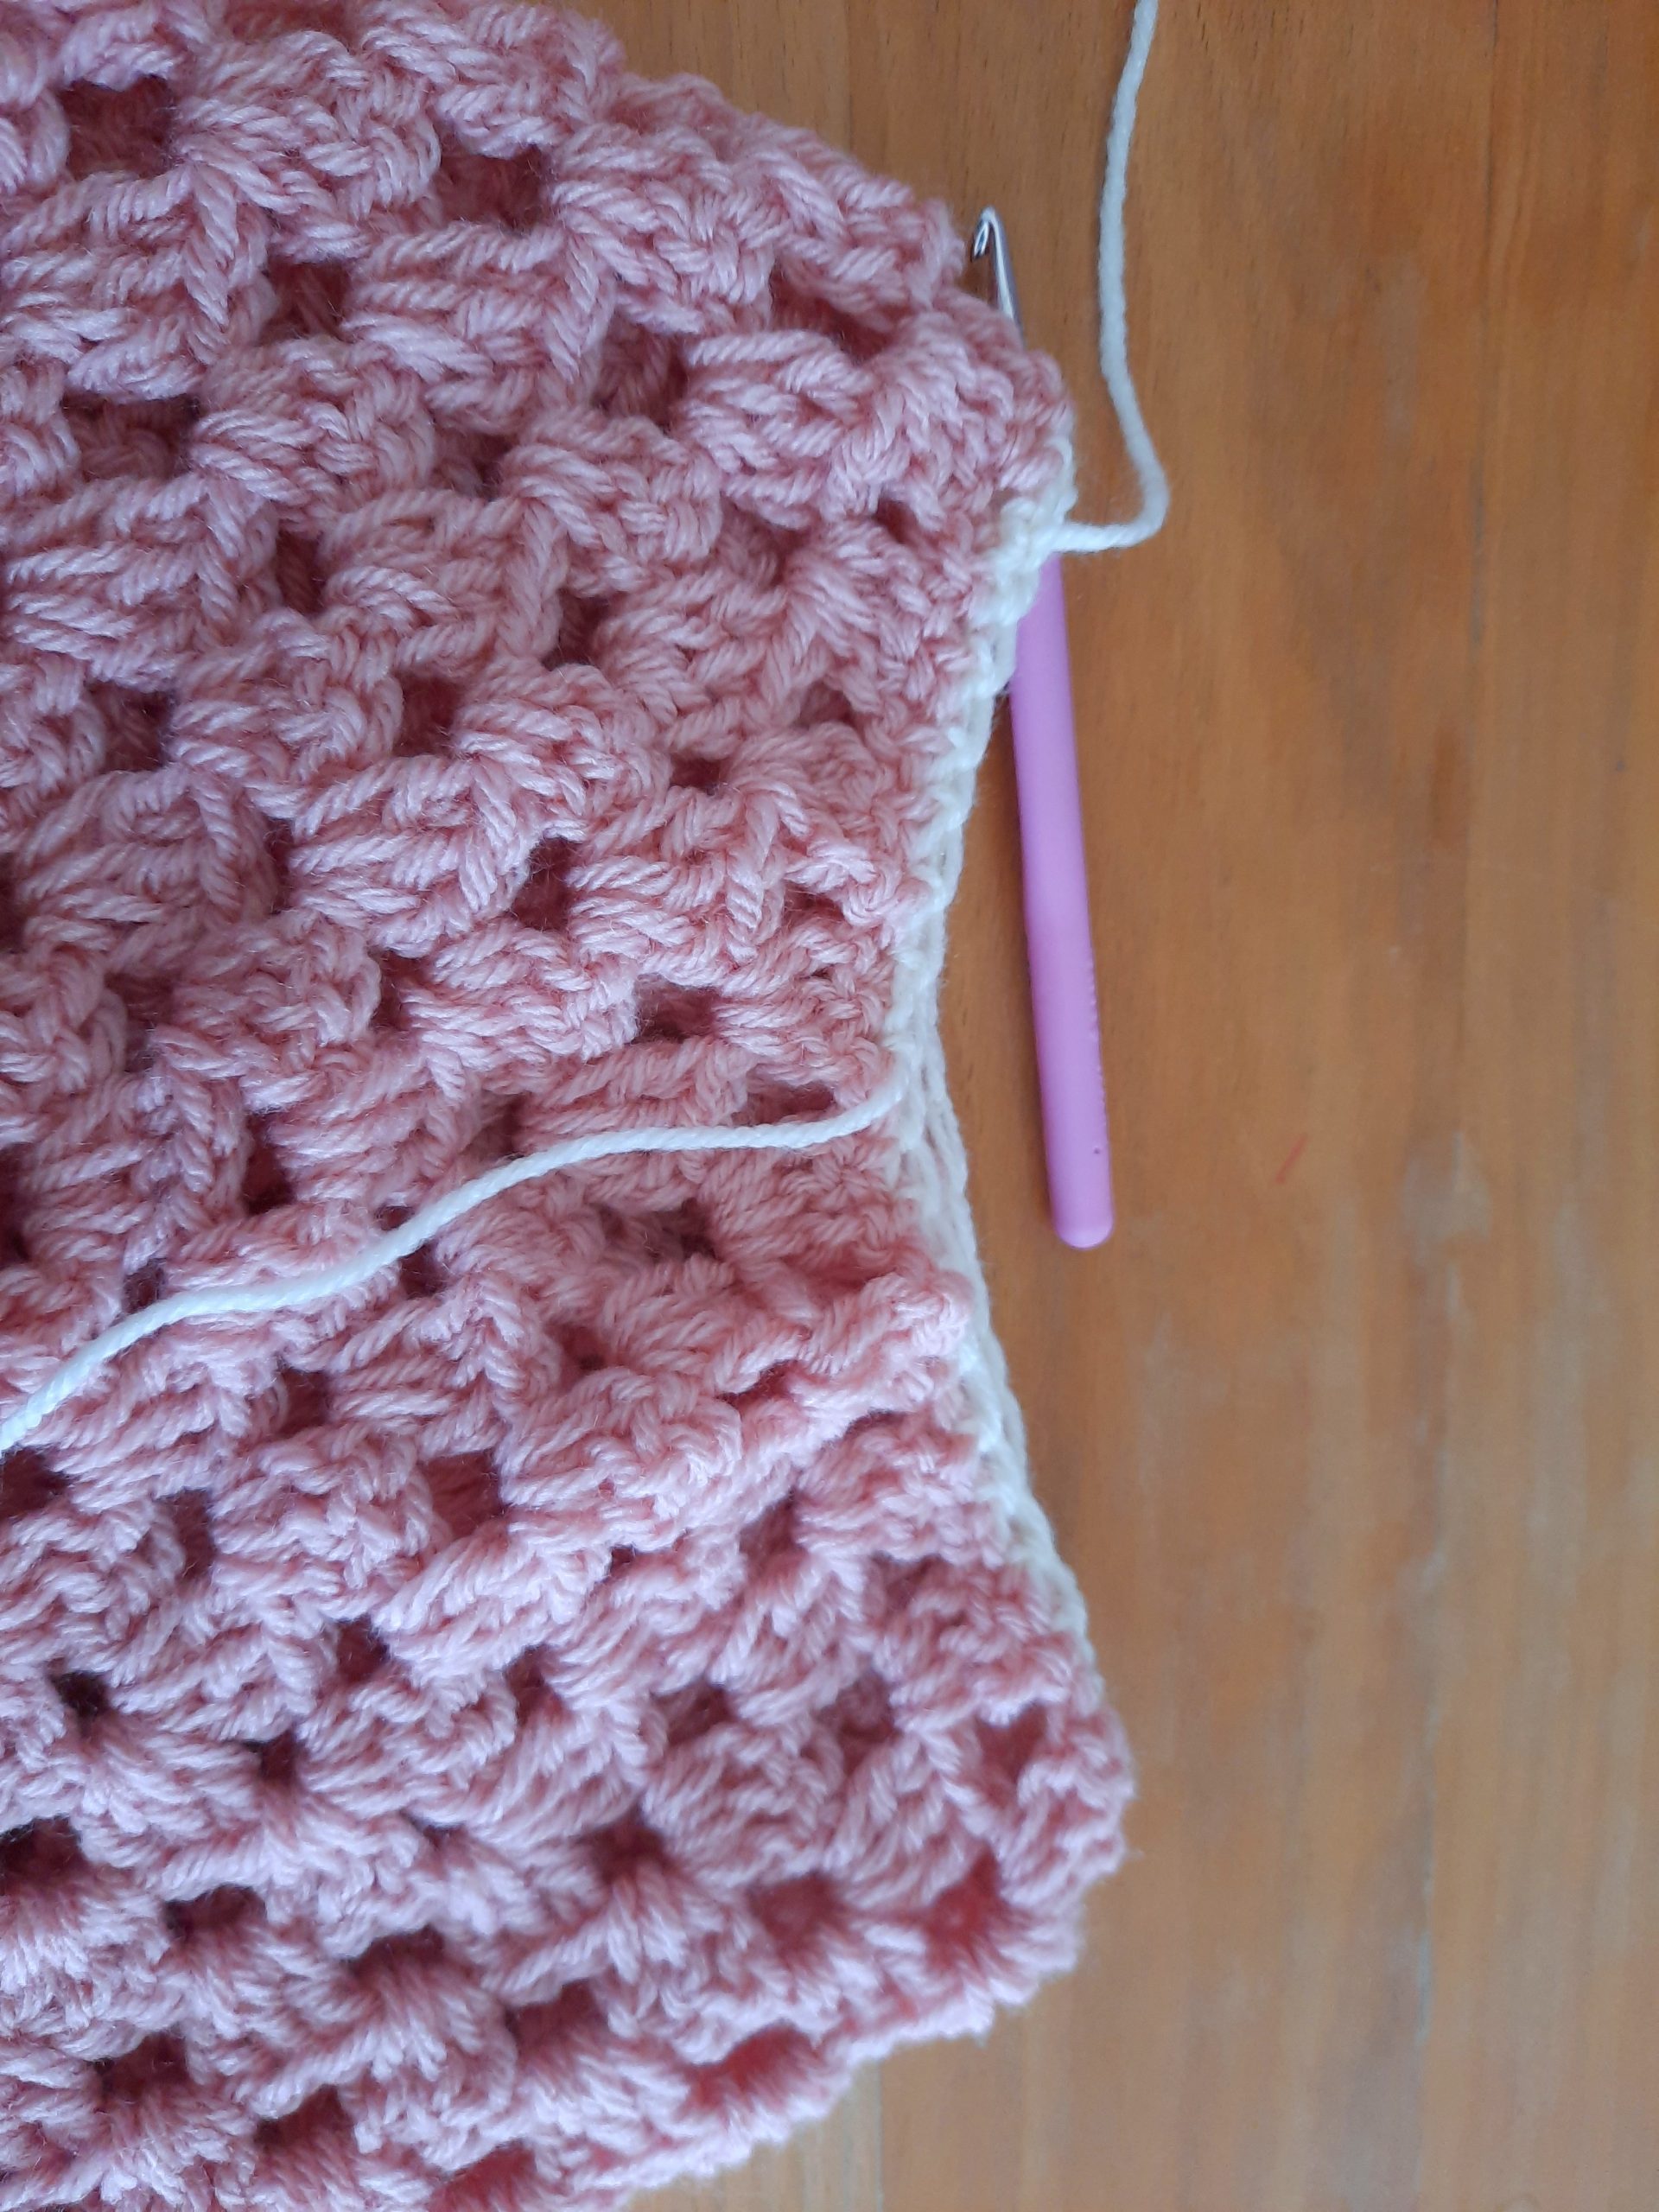
Front and neck edging
Attach yarn onto any side on the bottom edge of the front opening of the cardigan. Use 6 mm crochet hook and Vanna’s Choice yarn.
Ch 1, place a SC into each stitch across until you reach the other side of the cardigan opening.
Fasten off, tidy up all loose ends.
Sleeve cuffs
Using 5 mm crochet hook and Stylecraft Special Aran yarn in shade Cream.
Front Post Double Crochet: Wrap yarn around your hook, insert hook around the DC from previous row going from right to left in the front of stitch; pull up a loop, go through 2 loops, pull up a loop, go through 2 loops.
Back Post Double Crochet: Wrap yarn around your hook, insert hook around the DC from previous row going from right to left from the back of the stitch; pull up a loop, go through 2 loops, pull up a loop, go through 2 loops.
Attach yarn to cuff. Complete rows as follows.
1: Ch 1 (=SC), [sk 1 stitch, 1 SC] until eor. Sl st to first ch 1 to close off round
2: Ch 3 (counts as a DC), place a DC into next stitch until eor. Sl st to 1st ch 3 at beginning of row.
3: Ch 3 (counts as a BPDC), [Front Post Double Crochet into the next DC from previous row, Back Post Double Crochet into next stitch] until you reach the first ch 3, sl st to 1st ch 3 to close off round.
4: Ch 3 (counts as FPDC), [Back Post Double Crochet into the Front Post Double Crochet from previous row, Front Post Double Crochet into the Back Post Double Crochet from previous row] until eor. Therefore you will be alternating FPDC and BPDC from row to row, creating a ribbed effect.
Sl st to 1st ch 3 to close off round.
5-6: repeat rows 2 and 3
Fasten off, tidy up all loose ends.
Bottom edging
With 6 mm crochet hook and Stylecraft Special Aran.
Attach yarn to the bottom edging of the cardigan.
Complete rows as follows:
1: Ch 1 (=SC), SC into next stitch and each stitch across until eor
2: Ch 3 (counts as a DC), place a DC into next stitch until eor.
3: Ch 3 (counts as a BPDC), [Front Post Double Crochet into the next DC from previous row, Back Post Double Crochet into next stitch] until you reach the first ch 3.
4: Ch 3 (counts as FPDC), [Back Post Double Crochet into the Front Post Double Crochet from previous row, Front Post Double Crochet into the Back Post Double Crochet from previous row] until eor.
You will be alternating FPDC and BPDC from row to row, creating a ribbed effect.
5-7: repeat rows 2 and 3.
Fasten off, tidy up all loose ends.
Thank you so much for stopping by,
Lots of love,
Selina.


2 Comments
Wendy Dinkins
I am making this cardigan. The instructions says 23 rounds XXXL, but based on my rounds it’s too short. Do I keep adding rounds?
Thank you
Selina Veronique
Hi Wendy!
Thank you for your comment; yes, please do add rounds until you are happy with the size!