Crochet Victorian Shawl Free Pattern
Crochet Victorian Shawl Free Pattern
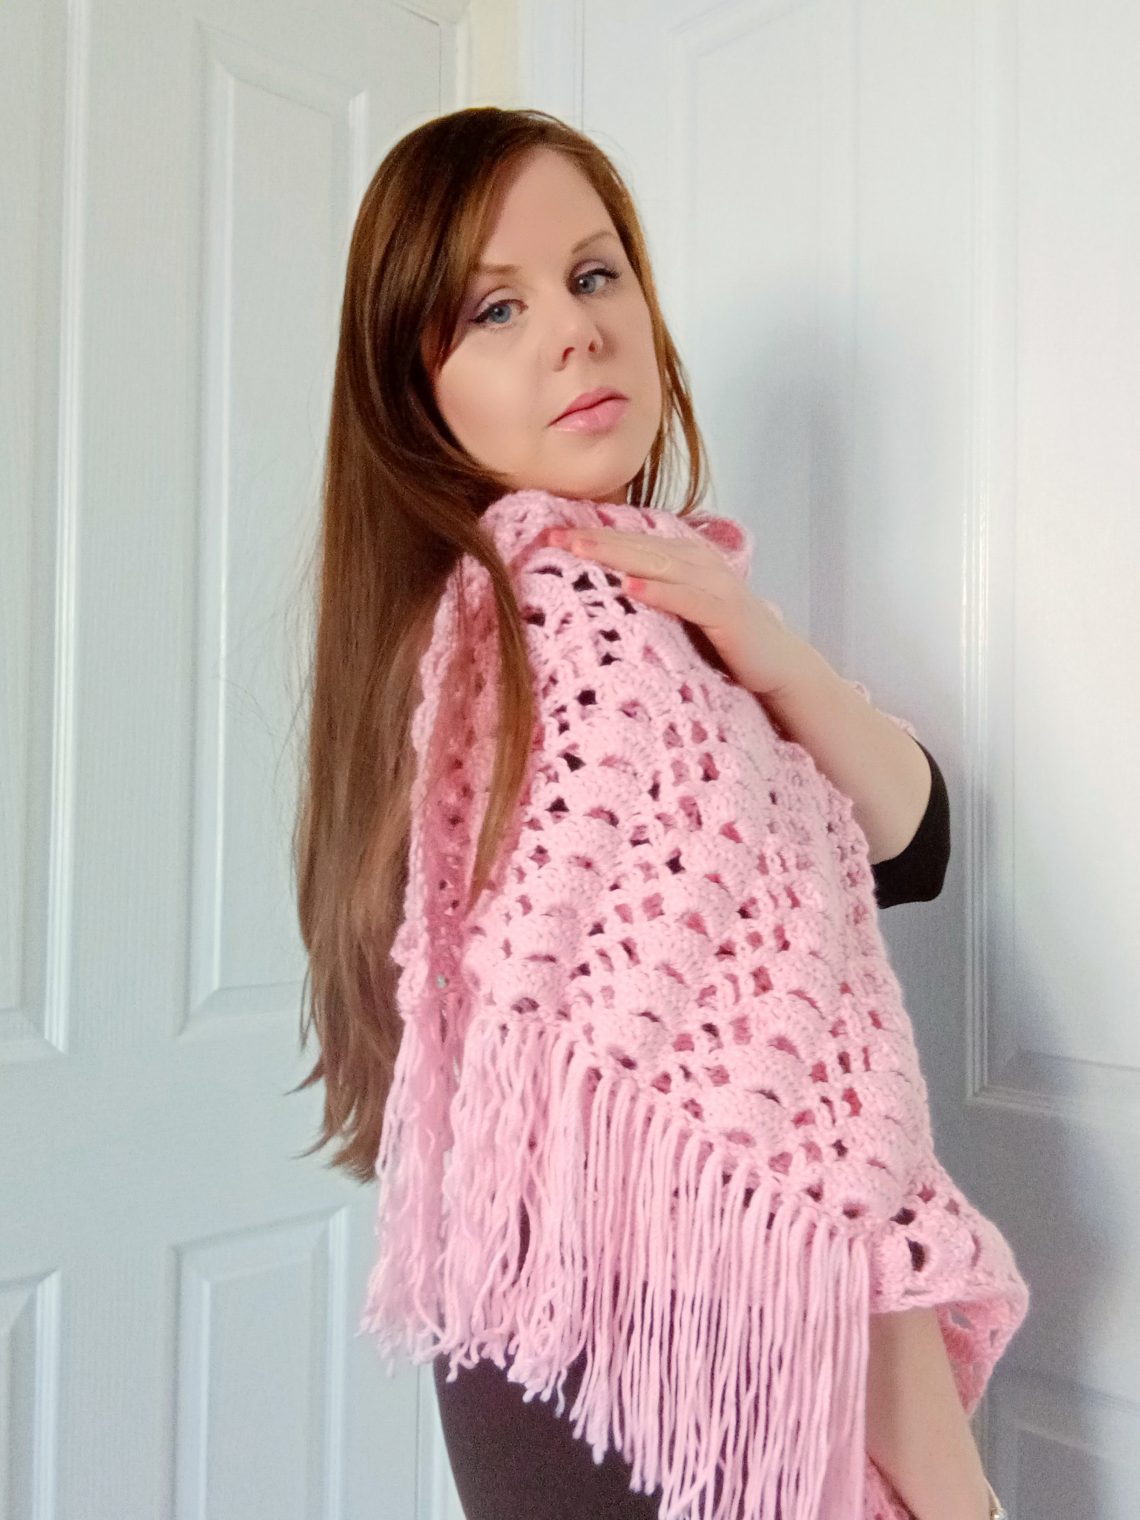
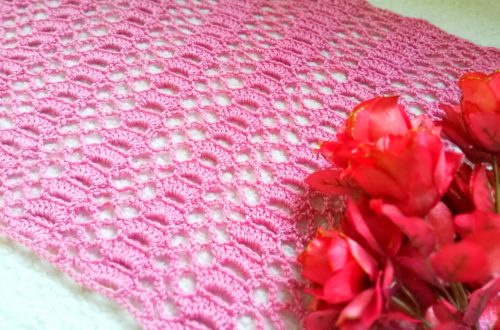
Hello everyone, this week I am bringing to you a tutorial on how to crochet a Victorian shawl free pattern. This Victorian Era shawl is also called The Leopoldine Shawl. It is very beautiful and delicate. This crochet project features the intricate yet simple Fans and Treillis stitch, which I love. It is perfect for beginners, and is part of my Vintage Crochet Series.
The video tutorial can be found here:
Crochet Victorian Shawl Pattern: the stitch
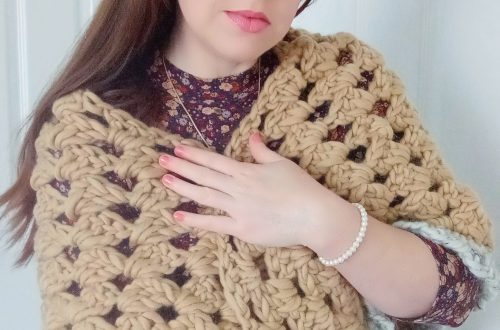
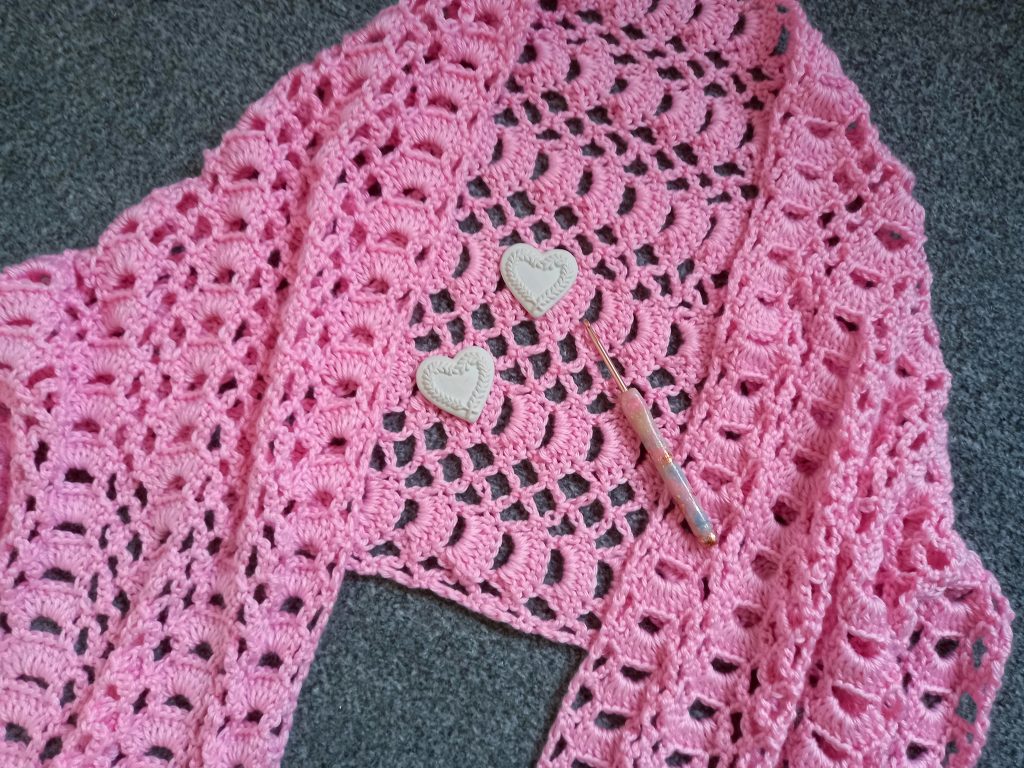
I love the Fan and Treillis stitch. It’s very delicate, and I have used it a couple of times last year. The Summer Pink Poncho was crocheted using this very pretty stitch. I have also crocheted the beautiful Edwardian Madeleine Wrap with this classic and vintage stitch.
This classic crochet stitch uses a simple two row repeat to create this lovely and dainty pattern. It looks very intricate and complex, when in fact it is quite simple once you have understood the simple two row repeat. I can definitely imagine creating a cardigan of sorts using this stitch! As a matter of fact, I did a survey on my Instagram, asking you lovely people which you would rather see using this very stitch and yarn. The majority voted for a shawl, as opposed to a cardigan. I have therefore created a shawl with this yarn. However, I am very excited to say I love this stitch so much I may well create a Summer cardigan with it!
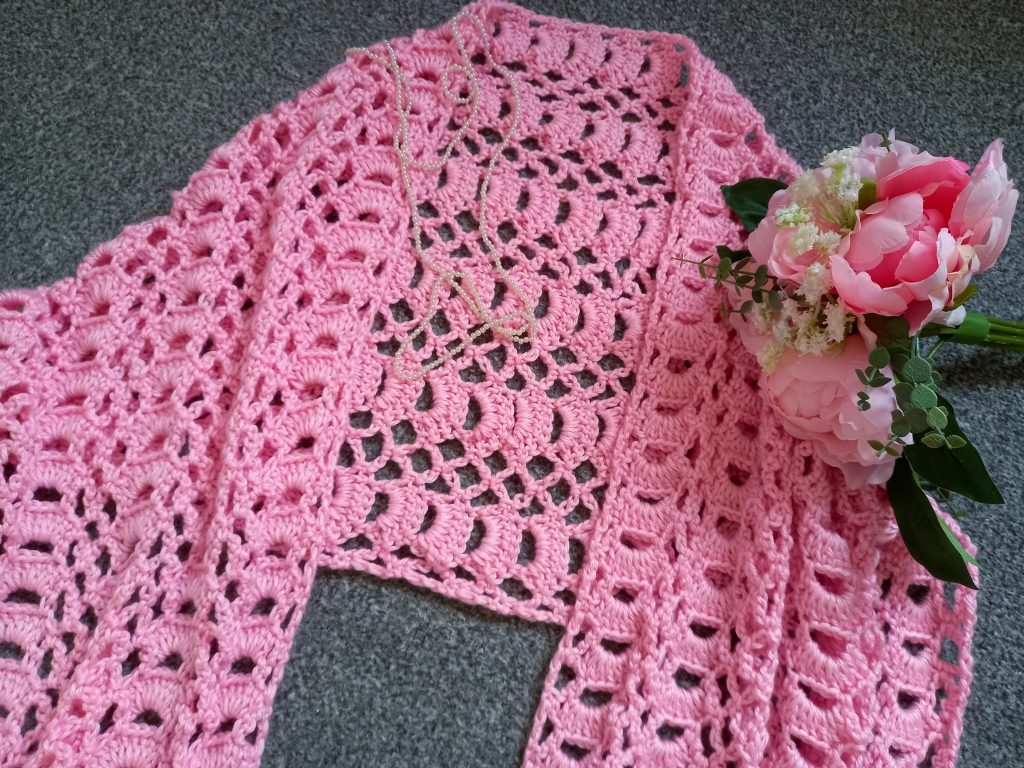
I first came across the Fans and Treillis stitch in an old British crochet stitch book. I fell in love immediately and have used this pattern quite a few times over the years. It is unusual yet classic. It has a beautiful delicate and intricate look that is so typical of old fashioned crochet.
Crochet Victorian Shawl Free Pattern: the Vintage Crochet Series
This crochet project is part of the Vintage Crochet Series. It seems most of my recent patterns are installments of the Vintage Crochet Series, which I love so much! I must be in a vintage crochet mood. You can find all of my Vintage Crochet projects right here.
You will find plenty of vintage crochet projects, ranging from the 18th Century all the way to the 1980s. It is a super fun crochet experience for me, to seek inspiration from past eras so as to recreate projects in this day and age. Crochet is a wonderful way to travel back in time, and it is very versatile too! I love how creative it is.
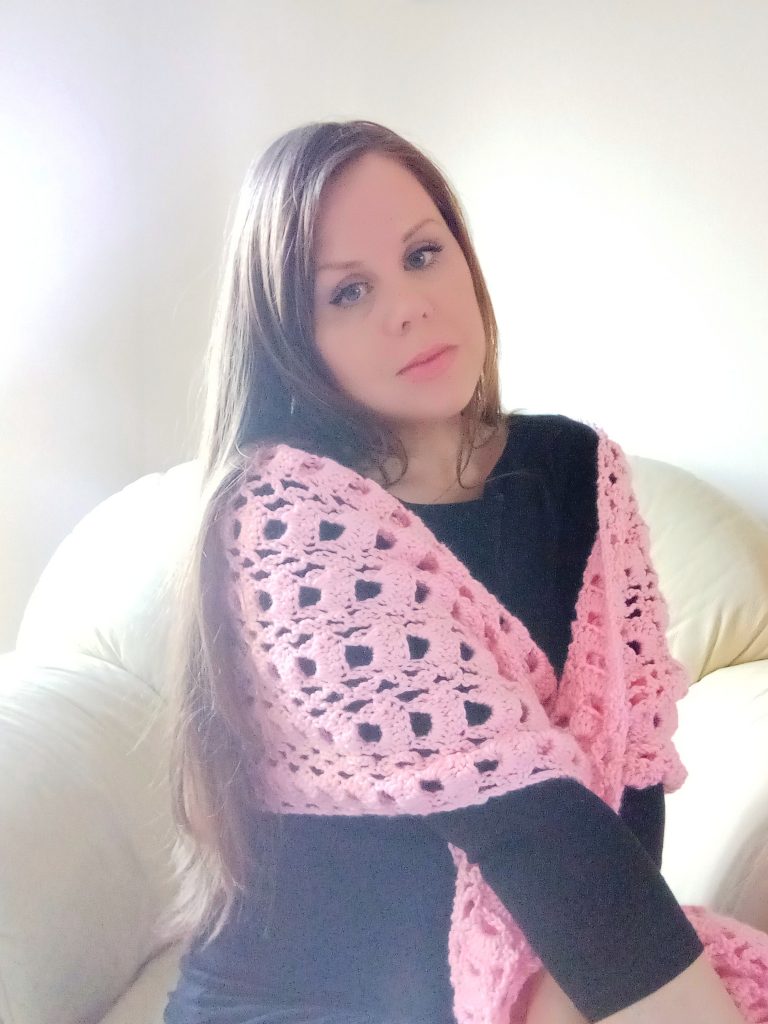
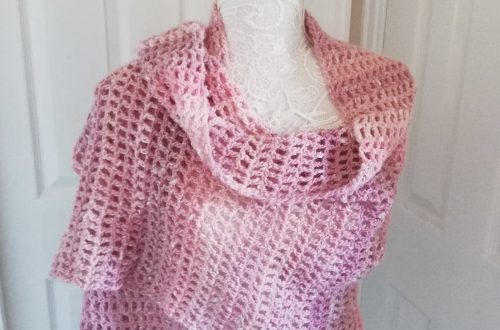
This crochet project is inspired by the Victorian Era (1837-1901). I wanted to create a rectangular shawl, similar to what was the fashion during the Regency Era (1811-1820). Rectangular shawls during the Victorian Era seem slightly less popular, with triangle shaped wraps and shawls taking center stage (as opposed to the Regency Era, where long and narrow rectangular shawls were everywhere). However, rectangular shawls did exist, although slightly wider and “substantial” than those popular during the Regency times.
During the Victorian Era, feminine colors and shapes were very popular. Lots of details (such as fringes and embroideries) were also present, as opposed to the more plain and simple Regency Era.
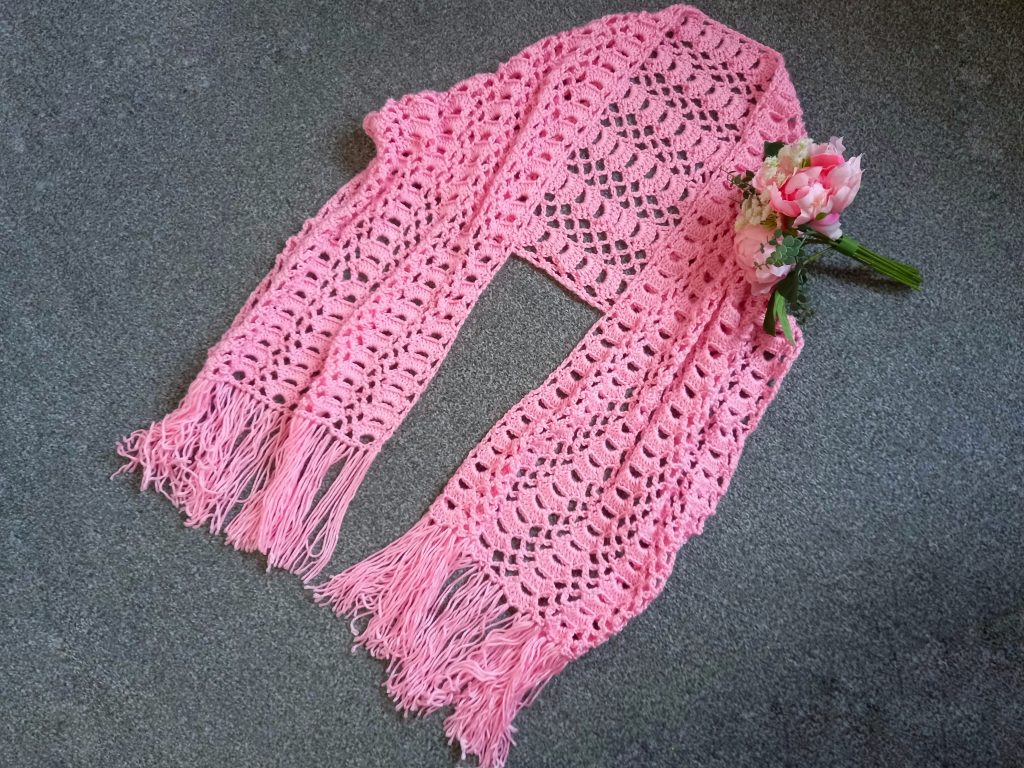
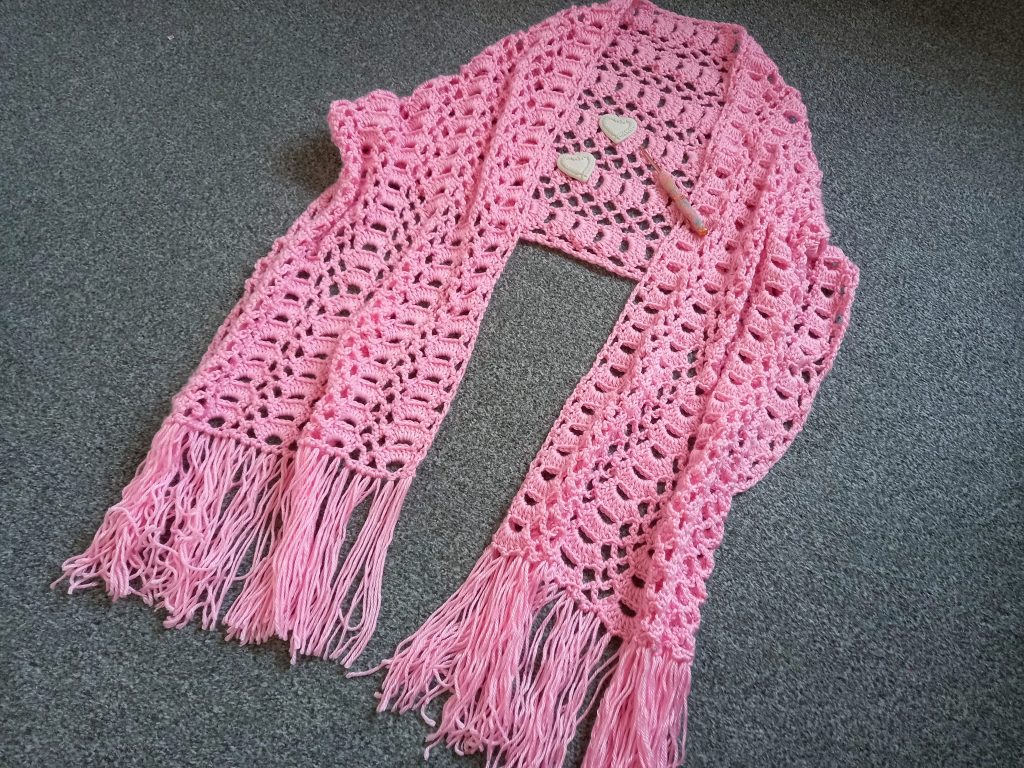
Shawls during the Victorian Era featured fringes and tassels quite a lot. This is why I have added beautiful fringes to my wrap. I called this wrap the Leopoldine Shawl, as an homage to my favorite writer, Victor Hugo. Indeed, his beloved daughter was called Leopoldine. I absolutely love this name, and thought it would be perfect for this project!
Connecting with you
I love connecting with my Crochet Community through my blog and Social Media. You can find me on Youtube, Instagram, and Pinterest. I would love to connect with you on these platforms.
You can also join my private Facebook group to connect.
You can subscribe to my weekly newsletter here:
Thank you so much for stopping be, and have a lovely week!
Crochet Victorian Shawl: The Pattern
You can purchase the ad free, large print, PDF pattern from my Etsy store here: Crochet The Leopoldine Victorian Shawl PDF Pattern
Level: Easy +
Notes: I will be writing in US terms (British terms in brackets)
Gauge
5″ (13 cm): 2 fans pattern repeat
5″ (13 cm): 5 rows
Sizes of finished wrap:
63” (160 cm) x 16” (41 cm)
Note you can adjust your wrap when you apply this multiple: multiple of 12 sts+11(+1 for base chain)
Materials
4 skeins of Red Heart Soft Baby Steps in shade 03 Light Pink
A 5 mm crochet hook
A tapestry needle
A pair of scissors
An 8″ book to create the tassels
Abbreviations
ch: chain
sk: skip
SP: space
SC: Single Crochet (UK Double Crochet)
DC: Double Crochet (UK Treble Crochet)
TC: Treble Crochet (UK Double Treble Crochet)
Sl st: Slip stitch
EOR: End of row
Pattern
Ch 72
Row 1: SC into 2nd ch from hook, *5 ch, sk 3 ch, 1 SC into next ch*, repeat * until last 2 ch; 2 ch, sk 1 ch, DC into last ch
Row 2: Turn your work; 1 ch, SC into same 1st st, miss 2 ch sp, *7 DC into next 5 ch arch, 1 SC into next arch **, 5 ch, 1 SC into next arch*, repeat from* ending last repeat at **, sk ch 2 sp, 2 ch, 1 TC into last stitch.
Row 3: Turn your work; 1 ch, 1 SC into same 1st st, *5 ch, 1 SC into 2nd DC from previous 7 DC fan, 5 ch, 1 SC into 6th DC from previous 7 DC fan **, 5 ch, 1 SC into next 5 ch sp*; repeat from * and ending last repeat at **, 2 ch, 1 TC into last stitch.
Rows 4-114 rows: repeat rows 2 and 3
Fasten off, tidy up all loose ends.
Create Fringes
We will be placing fringes on each side of the wrap.
For this you will need yarn, your hook, scissors, and your book. On this wrap, one side will be straight (the beginning chain of the project), whereas the other side will be “curvy” as it will be the side of the stitches. This does not change the fact that you will be placing the fringes on both sides the exact same way.
I will be placing 2 strands of fringes into every second stitch on both the bottom edges of the shawl as explained below.
To create your fringe, you will be wrapping your yarn around your book (the vertical side of your book) 2 times (or more if you want to create multiple strands of fringe at once).
Once you have done this, you will slide your yarn off the book and snip off your yarn on the bottom side of the strand with your scissors, creating 2 individual strands which are folded in half.
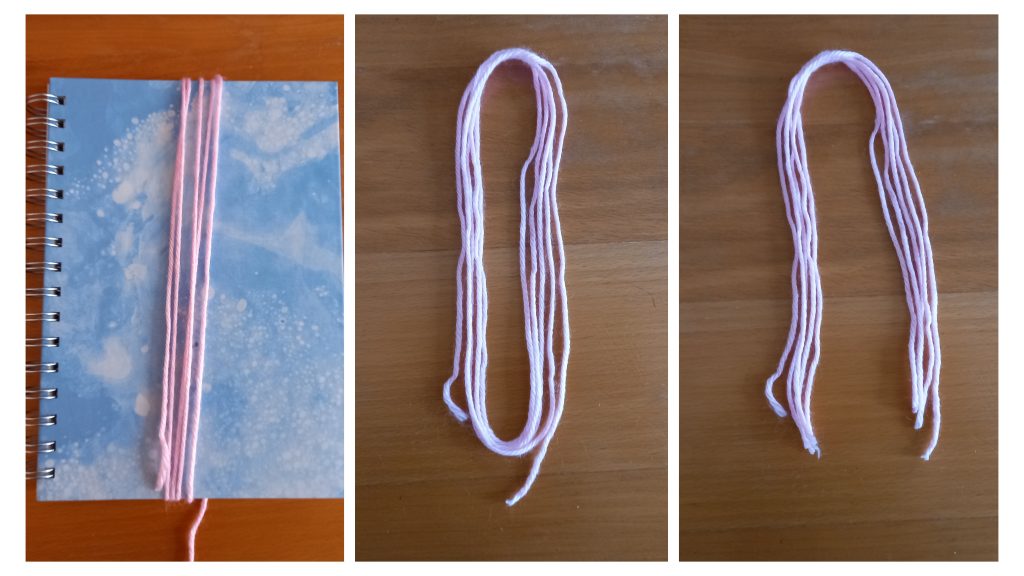
Delicately take your yarn, create an even looking fringe, keeping the strands folded (ie this will make 4 strands).
You will be placing your first fringe onto the bottom corner stitch of your wrap, before skipping one stitch, and placing the next strand into the next stitch.
To place your strand, you will need to use your crochet hook. With fringe strand evenly folded in half in one hand, place your crochet hook directly inside the stitch with the other. With your hook, grab the folded side of your strand, pulling it completely through the stitch. Once 2 cm are in, take your crochet hook and pull the bottom side of the strands though the fringe loop, the same way you would when creating a slip knot. This way you are fastening the fringe onto the project.
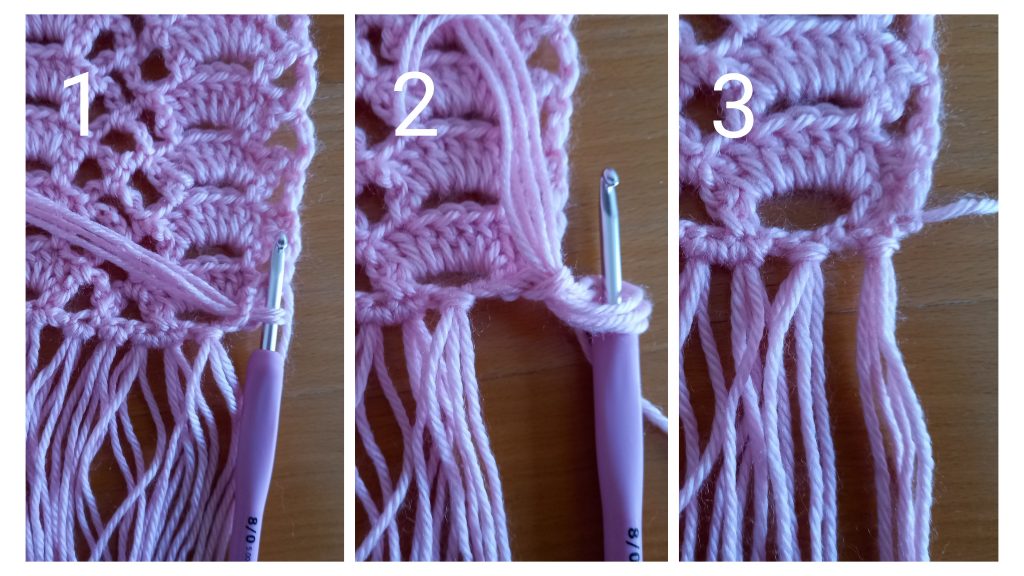
Gently pull the strands through all the way, pull on these to tighten the fringe, making sure the knot part on the edge of the wrap is nice and tight.
Proceed to do this with each fringe until you reach the end of the row, placing your last fringe into the side corner of the wrap.
Once all the fringes are placed, you can trim your fringes to make them look more even.


You May Also Like
Crochet Regency Era Wrap
Crochet La Vie en Rose Wrap