Crochet The Serena Pocket Shawl
Crochet The Serena Pocket Shawl
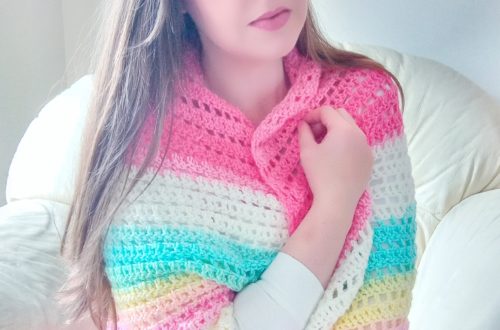
Hello everyone! Welcome back to my blog. This week I am bringing to you a new design on how to crochet The Serena Pocket Shawl. This is a new pocket shawl design that is super easy and pretty.
This pocket shawl is created for the main part with a stitch that I love, the twin v stitch. This version of the v stitch is really nice and creates a bit of a different look to the classic v stitch. It is however equally easy to crochet.
You can watch my Youtube video tutorial here: Crochet The Serena Pocket Shawl Video Tutorial
Crochet The Serena Pocket Shawl: behind the pattern
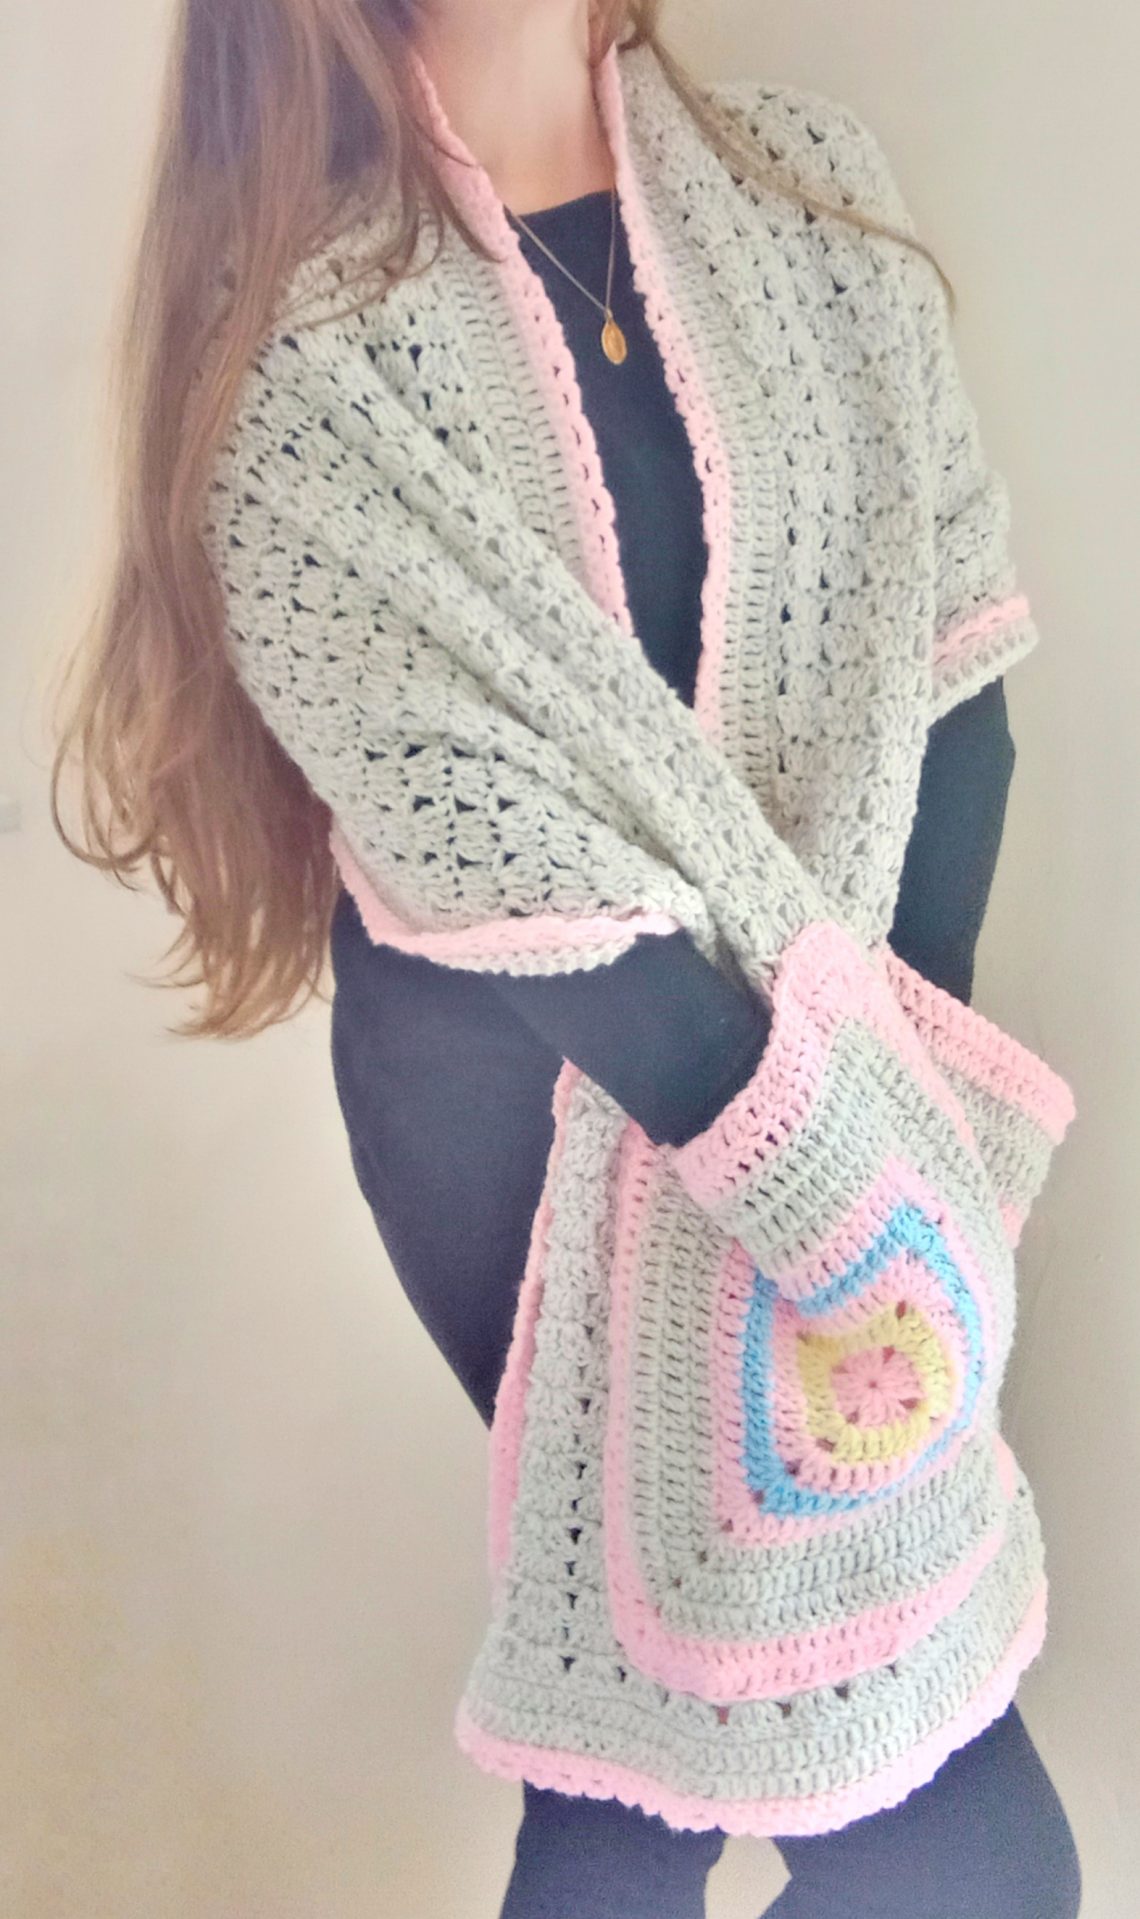
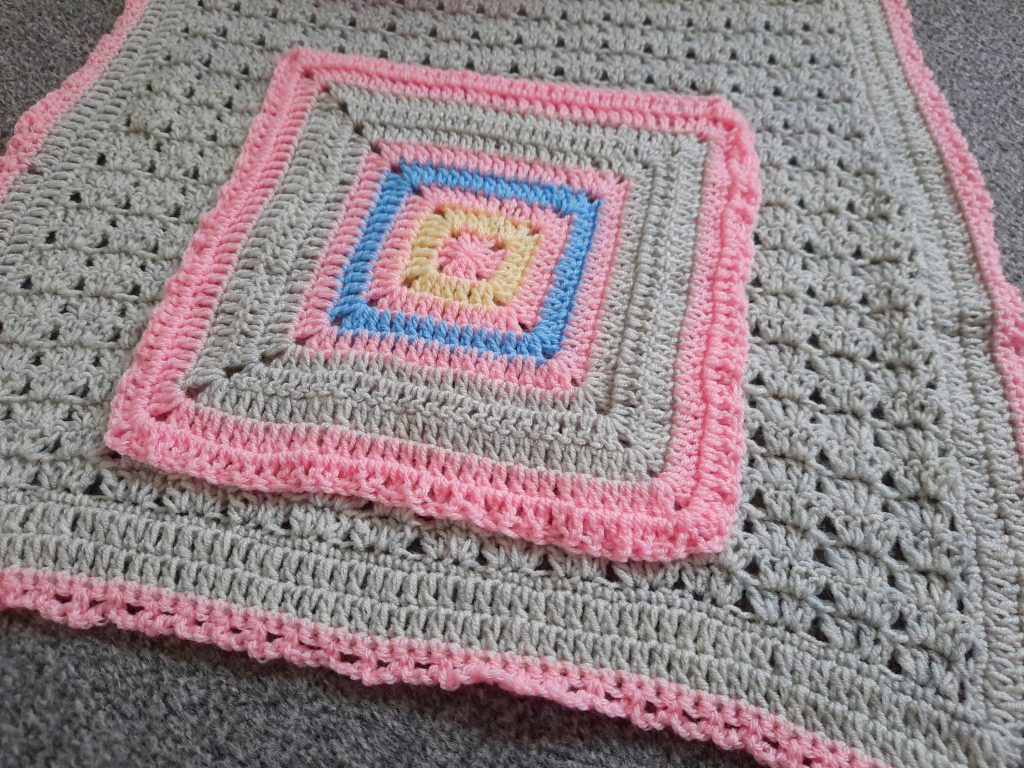
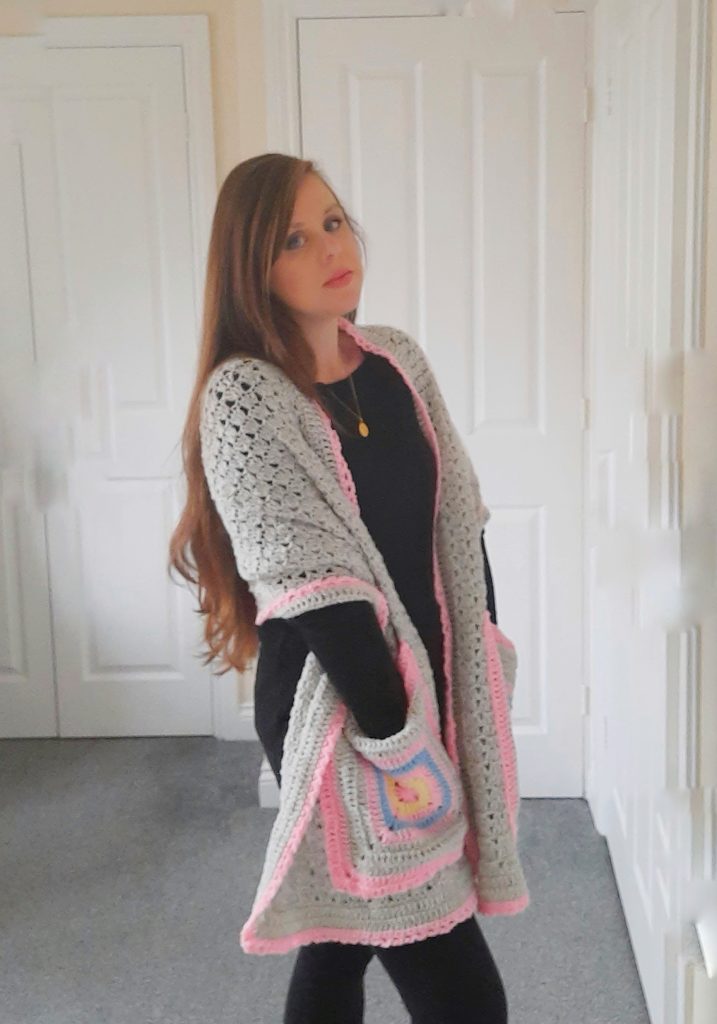
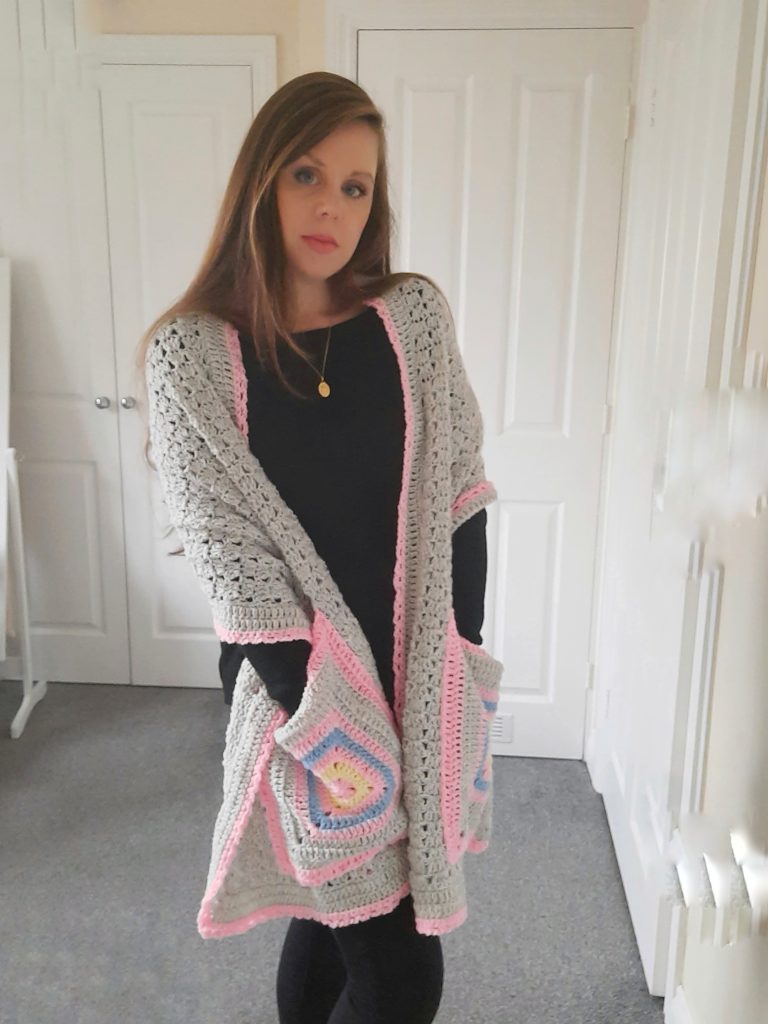
The Serena Shawl is a very easy pattern, that complete beginners can crochet. It is created by rows of twin V stitches. A border of Double Crochets and chain arch edging are then added to the project. The pockets are created as solid granny square, made with different shades of Stylecraft Special DK. These are then sewed onto the shawl, creating a beautiful and stylish pocket wrap.
This is a very simple, yet beautiful and intricate crochet shawl. The twin V stitch is quite an unusual stitch, so it is nice to be able to use it. The chain arch edge is really beautiful, and adds a feminine vibe to the whole piece.
Crochet The Serena Pocket Shawl: the yarn
I have to say, the yarn used for this project is very cosy. I used Stylecraft Batik in shade silver for the majority of the project. After that, I used different shades of Stylecraft Special DK in various shades for the border and the pockets. I think this adds extra dimension and femininity to this crochet shawl.
Stylecraft Special DK have a wide variety of colours and this makes for a lovely project. I know I loved using this yarn for the border and pockets.
Stylecraft Batik is an acrylic and wool blend, which I am starting to appreciate more and more. The wool does add extra cosiness to any project, perfect for the winter months. Do you prefer using yarns with wool, or acrylic yarns? I would love to know!
I did love using Stylecraft Batik, and definitely recommend this yarn for crochet projects.
Connecting with you
Connecting with you is so important to me. I really appreciate all your support for my blog, as well as my Youtube channel. You can follow me on Instagram, Youtube, and Pinterest, my user name is Selina Veronique Crochet. The links are on the home page of this blog. I love hearing from you and having your feedback.
You can also join my Facebook group to connect: My Facebook group to connect
I would be delighted if you wanted to subscribe to my weekly newsletter:
Thank you so much for stopping by,
Take care,
Xoxo Selina.
Crochet The Serena Pocket Shawl: The Pattern
You can purchase the Ad free, PDF pattern from my Etsy shop here: Crochet The Serena Pocket Shawl PDF Pattern
Level: Easy +
Notes: I will be writing in US terms
Gauge: 4” (=10 cm) = 4 Twin V stitches repeats
4” (=10 cm) =6 rows
Please note gauge is not crucial for completion of this project.
Size of finished Pocket Shawl before edging: 16,5” x 62,5” (42 cm x 159 cm)
Size of finished shawl including edging: 21” x 70” (53 x 177 cm)
The size of pockets: 11,5 x 11,5 cm (29 x 29 cm)
Materials:
8 to 10 skeins of 50g Stylecraft Batik DK in shade Silver
1 of each skein of Stylecraft Special DK in shades:
Candy Floss, Lemon, Cloud Blue
Any of the above yarns can be substituted with Paintbox Simply DK yarn
5 mm crochet hook
Tapestry needle
Pair of scissors
Abbreviations:
ch: chain
sk: skip
SP: space
SC: Single Crochet
DC: Double Crochet
Sl st: Slip stitch
EOR: End of row
Pattern starts here:
Ch 68 (pattern calls for a multiple of 4 sts + 2+2 for base chain)
Complete rows as follows:
1: 2 DC into 5th ch from hook, 2 DC into next ch, *sk 2 ch, 2 DC into each of next 2 ch* Repeat from * until last 2 ch; sk 1 ch, 1 DC into last ch.
2: Ch 3 (=DC), turn your work. *Place 2 DC (=V stitch) into 2nd and 3rd V stitch from previous row’s twin V stitch, sk 4th V stitch*. Repeat from * until last 2 st, sk last V stitch and place a DC into ch 3 from previous row.
3-104 (or until you are satisfied with the length of your shawl): repeat row 2.
Do not fasten off.
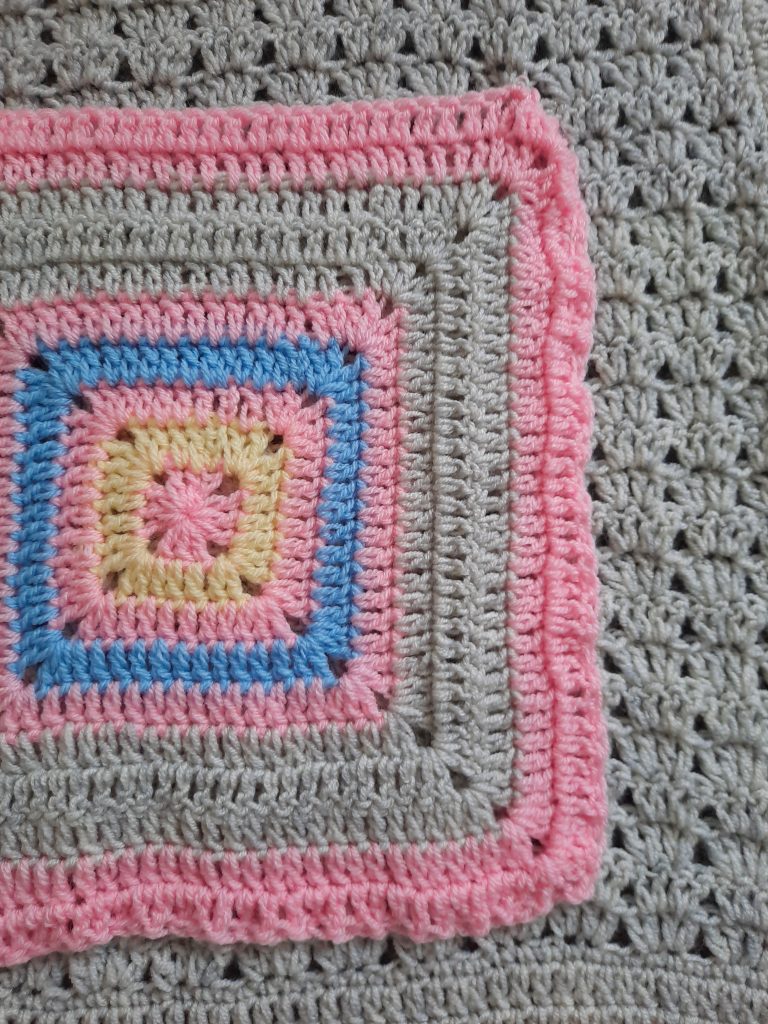
Border:
1: Ch (=SC), SC into 2nd stitch and each stitch across until end of row. Once you reach eor, turn your work, so that you are working on the side of the shawl. Place SC all along this edge, placing them as equally spaced as possible. Repeat process until you reach 1st ch, sl st to 1st ch.
Note: Make sure these SC are a multiple of 2.
2: Ch 3 (=DC), place a DC into each SC; in the corners, place [2 DC, ch 2, 2 DC]. Sl stitch to 1st ch 3 to finish round.
3: Repeat row 2. Fasten off.
4: Attach Stylecraft Special DK in shade Candy Floss. Ch 1 (=SC), SC into 2nd st and each st across, placing [2 SC, ch 2, 2 SC] in corners. Sl st to 1st ch to finish round.
5: [ch 3, sk 1 st, SC into next st] until eor, including corners. Sl st to 1st ch to finish round.
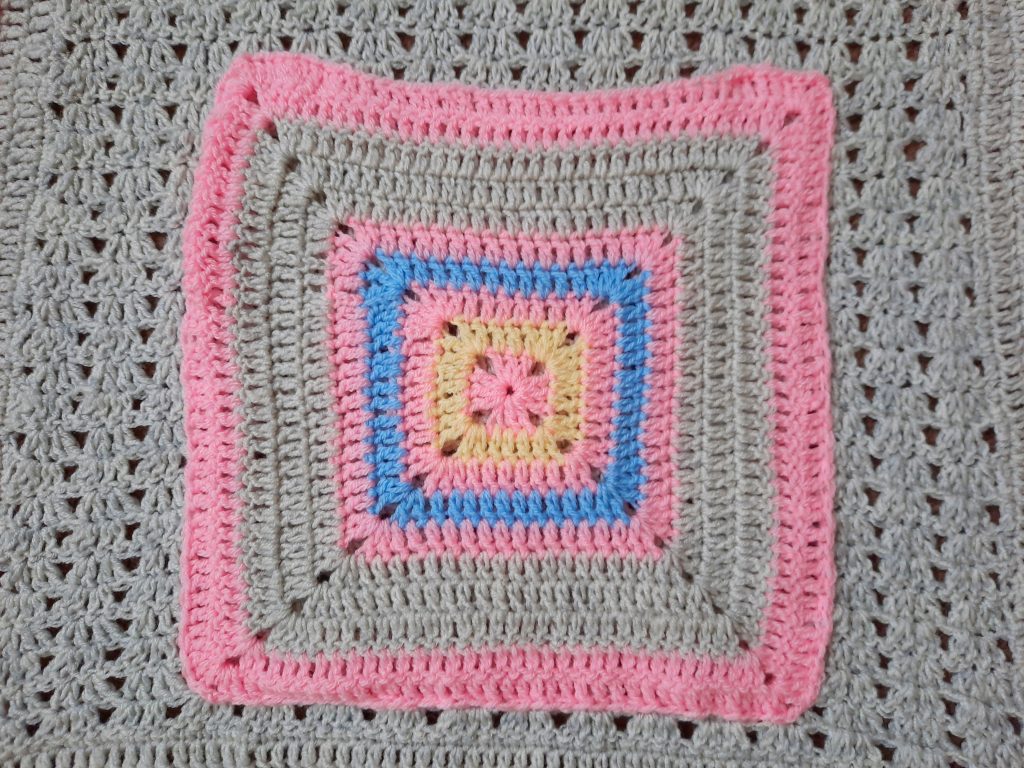
Pockets:
With Stylecraft Special DK in shade Candy Floss, ch 4; sl st to 1st ch to form a ring.
1: Ch 3 (=DC), place 2 DC in center of ring. [ch 2, 3 DC, ch 2] 3 times, finishing on a ch 2. Sl st to first 3 chains to finish round.
Fasten off and attach Stylecraft Special DK in shade Lemon to 1st DC of any side.
2: Ch 3 (=DC), place a DC into each DC from previous row. When you reach a corner, place 2 DC, ch 2, 2 DC into corner. Sl st to 1st ch 3 to finish round.
Fasten off and attach Stylecraft Special DK in shade Candy Floss.
3: repeat row 2.
Fasten off and attach Stylecraft Special DK in shade Cloud Blue.
4: now repeat row 2.
Fasten off and attach Stylecraft Special DK in shade Candy Floss.
5: repeat row 2
Fasten off and attach Stylecraft Batik in shade Silver.
6-7-8: now repeat row 2.
Now fasten off and attach Stylecraft Special DK in shade Candy Floss
9-10: repeat row 2.
Fasten off, leaving long tail for sewing.
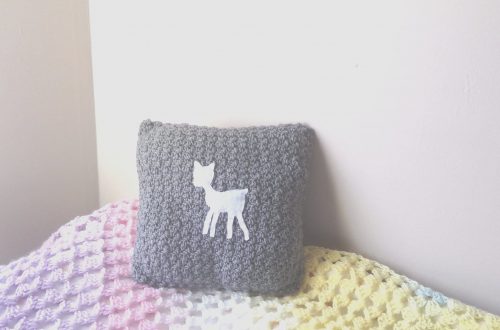
Sew your pockets onto your shawl:
Place your 1st pocket onto the right side of your shawl, making sure you are placing it as follows. Measure 1 inch (=2 cm) from the bottom edge, and place your pocket there, making sure you place it at the center. With long tail of yarn, sew in your pocket onto project.
Repeat this onto the other side of shawl.
Fasten off, tidy up all loose ends.


4 Comments
Magda Faasen
Beautiful pattens specially for me as a beginner.
Selina Veronique
Thank you so much! xx
Kerry Kaplan
Hi there – thanks for posting your pattern – looking forward to creating my own pocket shawl! One question – I am having trouble with the numbers in the first row of the pattern. You say to do 66 chains and then I followed your pattern for row 1. However, the numbers don’t seem to be working out. I don’t end up with 2 final chains – I end up with 4 (assuming I follow your pattern repeat). I’ve done this twice and come up with the same result and am wondering what I am missing. Let me try to show you my math:
– First 4 chains – presumably a DC (3 chains) and then an extra chain
– Next two chains (5 & 6) have 2 DCs each
– Skip next two chains (7 & 8)
– Next two chains (9 & 10) have 2 DCs each
– If you keep following this pattern, the following chains get skipped (11-12, 15-16, 19-20, 23-24, 27-28, 31-32, 35-36, 39-40, 43-44, 47-48, 51-52, 55-56, 59-60, 63-64)
– From the above, 64 is the last skipped chain – there are then 2 chains left. Am I supposed to skip chain 65 as well (that’s 3 skipped chains in a row) and then put the DC in the last chain? The confusion I have with this is your pattern repeat ends with the two sets of DCs in the 4th and 3rd to last chains (63 & 64), with the last two being left to do as you said. However, you can see from my count that chains 63 and 64 are skipped chains, which doesn’t follow your repeat pattern that suggests those should have 2 DCs each in them. Do we actually need to do 68 chains?
Thanks so much!
Selina Veronique
Hello and thank you for commenting on this post. I have just tested my pattern again and yes, you are right, I did make a mistake for the base chain. The first base chain should be chain 68, not 66. I have corrected this now, so everything should be fine. Again, apologies for this mistake which probably appeared as I was typing.
The pattern is now corrected.
Thank you for stopping by,
Selina.