
Crochet The Blue Skies Cardigan
Crochet The Blue Skies Cardigan
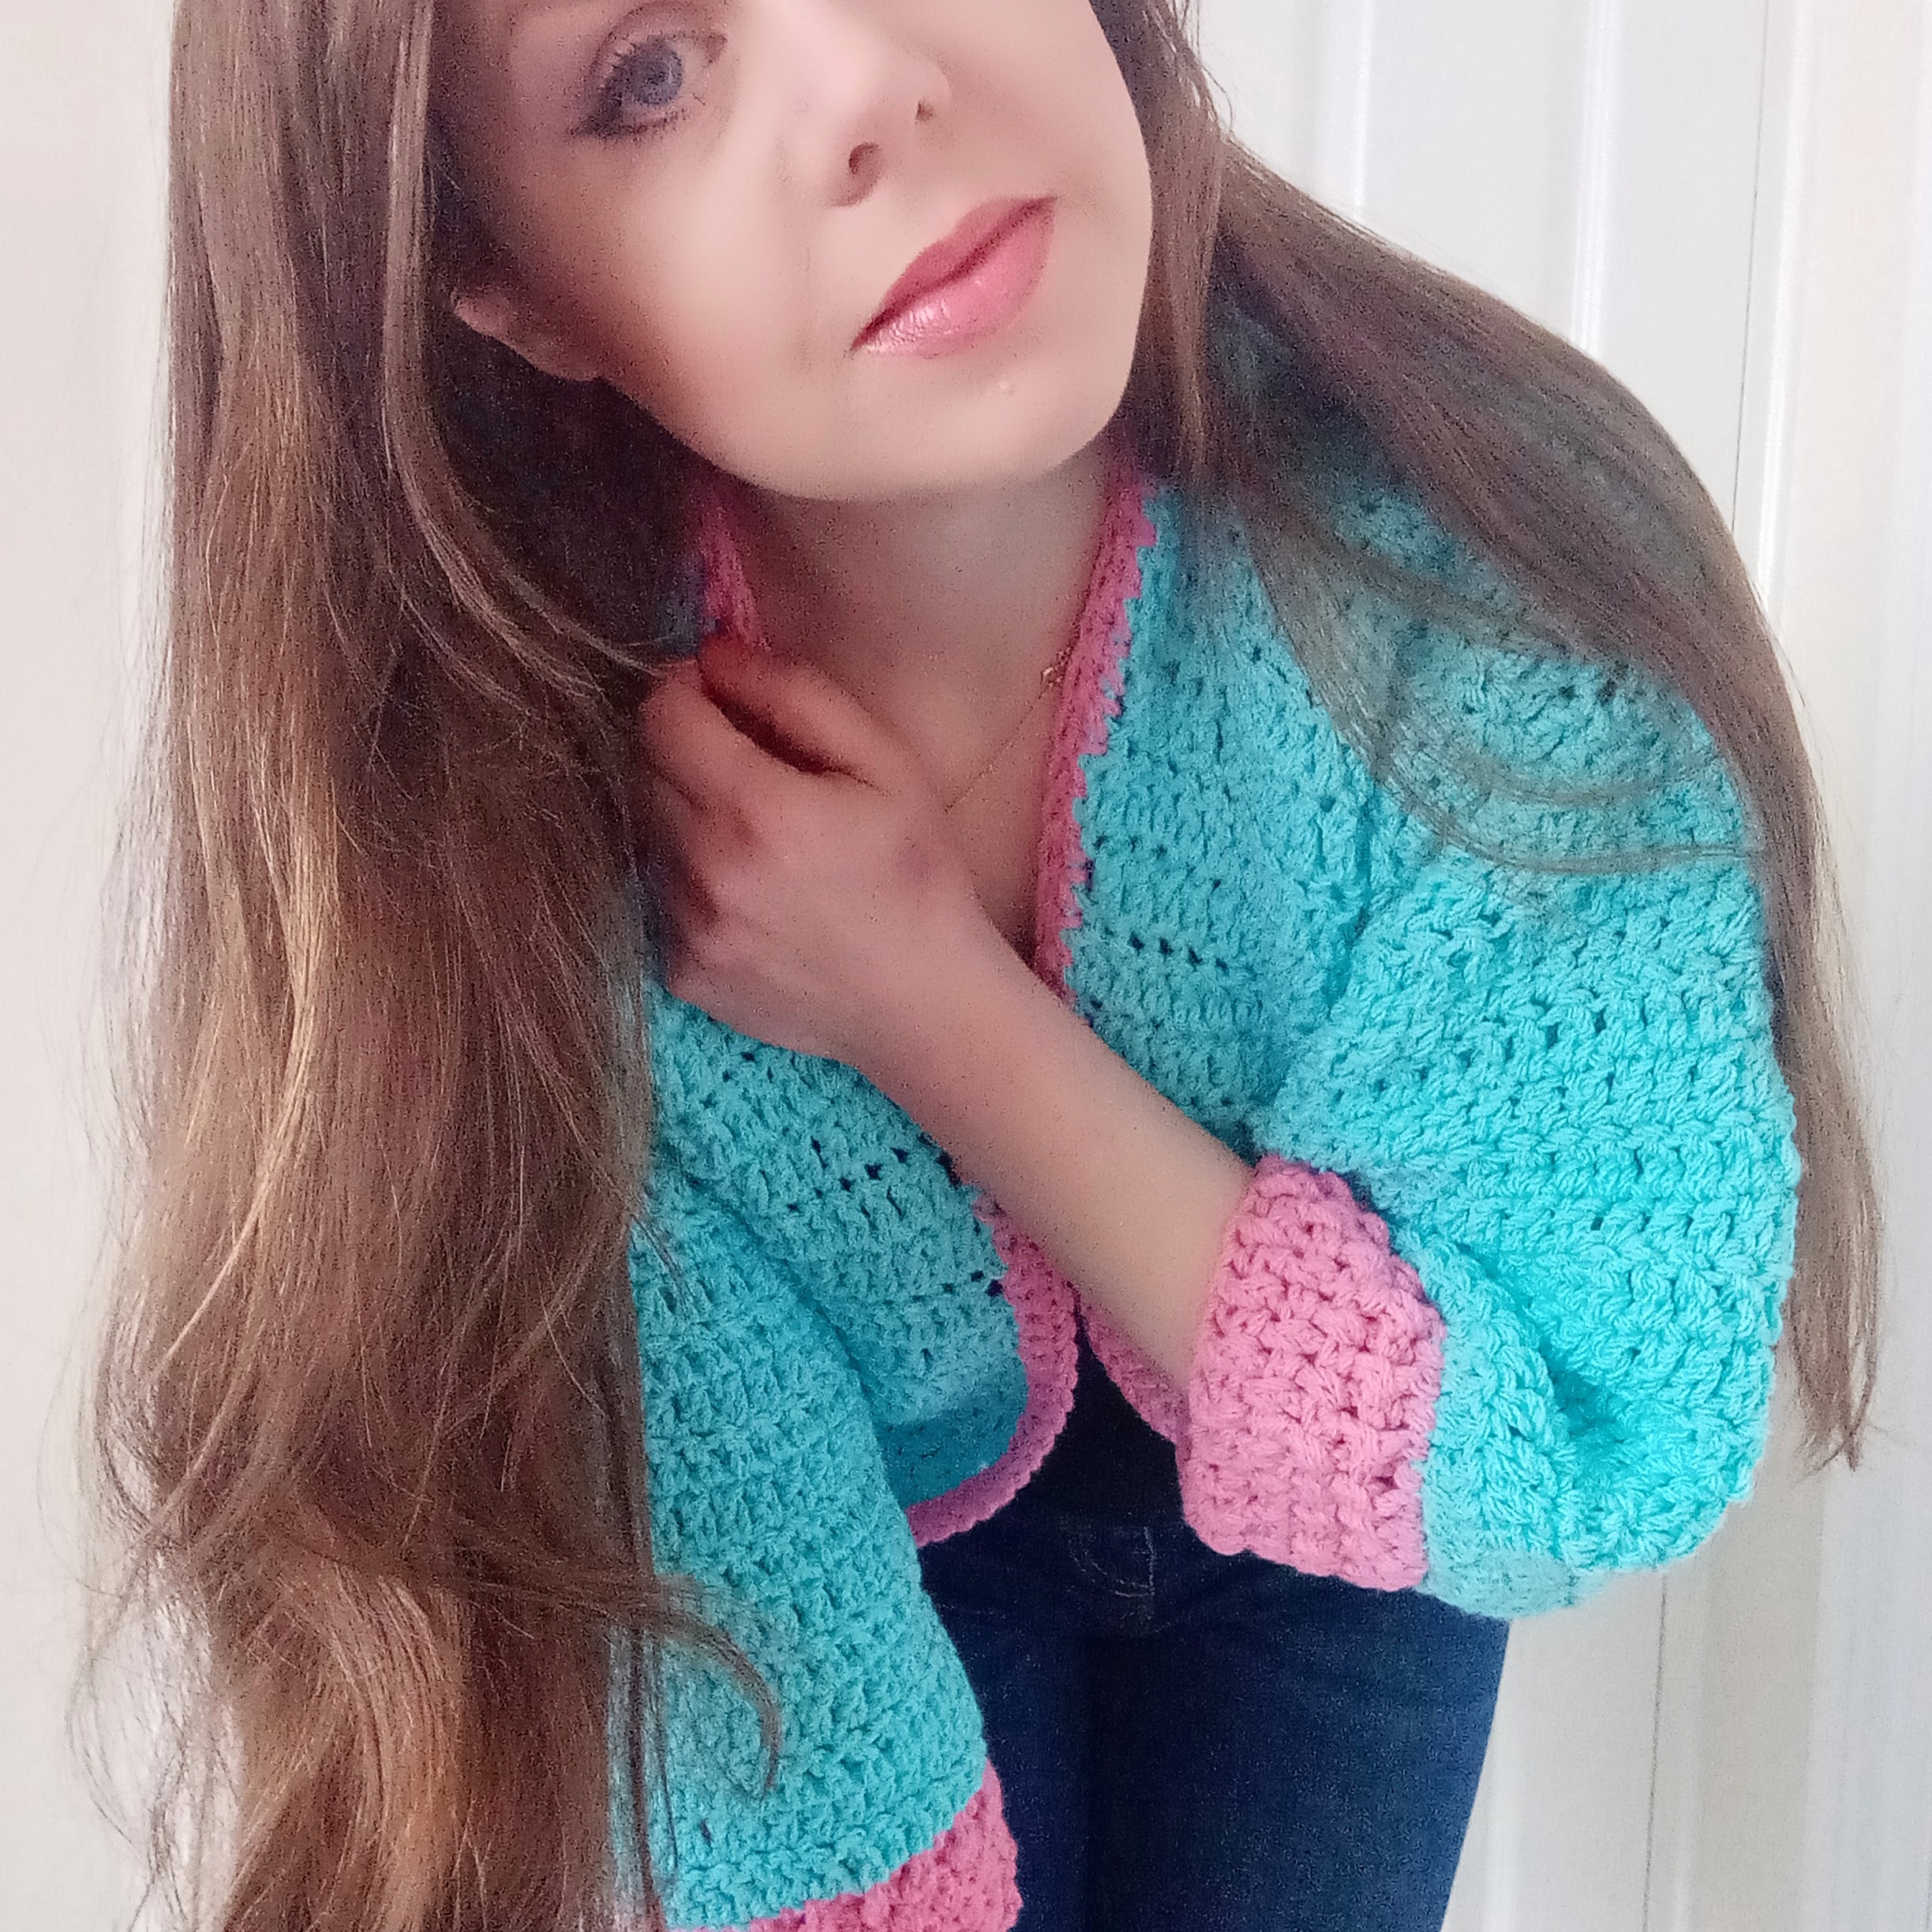
Hi everyone, this week I am bringing to you a brand new tutorial on how to crochet The Blue Skies Cardigan. This is a super easy crochet project to make, as it builds up quickly with chunky yarn. It is the perfect accessory for Spring!
You can find the video tutorial here:
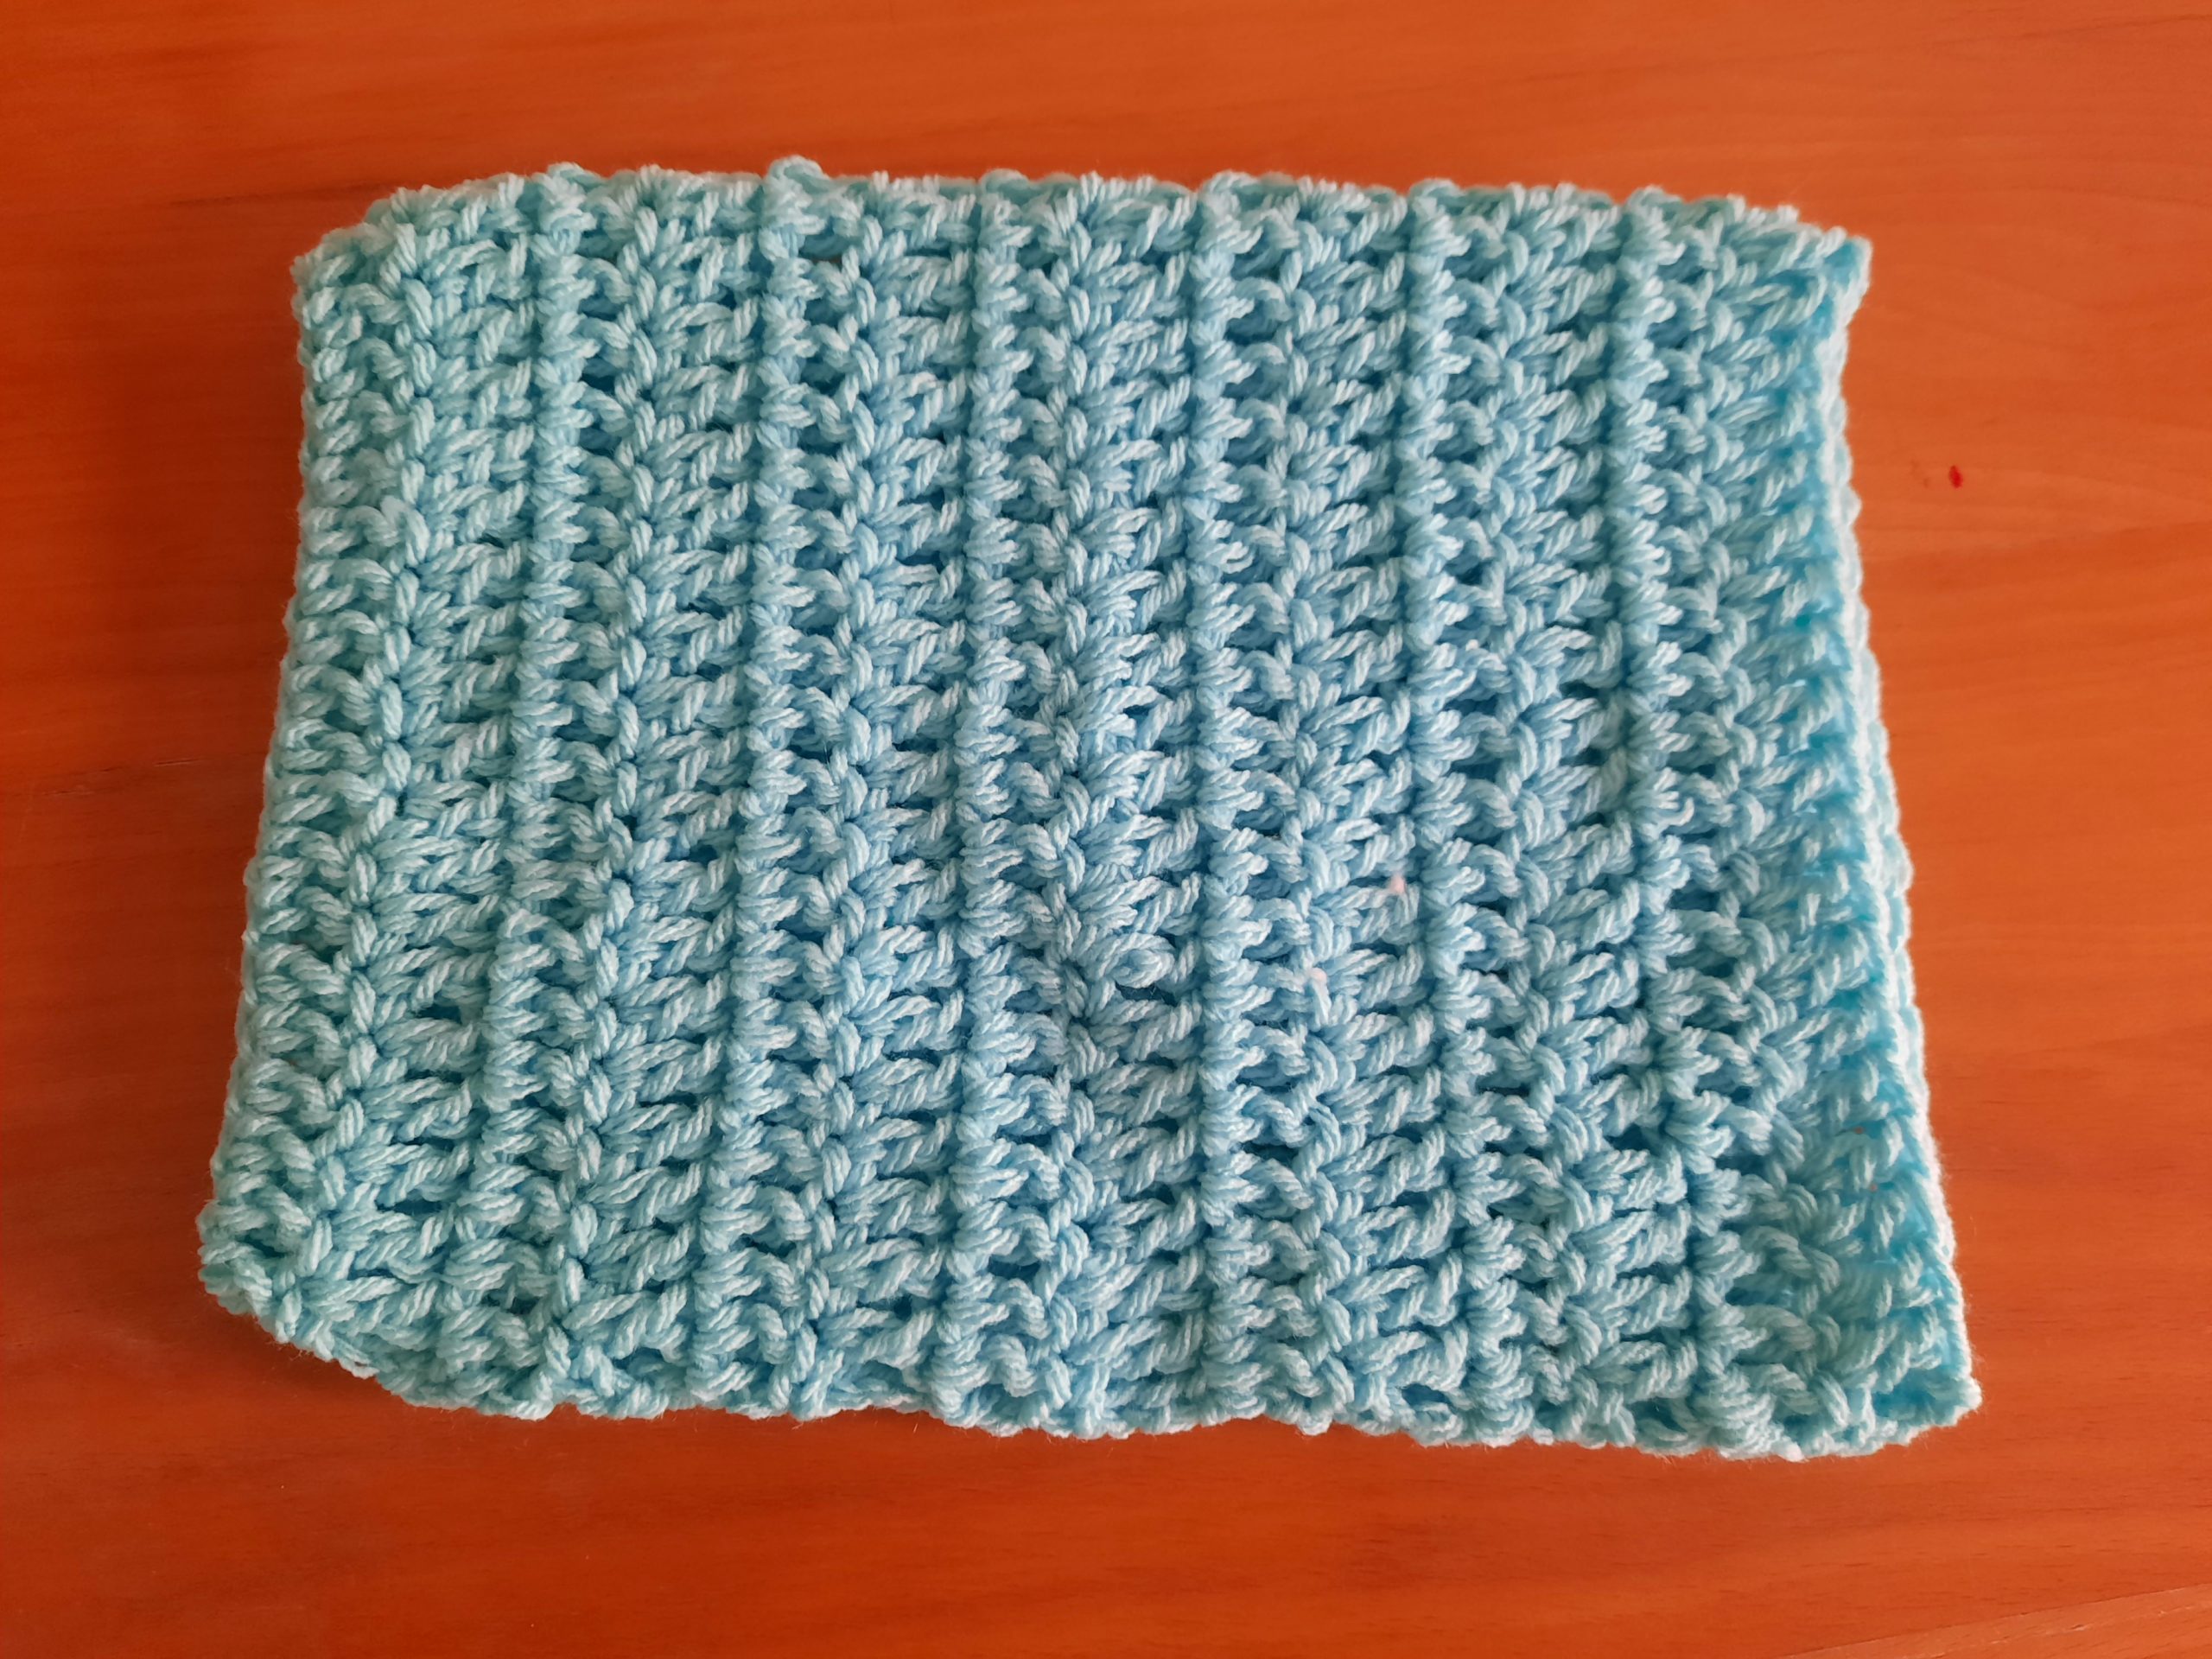
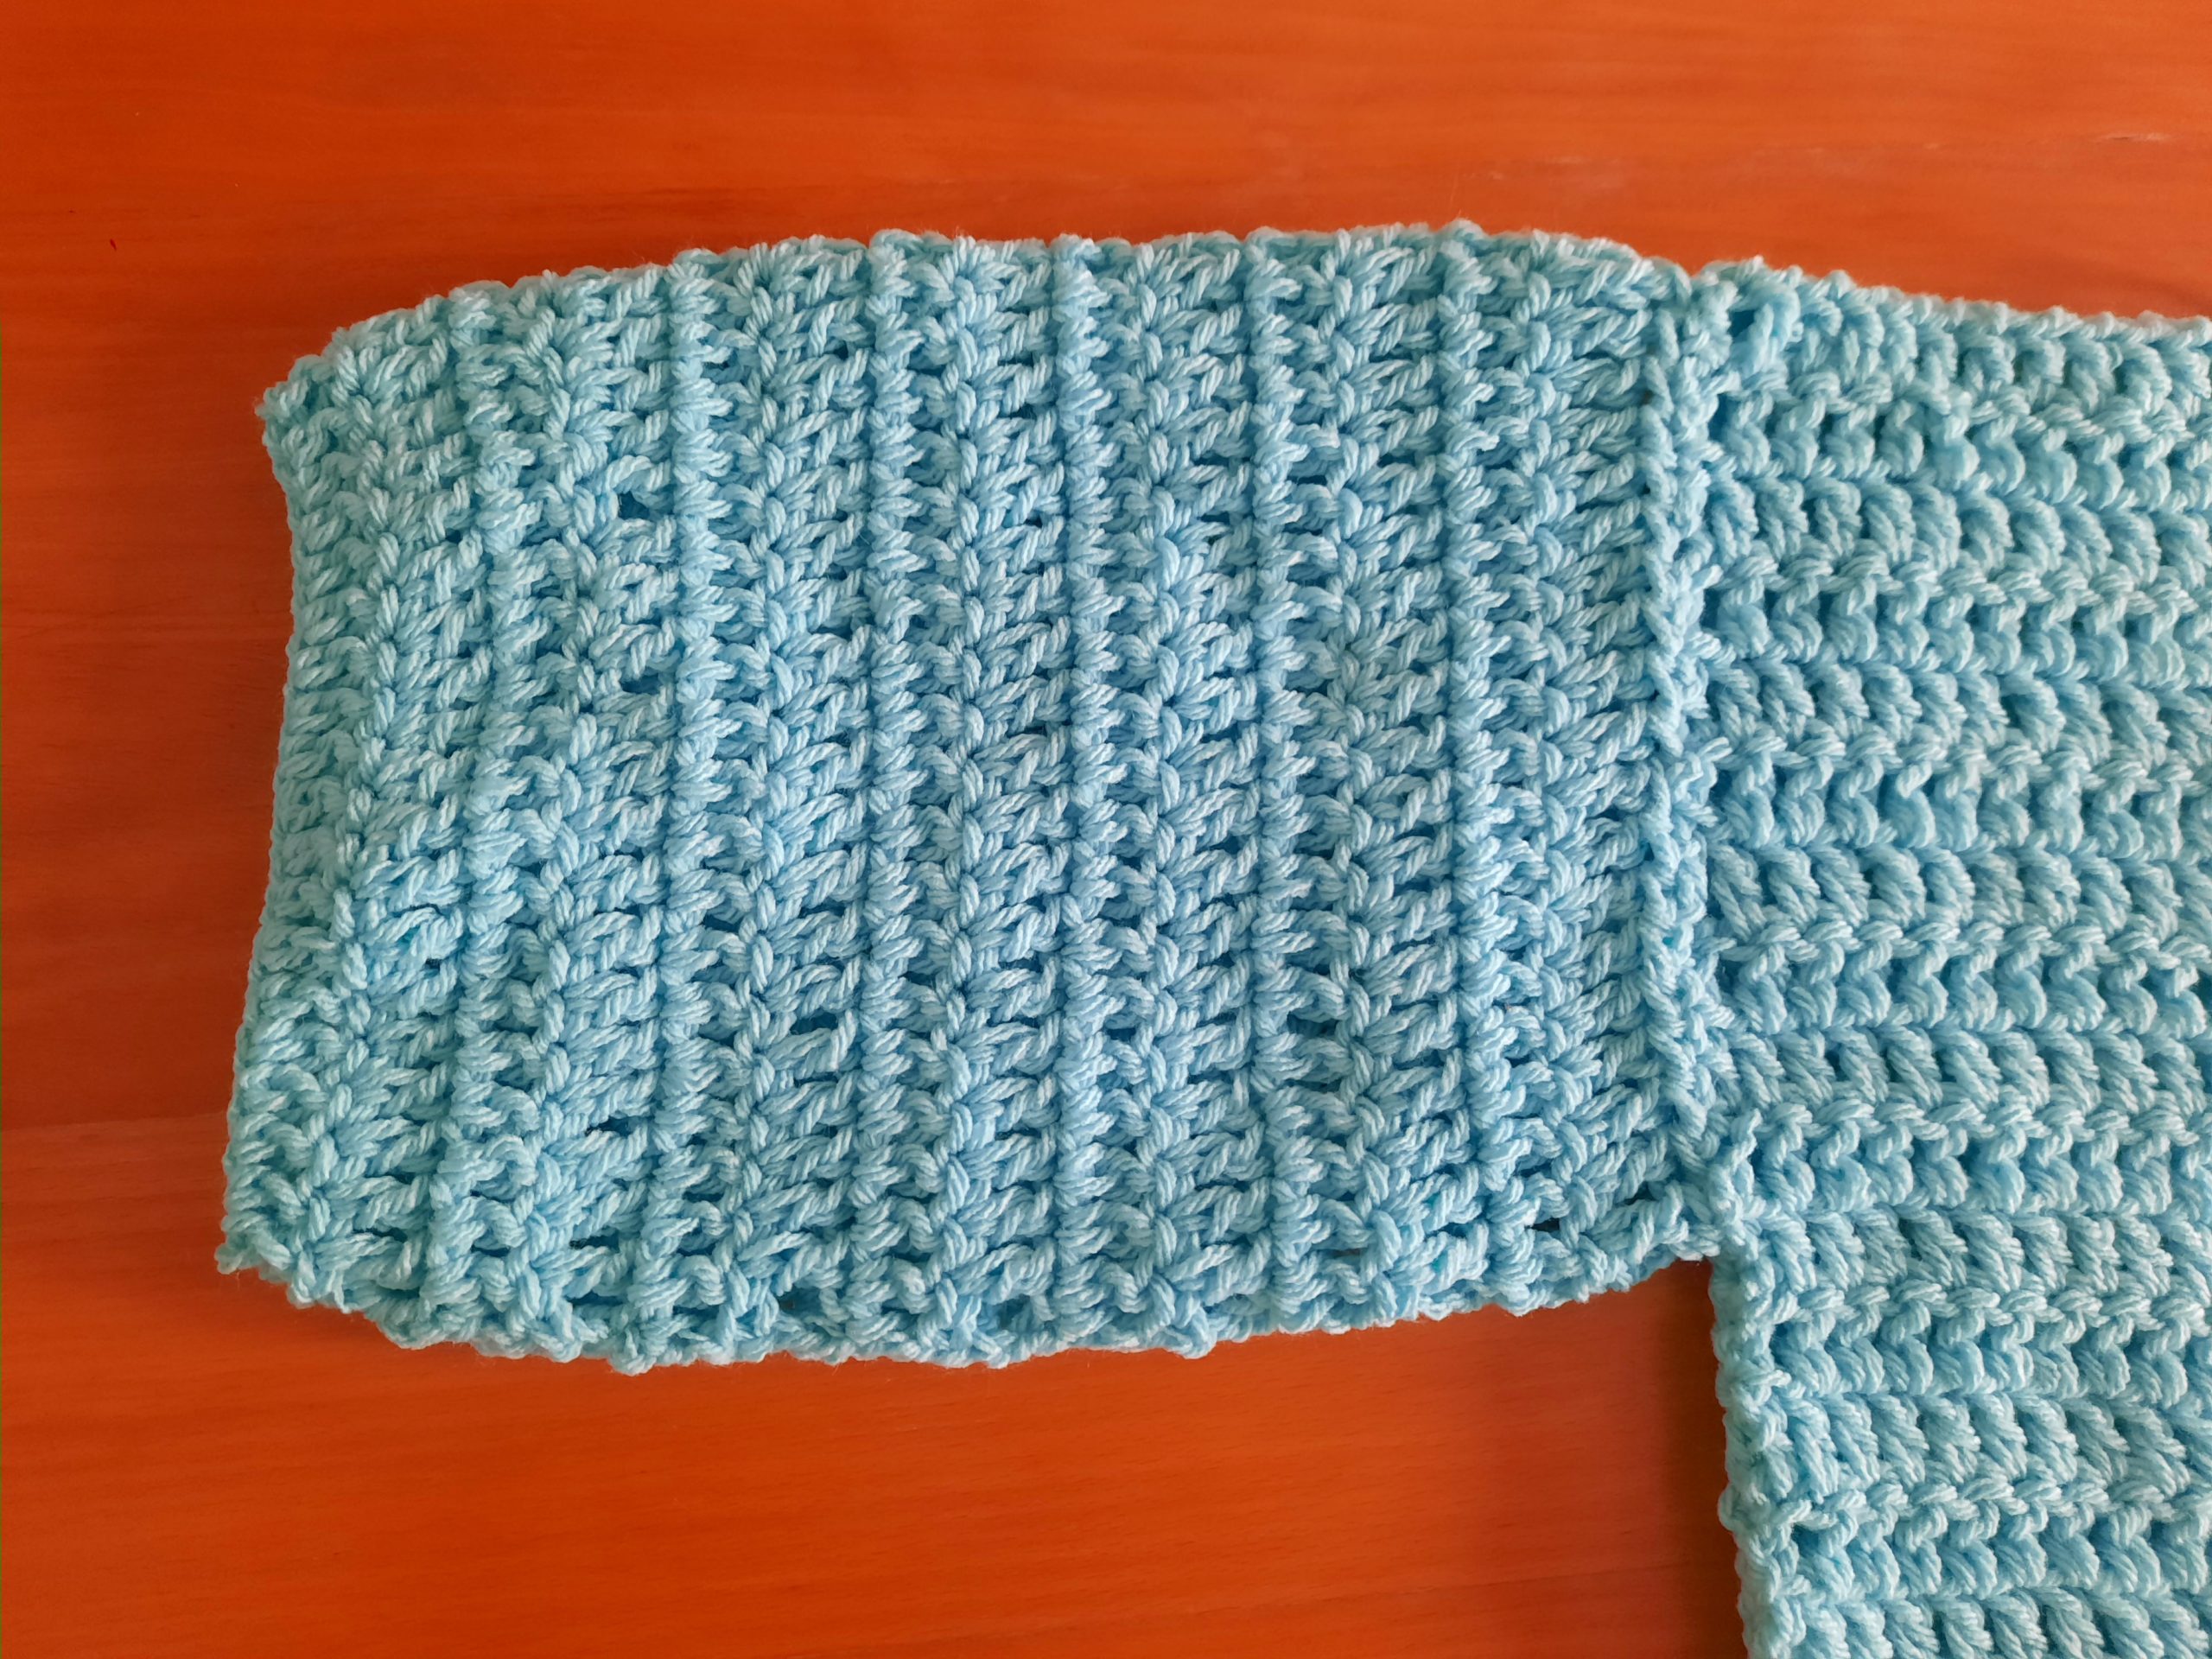
This is a great first garment project for beginners too, as the construction of this pattern is very simple. It is crocheted with a simple pattern repeat of Double Crochets throughout.
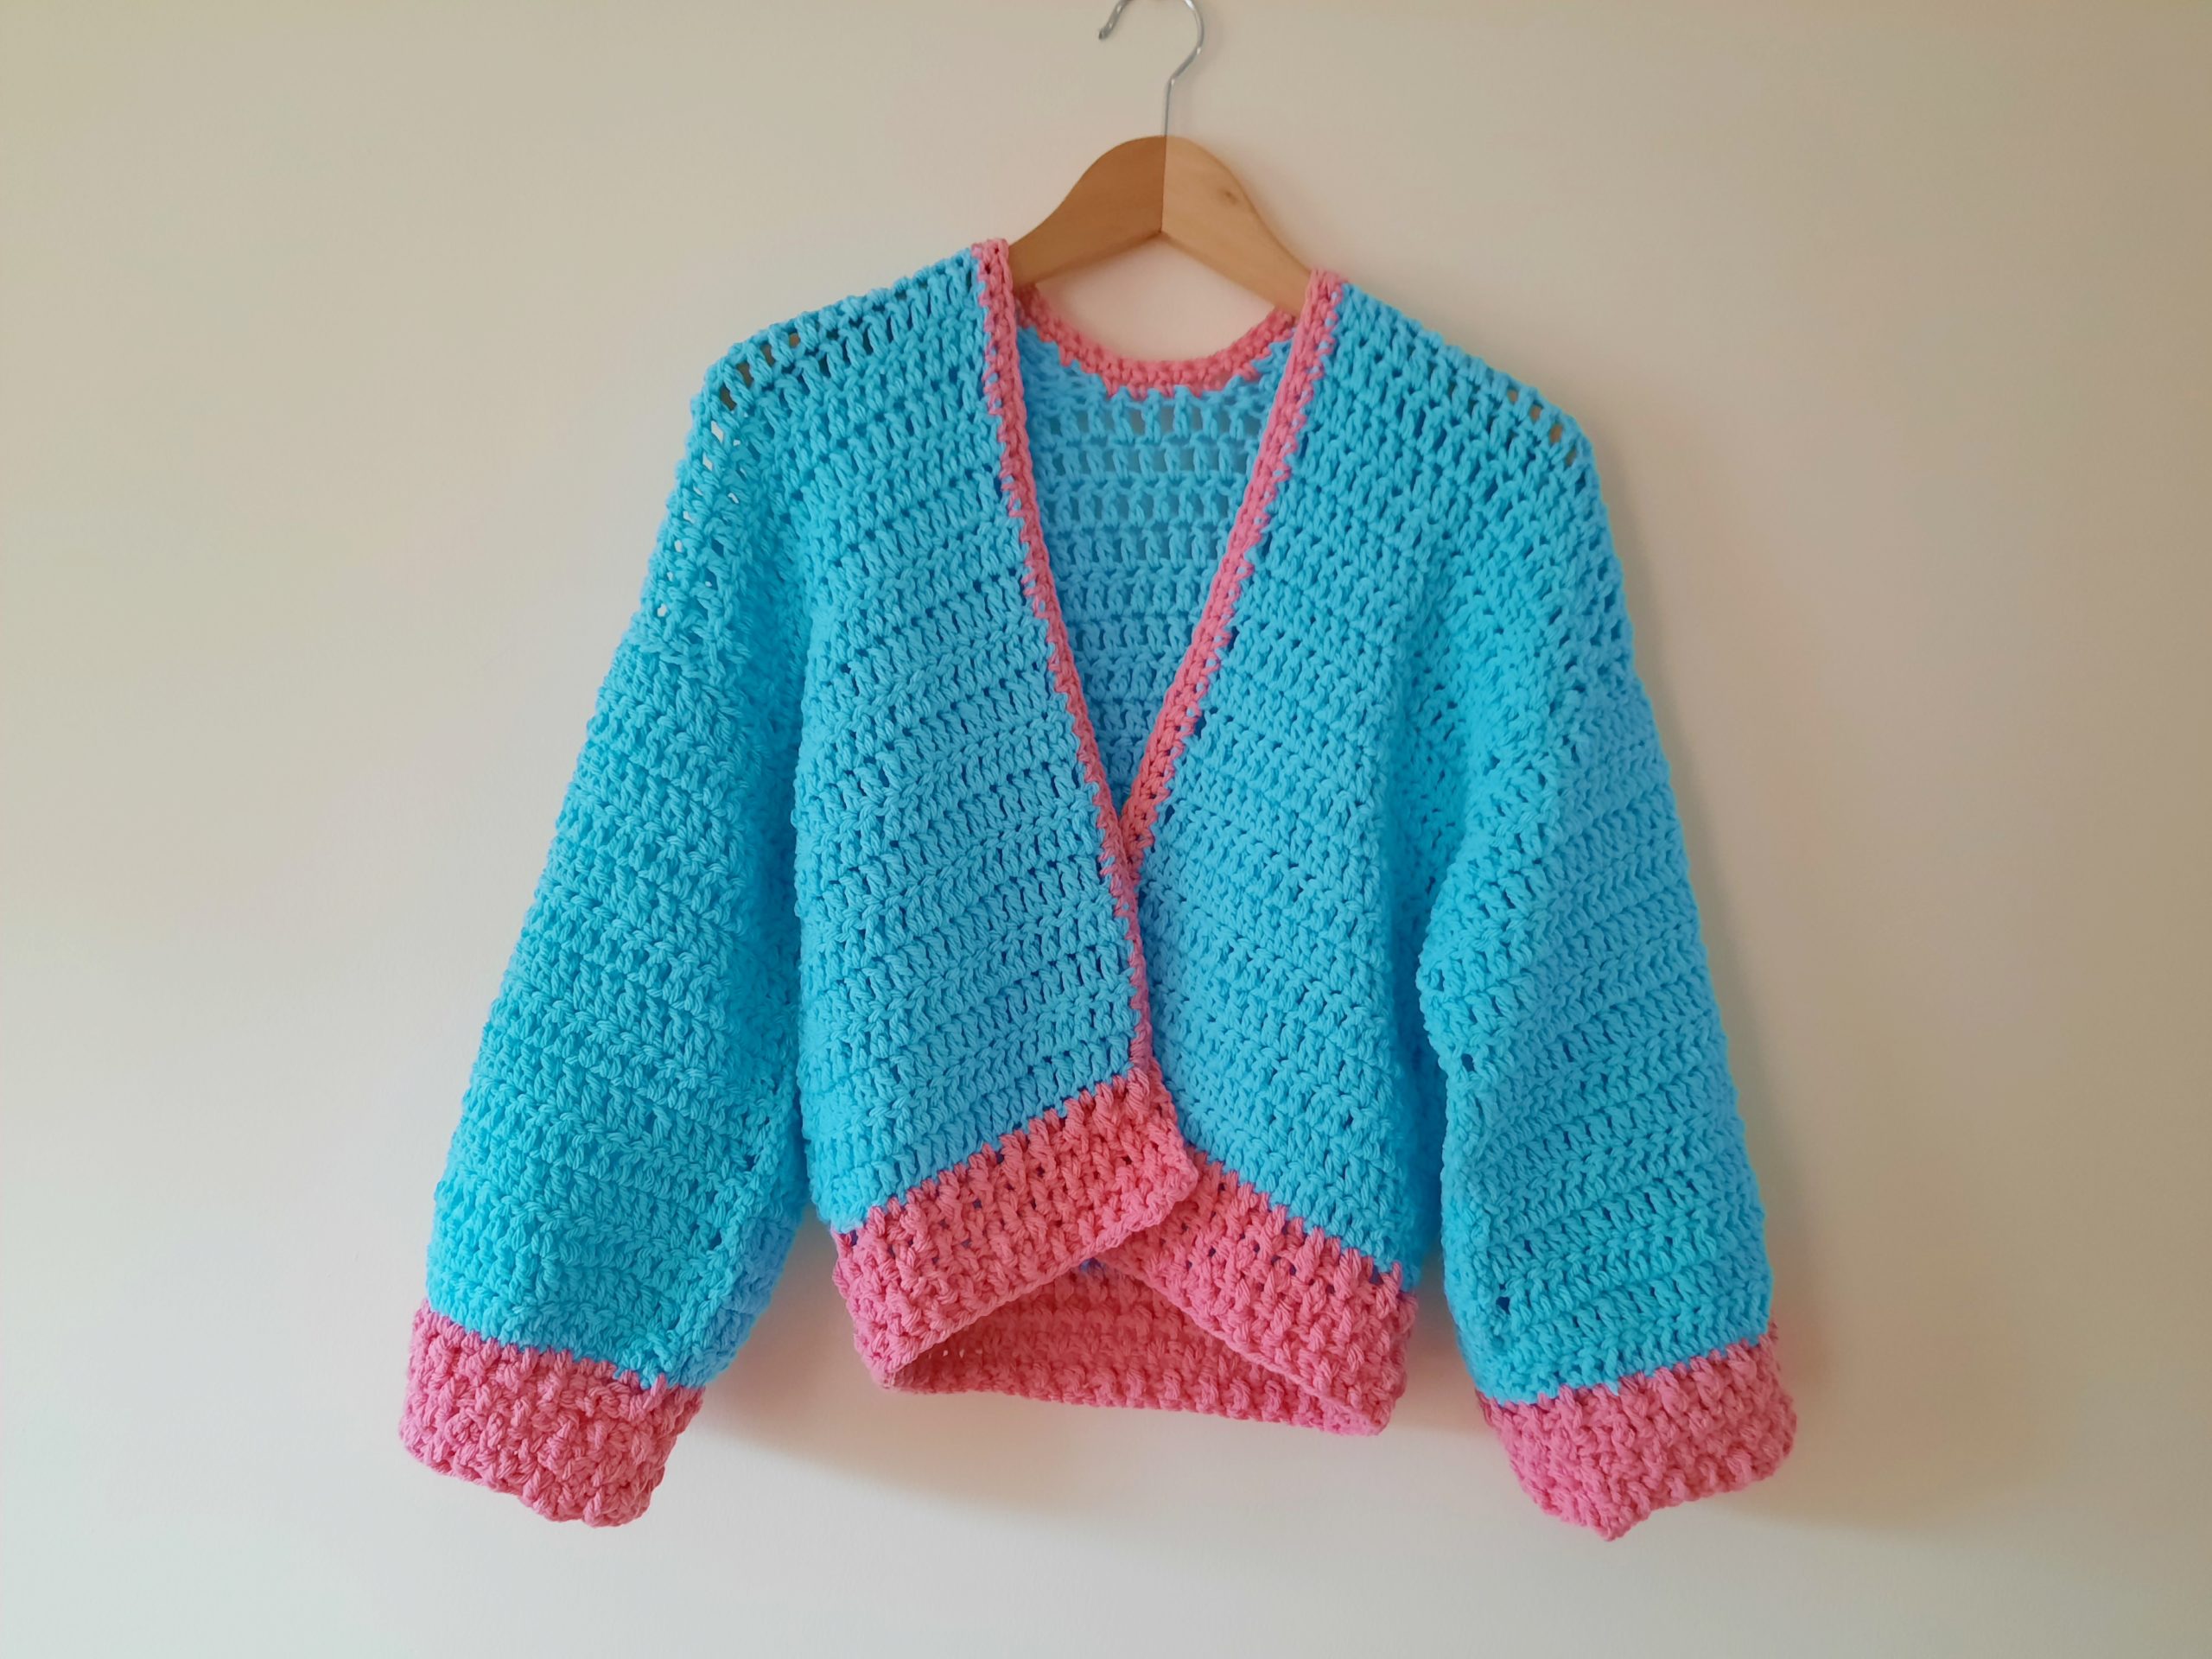
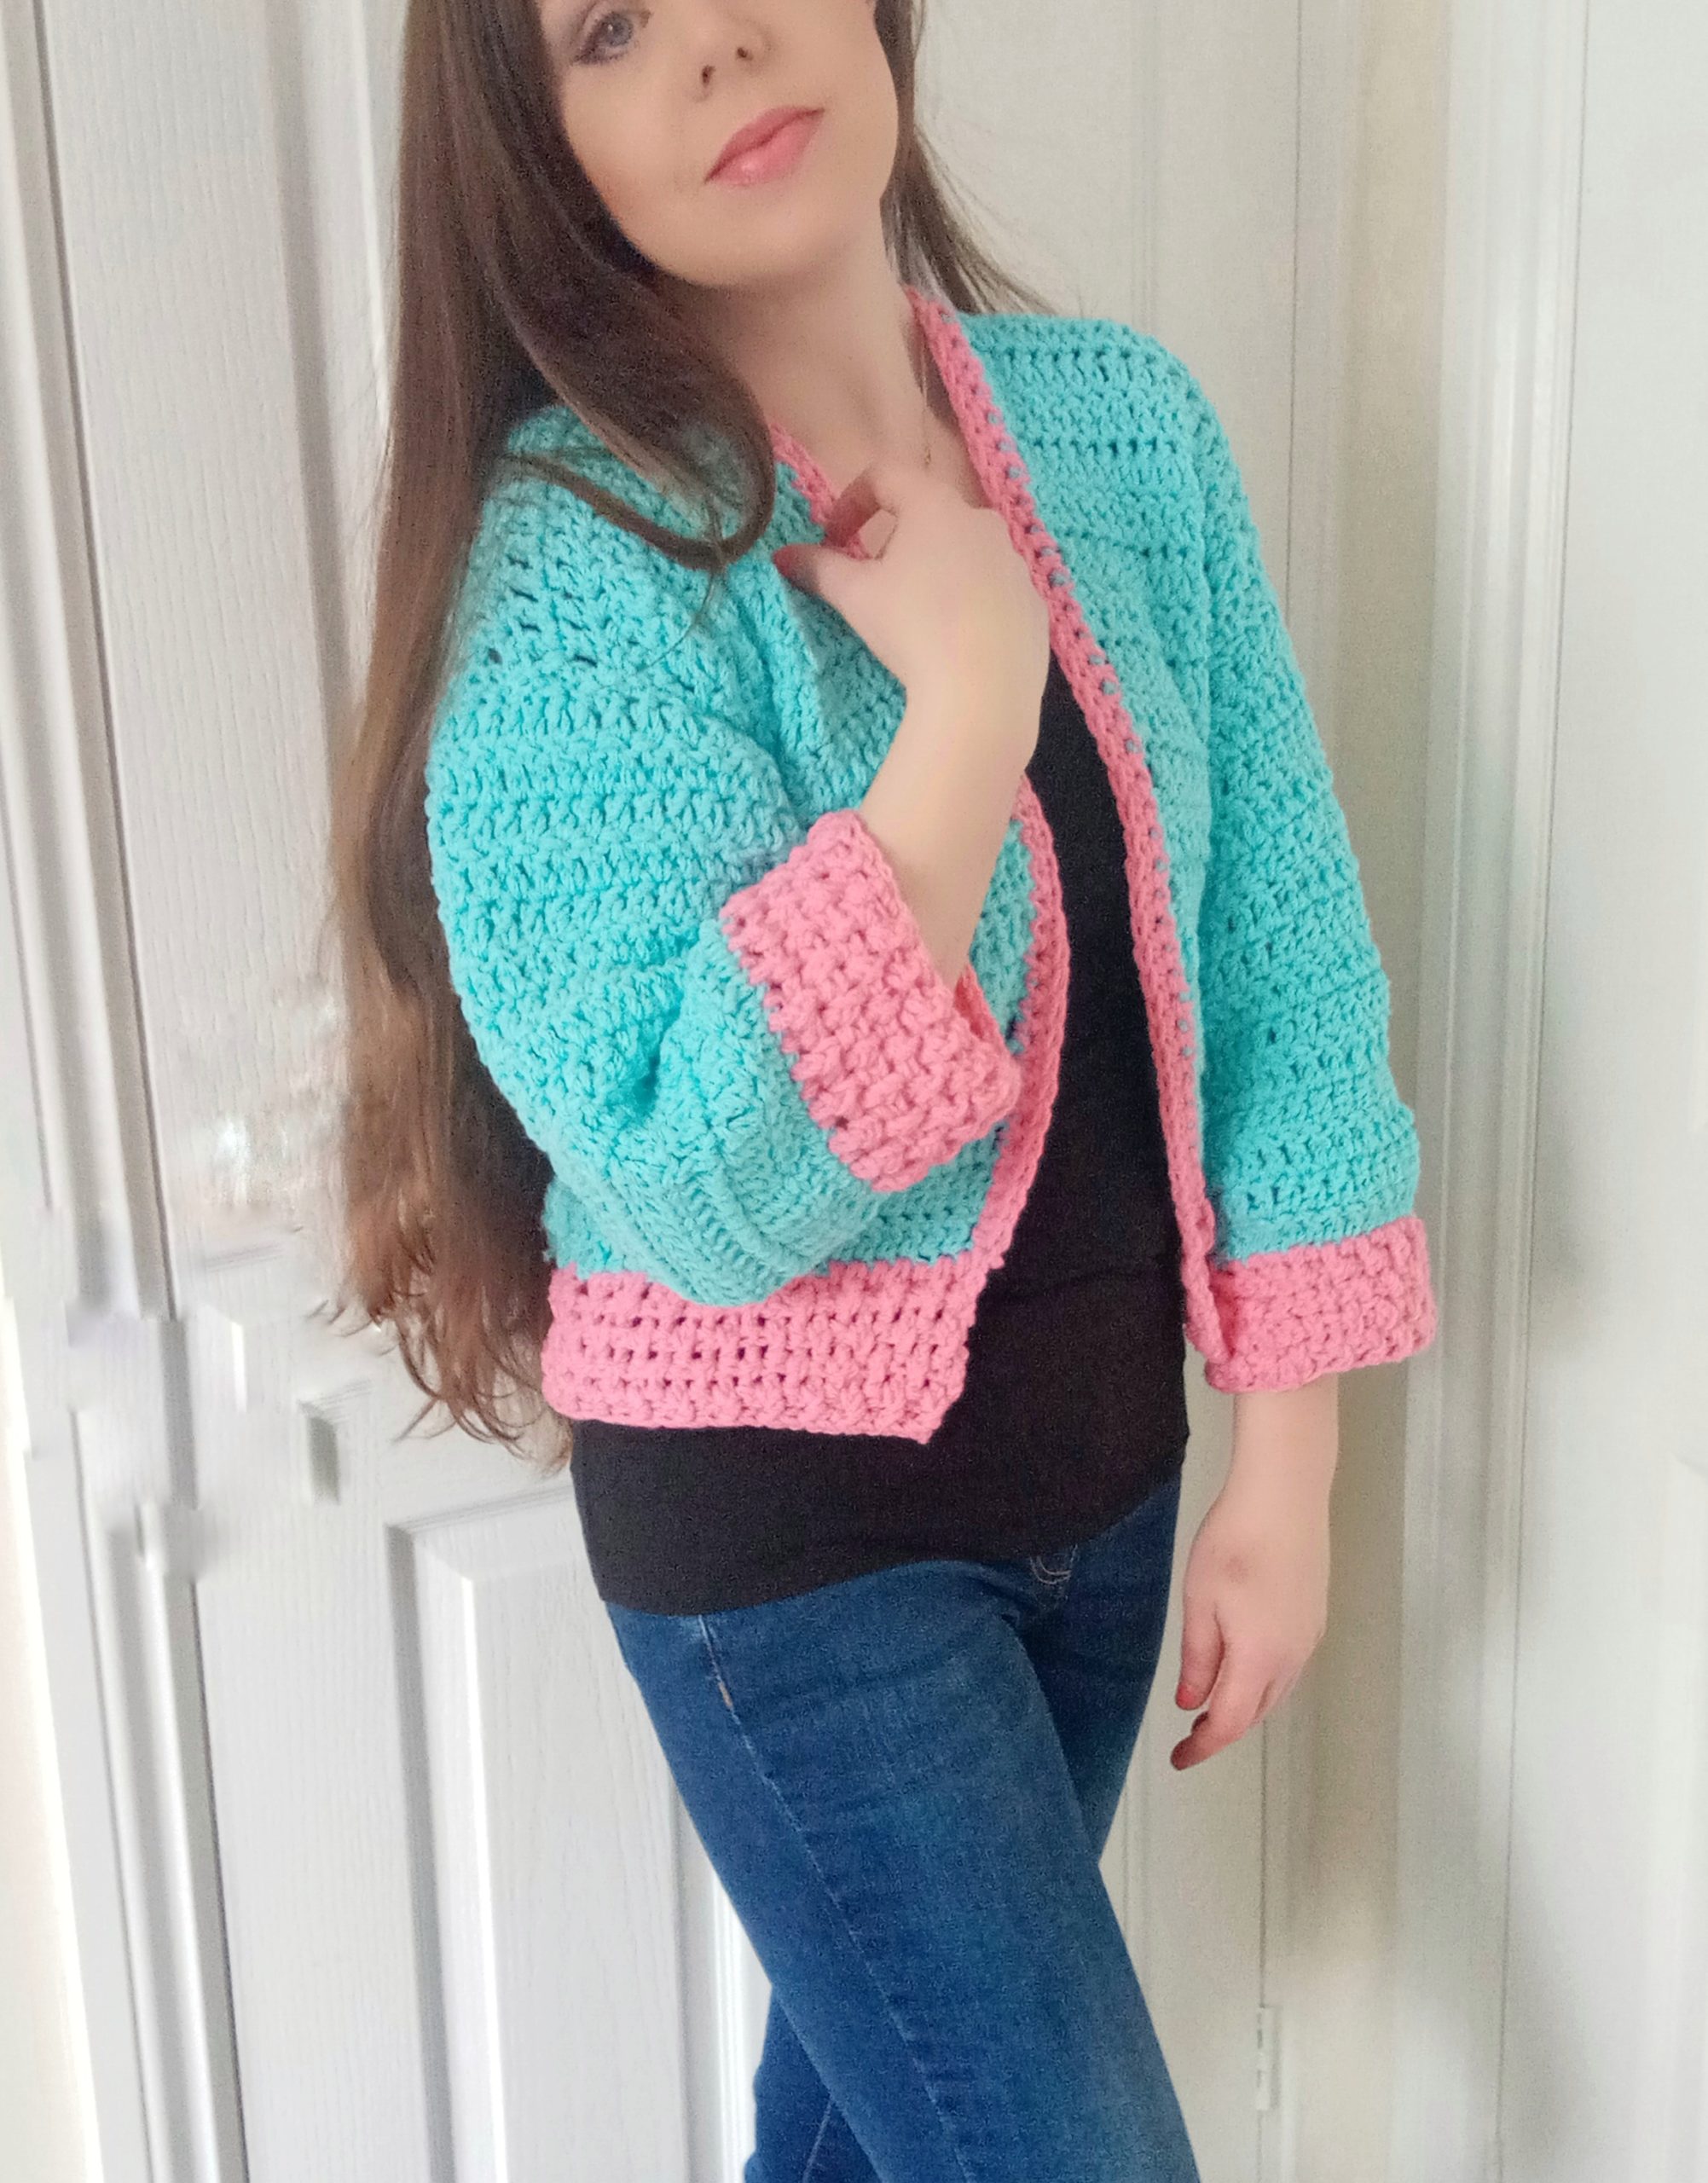
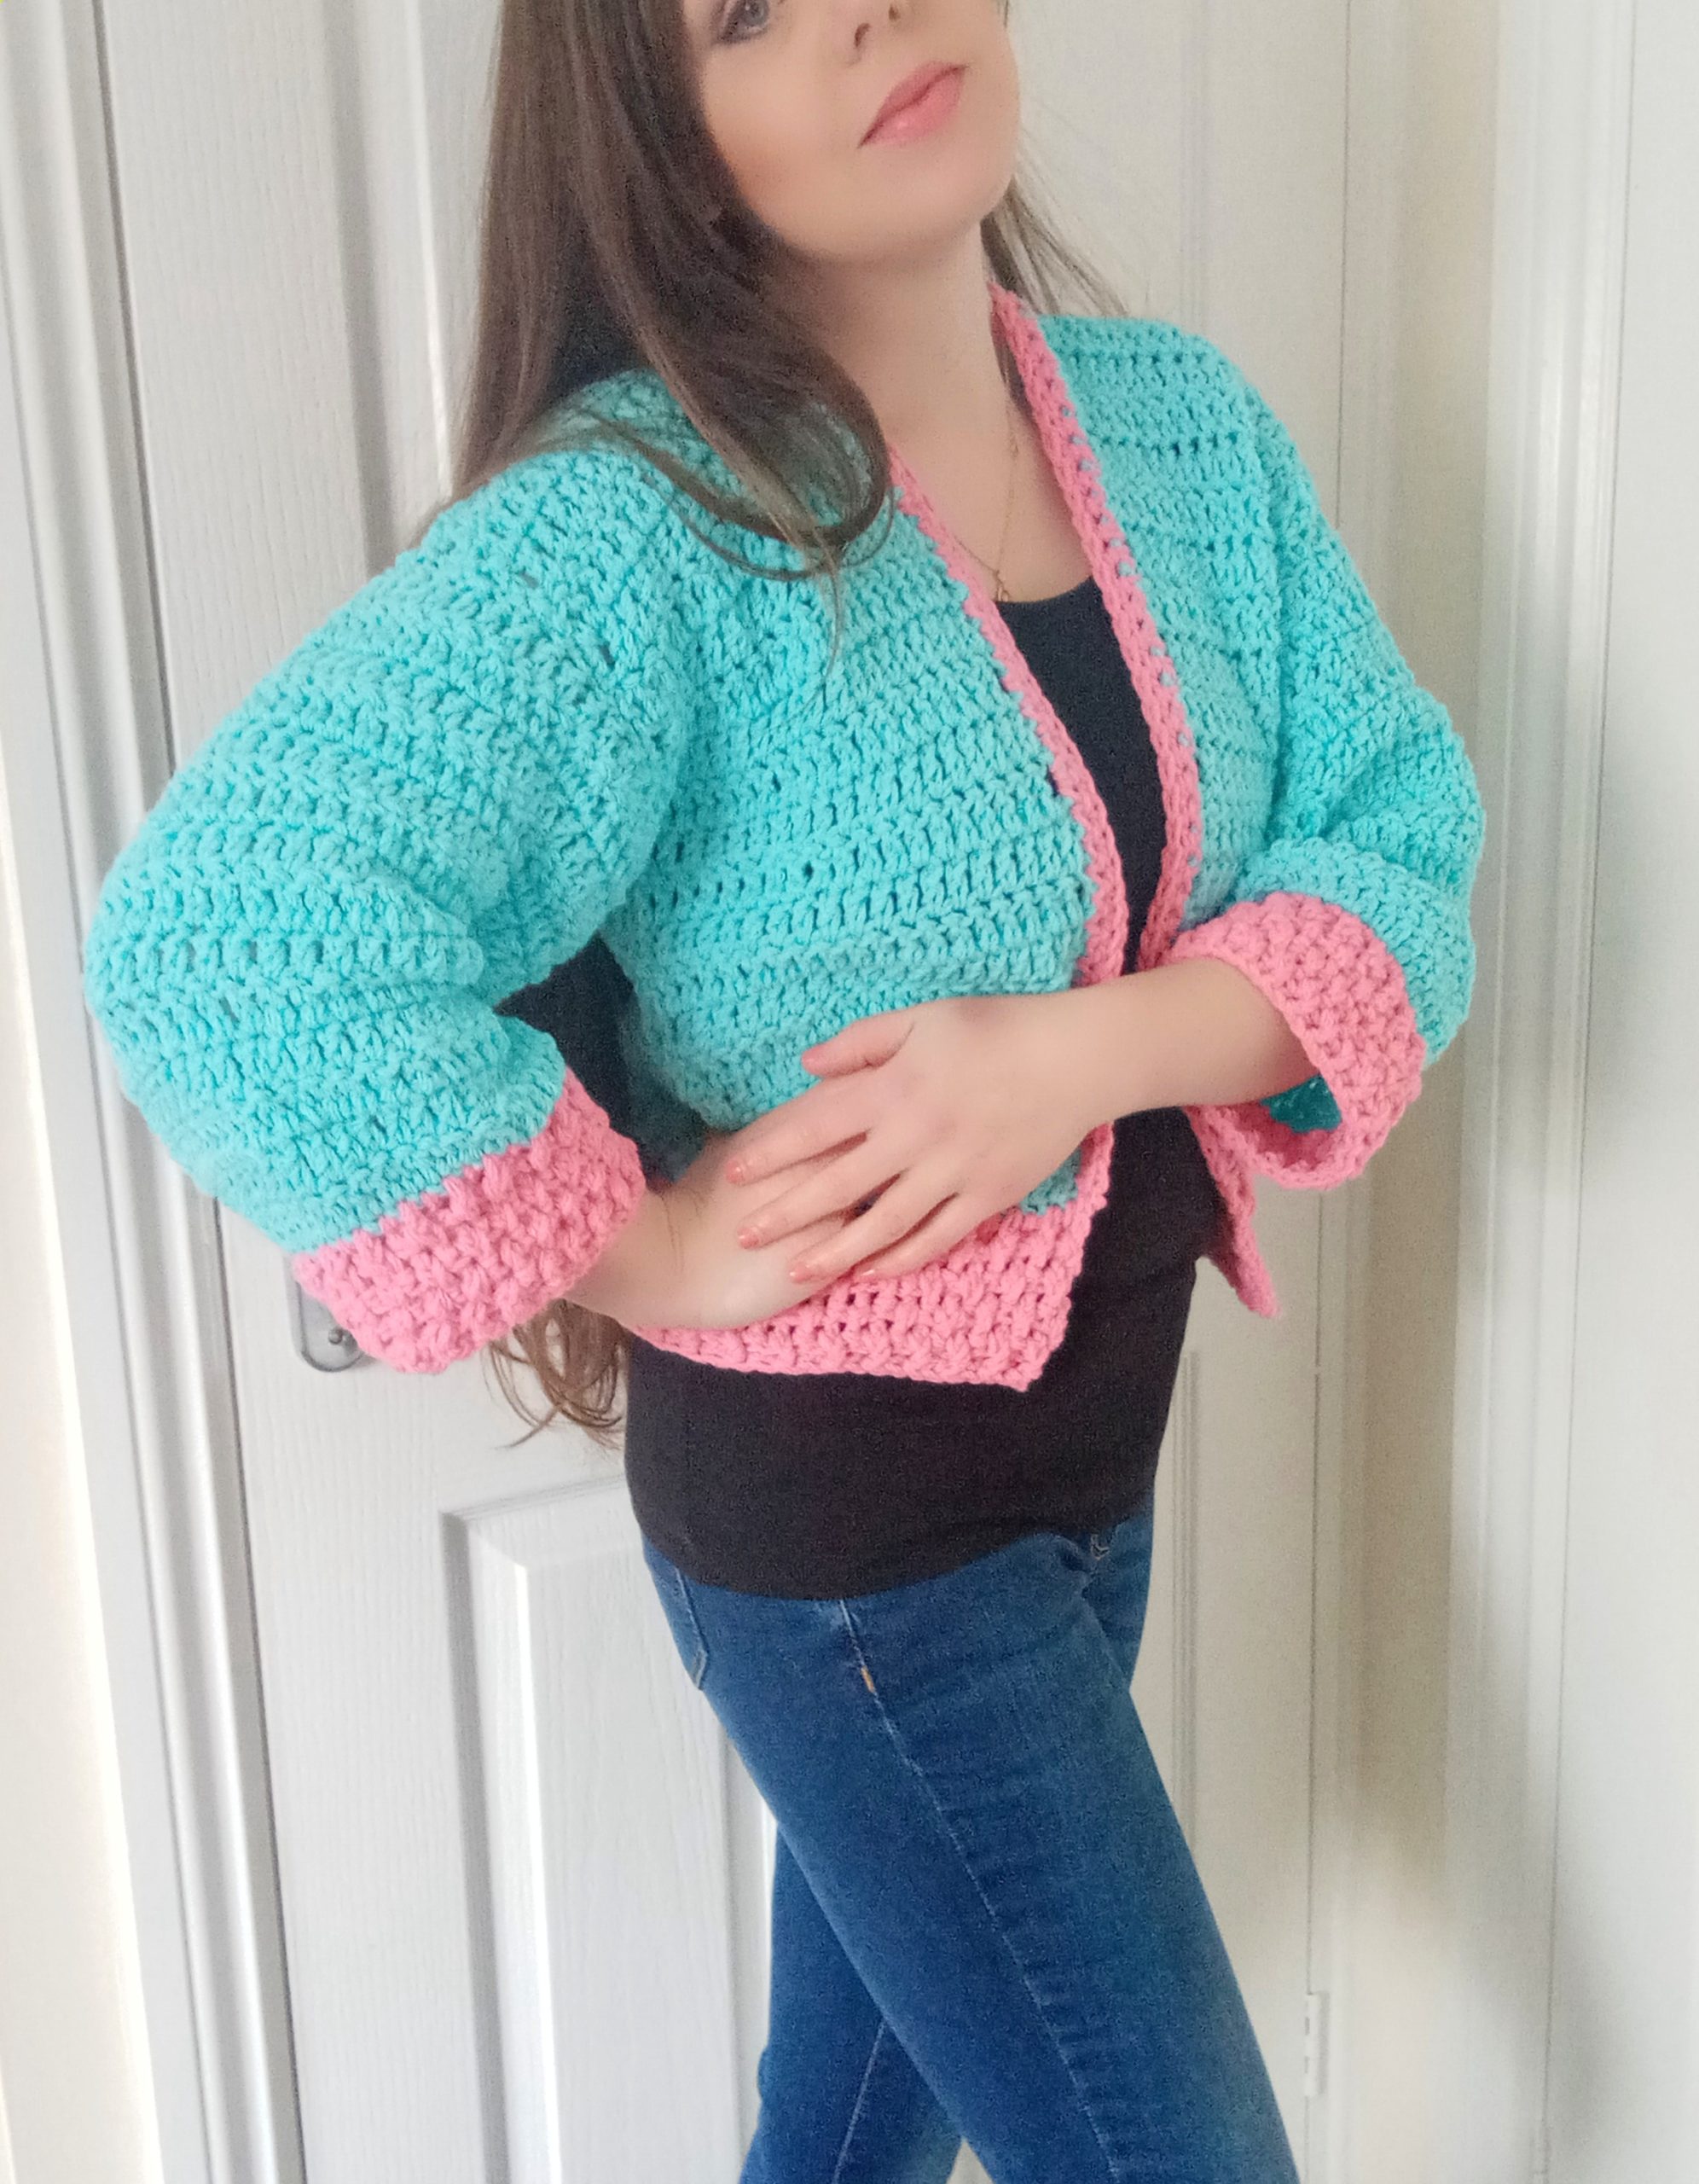
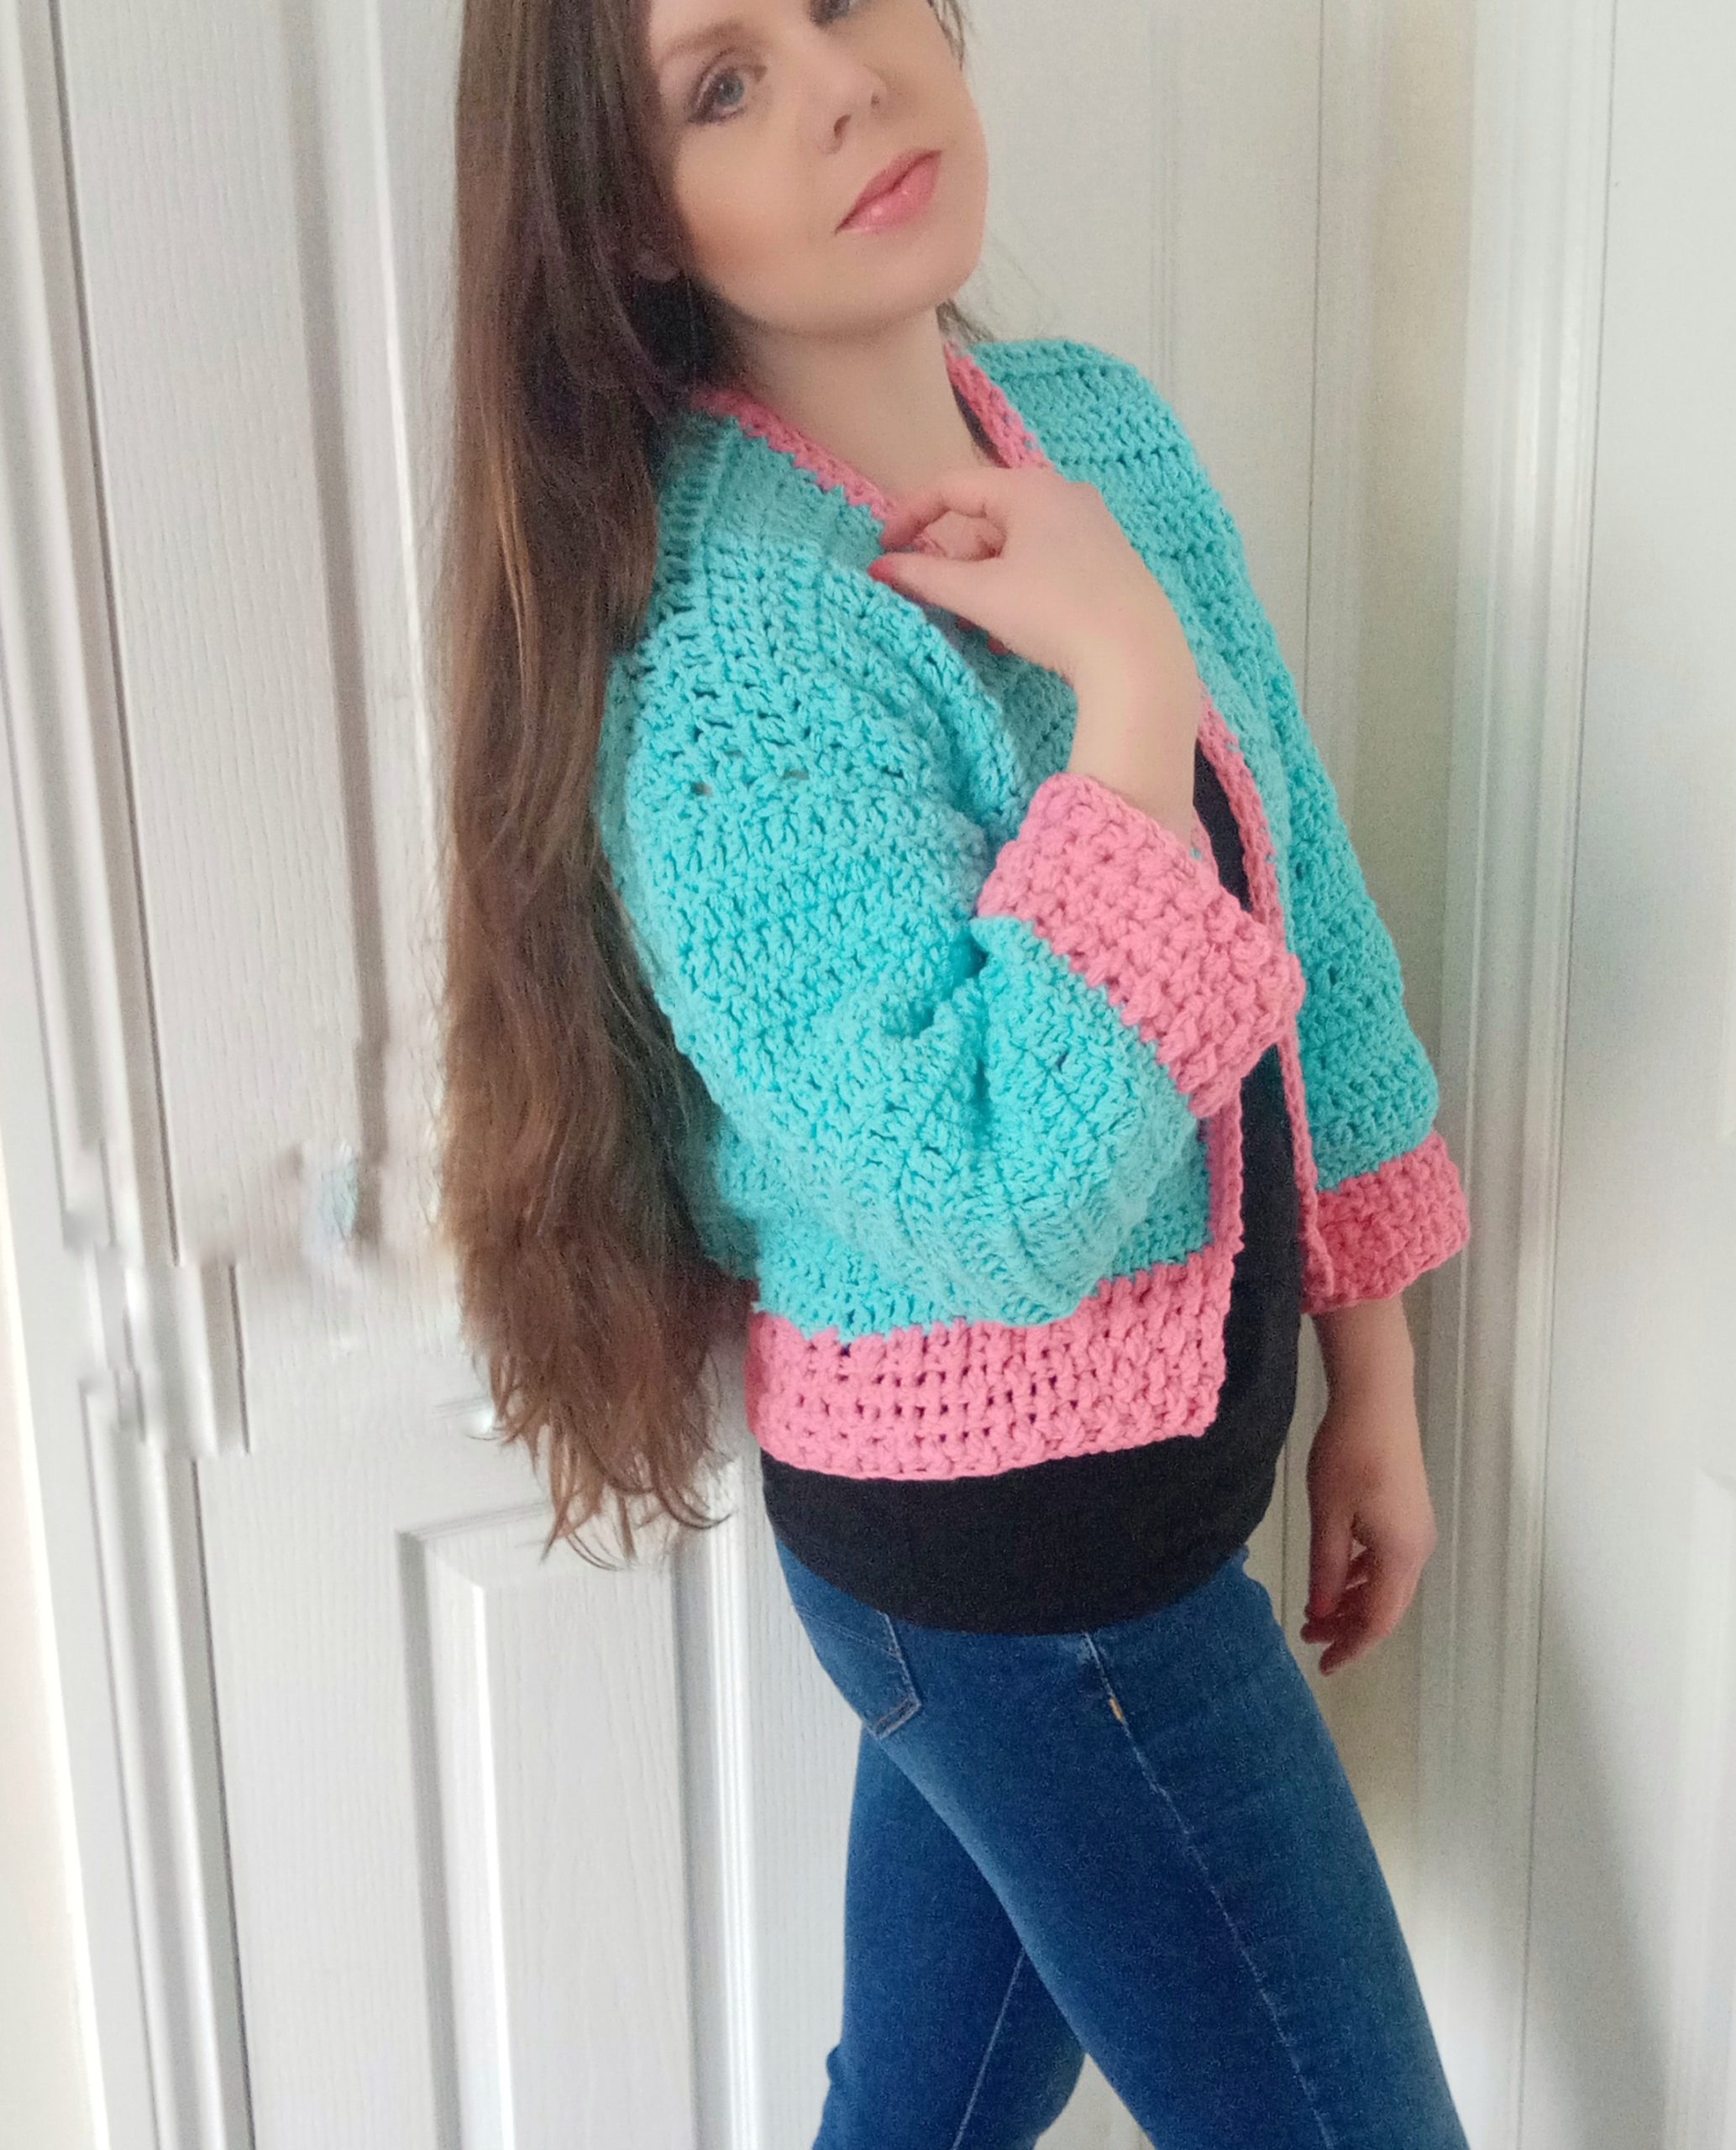
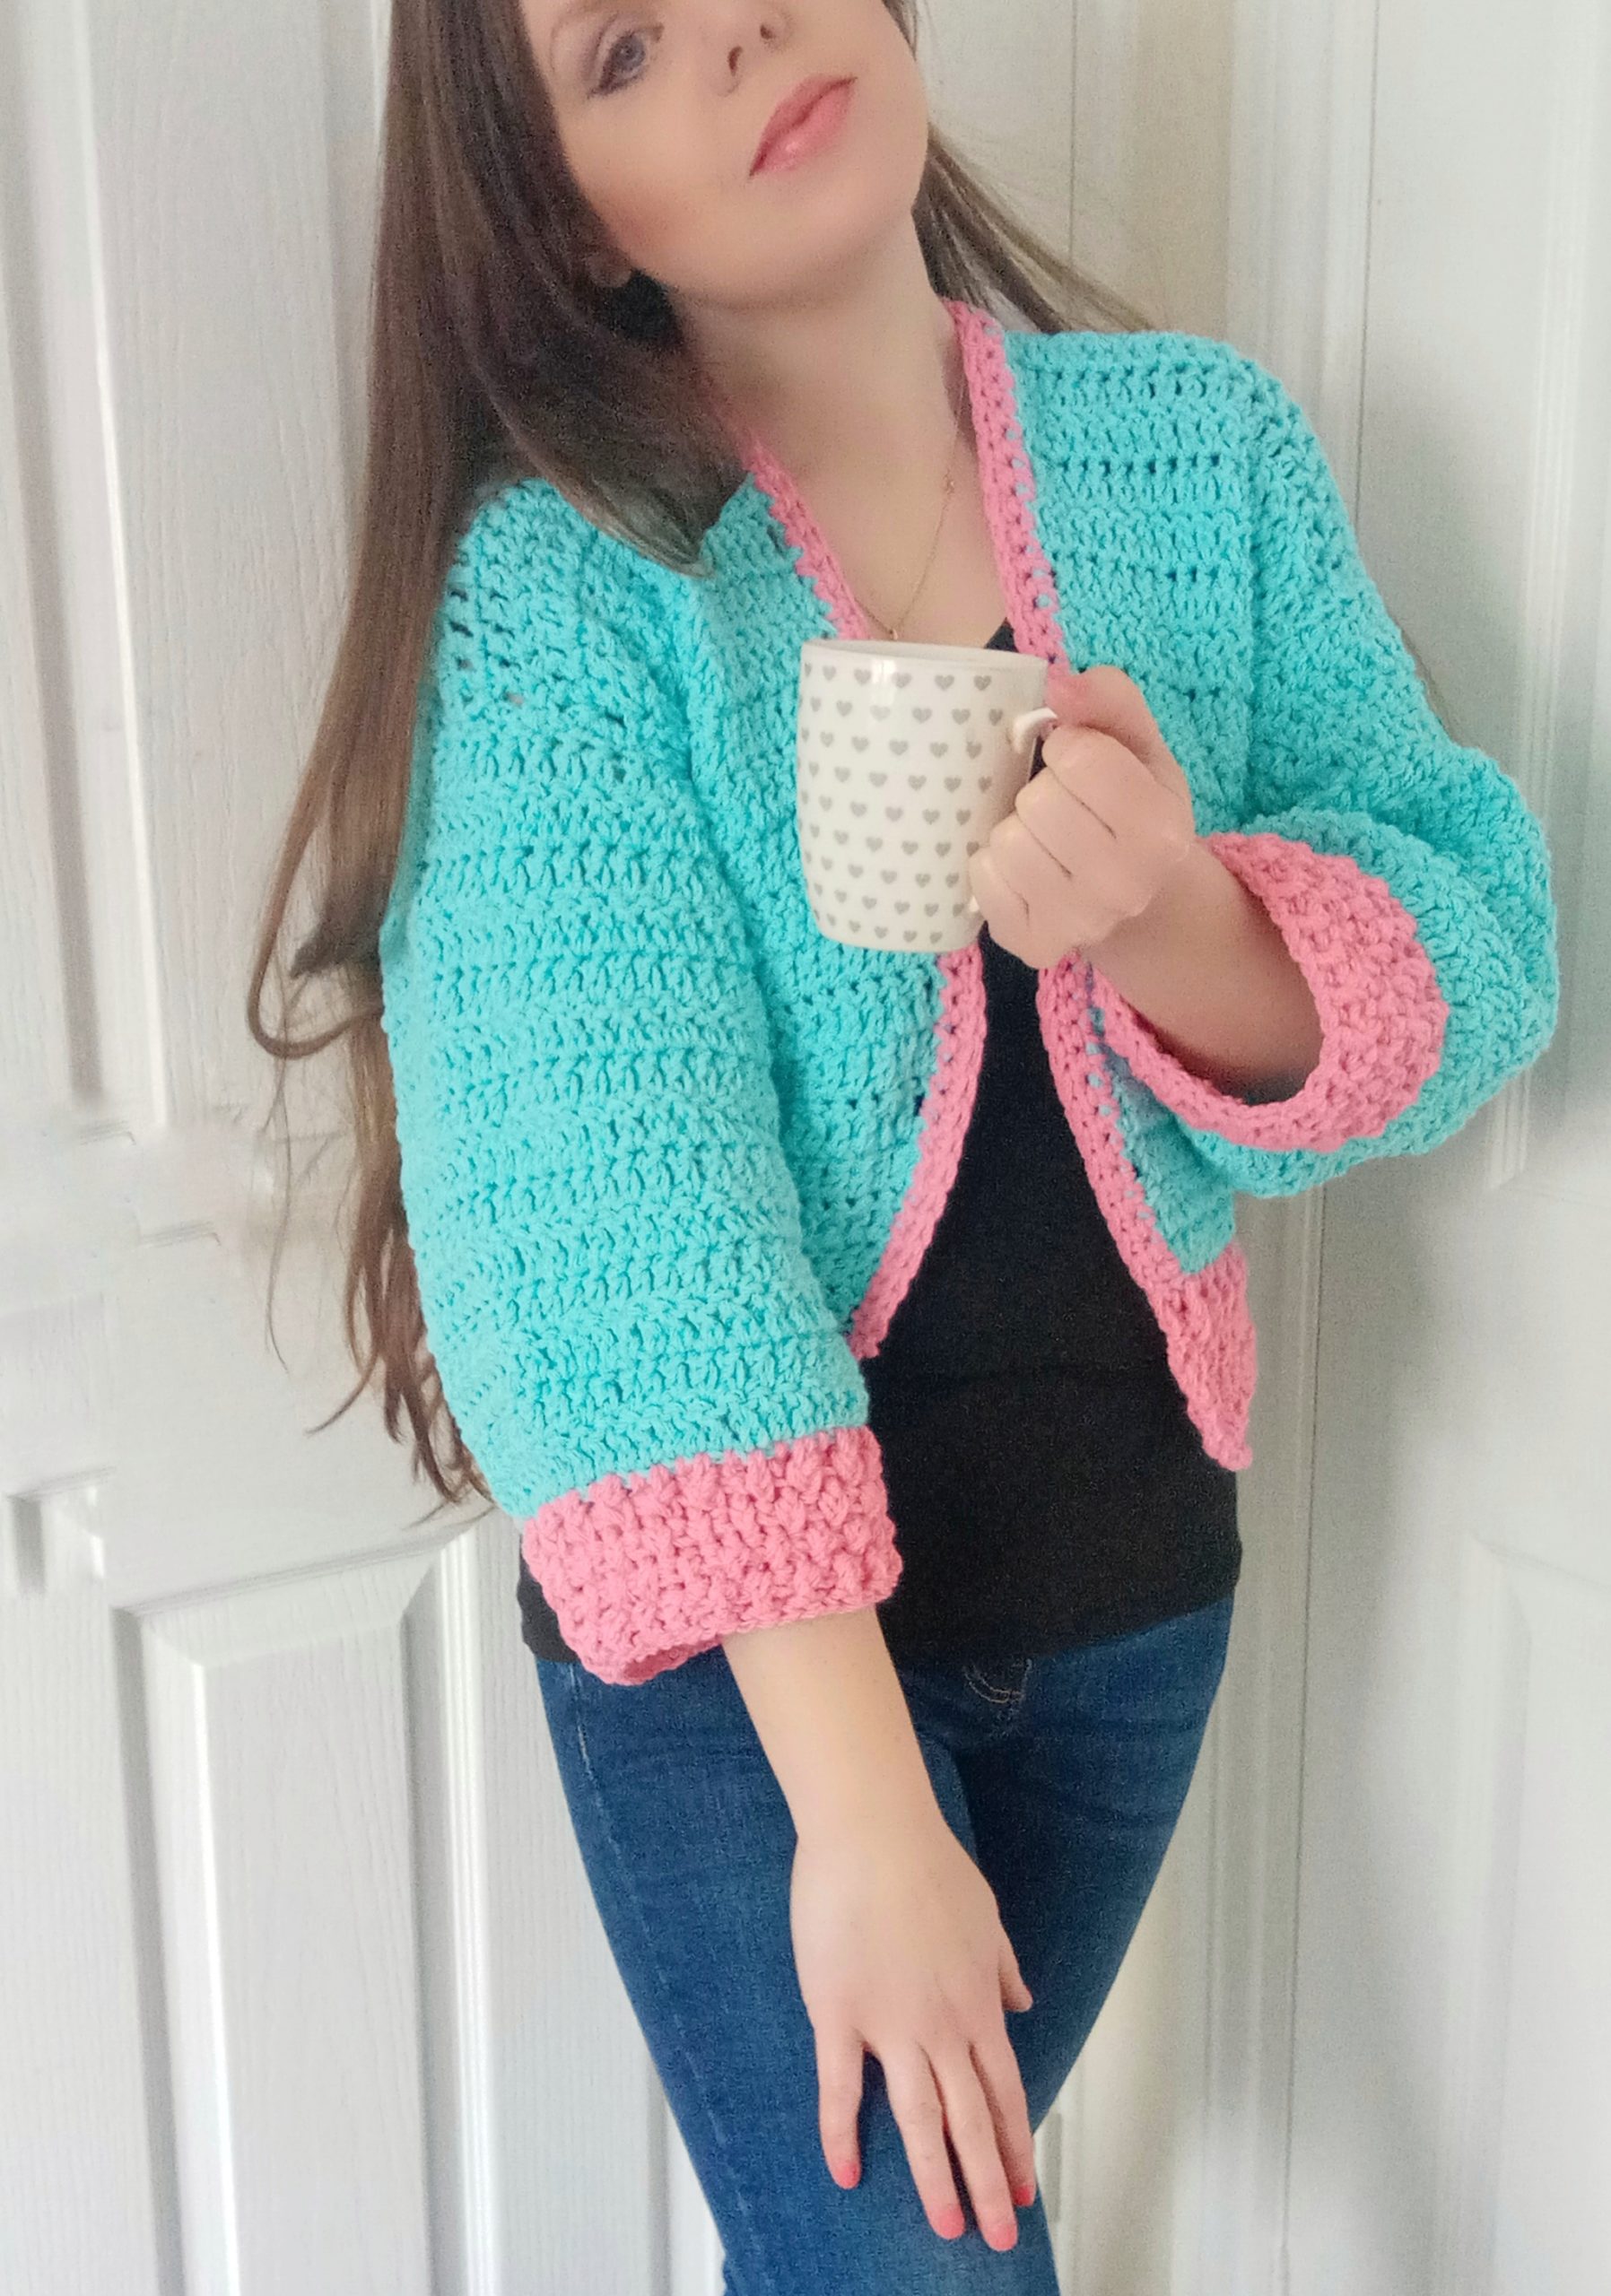
Crochet The Blue Skies Cardigan: a perfect accessory for Spring
This crochet cardigan is great for Spring. It is quite chunky, and could actually be a perfect coat for the warmer seasons. The simple cropped look of this garment gives it a very trendy, fashionable vibe. The edgings and borders of this cardigan are stunning, and give this crochet garment a lot of texture and character.
Truly, I had had a vision for this exact cardigan quite a few weeks back, and when I spotted these colors in Hayfield’s Baby Chunky range, I knew they would be perfect for this project. I love mixing baby blues and pinks, especially in a Spring project.
This is such a feminine and cute crochet accessory, perfect for the coming warmer seasons. I know I love this cardigan already!
This pattern is also inclusive, as sizes range from sizes S to XXXL. It is very versatile and fun to crochet, and like I previously said, the simple construction make this a very easy and relaxing crochet project to make.
Crochet The Blue Skies Cardigan: the yarn

So this crochet project requires worsted/chunky yarn depending on which country you are in. The yarn requires a size 6/6.5 mm crochet hook, so in the UK this is considered chunky, but in America, this is considered Worsted weight yarn (think Lion Brand Wool Ease, for example). More details can be found on my free pattern down below.
I used two crochet hooks for this pattern. I used a 7 mm crochet hook, as well as a 5 mm crochet hook (for the borders and edgings). The British brand I used for this project is Hayfield Baby Chunky, however, this yarn can be easily substituted with another brand (such as Lion Brand Wool Ease, or Caron Cake for example).
Crochet The Blue Skies Cardigan: make it longer
This crochet design is slightly cropped, however you can very easily make it longer. Indeed, you simply need to add rows to the back and front panels, and you can make this cardigan to the length you desire.
This crochet pattern is so simple and easy to make, I know I enjoyed every second of making it. Let me know in the comments if you enjoyed making it as much as I did!
Connecting with you
I love nothing more than connecting with you! You can follow me on Youtube, Instagram and Pinterest. I am very active on these platforms and love connecting with you on these. My user name is Selina Veronique Crochet, and you can also find the direct links to my Social Media on my home page.
You can also subscribe to my weekly newsletter, where you will be the first to know of a free pattern release, giveaway, and new video tutorial.
Thank you so much for stopping by!
Have a great week,
love Selina.
Crochet The Blue Skies Cardigan: the pattern
You can purchase the ad free, large print, PDF pattern on my Etsy shop:
This really helps support my small business, and I truly appreciate it.
Level: Easy +
Notes: I will be writing in US terms
Materials
4 (S, M), 5 (L, XL), 6 (XXL, XXXL) skeins of Hayfield Baby Chunky yarn in shade Bubblegum (blue), and 2 to 3 skeins of Hayfield Baby Chunky yarn in shade Petal Pink. You can use any other chunky yarn of your preference (this yarn will require a 6.5 mm crochet hook).
5 and 7 mm crochet hook
Tapestry needle
Pair of scissors
Gauge
4” (10 cm) = 10 DC
4” (10 cm) = 5f rows
Sizes of finished jumper
These are the sizes measured once jumper has been assembled and all edgings and borders have been added. Size of sleeves given once they have been sewed onto project and edging added:
Size S:
Body of jumper: 19,5” (50 cm) in length x 18,5” (47 cm) in width
Sleeves: 13,5” (35 cm) in length x 8,5” (22 cm) in width
Size M:
Body of jumper: 20” (51 cm) in length x 20,5” (52cm) in width
Sleeves: 14” (36 cm) in length x 9,5 (25 cm) in width
Size L:
Body of jumper: 20,5” (52 cm) in length x 22,5” (57 cm) in width
Sleeves: 14,5” (37 cm) in length x 10,5 (27 cm) in width
Size XL:
Body of jumper: 21” (54 cm) in length x 24,5” (62 cm) in width
Sleeves: 15” (38 cm) in length x 11,5” (29 cm) in width
Size XXL:
Body of jumper: 21,5” (55 cm) in length x 26,5” (67 cm) in width
Sleeves: 15,5” (40 cm) in length x 12,5” (32 cm) in width
Size XXXL:
Body of jumper: 22”(56 cm) in length x 28,5” (73 cm) in width
Sleeves: 16” (41 cm) in length x 13,5” (34 cm) in width
Abbreviations
ch: chain
sk: skip
SP: space
SC: Single Crochet (= UK Double Crochet)
DC: Double Crochet (=UK Treble Crochet)
FPDC: Front Post Double Crochet
BPDC: Back Post Double Crochet
Sl st: Slip stitch
EOR: End of row
Sizes will be indicated like this:
S, (M), [L], {XL}, *XXL*, XXXL
Pattern begins here
Please note this is a cropped cardigan, if you wish to make it longer just add as many rows to the front and back panels until you reach the length you desire.
Use 7 mm crochet hook for this part, and shade Bubblegum.
Back of cardigan
Ch 43 (48) [53] {58} *63* 68
Complete rows as follows:
1: DC in 4th ch from hook, and into each ch across until eor
2: Ch 3 (counts as DC throughout), DC in 2nd and every DC from previous row until eor
3-21 (22) [23] {24} *25* 26: repeat row 2
Fasten off, leaving a long tail for sewing.
Front of cardigan (make 2)
Ch 22 (24) [27] {29} *32* 34
Complete rows as follows:
1: DC in 4th ch from hook, and into each ch across until eor
2: Ch 3 (counts as DC throughout), DC in 2nd and every DC from previous row until eor
3-21 (22) [23] {24} *25* 26: repeat row 2
Sleeves (make 2):
Use 7 mm crochet hook and shade Bubblegum.
Ch 43 (48) [53] {58} *63* 68
Complete rows as follows:
1: DC in 4th ch from hook, and into each ch across until eor
2: Ch 3 (counts as DC throughout), DC in 2nd and every DC from previous row until eor
3-21 (22) [23] {24} *25* 26: repeat row 2
Fasten off, leaving a long tail for sewing.
Once you have these 4 elements, you can start assembling your jumper together.
Assembling your cardigan together
Start by folding sleeves in half, and seaming the sleeves together, using tapestry needle and loose end.
With wrong side facing, place the back of your cardigan onto a flat surface. Now place both front panels flat onto the back of the cardigan.
Sew the shoulder seams at the top of the jumper, using the mattress stitch.

Then attach sleeves to each side of the cardigan, sew sleeves from the top of project, working all the way down to the bottom of the cardigan. You can then sew the “back” side of the sleeve to the back side of the project. This creates a more seamless stitching.
Do this on both sides of the cardigan for each sleeve and side of project.
Fasten off, tidy up all loose ends.
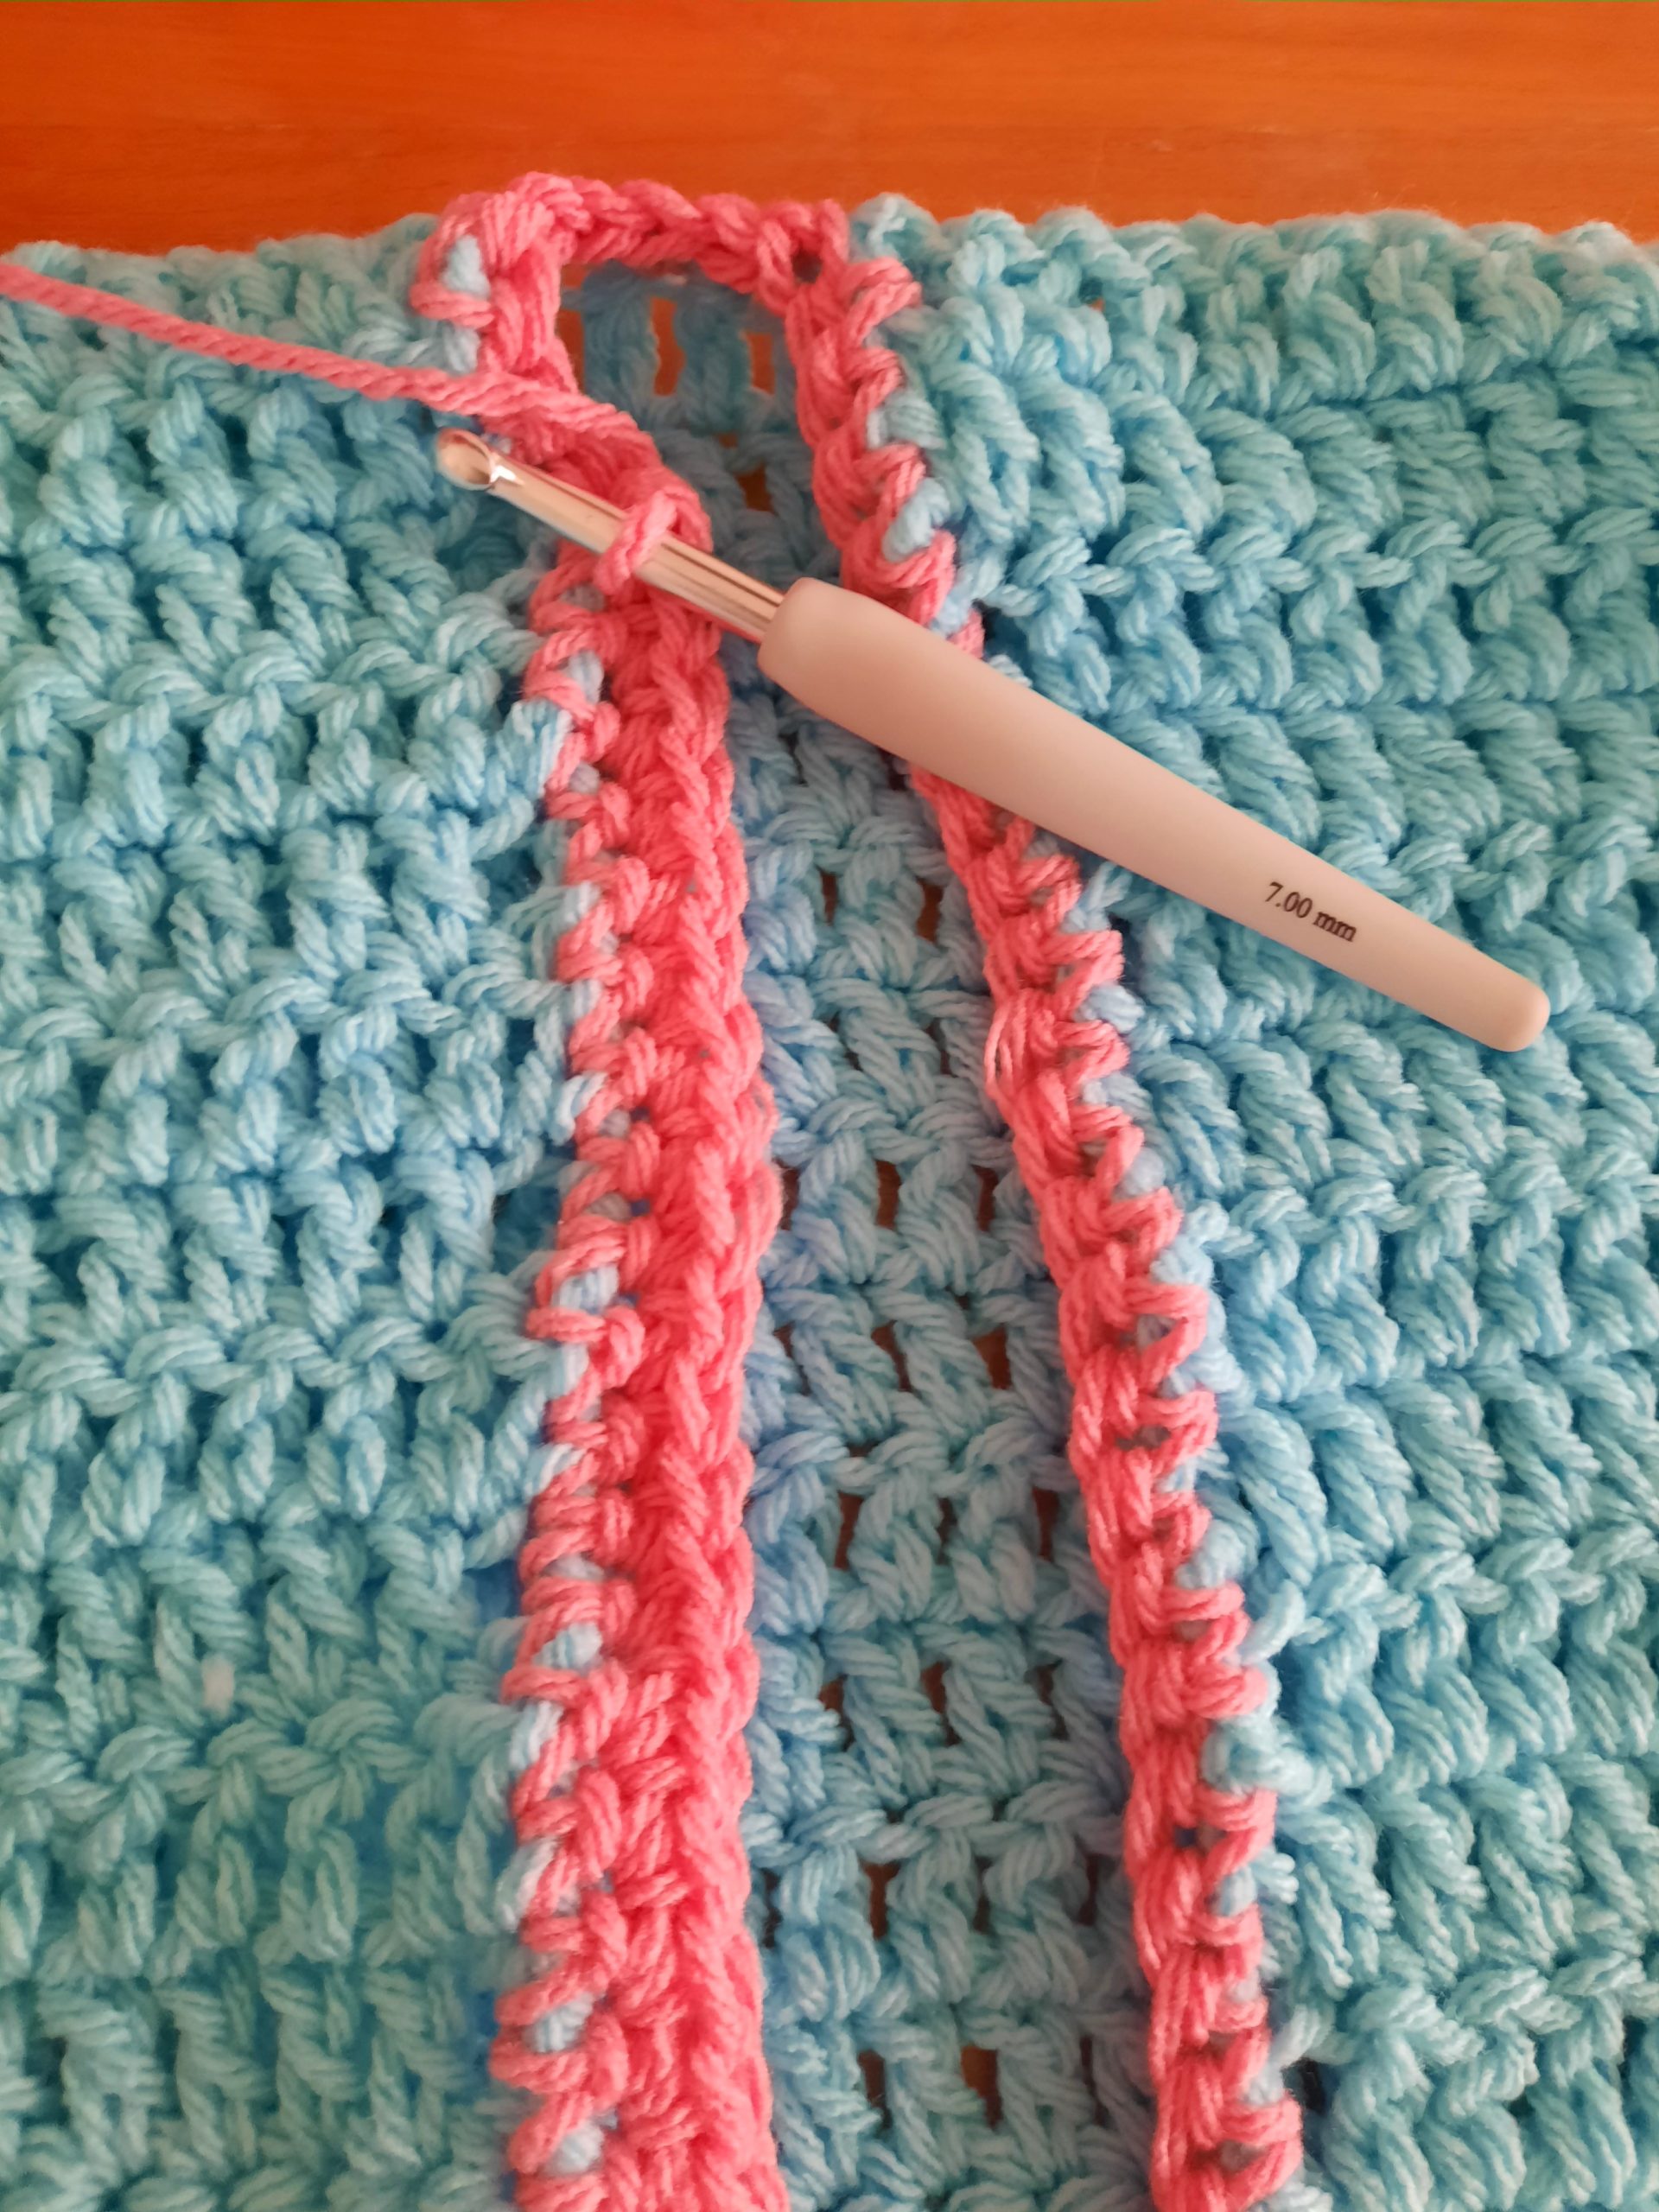
Neck and front edging
Use 7 mm crochet hook for this part, and shade Petal Pink
Fasten on yarn to the bottom edge of the cardigan (on whichever side you prefer).
Round 1: ch 1 (counts as a SC); SC into each stitch across, making sure you space your SC equally, as there will not be clear stitches across the front opening. Sl st to ch 1 at beginning of round.
Round 2: ch 1, SC into each SC from the previous row. Sl st to ch 1 from previous row.
Fasten off, tidy up all loose ends.
Sleeve cuffs
Repeat this process on each sleeve, using 5 mm crochet hook and shade Petal Pink.
Front Post Double Crochet: Wrap yarn around your hook, insert hook around the DC from previous row going from right to left in the front of stitch; pull up a loop, go through 2 loops, pull up a loop, go through 2 loops.
Back Post Double Crochet: Wrap yarn around your hook, insert hook around the DC from previous row going from right to left from the back of the stitch; pull up a loop, go through 2 loops, pull up a loop, go through 2 loops.
Attach yarn to cuff.
Complete rows as follows:
1: Ch 3 (counts as a DC), place a DC into next stitch until eor. Sl st to 1st ch 3 at beginning of row.
2: Ch 3 (counts as a BPDC), [Front Post Double Crochet into the next DC from previous row, Back Post Double Crochet into next stitch] until you reach the first ch 3, sl st to 1st ch 3 to close off round.
3: Ch 3 (counts as FPDC), [Back Post Double Crochet into the Front Post Double Crochet from previous row, Front Post Double Crochet into the Back Post Double Crochet from previous row] until eor. Therefore you will be alternating FPDC and BPDC from row to row, creating a ribbed effect.
Sl st to 1st ch 3 to close off round.
4-5: repeat rows 2 and 3
Fasten off, tidy up all loose ends.
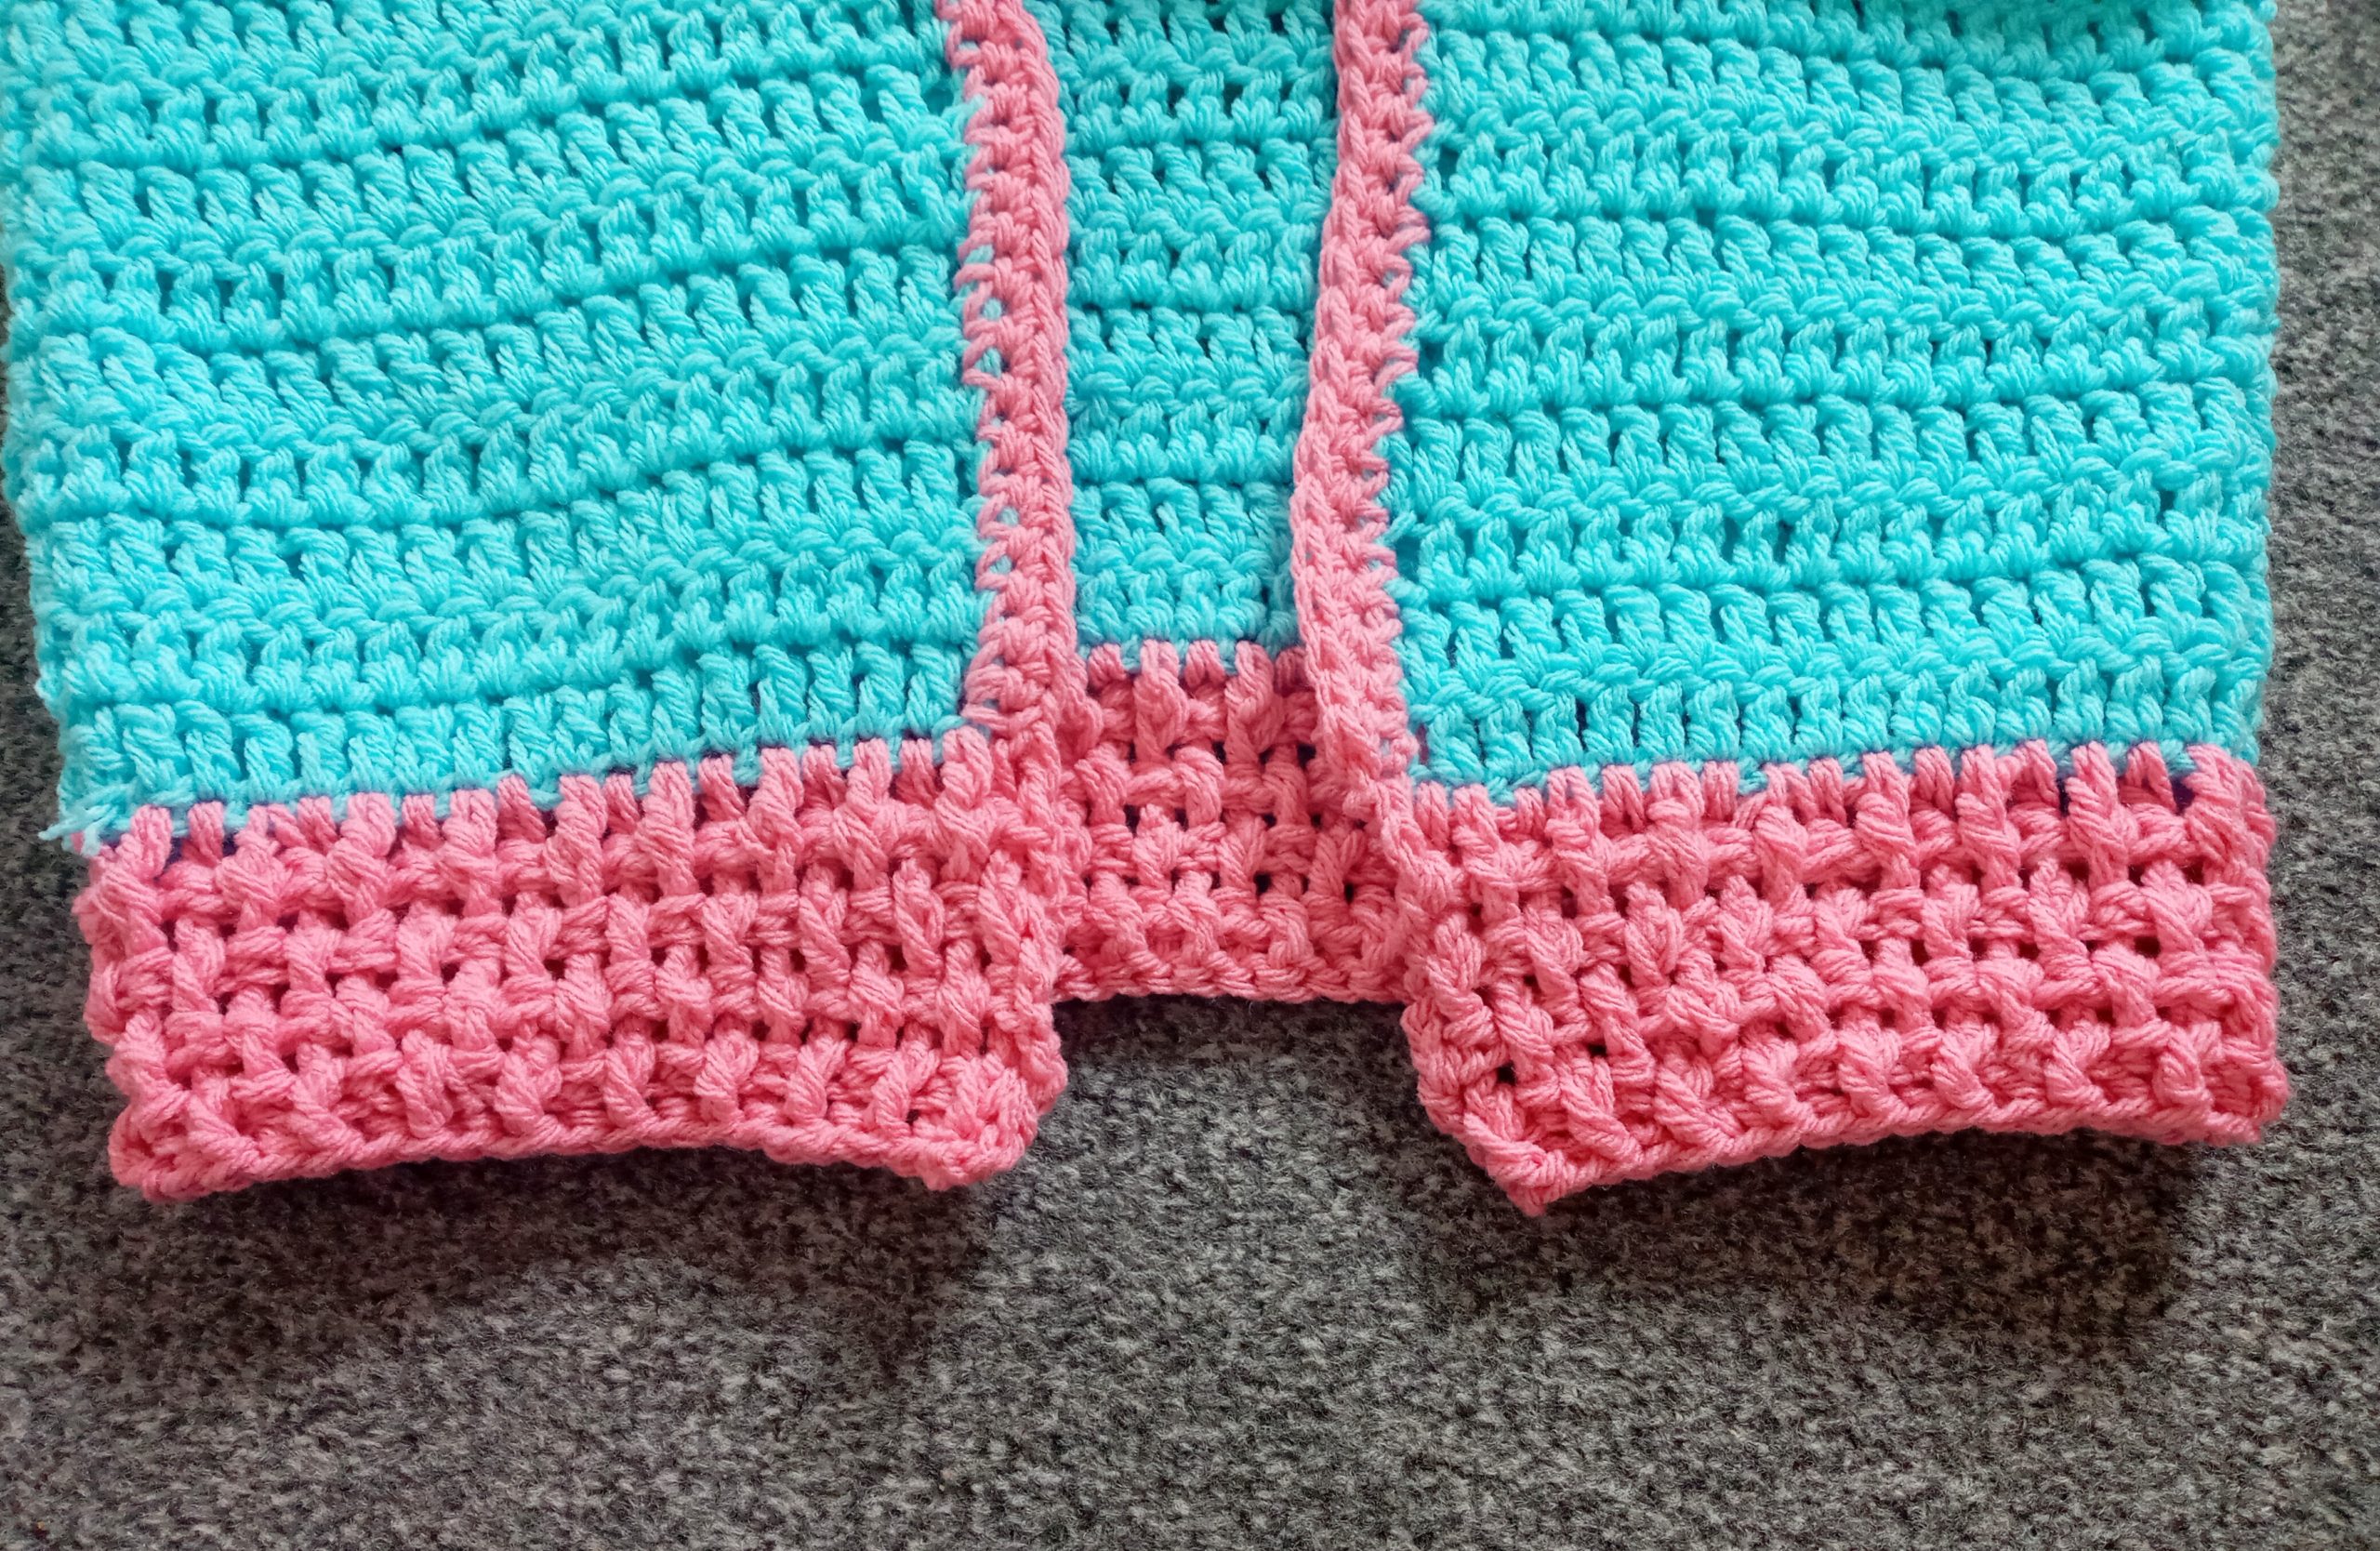
Bottom edging
Attach yarn to the bottom edging of the jumper (onto the pink edging part on the side that you prefer).
Complete rows as follows:
1: Ch 3 (counts as a DC), place a DC into next stitch until eor.
2: Ch 3 (counts as a BPDC), [Front Post Double Crochet into the next DC from previous row, Back Post Double Crochet into next stitch] until you reach the first ch 3.
R 3: Ch 3 (counts as FPDC), [Back Post Double Crochet into the Front Post Double Crochet from previous row, Front Post Double Crochet into the Back Post Double Crochet from previous row] until eor.
You will be alternating FPDC and BPDC from row to row, creating a ribbed effect.
4-5: repeat rows 2 and 3.
Fasten off, tidy up all loose ends.
Thank you so much for stopping by my blog! I hope you enjoyed this tutorial, take care,
Love,
Selina.


2 Comments
KAT
Thank you for cute cardigan.
Selina Veronique
Thank you!