Crochet The Vintage Baby Blanket
Crochet The Vintage Baby Blanket
Hi everyone! Today I am bringing to you a new tutorial, on how to crochet The Vintage Baby Blanket.
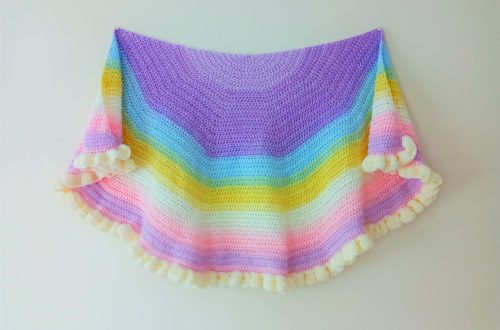
I have just finished designing this vintage baby blanket which I love. I wanted to share my step by step tutorial for it. It is a very classic pattern, made from a simple Granny Square to begin with, before finishing it off with a shell stitch border.
You can find this video here : Crochet The Vintage Baby Blanket Video Tutorial
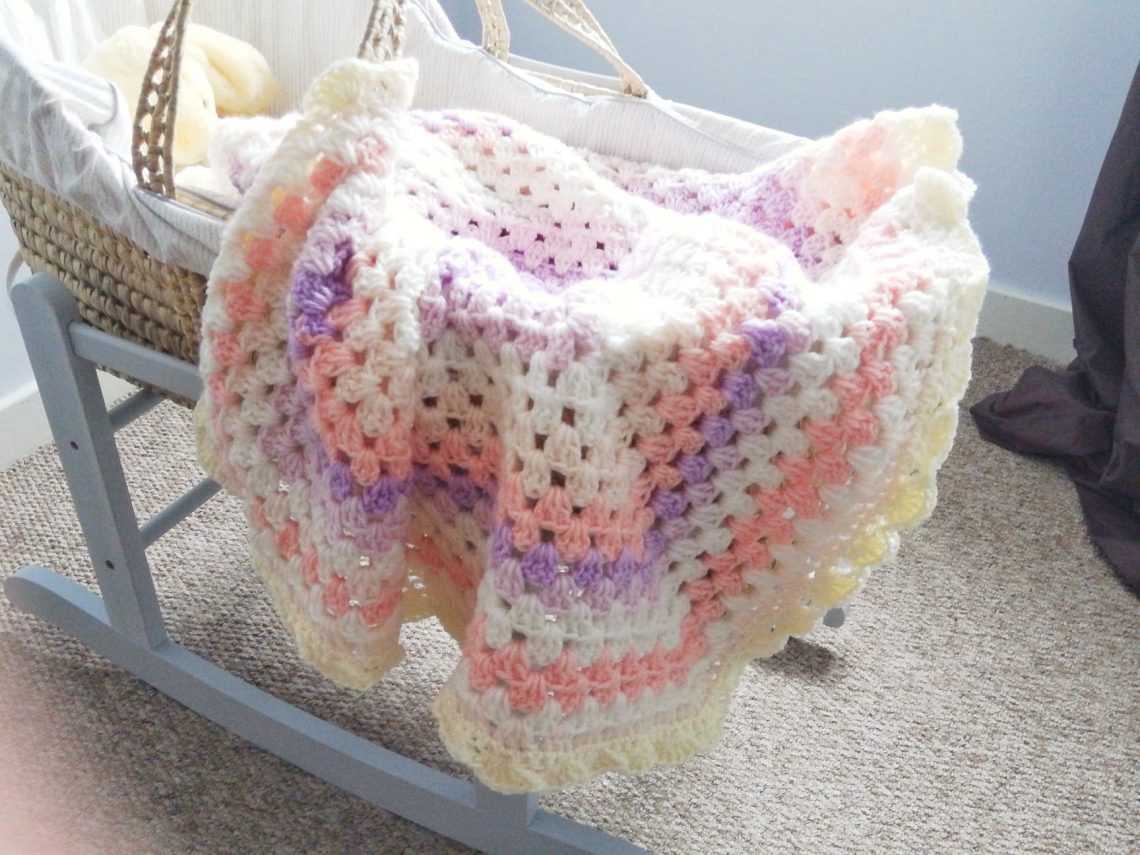
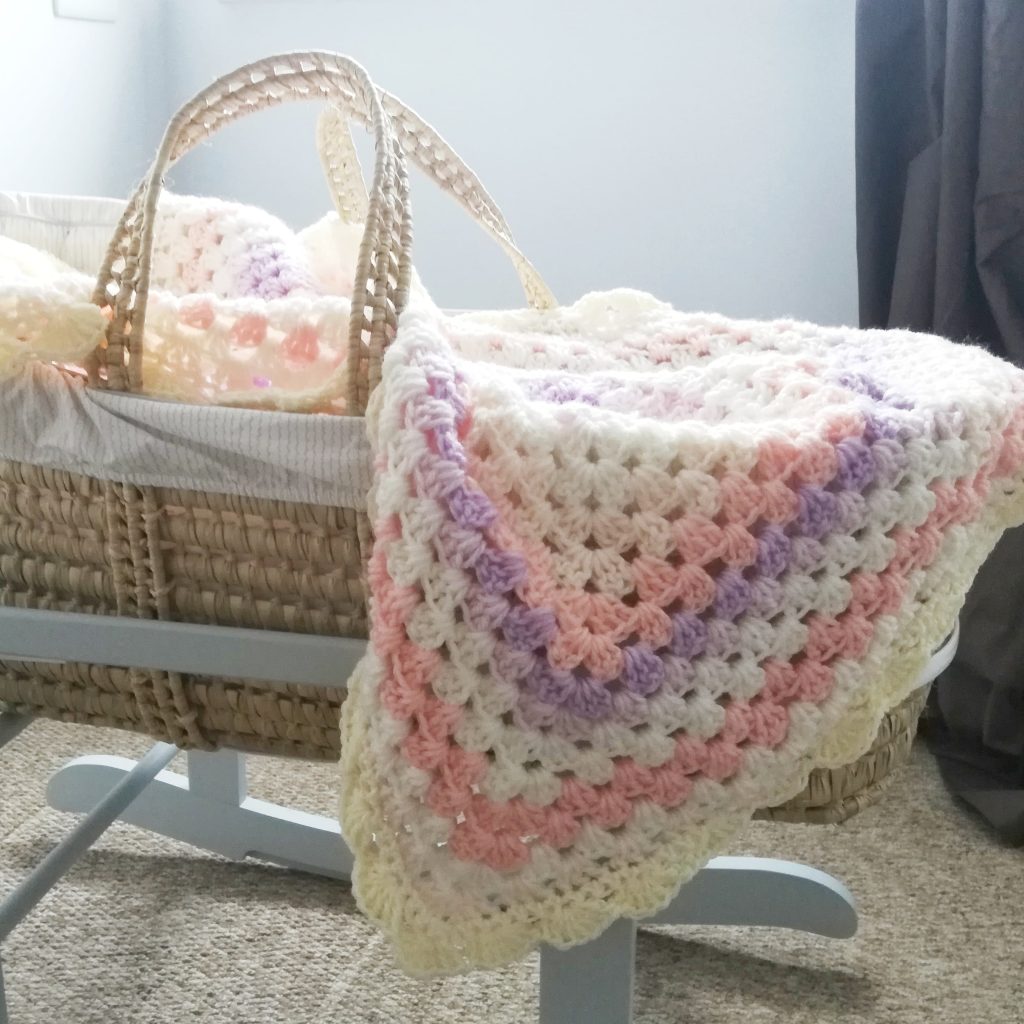
Crochet The Vintage Baby Blanket: a very soothing pattern
It’s a wonderfully soothing pattern, and I hope you enjoy it as much as I enjoyed crocheting it! The pattern is very classic yet modern, and looks great in any nursery. It was a great delight for me to write this pattern up too, you can download it at the bottom of this page.
Caron Baby Cakes in shade Ballerina
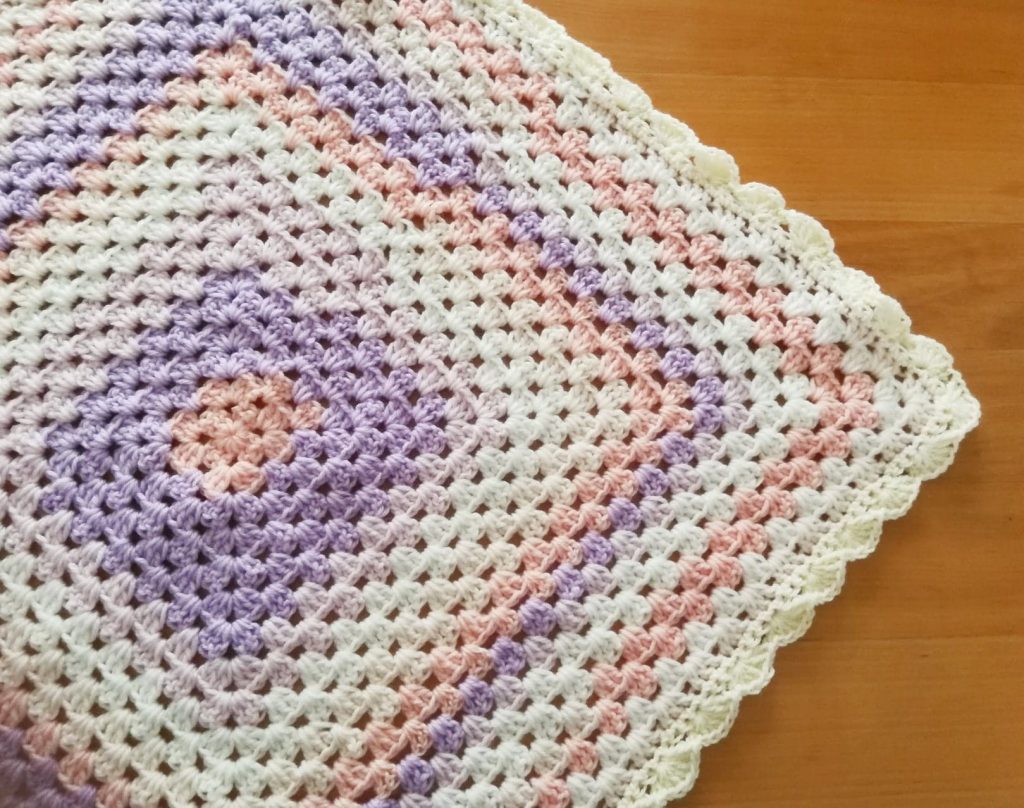
I used 3 skeins (well, 2 and a half to be exact) of Caron Baby Cakes in shade Ballerina. It is a gorgeous and very feminine self striping yarn in Aran weight. It built up really quickly, and I added a shell border in Sirdar Supersoft Aran (cream colour).
I love it for its simplicity, and I decided to call it the The Vintage Baby Blanket as this is what it made me think off. This is the first time I have designed a baby blanket, and I am very happy with the result. I hope you will enjoy making it as much as I loved making it.
Crochet The Vintage Baby Blanket: A simple pattern for everyone
To begin with, I created the Granny Square with Caron Baby Cake. This is a very therapeutic and repetitive pattern that I love. Once I was satisfied with the number of rows, I added a shell stitch pattern. This again was very easy and just adds so much dimension to the simple Granny Square pattern. Also, I really think Caron Baby Cakes make this pattern so gorgeous, because the colours are stunning yet subtle. The yarn is super soft and gorgeous, an absolute delight to crochet with. You can also rest assured your baby will sleep nice and tight when snuggled up into this blanket!
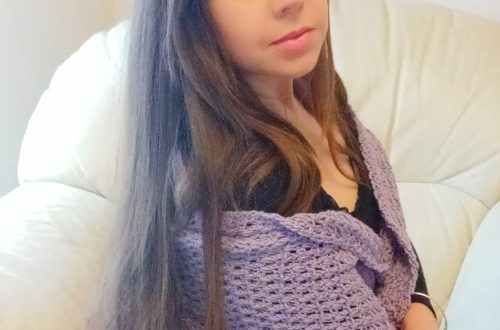
Caron Baby Cakes are lovely, and have to say I have quite a collection of these at home, ready to be used up on magical crochet projects. I have used these for not only baby items, but also adult garments. I have made myself a lovely Granny Square Coachella inspired cardigan with this yarn, with a simple border, and it looks absolutely stunning.
Connecting with you on Social Media
Let me know if you enjoyed this tutorial. Please do not hesitate to follow me on Social Media, I love to see your beautiful creations and I love to connect with you about crochet. You can also join my private Facebook group called Selina Veronique’s Crochet Corner. There we discuss all things crochet in a very warm and friendly atmosphere.
The free PDF pattern can be downloaded here: Crochet Vintage Baby Blanket_Selina Veronique
You can also let me know in your comments if you have any questions, in the meantime, take care, and lots of love,
XOXO, Selina.
The Pattern to crochet The Vintage Baby Blanket
Level: Easy
Notes: I will be using US terms
Gauge: Gauge is not crucial for completion of this pattern
Materials:
3 skeins of Caron Baby Cakes in shade Ballerina (or any other yarn in Aran/Worsted weight)
1 skein of Sirdar Super Soft Aran in shade cream (or any other yarn in Aran weight)
6 mm crochet hook
Tapestry needle
Pair of scissors
Abbreviations:
ch: chain
sk: skip
SC: Single Crochet
DC: Double Crochet
Sl st: Slip stitch
Begin pattern here:
With a 6 mm hook using Caron Baby Cake yarn, make a Granny Square as follows:
1: Ch 4, sl st into 1st stitch to form a ring. Ch 3, 2 DC inside ring (=3 DC); [ch 2, 3 DC] inside ring 3 more times, ch 2, sl st to beginning ch 3
2: Ch 3, turn your work, 2 DC, ch 2, 3 DC inside ch sp from previous row (= 3DC, ch 2, 3DC which forms a corner); [go directly into next sp, 3 DC, ch 2, 3 DC] 3 more times, sl st to first 3 ch to join round.
3: Ch 3, turn your work, 2 DC inside space (=3 DC); [going directly into next sp 3DC, ch 2, 3DC (=corner); going into next sp 3DC] 4 times, sl st to join this round.
4-end (until piece measures 88 cm/35 inches or until you are satisfied with size): Repeat row 3, always placing 3 DC inside simple “side” spaces, and 3 DC, ch 2, 3 DC into each corner (4 per round to form a square).
Fasten off leaving a long tail to sew in one sleeve.
Once you have finished your granny square, you can start the border
Start border here:
1: Attach Sirdar yarn in Cream onto any st. of Granny Square, ch 1, SC into every st around, sl st to 1st ch 1.
2: Ch 3, 6 DC inside that same first st (=7 DC forming first shell), [skip 3 st, 7 DC into 4th st, sk 3 st] until only a few stitches remain, sl st to finish shell edging.
Fasten off, tidy all loose ends.


2 Comments
Valerie Courtney
Beautiful patterns! Thanks for sharing!
Selina Veronique
Thank you so much!