Crochet Bandana Free Pattern
Crochet Bandana Free Pattern
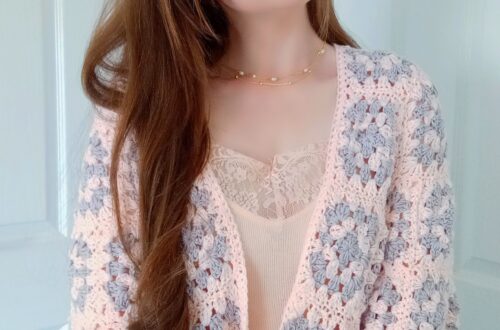
Hi everyone, this week I am bringing to you this lovely crochet bandana free pattern. I absolutely adore it. It is so feminine and delicate, and is crocheted very easily too. It can be crocheted by beginners and experts alike. This crochet bandana is also called “The Tatiana Headscarf”. I hope you enjoy this bandana tutorial which features granny squares.
The video tutorial can be found here:
Crochet Bandanna Free Pattern: a vintage vibe
This lovely bandana headscarf has a definite vintage vibe. Indeed, the granny squares automatically give a vintage look to any project. This traditional look is however counterbalanced by the lovely feminine colors which make this project quite modern. I love this type of crochet project, where tradition and modernity meet. Do you love these projects as much as I do? I am in love with this bandana!

Crochet bandanas are becoming really popular at the moment. I am in a very Spring mood right now, so wanted to crochet something in light colors. I also wanted to crochet this bandana in a more summery type of yarn, such as cotton or linen. Enter Lion Brand’s Coboo yarn. I cannot begin to express how much I love this yarn! Indeed, this is one of my favorites for Spring/Summer.
Coboo yarn is a delight to crochet with. It is considered a light 3 yarn, and is made of 50% cotton, and 50% rayon. It is super soft and such high quality! I have already used this yarn quite a few times, including when I crocheted these beautiful envelope purses. These little purses are really beautiful, and crocheted up so fast! I also used Coboo yarn to crochet The Summer Pink Poncho. Again, this is a great project to make for Spring and Summer.
Crochet Bandana Free Pattern: The Granny Design
I wanted to crochet a bandana headscarf that featured a more complex design than my previous bandana design. Although I love simple crochet projects, sometimes I do enjoy mixing it up a bit!
I love feminine colors and designs, and the two colors that I used for this project are just so beautiful. They match really well too! I find associating these two colors to create a granny square bandana is just perfect. Grey and pink match really well and look so feminine together.

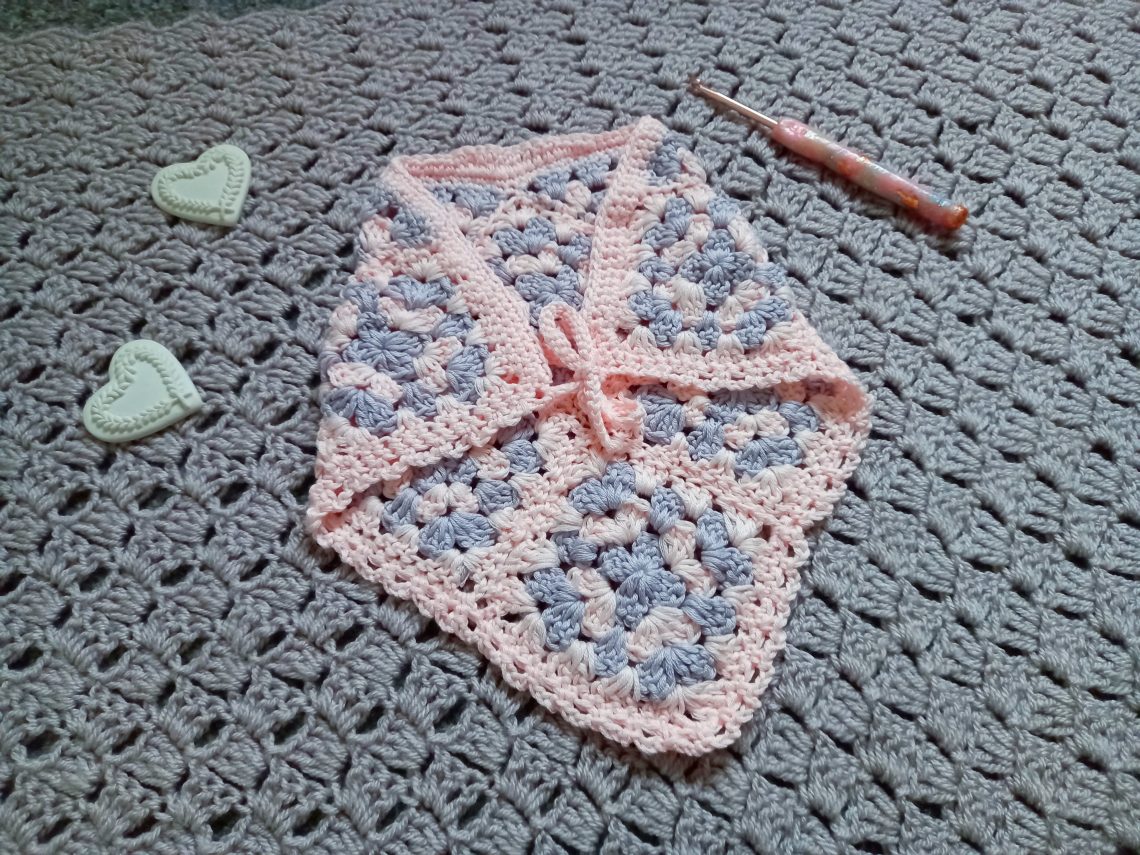
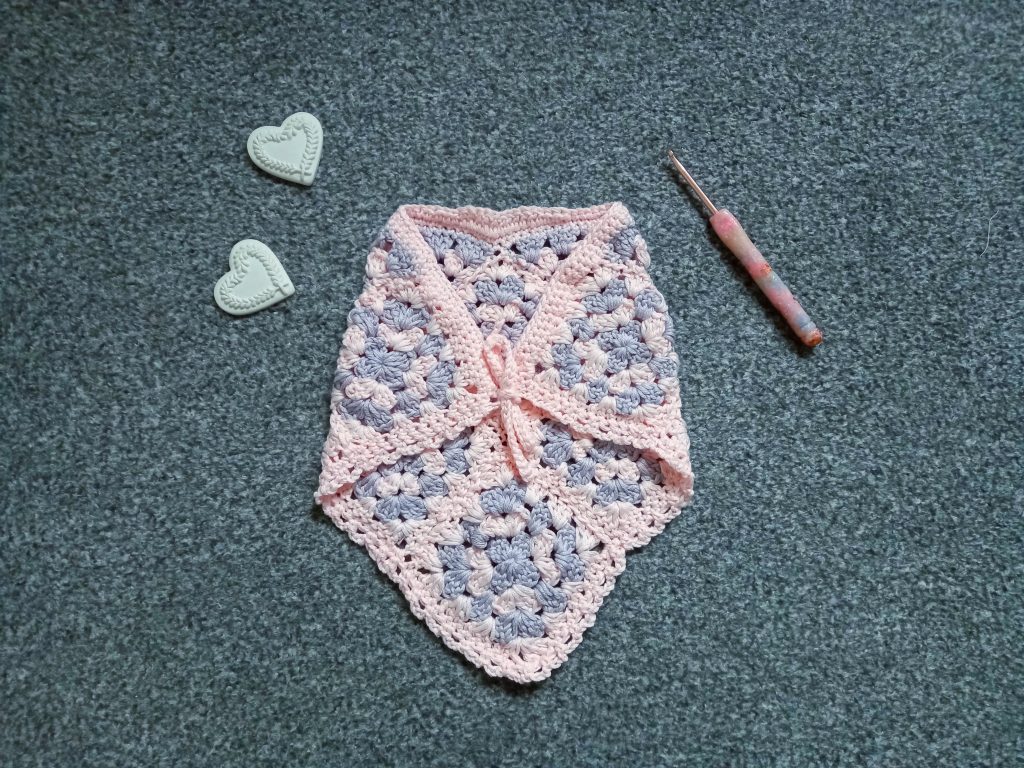
This design comprises 6 granny squares, as well as two little granny triangles. Once assembled, these squares and triangles form the bigger triangle that is the bandana. Once these elements are sewed together, a chain arch edging is added to create a finished and delicate finishing touch. Two ties are later added on either side of the headscarf for ease of wear.
This is a simple, yet beautiful and detailed crochet bandanna. I hope you enjoy this tutorial as much as I enjoyed designing it. Let me know in the comments what you thought of this project. I always love your feedback!

Connecting with you
I love connecting with my Crochet Community through my blog and Social Media. You can find me on Youtube, Instagram, and Pinterest. I would love to connect with you on these platforms.
You can also join my private Facebook group to connect.
Subscribe to our weekly newsletter so that you never miss a stitch! You will be informed as soon as a new pattern is released, a new video tutorial is made, and much more.
Crochet Bandana: the Pattern
You can purchase the ad free, large print, PDF pattern from my Etsy shop: Crochet Bandana PDF Pattern
Level: Easy/beginner
Gauge: Gauge is not crucial to complete this project.
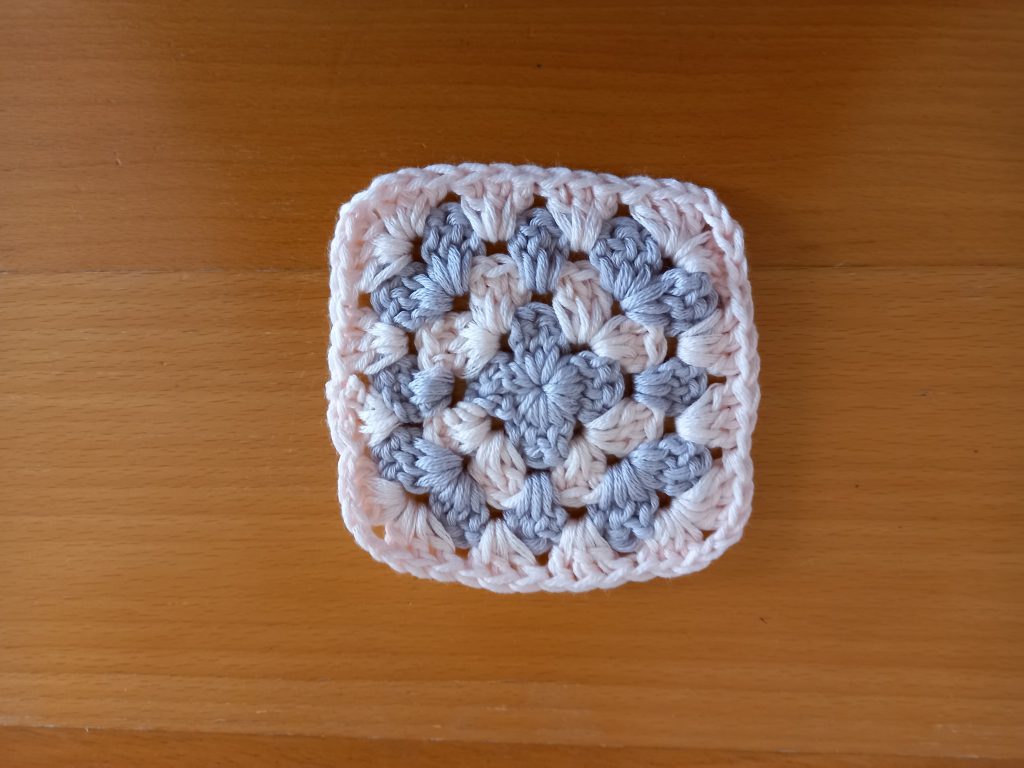
Size of one granny square (approximately)
3,5”x3,5” (9×9 cm)
Size of finished bandana (excluding chain arch edging and ties)
11”x15,5” (28×40 cm)
Notes
I will be using US terms (British terms in brackets)
You will need
1 skein of Lion Brand Coboo yarn in shade Silver, and one skein of Coboo yarn in shade Pale Pink
4,5 mm crochet hook
A pair of scissors
Tapestry needle
A stitch marker (optional)
Abbreviations
Ch : chain
Sl st : slip stitch
Sk: skip
DC: Double Crochet (UK Treble)
SC: Single Crochet (UK Double)
DC: Double Crochet (UK Treble)
HDC: Half Double Crochet (UK Half Treble)
EOR: End of row
Begin pattern here
Make 6 granny squares (2 colors):
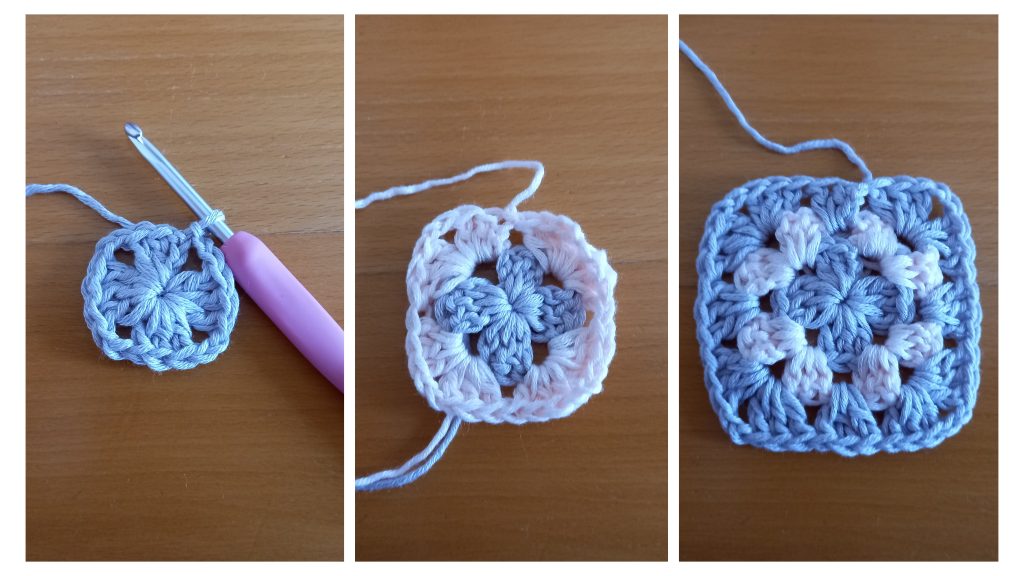
1: With grey yarn, ch 4. Sl st into 1st stitch to form a ring.
Ch 3, 2 DC inside ring (=3 DC); [ch 2, 3 DC] inside ring 3 more times, ch 2, sl st to beginning ch 3.
Fasten off grey yarn, attach pink yarn to the same stitch.
2: Ch 3, turn your work, 2 DC, ch 2, 3 DC inside ch sp from previous row (= 3DC, ch 2, 3DC which forms a corner). [Go directly into next sp, 3 DC, ch 2, 3 DC] 3 more times. Sl st to first 3 ch to join round.
Fasten off pink yarn, attach grey yarn to the same stitch.
3: Ch 3, turn your work, 2 DC inside space (=3 DC). [Go directly into next sp with 3DC, ch 2, 3DC (=corner). Go into next sp 3DC] 4 times, sl st to join this round.
Fasten off grey yarn, attach pink yarn to the same stitch.
4: Repeat row 3, always placing 3 DC inside simple “side” spaces, and 3 DC, ch 2, 3 DC into each corner (4 per round to form a square).
Fasten off and tidy up all loose ends.
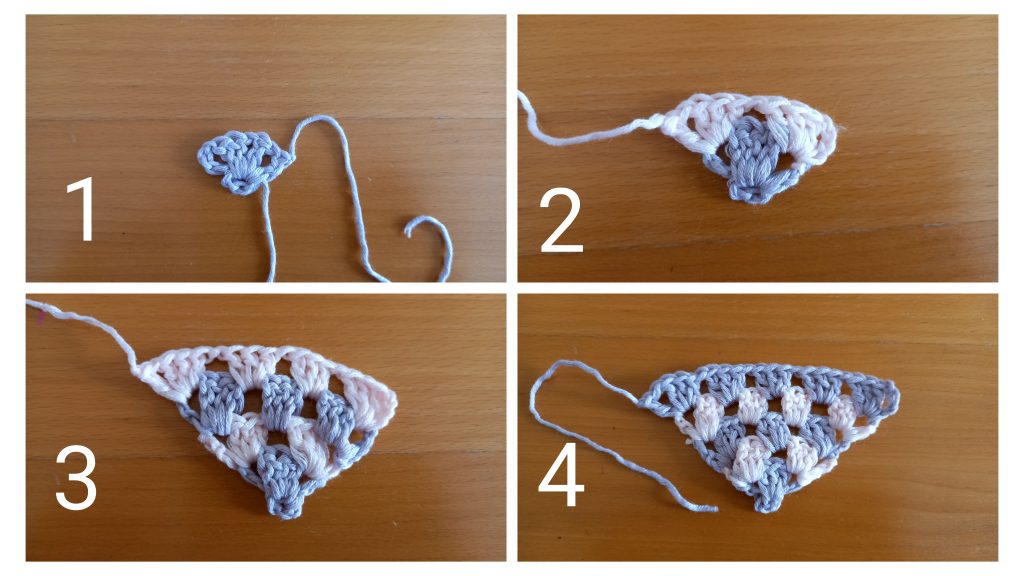
Make 2 Granny triangles (2 colors)
Ch 4, sl st through 1st chain to form a ring.
Complete rows as follows:
1: With grey yarn, ch 4 (DC + ch space); 3 DC in the circle, ch 2, 3 DC in the circle; ch 1; 1DC.
Fasten off grey yarn, attach pink yarn.
2: Turn your work; ch 4 (1 DC + ch space); 3 DC into first ch space, ch 1; in next ch space, 3 DC, ch 1, 1 DC.
Fasten off pink yarn, attach grey yarn.
3: Turn your work, ch 4 (1 DC +ch space), 3 DC in chain space, ch 1; in next space, 3 DC, ch 1; in next chain space, 3 DC, ch 1, 1 DC.
Fasten off grey yarn, attach pink yarn.
4: Turn your work, ch 4 (1 DC +ch space), 3 DC into first ch space, [3 DC in next chain space, ch 1] twice; in next chain space, 3 DC, ch 1, 1 DC.
Fasten off pink yarn, attach grey yarn.
5: Turn your work, ch 4 (1 DC +ch space), 3 DC into first ch space, [3 DC in next chain space, ch 1] three times; in next chain space, 3 DC, ch 1, 1 DC.
Fasten off, tidy up all loose ends.
Sew your 6 granny squares and 2 triangles together to form bandanna
Place your 6 granny squares and 2 triangles together like so to form a bandanna (as seen in picture).
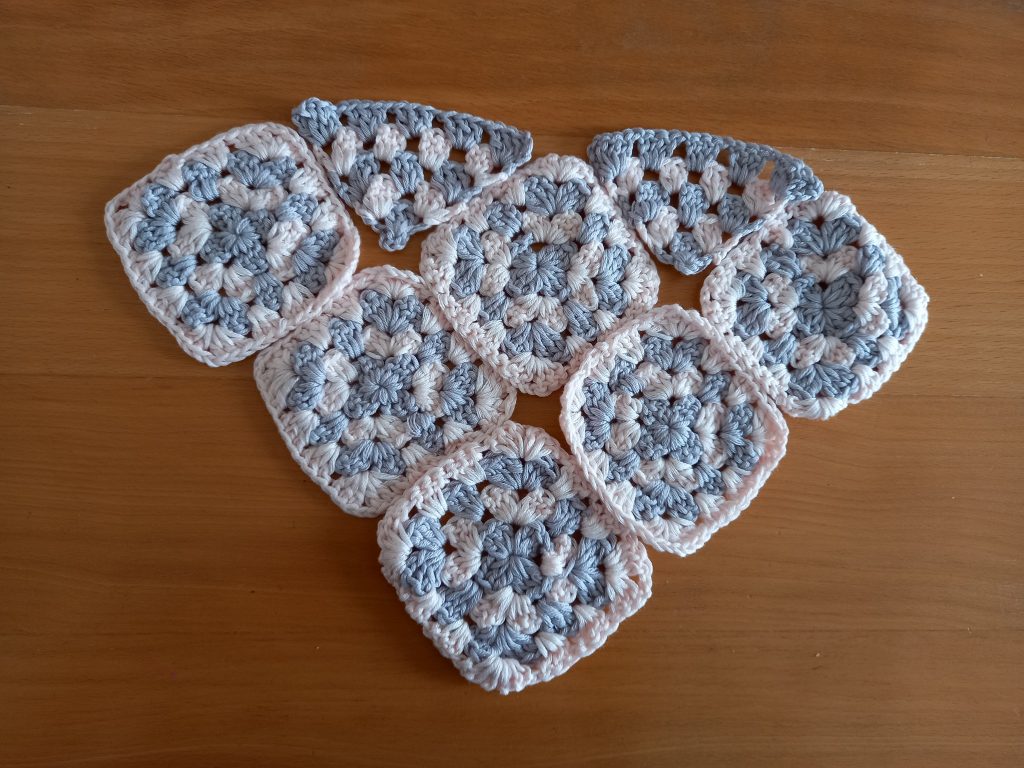
Once you have placed all these elements together, sew these together using the mattress stitch.
Create border and chain arch edging
Once you have sewed all your elements together, you can start crocheting your border.
To crochet your border:
Attach your yarn to the top corner of your project.
Round 1: Ch 1, place a SC into each and every stitch all around the bandanna.
Once you reach the beginning of row 1, sl stitch to the first ch 1.
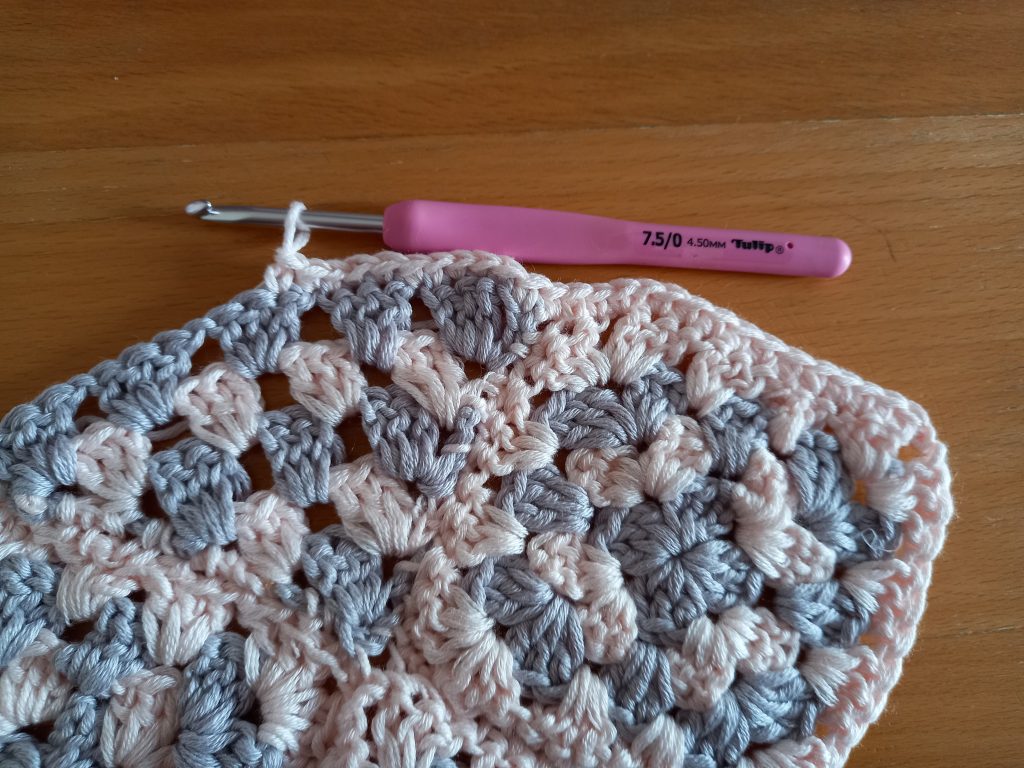
Round 2 (chain arch edging): You will be crocheting two different stitches across this round. Firstly, ch 1, and place a SC into each SC from previous row across the top of your bandanna. Once you finish this first side of the triangle (which should be the top side of the triangle), the stitch will change for the “V” section of the bandana.
Once you have finished your last SC, turn your work so as to work on the first side of the “V”.
Ch 3, sk a stitch, place a SC into the next stitch. Ch 3, sk a stitch, place a SC into the next stitch until you reach the other side of the V, where without interruption, just carry on with your pattern of chain arch edging.
Once you have gone all around your “V”, sl stitch to first ch 1 to close off round.
Row 3 (optional): Placing your project flat on a surface, count from the top center of your last row of SC. Count 10 stitches on either side of this center, and place a stitch marker at the center stitch, and both 10th stitch either side of the center.
Once you have placed your stitch marker, ch 1, and turn your work so as to crochet your stitches along the top section of the bandanna.
Place a SC into each SC from the previous row until you reach the first stitch marker, where you will place your last SC.
Now place a HDC into next stitch 4 times, and then place a DC into next stitch 10 times, and then place a HDC into next stitch 4 times. Once you have placed these stitches, place a SC into next stitch until the end of the row.
Fasten off, tidy up all loose ends.
Creating the bandanna ties
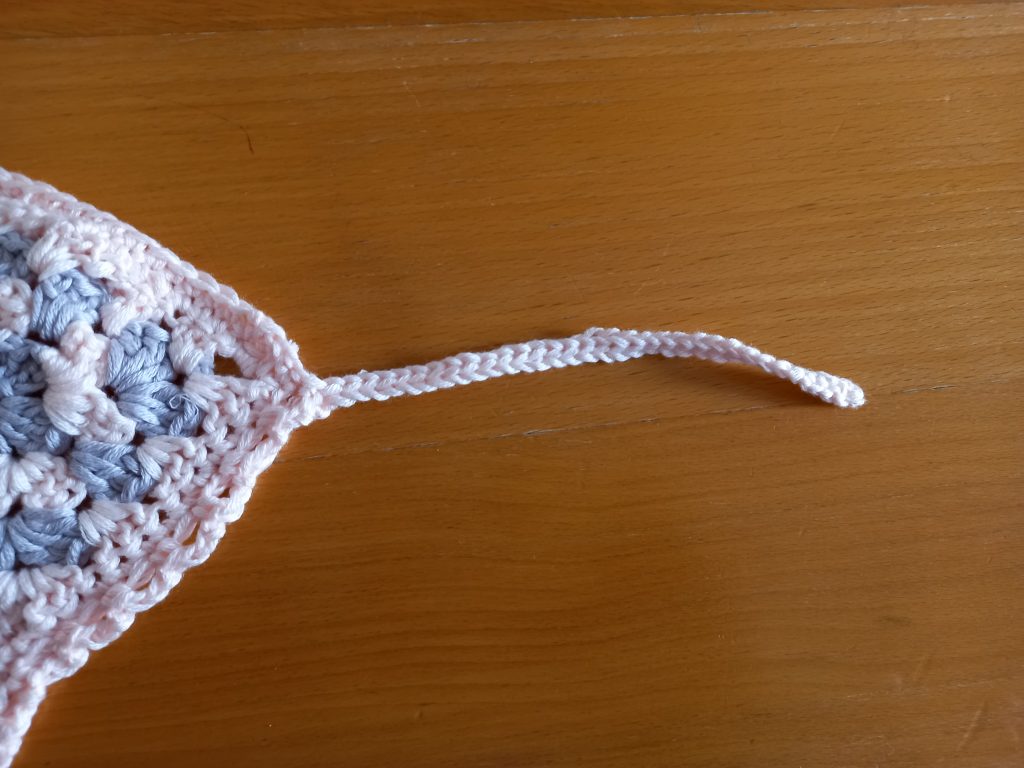
You will be creating 2 bandanna ties, one on each side of the project.
For the 1st bandanna tie, attach your yarn to either top corner, and chain 35.
Now sl st through the 2nd ch from hook, and place a slip stitch through every chain until you reach the end of the chain. Sl st to project to secure the bandanna tie, fasten off and tidy up your loose end.
Bandanna tie number 2: attach yarn to the other side of the project, and chain 35. Now sl st through the 2nd ch from hook, and place a slip stitch through every chain until you reach the end of the chain. Sl st to project to secure the bandanna tie, fasten off and tidy up your loose end.


You May Also Like
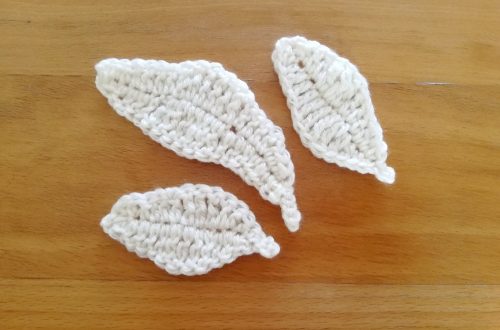
Crochet a Feather
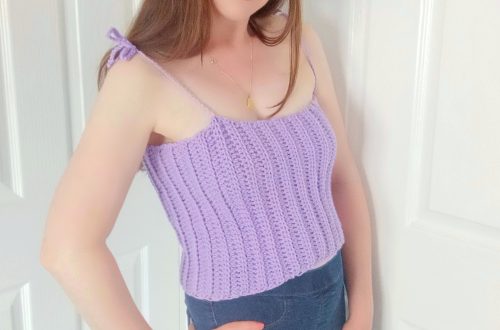
Crochet The Lilac Summer Top