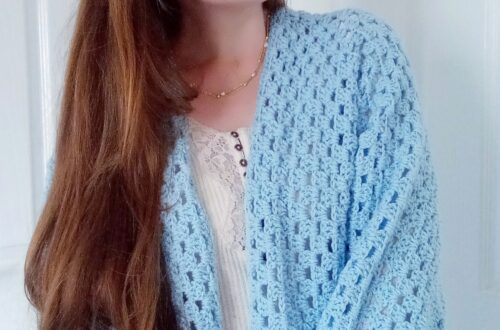
Crochet Pastel Patchwork Cardigan Free Pattern
Crochet Pastel Patchwork Cardigan Free Pattern
Crochet Pastel Patchwork Cardigan Free Pattern
Hi everyone, this week I am bringing to you a crochet pastel cardigan free pattern. I hope you enjoy this fun Spring Summer project! It was such a labor of love, and has been in the works for a year now. This crochet pattern comes in sizes S to XXXL, and it is a very easy pattern to follow too.
The video tutorial for this project can be found here:
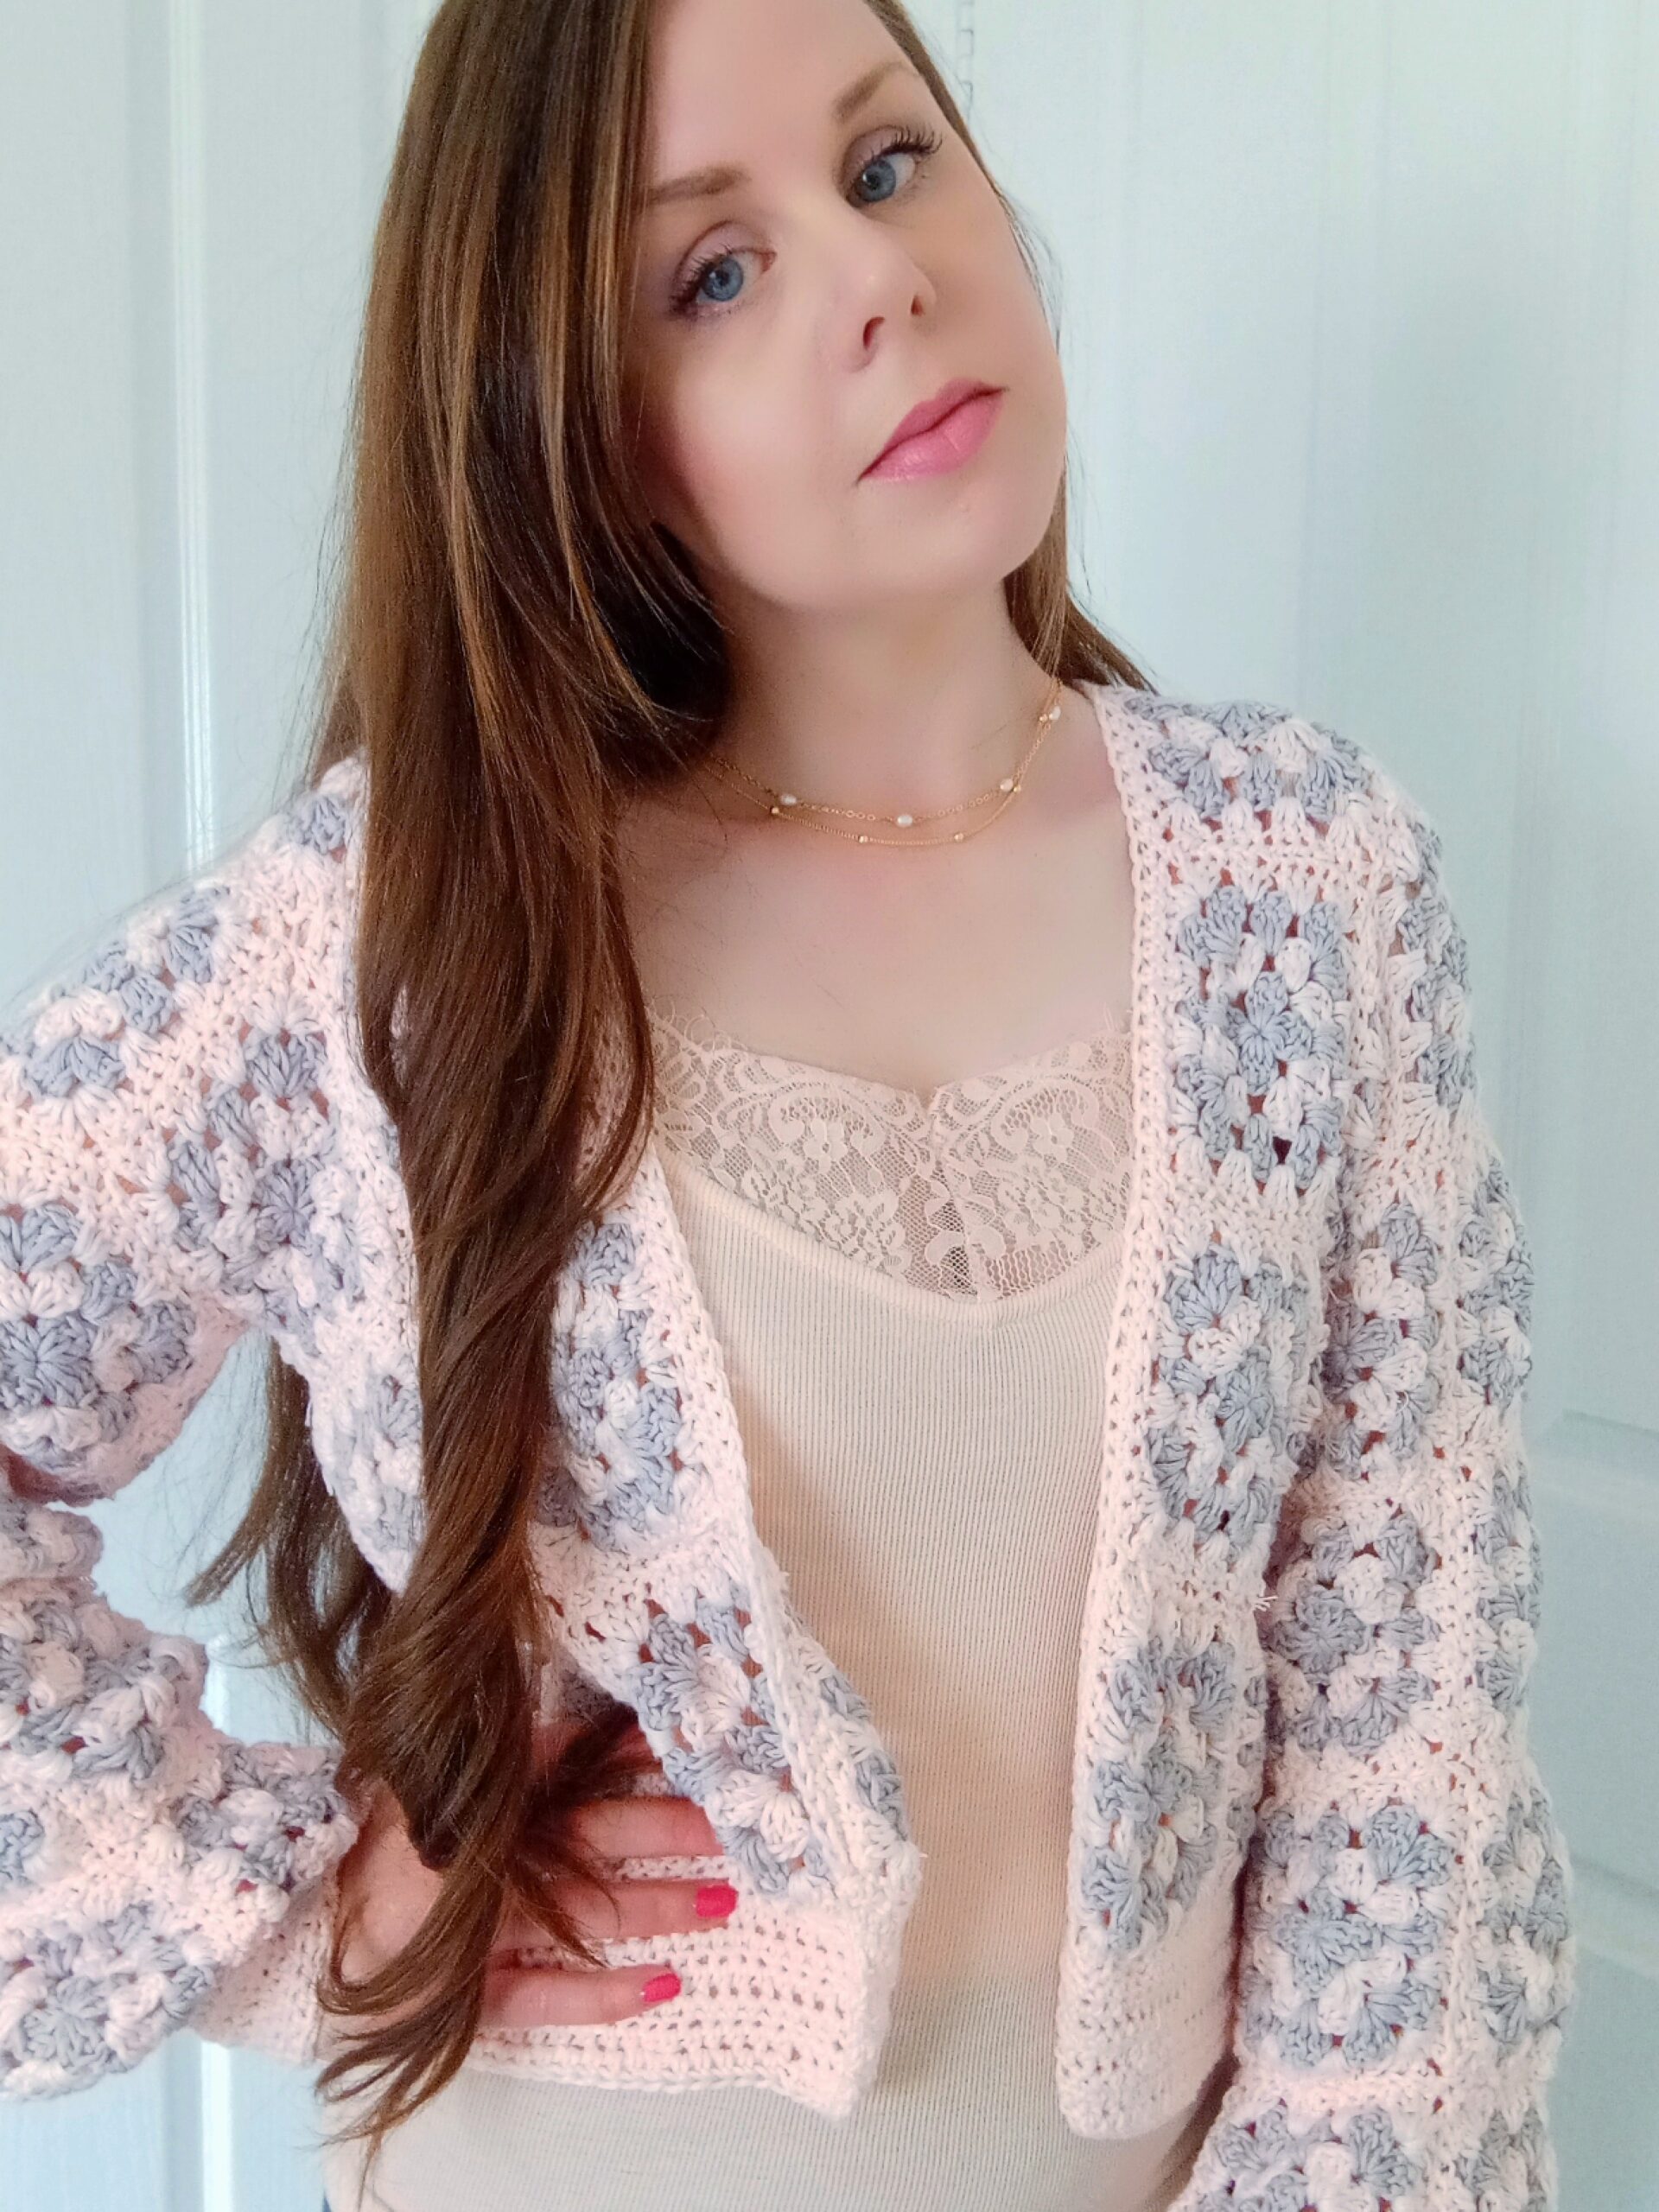
Crochet Pastel Patchwork Cardigan Free Pattern: A Granny Square Project
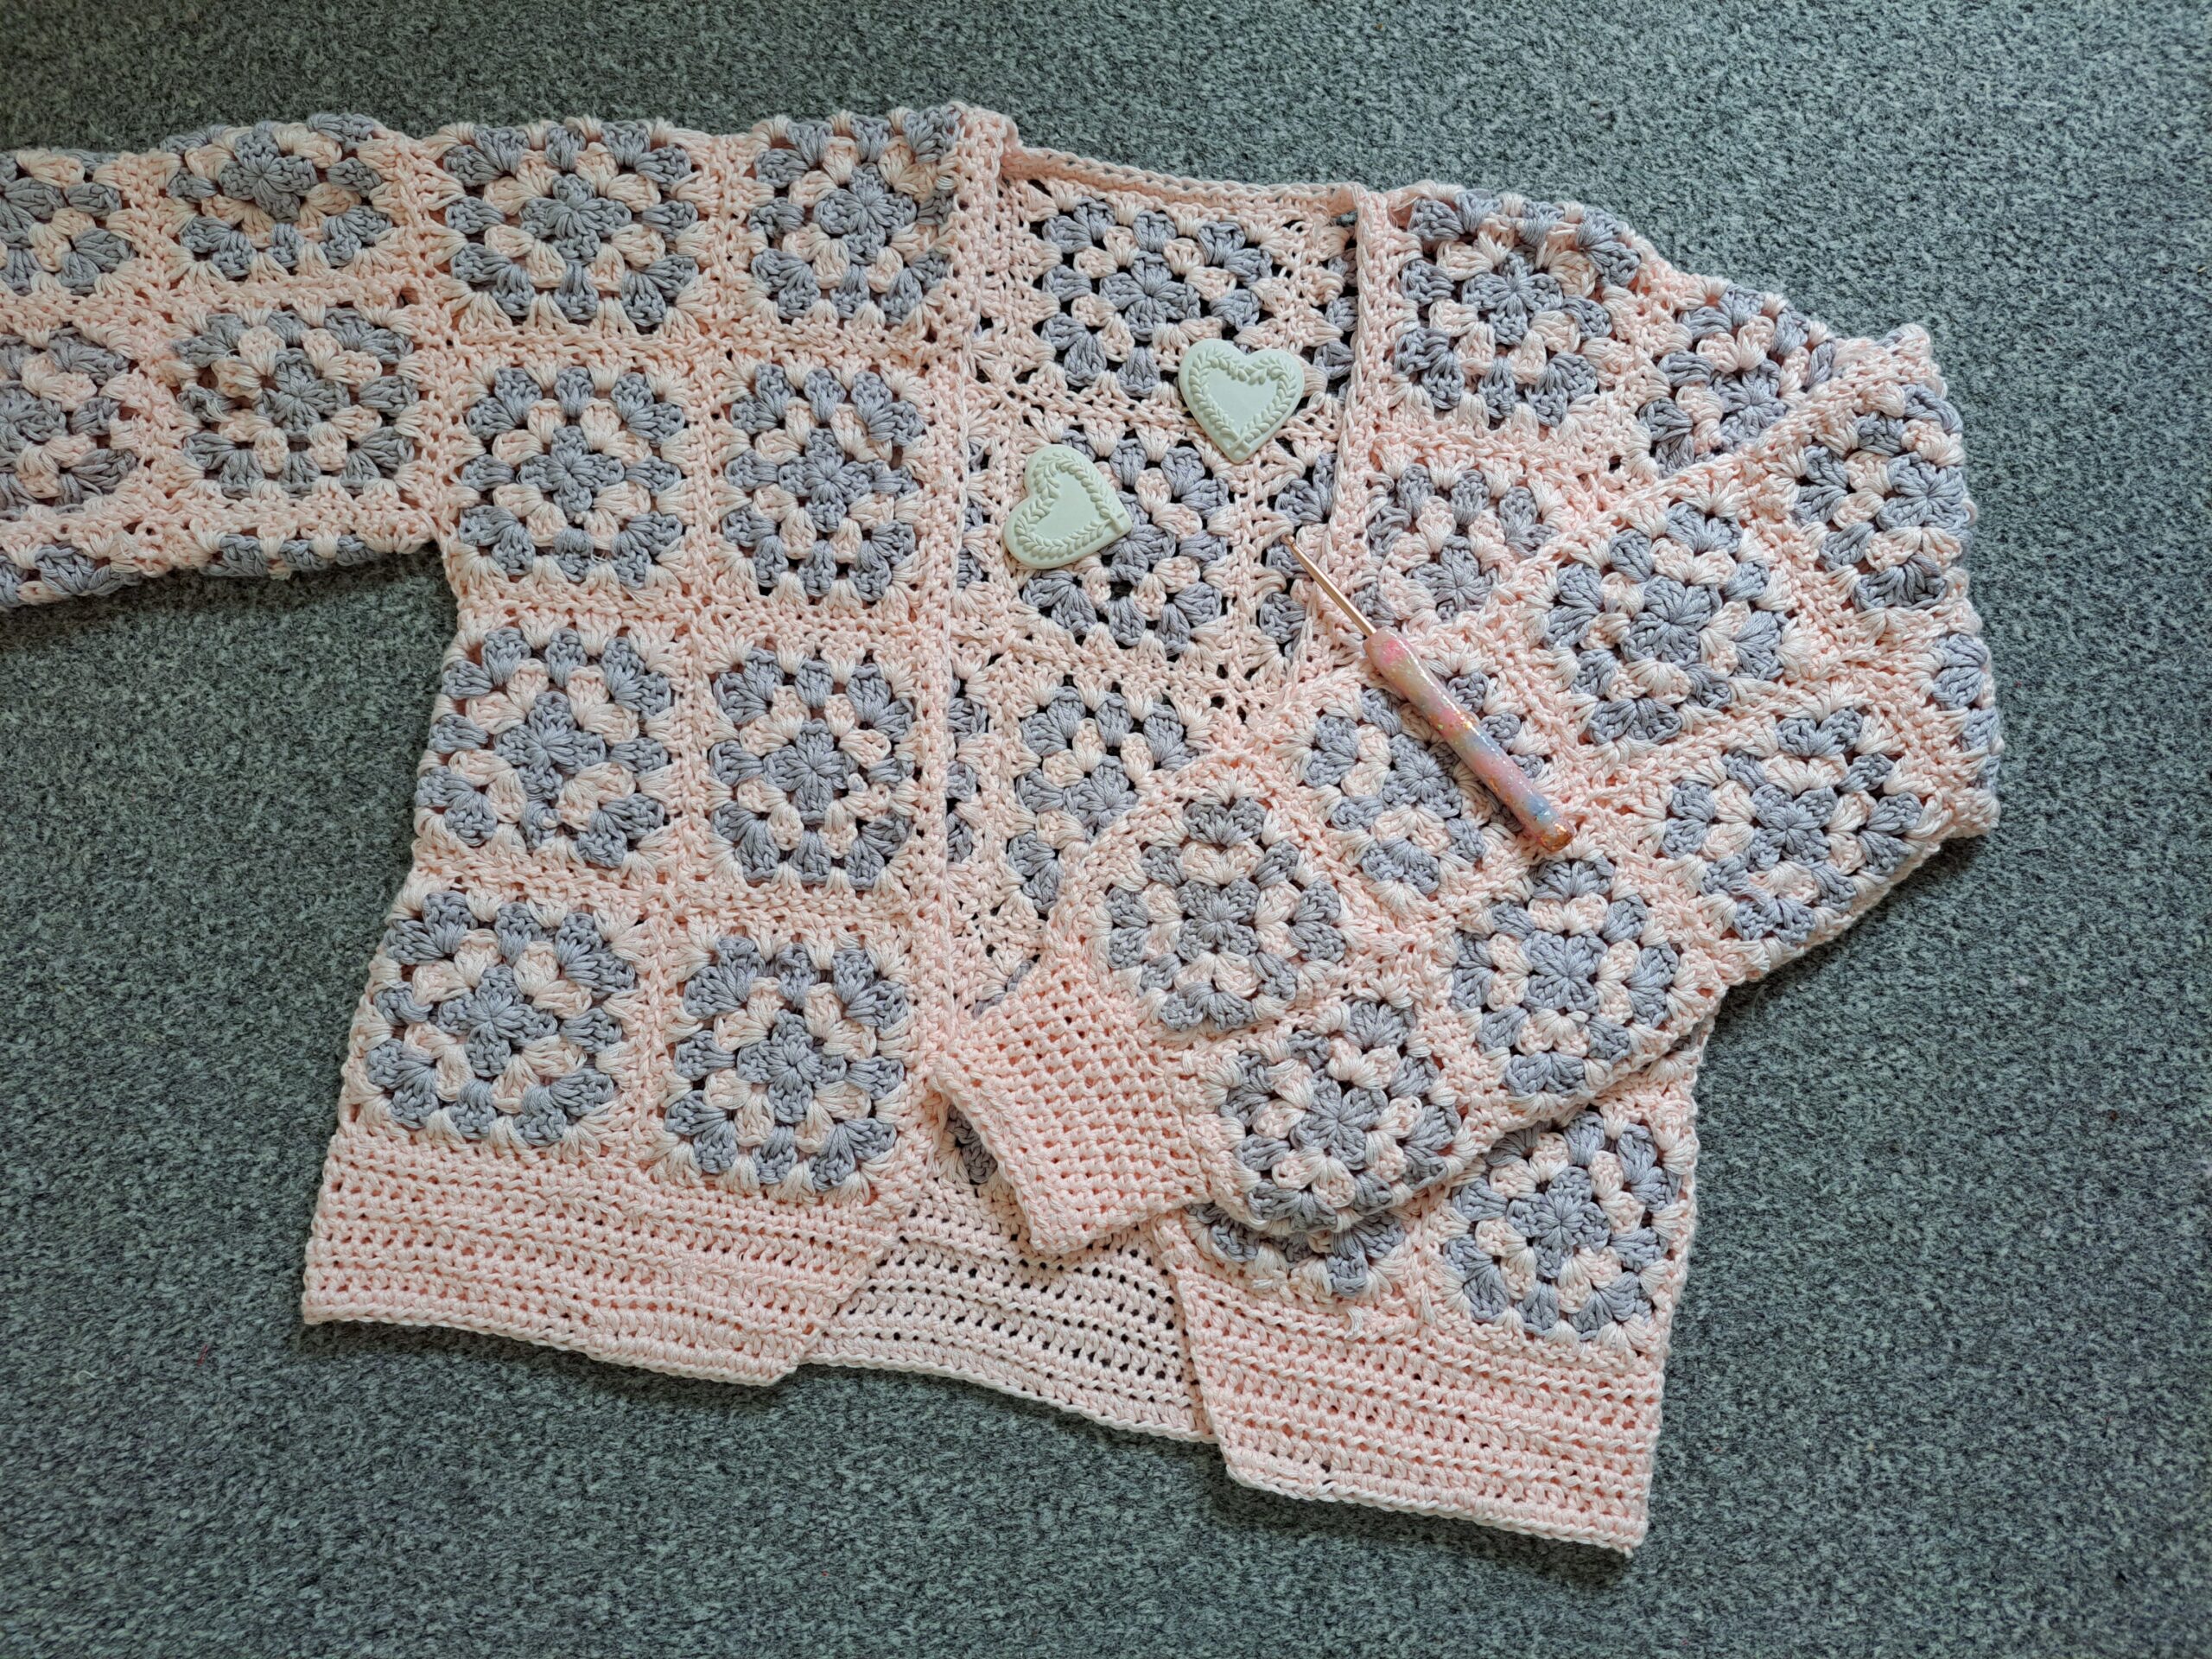
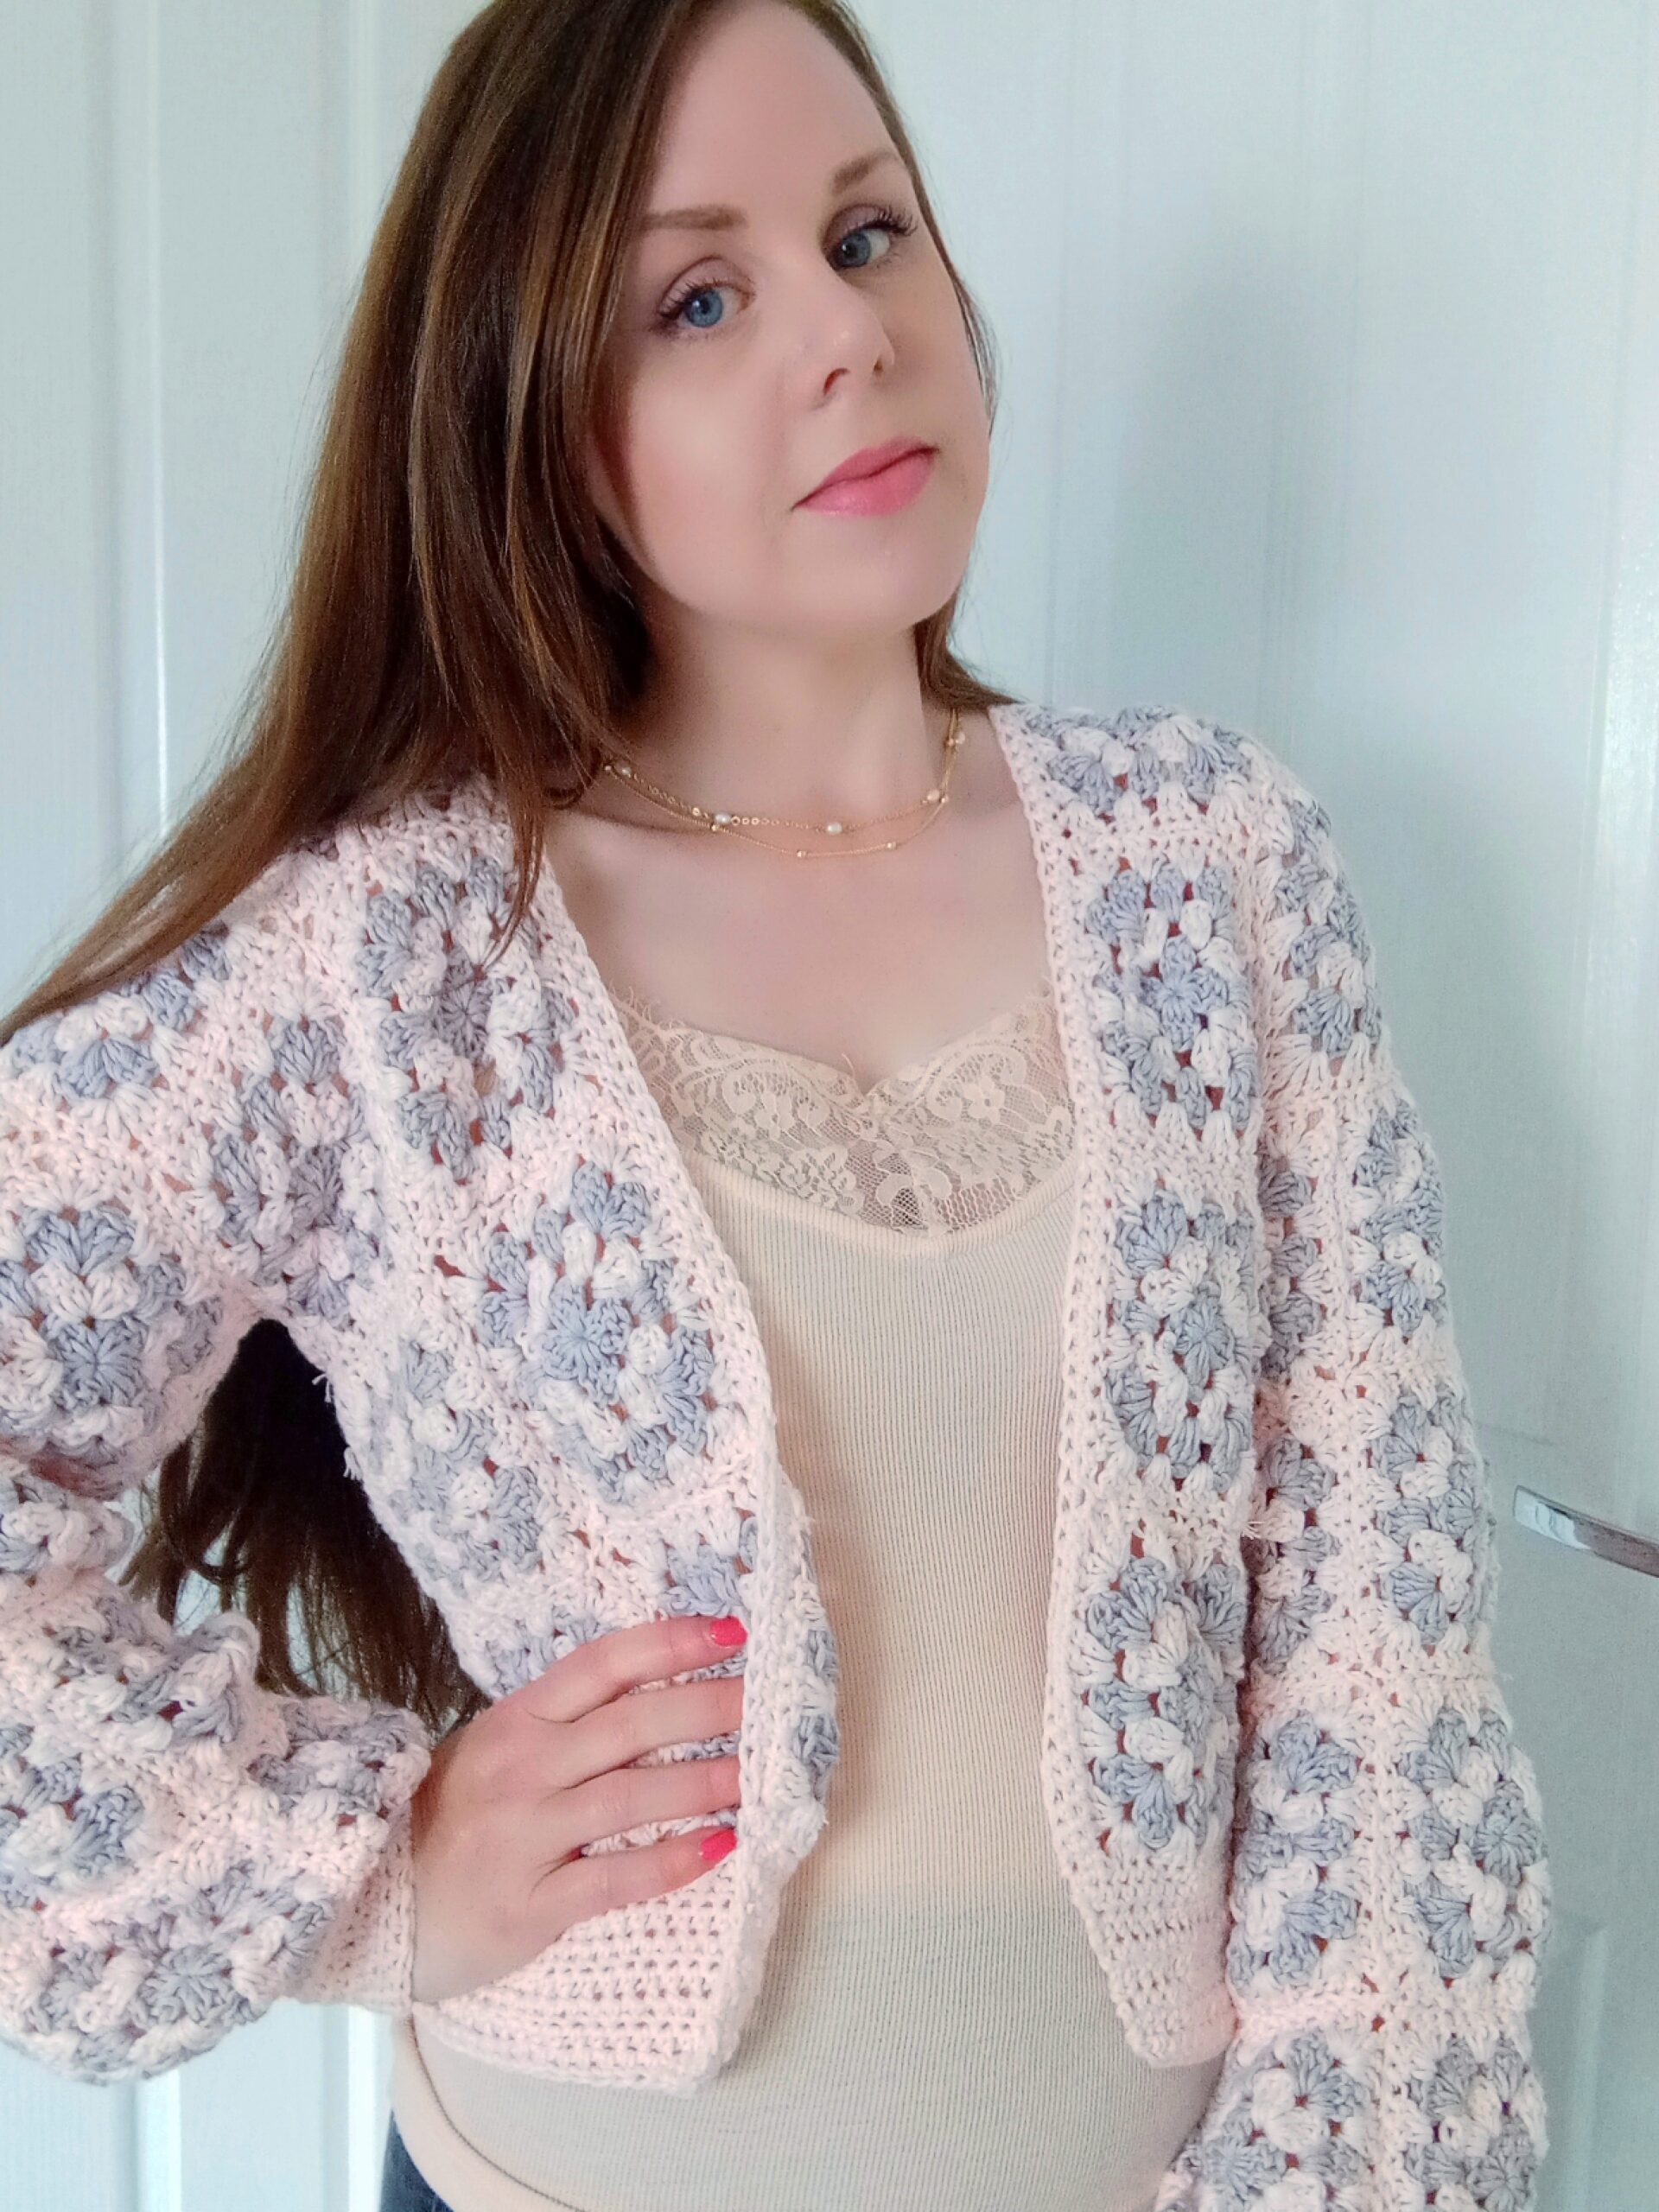
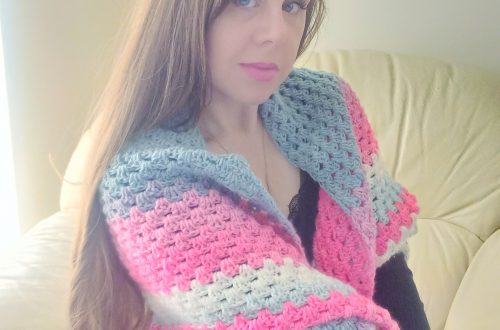
This crochet cardigan is based on the Granny Square pattern. Indeed, this cardigan is made from dozens of small granny squares stitched together. This crochet cardigan is very lovely, and has a slightly cropped look. Once all the granny squares are stitched together, the cardigan is then sewn to create the basic shape of it. After this, a crochet border is added to both sleeves and the front opening.

If you are looking for a matching accessory to this cardigan, make sure you check out this Cottagecore inspired bandana. Indeed, this crochet bandana is made from the exact same yarn (Coboo by Lion Brand Yarns), and also features granny square. Both these projects match perfectly, and would be great for Spring and Summer.
This project has been in the works for a long time now. Indeed, most of the granny squares used in this project were made last Summer. However, I found I struggled to have time to then stitch all the squares together. I finally decided to complete this feminine patchwork cardigan a few weeks ago. It has been a lot of work, but I am so pleased with the result!
If you enjoy patchwork cardigans, don’t forget to look at this lovely pastel patchwork cardigan I made in 2020. The Iconic Patchwork Cardigan is also a great project to make if you enjoy patchwork cardigans. Both the projects were inspired by the iconic design made by JW Anderson for famous singer Harry Styles. The Iconic Patchwork Cardigan was featured in the New York Times in January 2021.
Crochet Pastel Patchwork Cardigan Free Pattern: The Yarn
I used Coboo yarn by Lion Brand yarns for this project. This is a lovely and beautiful yarn that I absolutely love. I have used this yarn many times in the past.
It is very soft and is made from 51% cotton and 49% rayon from bamboo. It is considered a light 3 yarn in American terms, and a DK weight yarn in British terms. I have used this yarn many times in the past. Last week I crocheted this two toned lacy scrunchie with this yarn. And a few weeks ago I made this romantic mesh shawl with Coboo yarn. As I said, this is one of my favorite yarns and I absolutely love crocheting with it!
In 2021 I crocheted this Summer pink poncho, which is so lovely and lightweight, perfect for Spring and Summer. I also made these lovely envelope purses that same year. Both these projects are made using Coboo yarn by Lion Brand. This yarn is indeed very versatile, and many projects can be made with it.
Crochet Pastel Patchwork Cardigan Free Pattern: A Vintage Crochet Project
I classed this new crochet patchwork cardigan in in my Vintage Crochet Series. Indeed, this crochet project reminds me of the 1960s, when patchwork cardigans and granny squares were everywhere!
I love vintage crochet, and I believe this is the first time I have made a crochet project inspired by the 1960s.
If you enjoy the 1950s, please remember to check out this 1950s inspired hair scarf. This is a great project for beginners, and looks beautiful in the Spring and Summer too.
Connecting with you
I would like to take a moment to thank every single one of you, for supporting me and my crochet journey. Indeed, If you want more exclusive crochet content from me, please do consider subscribing to my Patreon page. Thank you!
I love connecting with my Crochet Community through my blog and Social Media. You can find me on Youtube, Instagram, and Pinterest. I would love to connect with you on these platforms.
If you are on Ravelry, you can find my Ravelry page here. This is a great way to connect with me and have access to all of my PDF patterns. You can also find my Etsy shop by clicking here.
You can also join my private Facebook group to connect.
Don’t forget to subscribe to our weekly newsletter so you never miss a stitch!
Crochet Pastel Patchwork Cardigan: The Pattern
You can purchase the ad free, large print, PDF pattern from my Etsy store here: Crochet Pastel Patchwork Cardigan PDF Pattern
You can purchase the ad free, large print, PDF pattern from my Ravelry store here: Crochet Patchwork Cardigan PDF Pattern
Level: Easy +
Notes
I will be using US terms (British terms in brackets)
The video tutorial for this project can be found here:
Gauge (size of one square):
4” (10 cm) x 4” (10 cm)
Size of finished cardigan (including border but excluding sleeves)
Sizes indicated is height x width
S: 19” (48 cm) x 19,5” (49,5 cm)
M: 23” (58,5 cm) x 23,5” (59,5 cm)
L: 27” (68,5 cm) x 27,5” (70 cm)
XL: 31” (79 cm) x 31,5” (80 cm)
Materials
3 (S), 4 (M/XL), 5 (XXL/XXXL) skeins of Lion Brand Coboo yarn in shade Pale Pink or Pink
2 (S), 3 (M/L), 4 (XXL/XXXL) skeins of Lion Brand Coboo yarn in shade Silver
4 mm crochet hook
Pair of scissors
Tapestry needle
Sewing pins (optional)
Abbreviations
Ch: Chain
Sl st: slip stitch
St: Stitch
Sk: skip
Sp: Space
SC: Single Crochet (UK Double Crochet)
DC: Double Crochet (UK Treble Crochet)
HDC: Half Double Crochet (UK Half Double Treble)
EOR: End of row/end of round
General Pattern Notes:
We will be crocheting a required number of granny squares as indicated below for each size.
The sizes for this project are as follows: S, M/L, XL/XXL, and XXXL. This is because of the fact that this crochet cardigan is made out of granny squares which are stitched together.
Once we have crocheted all the required squares depending on the size you are making, these will be sewed together to create the back panel, the front panel, and 2 identical sleeves.
We will then sew all the different parts to create the cardigan, before adding the sleeve cuff edging, bottom edging, and front opening edging.
Number of granny squares required per size:
S: 68 granny squares
M/L: 100 granny squares
XL/XXL: 126 granny squares
XXXL: 140 granny squares
Begin pattern here
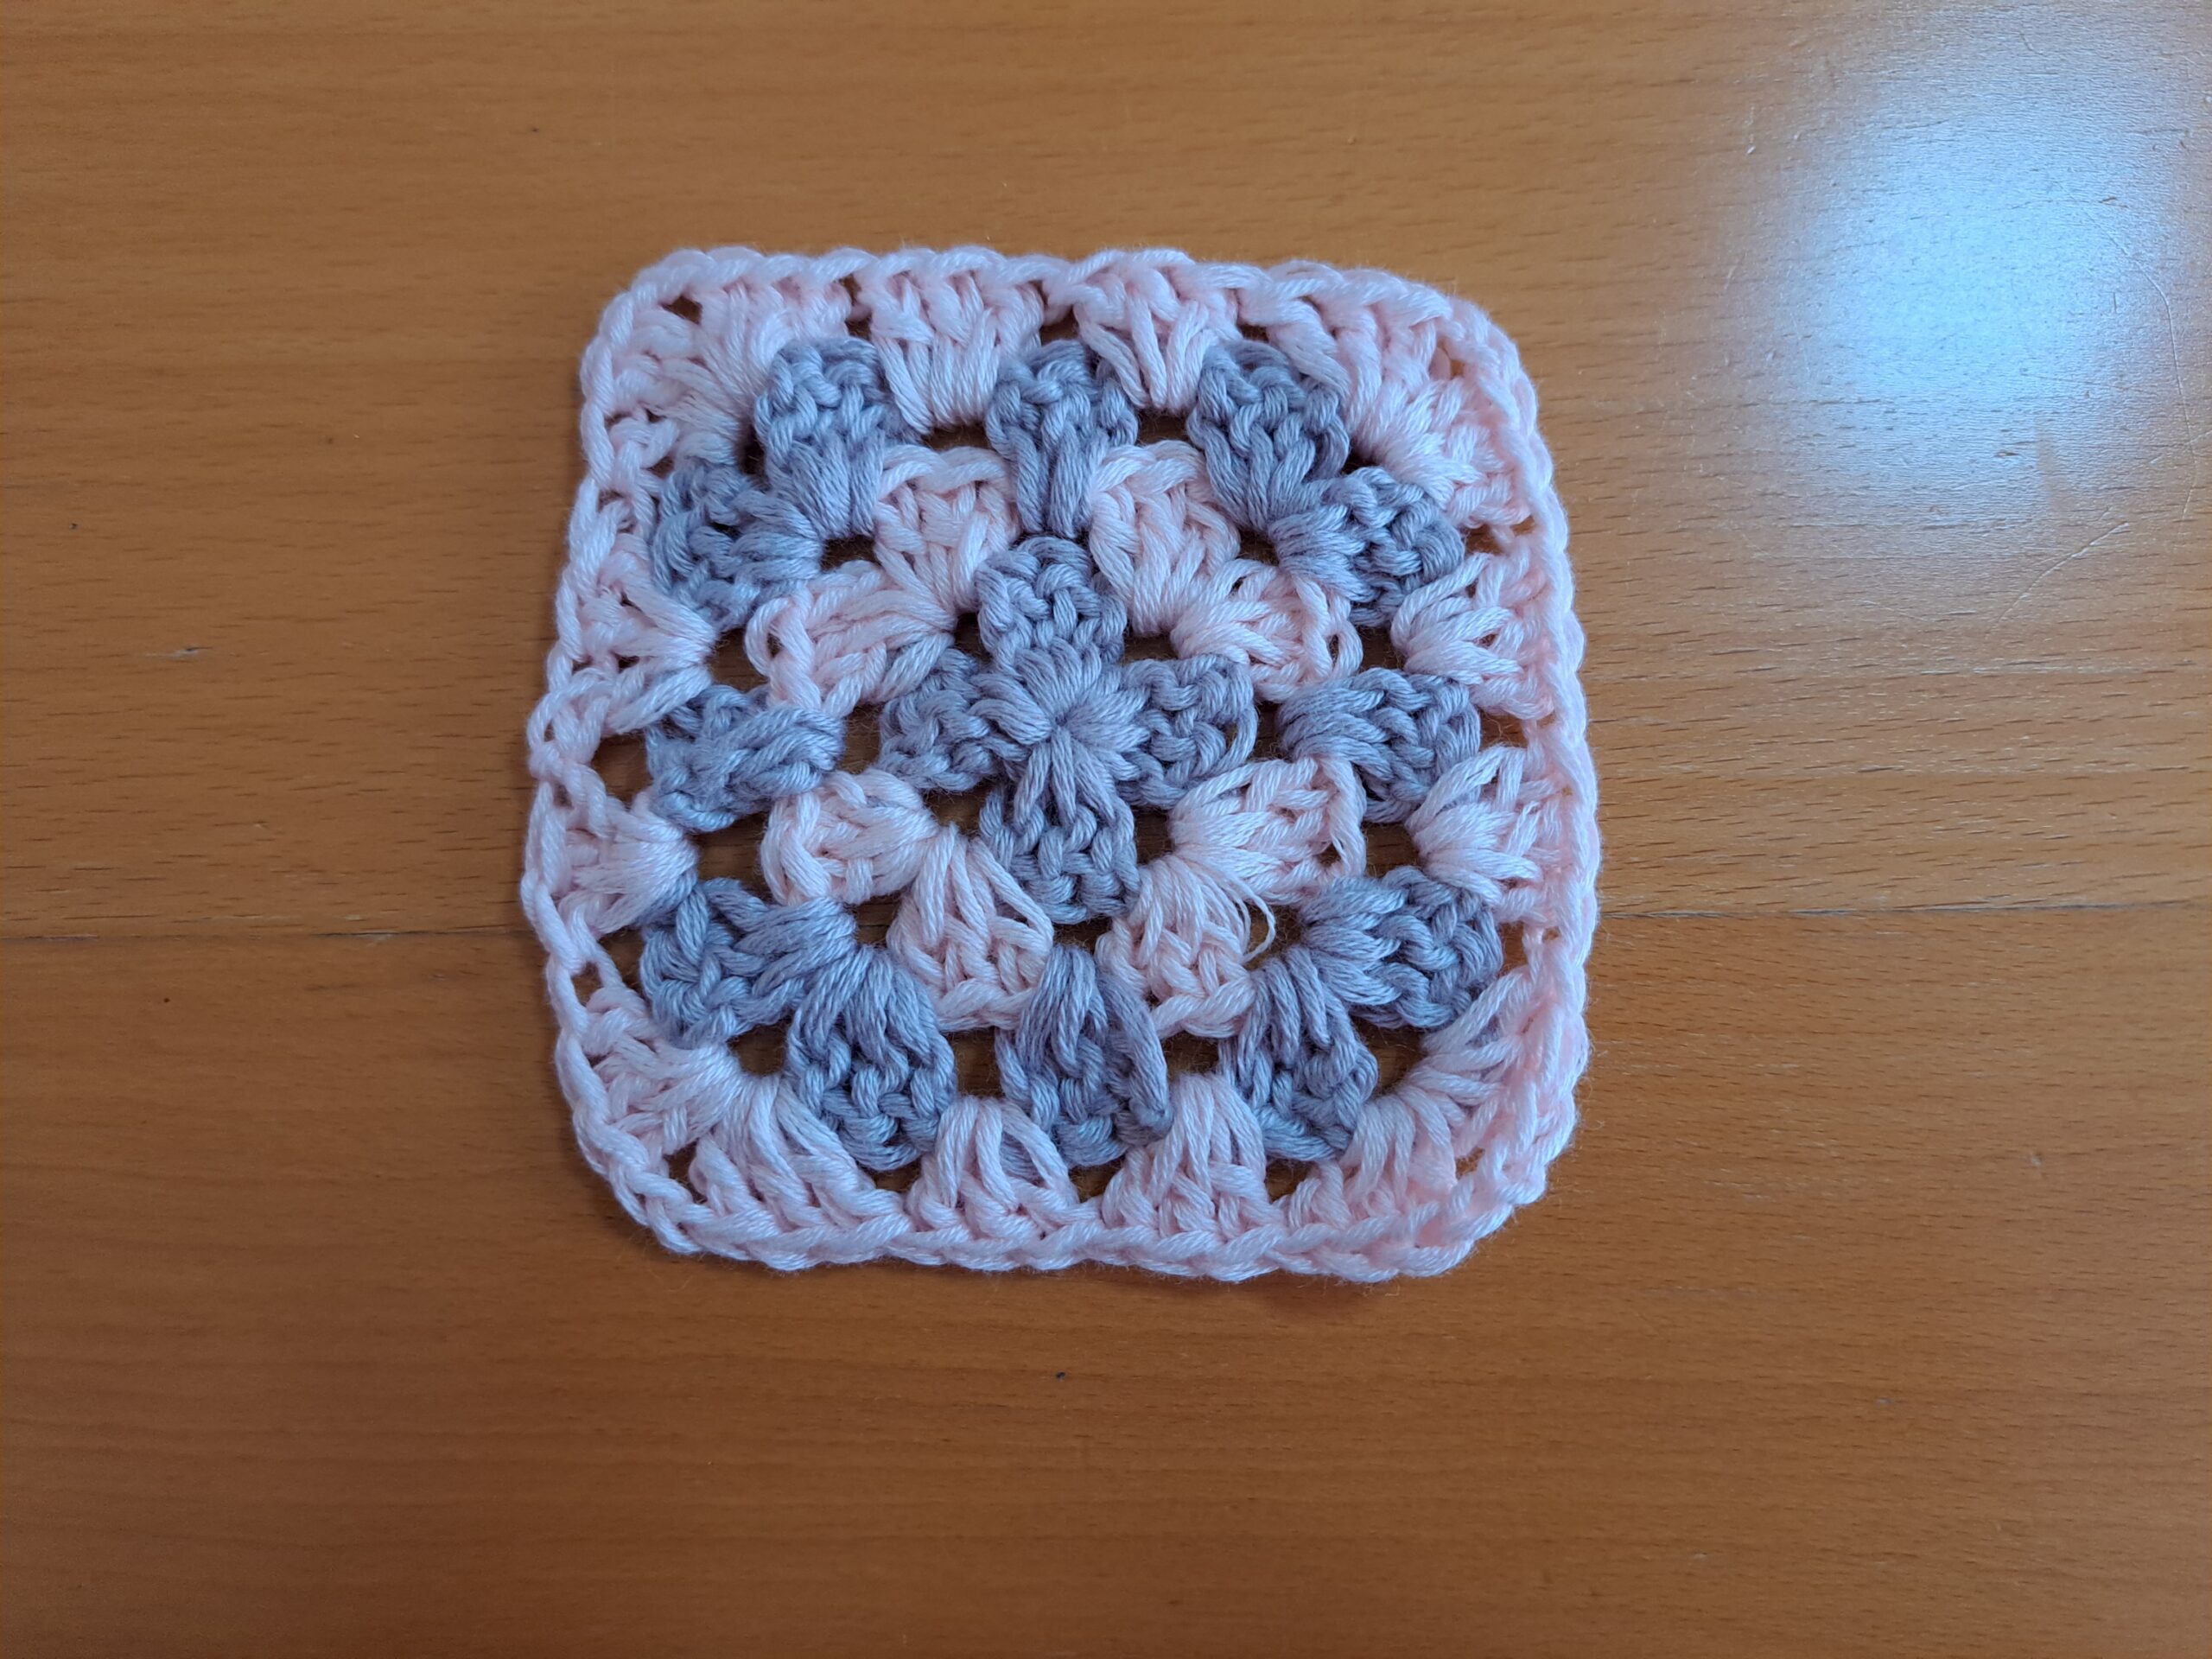
Granny square pattern (make the number indicated above):
To start, make a slip knot with silver yarn.
Ch 4, sl st through 1st stitch to form a ring.
Round 1: Ch 3 (=DC throughout), 2 DC inside ring; [ch 2, 3 DC] inside ring 3 more times, ch 2, sl st to beginning ch 3.
Fasten off silver yarn, attach pink yarn.
Round 2: Ch 3, turn your work, 2 DC into same space, ch 2, 3 DC inside ch sp from previous row (= 3DC, ch 2, 3DC which forms a corner). [Go directly into next sp, 3 DC, ch 2, 3 DC] 3 more times. Sl st to first 3 ch to join round.
Fasten off pink yarn, attach silver yarn.
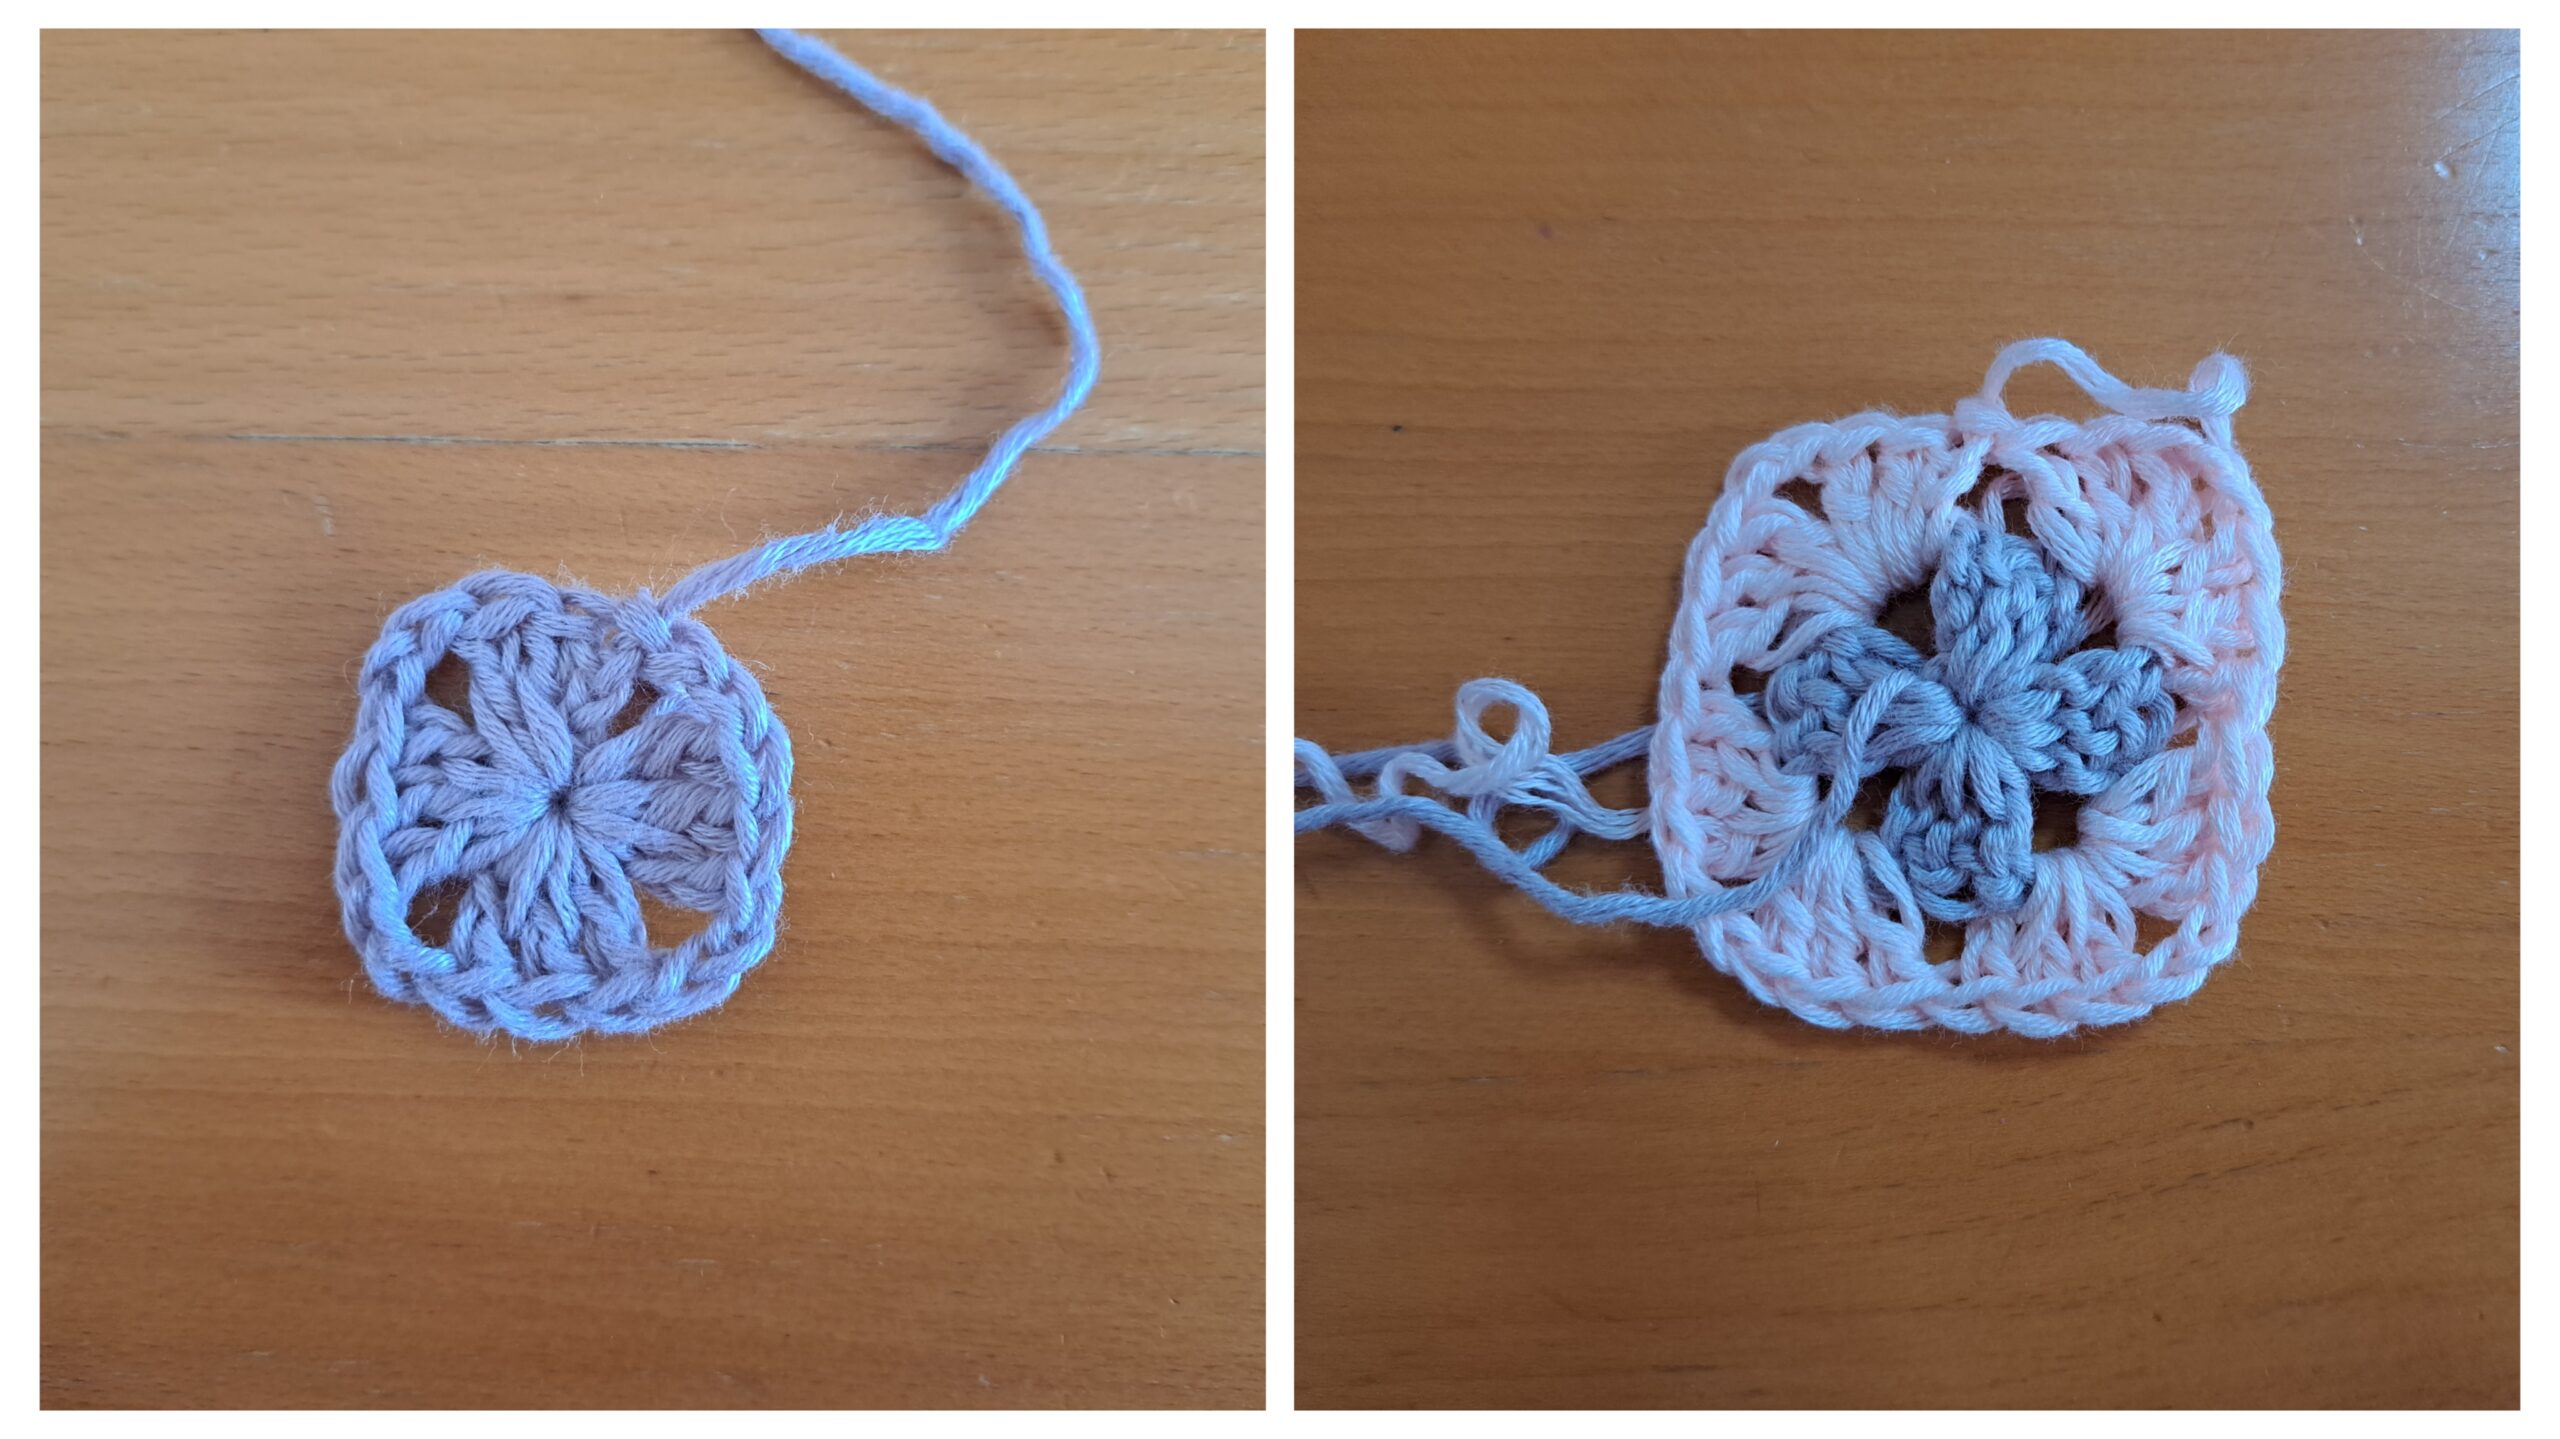
Round 3: Ch 3, turn your work, 2 DC inside space (=3 DC). [Go directly into next sp with 3 DC, ch 2, 3 DC (=corner); 3 DC into the next space] 3 times. In last space place 3 DC, ch 2, 3 DC (corner). Sl st to close off round.
Fasten off silver yarn, attach pink yarn.
Round 4: Ch 3, turn your work, [Go directly into next sp with 3 DC, ch 2, 3 DC (=corner); 3 DC into next two spaces] 3 times. In last space place 3 DC, ch 2, 3 DC (corner). Sl st to close off round.
Fasten off pink yarn, and sew in all loose ends.
Now sew your squares together to create the back panel, front panels, and 2 sleeves as follows for each size:
Size S:
Back panel:
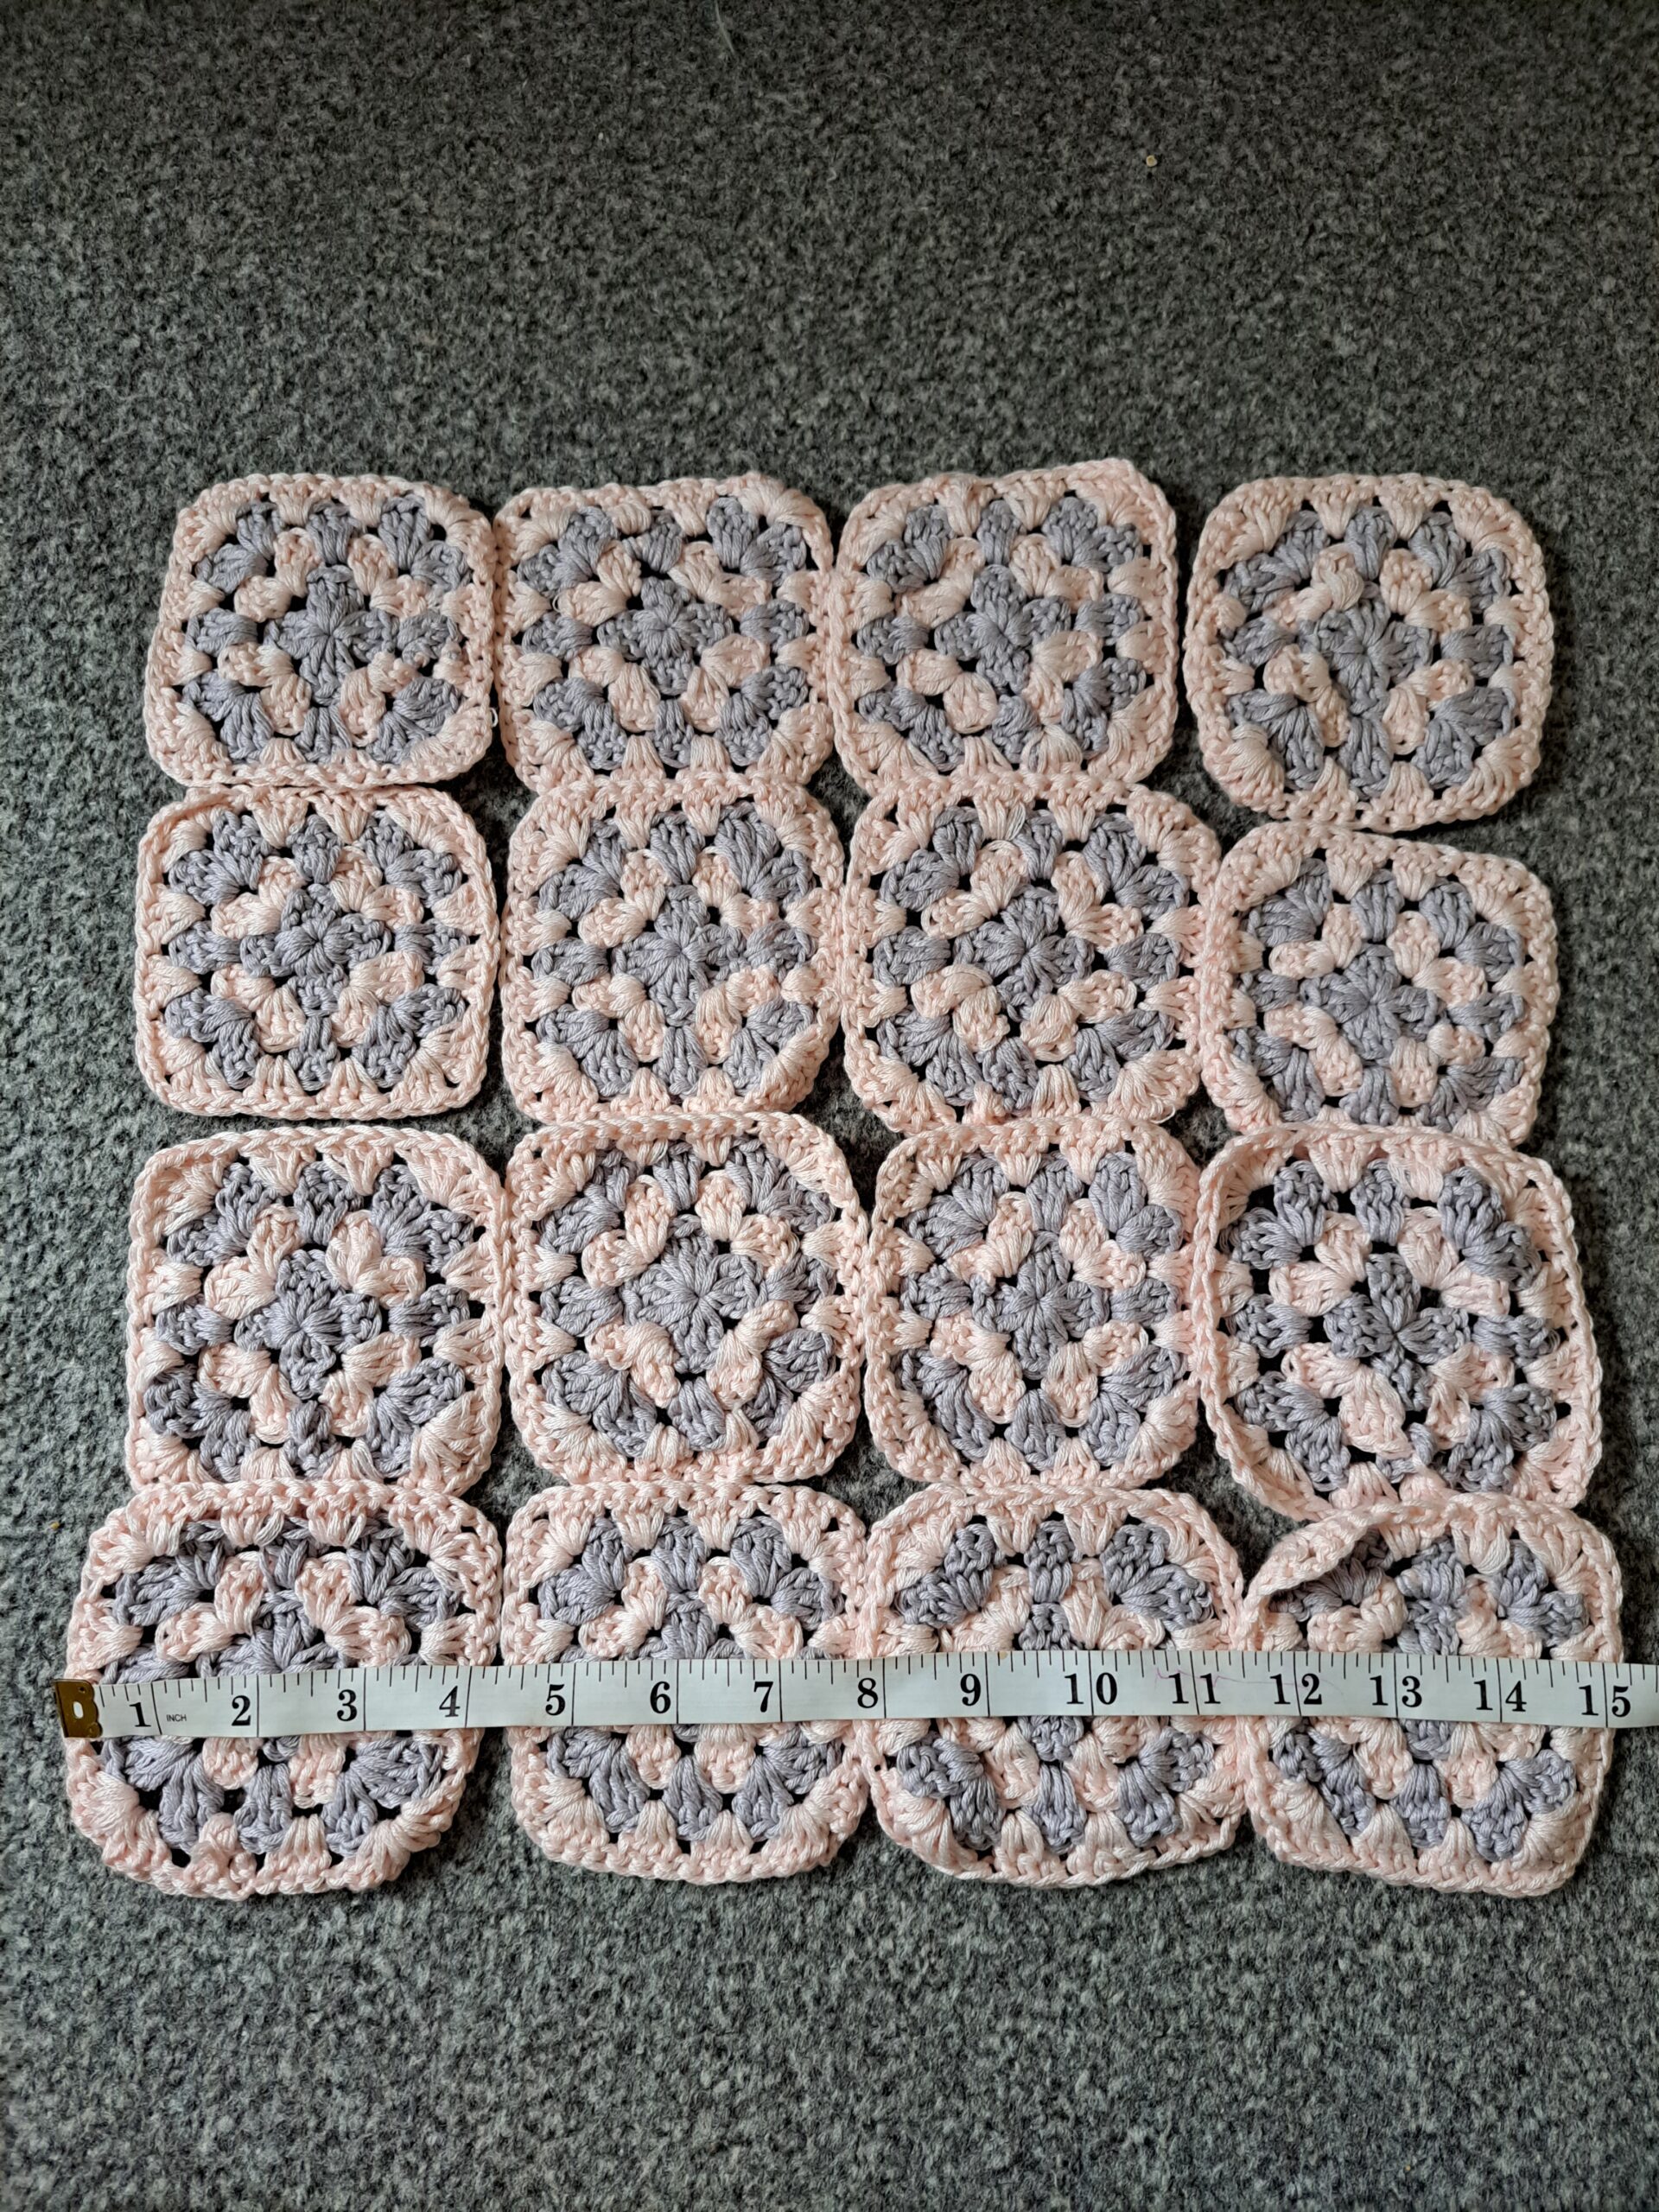
On a flat surface, place 20 squares so as to have 5 squares across 4 vertical columns (see photo below):
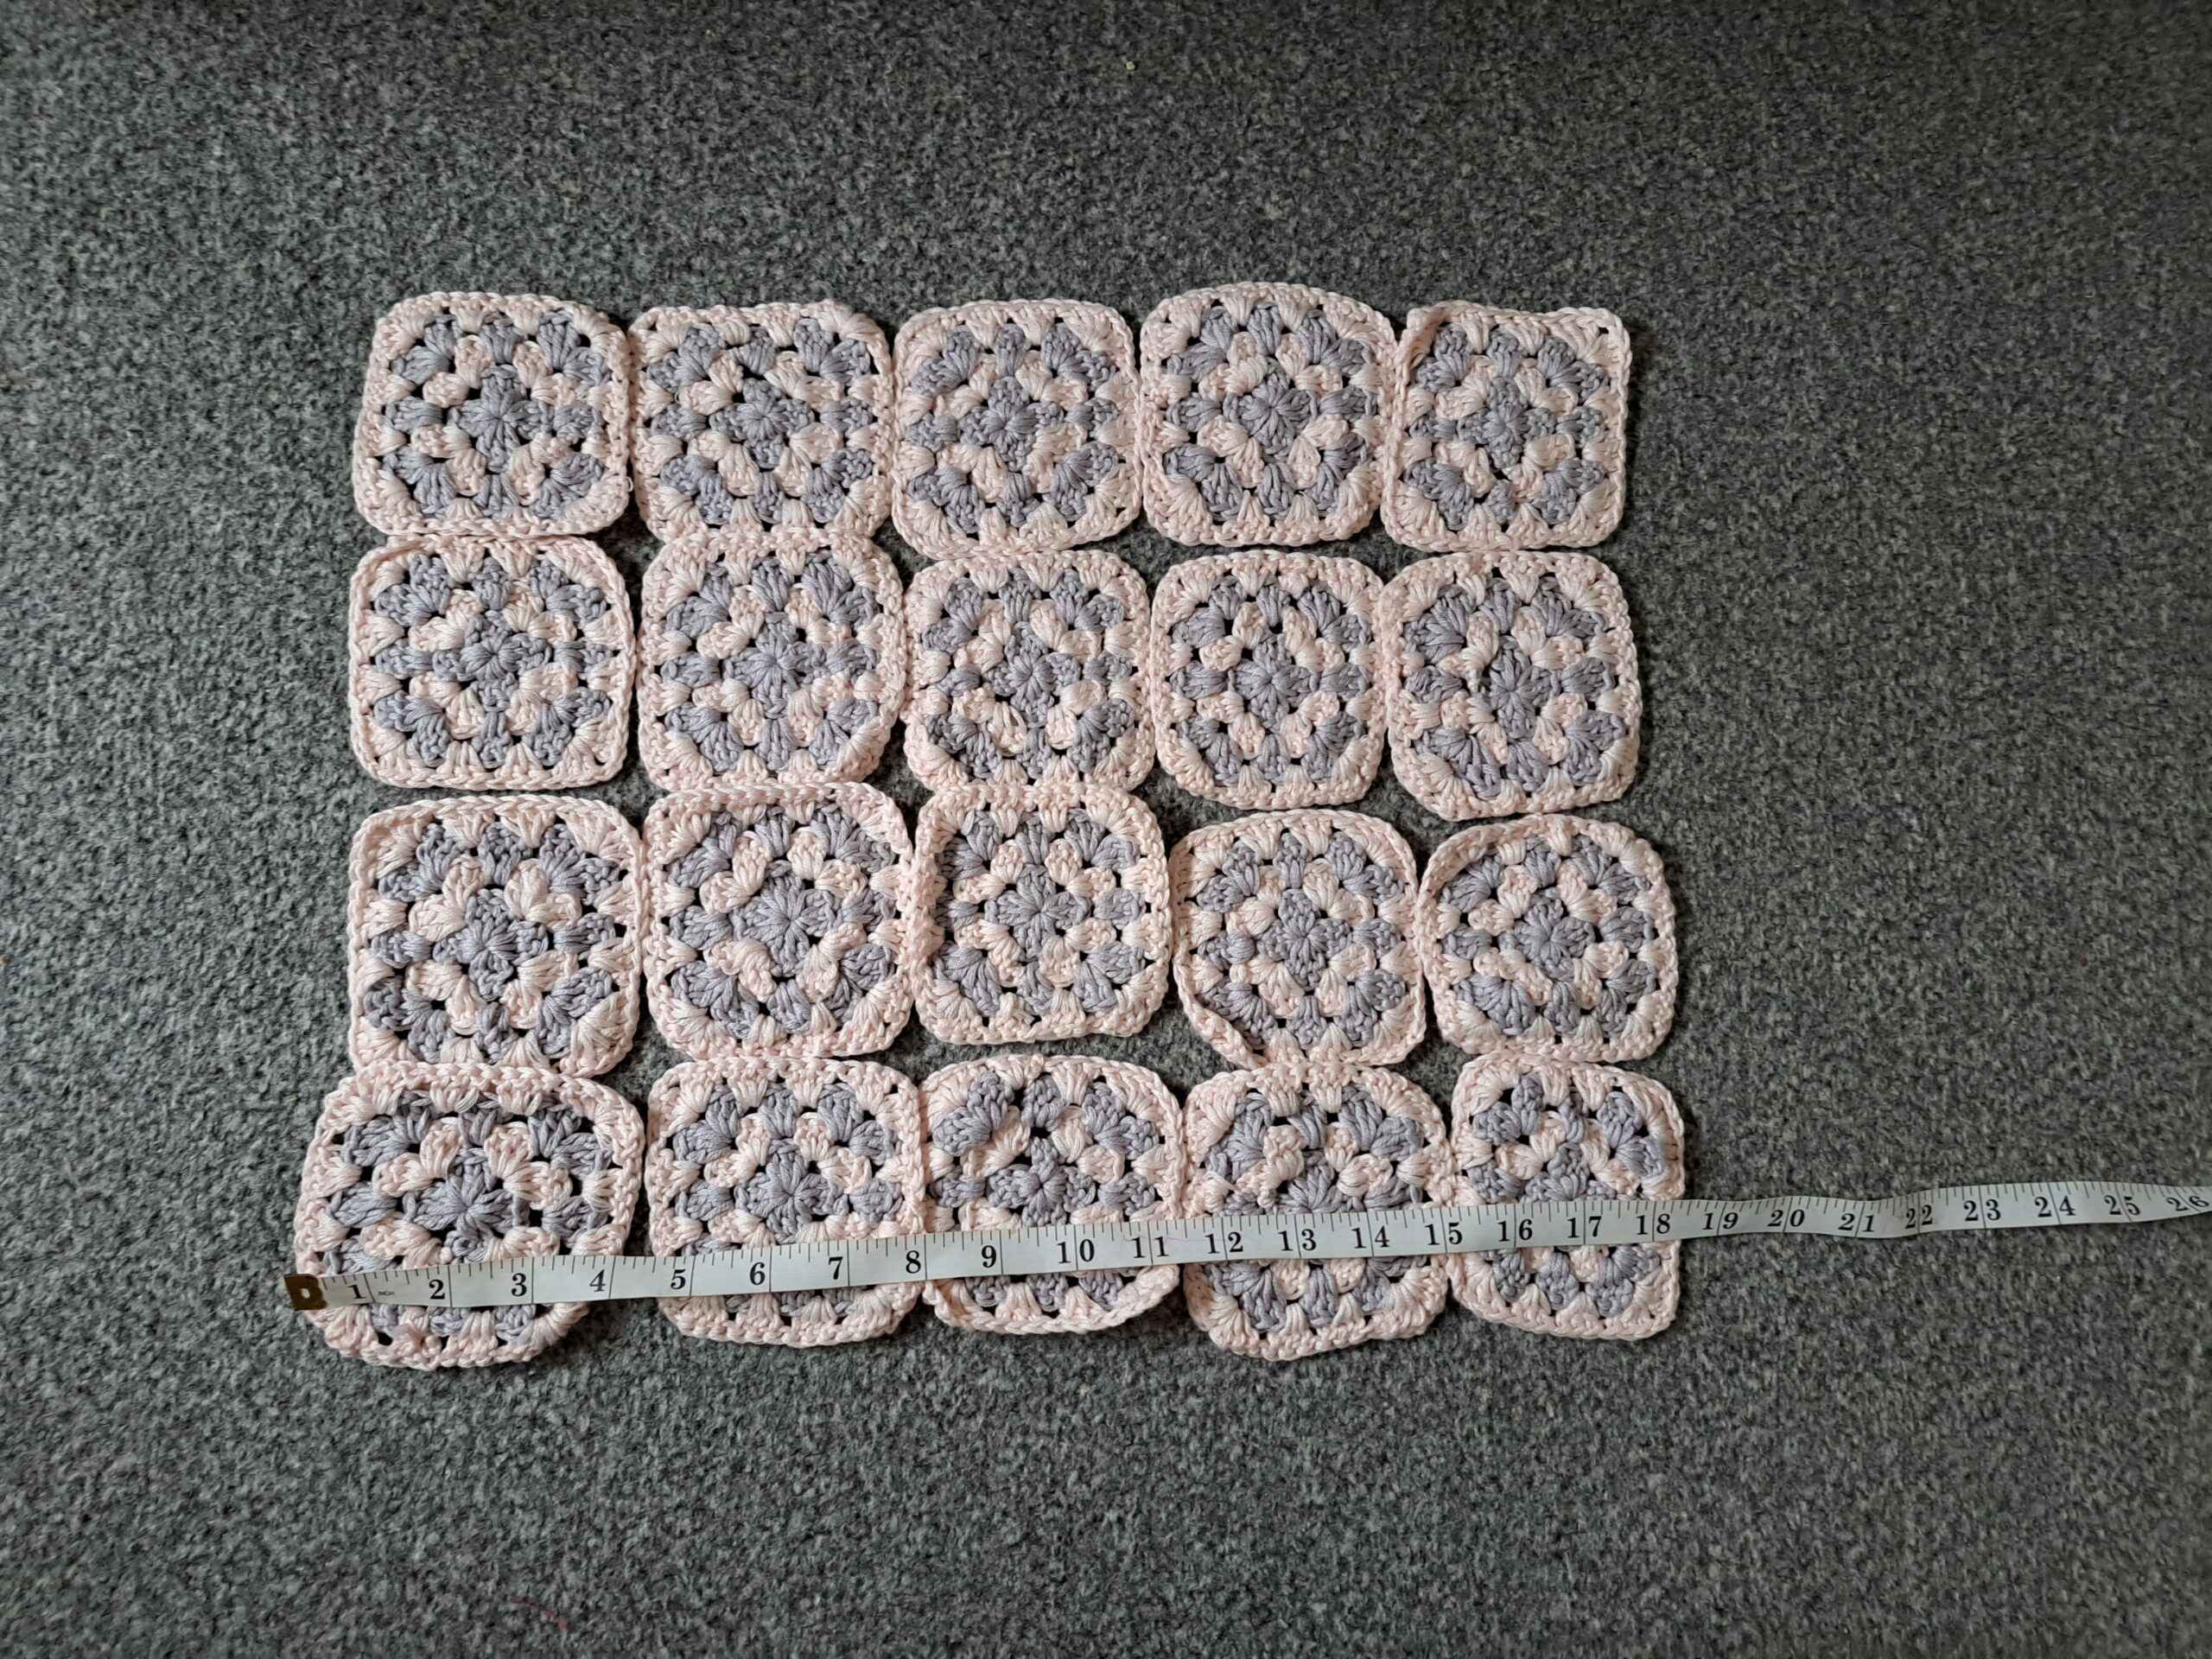
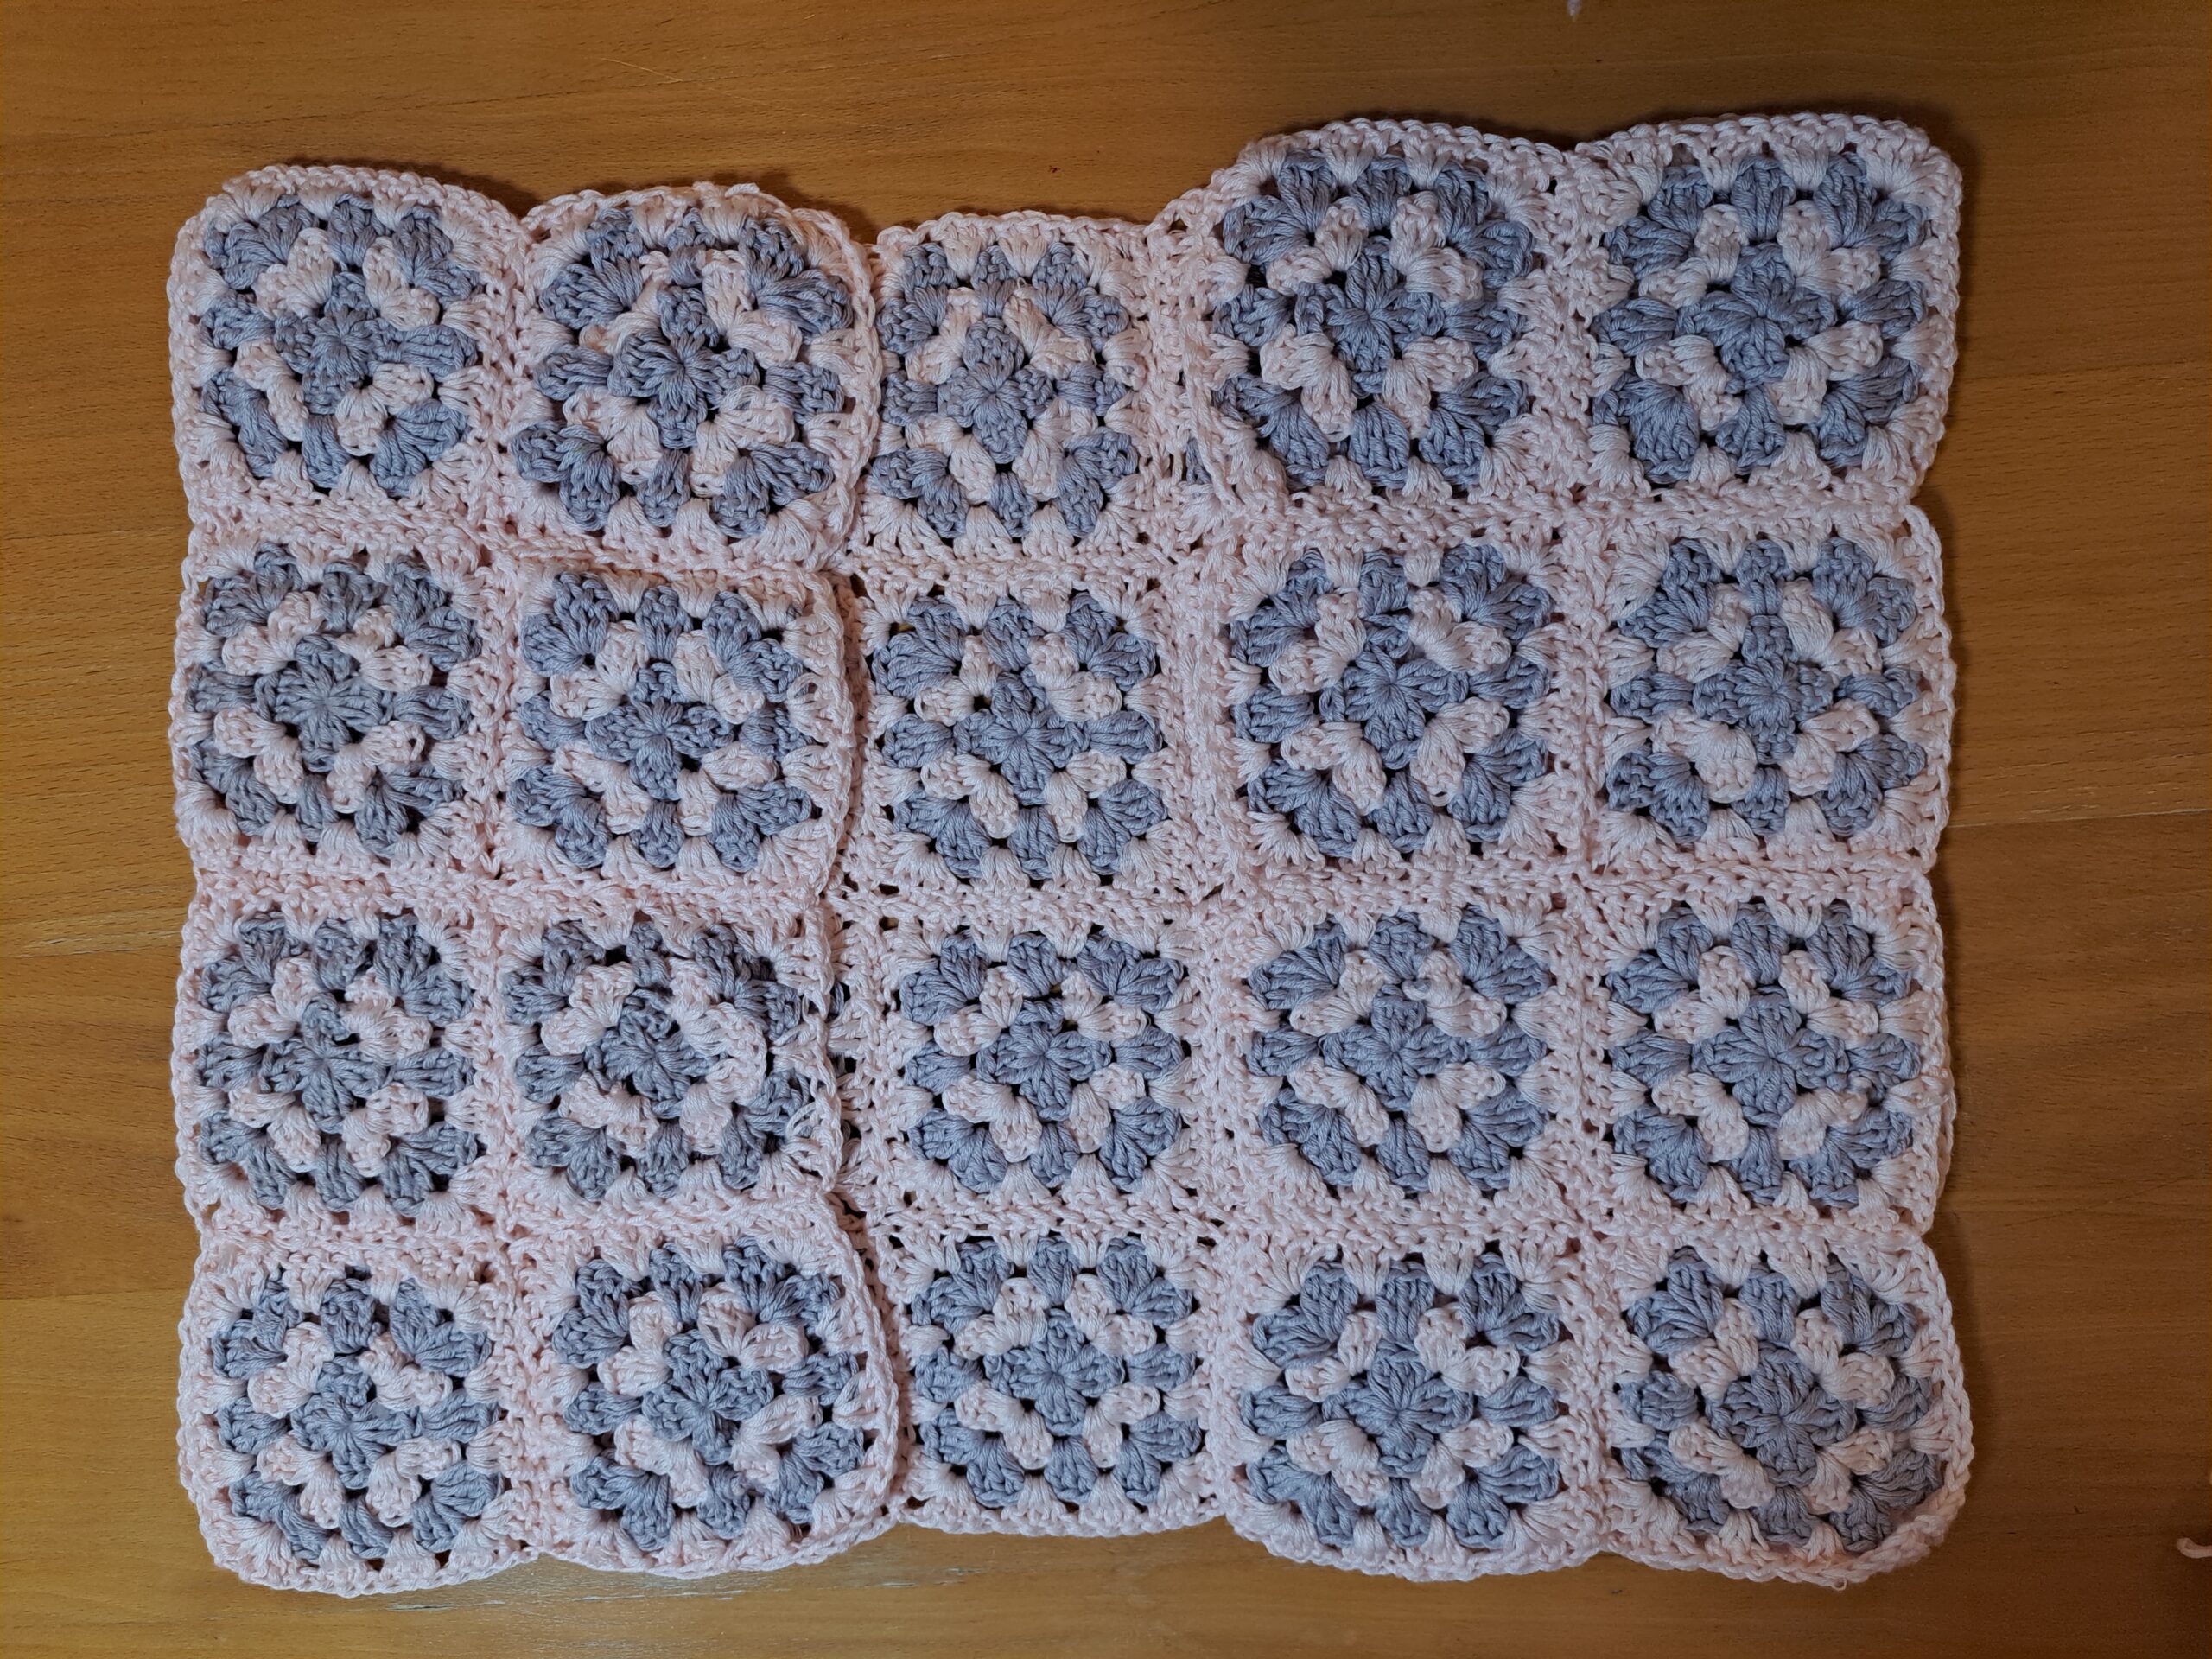
Sew squares together to create back panel using the mattress stitch, or your preferred stitch.
Once you have sewed all the squares together, sew in all your loose ends.
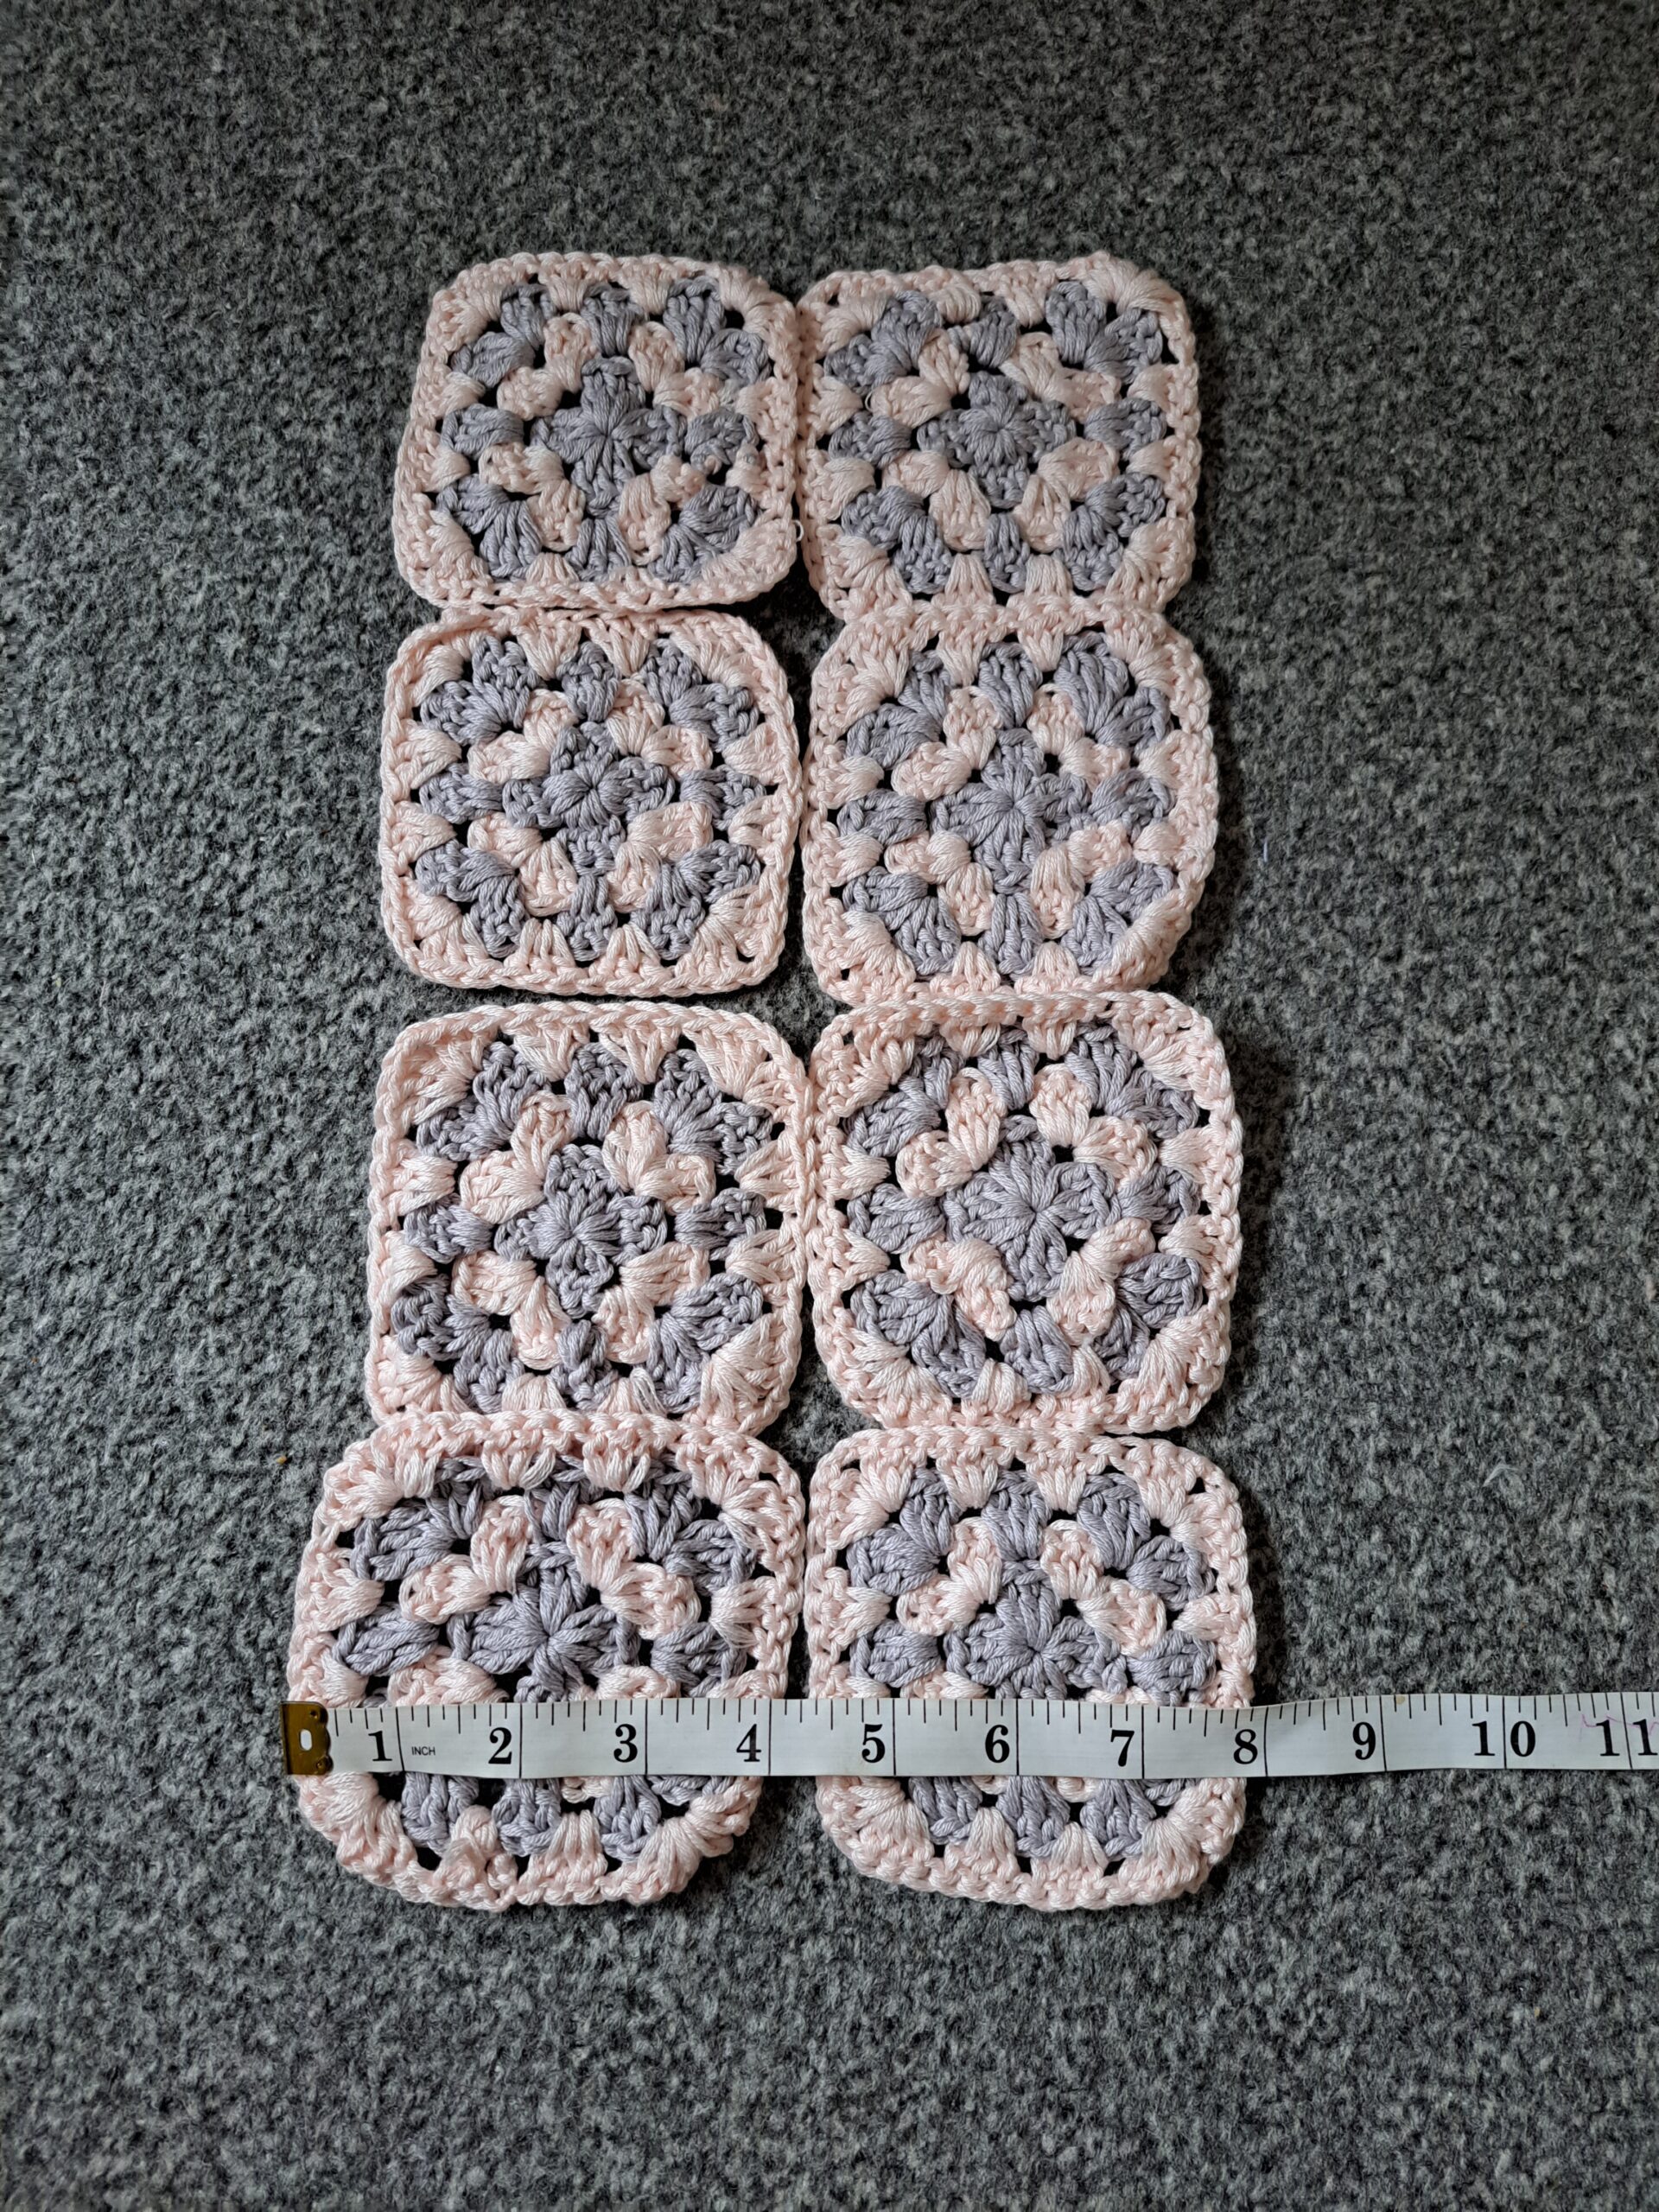
Front panels (create 2 identical front panels):
On a flat surface, place 8 squares so as to have 2 squares across 4 vertical columns (see photo below):
Sew squares together to create front panels using the mattress stitch, or your preferred stitch.
Once you have sewed all the squares together, sew in all your loose ends.
Sleeves (create two identical sleeves):
On a flat surface, place 16 squares so as to have 4 squares across 4 vertical columns (see photo below):
Sew squares together to create sleeves using the mattress stitch, or your preferred stitch.
Once you have sewed all the squares together, sew in all your loose ends.
Size M/L
Back panel:
On a flat surface, place 30 squares so as to have 6 squares across 5 vertical columns.
Sew squares together to create back panel using the mattress stitch, or your preferred stitch.
Once you have sewed all the squares together, sew in all your loose ends.
Front panels (create 2 identical front panels):
On a flat surface, place 15 squares so as to have 3 squares across 5 vertical columns.
Sew squares together to create front panels using the mattress stitch, or your preferred stitch.
Once you have sewed all the squares together, sew in all your loose ends.
Sleeves (create two identical sleeves):
On a flat surface, place 20 squares so as to have 5 squares across 4 vertical columns.
Sew squares together to create sleeves using the mattress stitch, or your preferred stitch.
Once you have sewed all the squares together, sew in all your loose ends.
Size XL/XXL
Back panel:
On a flat surface, place 42 squares so as to have 7 squares across 6 vertical columns.
Sew squares together to create back panel using the mattress stitch, or your preferred stitch.
Once you have sewed all the squares together, sew in all your loose ends.
Front panels (create 2 identical front panels):
On a flat surface, place 18 squares so as to have 3 squares across 6 vertical columns.
Sew squares together to create front panels using the mattress stitch, or your preferred stitch.
Once you have sewed all the squares together, sew in all your loose ends.
Sleeves (create two identical sleeves):
On a flat surface, place 24 squares so as to have 6 squares across 4 vertical columns.
Sew squares together to create sleeves using the mattress stitch, or your preferred stitch.
Once you have sewed all the squares together, sew in all your loose ends.
Size XXXL
Back panel:
On a flat surface, place 56 squares so as to have 8 squares across 7 vertical columns.
Sew squares together to create back panel using the mattress stitch, or your preferred stitch.
Once you have sewed all the squares together, sew in all your loose ends.
Front panels (create 2 identical front panels):
On a flat surface, place 28 squares so as to have 4 squares across 7 vertical columns.
Sew squares together to create front panels using the mattress stitch, or your preferred stitch.
Once you have sewed all the squares together, sew in all your loose ends.
Sleeves (create two identical sleeves):
On a flat surface, place 28 squares so as to have 7 squares across 4 vertical columns.
Sew squares together to create sleeves using the mattress stitch, or your preferred stitch.
Once you have sewed all the squares together, sew in all your loose ends.
To sew your cardigan together
Start with sewing in the sleeves:
With wrong side facing, place your sleeves flat and fold in half widthwise.
With tapestry needle and yarn, sew your seam up so as to create your sleeves.
Do not turn inside out yet.
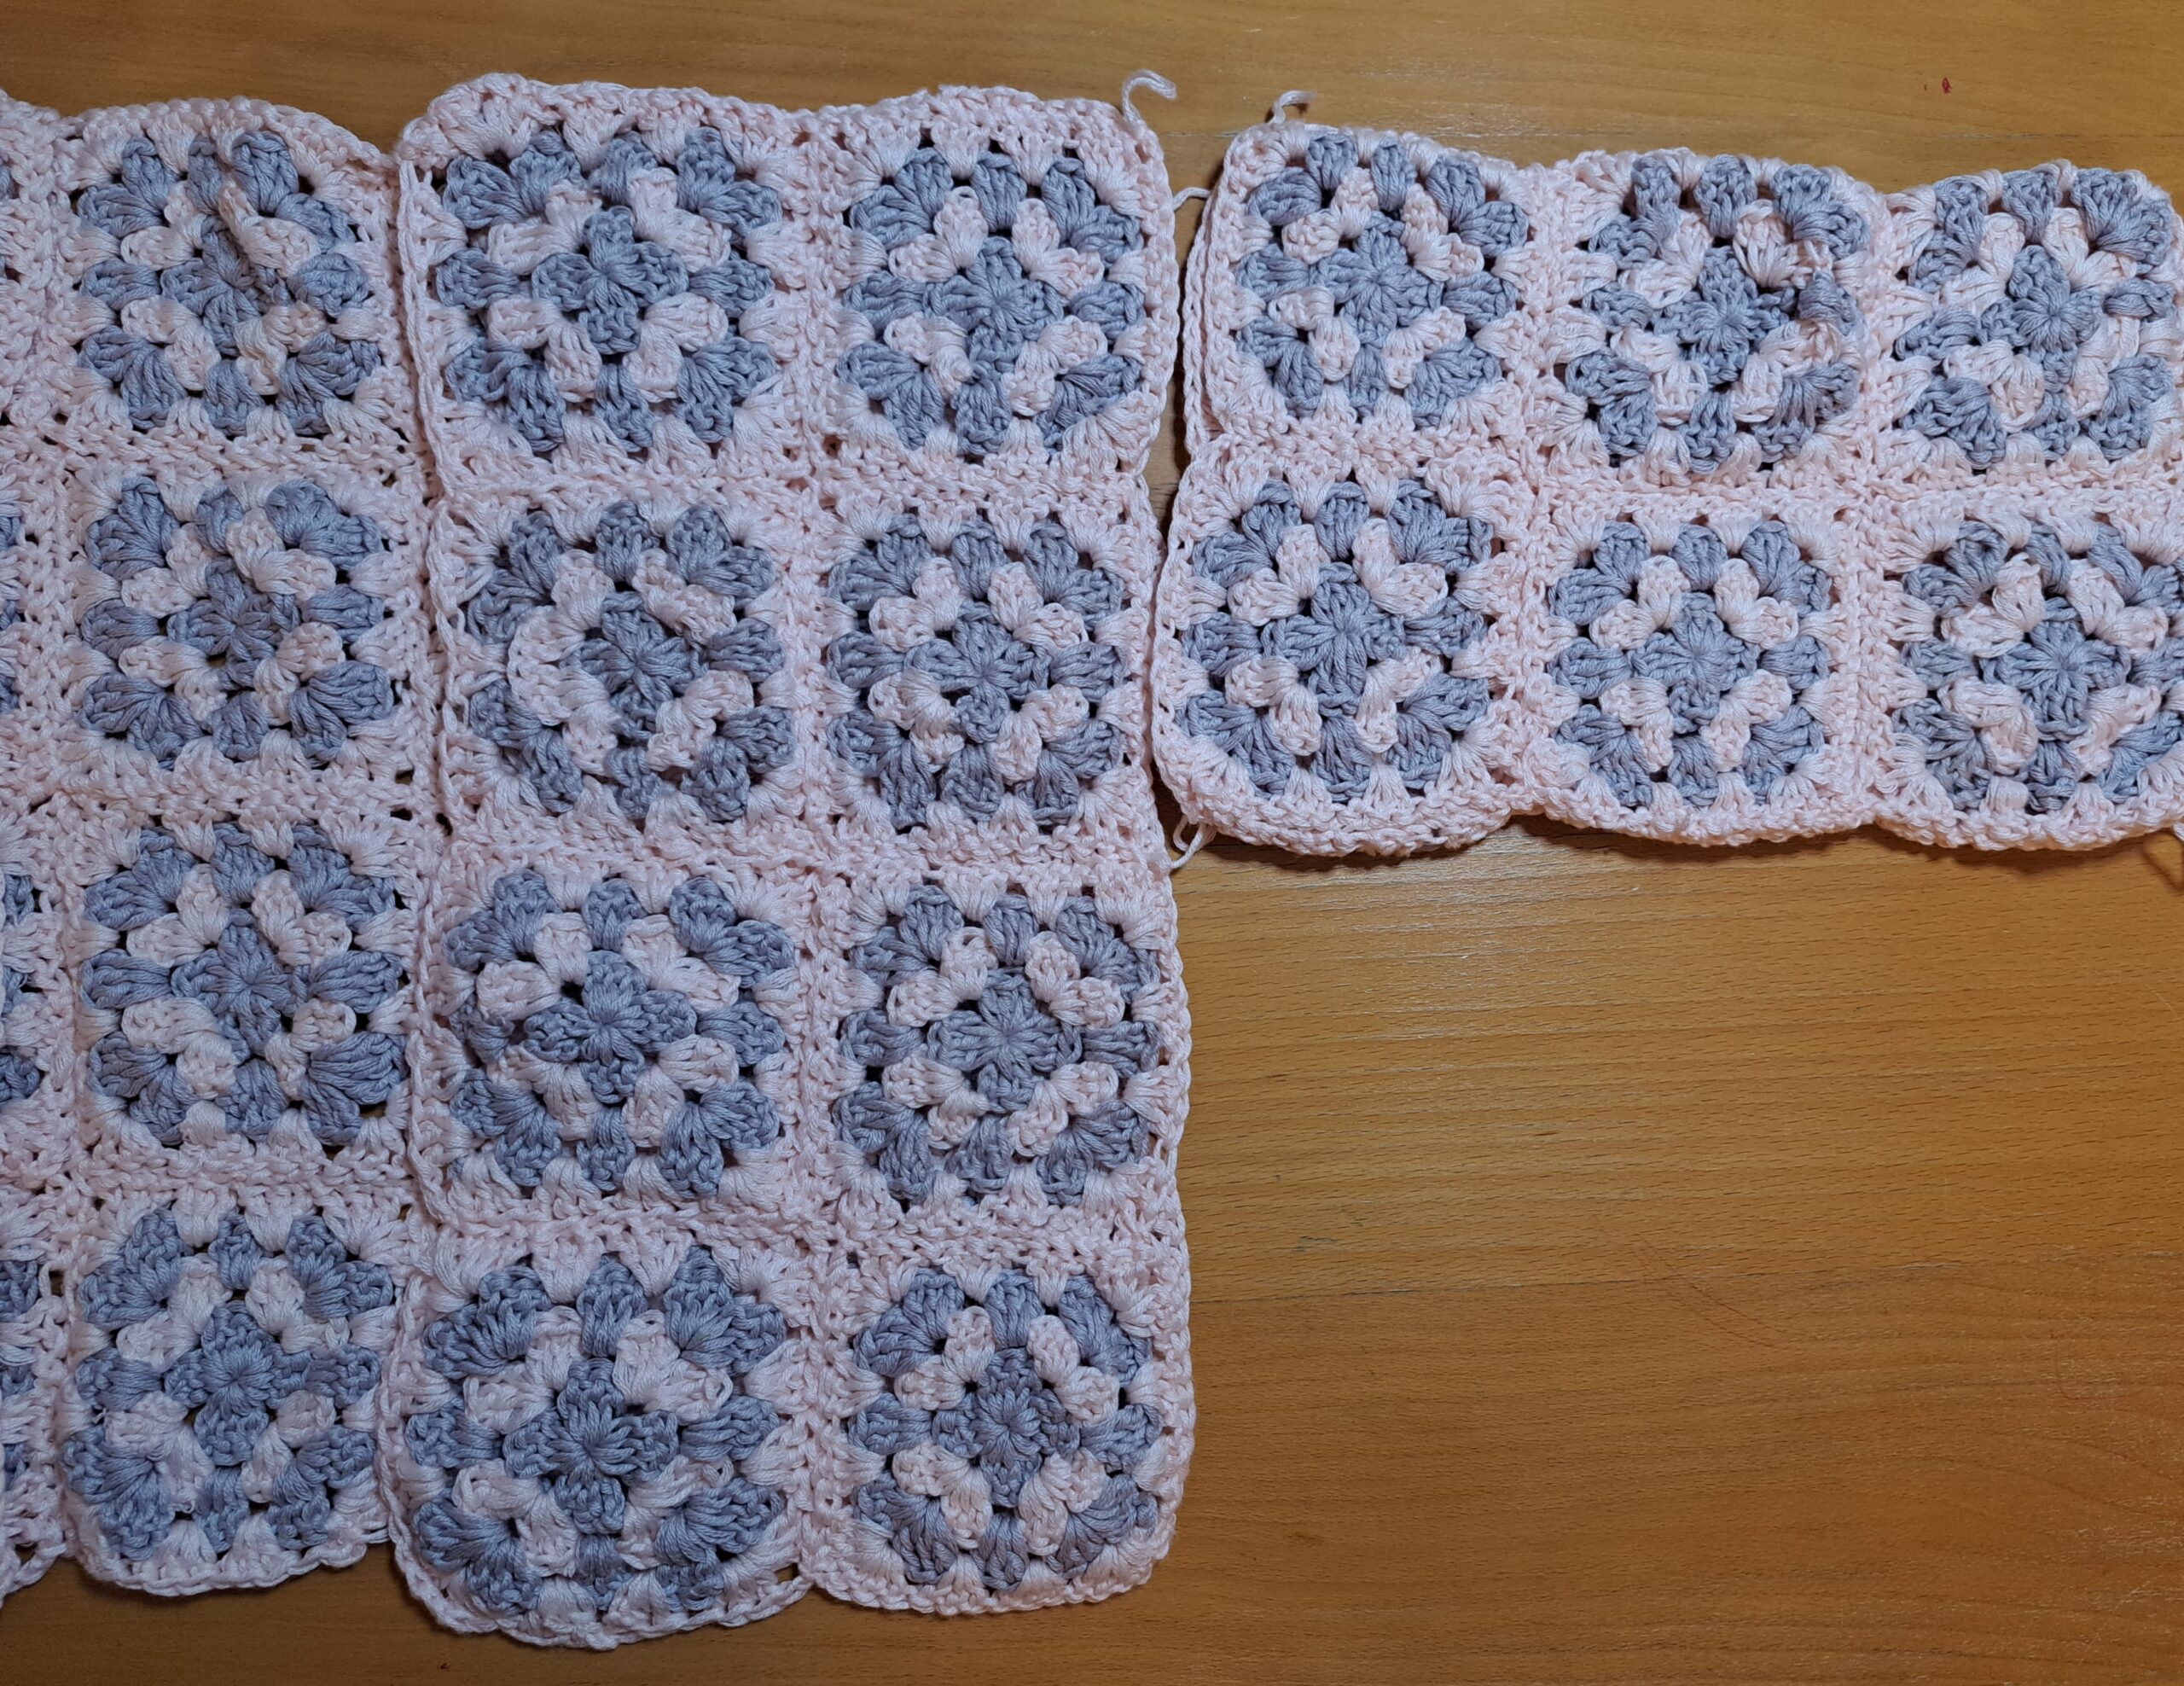
Sew front and back panel together:
With wrong side facing, place your back panel onto a flat surface. Place your 2 front panels symmetrically straight across the back panels, making sure that each top and bottom corner on the outside touch each other (the top and bottom corners of the back and front panels).
For sizes S and XL/XXL, there will be a larger gap at the front opening of the cardigan; this is due to the number of squares necessary for the project.
There will be no gap at all when placing the front and back panels onto each other for sizes M/L and XXXL.
Start sewing the shoulder seams straight across (see photo below, which pictures size S as an example):
Once this is done, sew your sleeves onto each side of the cardigan. To do this, place your sleeve at the top of the cardigan on each side, so that the top of each sleeve joins the top of the body of the cardigan. Make sure the seams of your sleeves are facing down.
Now attach a piece of yarn to the top of the cardigan, where the top front panel is touching the sleeve; start sewing the sleeve and front panel together. Once you reach the bottom side of the sleeve, just carry on sewing the front and back panels together, without stopping. When you reach the bottom of the cardigan, fasten off.
Now turn your project around so as to sew in the back part of your sleeve to the back panel. Attach yarn at the top of shoulder, and sew both parts together. Once you reach the bottom of the sleeve, fasten off.
Repeat this process on the other side of the cardigan.
Add sleeve cuff edging (repeat process on both sleeve cuffs)
Attach pink yarn to first sleeve end (attach yarn to any stitch on the sleeve end).
Round 1: Ch 1 (counts as a SC), sk one stitch. [Place a SC into next stitch, sk a stitch] until eor. Sl stitch to first ch 1 to close round.
Round 2: Ch 2 (=HDC), turn your work, HDC into next st until eor. Sl st to first ch 2 to close off round.
Round 3-8: Repeat row 2.
Fasten off and tidy up all loose ends.
Add edging to the front opening of the cardigan
Attach yarn to the front opening of the cardigan; attach yarn to the first stitch at the bottom of either side of the front opening.
Row 1: Ch 1 (=SC), place a SC into next stitch until eor all the way around the front of cardigan, until you reach the other side of the front opening. Make sure you place a SC evenly all across the front opening as there may not always be an actual stitch into which you will place each SC across this edge.
Row 2: Ch 2 (=HDC), turn your work, place a HDC into each SC from previous row until eor.
Fasten off and tidy up all loose ends.
Add border to the bottom of the cardigan
Attach yarn to either bottom edge of the front opening.
Row 1: Ch 1 (=SC), SC into next stitch until eor all the way around the bottom of cardigan, until you reach the first ch 1. Sl st to the first ch 1 to close off round.
Row 2: Ch 2 (=HDC), turn your work, HDC into next st until eor. Sl st to the 1st ch 2 to close off round.
Row 3-8: Repeat row 2.
Fasten off and tidy up all loose ends.


You May Also Like
Crochet Vintage Prayer Shawl Free Pattern
Crochet The Elena Boho Wrap