Crochet The Rainbow Cushion
Crochet The Rainbow Cushion
Hello everyone! Today I am bringing to you a new project, on how to Crochet the Rainbow Cushion.
I hope you are well, today I wanted to bring to you a little home décor project today to brighten up this dreary and freezing British weather we have been experiencing of late.
I hope you enjoy this easy tutorial, as always the video tutorial has been uploaded on Youtube and you can find it here: https://youtu.be/5nRjOMPi9sM
Behind the pattern
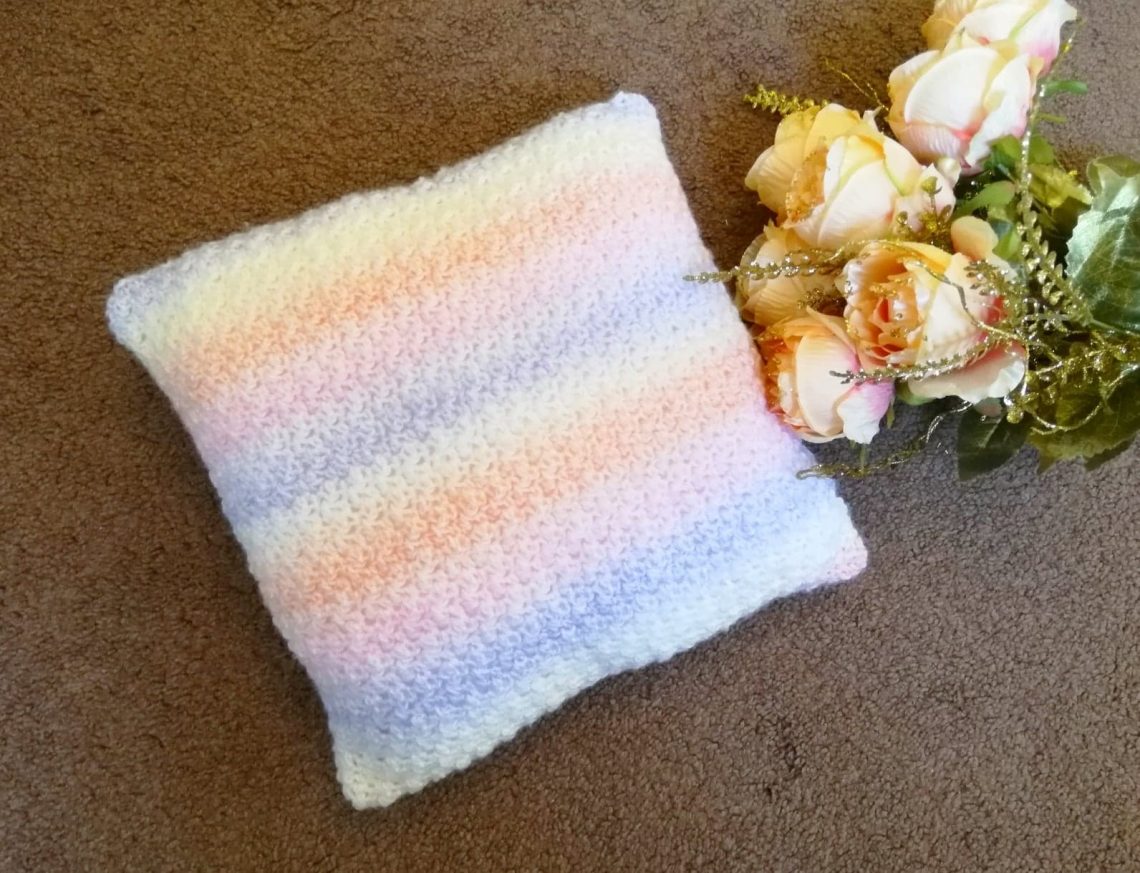
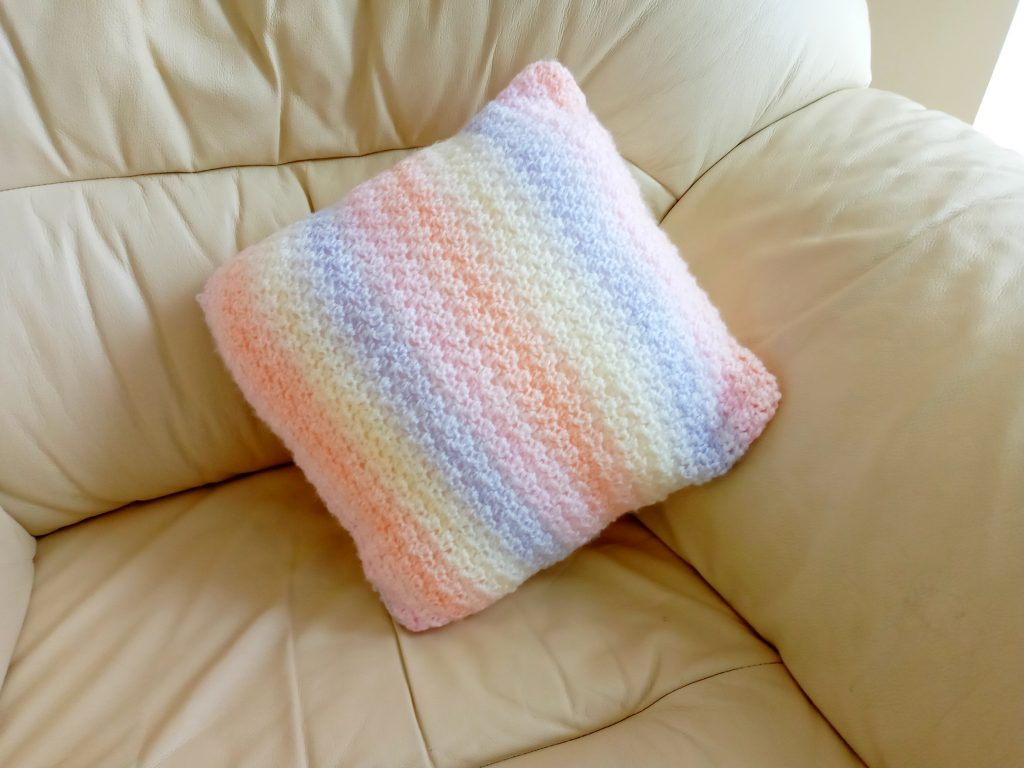
This Spring cushion is a perfect pick me up crochet project which can be worked up in a very short time, and will look fabulous in any setting as the variegated shades of the yarn are so subtle and fairy-tale like. It is made using two skeins only of James C Brett’s DK marble yarn (a size 3 light yarn in American terms), which really create a delicate type of pattern for this cushion.
The multiple shades of this cushion make me think of a beautiful and soft rainbow on a lovely afternoon, and really improves my mood, so I hope you find it has the same effect for you! It’s a great addition to my living room decor, and I do love having some of my handmade decorations around the house, I think it really does give a home a bohemian and soothing vibe.
About the yarn used for The Crochet Rainbow Cushion
I crocheted it with James C Brett’s Marble DK (a light 3 yarn in American terms), and it is a delight to crochet. You can use any yarn in that weight and size to make this cushion, so it’s a very versatile pattern.
The free pattern can be downloaded here:
Let me know what you think in the comments below, and thank you again for all your support and messages, it means the world to me!
Xoxo, Selina.
The Pattern:
Level: Easy
Notes: I will be writing in US terms
Gauge: 10 cm x 10 cm =11 rows and 14 stitches
Materials:
2 skeins of James C Brett Marble DK (or any size 3 light yarn)
A 4 mm crochet hook
A tapestry needle
A pair of scissors
Stuffing for the cushion
Abbreviations:
ch: chain
sk: skip
SC: Single Crochet
DC: Double Crochet
Sl st: Slip stitch
EOR: End of row
Begin pattern here:
Front and Back panel (= 2 panels for each side of the cushion)
Ch 51
Complete rows as follows:
1: SC in 3rd ch, [DC in next st, SC in next st] until end of row
2: Ch 1 (counts as SC), turn your work, [DC into SC from previous row, SC into DC from previous row] until eor
3: Ch 3 (counts as DC), turn your work, [SC into DC from previous row, DC into SC from previou row] until eor
4-40: Repeat rows 2 and 3.
Sewing your cushion up:
Once you have crocheted both the sides of the cushion, choose the wrong side, and placing both sides of cushion on top of each other to create a perfect symmetry, sew three of the four sides of the cushion.
Once you have sewed these three sides, turn your cushion inside out (so that the rignt side is facing outwards), and stuff your cushion until you are satisfied with how full it is. Delicately sew the fourth and last side of your cushion to close it, fasten off and tidy up all lose ends.


You May Also Like

Crochet A Velvet Scrunchie
Crochet Romantic Headband with Flowers