Crochet Daisy Granny Square Free Pattern
Crochet Daisy Granny Square Free Pattern
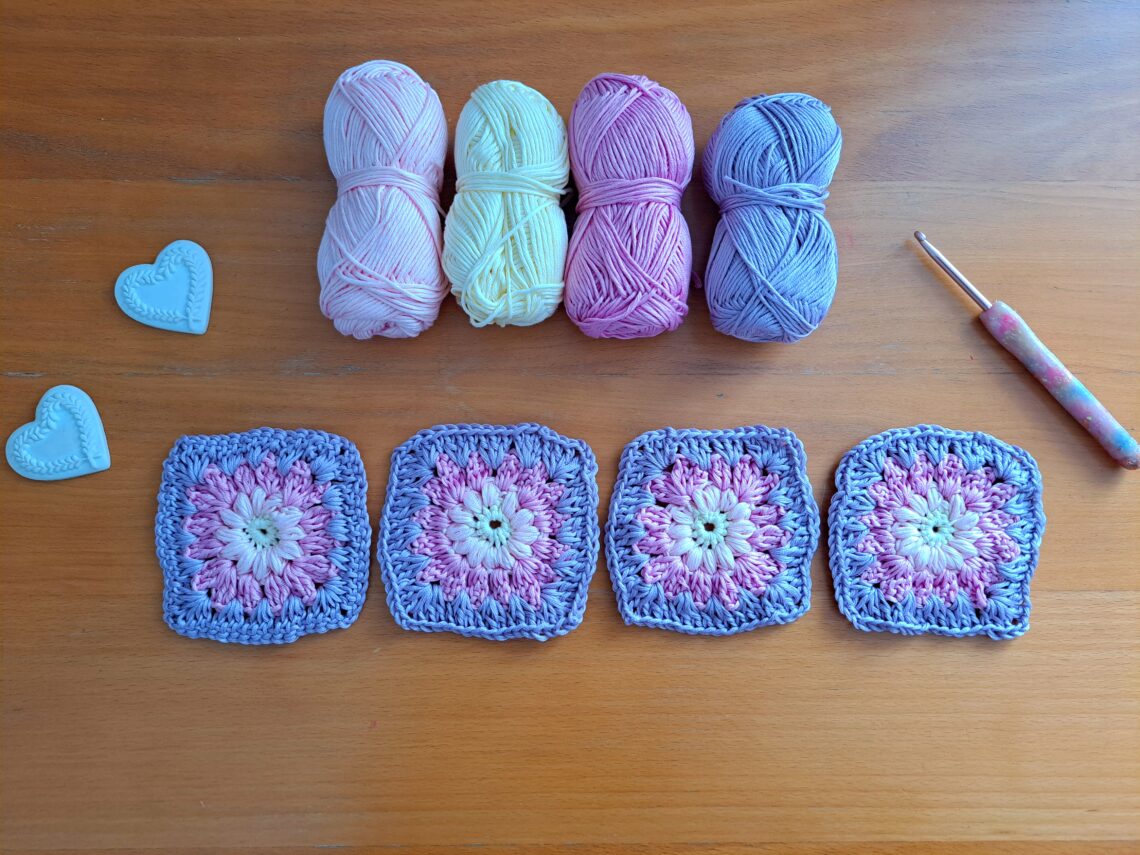
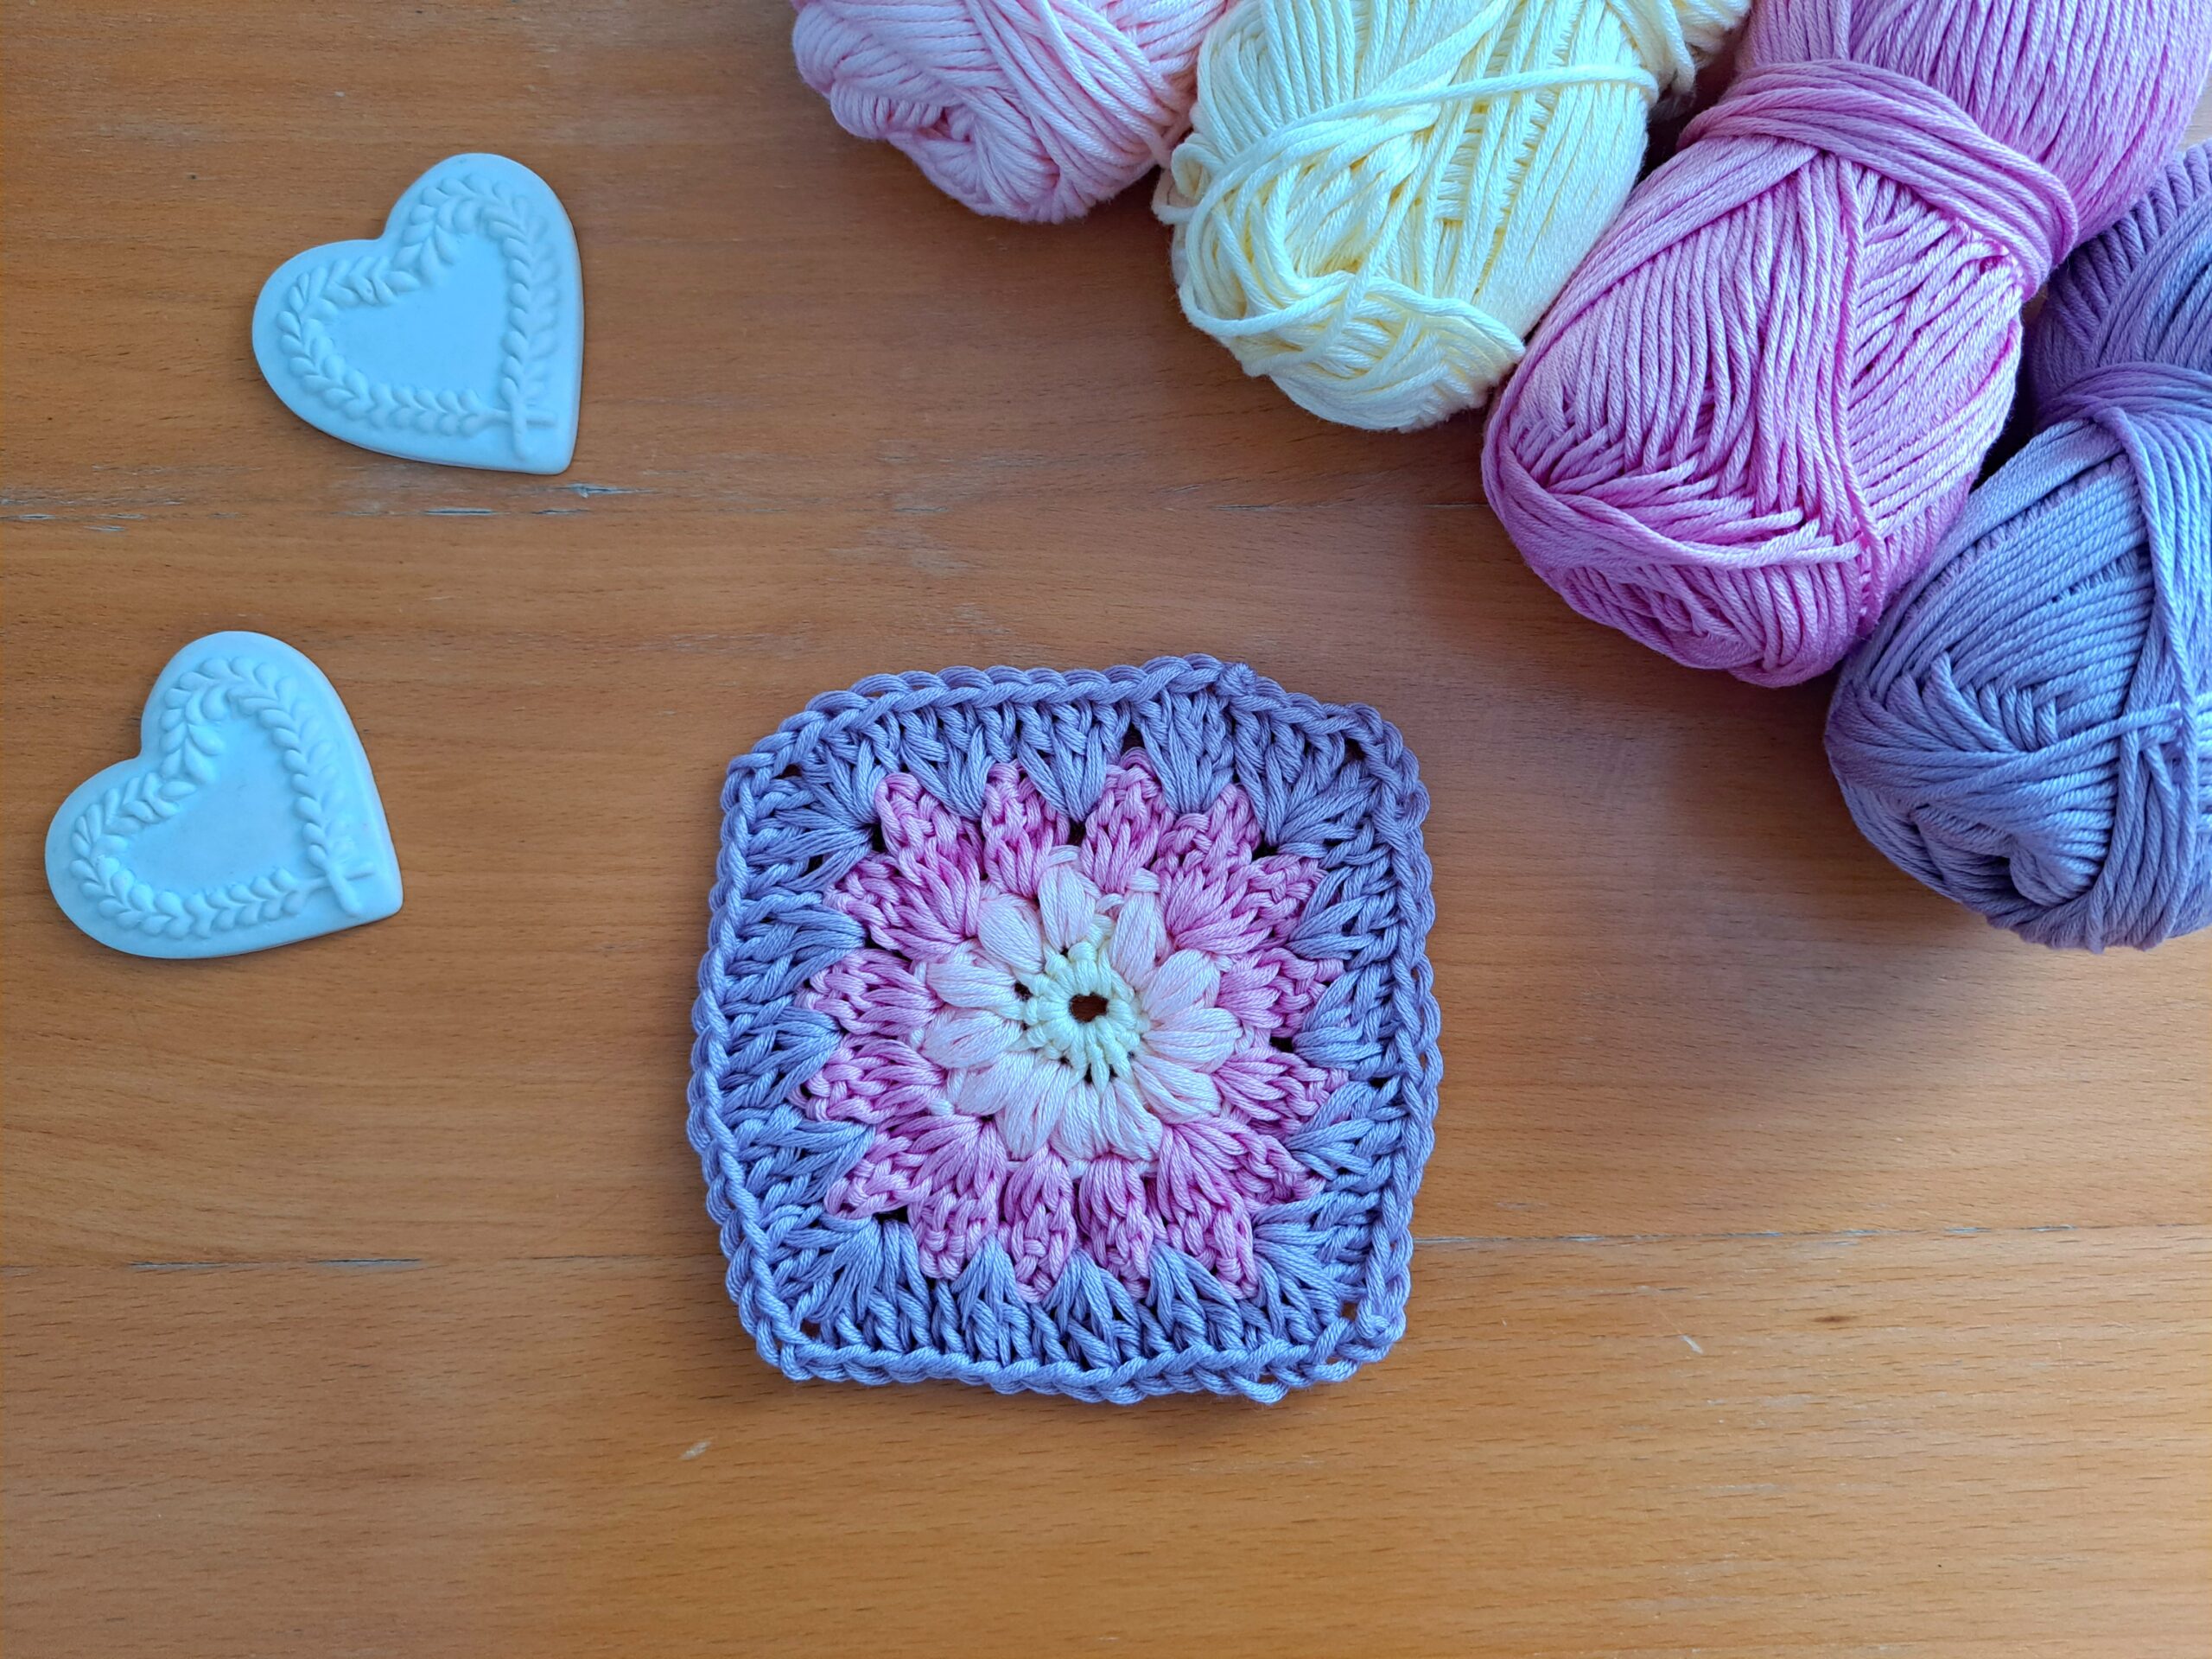
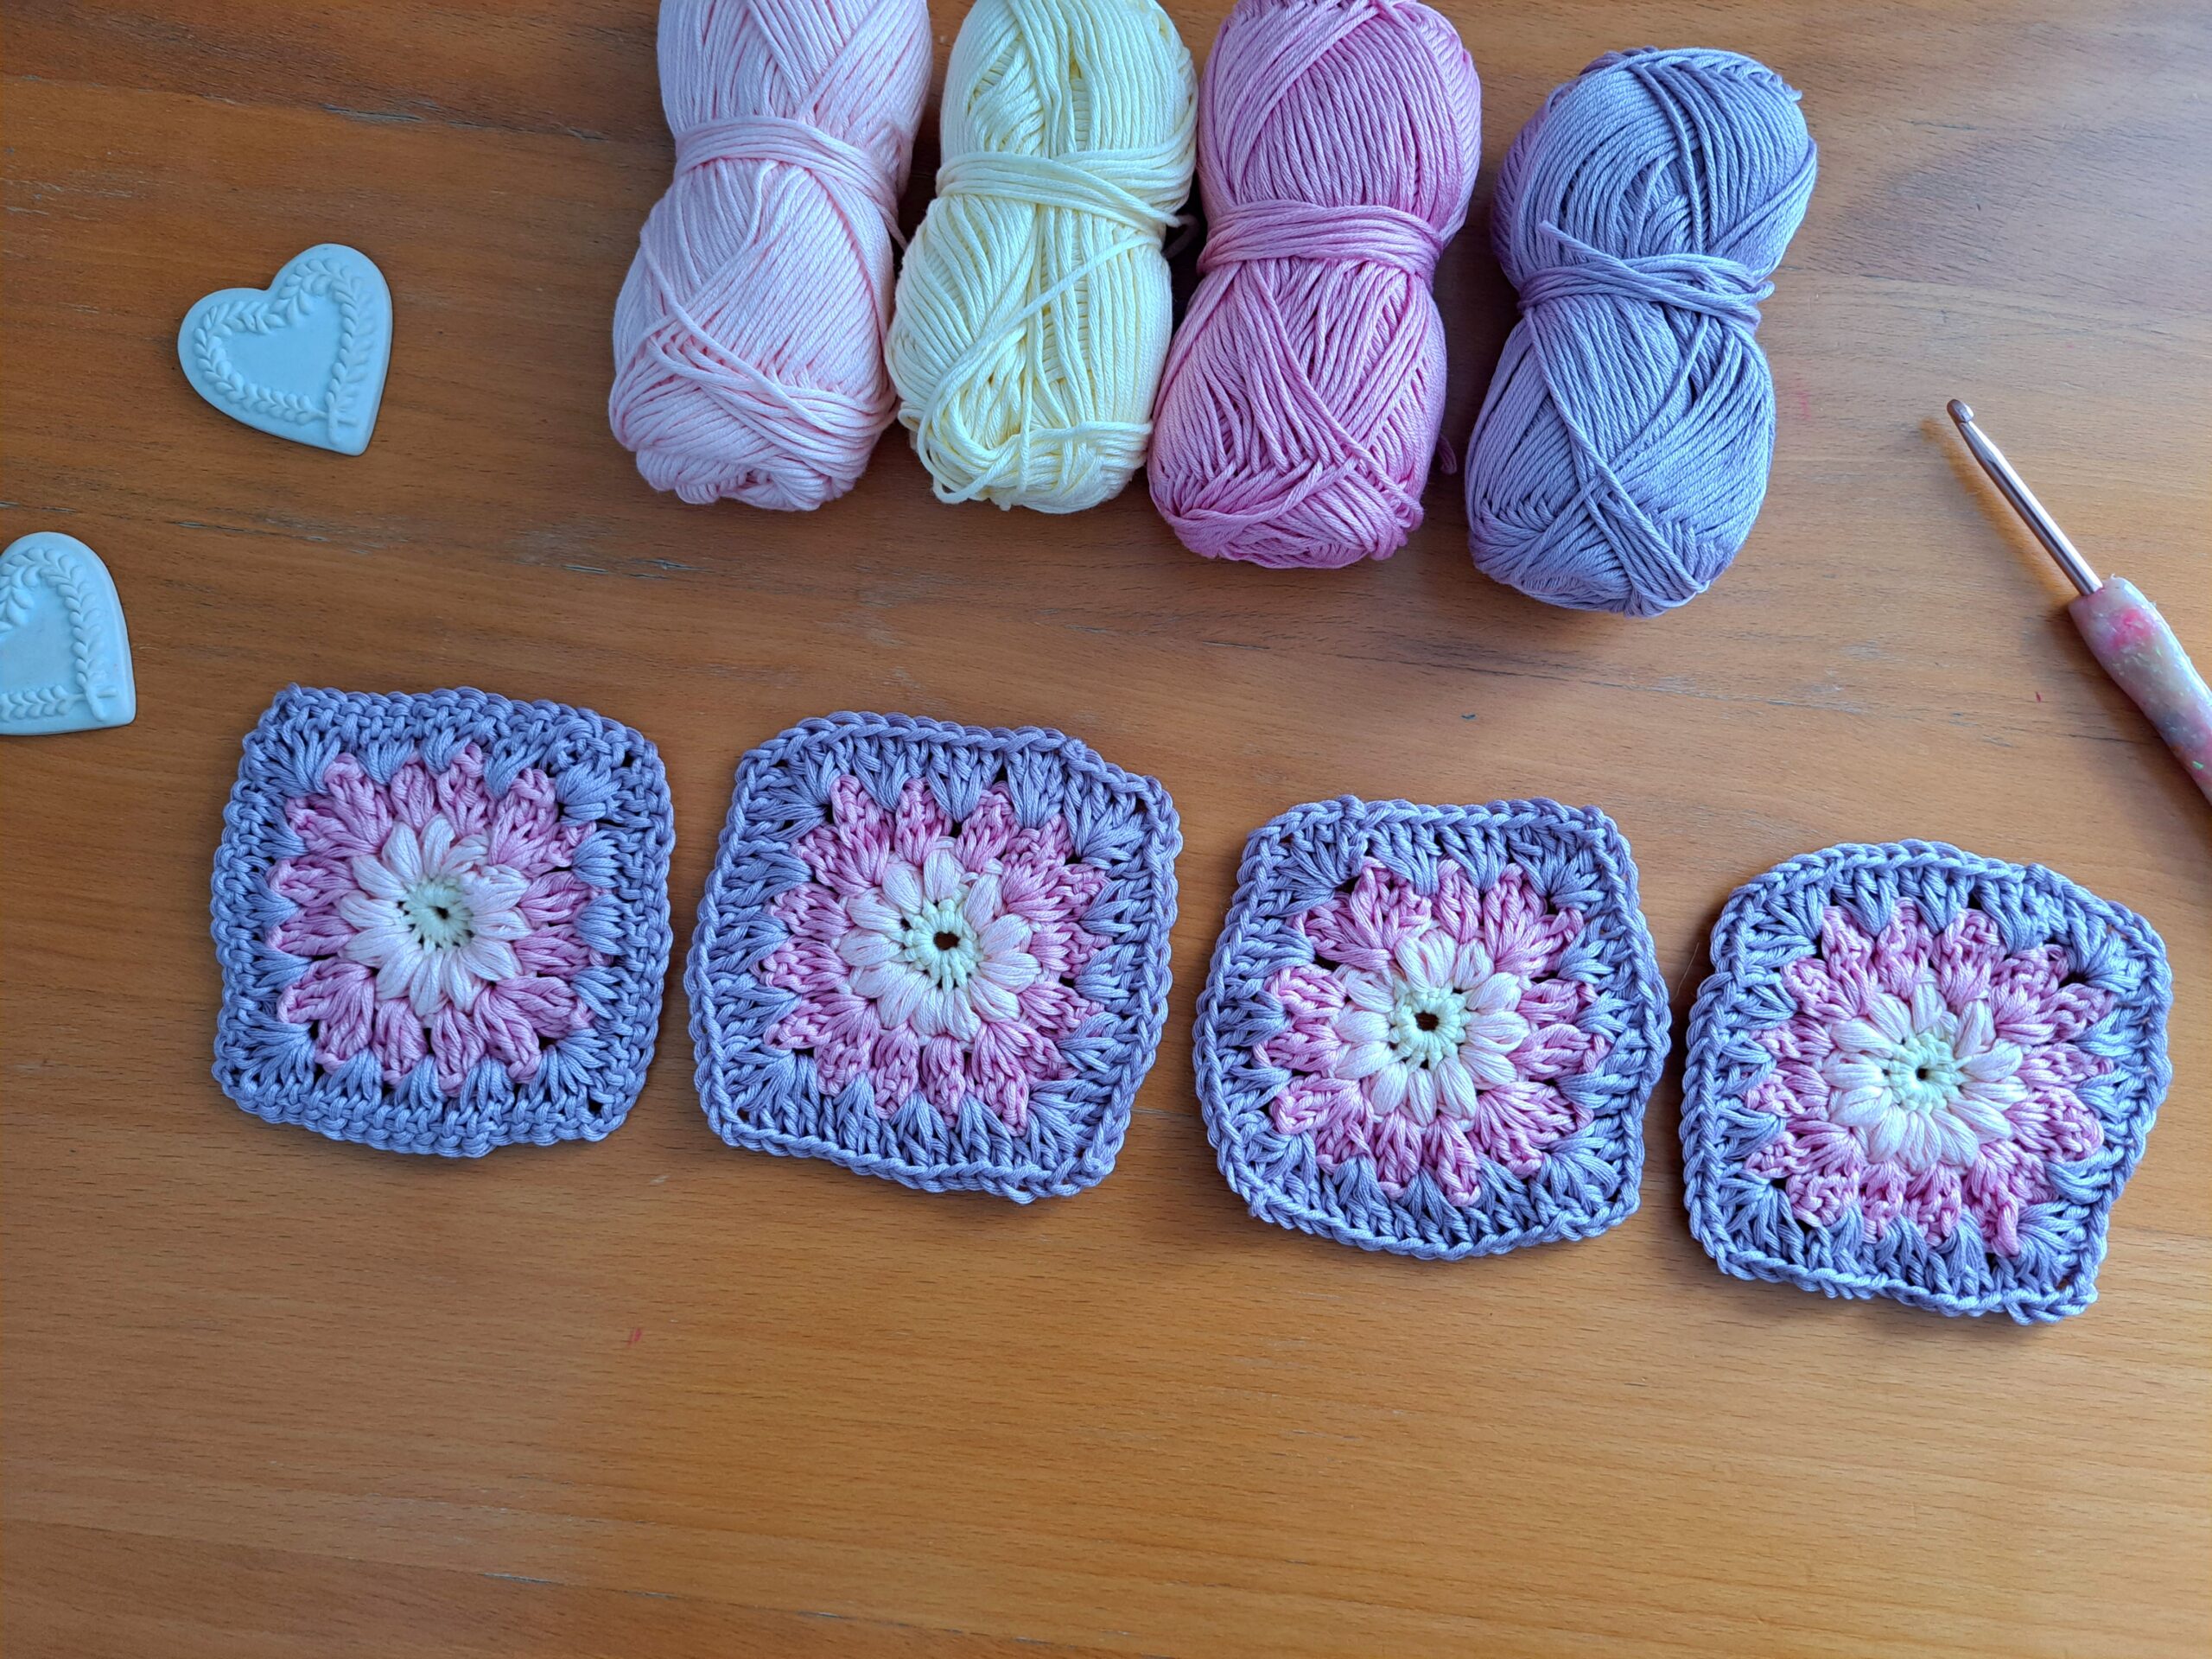
Hi everyone, today I am bringing to you the crochet daisy granny square (free pattern). I love this granny square so much! This new crochet pattern is utterly unique, perfect for so many projects. I know I will be using this daisy granny square a lot going forward, so watch this space.
The video tutorial can be found here:
Crochet Daisy Granny Square Free Pattern: An Original Design
This new granny square design is utterly unique, and I designed this square a few weeks ago. I love this granny square so much already! The Flower Granny Square Headband I made a few weeks ago is crocheted using this very design. I am currently crocheting more squares so as to make a cardigan too (I may also crochet a matching bag!).
Granny squares and granny square projects are definitely a crochet favorite of mine. Patchwork cardigans are so lovely, and they can look so feminine too! This pastel patchwork cardigan is one of my favorite crochet designs to date, and I love it! It is made with lots of different classic granny squares, and it looks so dreamy and feminine. Let me know in the comments if you have made this.
Granny squares are perfect for lots of different projects, and I love how versatile and amazing they can be.
Crochet Daisy Granny Square Free Pattern: A Feminine Design
As I said prior, granny squares are perfect and so beautiful. You can crochet many original and beautiful designs using a simple granny square.
My original classic granny square design can be found on my blog. My patterns are easy to follow, and you can crochet granny squares in a myriad of different yarns and colors. This is what makes granny squares so special!
If you are looking for a slightly different granny square design don’t forget to check out my Sunburst Granny Square design. I love this so much too. Another beautiful and versatile square you can crochet is this unique flower granny square I designed last year.
With this unique flower granny square that I made last year, I crocheted a lot of different projects, including this lovely tote bag. I also made a matching headband, which I love so much.
I hope you enjoy this new crochet daisy granny square design. This is going to be one of my go to patterns for future projects.
Connecting with you
I would like to take a moment to thank every single one of you, for supporting me and my crochet journey. Indeed, I absolutely am so touched by all your messages, comments, and every person who has become a patron of my work through Patreon. Thank you!
I love connecting with my Crochet Community through my blog and Social Media. You can find me on Youtube, Instagram, and Pinterest. I would love to connect with you on these platforms.
You can also join my private Facebook group to connect.
Subscribe to our bi weekly newsletter so that you never miss a stitch!
Crochet Daisy Granny Square: The Pattern
You can purchase the ad free, large print, PDF pattern from my Etsy store here: Crochet Daisy Granny Square PDF Pattern
You can purchase the ad free, large print, PDF pattern from my Ravelry store here: Crochet Daisy Granny Square PDF Pattern
Level: Easy +
Gauge
4”x4” (10 cm x 10 cm)
Size of each Flower Granny Square
4”x4” (10 cm x 10 cm)
Notes
I will be using US terms (British terms in brackets).
Materials
– 1 skein each of Drops Muskat yarn in shades:
07 Light Yellow
10 Light Peach
06 Desert Rose
92 Sweet Orchid
– A 4 mm crochet hook
– A pair of scissors
– A tapestry needle
Abbreviations
Ch: chain
Sl st: slip stitch
St: stitch
Sk: skip
SC: Single Crochet (UK Double Crochet)
DC: Double Crochet (UK Treble Crochet)
EOR: End of round
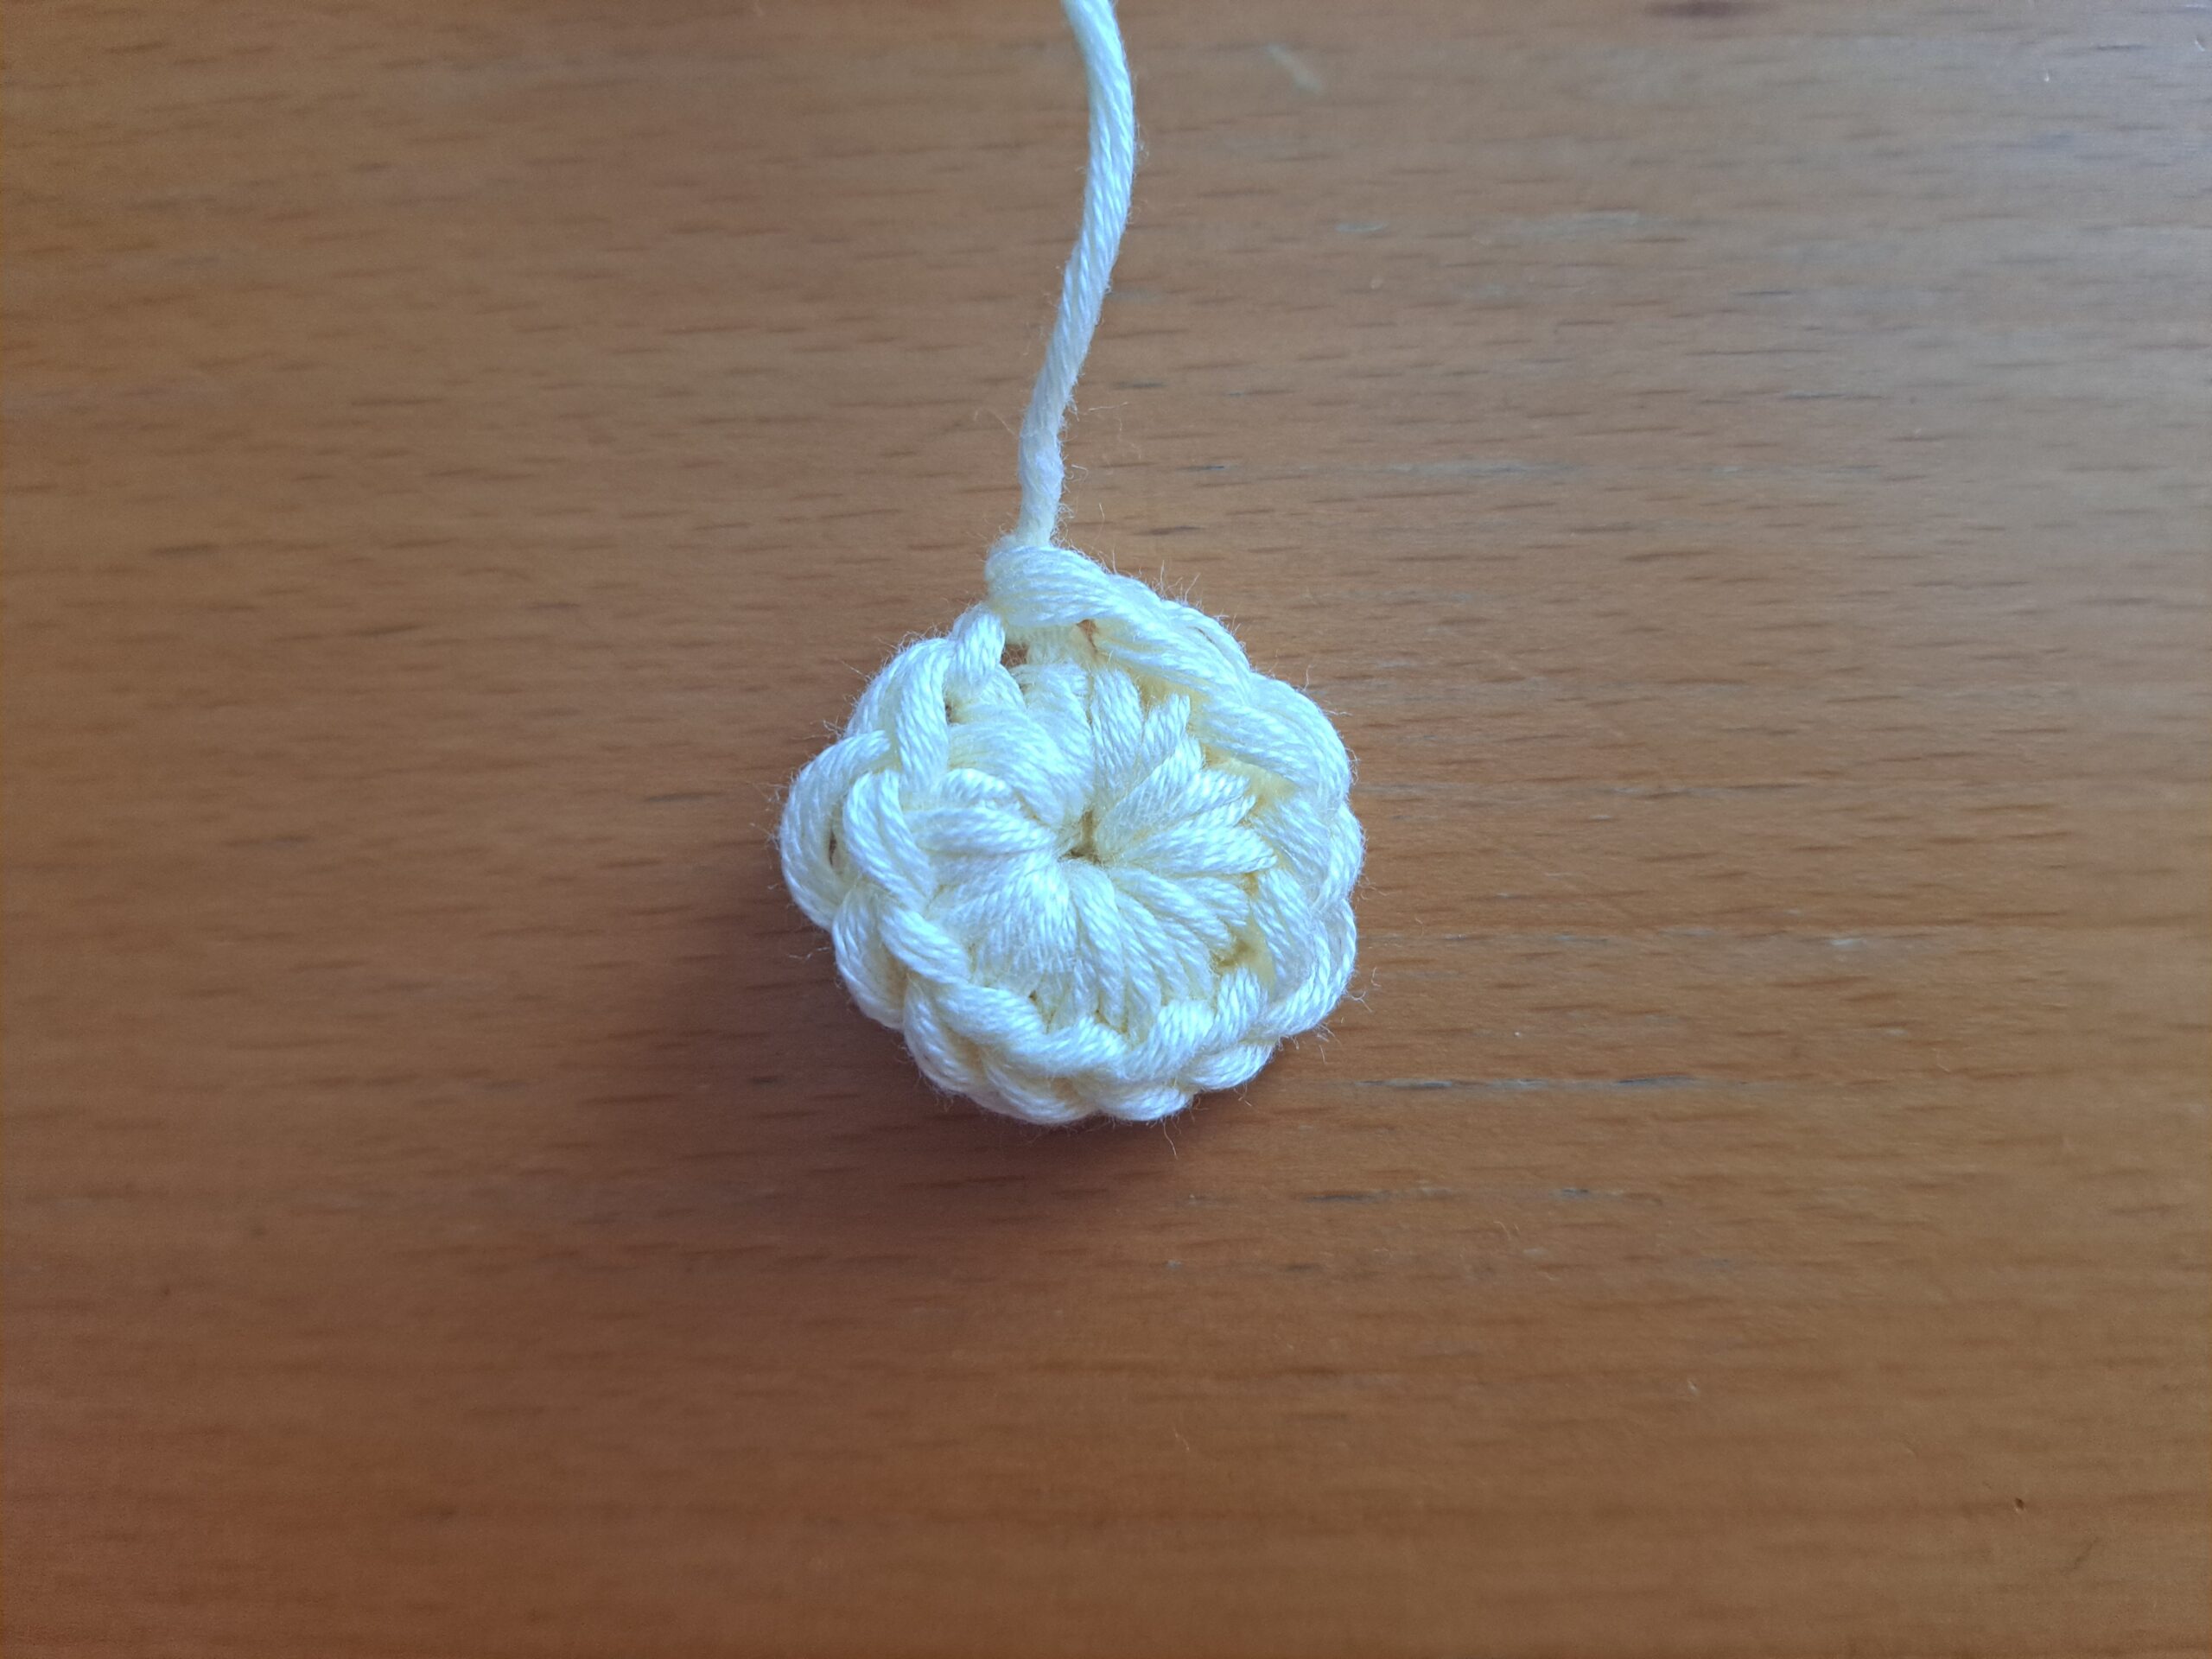
Pattern begins here
With shade 07 Light Yellow, make a slip knot.
Ch 4, sl st to 1st chain to create a circle into which we will be working.
Note: you can use the magic circle to begin if you prefer.
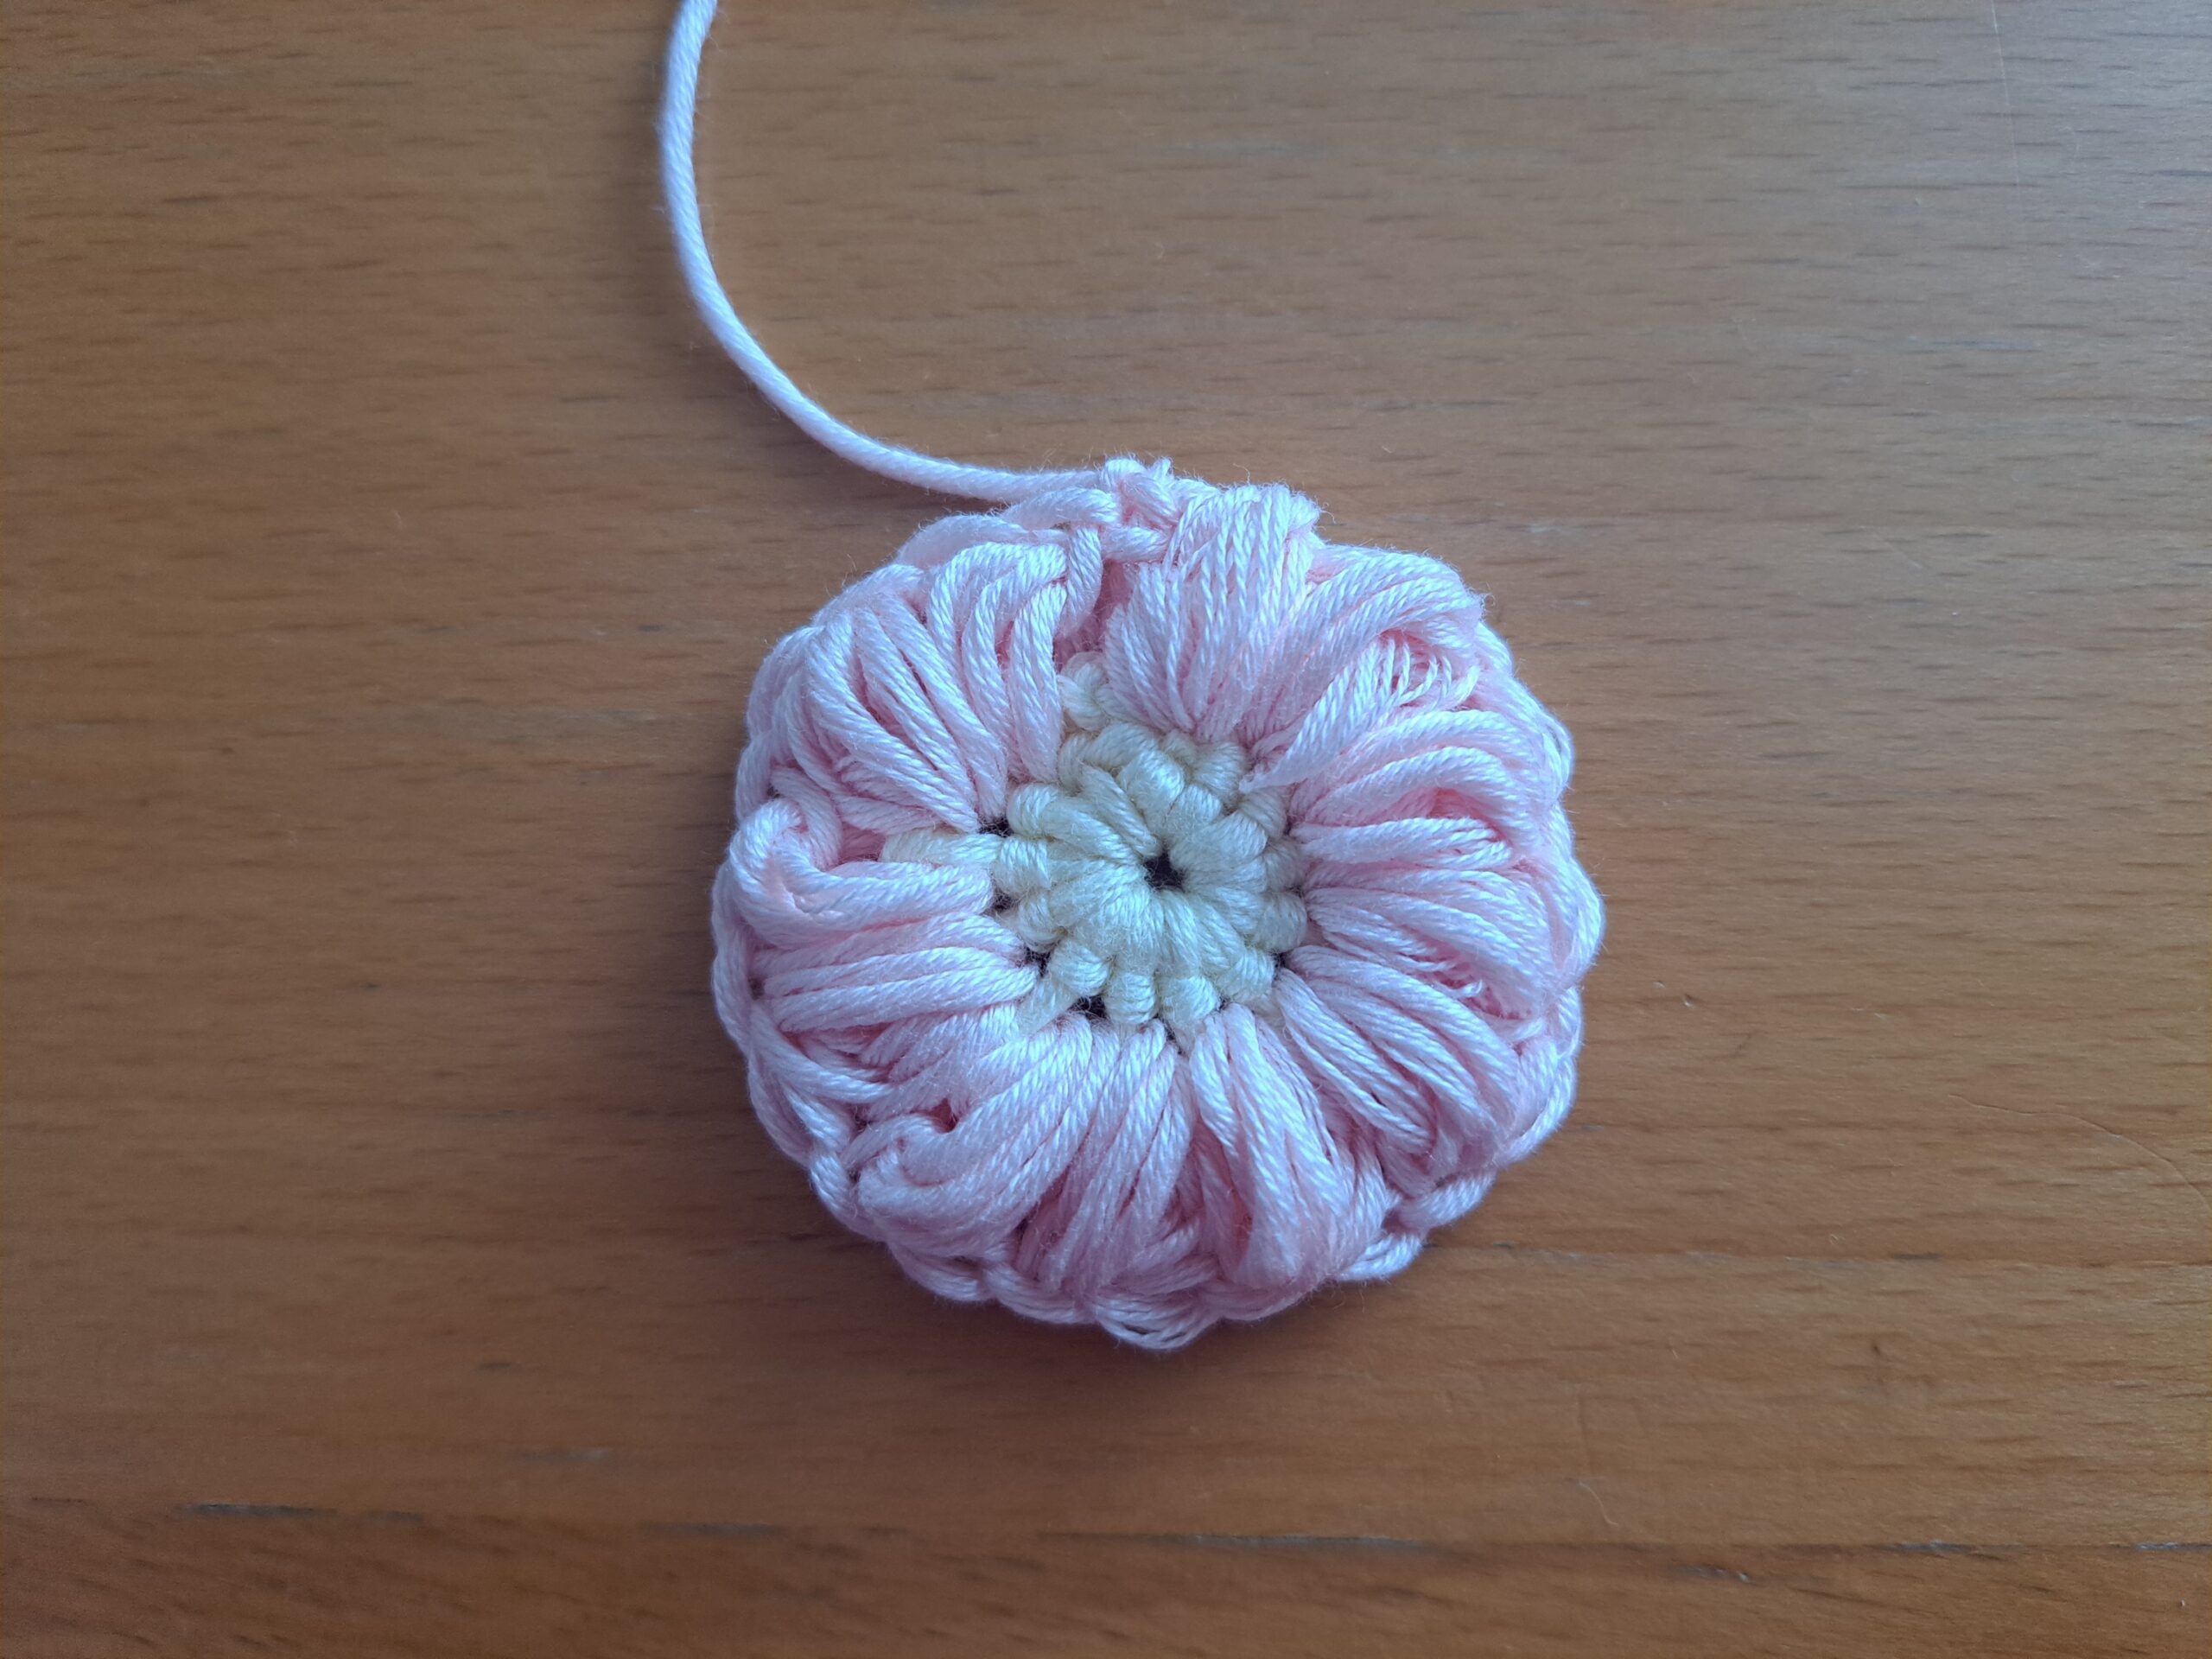
1: Ch 1 (does not count as a stitch), place 12 SC inside the circle you made. Slip stitch to the first SC to close off round.
Note: Make sure you fasten in your loose end under your stitches, so that you can pull this loose end to tighten original circle made of 4 chains or magic circle.
Fasten off color Light Yellow.
2: Attach color 10 Light Peach to any stitch.
Ch 1 (does not count as stitch throughout), * yarn over, go back into stitch, pull up a loop, and pull yarn up gently to create a “height” to the stitch * 4 times. Now yarn over and go through all loops on hook to create petal. Ch 1. (=1st petal)
Now to create next petal throughout round (there will be 16 petals total):
Yarn over, go directly into next stitch, pull up a loop and pull yarn up gently to create a “height” to the stitch 4 times. Now yarn over and go through all loops on hook to create a petal, ch 1.
Repeat this process into each and every stitch from previous round (=12 petals).
Fasten off shade 10 Light Peach.
Round 3
Fasten on shade 06 Desert Rose to any chain space from round 2.
Note: We will be placing this round’s stitches in the spaces in between each petal from previous round.
Ch 3 (=DC), place 2 DC, ch 2, 3 DC into chain space from previous round (=1st corner); [skip next petal from previous round and go directly into next space with 3 DC together] twice.
*Sk next petal from previous round, go directly into next space with 3 DC, ch 2, 3 DC (=corner); [sk next petal from previous round and go directly into next ch sp with 3 DC] twice*; repeat from * to * another two times.
Sl st to first ch 3 to close off round.
Fasten off.
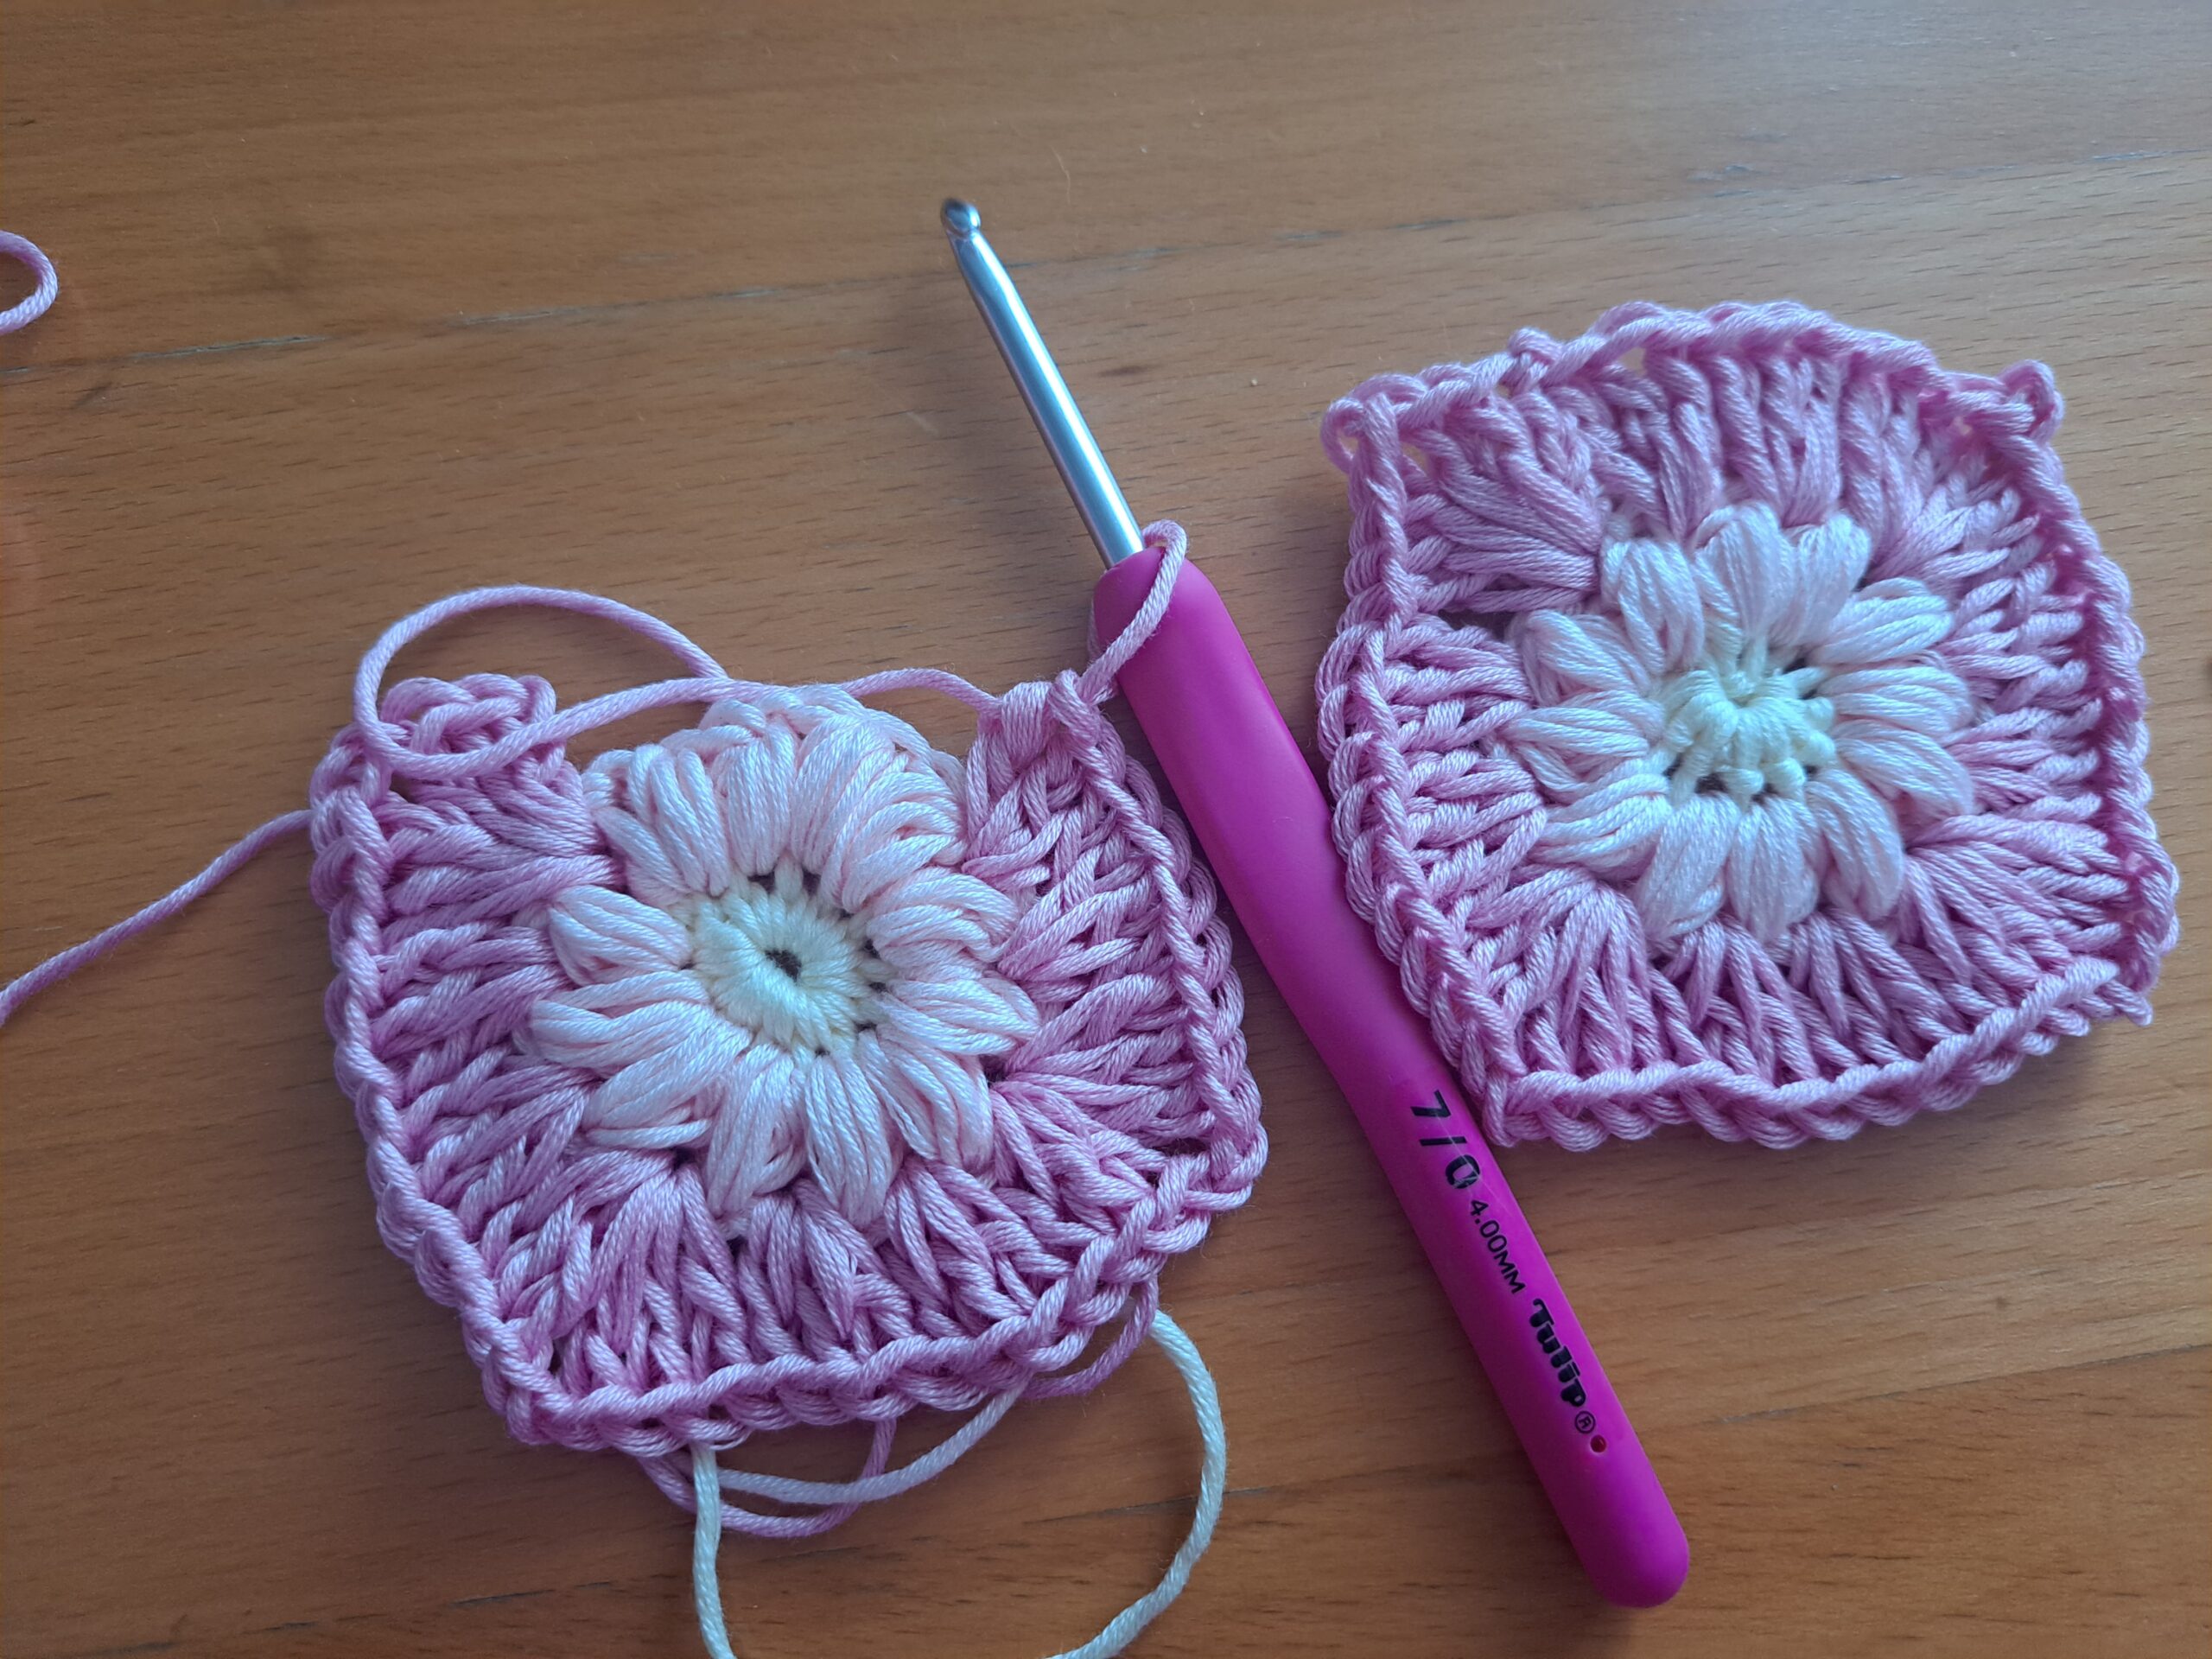
Round 4
Attach color Sweet Orchid in the space where we fastened off color Desert Rose.
Note: We will be placing this round’s stitches in the spaces in between each space from previous round.
Ch 3 (=DC), place 2 DC into same space; go directly into next space from previous round and place 3 DC 2 times; 3 DC, 2 ch, 3 DC into next space (=corner);
* Now place 3 DC into next space 3 times, then 2 DC, ch 3, 2 DC (=corner) * 3 times; sl st to first ch 3 to close off this round.
Fasten off, tidy up all loose ends.


2 Comments
Karen Adams
I really enjoy all of your patterns. Thank you.karen.
Selina Veronique
Hi Karen! Thank you so much, I’m so pleased you like my patterns!