Crochet Lilly Cottagecore Bandana Free Pattern
Crochet Lilly Cottagecore Bandana Free Pattern
Hi everyone, this week I am bringing to you the crochet Lilly Cottagecore bandana free pattern. This project is so lovely, perfect for Spring and Summer. I love how feminine this bandana looks. This new design is inspired by the Cottagecore aesthetic, and is very easy to crochet.
The video tutorial can be found here:
Crochet Lilly Cottagecore Bandana Free Pattern: The Inspiration
This new crochet bandana design is inspired by the Spring. Indeed, I called this bandana “The Lilly Bandana” as I was inspired by the fact that today is the 1st of May, which in France is the feast of the lily of the valley flower. I love the “1er Mai”, also called “Fete du Muguet”.
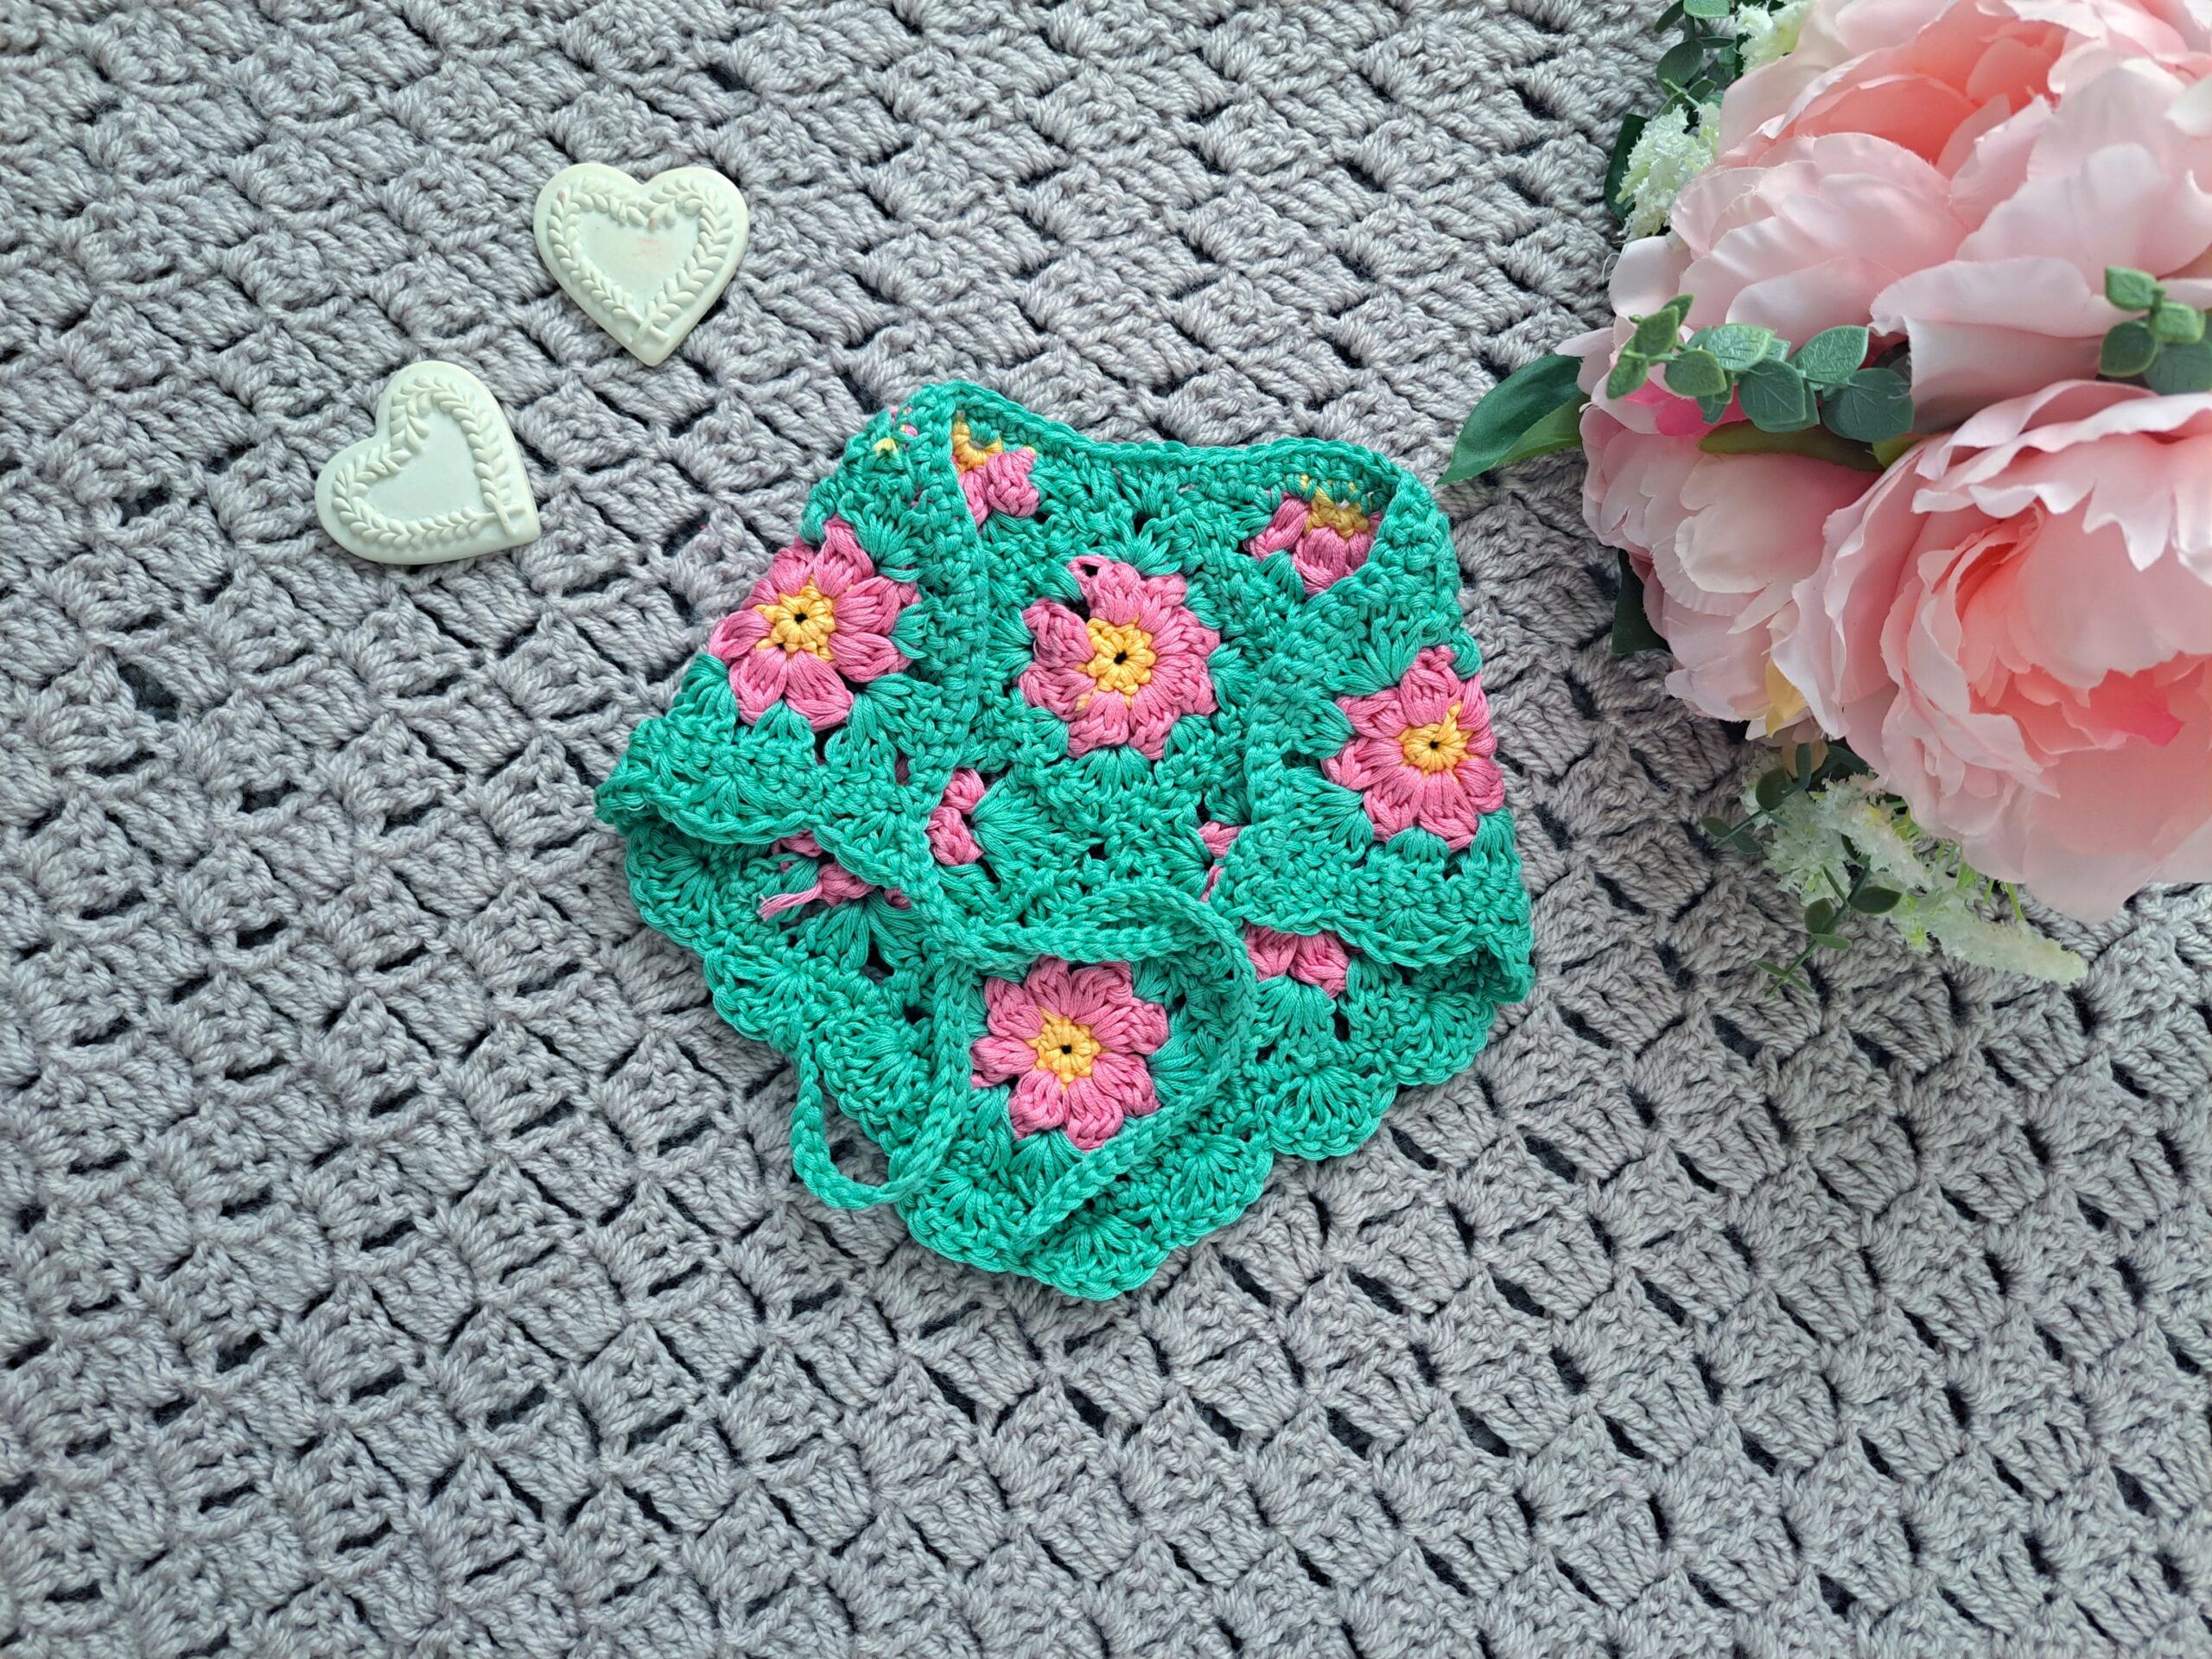
This project is also Cottagecore inspired. It features little flower squares that are sewed together to create the triangle shape of this bandana. In the past I have designed different bandanas, and I do love these! They just add such a lovely feminine vibe to any outfit. And bandanas really can looks very soft and dreamy, perfect for the Cottagecore aesthetic.
This lovely and feminine bandana I crocheted last year is also perfect in all seasons. Crocheted with Lion Brand Feels Like Butta yarn, this Cottage inspired bandana features a delicate shell stitch. This two toned bandana is also a great project for all levels of crochet, and it is very easy to make too.
Crochet Lilly Cottagecore Bandana Free Pattern: Cotton Yarn
I used one of my favorite yarns for this pattern, which is Drops Muskat yarn. This yarn is so soft and it is perfect for so many reasons. In the Spring and Summer cotton projects are so lovely, perfect for the warmer months.
Drops Muskat is 100% mercerized cotton and is of a DK/Light 3 weight yarn. This yarn is very easy to use, and it is available in many different colors. So many different types of projects can be crocheted with this yarn.
The Constance Vintage Shawl is crocheted with this yarn, and it is very soft and lovely to look at too. The Brigitte Headband, inspired by the 1960s, is also a great example of cotton yarn used for this Vintage project. Lately, I was really pleased to release this puff flower purse which is also made with cotton yarn.
I hope you enjoy this new crochet bandana pattern. It was so much fun to make! I love flower granny squares, and this is a perfect way to showcase these squares.
Connecting with you
I would like to take a moment to thank every single one of you, for supporting me and my crochet journey. Indeed, I absolutely am so touched by all your messages, comments, and every person who has become a patron of my work through Patreon. Thank you!
I love connecting with my Crochet Community through my blog and Social Media. You can find me on Youtube, Instagram, and Pinterest. I would love to connect with you on these platforms.
You can also join my private Facebook group to connect.
Subscribe to our bi weekly newsletter so that you never miss a stitch!
Crochet Lilly Cottagecore Bandana: The Pattern
You can purchase the ad free, large print, PDF pattern from my Etsy store here: Crochet Granny Square Bandana Pattern
You can purchase the ad free, large print, PDF pattern from my Ravelry store here: Crochet Flower Granny Square Bandana
Level: Easy +
Notes:
I will be using US terms (British terms in brackets).
Gauge:
Gauge is not crucial to complete this project.
Size of one granny square (approximately):
3”x3” (7 cm x 7 cm)
Size of finished bandanna (including shell stitch edging):
8”x12” (20,5 cm x 30,5 cm)
You will need:
– 1 skein of Drops Muskat in shade 03 Mint Green
– 1 skein of Drops Muskat in shade 30 Vanilla Yellow
– 1 skein of Drops Muskat in shade 29 Pink Panther
– A 4 mm crochet hook
– A pair of scissors
– A tapestry needle
– A stitch marker (optional)
Abbreviations:
Ch: chain
Sl st: slip stitch
St: Stitch
Sk: skip
DC: Double Crochet (UK Treble)
SC: Single Crochet (UK Double)
EOR: End of row/end of round
Notes concerning this pattern:
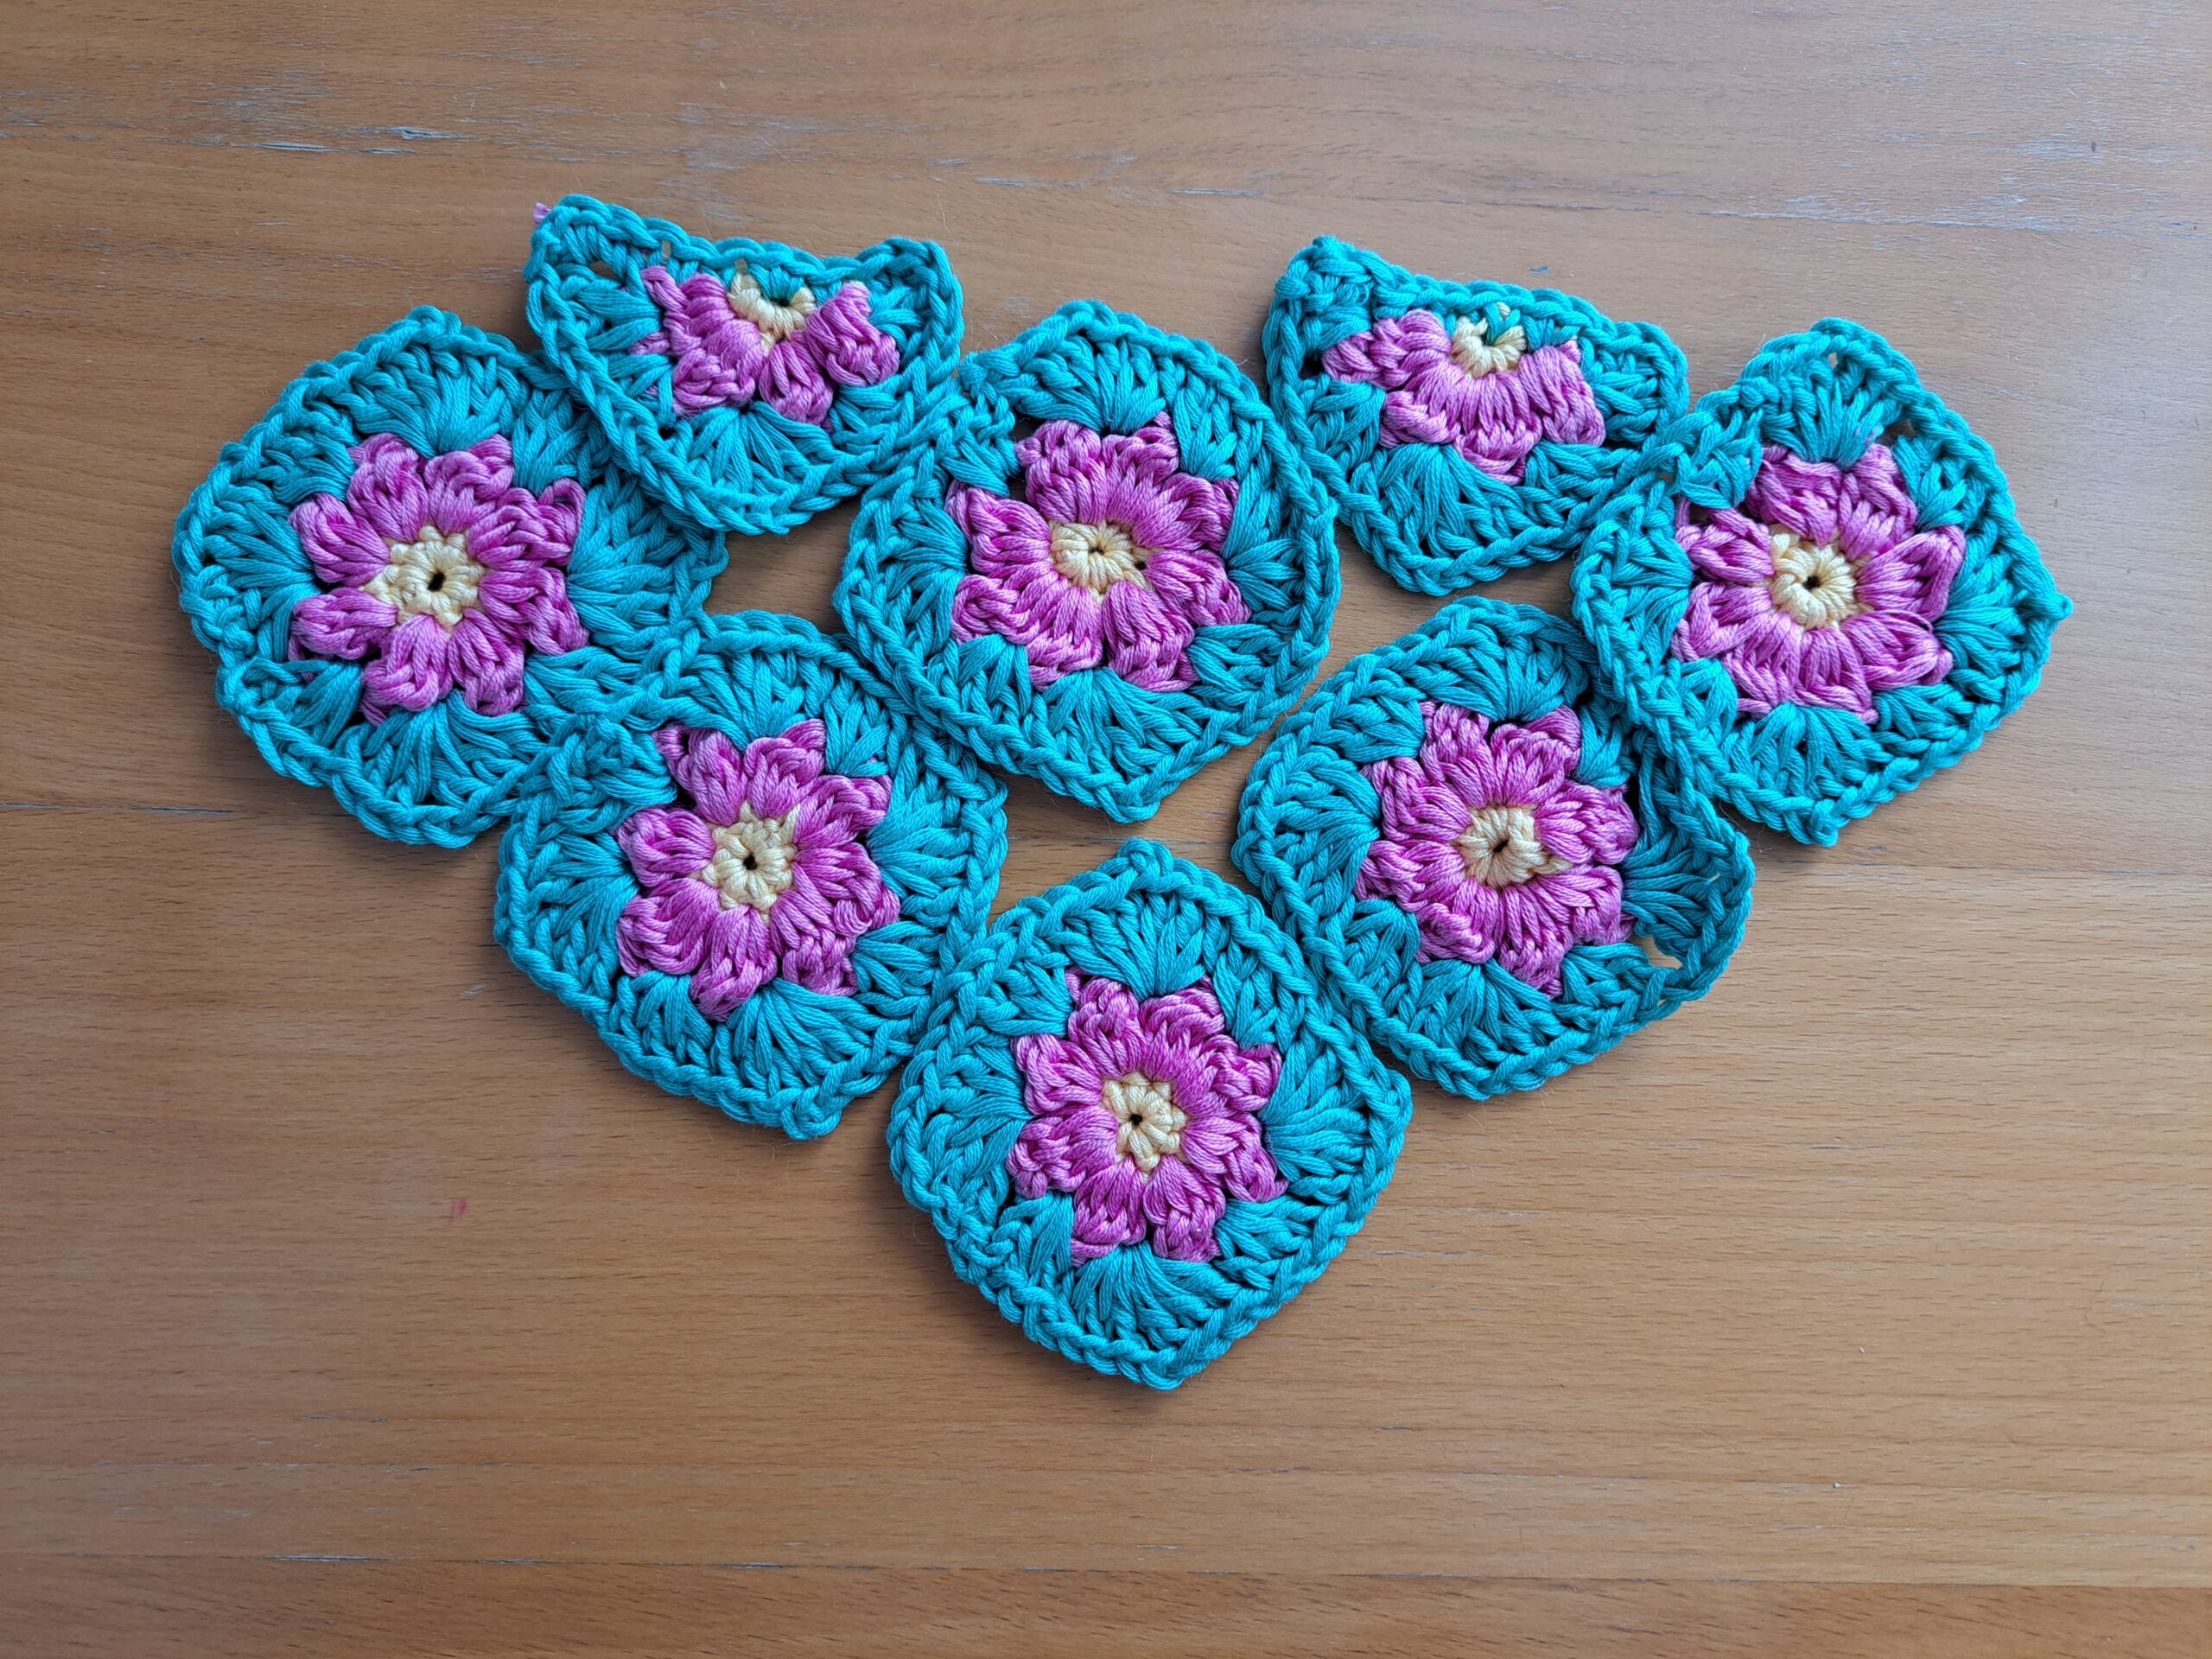
For this bandana, you will be crocheting 6 individual flower granny squares and 2 flower granny triangles. Once you have all your elements crocheted, you will need to sew these together as explained below to create bandana shape.
Once this is done, the two ties and shell stitch edging will be added.
Begin pattern here:
Make 6 granny squares (3 colors):
Round 1: With yellow yarn, ch 4. Sl st into 1st stitch to form a ring.
Place 8 SC directly into the ring; sl st to the 1st SC to close off round.
Fasten off yellow yarn, attach pink yarn to any SC.
Round 2: Ch 3 (=DC), turn your work, place 2 DC into same SC; place 3 DC into next SC into every stitch until eor (=8 petals).
Sl st to the first ch 3 to close off round.
Fasten off pink yarn; attach green yarn in between any pink petal from previous round (=3DC from previous round).
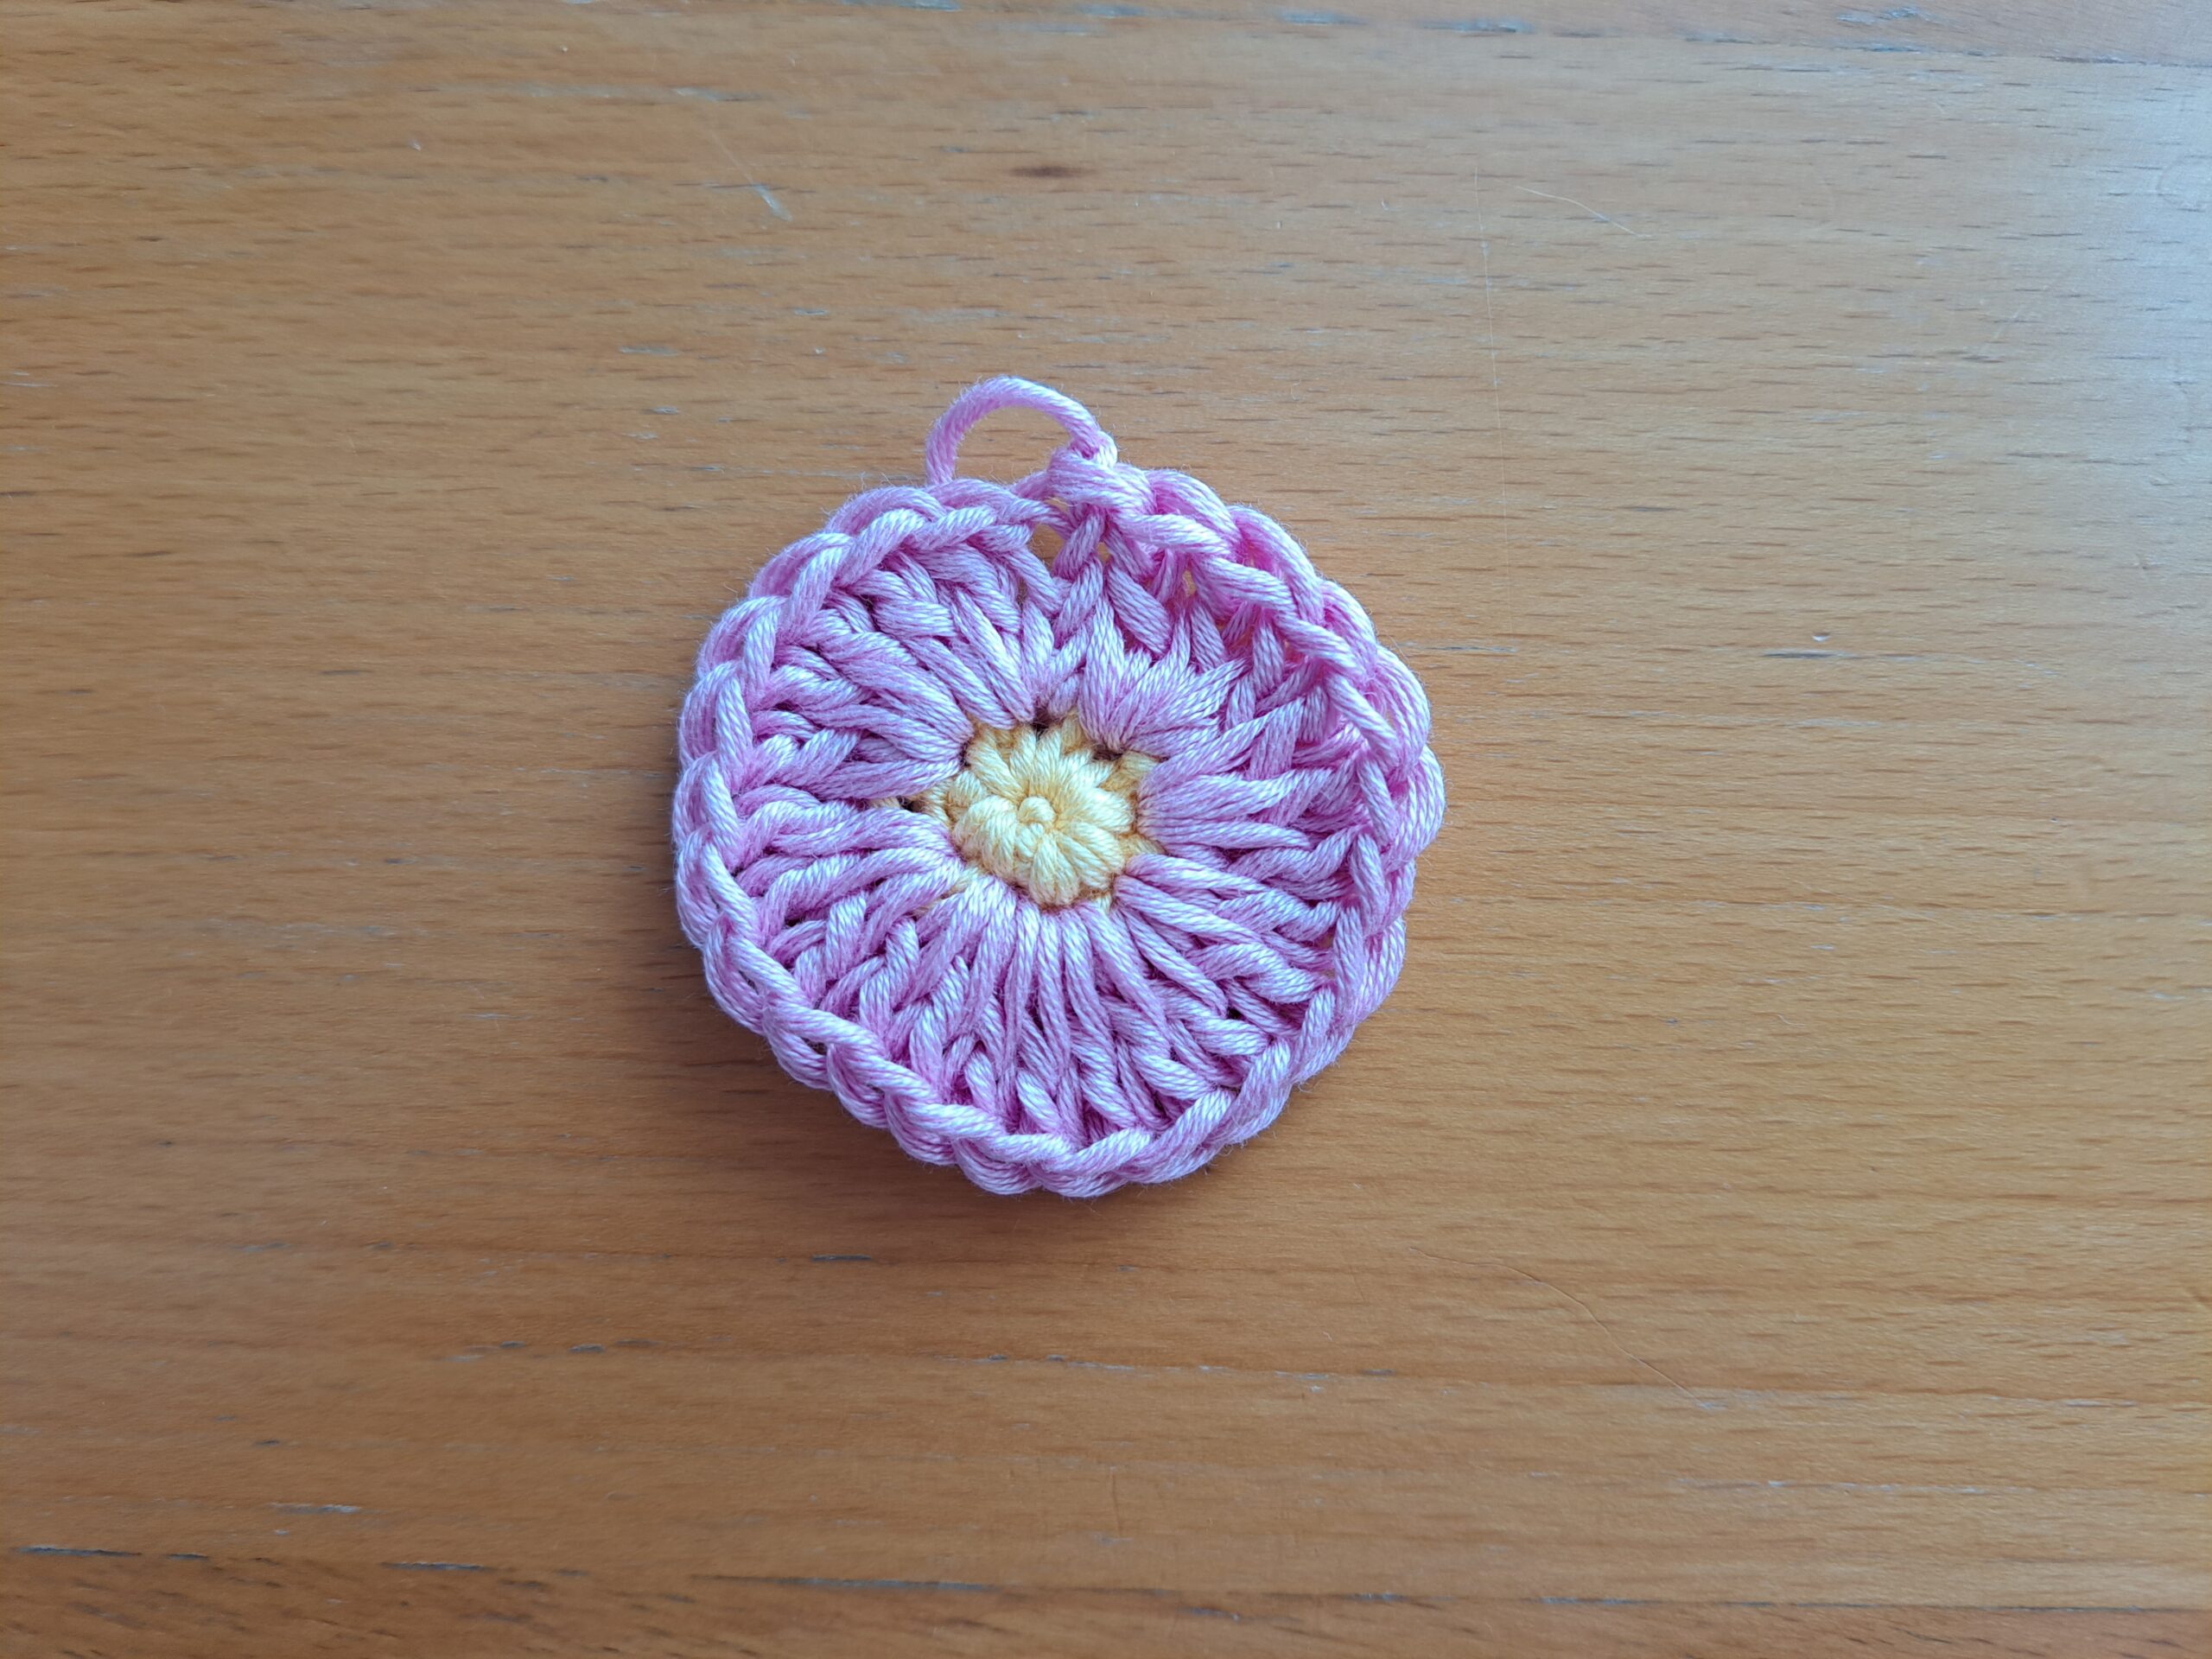
Round 3: Ch 3 (=DC), place 2 DC into same space; * go directly into next space and place 3 DC, ch 2, 3 DC; go into next space and place 3 DC * 3 times; go directly into next space and place 3 DC.
Slip stitch to first ch 3 to close off round.
Fasten off green yarn.
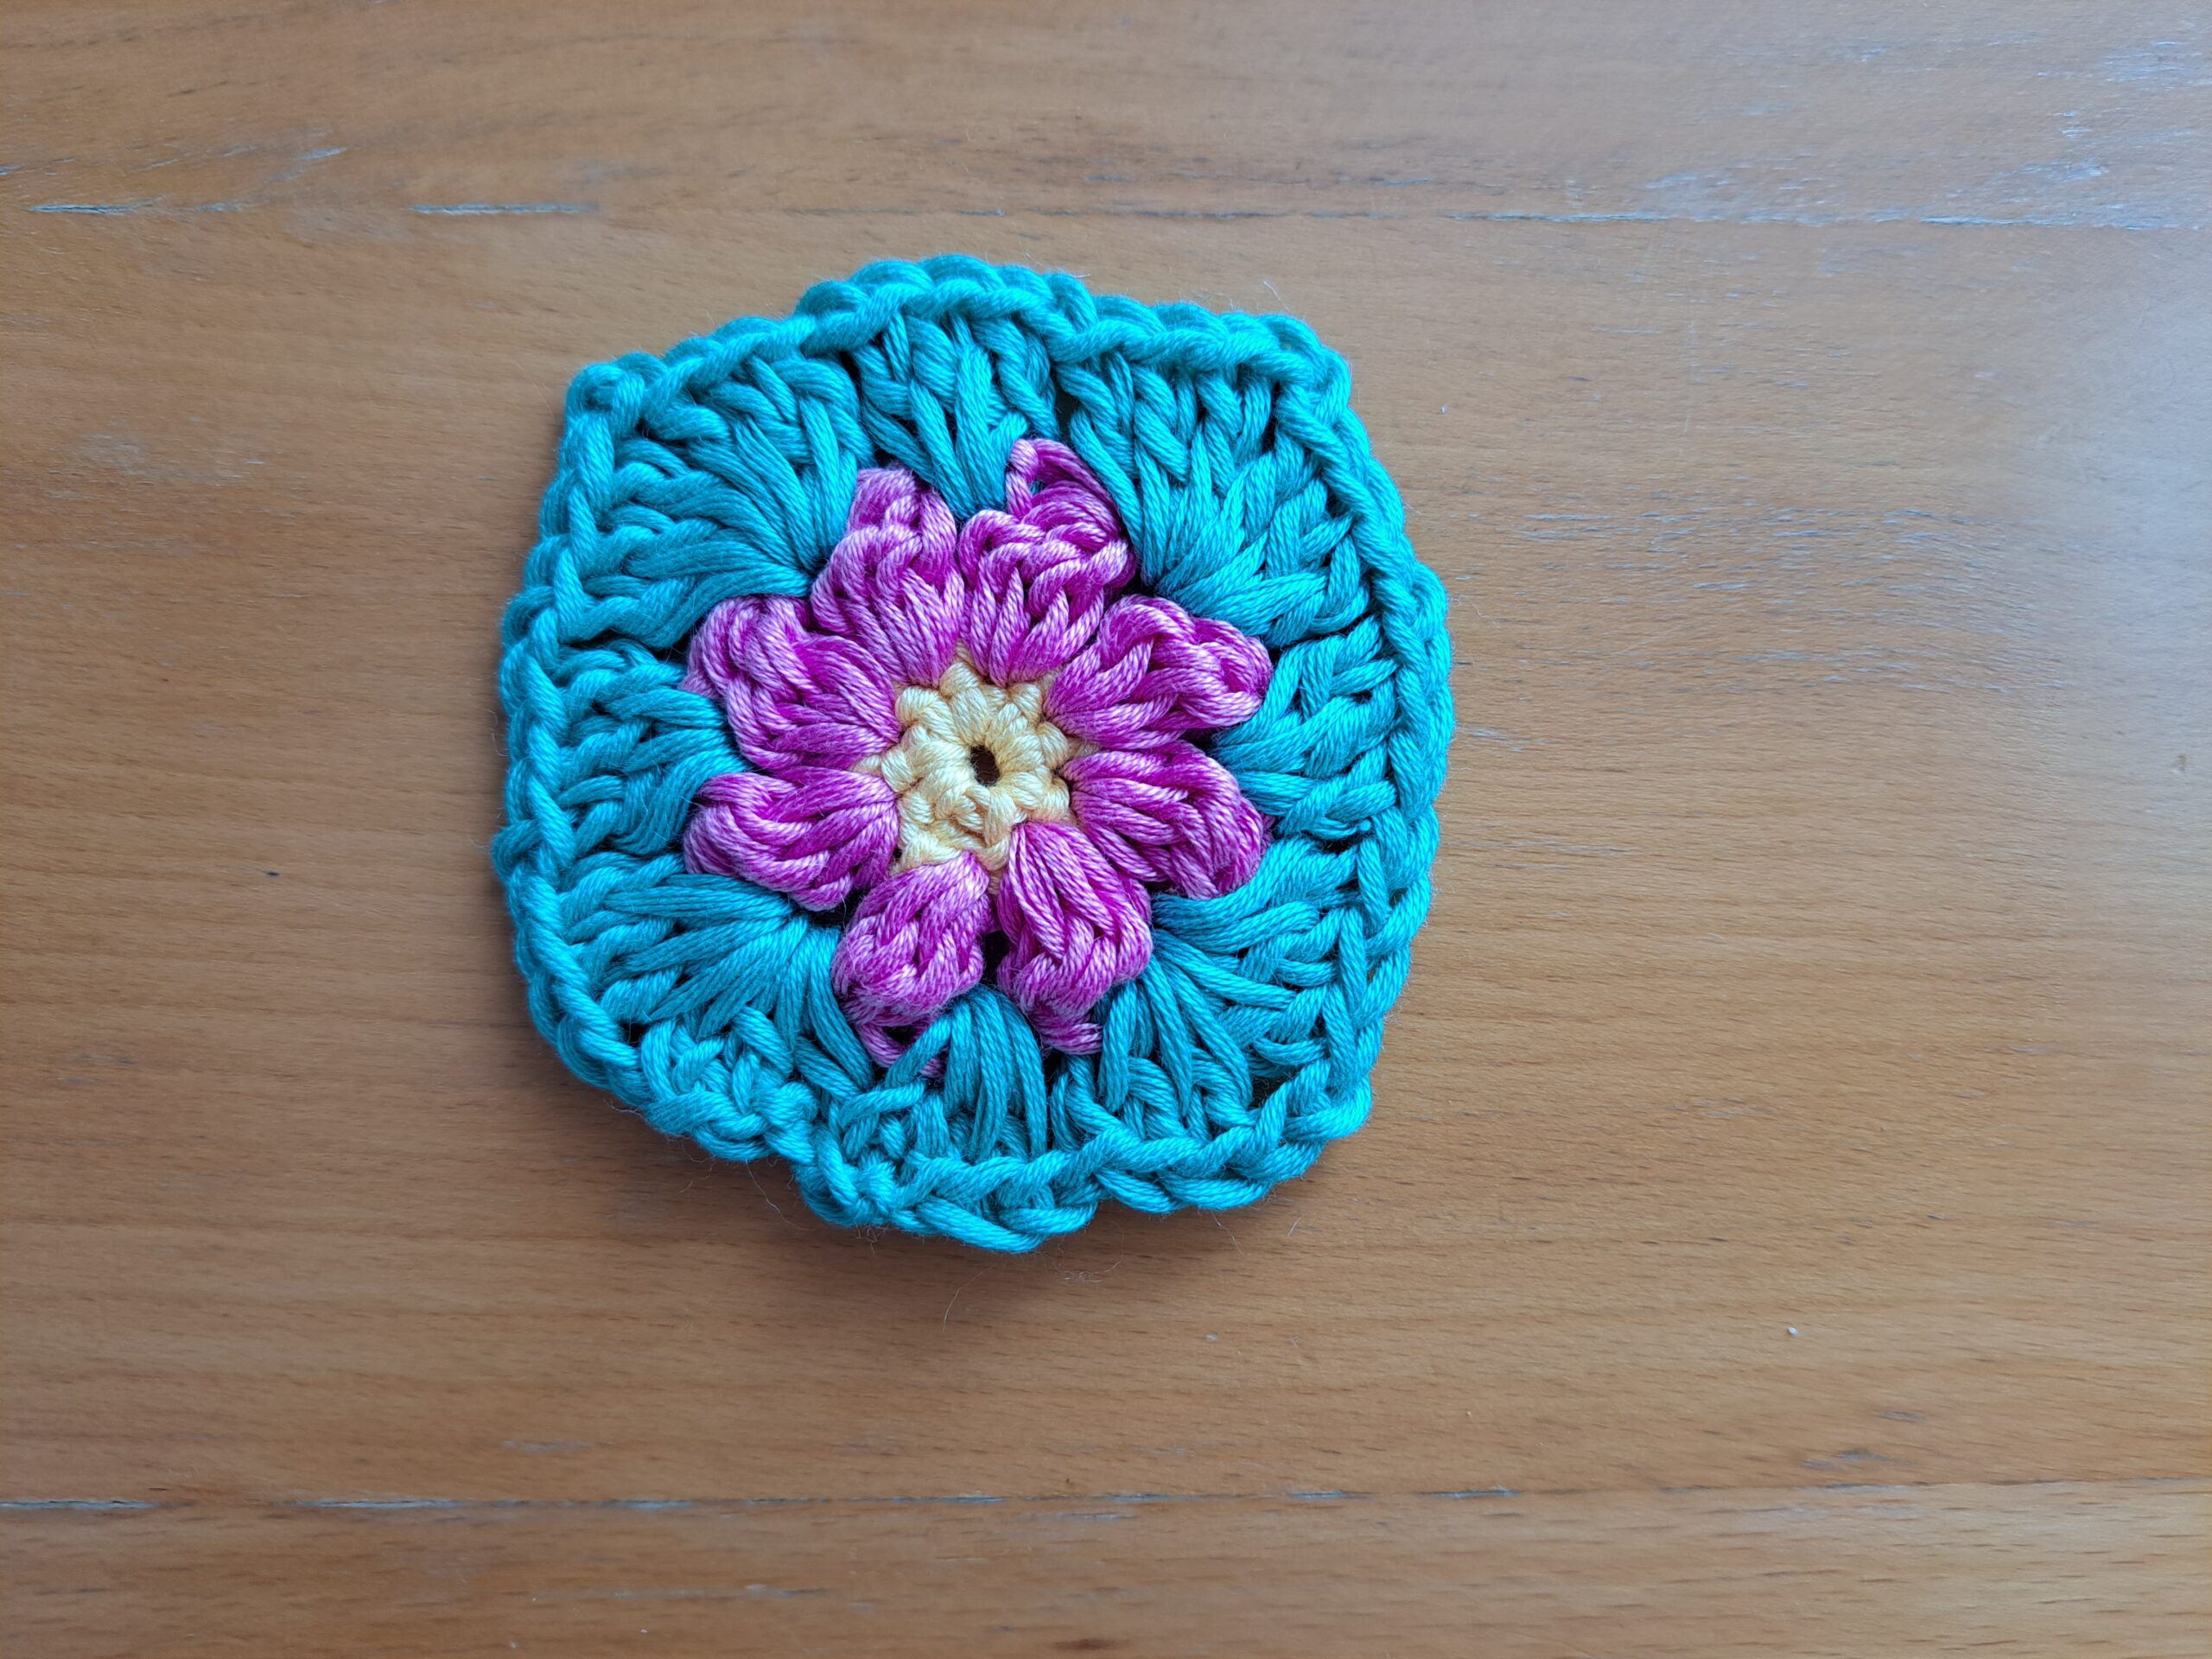
Make 2 flower granny triangles (3 colors):
Ch 4, sl st through 1st chain to form a ring.
Round 1: With yellow yarn, ch 4, sl st to 1st chain sp to create a ring.
Place 4 SC directly into the ring; sl st to the 1st SC to close off round.
Fasten off yellow yarn, attach pink yarn to any SC.
Round 2: Ch 3 (=DC), turn your work, place 2 DC into same SC; place 3 DC into next SC into every stitch until eor (=4 petals).
Sl st to the first ch 3 to close off round.
Fasten off pink yarn; attach green yarn in between the 1st and 2nd DCs on either side of the project.
Round 3: Ch 3 (=DC), place 2 DC into same space; * go directly into next space and place 3 DC, go directly into next space and place 3 DC ch 2, 3 DC; go into next space and place 3 DC; to finish off this triangle, go directly between the 2nd before last and last DCs and place 3 DCs and place 3 DCs.
Fasten off green yarn.
Sew your 6 granny squares and 2 triangles together to form bandanna:
Place your 6 granny squares and 2 triangles together like so to form a bandanna (as seen in picture).
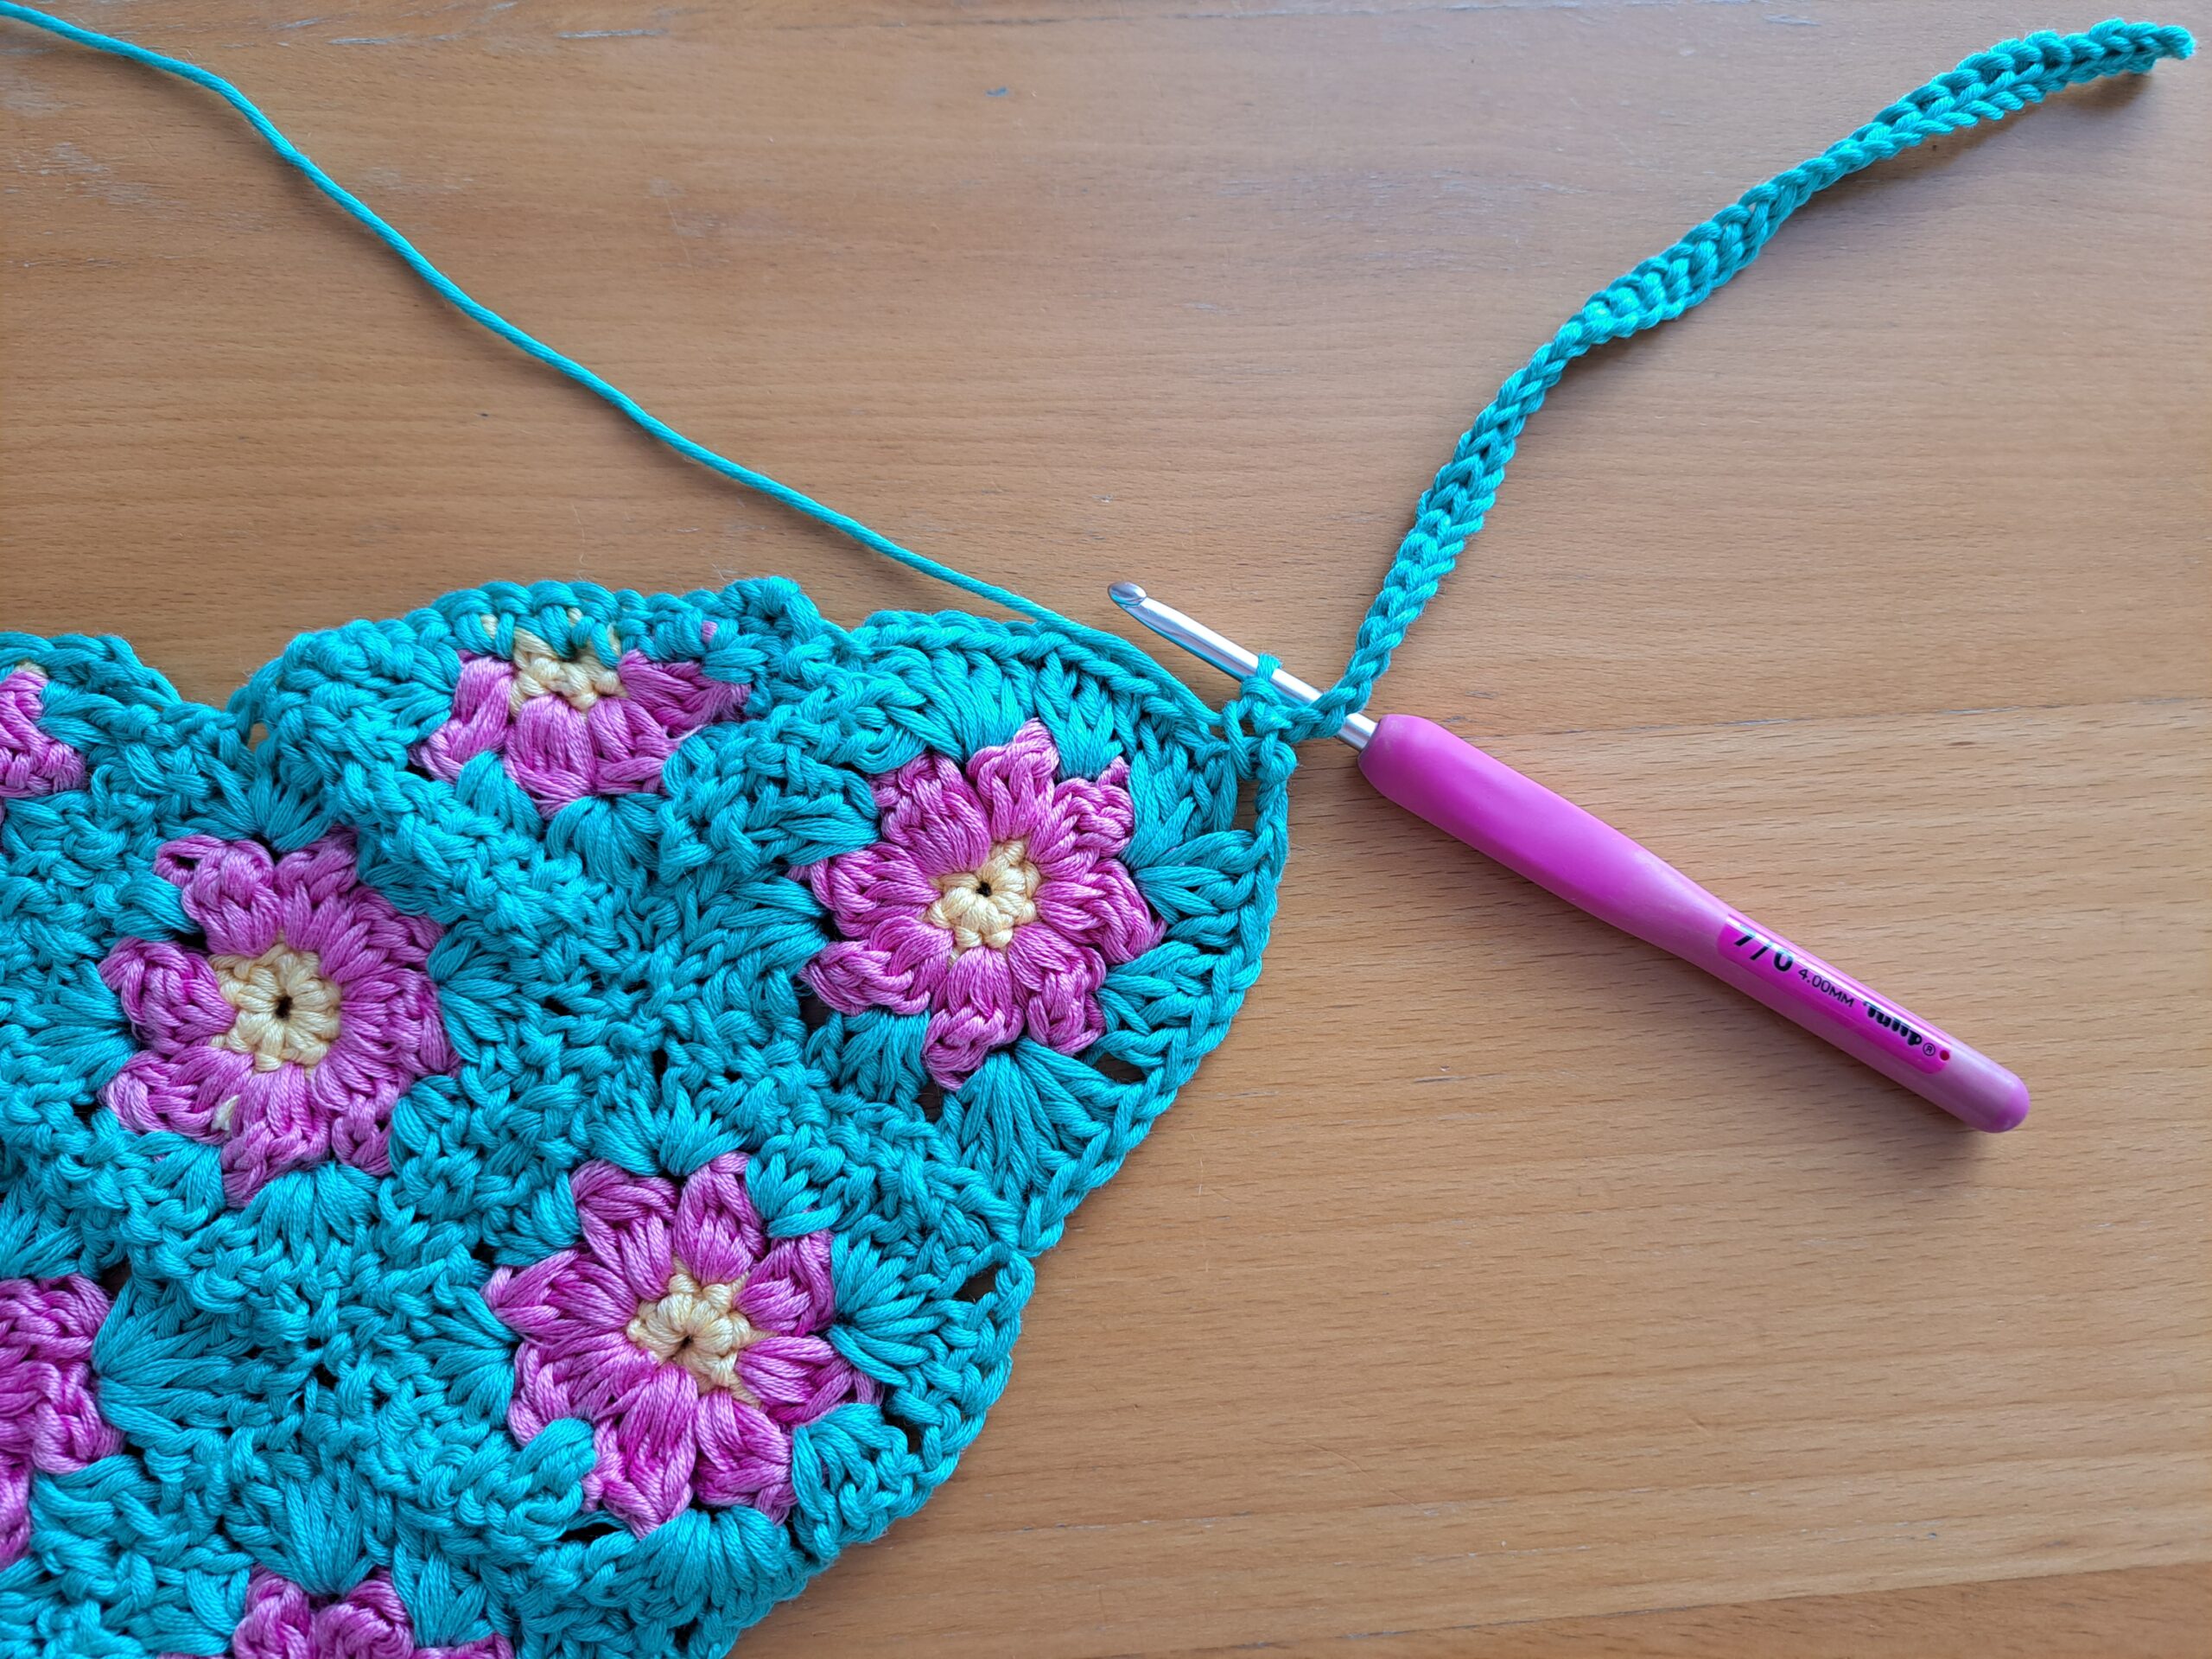
Create ties and shell stitch edging:
Once you have sewed all your elements together, you can start crocheting your border and ties.
You will be creating your ties as we create the border (the process is integrated).
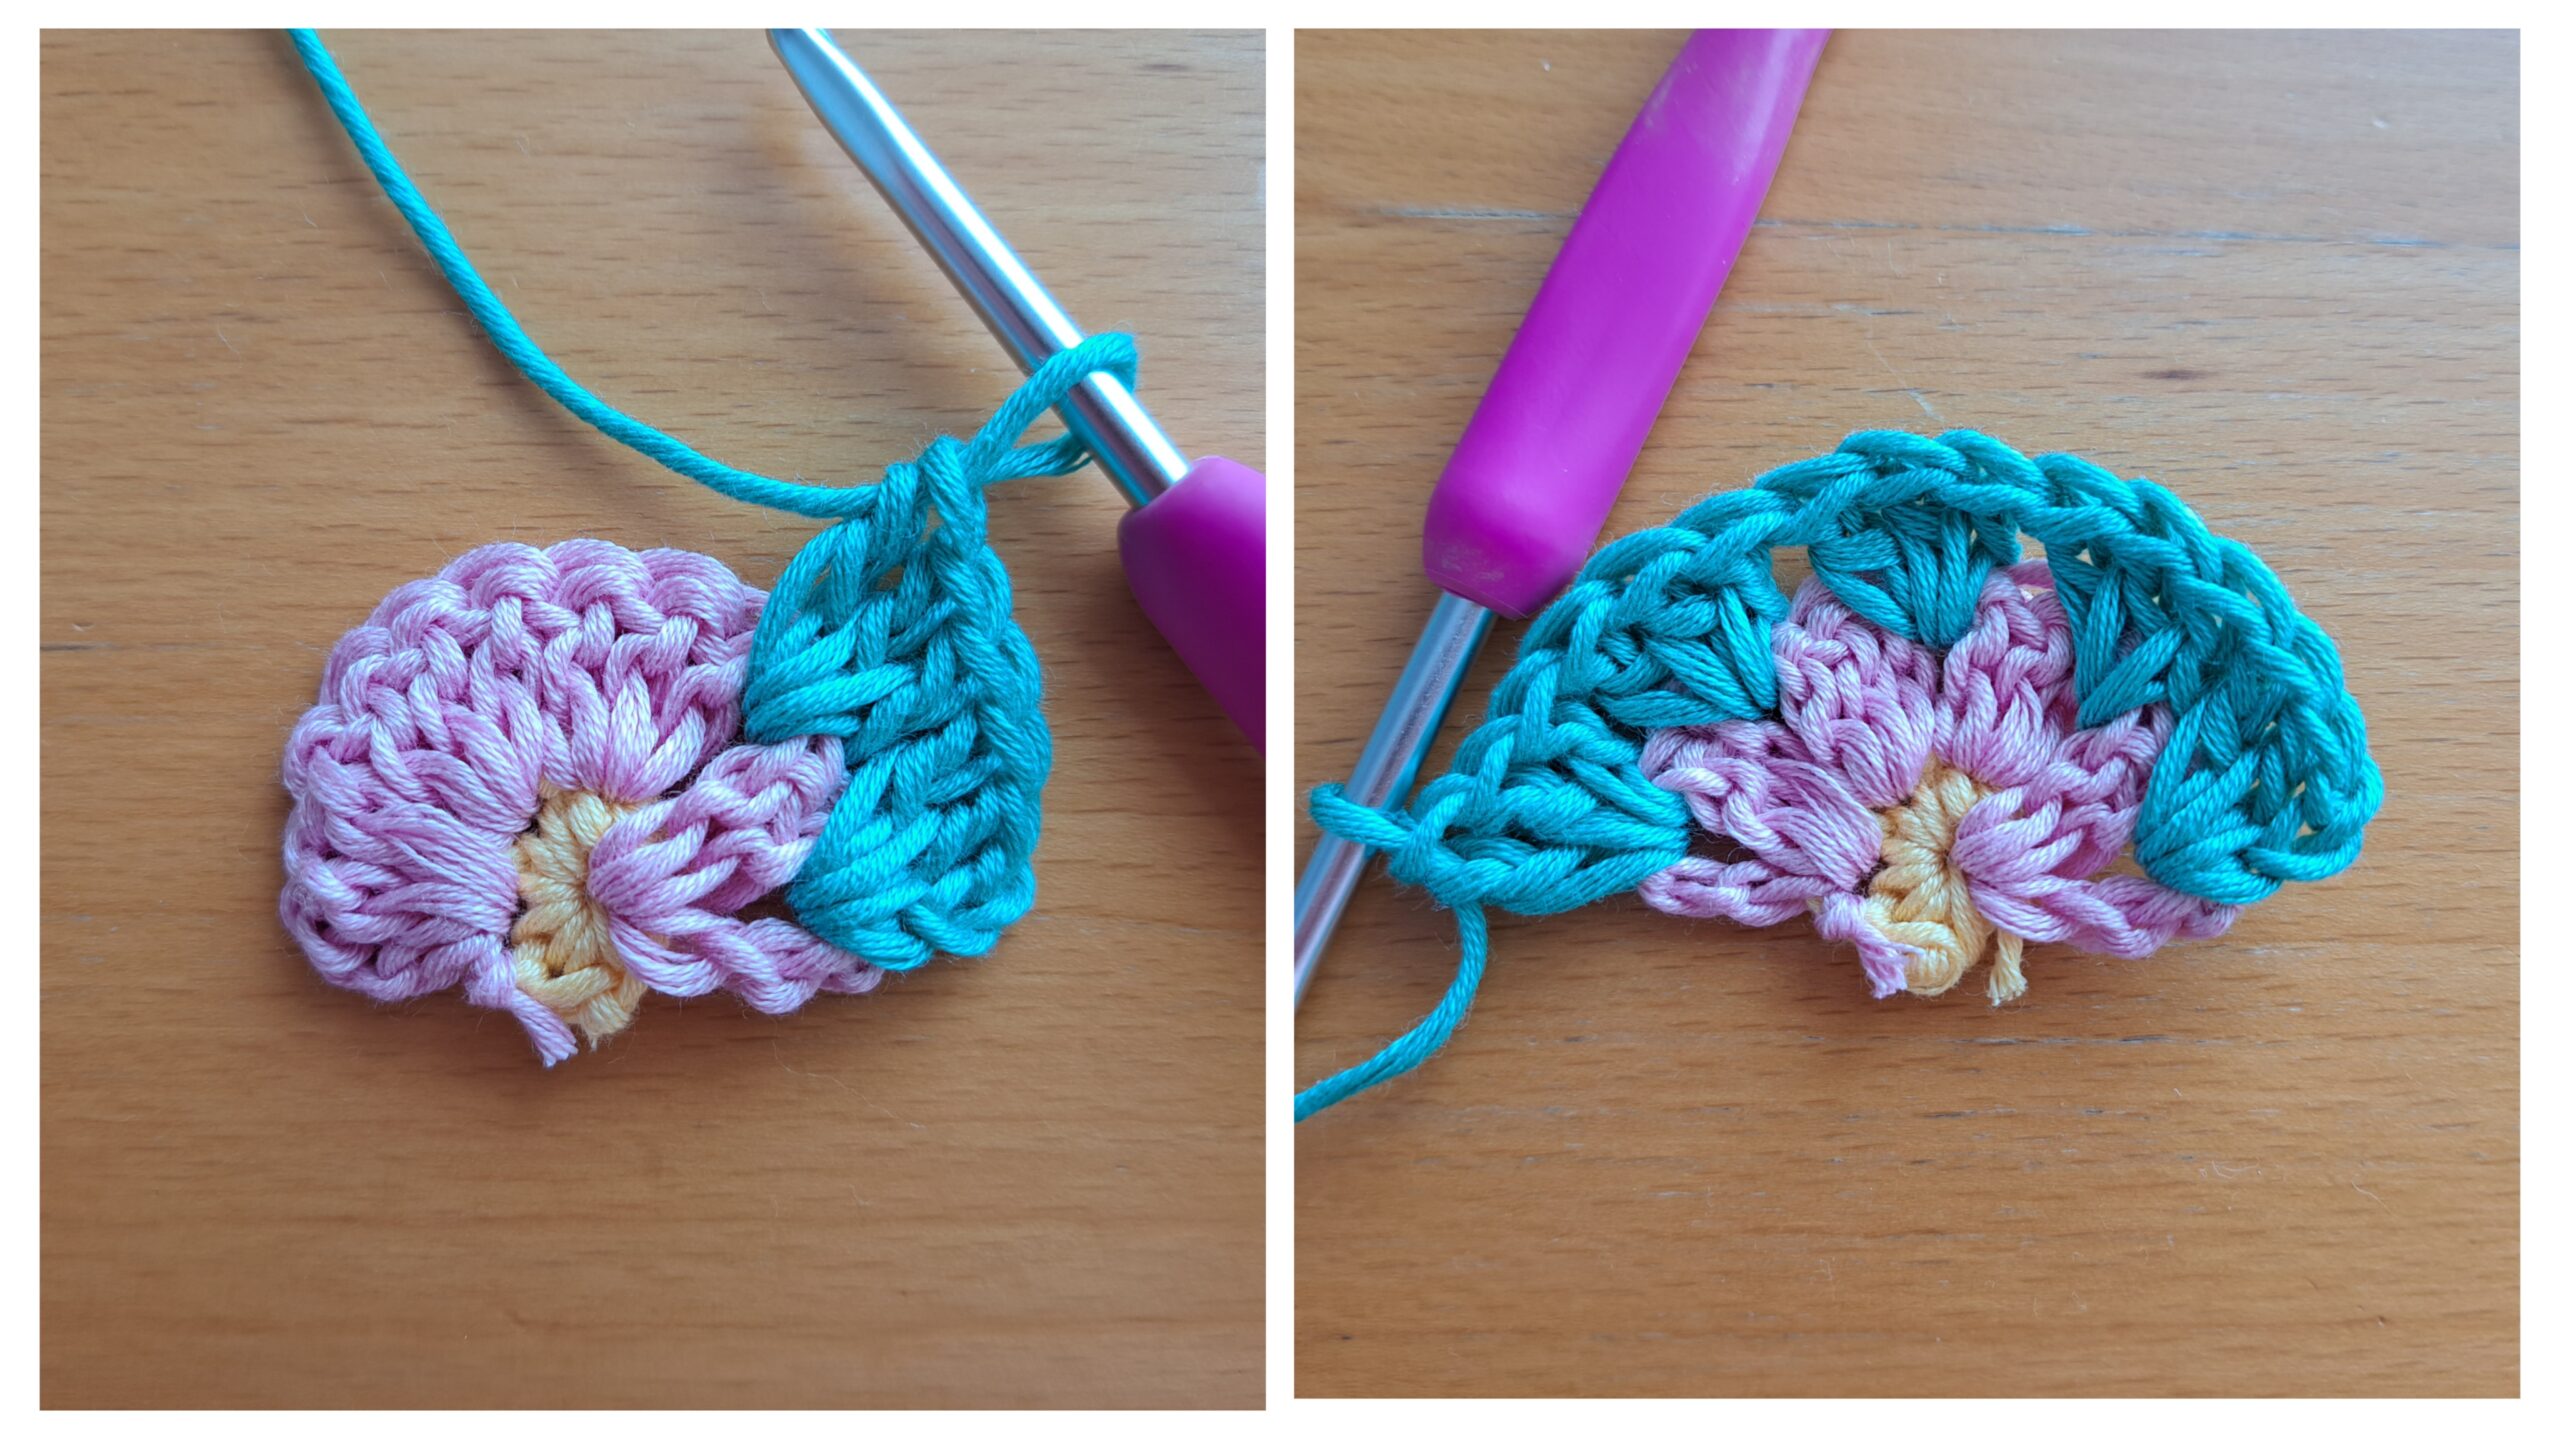
Attach your yarn to the top corner of your project, and chain 40. Once you have chained 40, slip stitch through each chain until you reach the last chain; slip stitch through the space you first began on the project to secure hair tie (see photograph below).
Once you have done this, place a SC into each stitch across the top until you reach the 5 central stitches at the top center part. In these stitches, place a DC instead of a SC (=5 DCs).
Now continue to place a SC into each stitch across until you reach the other side corner.
Once you have reached the other corner at the top of the bandana, chain 40, and slip stitch through every chain across until you reach the stitch where you began. Slip stitch through that stitch to secure second hair tie.
Now place a SC into each and every stitch across the “V” part of the bandana, until you reach the first SC on the other top corner of the project. Slip stitch through that stitch to finish off this round.
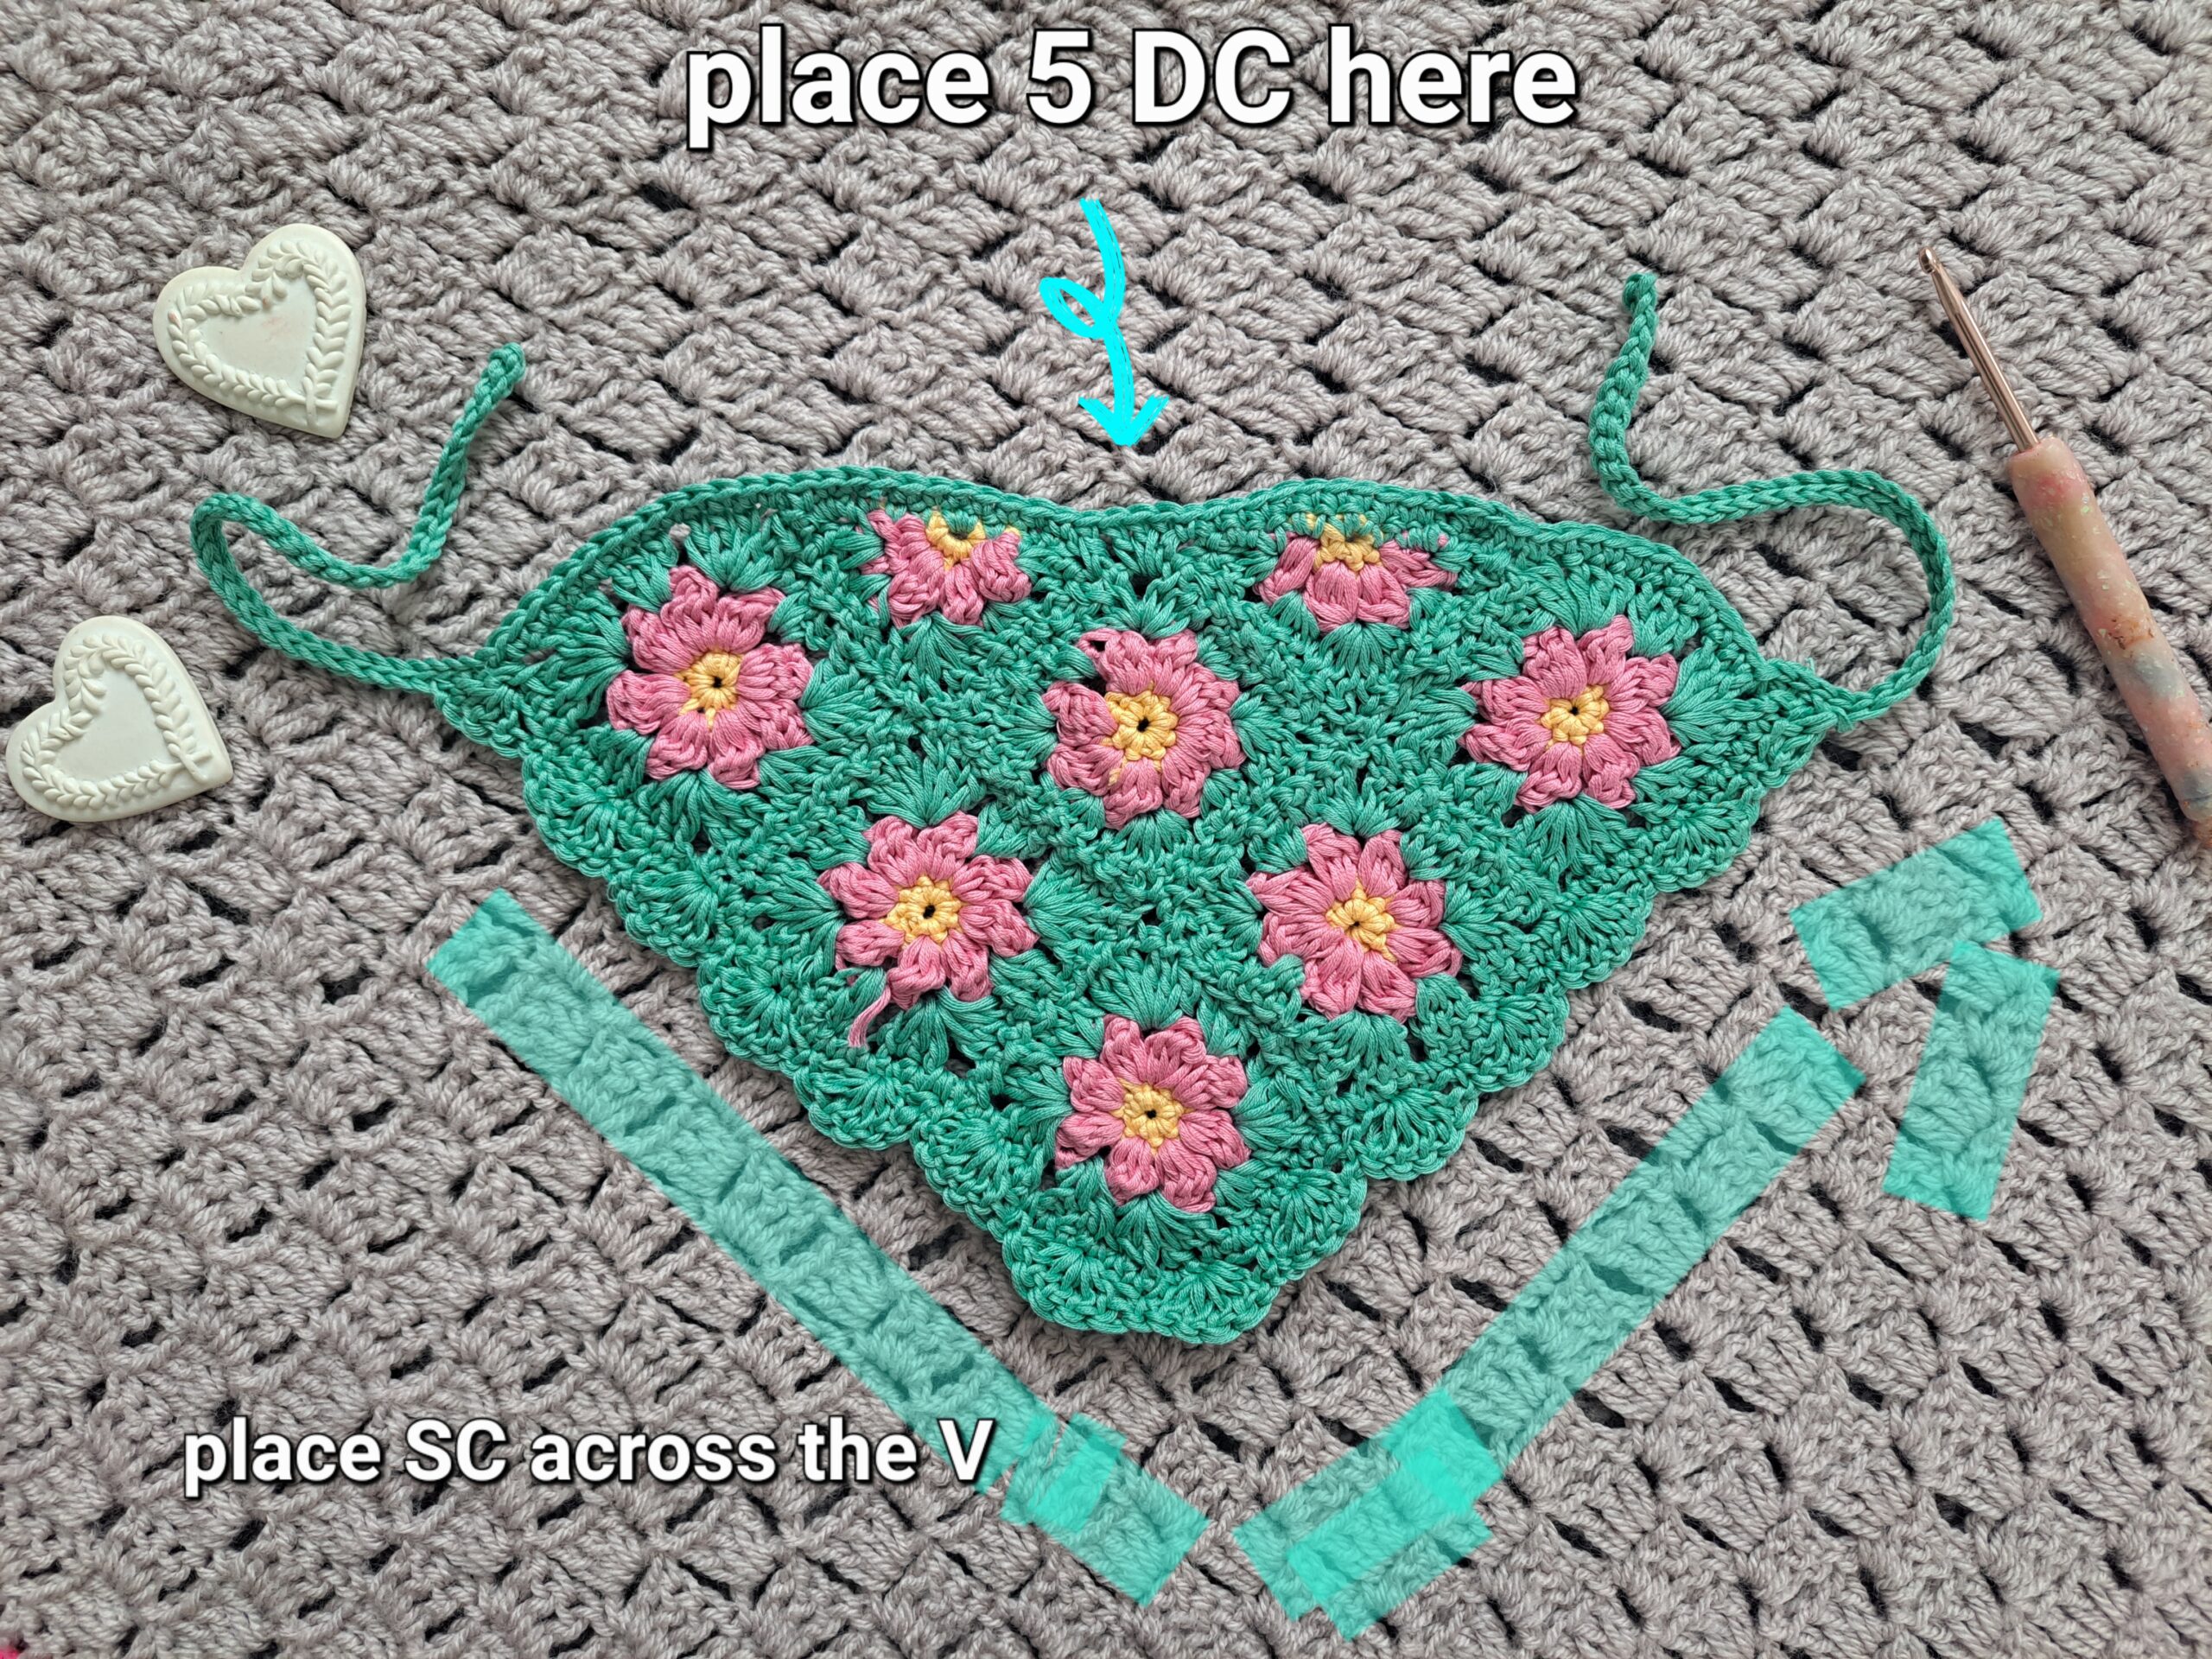
This is a photo of the finished project with indications on how to crochet round 1 of the edging.
Round 2 (shell stitch edging):
We will be crocheting across the “V” part of the bandana for this second round (from one hair tie to the other hair tie).
We will be working the shell stitch edging into the SCs from previous row.
Ch 3 (=DC), place 2 DCs into this first stitch (=half shell stitch); sk 2 st, SC into the next stitch; * sk 2 stitches, place 5 DC into next stitch, sk 2 st, SC into next st * until last 3 stitches on the other side of the “V”.
Now sk 2 st, place 3 DCs into last stitch (=half shell stitch).
Fasten off, tidy up all loose ends.
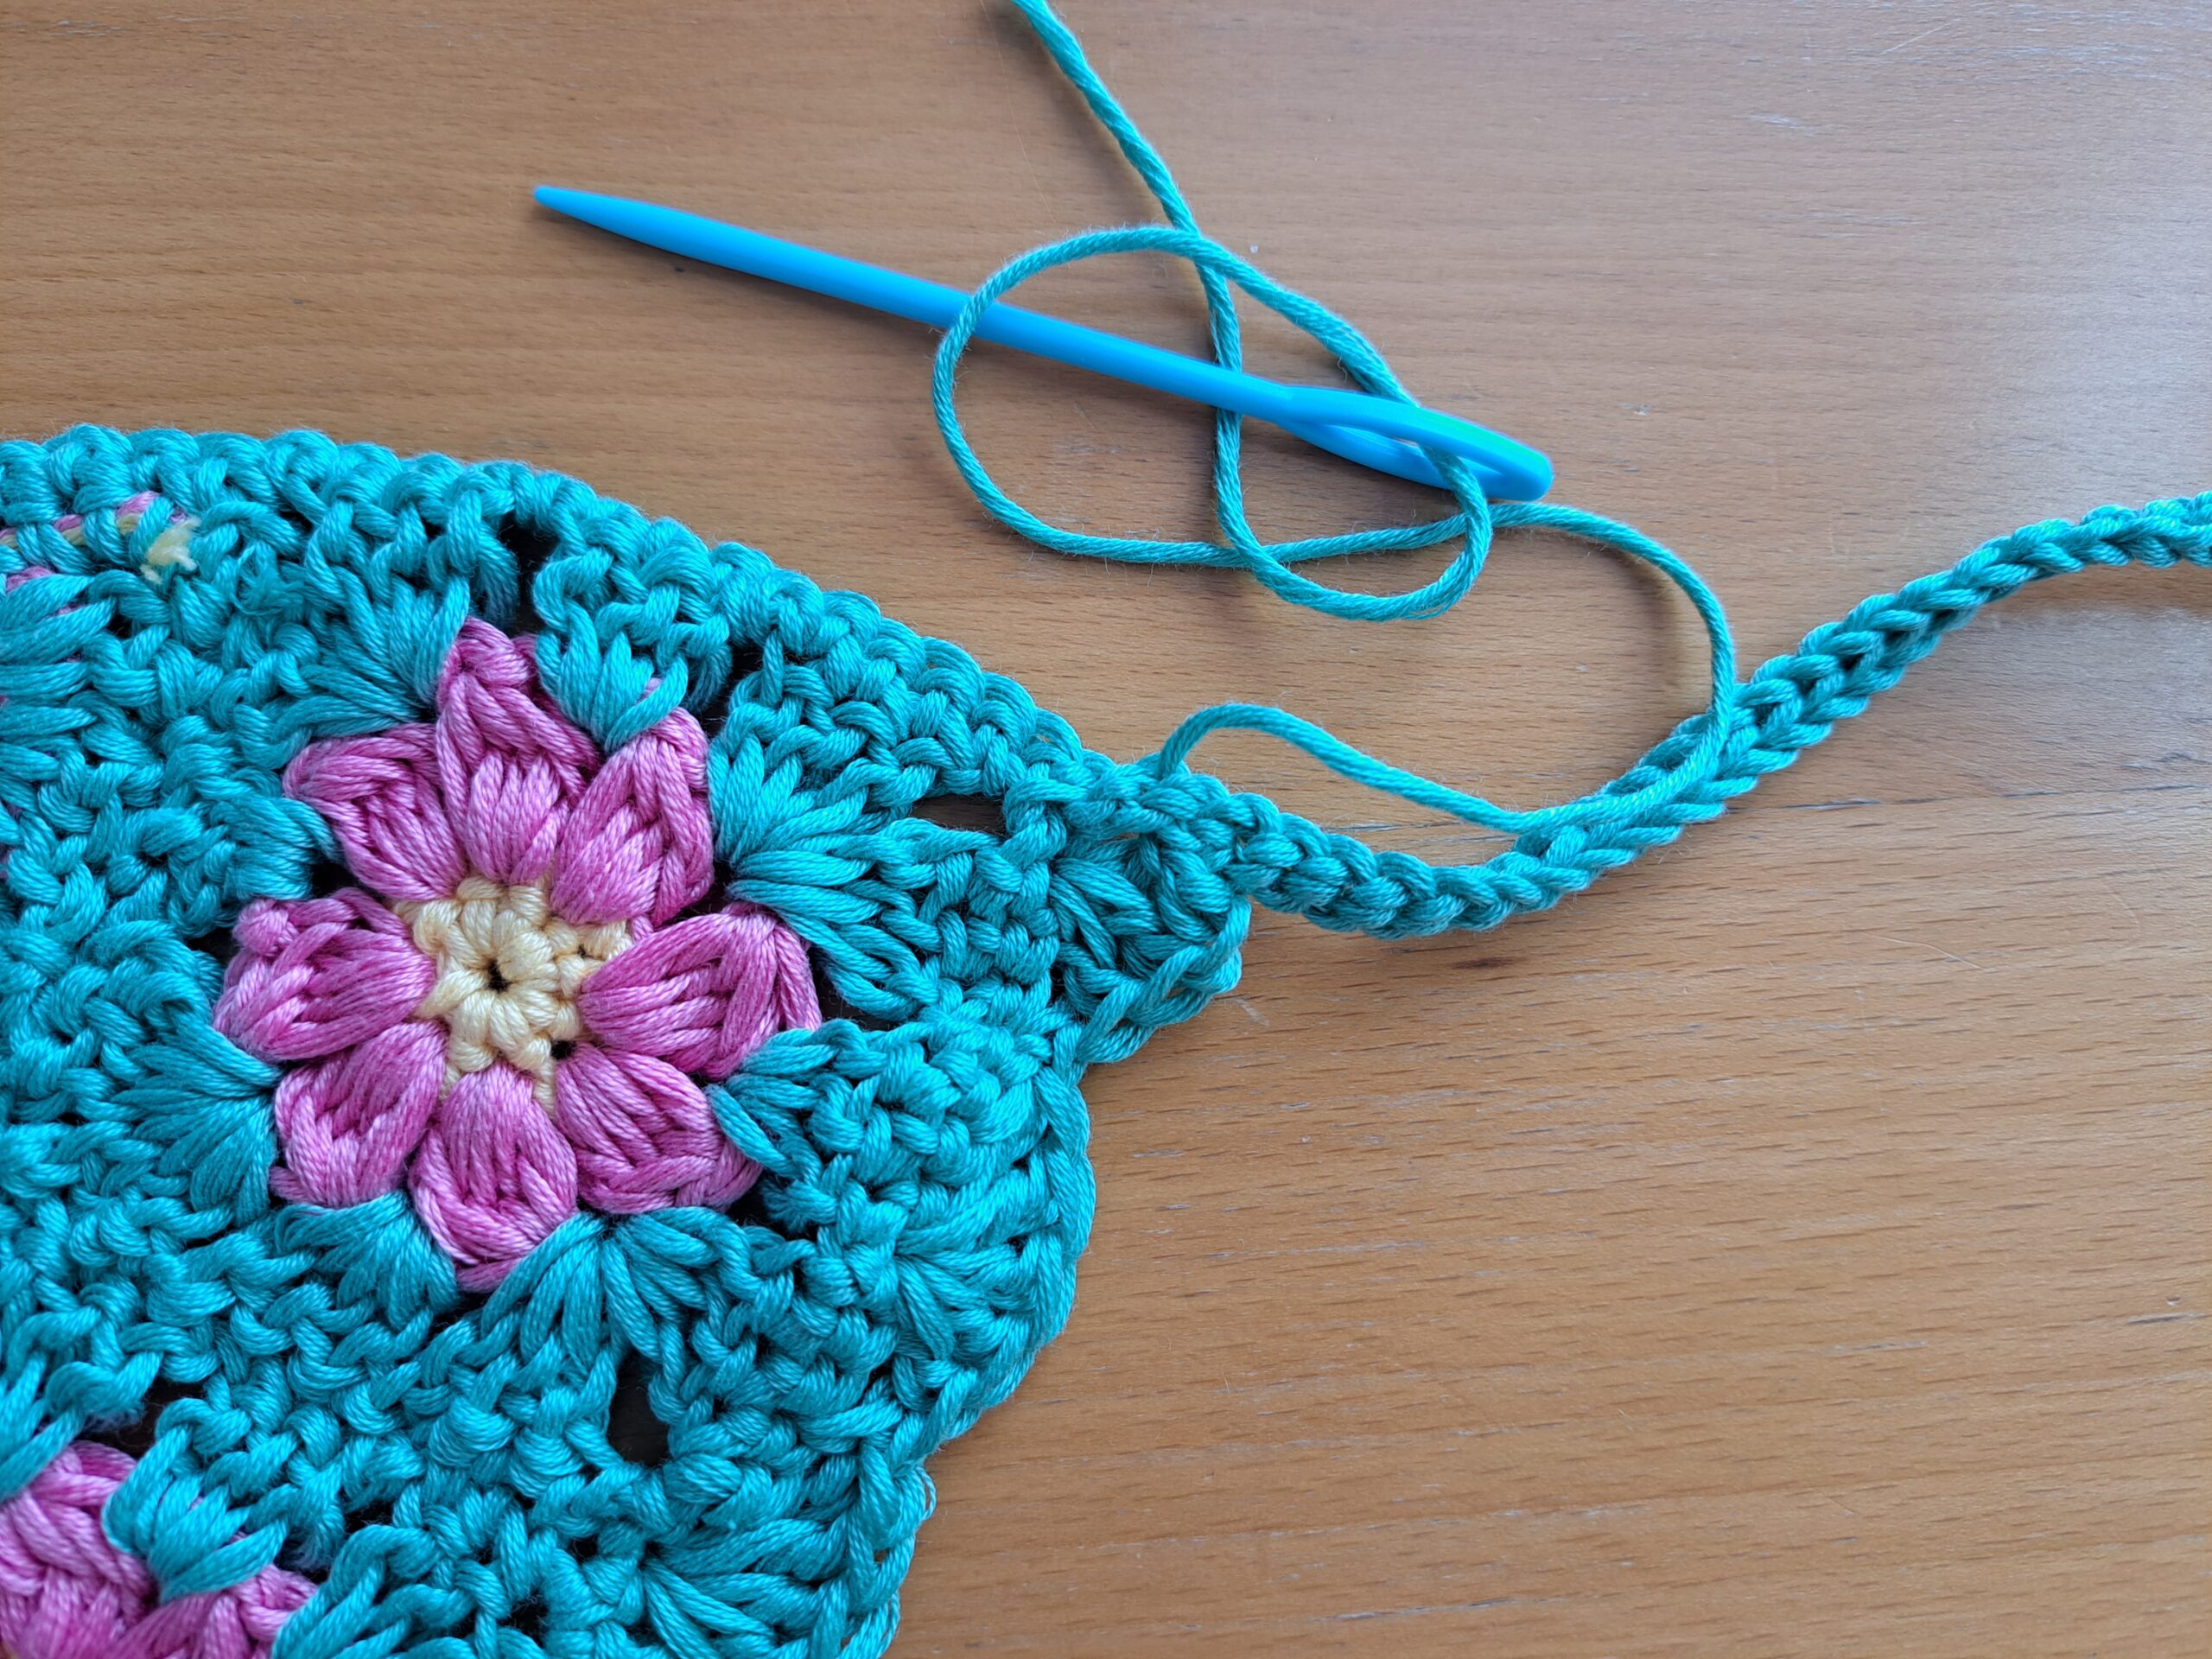
Optional:
You can sew the two half shells on each side to the hair ties (see photograph below). This will give a neater finish to the bandana.


You May Also Like
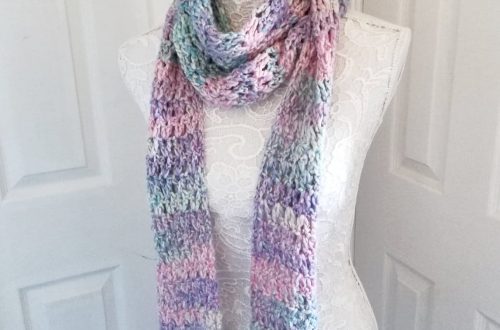
Crochet A Feminine Spring Scarf
Crochet Lovely Flower Headband Free Pattern