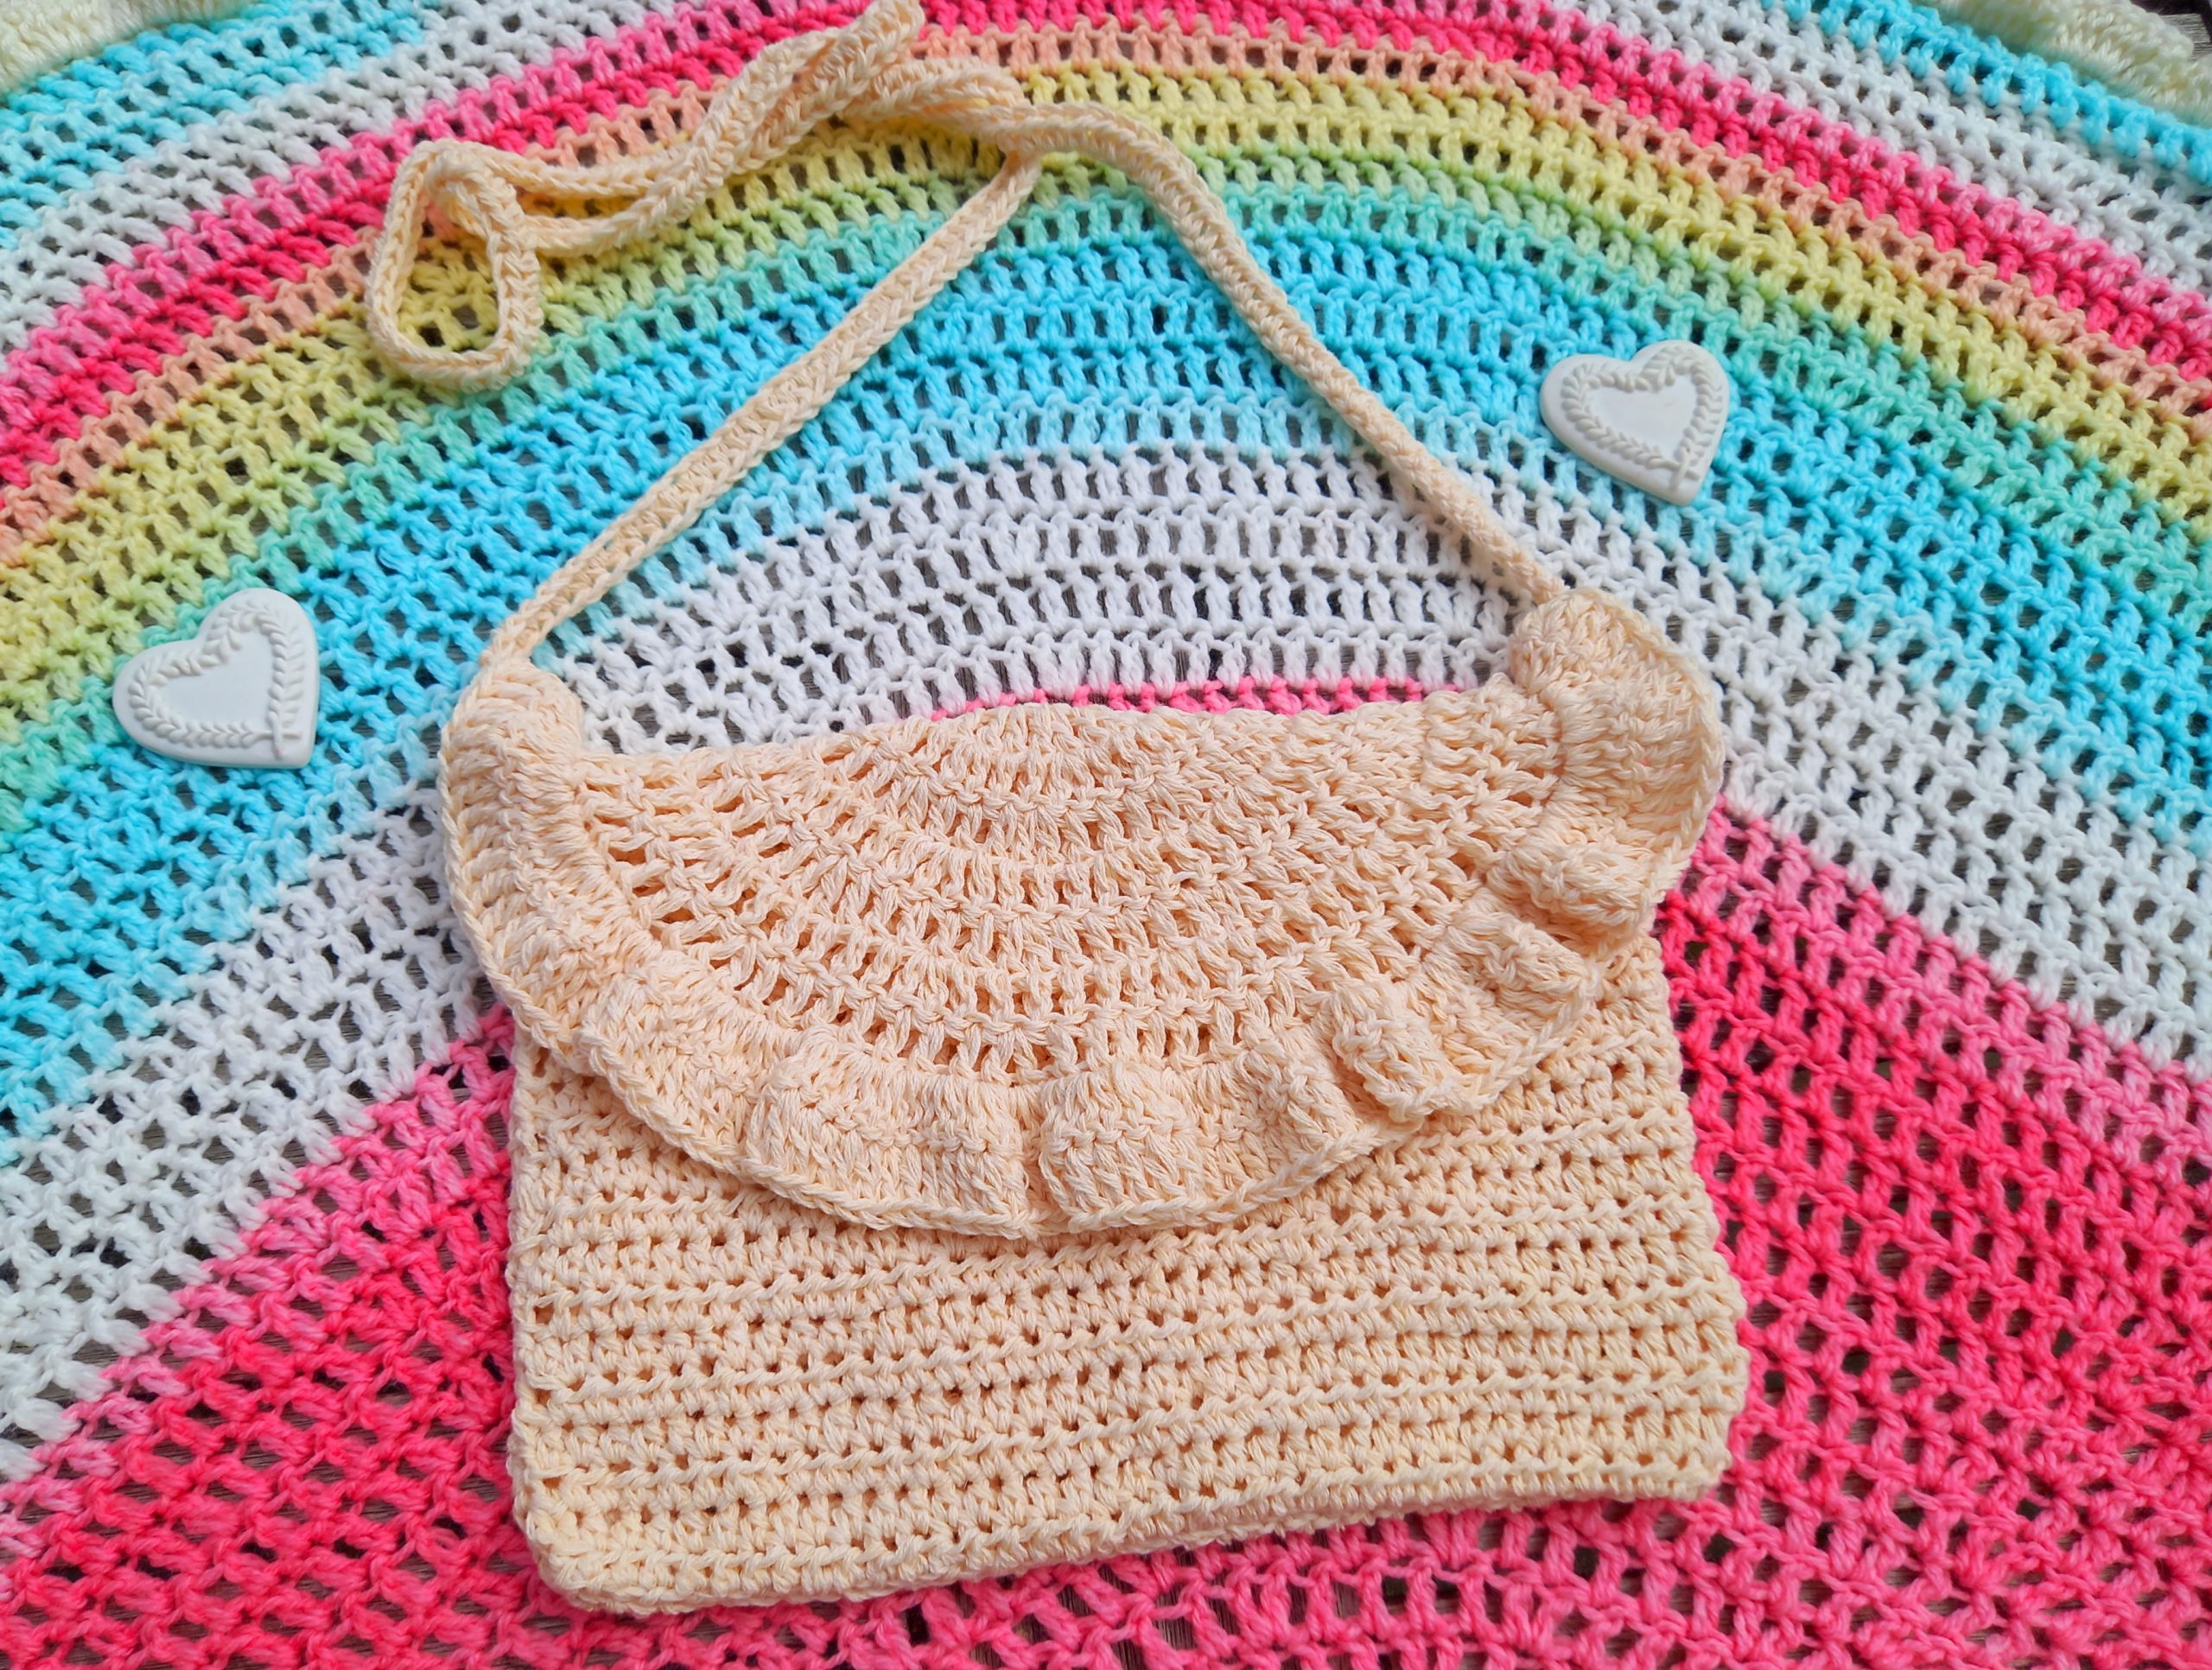
Crochet The Tessa Boho Bag
Crochet The Tessa Boho Bag
Hi everyone, today I am bringing to you a brand new tutorial on how to crochet The Tessa Boho Bag. This project is super easy to crochet. It has a clear festival Boho vibe, perfect for the Summer. If you are looking to crochet a quick, easy and feminine Summer bag, look no further.
You can find the video tutorial for this project here:
Crochet The Tessa Boho Bag: the inspiration
I was inspired to crochet a beautiful Coachella inspired vibes bag this week. Indeed, I love crochet bags, as they look so perfect and feminine, especially in the Summer months. I have already created Boho bags in the past. You can find a Boho festival bag from last year, or this more recent sling bag. Both are really easy to crochet, and look perfect in any occasion.
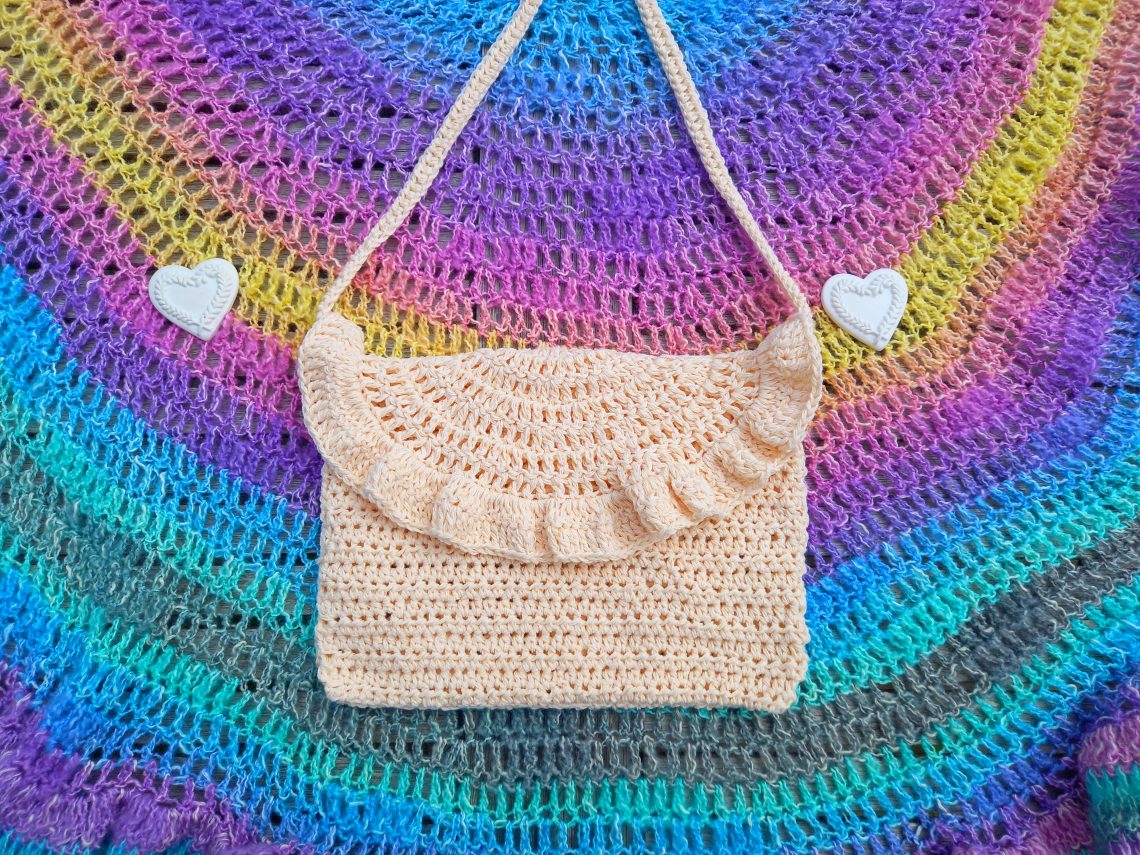
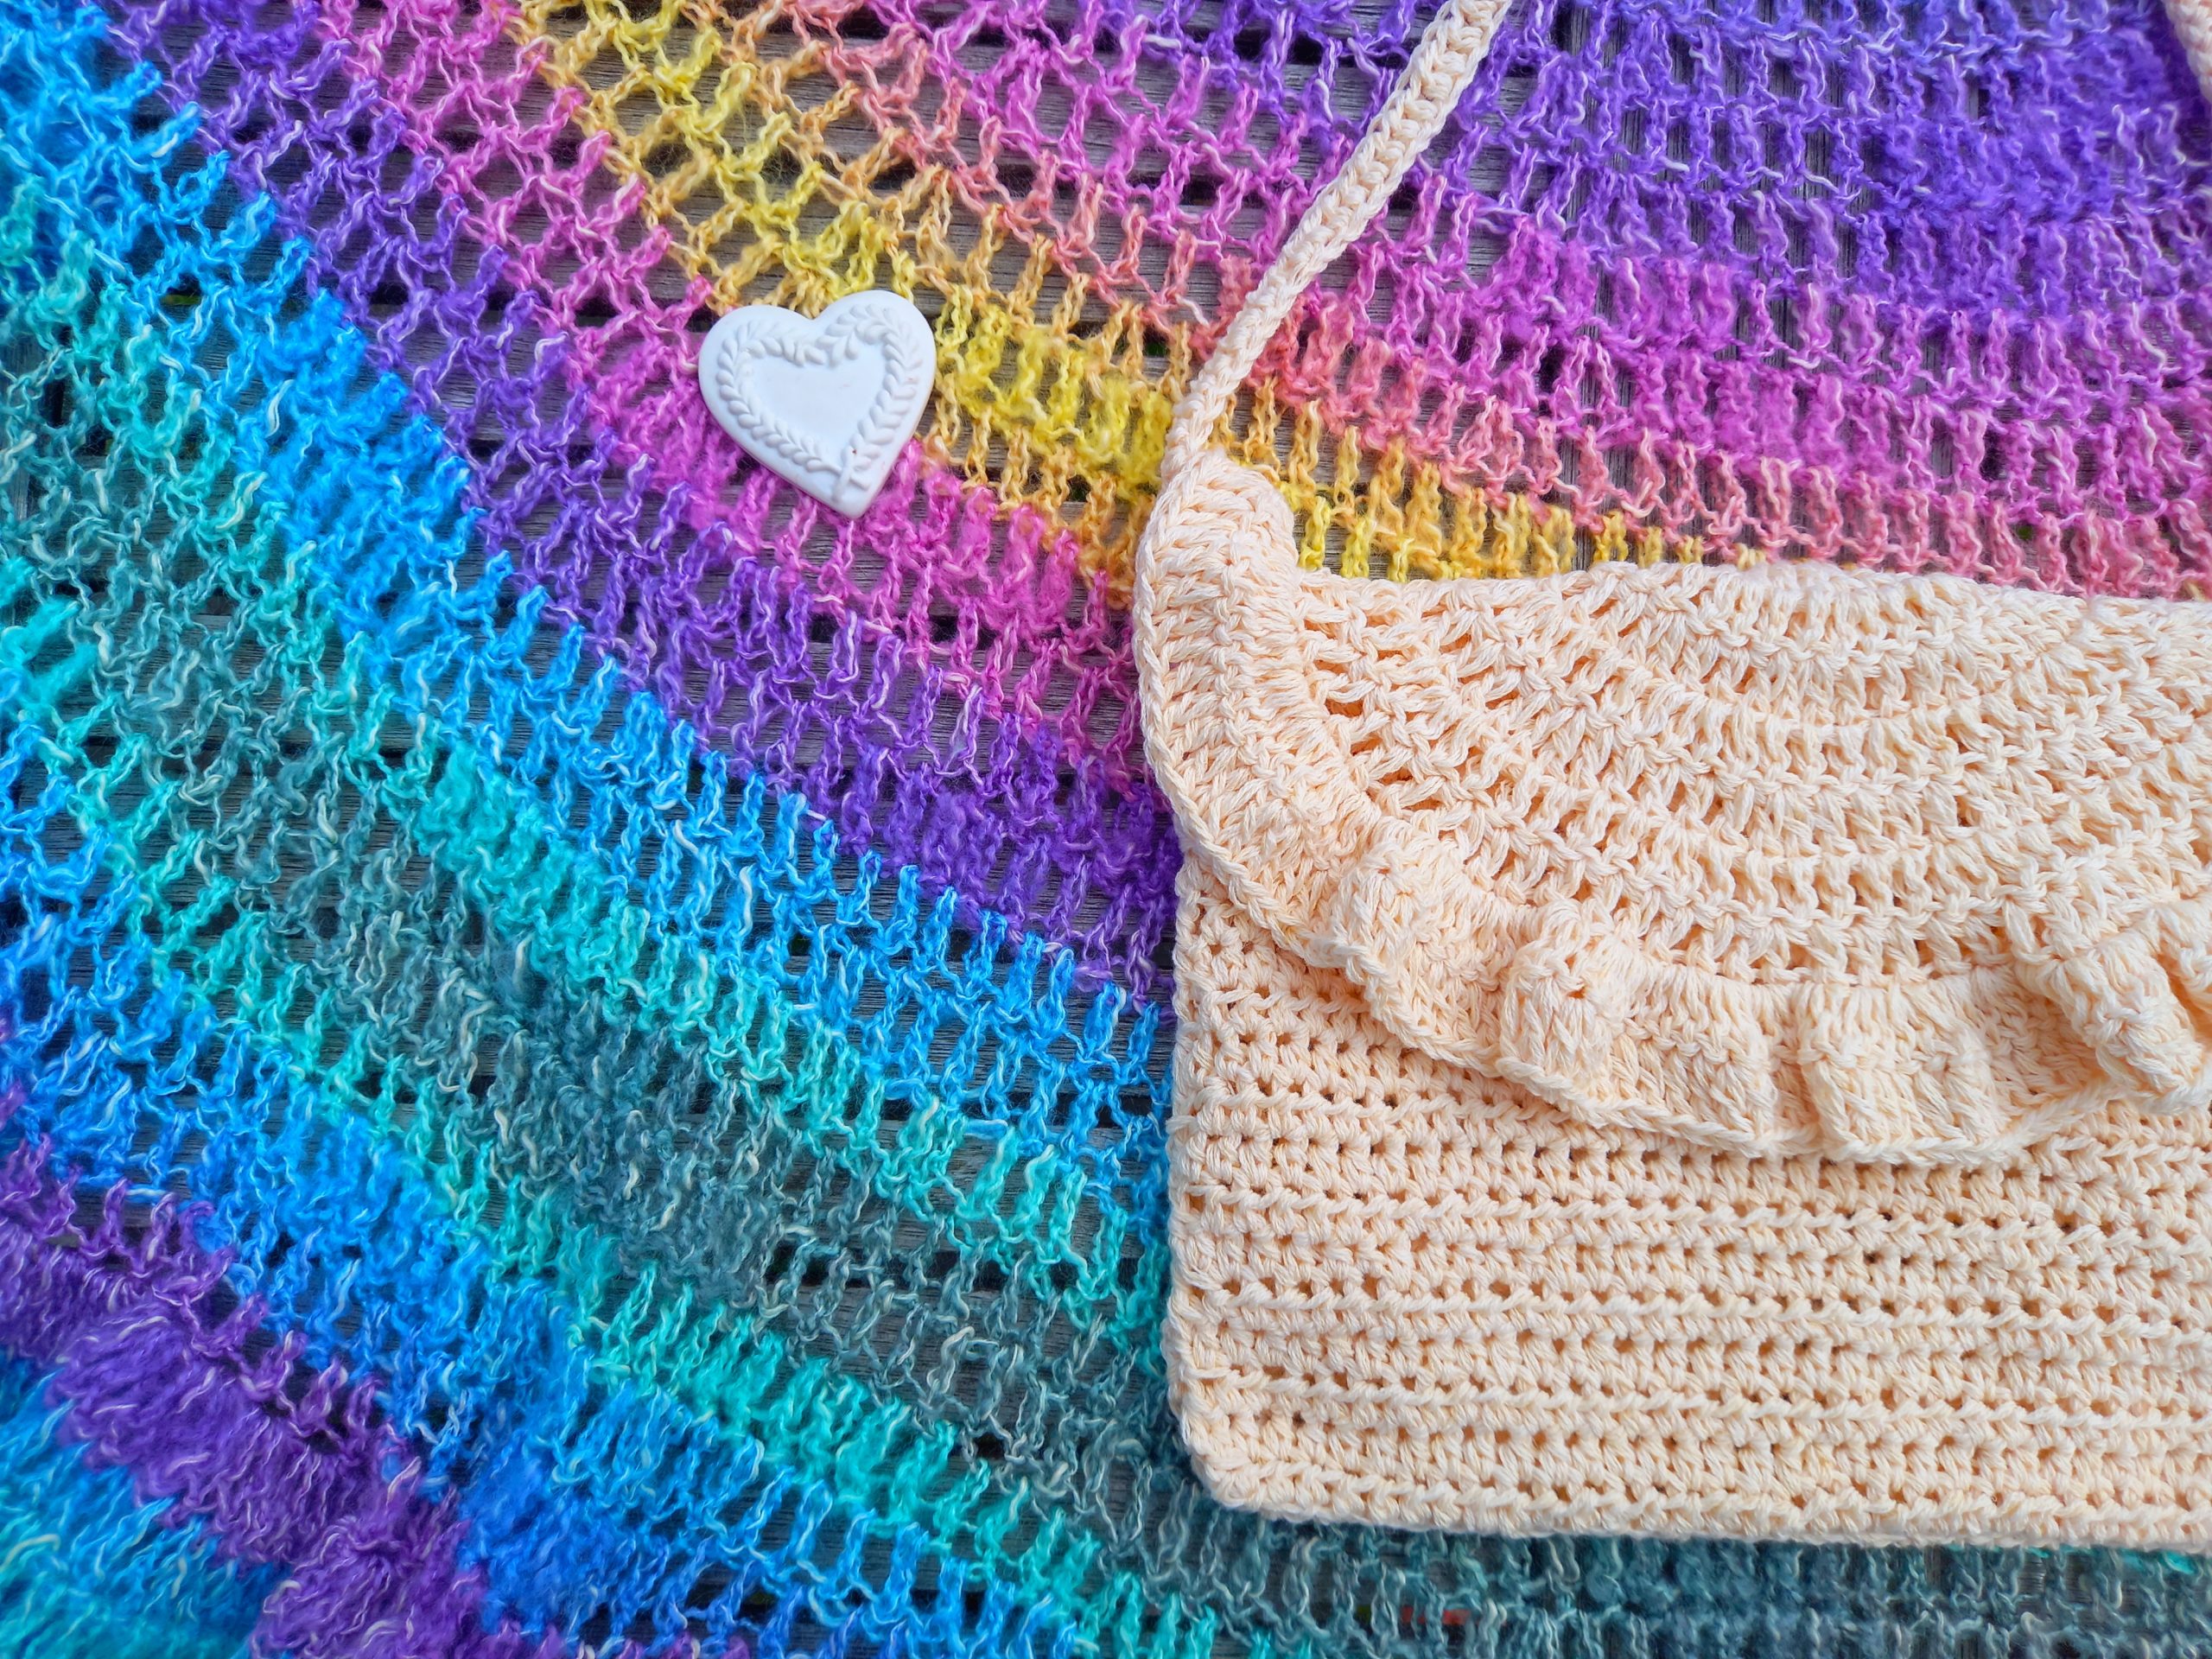
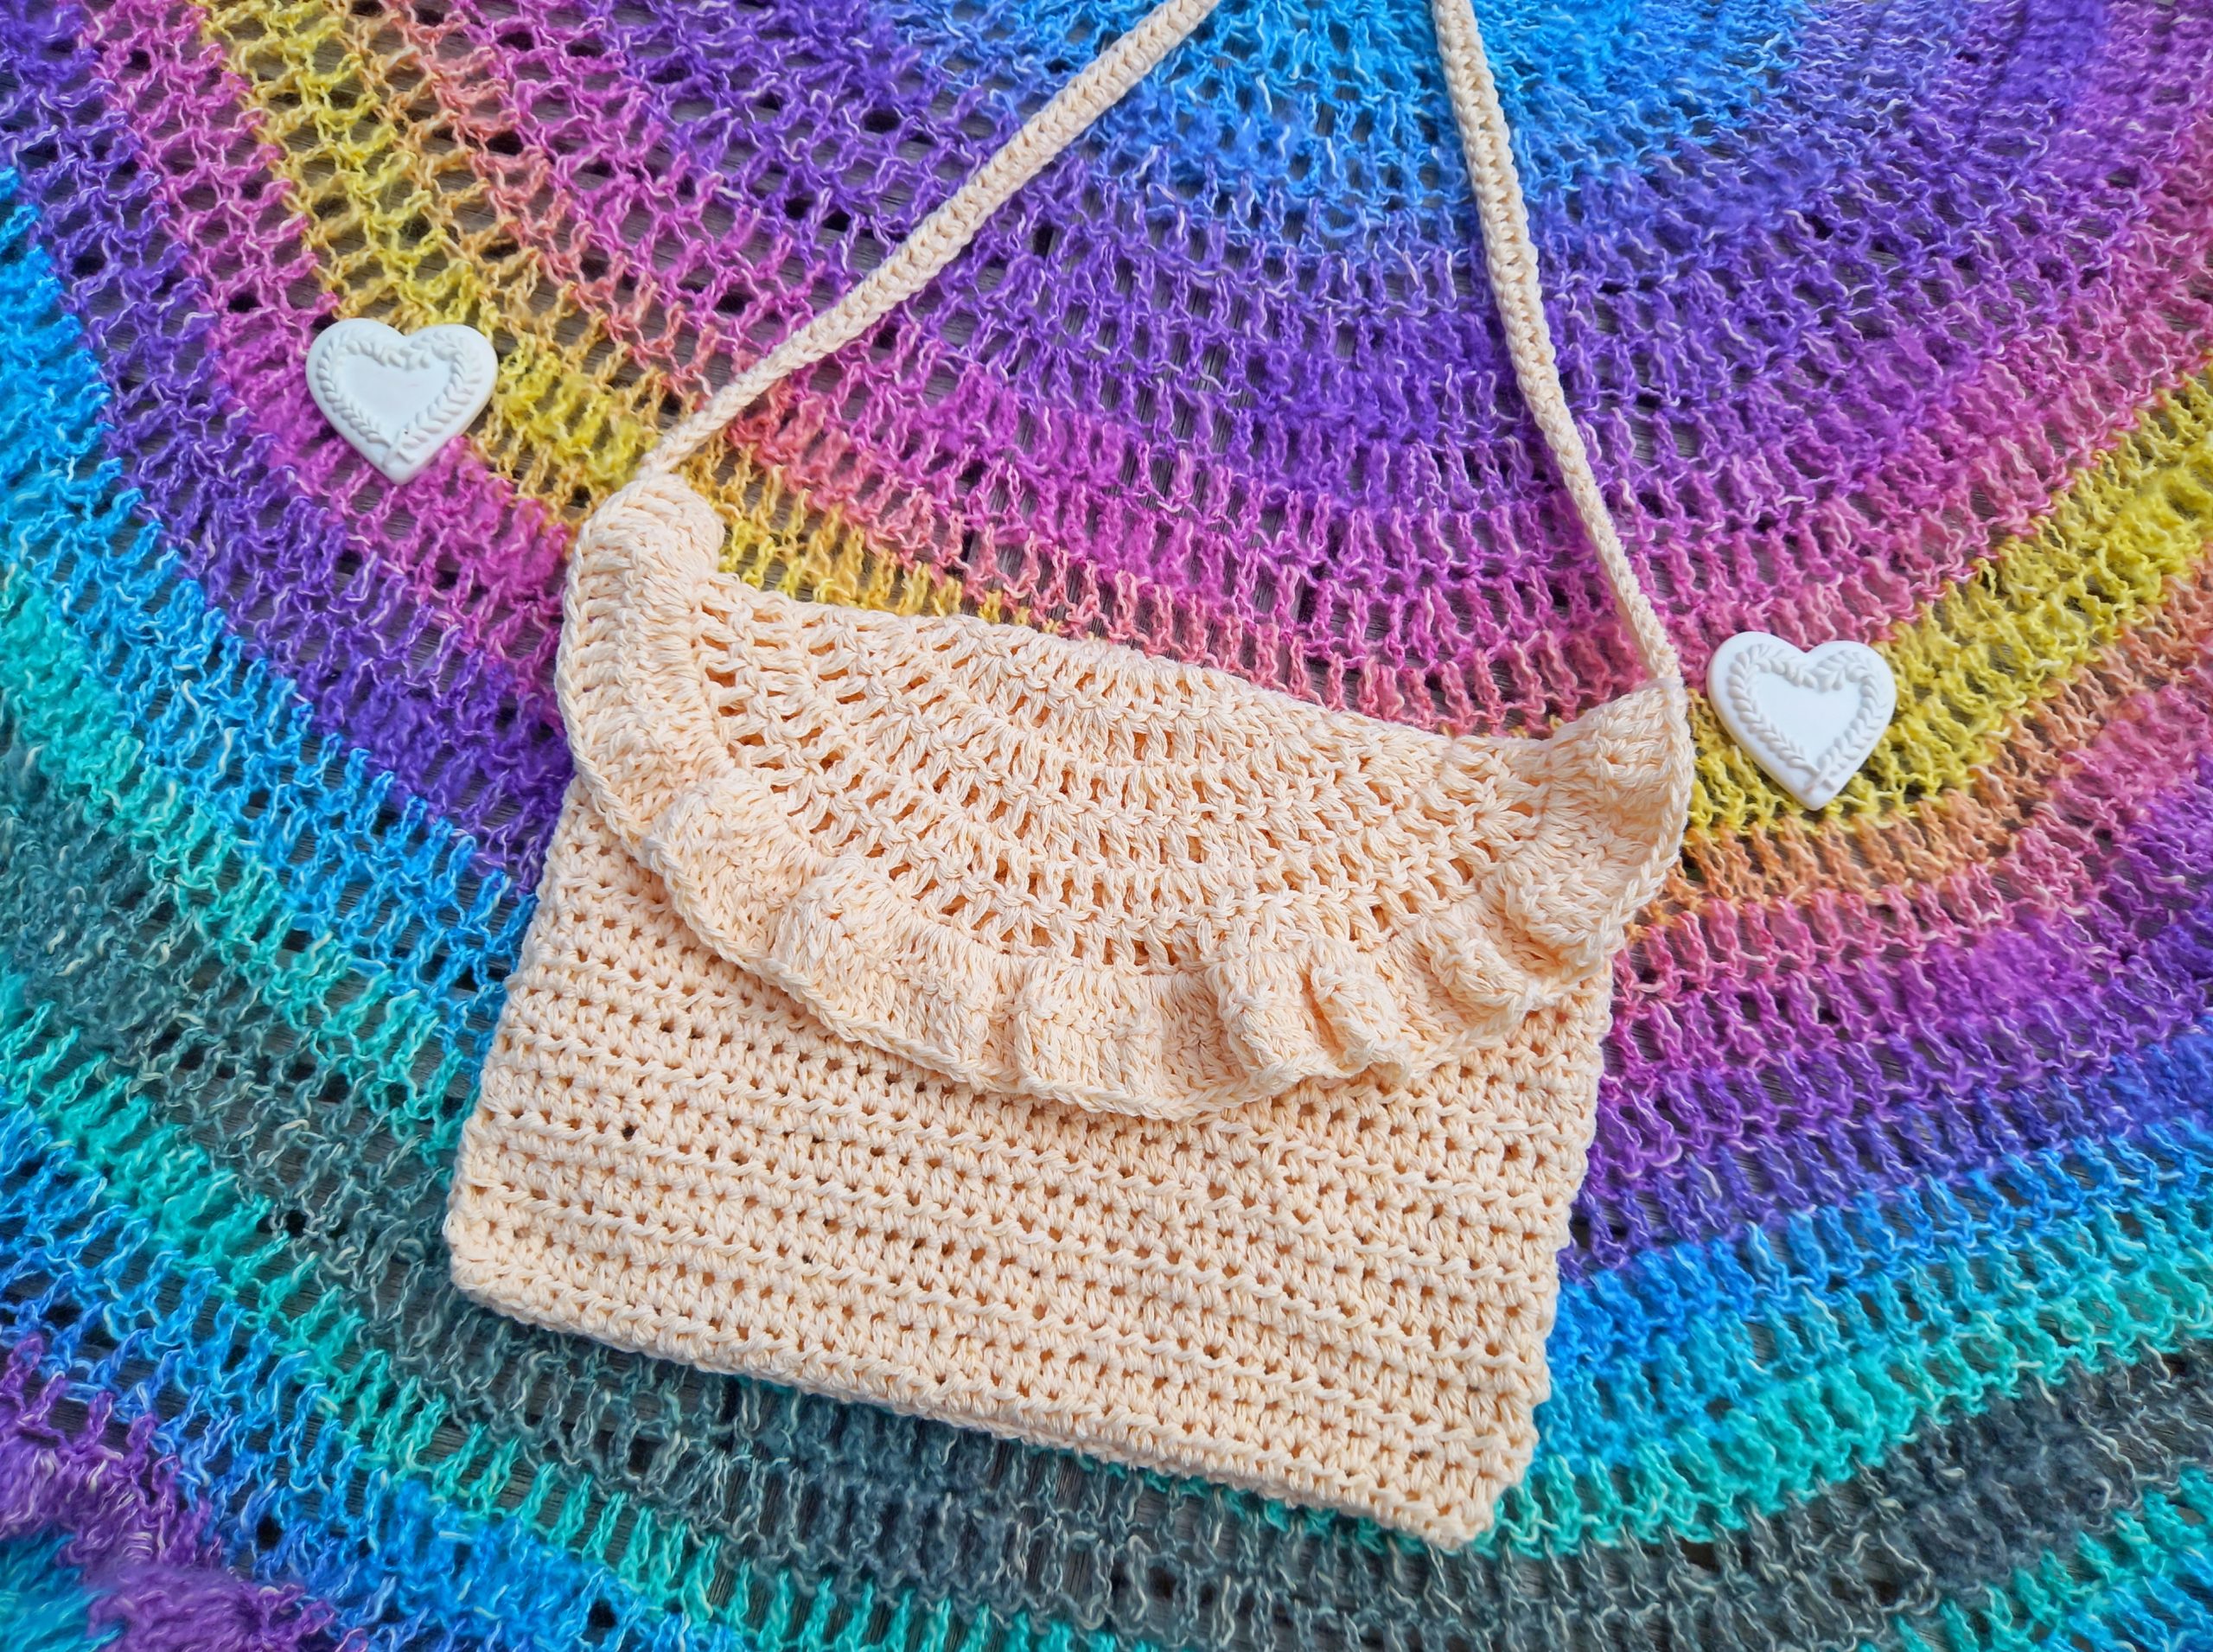
This week I wanted to crochet a cream cotton looking bag with a frilly border on the flap. I used the beautiful yarn “Belle” by Drops Design, which I love so much. This yarn contains 53% cotton, 33% viscose and 14% linen. I have to say it is a delight to work with, especially when creating crochet pieces reminiscent of festivals and Coachella. It is very easy to crochet with, and the effect of this yarn is particularly stunning on this feminine bag.
Crochet The Tessa Boho Bag: the creative process
When creating this bag, I did make it slightly wider than I usually do when crocheting a small bag. Indeed, usually I would just create a slightly “slinkier” bag, possibly because I was a teenager/young woman in the beginning of the 2000s, and I love the Y2K vibe. This fashion trend, as seen in movies such as Mean Girls for example, feature slinky, small and dainty bags. I have to admit I do love these types of bags, and have kept some of my favorites purses in my closet from my youth.
Anyway, I did decide to go out of my comfort zone with this project. It is very slightly wider than my usual bags, but still quite small and dainty. I was looking for a new crochet bag, and decided to make it last week end. Just in time for this tutorial!
Do you enjoy crocheting bags and purses? I love making these, especially for gifts too.

Crochet The Tessa Boho Bag: the design
The design for this project is very simple, perfect for beginners. Indeed, it is made very simply with 2 identical panels (the front and back), before adding the simple crescent flap onto it. It is perfect if you have never crocheted a bag before. The crescent flap features a dainty feminine frilly border which is very easy to create too.
You can line your bag very easily too. My video tutorial that I have linked below will take you through this process step by step. The best part of my tutorial is that you can line this bag either by hand or machine sewing, so no matter your sewing level, you can line your crochet bag!
Connecting with you
You can connect with me on all my Social Media platforms. I would be delighted if you follow me on Youtube, Instagram and Pinterest. I am very active on these platforms and love connecting with you on these. My user name is Selina Veronique Crochet, and you can also find the direct links to my Social Media on my home page.
I would also be delighted if you considered subscribing to my weekly newsletter. This way, you will never miss a free pattern, video tutorial, and giveaway!
Thank you so much for stopping by!
Sending lots of love and light,
Xoxo Selina.
Crochet The Tessa Boho Bag: the pattern
You can purchase the large print, ad free PDF pattern from my Etsy shop here: Crochet The Tessa Boho Bag PDF Pattern
Level: Easy
Materials
3 skeins of Drops Belle in shade 02 (Cream)
A 4 mm crochet hook
A tapestry needle
A pair of scissors
Abbreviations
I will be writing in US terms
Ch: chain
Sk: skip
SP: space
Sl st: Slip stitch
HDC: Half Double Crochet (UK Half Treble)
DC: Double Crochet (UK Treble)
EOR: End of row
Gauge
4” (10 cm): 16 HDC
4” (10 cm): 12 rows
Size of finished project
7” (18 cm) x 10” (26 cm)
Pattern begins here
Front and back panels (both identical):
Ch 40
Complete rows as follows:
1: HDC in 3rd ch from hook (first ch 2 counts as a HDC), HDC into each ch until eor
2: Ch 2 (=HDC), turn your work, HDC into 2nd HDC from previous row, and into each HDC until eor (including ch 2 from previous row)
3-20: Repeat row 2
Fasten off, leaving long tail for sewing bag together
Flap
Ch 4, sl st through first ch to form a ring
Complete rows as follows:
1: Ch 3 (=DC), 6 DC into ring (=7 DC in total)
2: Ch 3 (=DC), turn your work, place a DC into 1st DC from previous row (=2 DC in same stitch), 2 DC into each DC from previous row
3: Ch 3 (=DC), turn your work, place a DC into 1st DC from previous row (=2 DC in same stitch), [DC into next DC, 2 DC into next DC] until eor
4: Ch 3 (=DC), turn your work, place a DC into 1st DC from previous row (=2 DC in same stitch), [DC into next 2 DC, 2 DC into next DC] until eor
Row 5: Ch 3 (=DC), turn your work, place a DC into 1st DC from previous row (=2 DC in same stitch), [DC into next 3 DC, 2 DC into next DC] until eor
6: Ch 3 (=DC), turn your work, place a DC into 1st DC from previous row (=2 DC in same stitch), [DC into next 4 DC, 2 DC into next DC] until eor
7: Ch 3 (=DC), turn your work, place a DC into 1st DC from previous row (=2 DC in same stitch), [DC into next 5 DC, 2 DC into next DC] until eor
8: Ch 3 (=DC), turn your work, place a DC into 1st DC from previous row (=2 DC in same stitch), [DC into next 6 DC, 2 DC into next DC] until eor
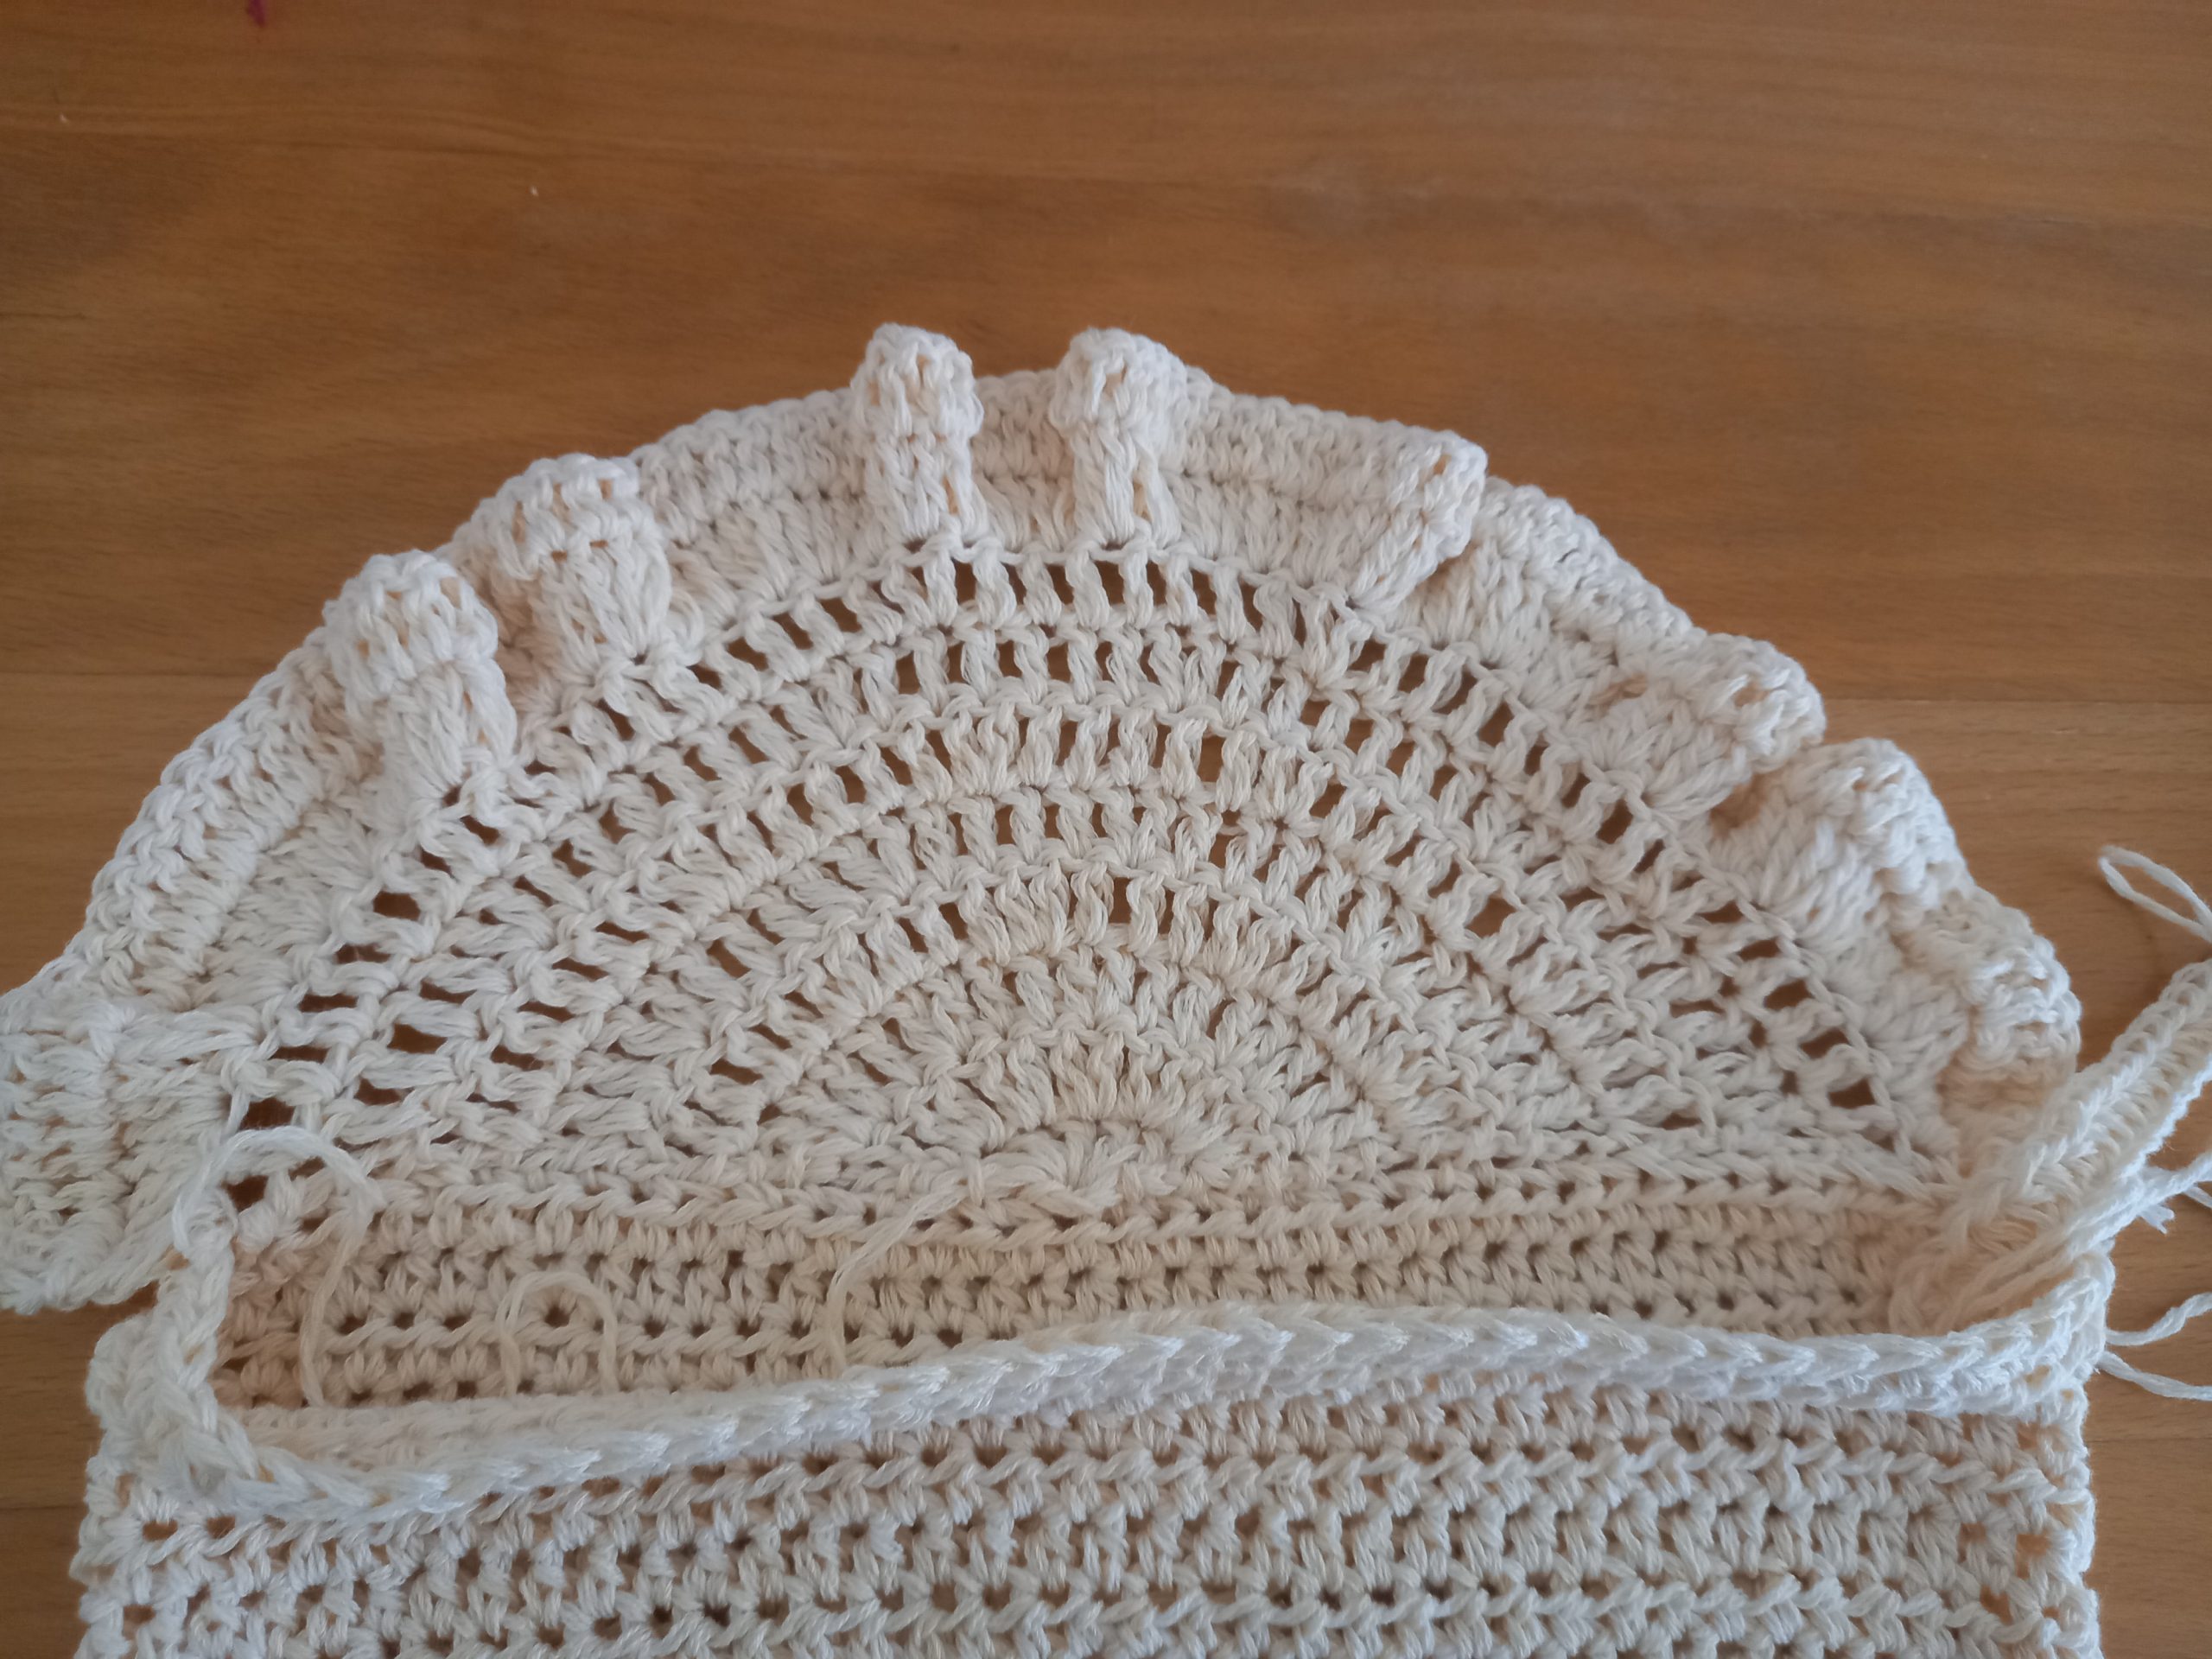
9 (frilly edging): Ch 3 (=DC), place 2 DC in same first stitch (=3 DC together in 1st stitch). Place 3 DC into next stitch until eor.
10: Ch 3 (=DC), place a DC into next stitch until eor.
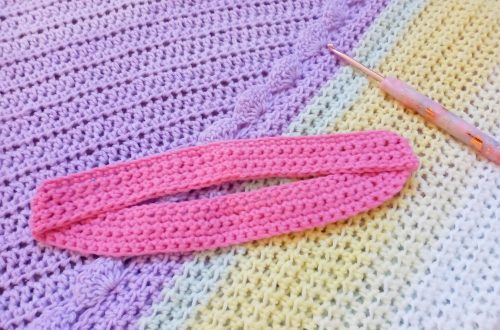
Strap
Ch 202
HDC into 3rd ch from hook and into each ch until eor, fasten off, leaving long tail for sewing into project
Sew project together
Place both front and back panel on top of each other, making sure they are symmetrically placed (this will be the inside of the bag as we will be turning it inside out to hide seam). Start sewing up one side, onto the bottom side, and then up the second side. Fasten off, tidy up loose ends.
Sew on the flap to the back panel: turn your project inside out, and secure your flap onto the back panel with sewing pins (optional). Sew the flap onto back panel, fasten off and tidy up loose ends.
Place strap into bag, inside the side of each side of the project, making sure you have 4 cm (=1,5 inches) of strap inside the bag.
Sew into project with yarn, making sure you do not twist strap when sewing it onto both sides of project.
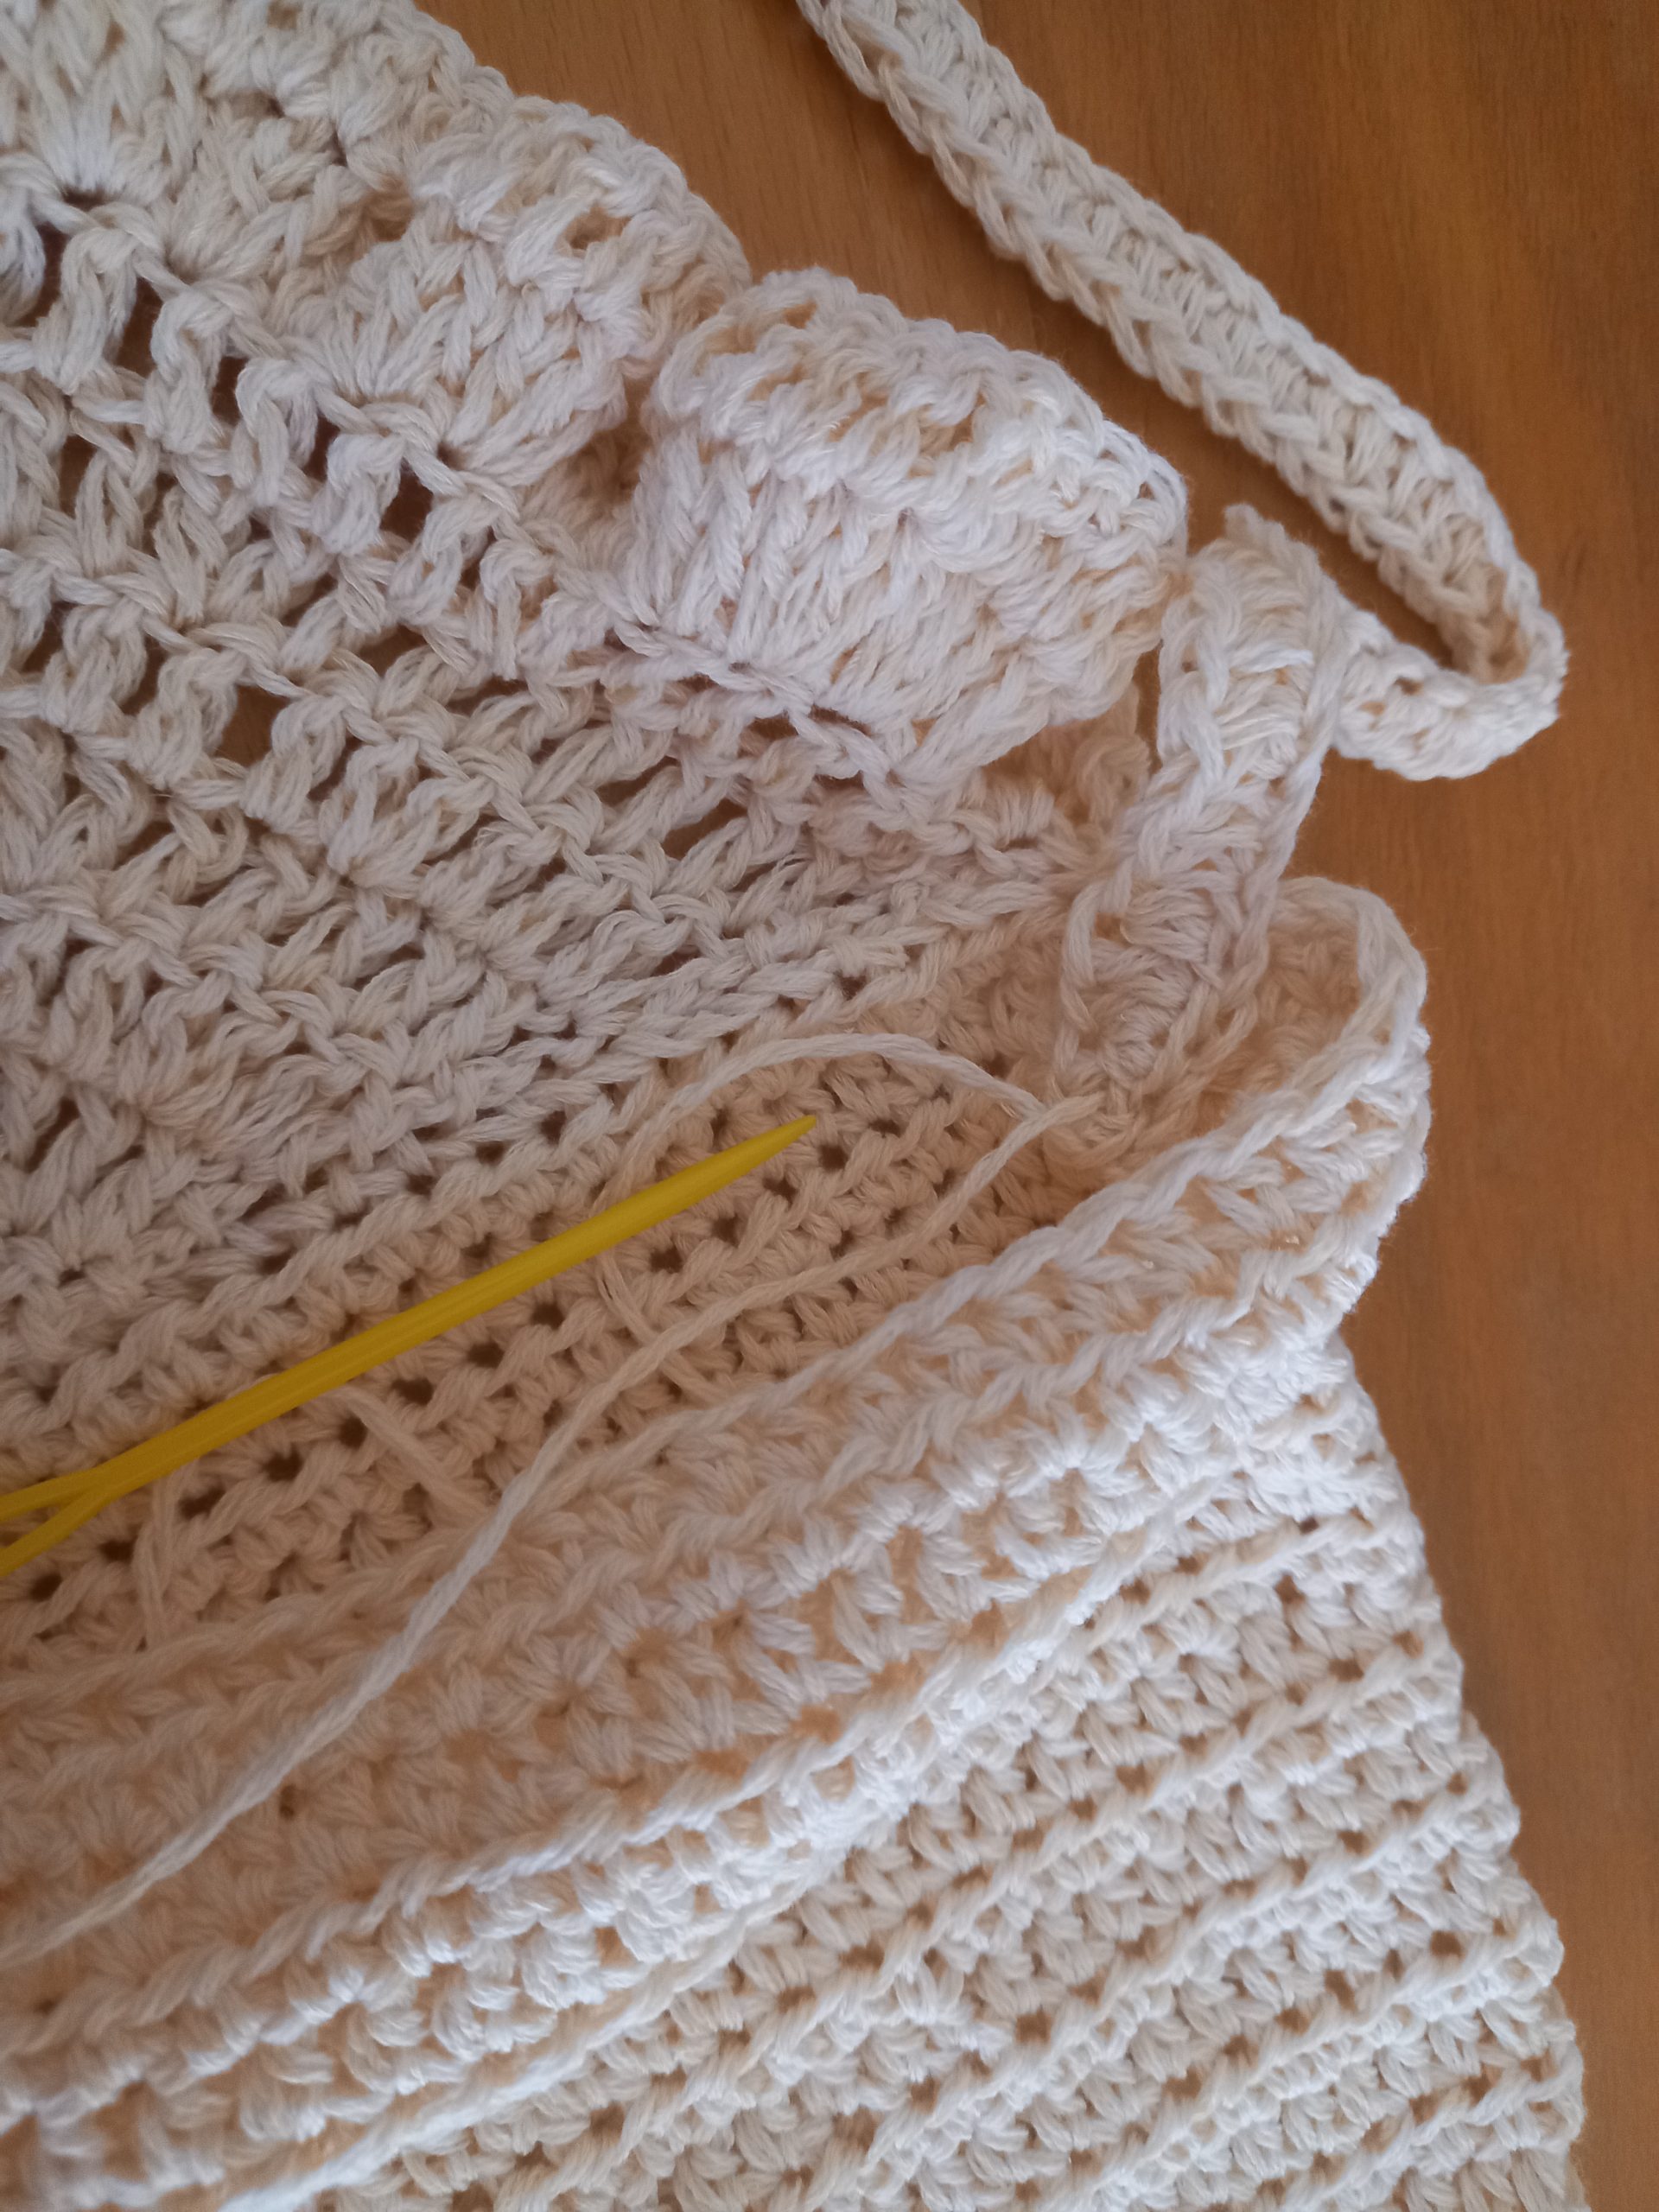
Make sure you sew the strap very securely onto project.
Fasten off and tidy up all loose ends.


You May Also Like
Crochet Puff Flower Free Pattern

Crochet Vintage Lavender Shawl Free Pattern