Crochet Lily Hexagon Cardigan Free Pattern
Crochet Lily Hexagon Cardigan Free Pattern
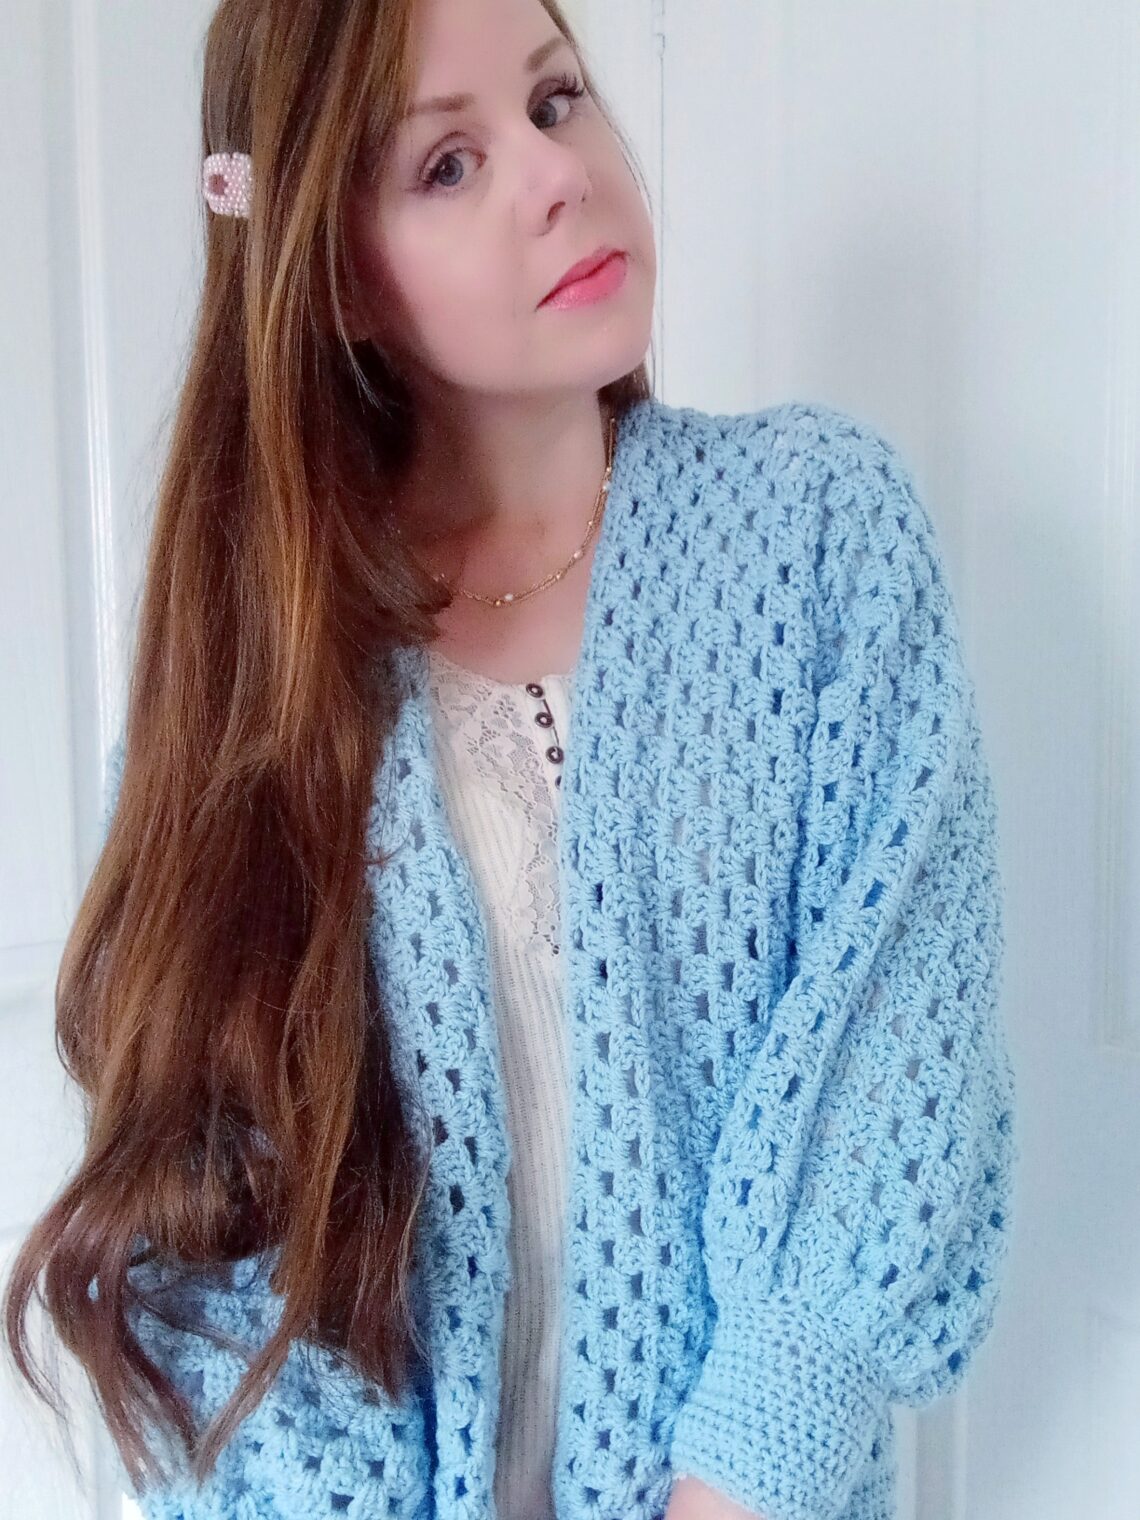
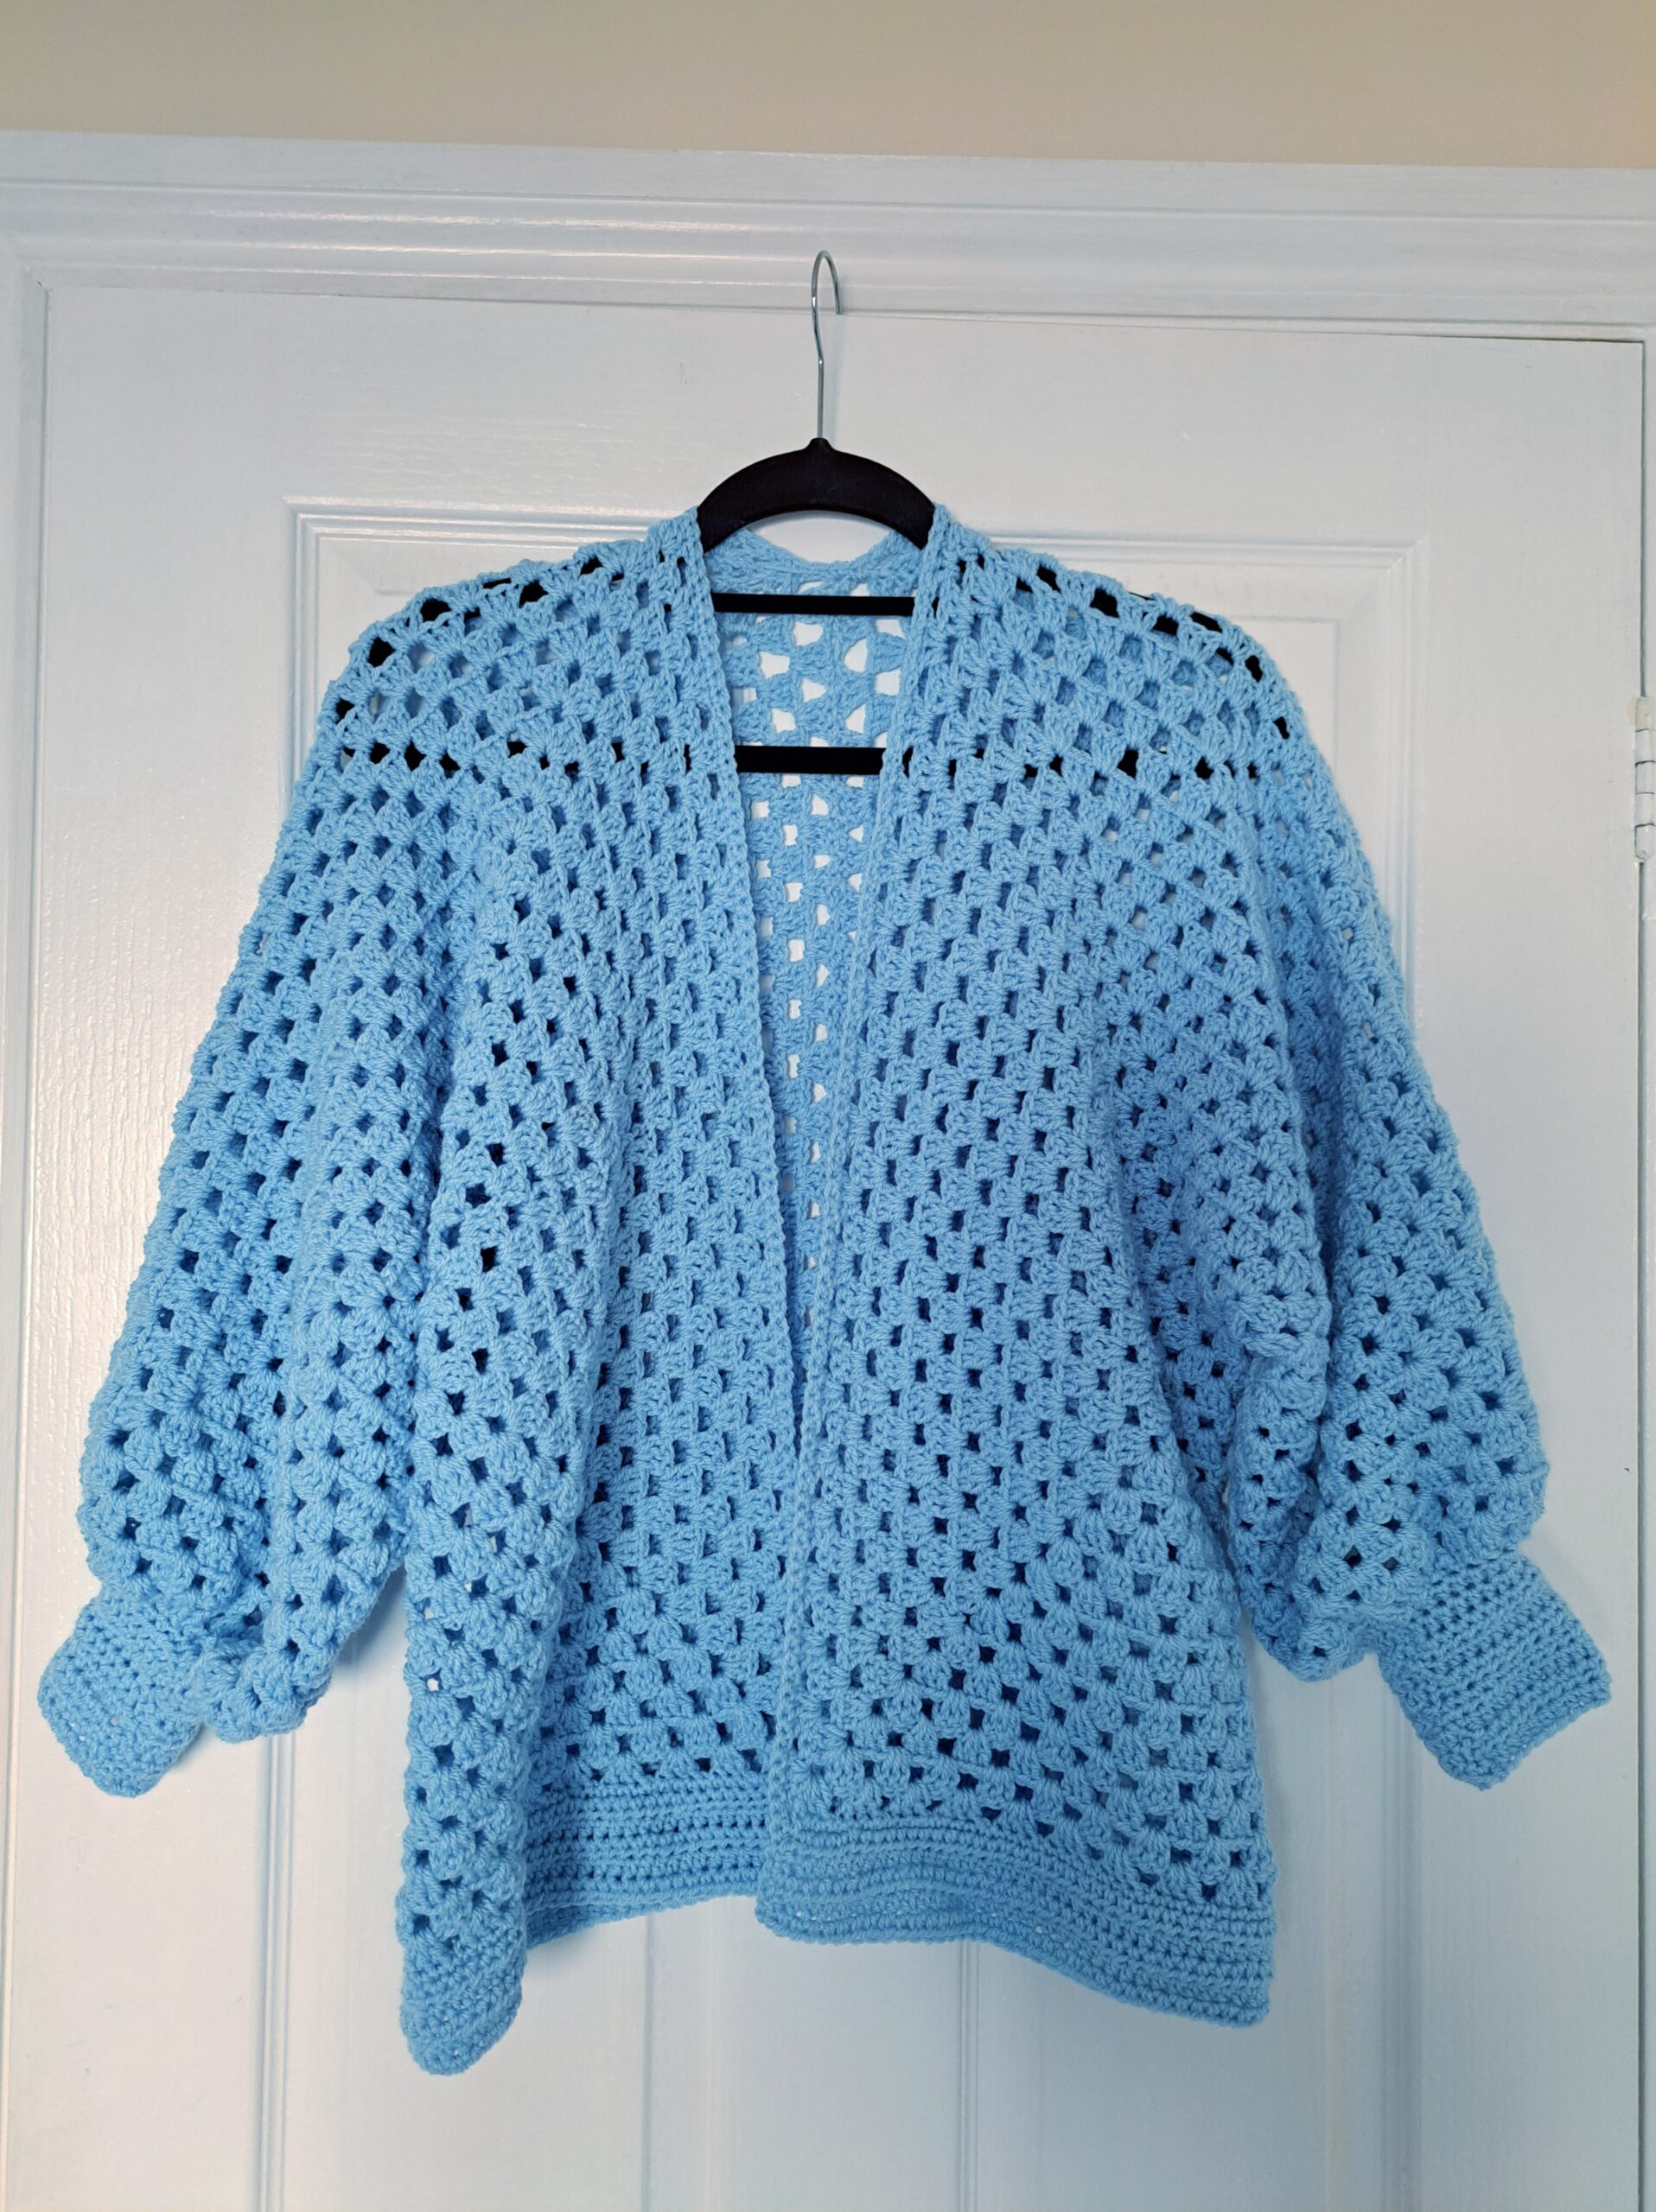
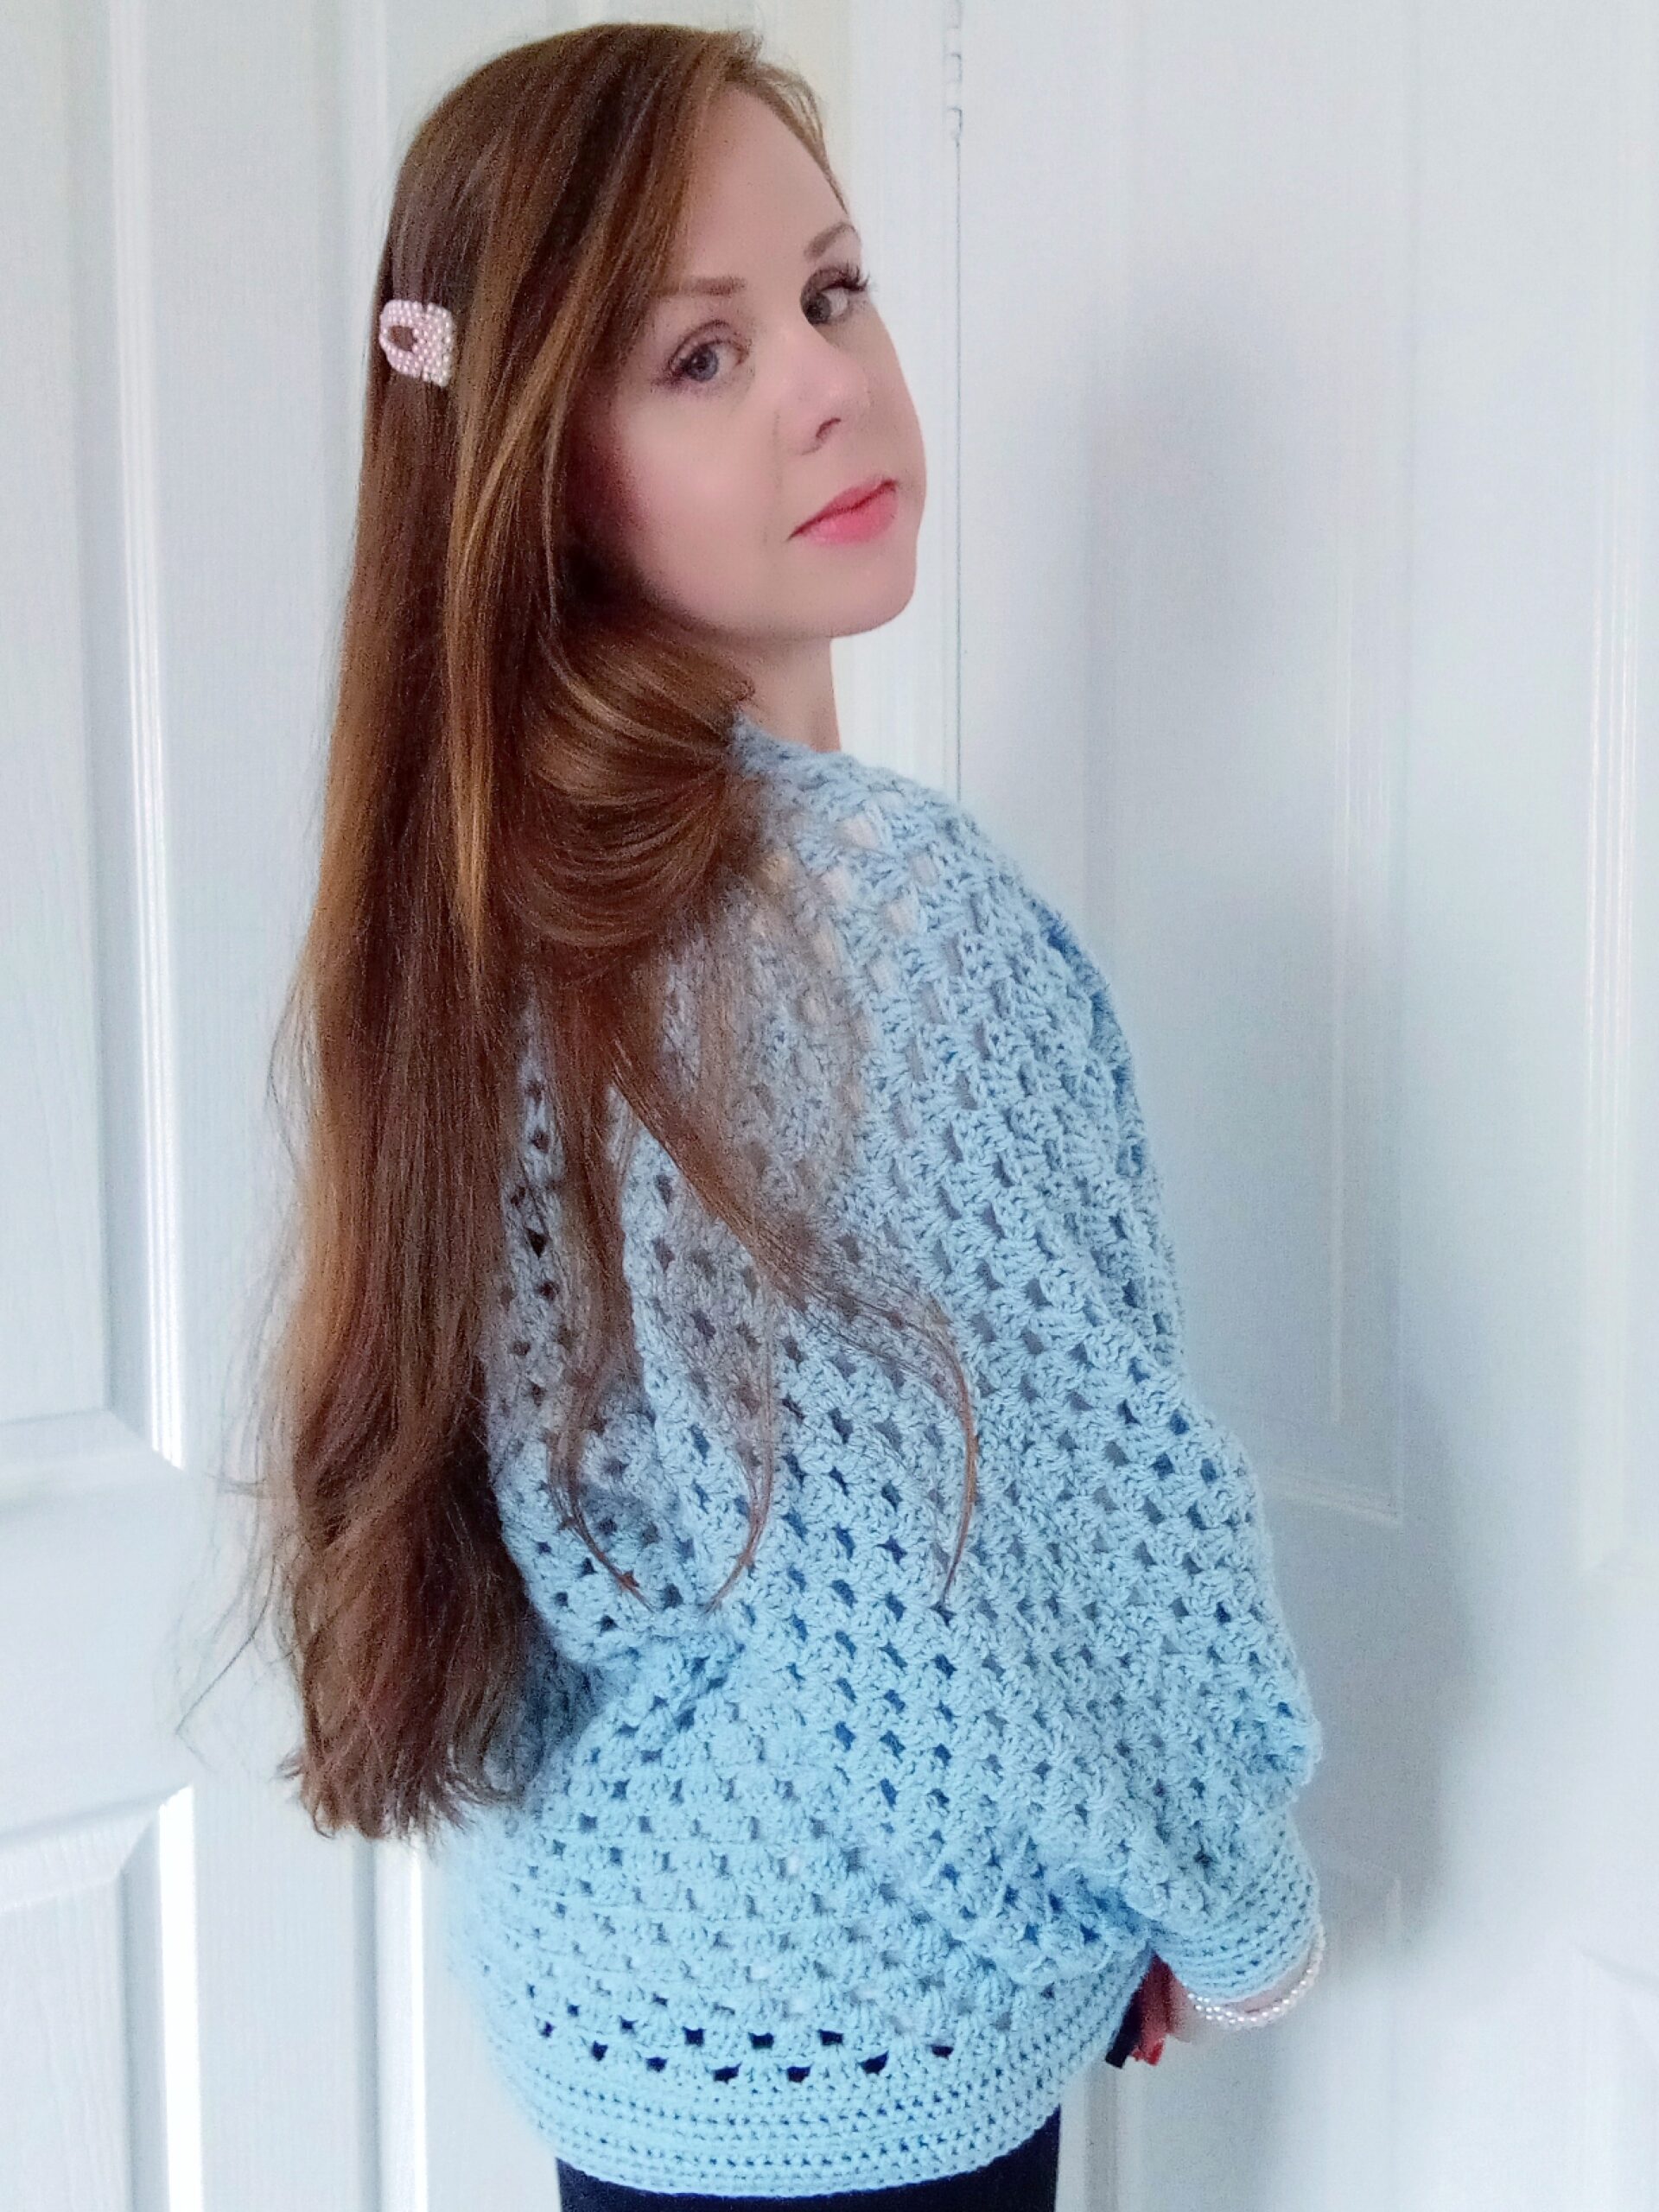
Hi everyone, today I am bringing to you this crochet Lily Hexagon Cardigan (free pattern). This new hexagon cardigan is perfect for beginners. This crochet project features the lovely granny hexagon. Two hexagons are made to create the base of this cardigan; once this shape is created, two sleeve cuffs and the bottom edging are added.
The video tutorial for this project can be found here:
Crochet Lily Hexagon Cardigan Free Pattern: The Inspiration
I have been wanting to create a new design for a hexagon cardigan. A few months ago, I designed the Lucienne Hexagon Cardigan, which has been really popular. I love cardigans so much! Indeed, cardigans are so fun to make, and are such a classic staple of any closet. The Pastel Patchwork cardigan that I crocheted a few months ago is also one of my favorite designs.
This cardigan was such a joy to crochet! Indeed, crocheting a simple hexagon is so relaxing. If you are looking for another relaxing cardigan project, don’t forget to check out this lavender cocoon cardigan.
This crocheted hexagon cardigan is perfect for beginners. Once the two hexagons are crocheted, they will be joined, before the two sleeve cuffs are added. Then the bottom edging is crocheted, before the simple Single Crochet edging is added to the front opening.
Other examples of my hexagon cardigans designs can be found here: the Sweet Dreams Hexagon Cardigan and the Lavender Hexagon Cardigan.
Crochet Lily Hexagon Cardigan Free Pattern: The Yarn
For this hexagon cardigan, I used Stylecraft Special DK yarn. This is a light 3 yarn (DK weight yarn in British terms). This is a lovely and soft 100% acrylic yarn which can be substituted with Bernat Softee baby yarn, for example.
I love using soft fine yarn to create crochet projects and accessories. This Edwardian Era shawl is perfect for beginners, and is so feminine too. Fine light 3 yarn is perfect for so many projects! Indeed, you could also crochet this easy baby blanket or this pretty knot wrap with a light 3 yarn. I know I love to crochet delicate crochet projects, and Stylecraft Special DK or Bernat Softee Baby are always perfect if you want a more refined crochet item.
In terms of accessories, I crocheted the Delicate Rose Bow hair slide with Lion Brand Coboo yarn. This is also one of my favorite yarns!
Connecting with you
I would like to take a moment to thank every single one of you, for supporting me and my crochet journey. Indeed, If you want more exclusive crochet content from me, please do consider subscribing to my Patreon page. Thank you!
I love connecting with my Crochet Community through my blog and Social Media. You can find me on Youtube, Instagram, and Pinterest. I would love to connect with you on these platforms.
If you are on Ravelry, you can find my Ravelry page here. This is a great way to connect with me and have access to all of my PDF patterns. You can also find my Etsy shop by clicking here.
You can also join my private Facebook group to connect.
Crochet Lily Hexagon Cardigan: The Pattern
You can purchase the ad free, large print, PDF pattern from my Etsy store here: Crochet Lily Hexagon Cardigan PDF Pattern
You can purchase the ad free, large print, PDF pattern from my Ravelry store here: Crochet Lily Hexagon Cardigan PDF Pattern
Level: Easy +
Notes
I will be writing in US terms (British terms in brackets)
The video tutorial for this project can be found here:
Materials
4 skeins (sizes XS/S/M), 5 skeins (sizes L/XL), 6 skeins (sizes XXL/XXXL) of Stylecraft Special DK in shade Cloud Blue (you can substitute with Bernat Softee Baby yarn)
4 mm crochet hook
4,5 mm crochet hook
A tapestry needle
A pair of scissors
Gauge
4” (10 cm) x 4” (10 cm) = 5 rounds of hexagon
Sizes of finished cardigan
These are the sizes measured once cardigan has been assembled, including the edgings and borders, and excluding sleeves.
Because this is a hexagon cardigan, the sleeves are wide for each size, and they are just worked up automatically while we crochet both our hexagons to form cardigan. Therefore, they automatically are bigger if you crochet a bigger size (ie add more rounds to each hexagon).
Size S:
24” (61 cm) in length x 20,5” (52 cm) in width
Size M:
25,2” (64 cm) in length x 23” (58 cm) in width
Size L:
26,5” (67 cm) in length x 25,5” (65,5 cm) in width
Size XL:
27,7” ( cm) in length x 28” (cm) in width
Size XXL:
29” (71,5 cm) in length x 30,5” (77 cm) in width
Size XXXL:
30,2” (77 cm) in length x 33” (84 cm) in width
Abbreviations
ch: chain
sk: skip
SP: space
St: stitches
SC: Single Crochet (= UK Double Crochet)
DC: Double Crochet (=UK Treble Crochet)
HDC: Half Double Crochet (=UK Half Treble Crochet)
Sl st: Slip stitch
EOR: End of round
General notes concerning this pattern and crochet hexagons
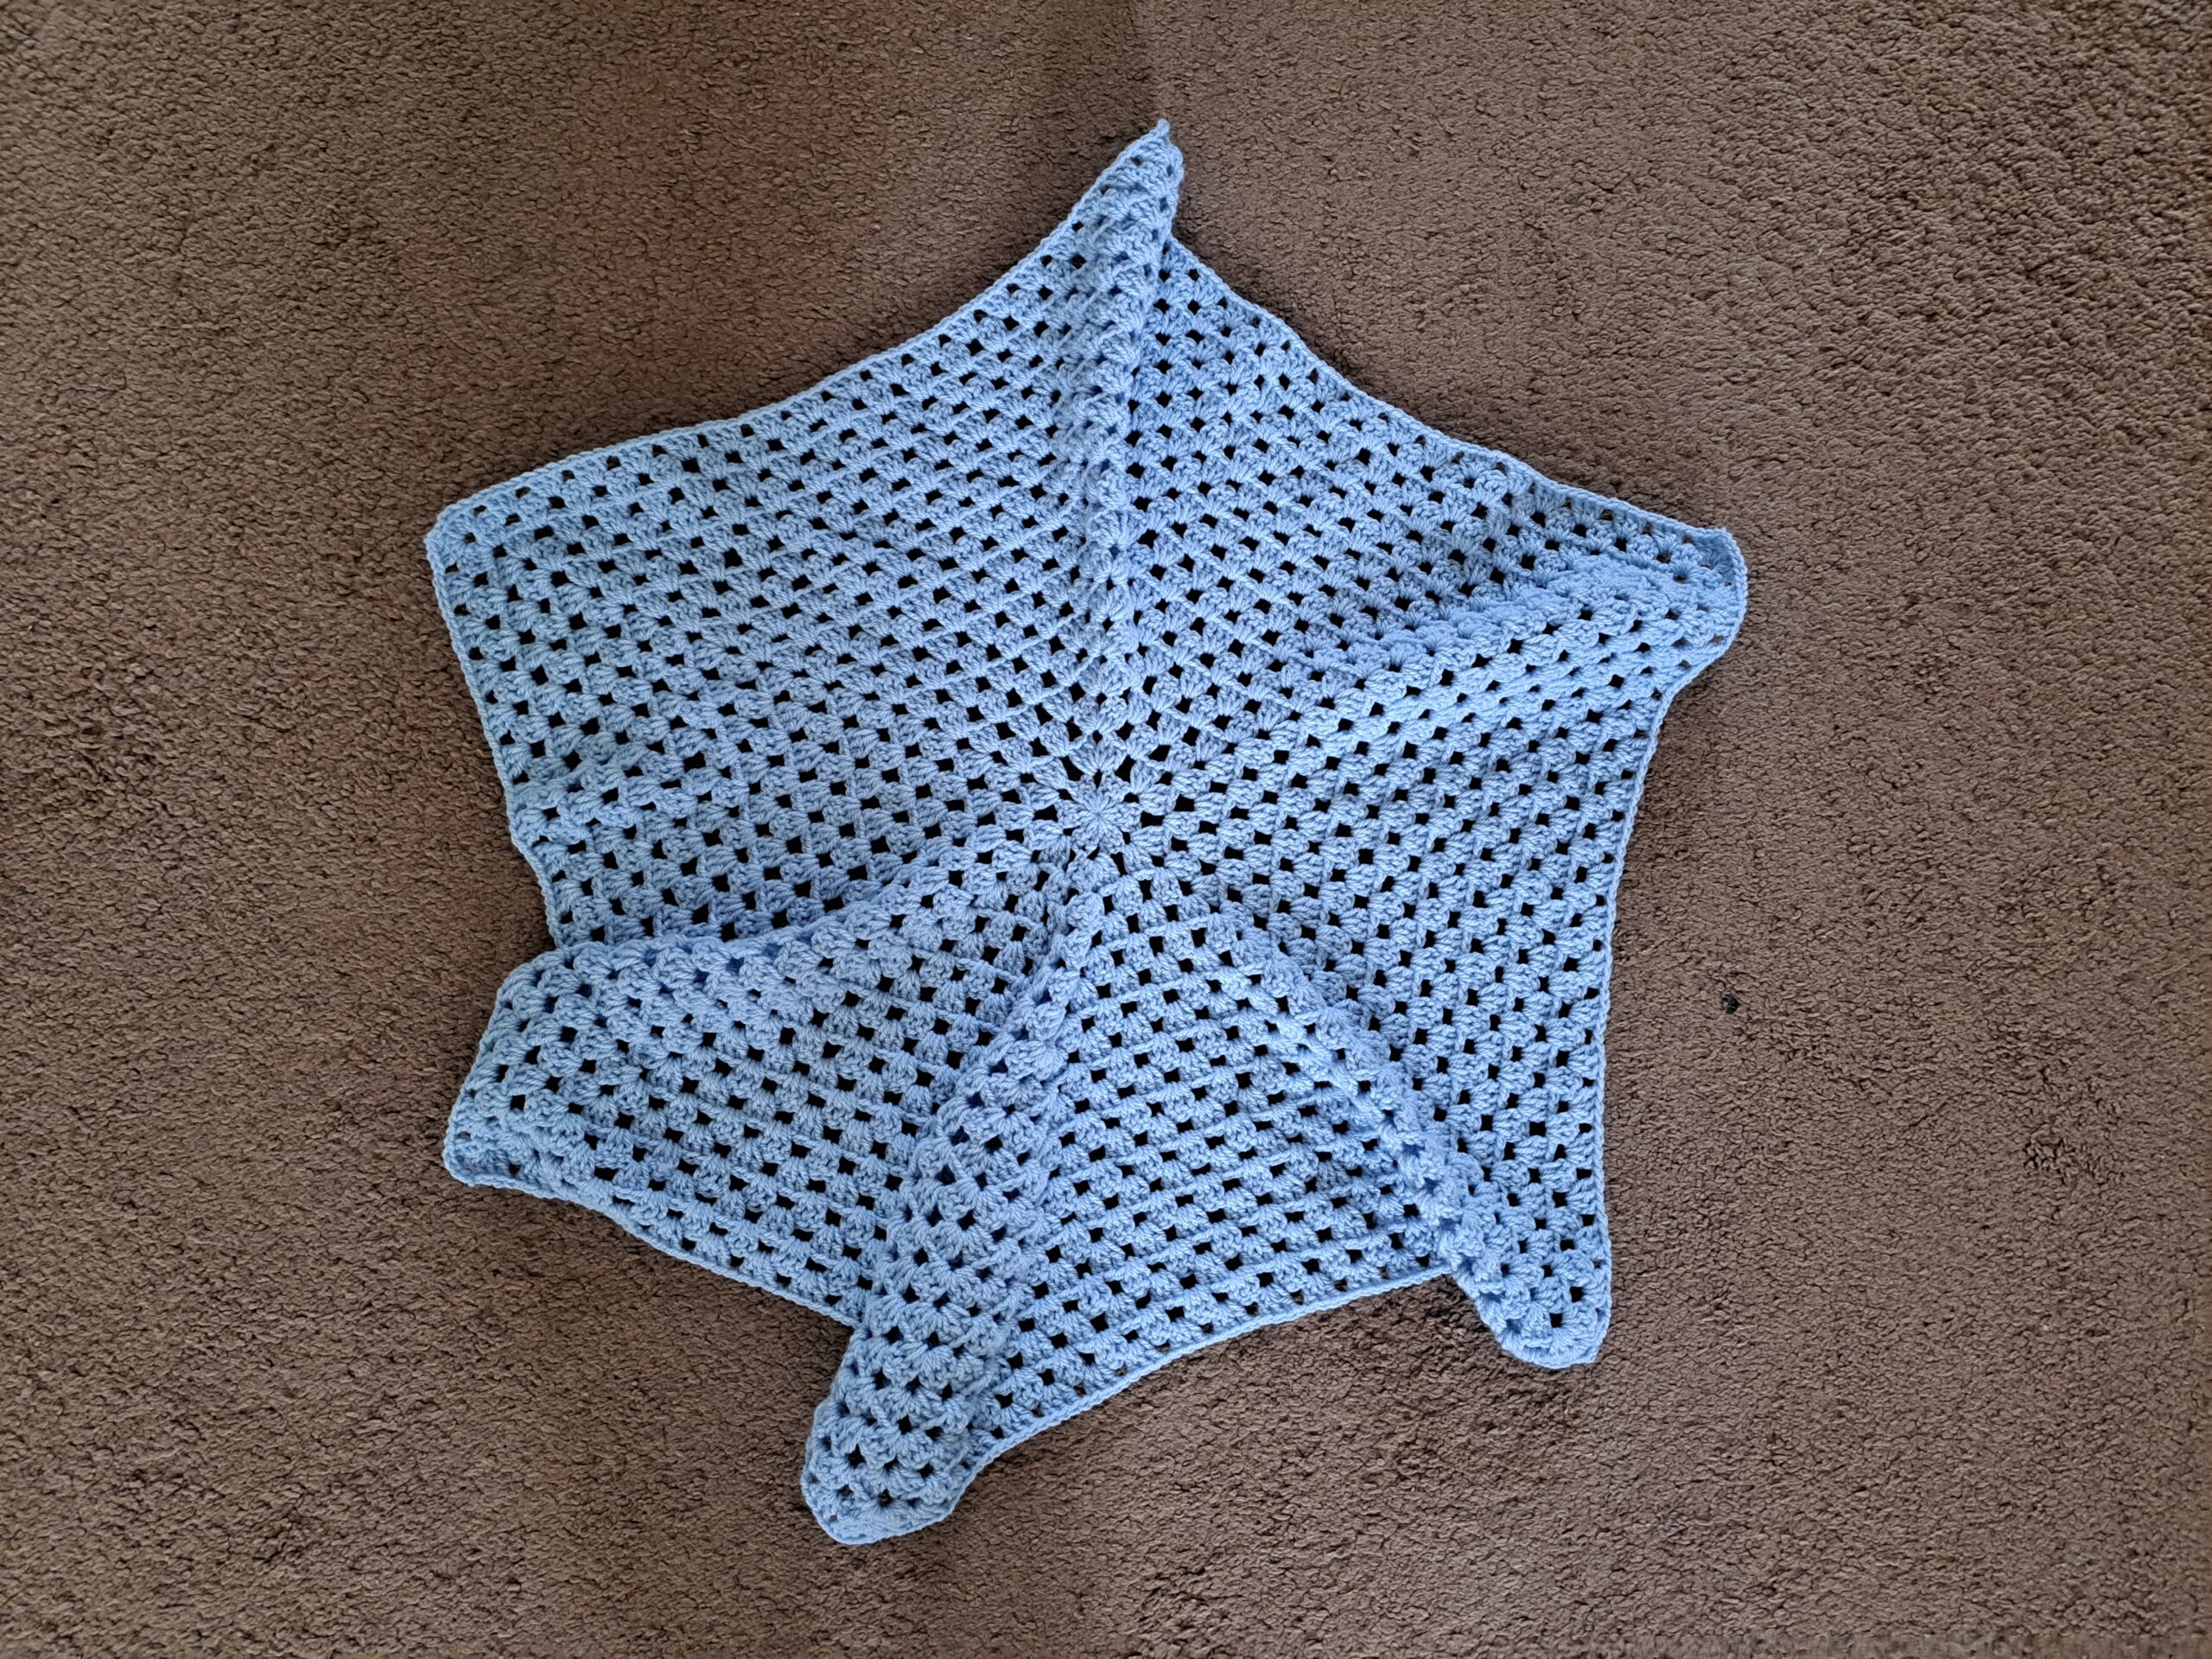
Hexagons do not lie flat whilst you crochet them, they are instead wavy. Please note this is completely normal and once have finished each hexagon (we will be crocheting 2), we will be placing them flat and folded in such a way that they will lie flat and create the shape of the cardigan.
The fact that each hexagon does not lie flat as you crochet it is not a mistake.
Corner spaces will always feature 3 chains, and the side spaces always feature 1 chain.
The chain 3 at the beginning of each round counts as a HDC throughout.
There will always be 6 corners per row for each hexagon. Each corner will be comprised of 3 DC, ch 3, 3 DC.
Begin pattern here
Use 4,5 mm crochet hook for this part.
Create your hexagon (you will be making 2 identical hexagons)
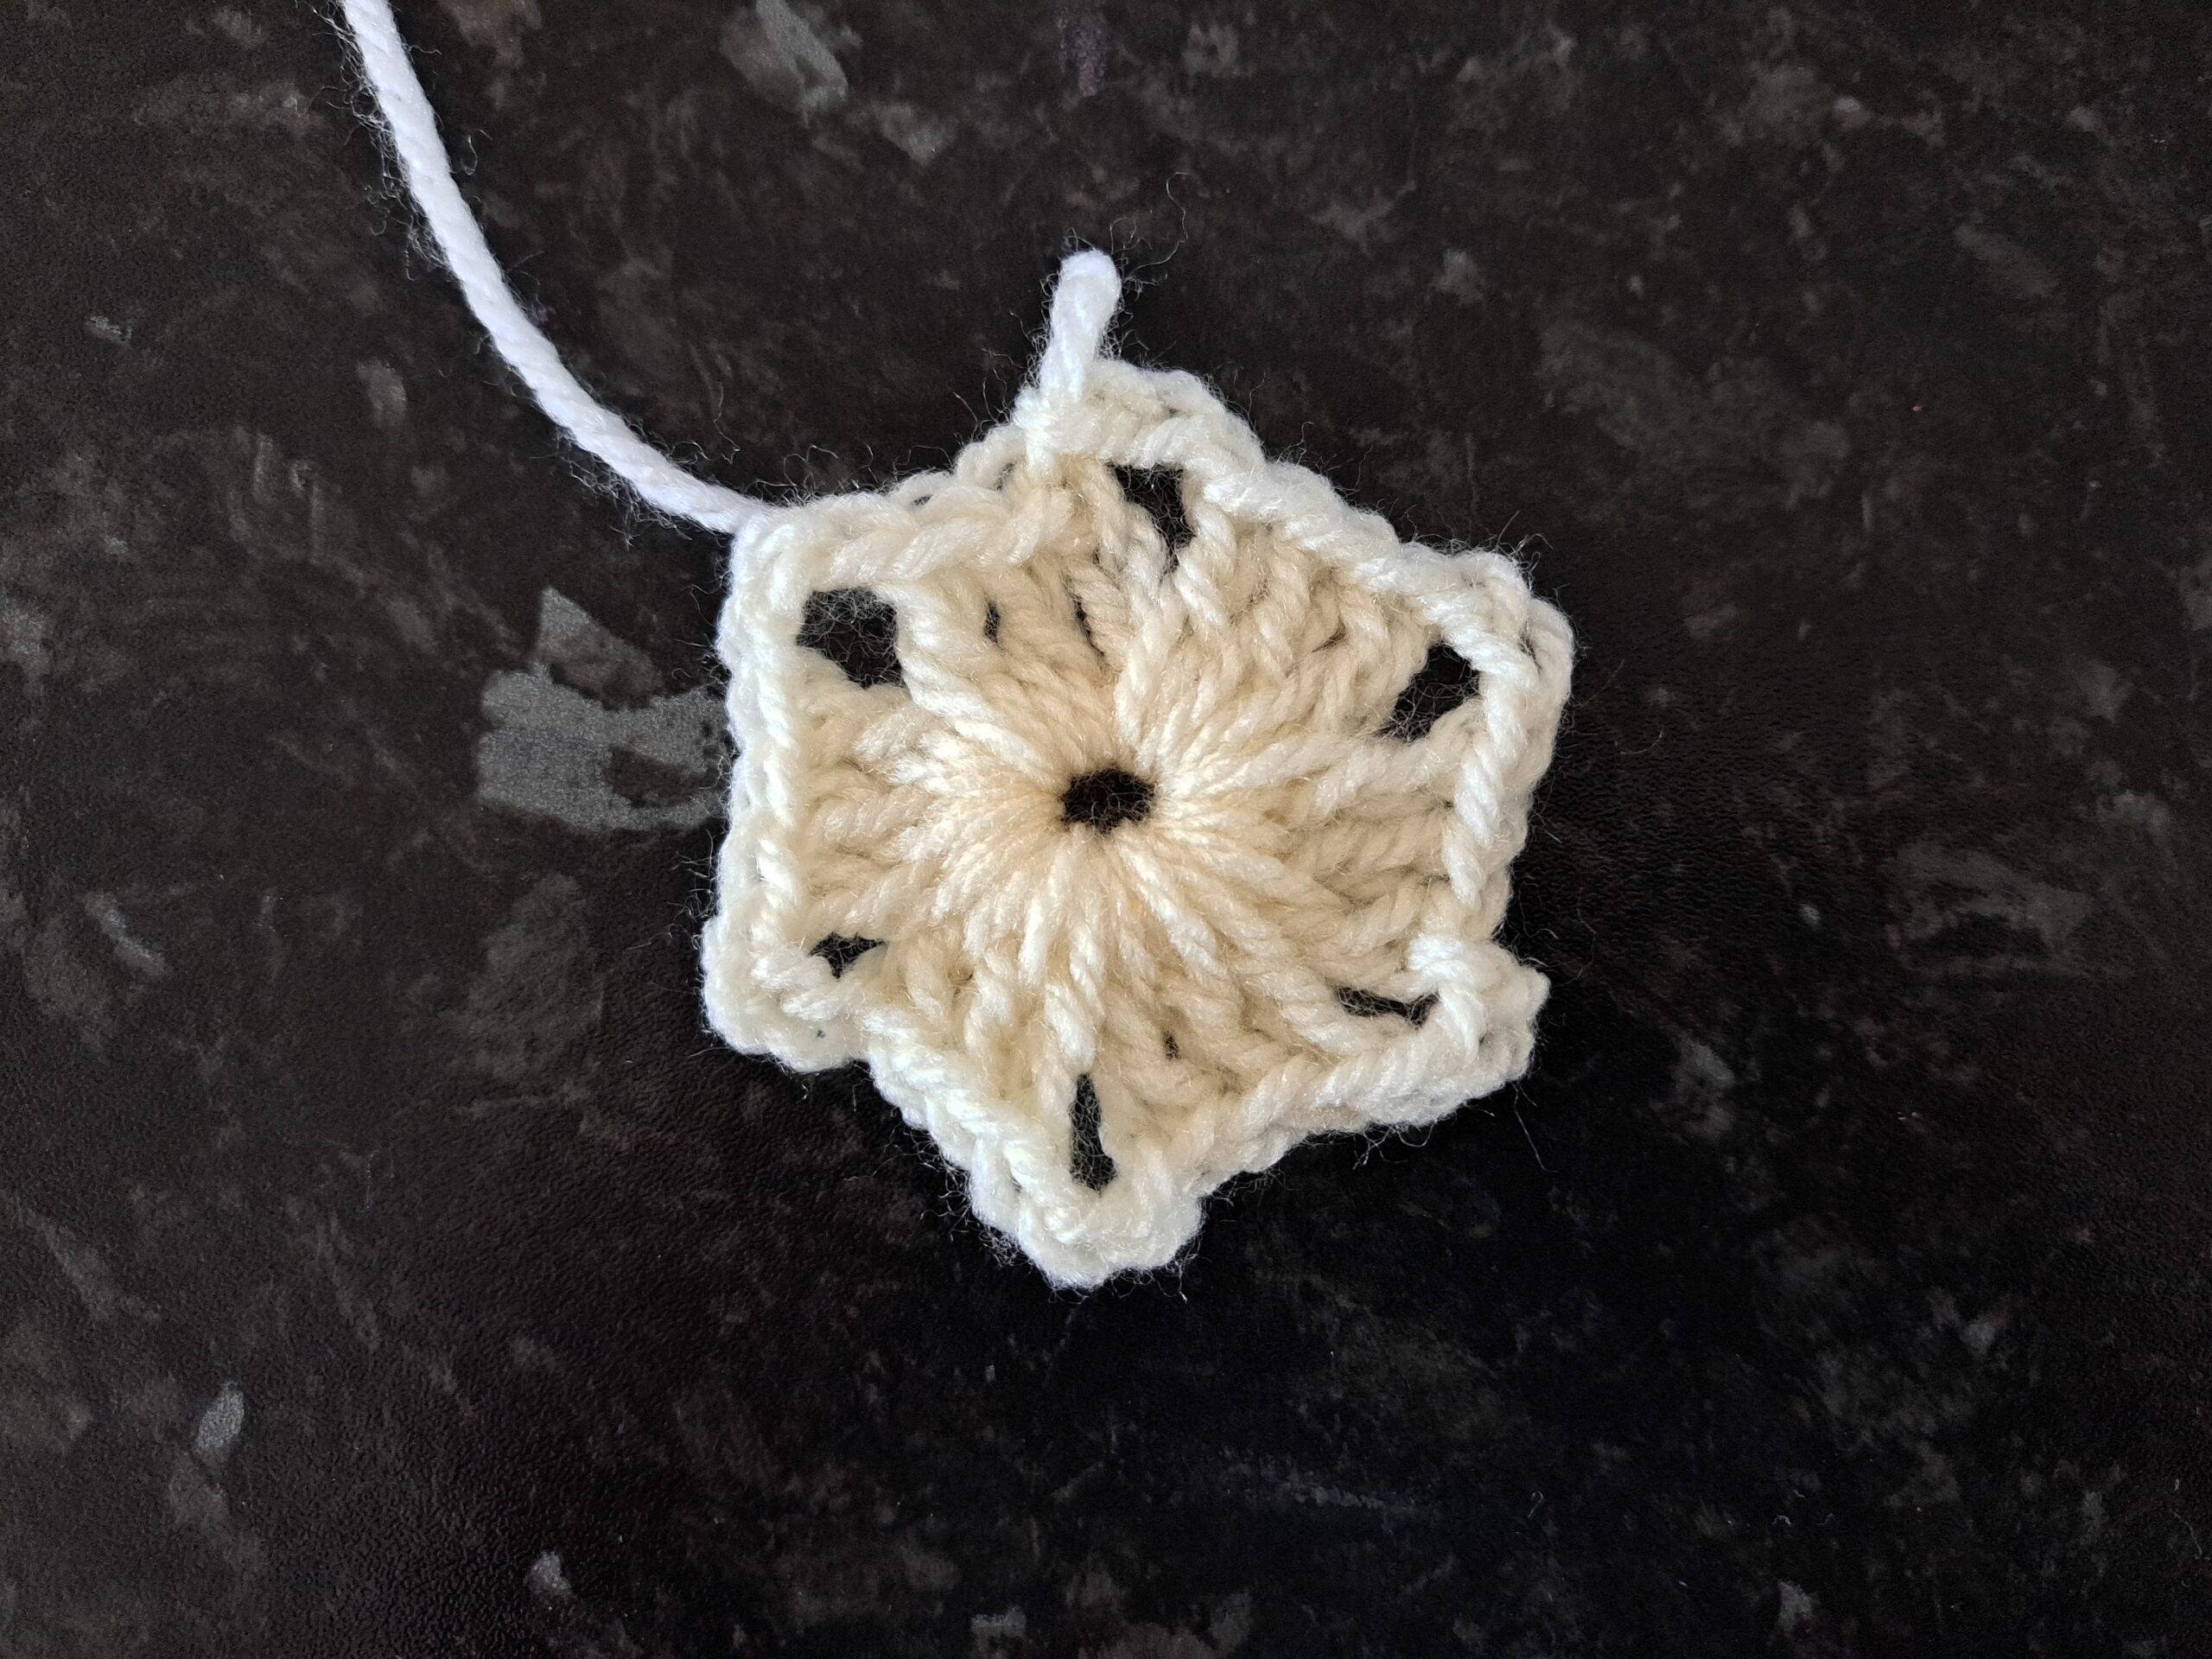
Ch 5, sl st to first ch to form a ring.
Complete rounds as follows:
1: Ch 3 (=DC), 2 DC within the ring (=3 DC total); [ch 3, 3 DC] 5 times, ch 3, sl st to first ch 3 to close round.
2: Ch 3 (=DC), turn your work, work 2 DC in ch 3 sp from previous row (=3 DC total), ch 3, 3 DC into same sp; [ch 1, place 3 DC, ch 3, 3 DC into next ch 3 from previous row] until eor. Ch 1, sl st to 1st ch 3 to close round.
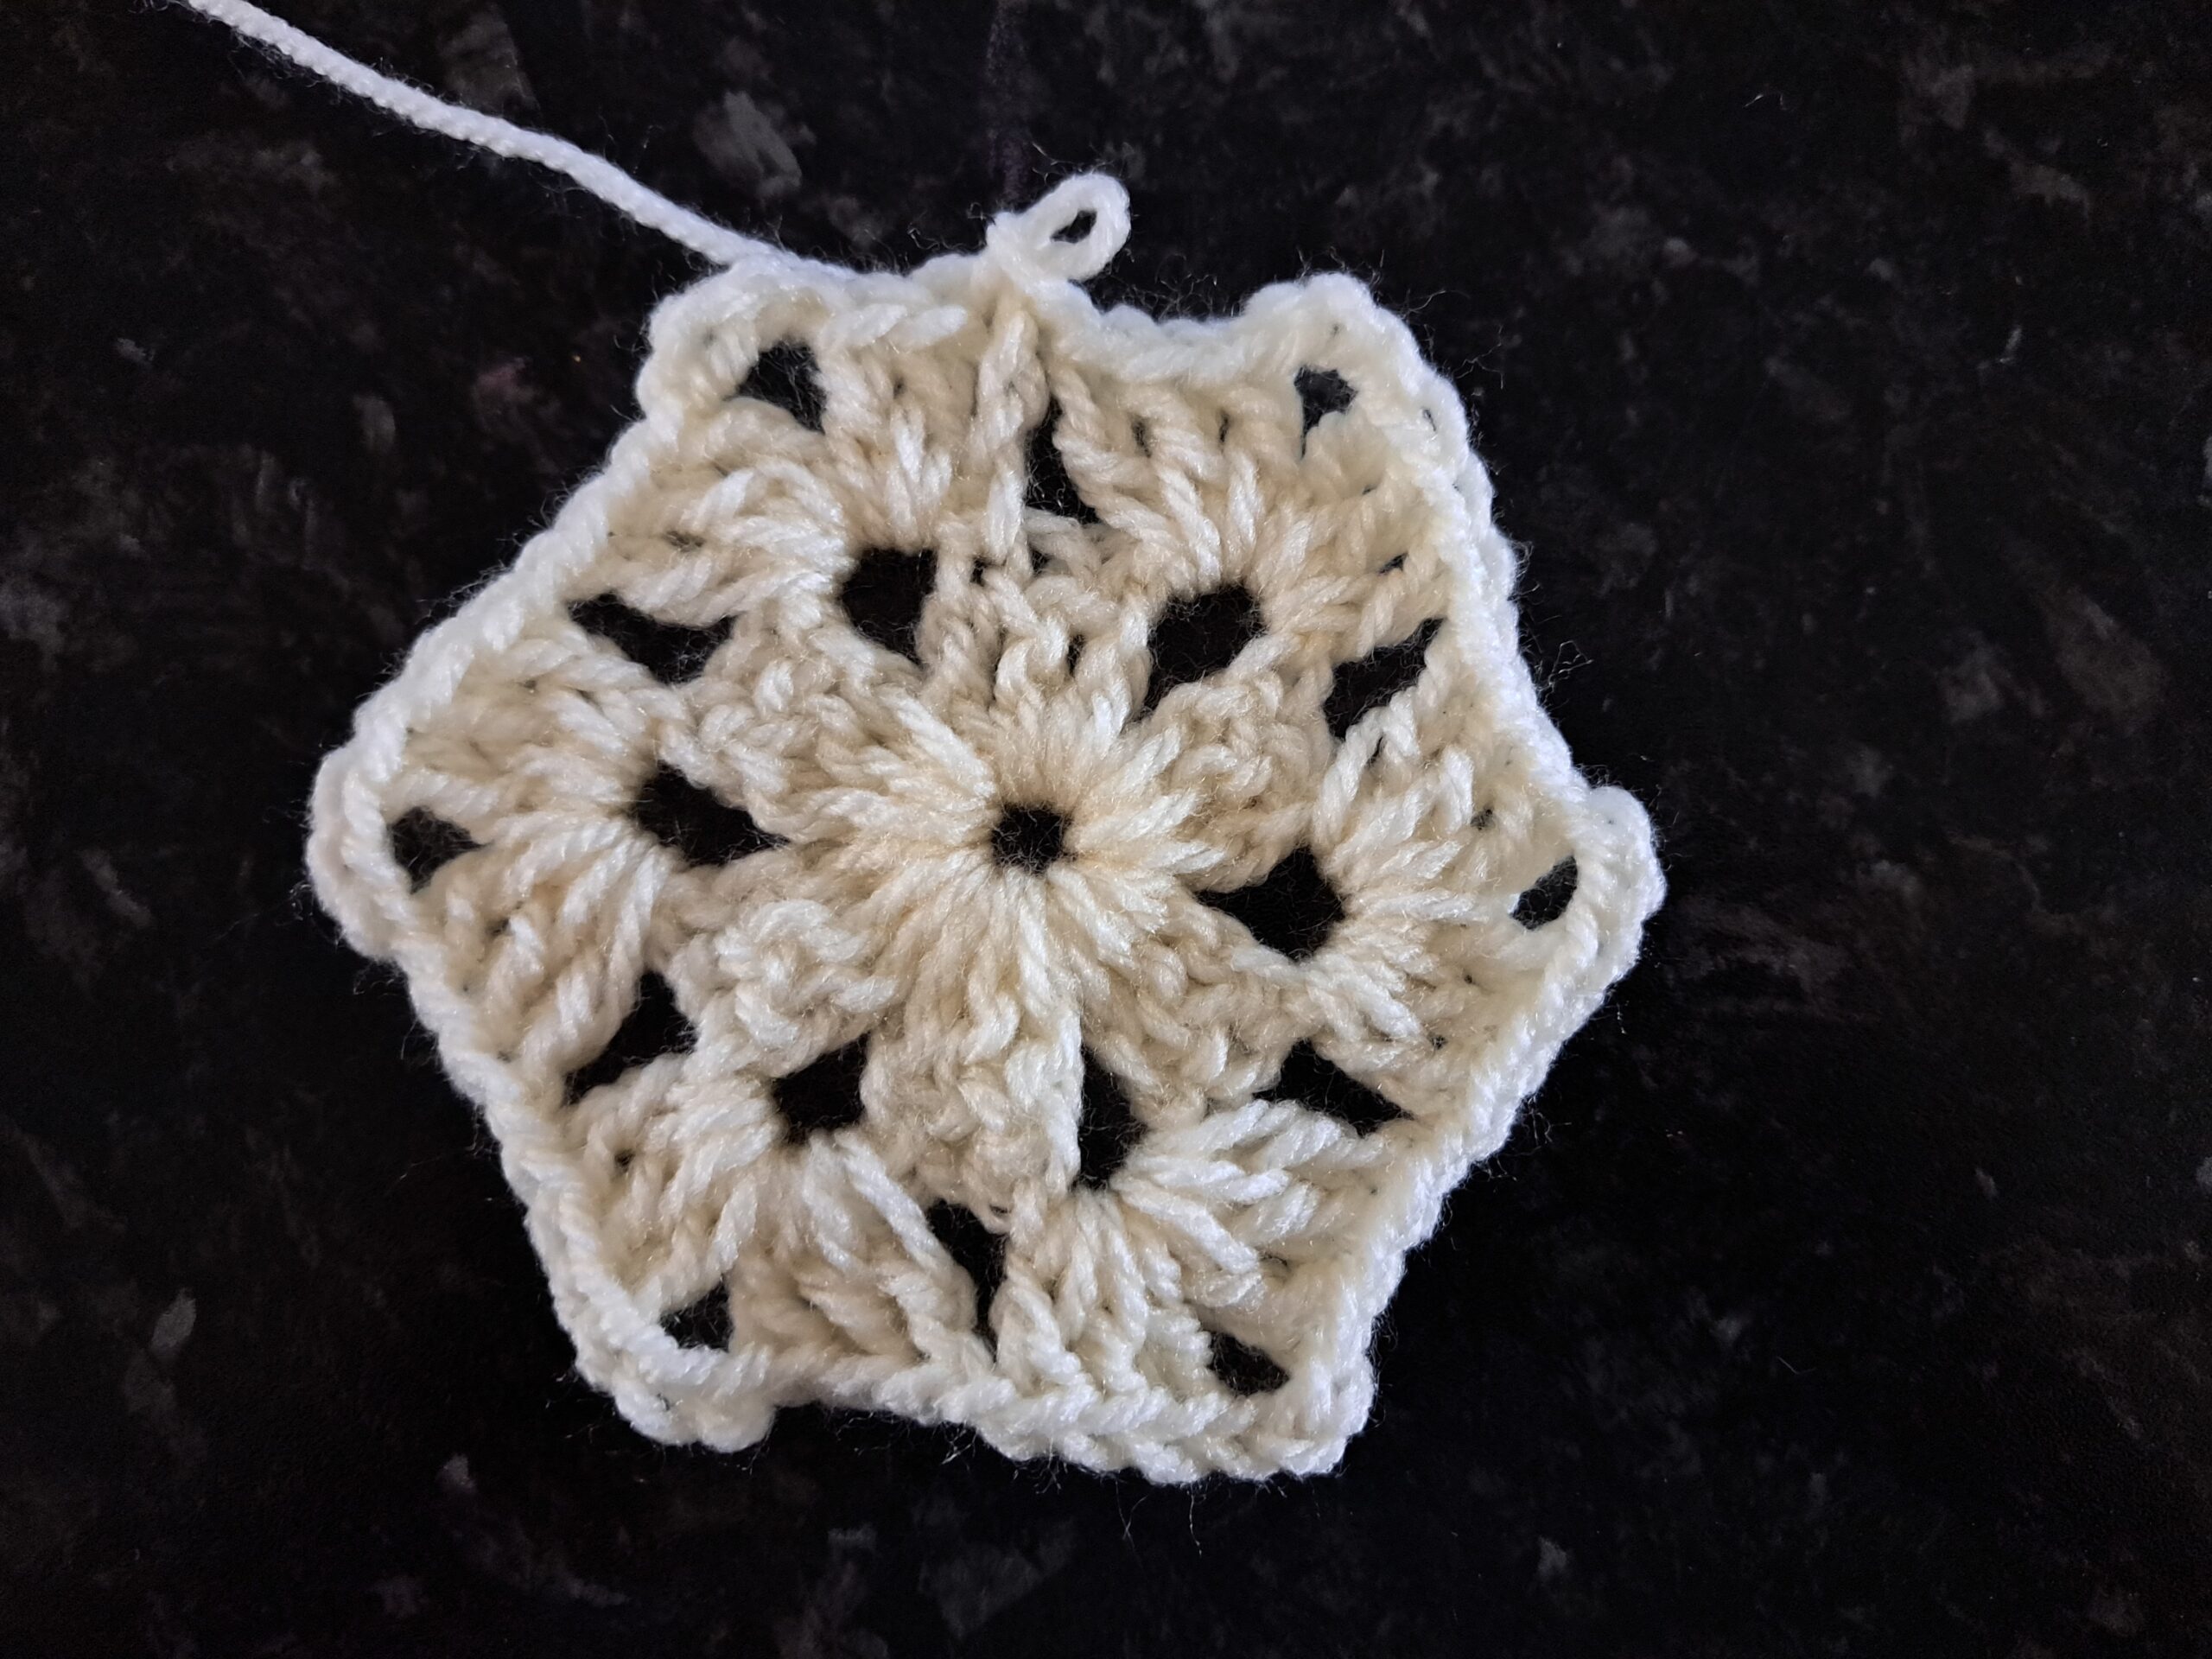
3: Ch 3, turn your work, work 2 DC into ch sp from previous row. Ch 1, [3 DC, ch 3, 3DC] into next ch sp (which is also the corner); [Ch 1, 3 DC into next ch sp, ch 1; 3 DC, ch 3, 3 DC into next ch sp], until eor. Ch 1, sl st to first ch 3 to close round.
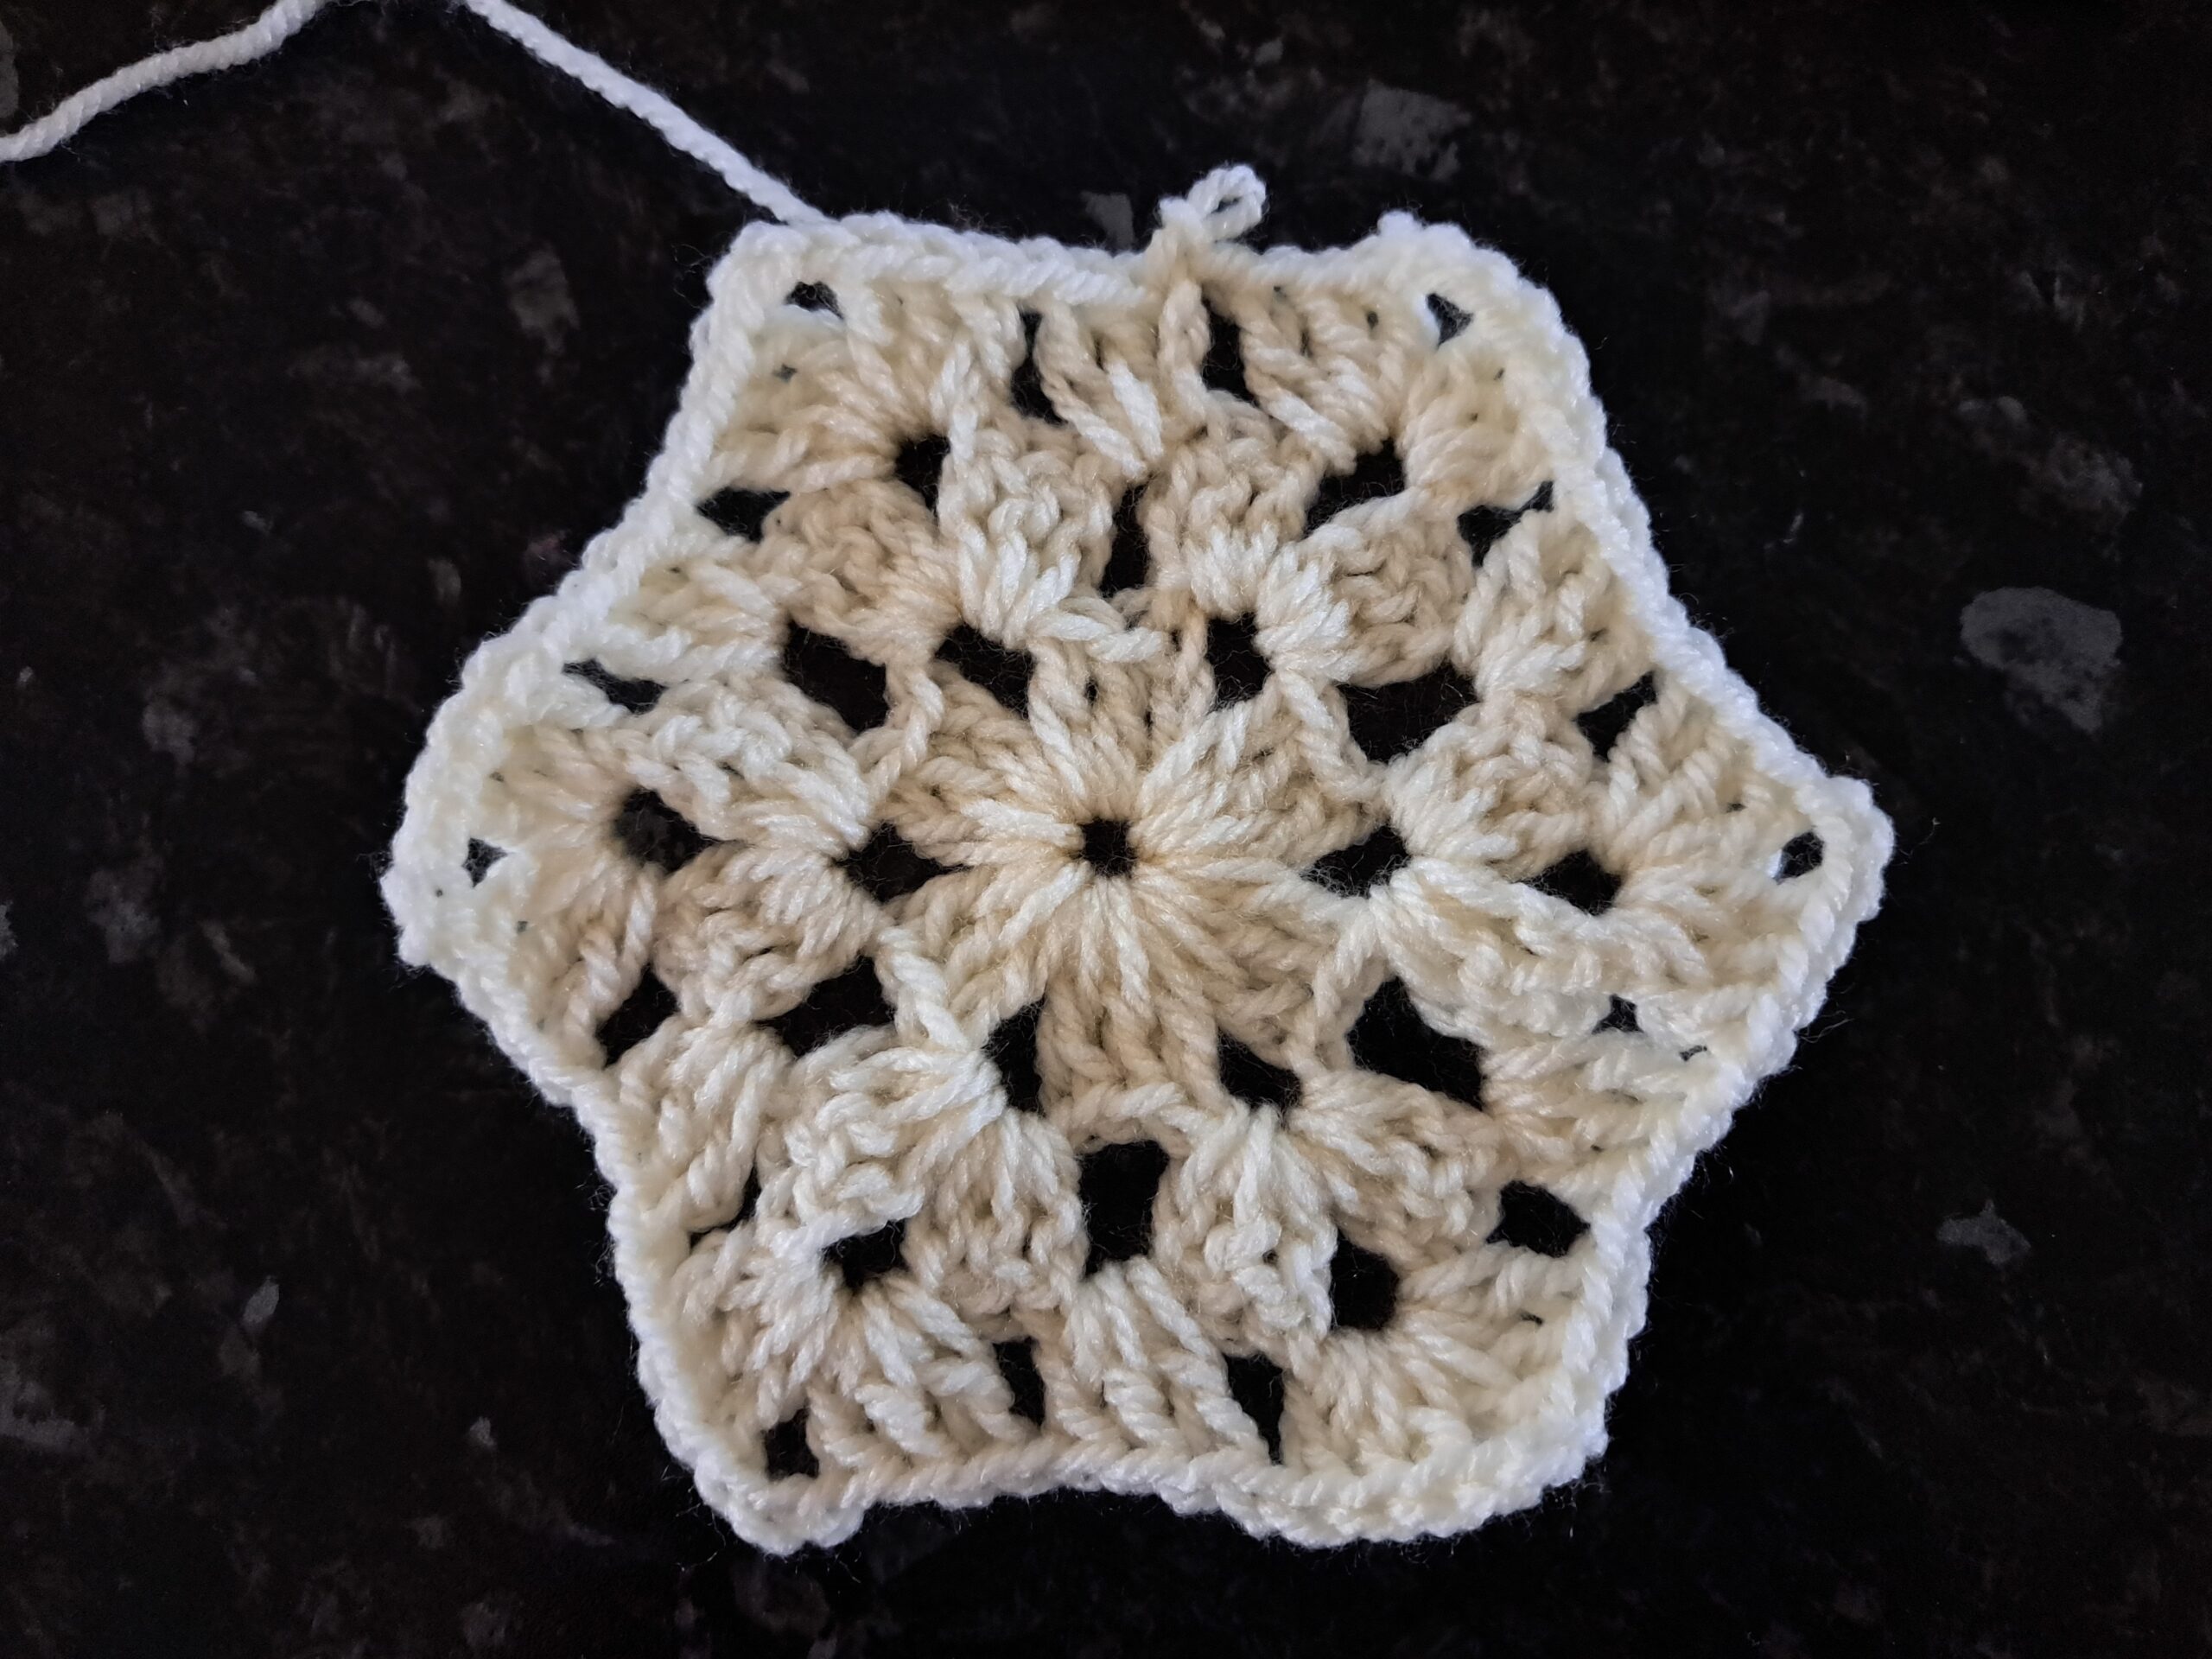
4: Ch 3 (=DC), turn your work, 2 DC into ch sp from previous row (=3 DC total); *ch 1, 3 DC, ch 3, 3 DC into next ch sp (=corner); [ch 1, 3 DC into next ch sp 2 times] ** Repeat from * to ** 5 times; ch 1, 3 DC, ch 3, 3 DC into next ch space; ch 1, 3 DC into next ch space, ch 1, sl st to ch 3 from beginning of row to close of round.
We are now starting to see this pattern being worked up more clearly. As the hexagon will grow, we will have more “side” clusters of 3 DC, and have 6 clusters of 3 DC, ch 3, 3 DC which are the corners (we will always have the same number of corners which is 6 throughout).
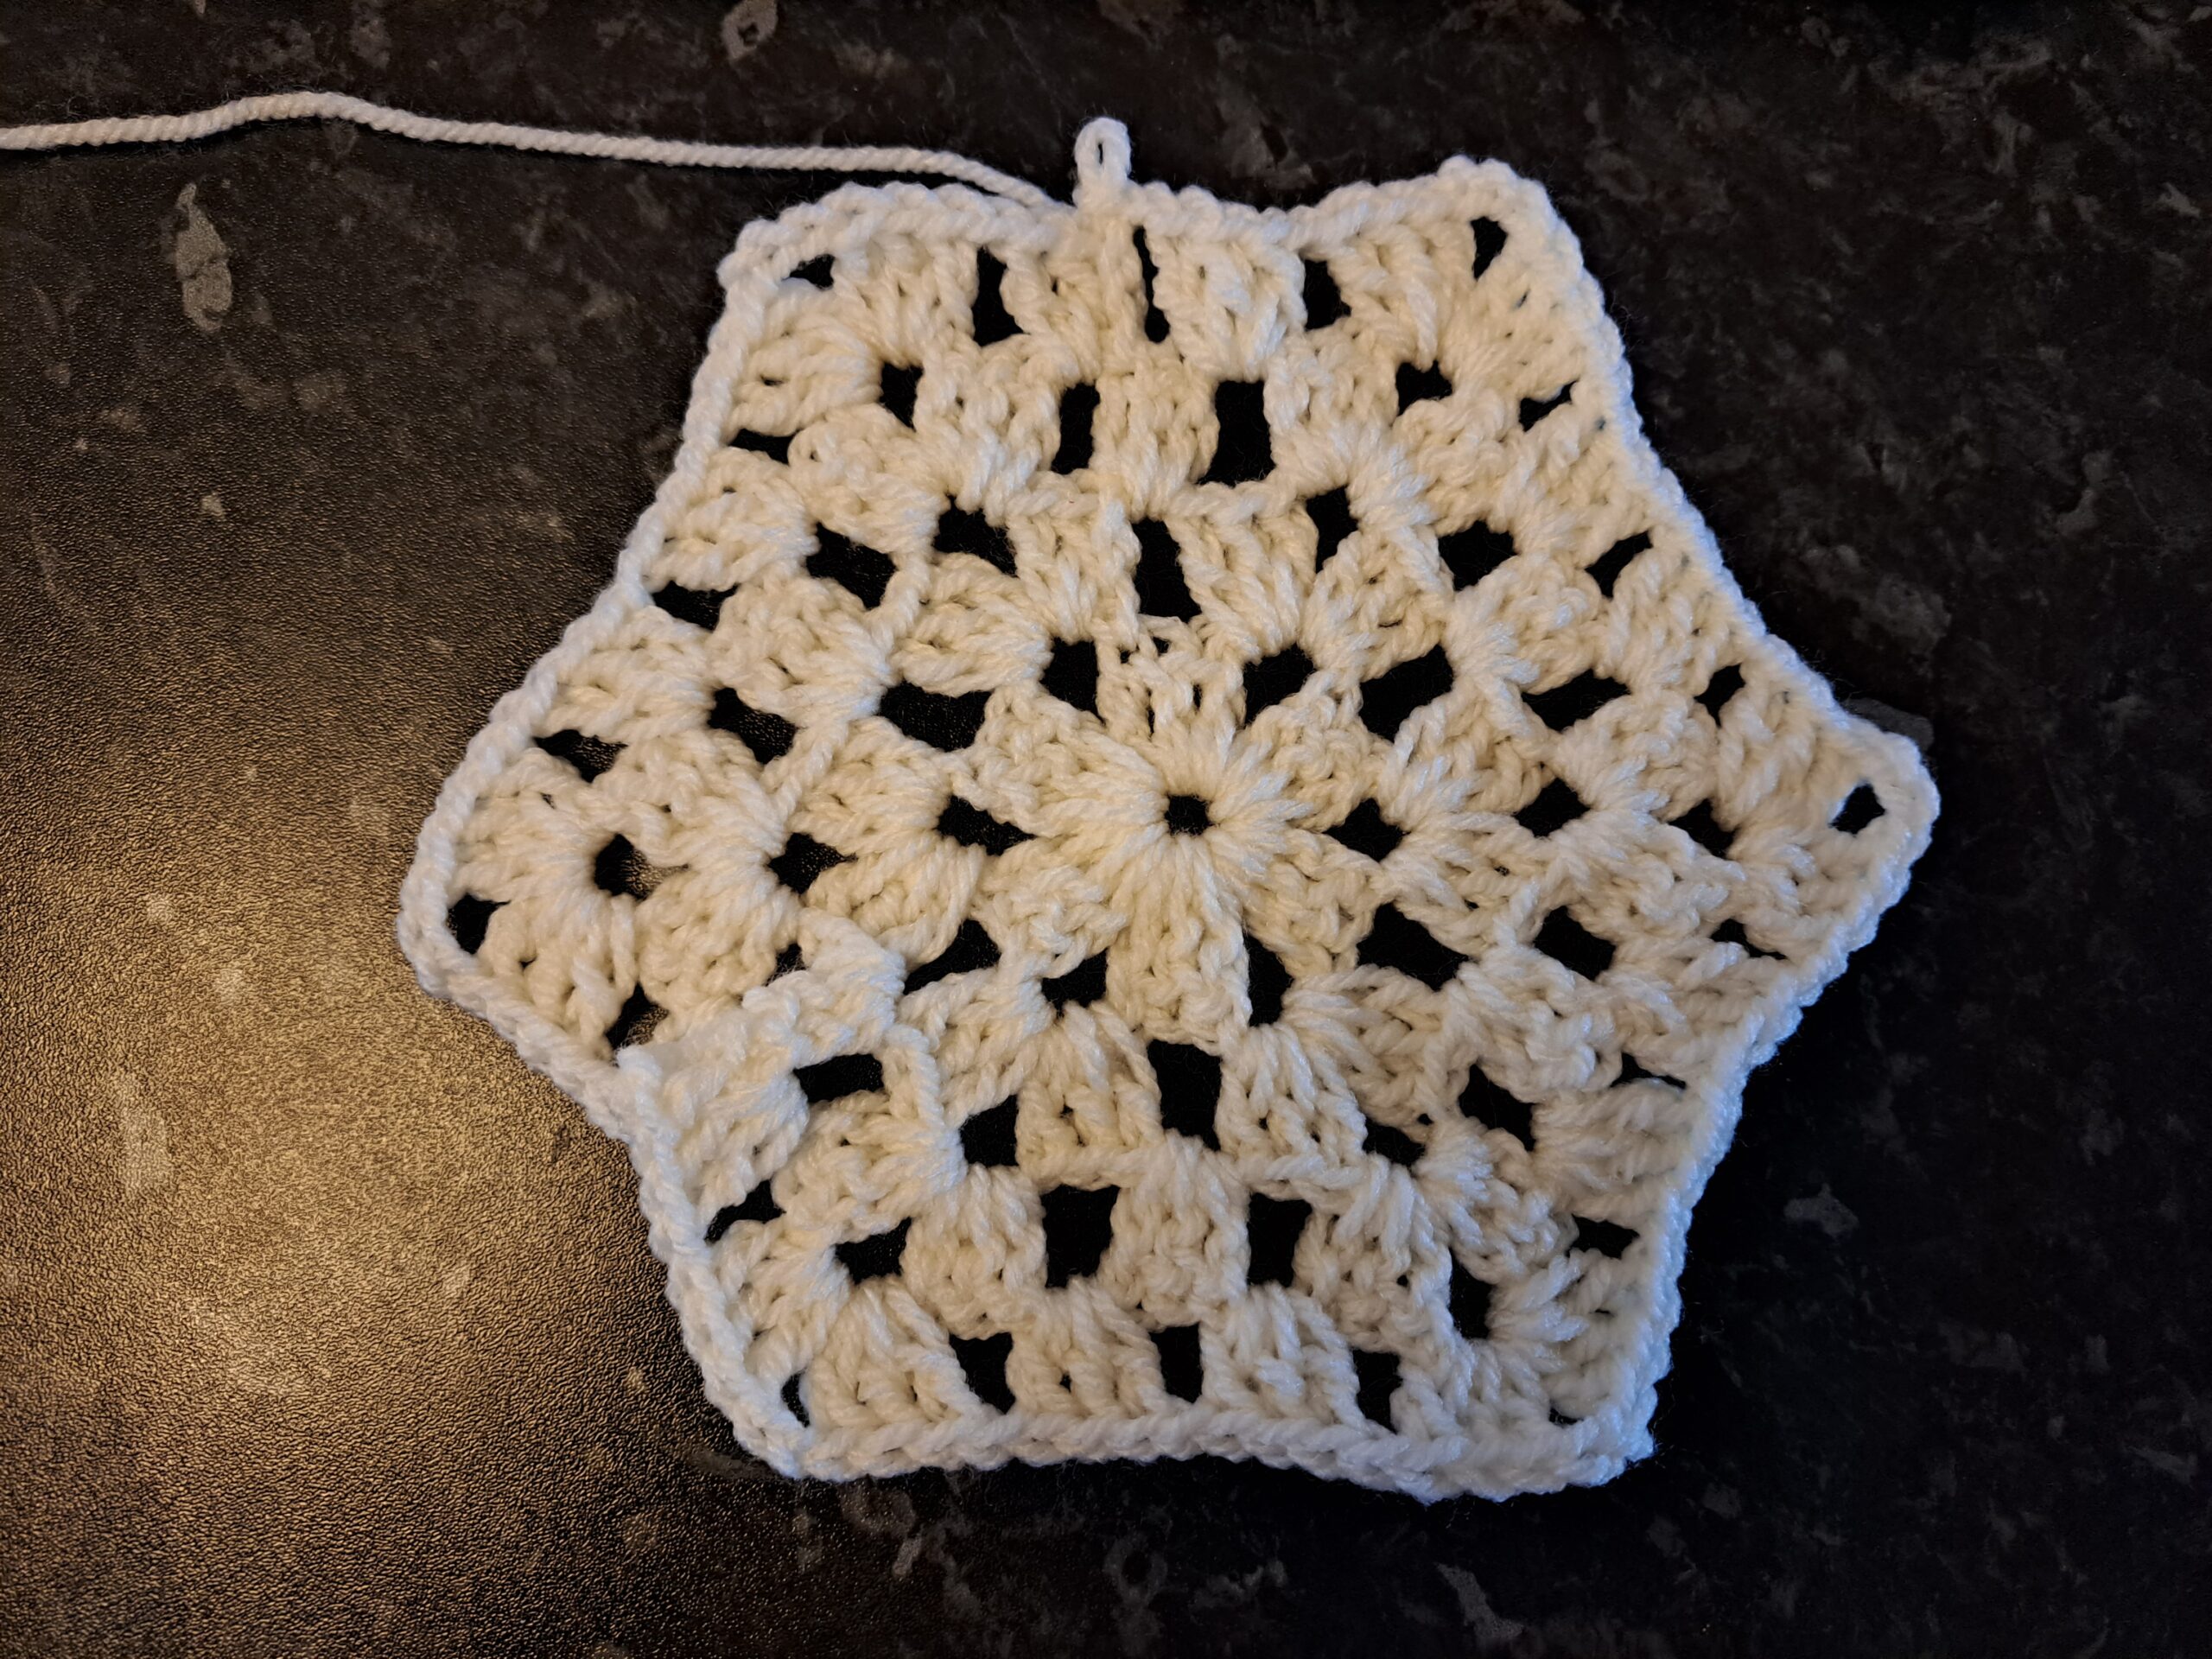
5-20 (S), 22 (M), 24 (L), 26 (XL), 28 (XXL), 30 (XXXL):
Repeat row 4, always adding 1 cluster of 3 DC per side per round as you increase your rounds. Of course, there will always be only 6 corners per round as you go along, where you will be placing 3 DC, ch 3, 3 DC.
Assembling your cardigan together
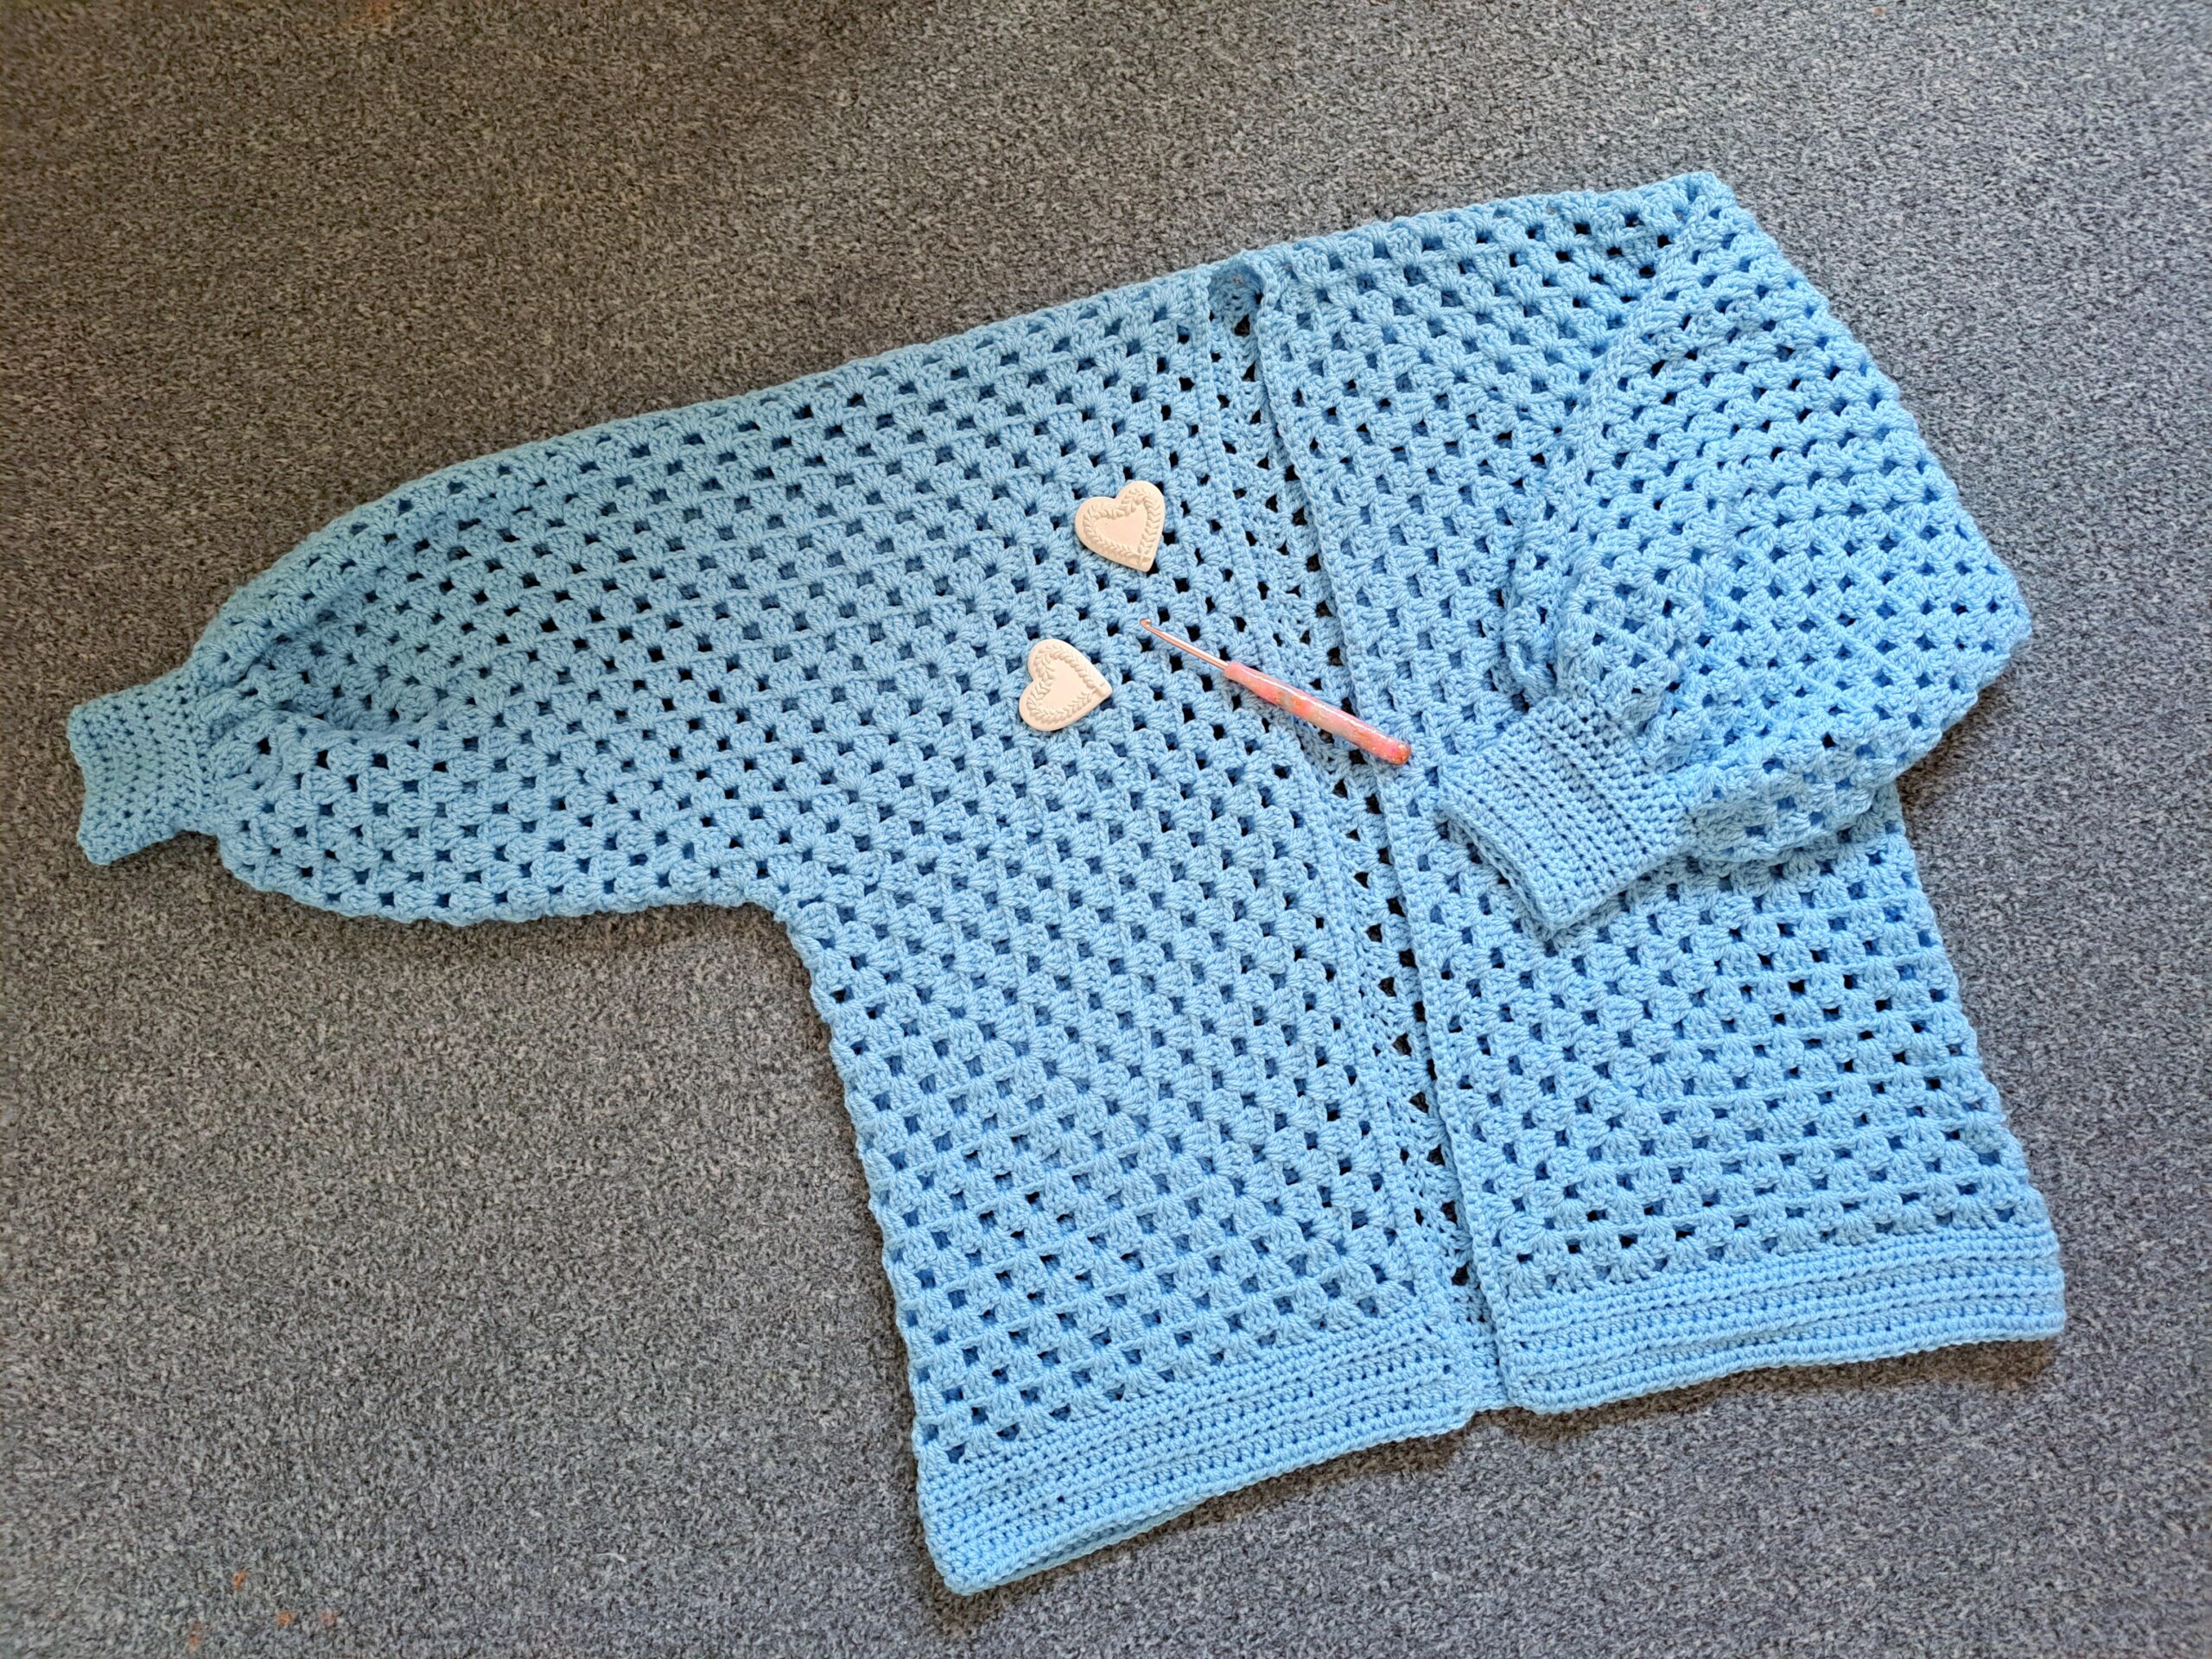
Once you have completed your 2 hexagons, fasten off, tidy up all loose ends. Sew in the center (where we began) of each hexagon to prevent unraveling.
Now place both hexagons side by side, folding them so as to form the shape of a cardigan.
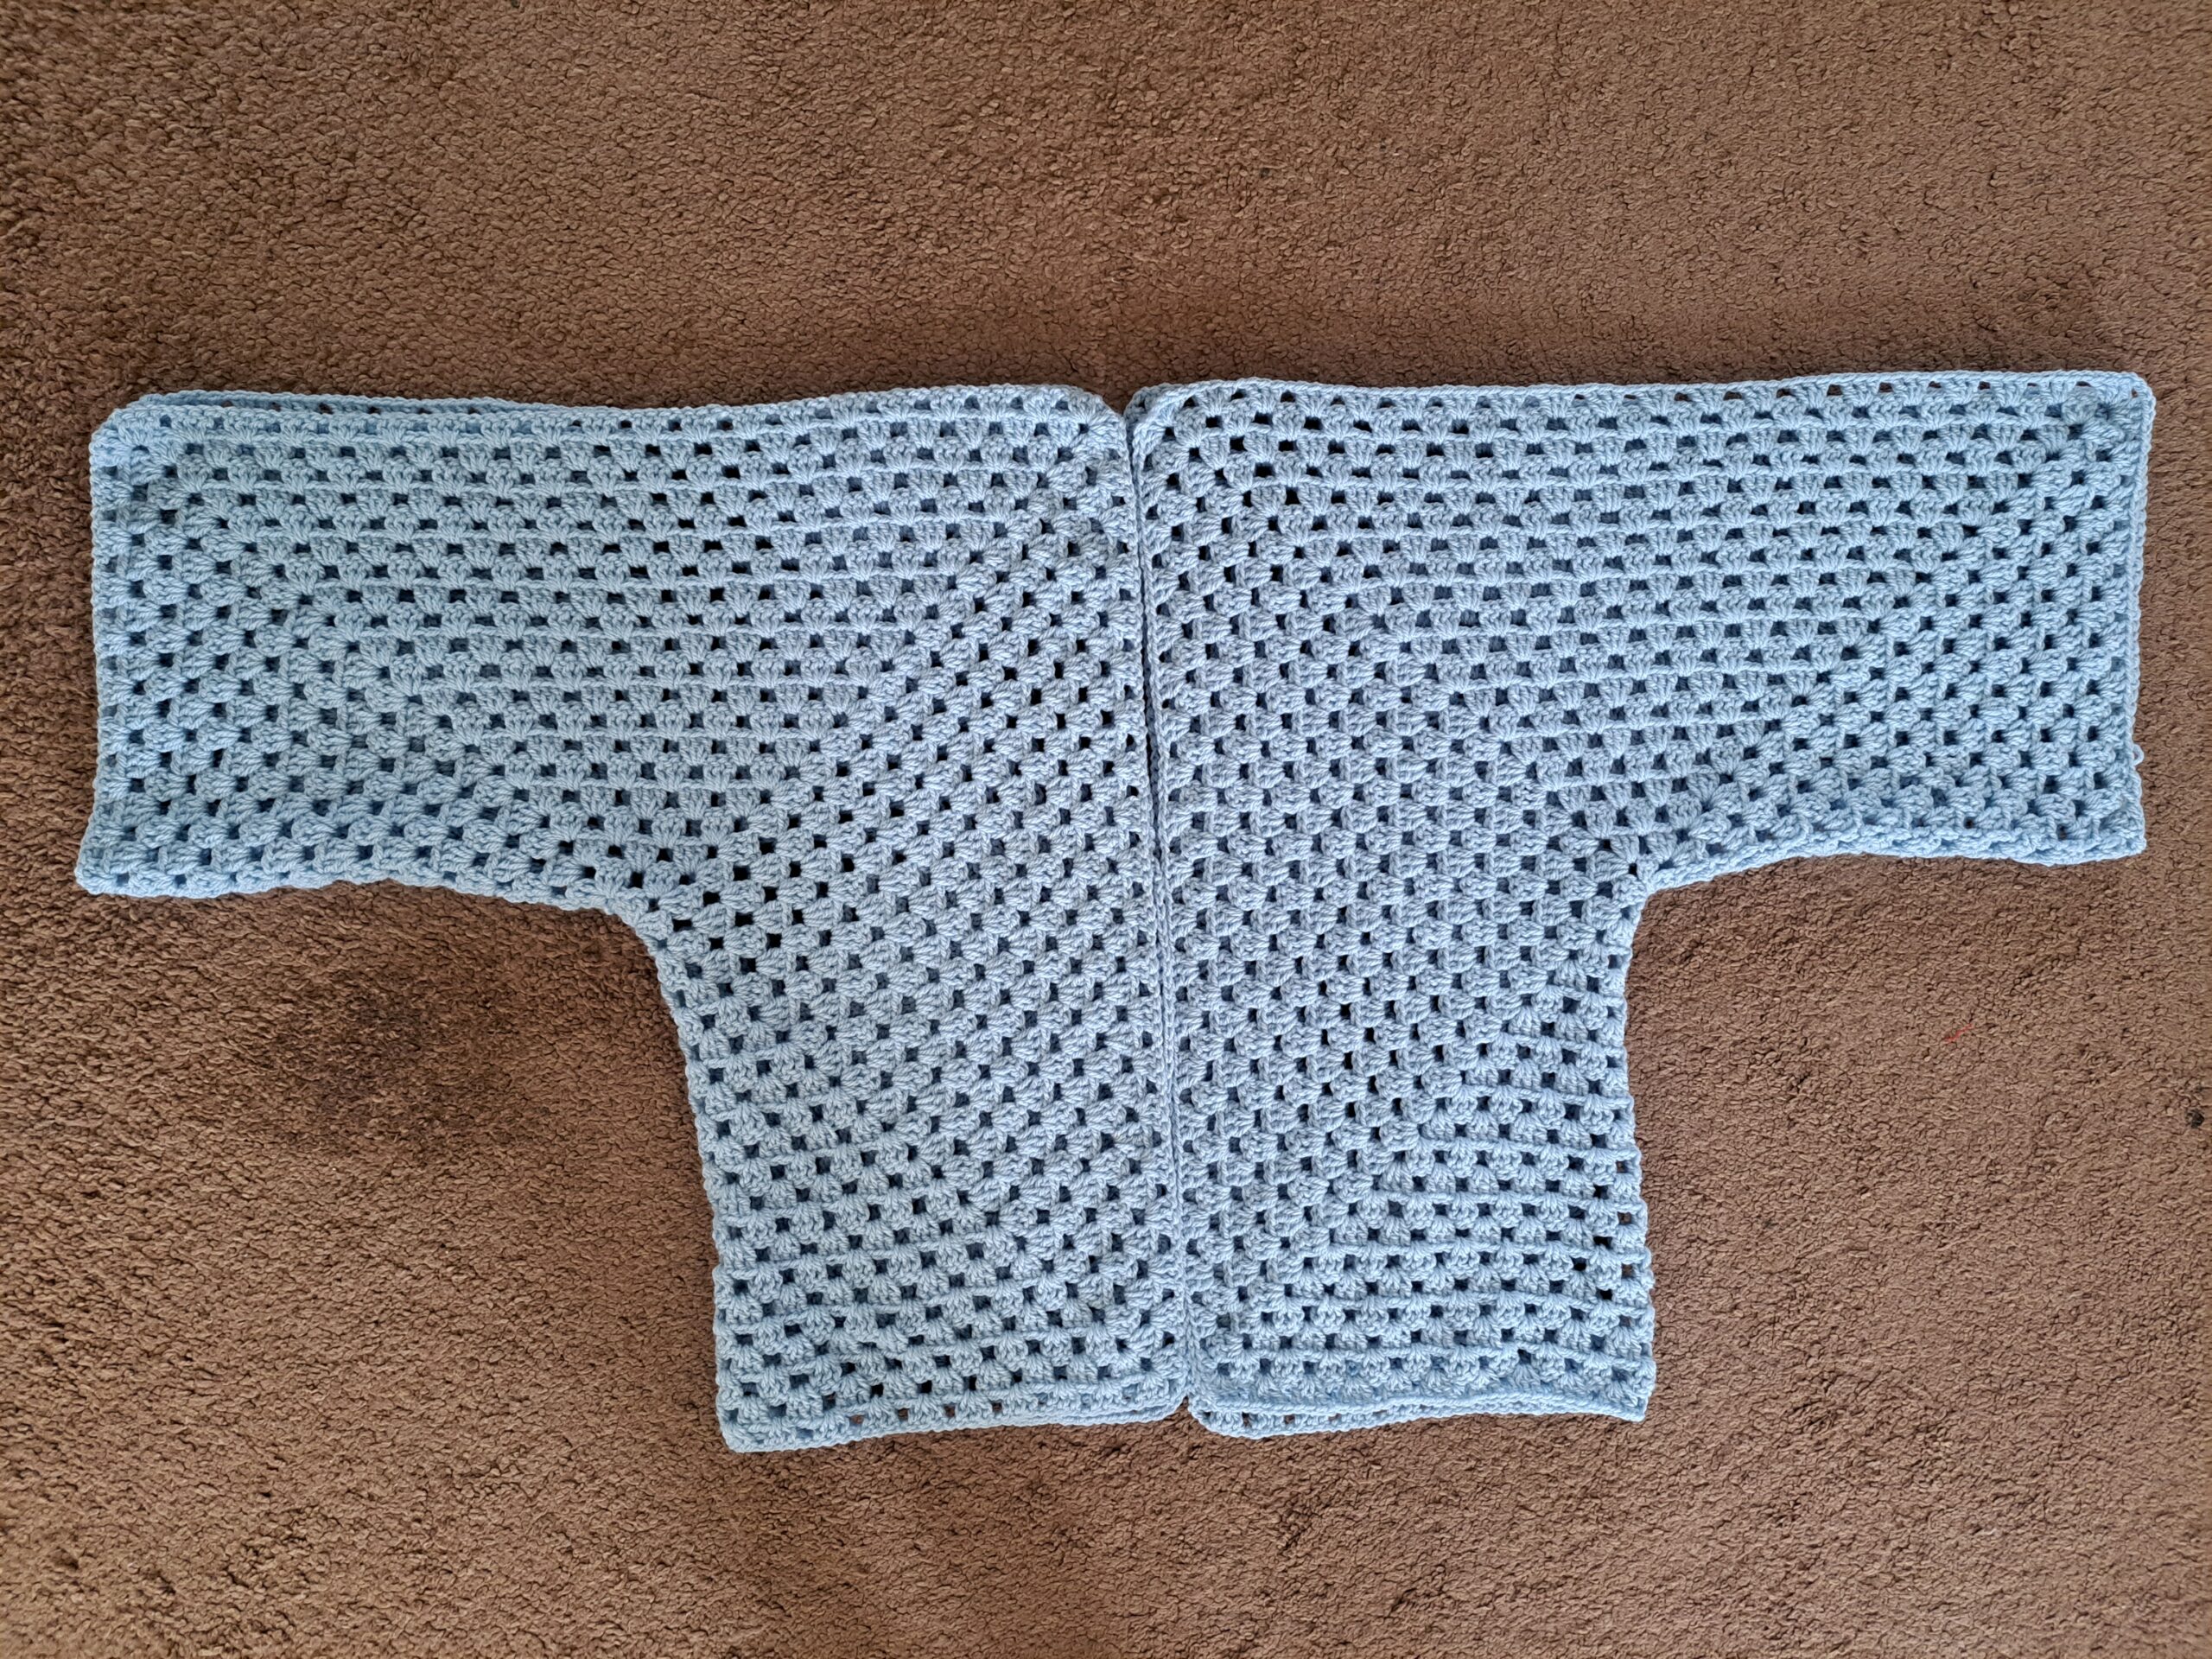
With piece of yarn and tapestry needle, start seaming the top part of the cardigan together as seen in photo below. Sew the seam in straight across, using the mattress stitch.

Now sew in the back seam of your cardigan, using mattress stitch.
Fasten off, tidy up loose end.
Sleeve cuffs
Use 4 mm crochet hook.
Attach yarn to cuff (attach yarn to any stitch across the cuff).
Complete rounds as follows:
1: Ch 1 (=SC), *sk 2 st, SC into next st*; repeat from * until eor.
2: Ch 2 (=HDC), turn your work, place a HDC into next st until eor.
3-10: Repeat row 2.
Fasten off yarn, tidy up all loose ends.
Repeat process on both sleeves.
Bottom edging
Use 4 mm crochet hook.
Attach yarn to the bottom edging of the cardigan (attach to a stitch on either side at the very bottom of the cardigan).
Complete rows as follows:
1: Ch 1 (=SC), SC into next st until eor.
2: Ch 2 (=HDC), turn your work, place a HDC into next st until eor.
3-6: Repeat row 2.
Do not fasten off.
Front and neck edging
Switch to 4,5 mm crochet hook (in your last stitch at the bottom edging of the cardigan).
Row 1: Ch 1, place a SC into each stitch across the first side of the cardigan until you reach the other side of the cardigan opening.
Fasten off, tidy up all loose ends.


You May Also Like
Crochet Romantic Ribbon Bag Free Pattern

Crochet A Boho Flower Slide