Crochet Easy Man Scarf Free Pattern
Crochet Easy Man Scarf Free Pattern
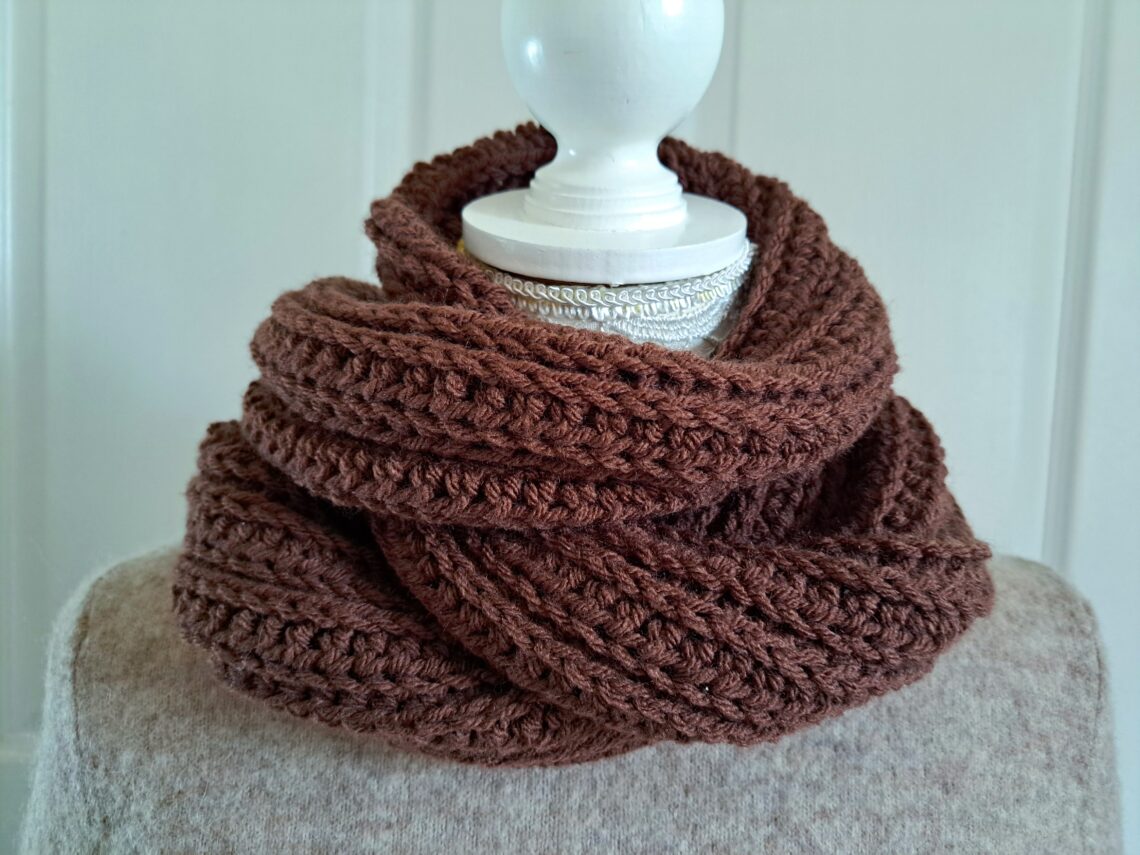
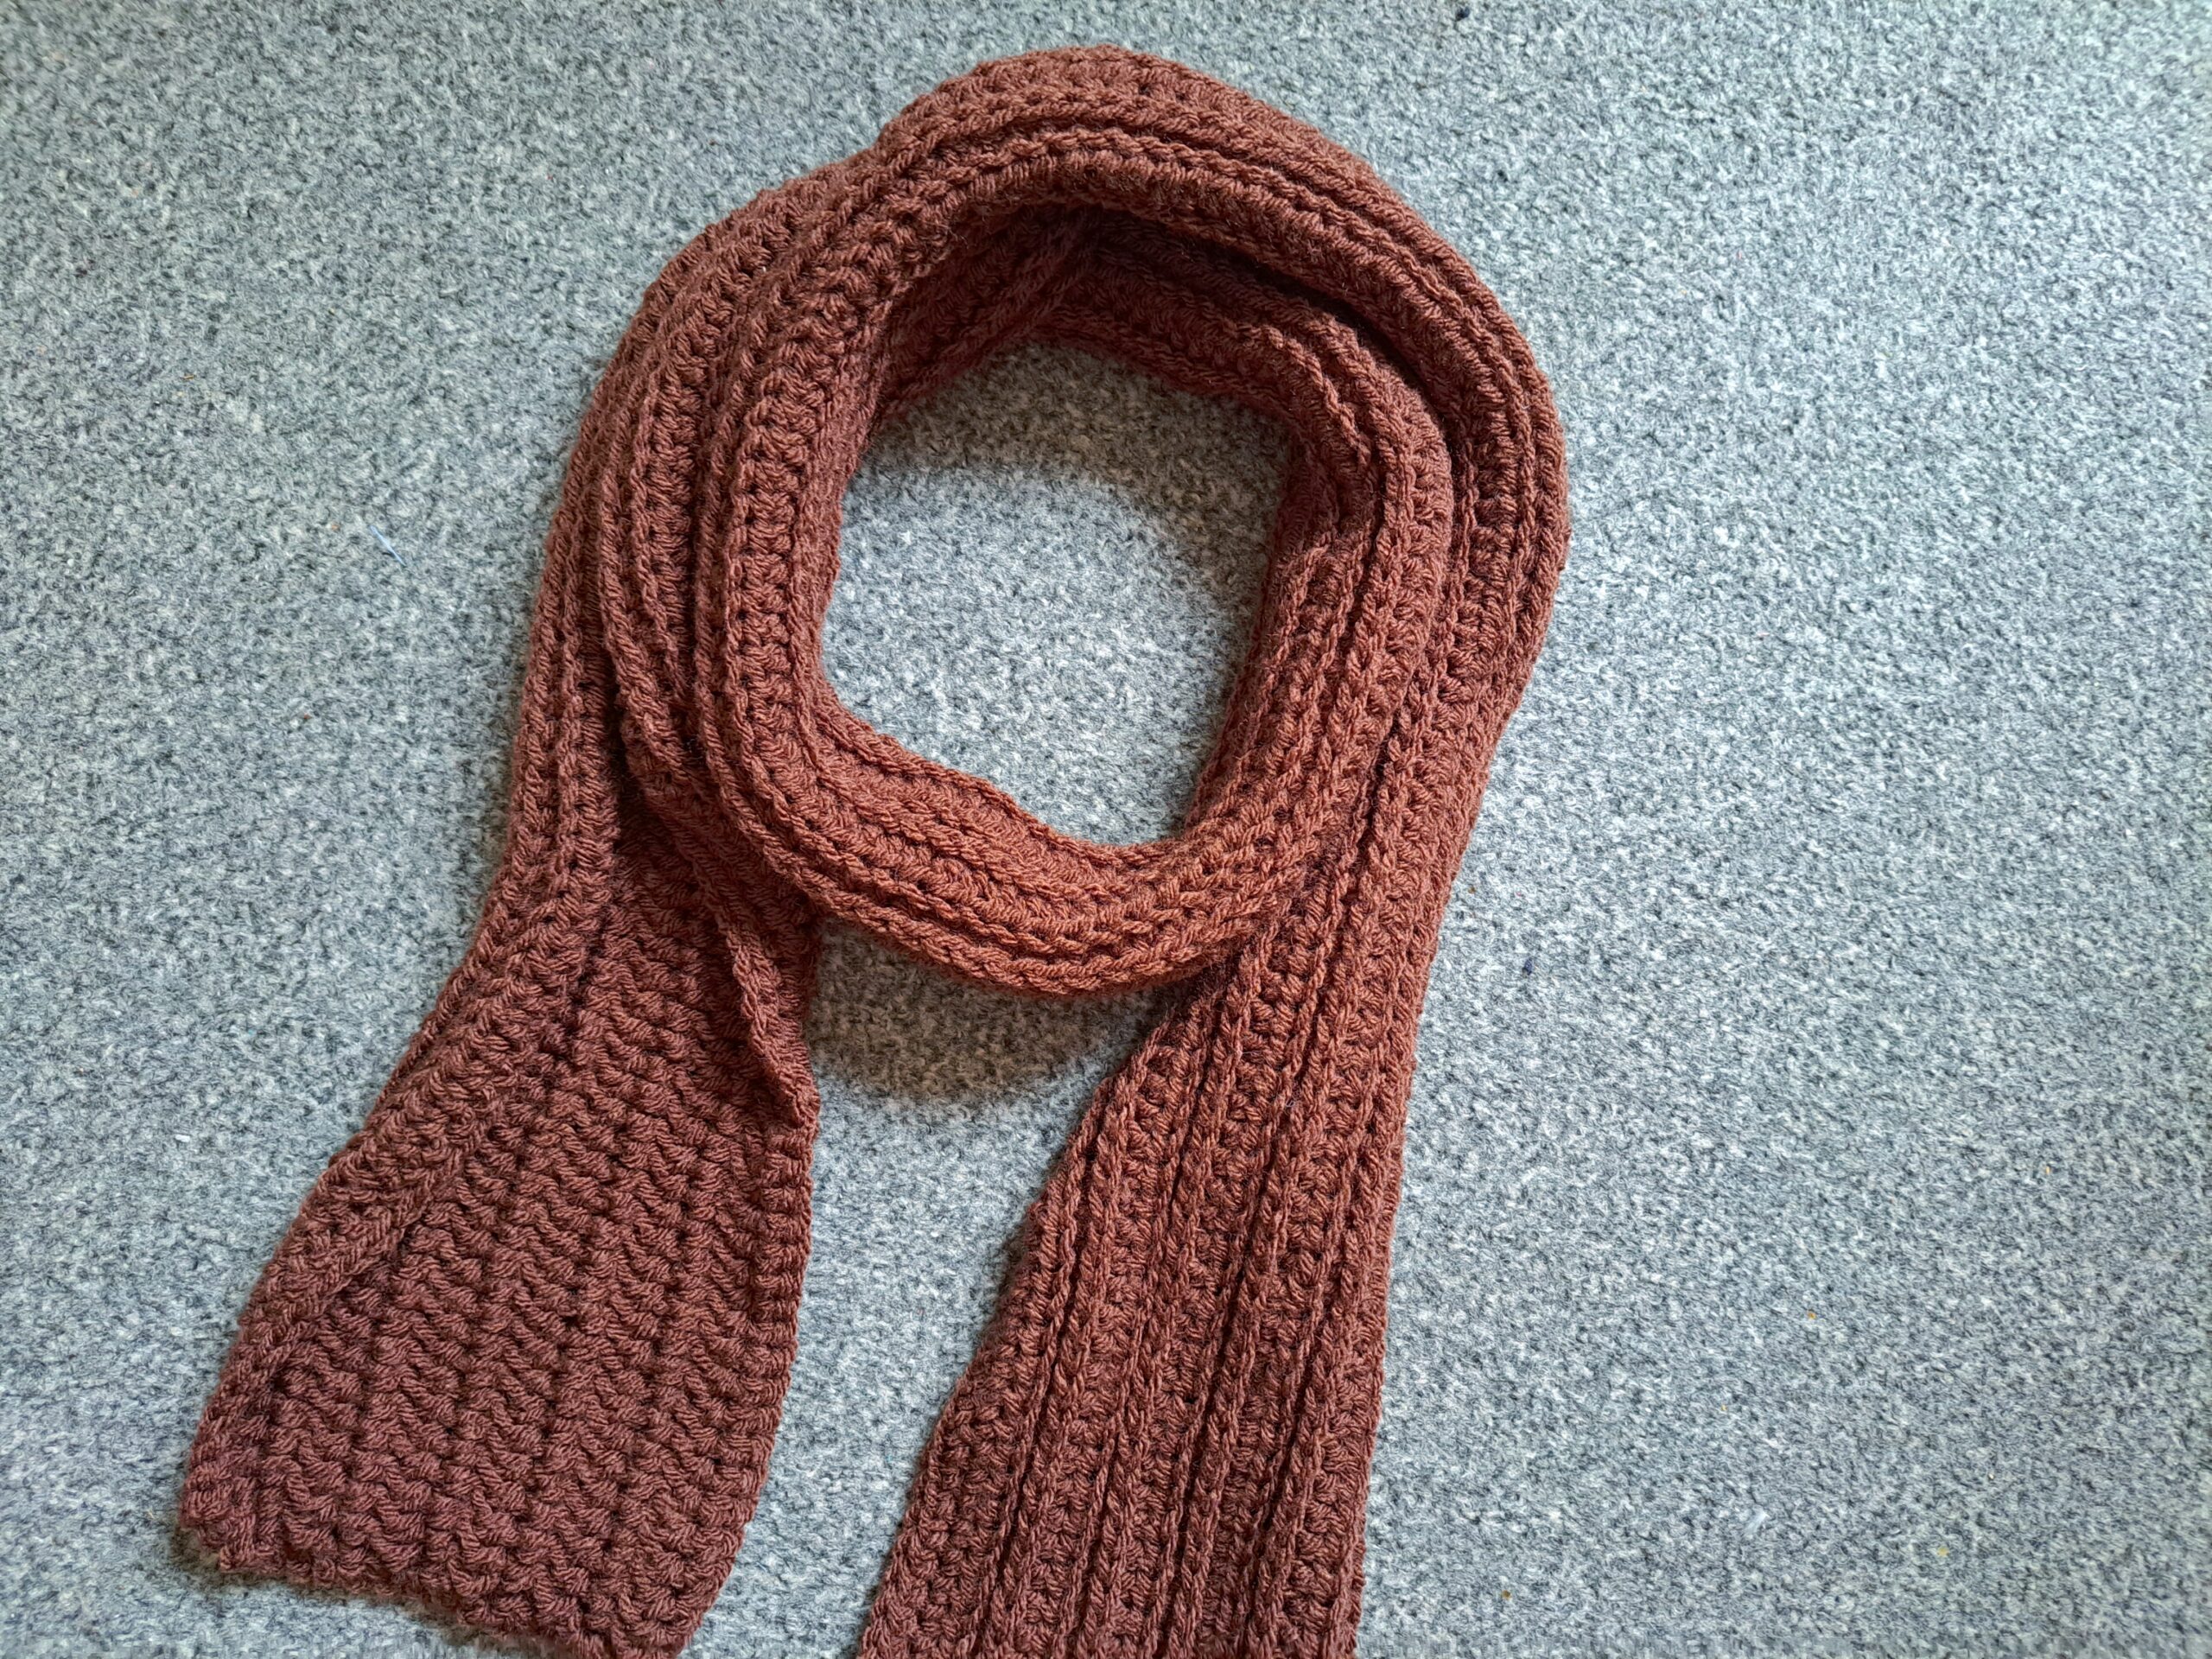
Hi everyone, today I wanted to bring to you this crochet easy man scarf (free pattern). This is a great project for beginners, and looks beautiful in all seasons. It is crocheted using a simple textured stitch. This scarf is perfect if you are looking to make a Christmas gift.
The video tutorial for this project can be found here:
Crochet Easy Man Scarf Free Pattern: The Inspiration
I love to crochet scarves for men as these make for the perfect gift. Last year I made this easy man scarf. This scarf (which I crocheted last year) features two different stitches, and is very easy to make too. It is also textured, and has been a very popular item to make.
I love simple and elegant scarves that stand out. If you are looking to make a crochet scarf for a man, don’t forget to check this elegant and easy man scarf from two years ago. It is a fun and easy crochet scarf to make, especially for Christmas!
As I said prior, I really love to release a new crochet tutorial for a man scarf every year. Indeed, this is the perfect Christmas or birthday gift. It is a unique way to gift that special man in your life. I hope you enjoy this new design!
Crochet Easy Man Scarf Free Pattern: The Design
For this new man scarf design, I used a simple knit look stitch. I have used this stitch prior in many different projects in the past, such as this delicate headband. The knit look crochet stitch is also featured in this simple headband, as well as this feminine and simple cardigan.
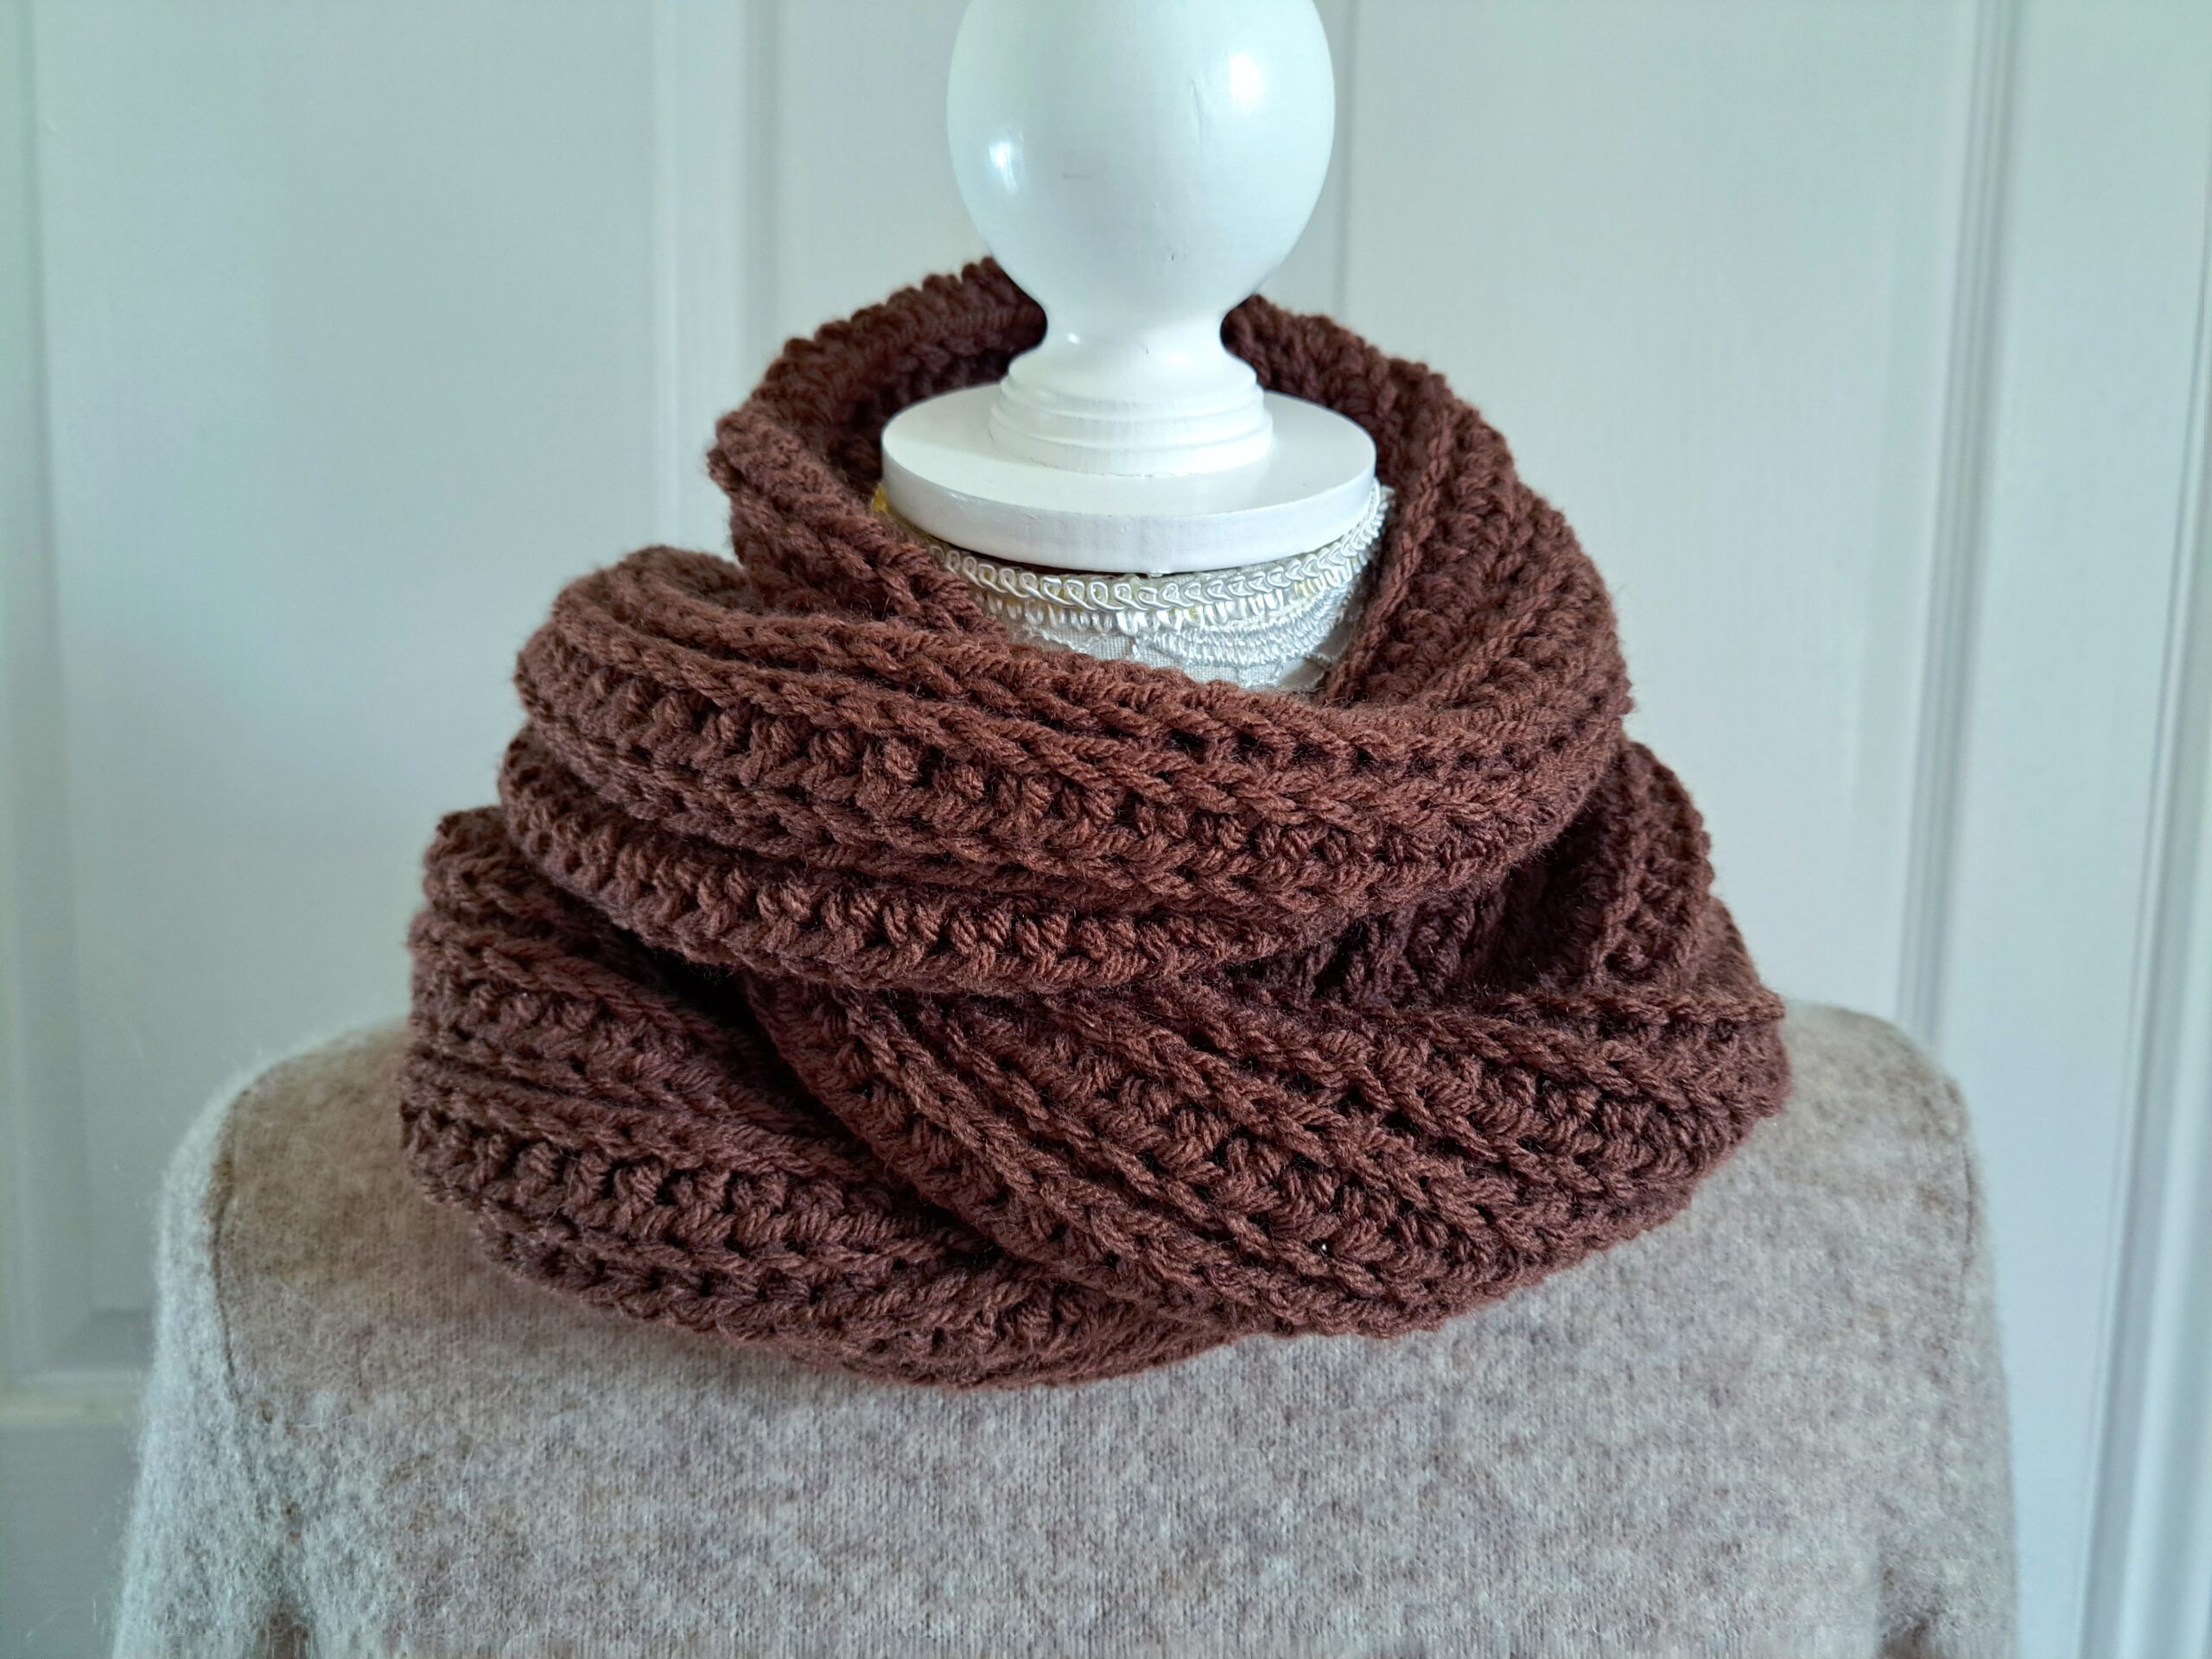
This simple knit look stitch is made by alternating two rows of Half Double Crochets strategically placed. This is a great way to add texture to any project. It is a very elegant and subtle stitch that I love using. Let me know if you love this stitch as much as I do!
Connecting with you
I would like to take a moment to thank every single one of you, for supporting me and my crochet journey. Indeed, If you want more exclusive crochet content from me, please do consider subscribing to my Patreon page. Thank you!
I love connecting with my Crochet Community through my blog and Social Media. You can find me on Youtube, Instagram, and Pinterest. I would love to connect with you on these platforms.
If you are on Ravelry, you can find my Ravelry page here. This is a great way to connect with me and have access to all of my PDF patterns. You can also find my Etsy shop by clicking here.
You can also join my private Facebook group to connect.
Crochet Easy Man Scarf: The Pattern
You can purchase the ad free, large print, PDF pattern from my Etsy shop here: Crochet Easy And Elegant Man Scarf PDF Pattern
You can purchase the ad free, large print, PDF pattern from my Ravelry shop here: Crochet Easy And Elegant Man Scarf PDF Pattern
Level: Easy/beginner +
Gauge
4” (10 cm)= 12 HDC
4” (10 cm)= 8 rows
Size of finished scarf (before sewing)
6.5” (17 cm) wide and 72.5” (184 cm) in length
Notes
I will be using US terms (British terms in bracket).
You will need
2 skeins of Vanna’s Choice by Lion Brand Yarns in shade 126 Chocolate (or any other Aran/Medium 4 yarn of your preference)
6 mm crochet hook
A pair of scissors
A tapestry needle
Abbreviations
Ch: chain
St: Stitch
Sl st: slip stitch
Sk: Skip
HDC: Half Double Crochet (Half Treble Crochet)
EOR: End of row
Pattern begins here
To start, make a slip knot.
Ch 200
Row 1: HDC in 3rd chain from the hook, HDC into each ch until end of row (first ch 2 counts as a HDC)
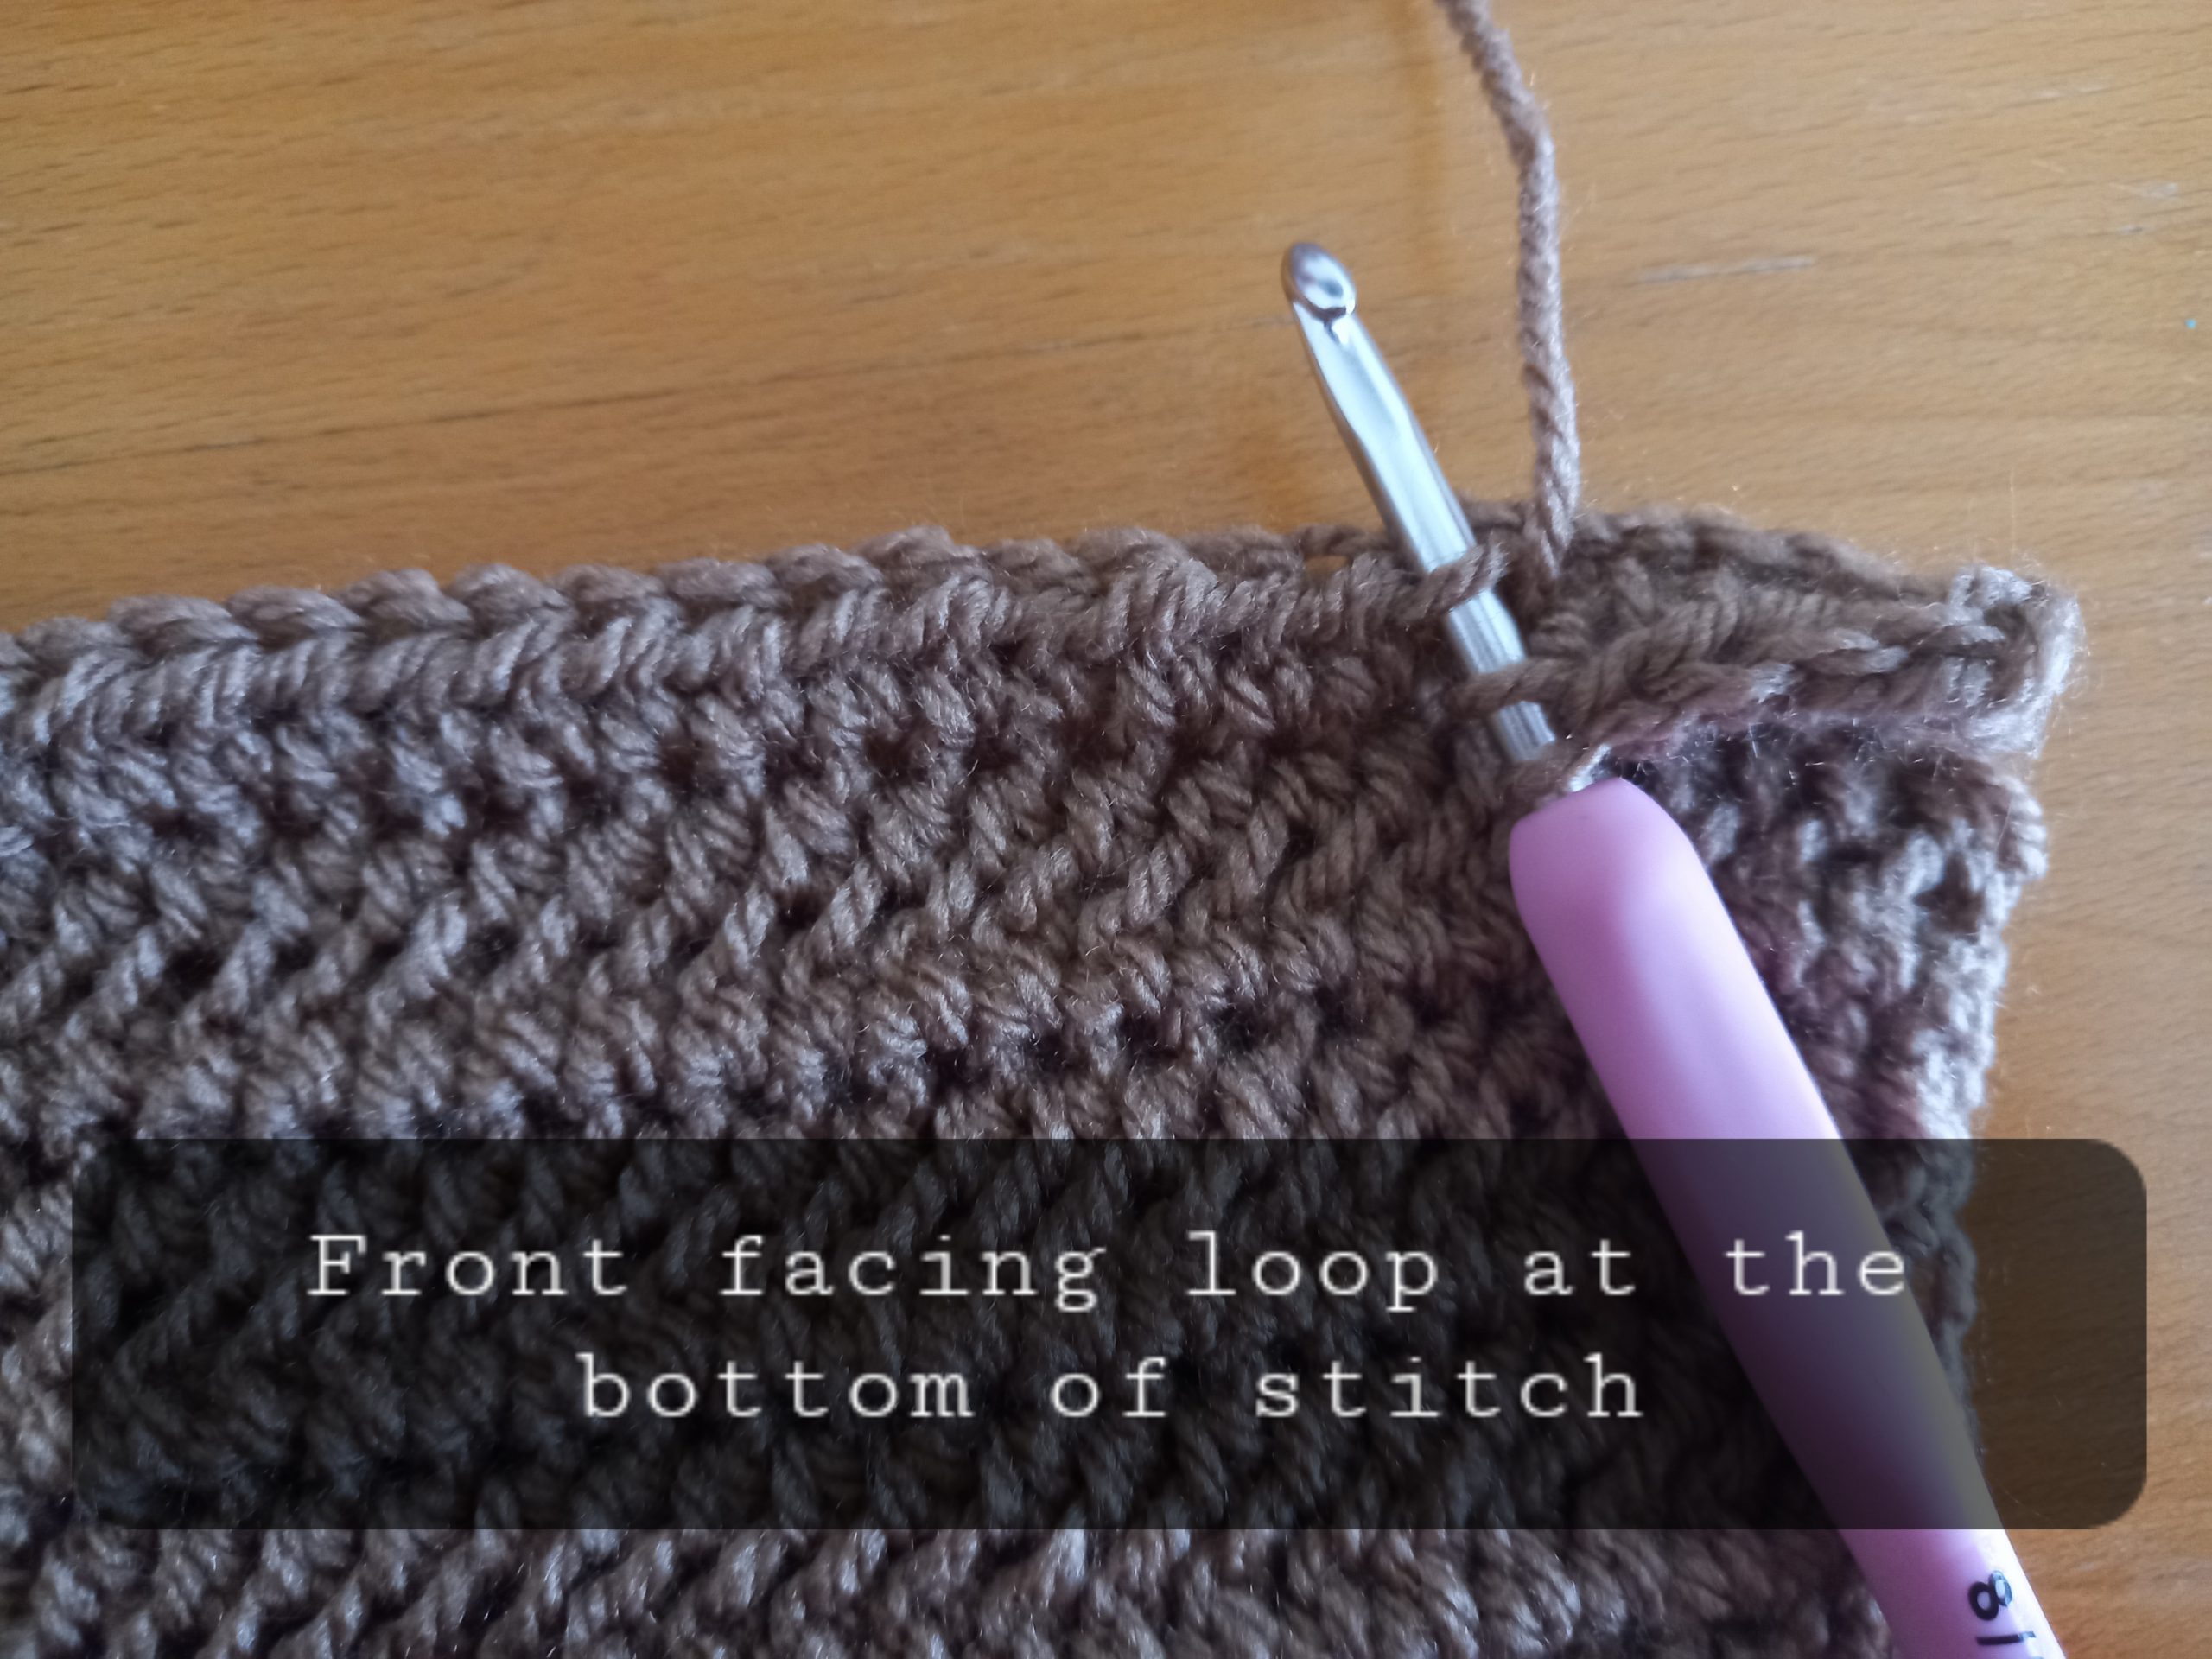
Row 2: Ch 1 (=turning chain throughout), turn your work, HDC into front facing loop of the bottom of each HDC from previous row (see photo below for more details) until eor, placing your last stitch into the ch 2 from previous row. This front facing loop is not one of the 2 loops at the top of each stitch, but this is the loop which is at the bottom front of the stitch.
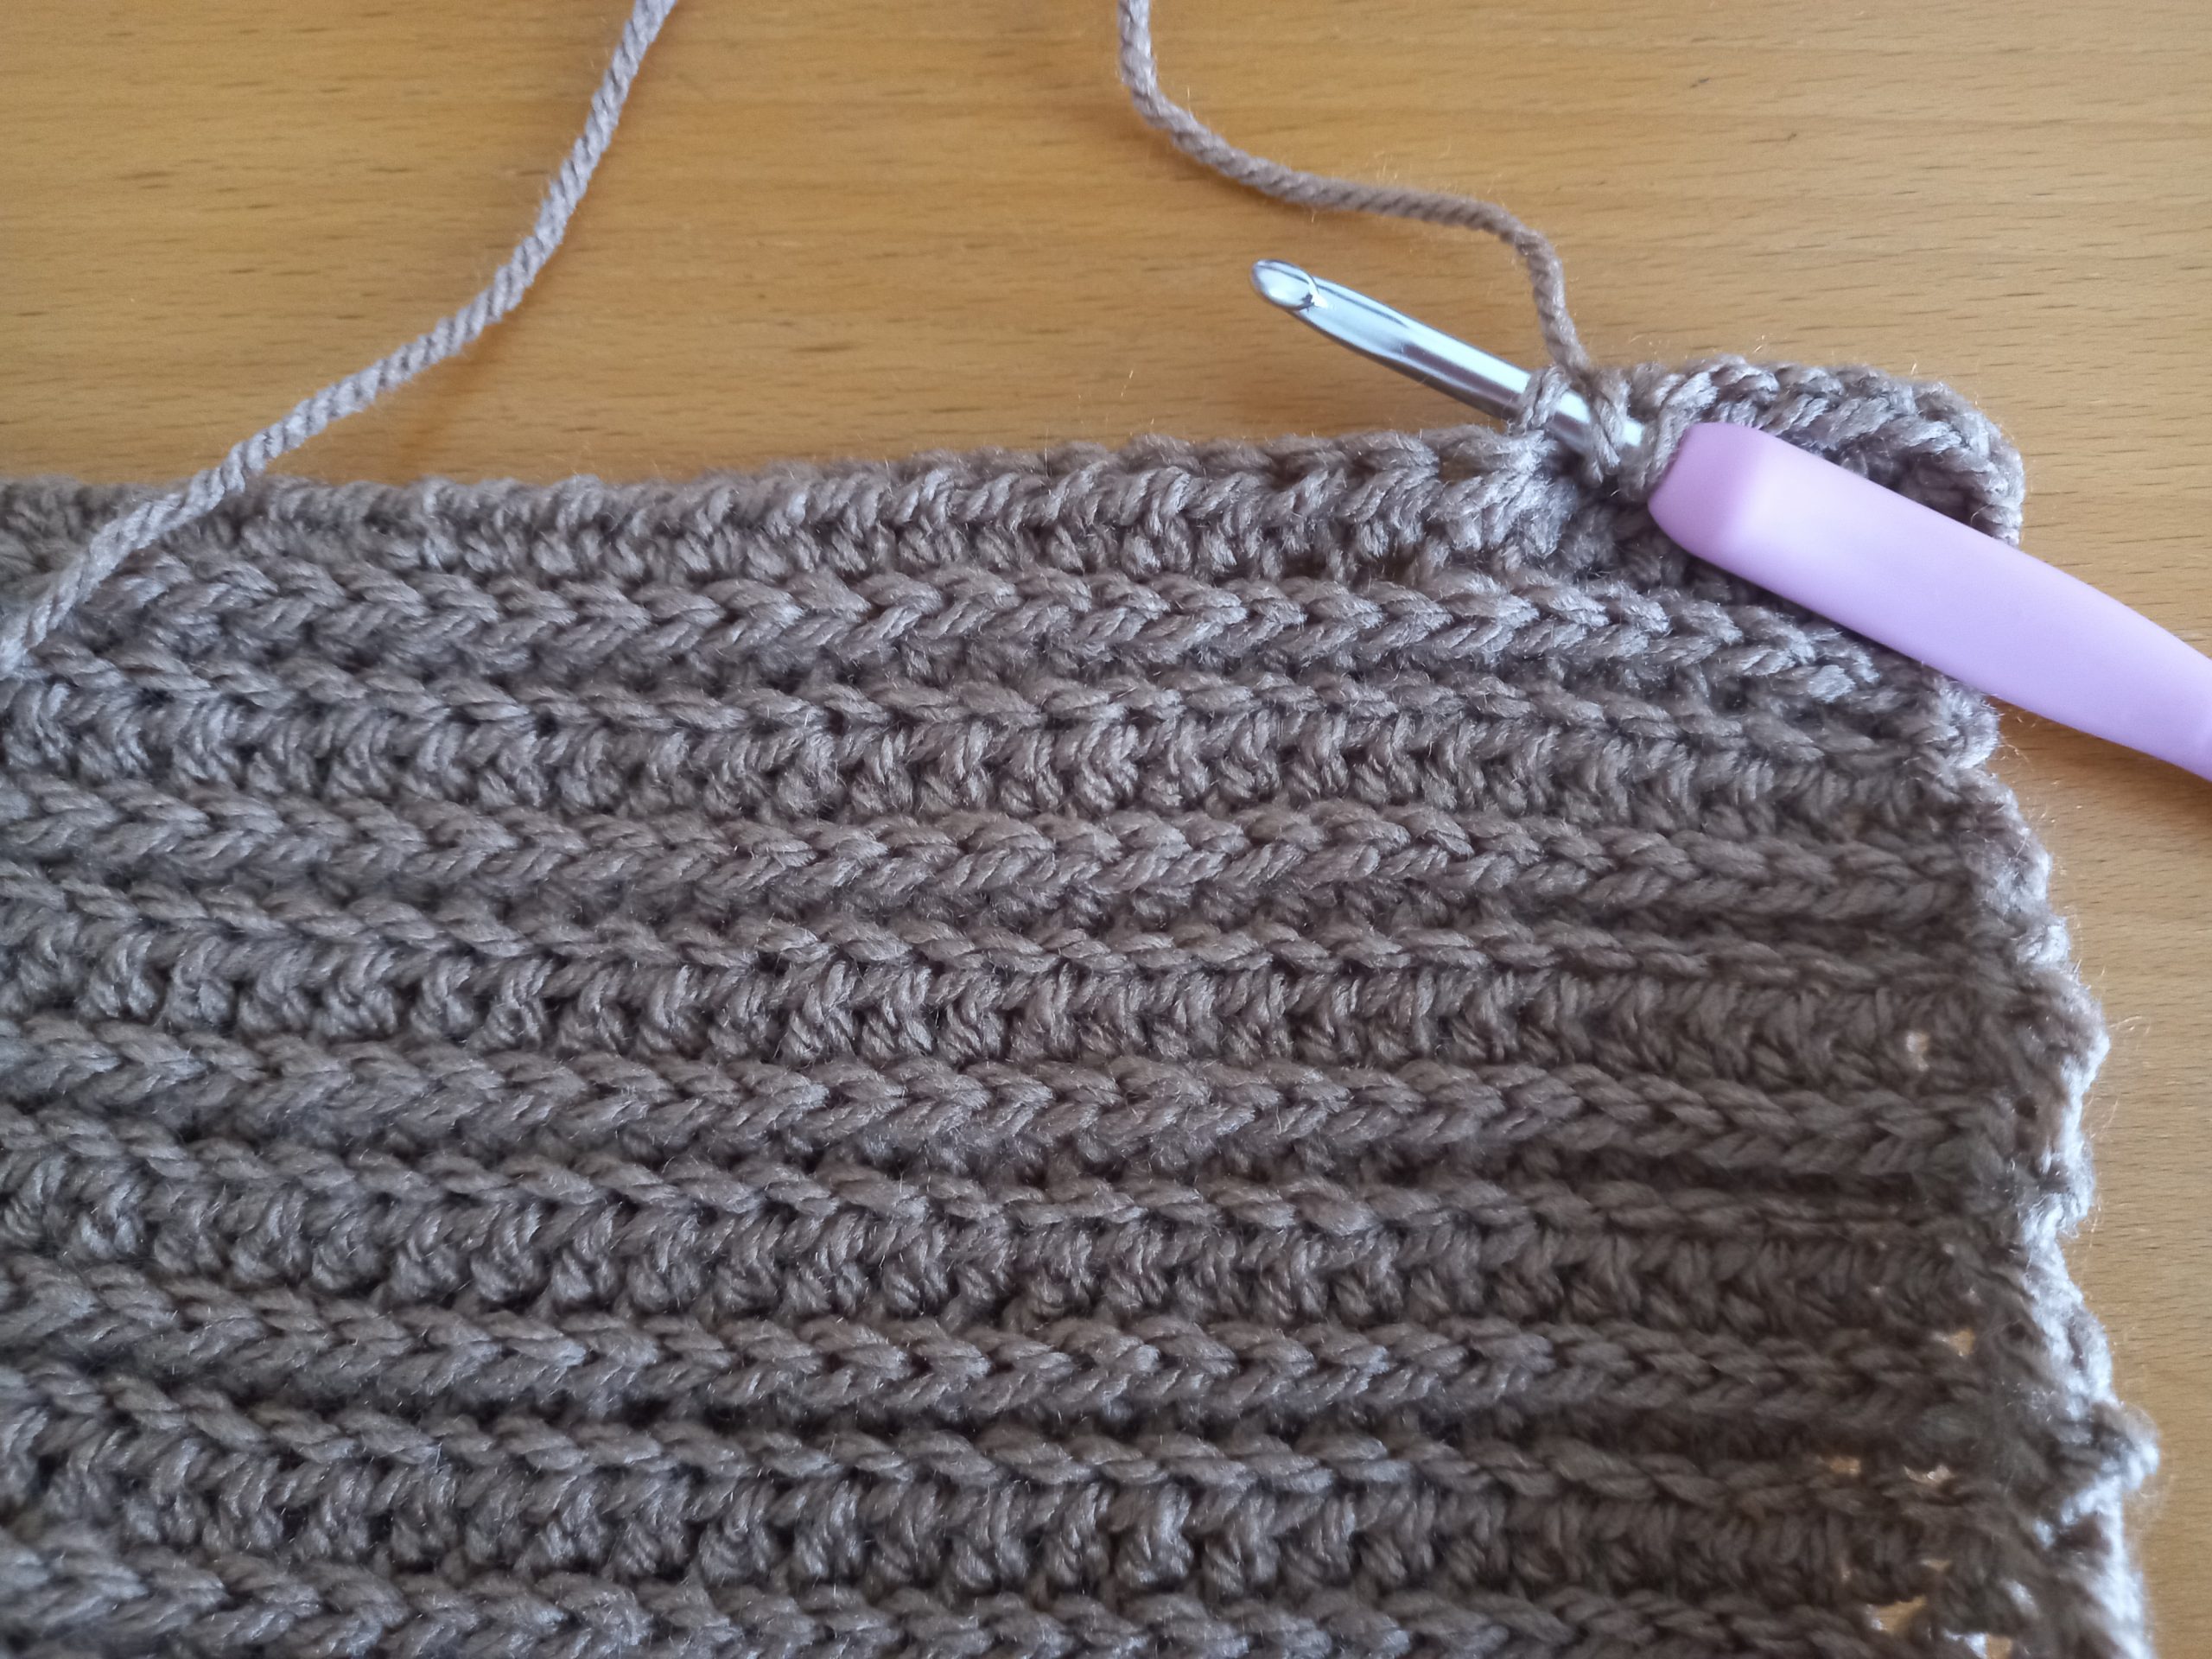
Row 3: Ch 1, turn your work, HDC into the back loop only of each HDC until eor (see photo).
Row 4: Ch 1 (=turning chain), turn your work, HDC into front facing loop of the bottom of each HDC from previous row until eor.
Rows 5-13: Alternate rows 2 and 3 until you reach row 15, or until you are satisfied with length of project.
You can add more rows if you wish to make this project larger.
Fasten off, tidy up all loose ends.
Optional: Block your project to avoid “curling”.


You May Also Like
Crochet The Snow Princess Hat Pattern
Crochet The Blue Skies Cardigan