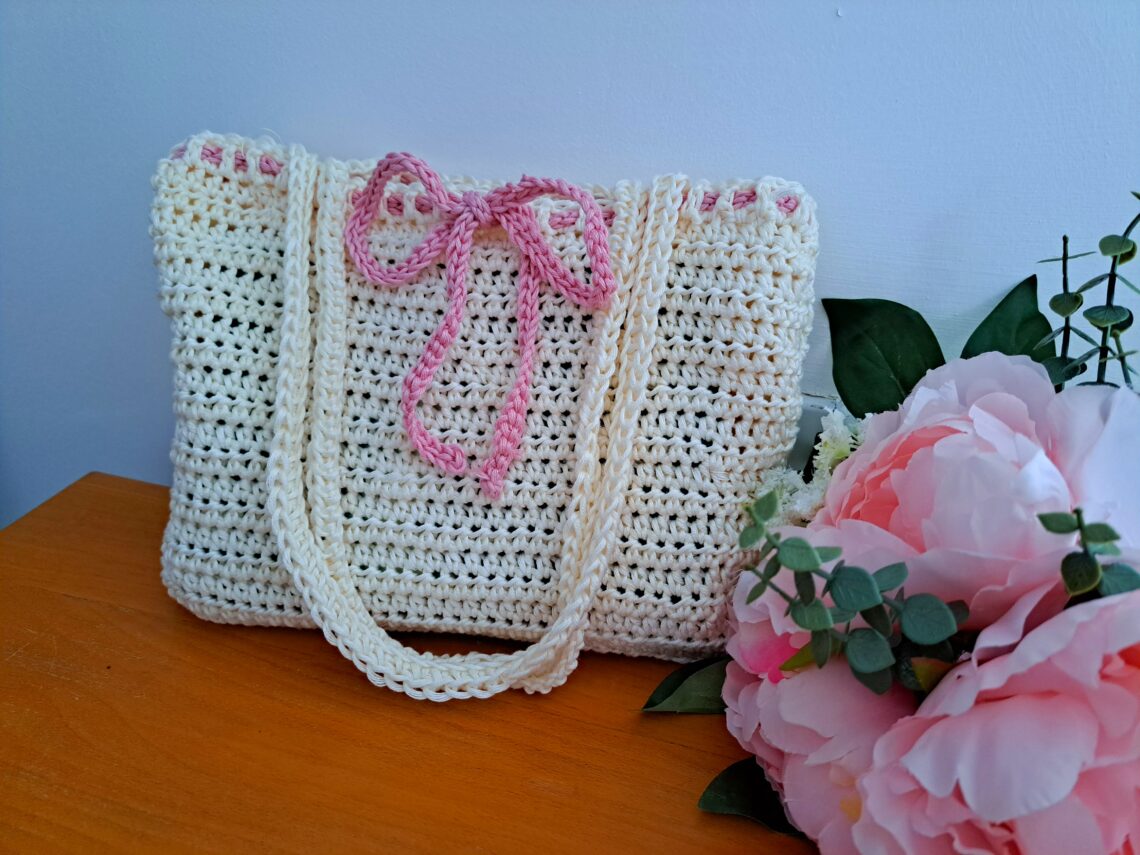
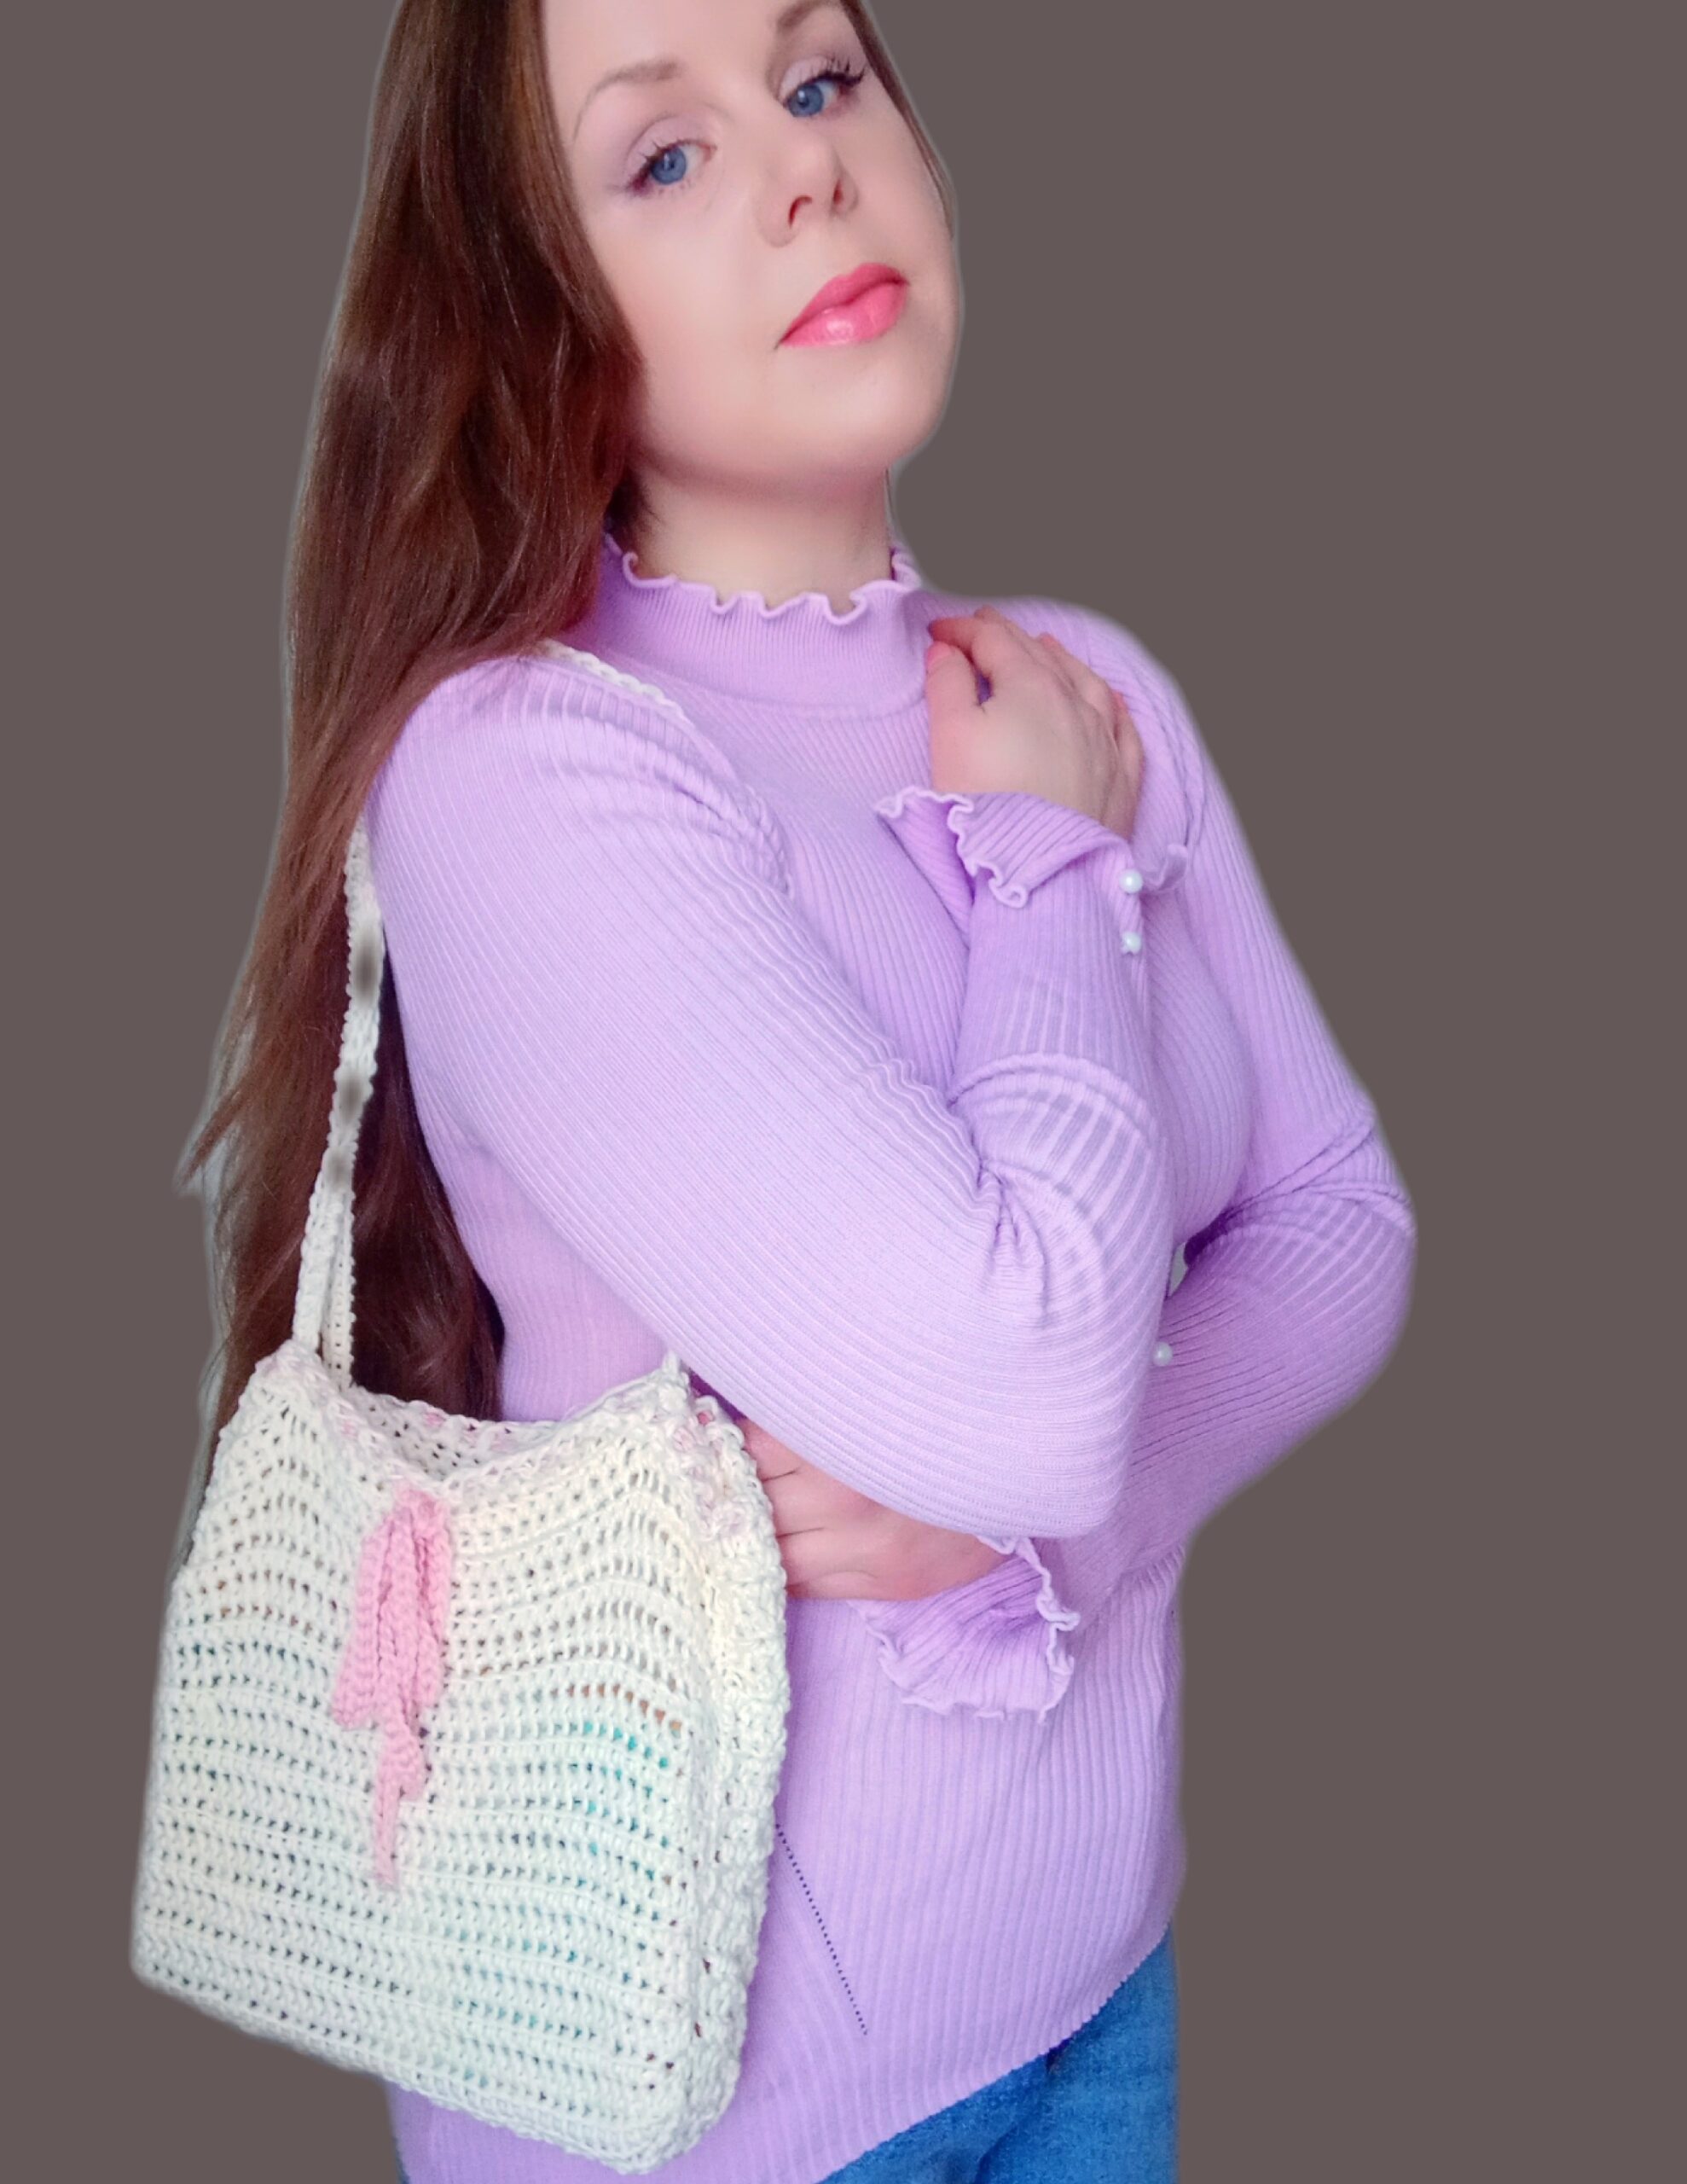
Crochet Romantic Ribbon Bag Free Pattern
Crochet Romantic Ribbon Bag Free Pattern
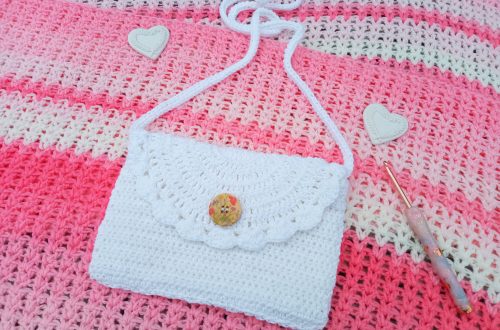
Hi everyone, today I am bringing to you a crochet romantic ribbon bag (free pattern). This crochet purse or bag (depending on the country you live in!) is inspired by the Cottagecore aesthetic. Featuring a simple yet feminine shape, this bag features a lovely and feminine ribbon at the top.
The video tutorial for this project can be found here:
Crochet Romantic Ribbon Bag Free Pattern: A Perfect Purse
I love crochet bags so much! These are such a staple in my own wardrobe. Indeed, I find that I love to design and make my own bags or purses, especially in the Spring and Summer. I have designed quite a few bags now, and I love every single one of them!
One of my favorite purses is the Flower Granny Square Bag available on my blog. This crochet design is perfect for beginners, and looks beautiful in all seasons. This Sunburst Granny Square Tote Bag is also one of my favorite projects to date.
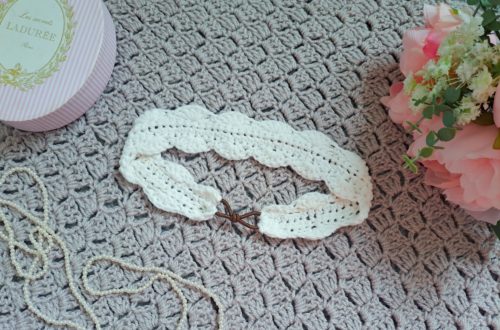
I also love this dainty clutch bag, which is a smaller sized purse. This romantic boho bag is perfect for beginners, and looks beautiful in all seasons too. Over the last few years, I have enjoyed crocheting many different sized bags and purses, and I have really enjoyed making every single one of them.
The Sweet Sixteen Bag is a very classic sling bag design, perfect in every season. Festival bags are also some of my favorite staples during the Summer and Spring. This crochet purse is the perfect festival bag and so pretty too!
Crochet Romantic Ribbon Bag Free Pattern: The Design
Inspired by the Cottagecore aesthetic, this purse is very feminine and dainty. It features a lovely ribbon that is added at the top of the bag. This crochet purse is made using Drops Muskat yarn, which is a 100% mercerized cotton yarn.
This is a purse that is what I would call medium sized. It will be perfect for Spring, and it looks so feminine and dainty! I will be lining this bag also, with a floral cotton fabric. If you are looking to line your bag, please feel free to follow my “how to line a crochet bag” tutorial linked just here:
I hope you enjoy this new crochet tutorial! Let me know in the comments if you have made it.
Connecting with you
I would like to take a moment to thank every single one of you, for supporting me and my crochet journey. Indeed, I absolutely am so touched by all your messages, comments, and every person who has become a patron of my work through Patreon. Thank you!
I love connecting with my Crochet Community through my blog and Social Media. You can find me on Youtube, Instagram, and Pinterest. I would love to connect with you on these platforms.
You can also join my private Facebook group to connect.
Subscribe to our weekly newsletter so that you never miss a stitch!
Crochet Romantic Ribbon Bag: The Pattern
You can purchase the ad free, large print PDF pattern from my Etsy store here: Crochet Romantic Purse PDF Pattern
You can purchase the ad free, large print PDF pattern from my Ravelry store here: Crochet Romantic Purse PDF Pattern
Level: Easy +
Size of finished project (excluding straps)
8” (20 cm) x 11” (28 cm)
Gauge
4” (10 cm) = 15 stitches
4” (10 cm) = 12 rows
General Notes
I will be using US terms (British terms in brackets)
You can find the video tutorial for this project here:
Materials
1 skein of Drops Muskat yarn in shade 06 Desert Rose
2 skeins of Drops Muskat yarn in shade 08 Off White
4 mm crochet hook
A pair of scissors
A tapestry needle
Sewing pins (optional)
Abbreviations
Ch: chain
Sl st: slip stitch
St: stitch
Sk: skip
SC: Single Crochet (UK Double Crochet)
DC: Double Crochet (UK Treble Crochet)
HDC: Half Double Crochet (UK Half Treble Crochet)
EOR: End of round/End of row
Pattern begins here
For this project, we will start by making the front and back panels (which are identical); then we will be making a long rectangular piece to sew between the front and back panels which will be the bottom and sides of the bag.
We will then be making the two identical straps.
Once these are made, we will be crocheting the pink ribbon.
Once all these pieces are crocheted, we will be assembling them together using the mattress stitch (everything will be explained in detail below).
If you wish to line your crochet bag, as I will be doing, please refer to my “how to line a crochet bag” video tutorial which you can find here:
https://www.youtube.com/watch?v=GdABlIhau0
Front and back panels (identical)
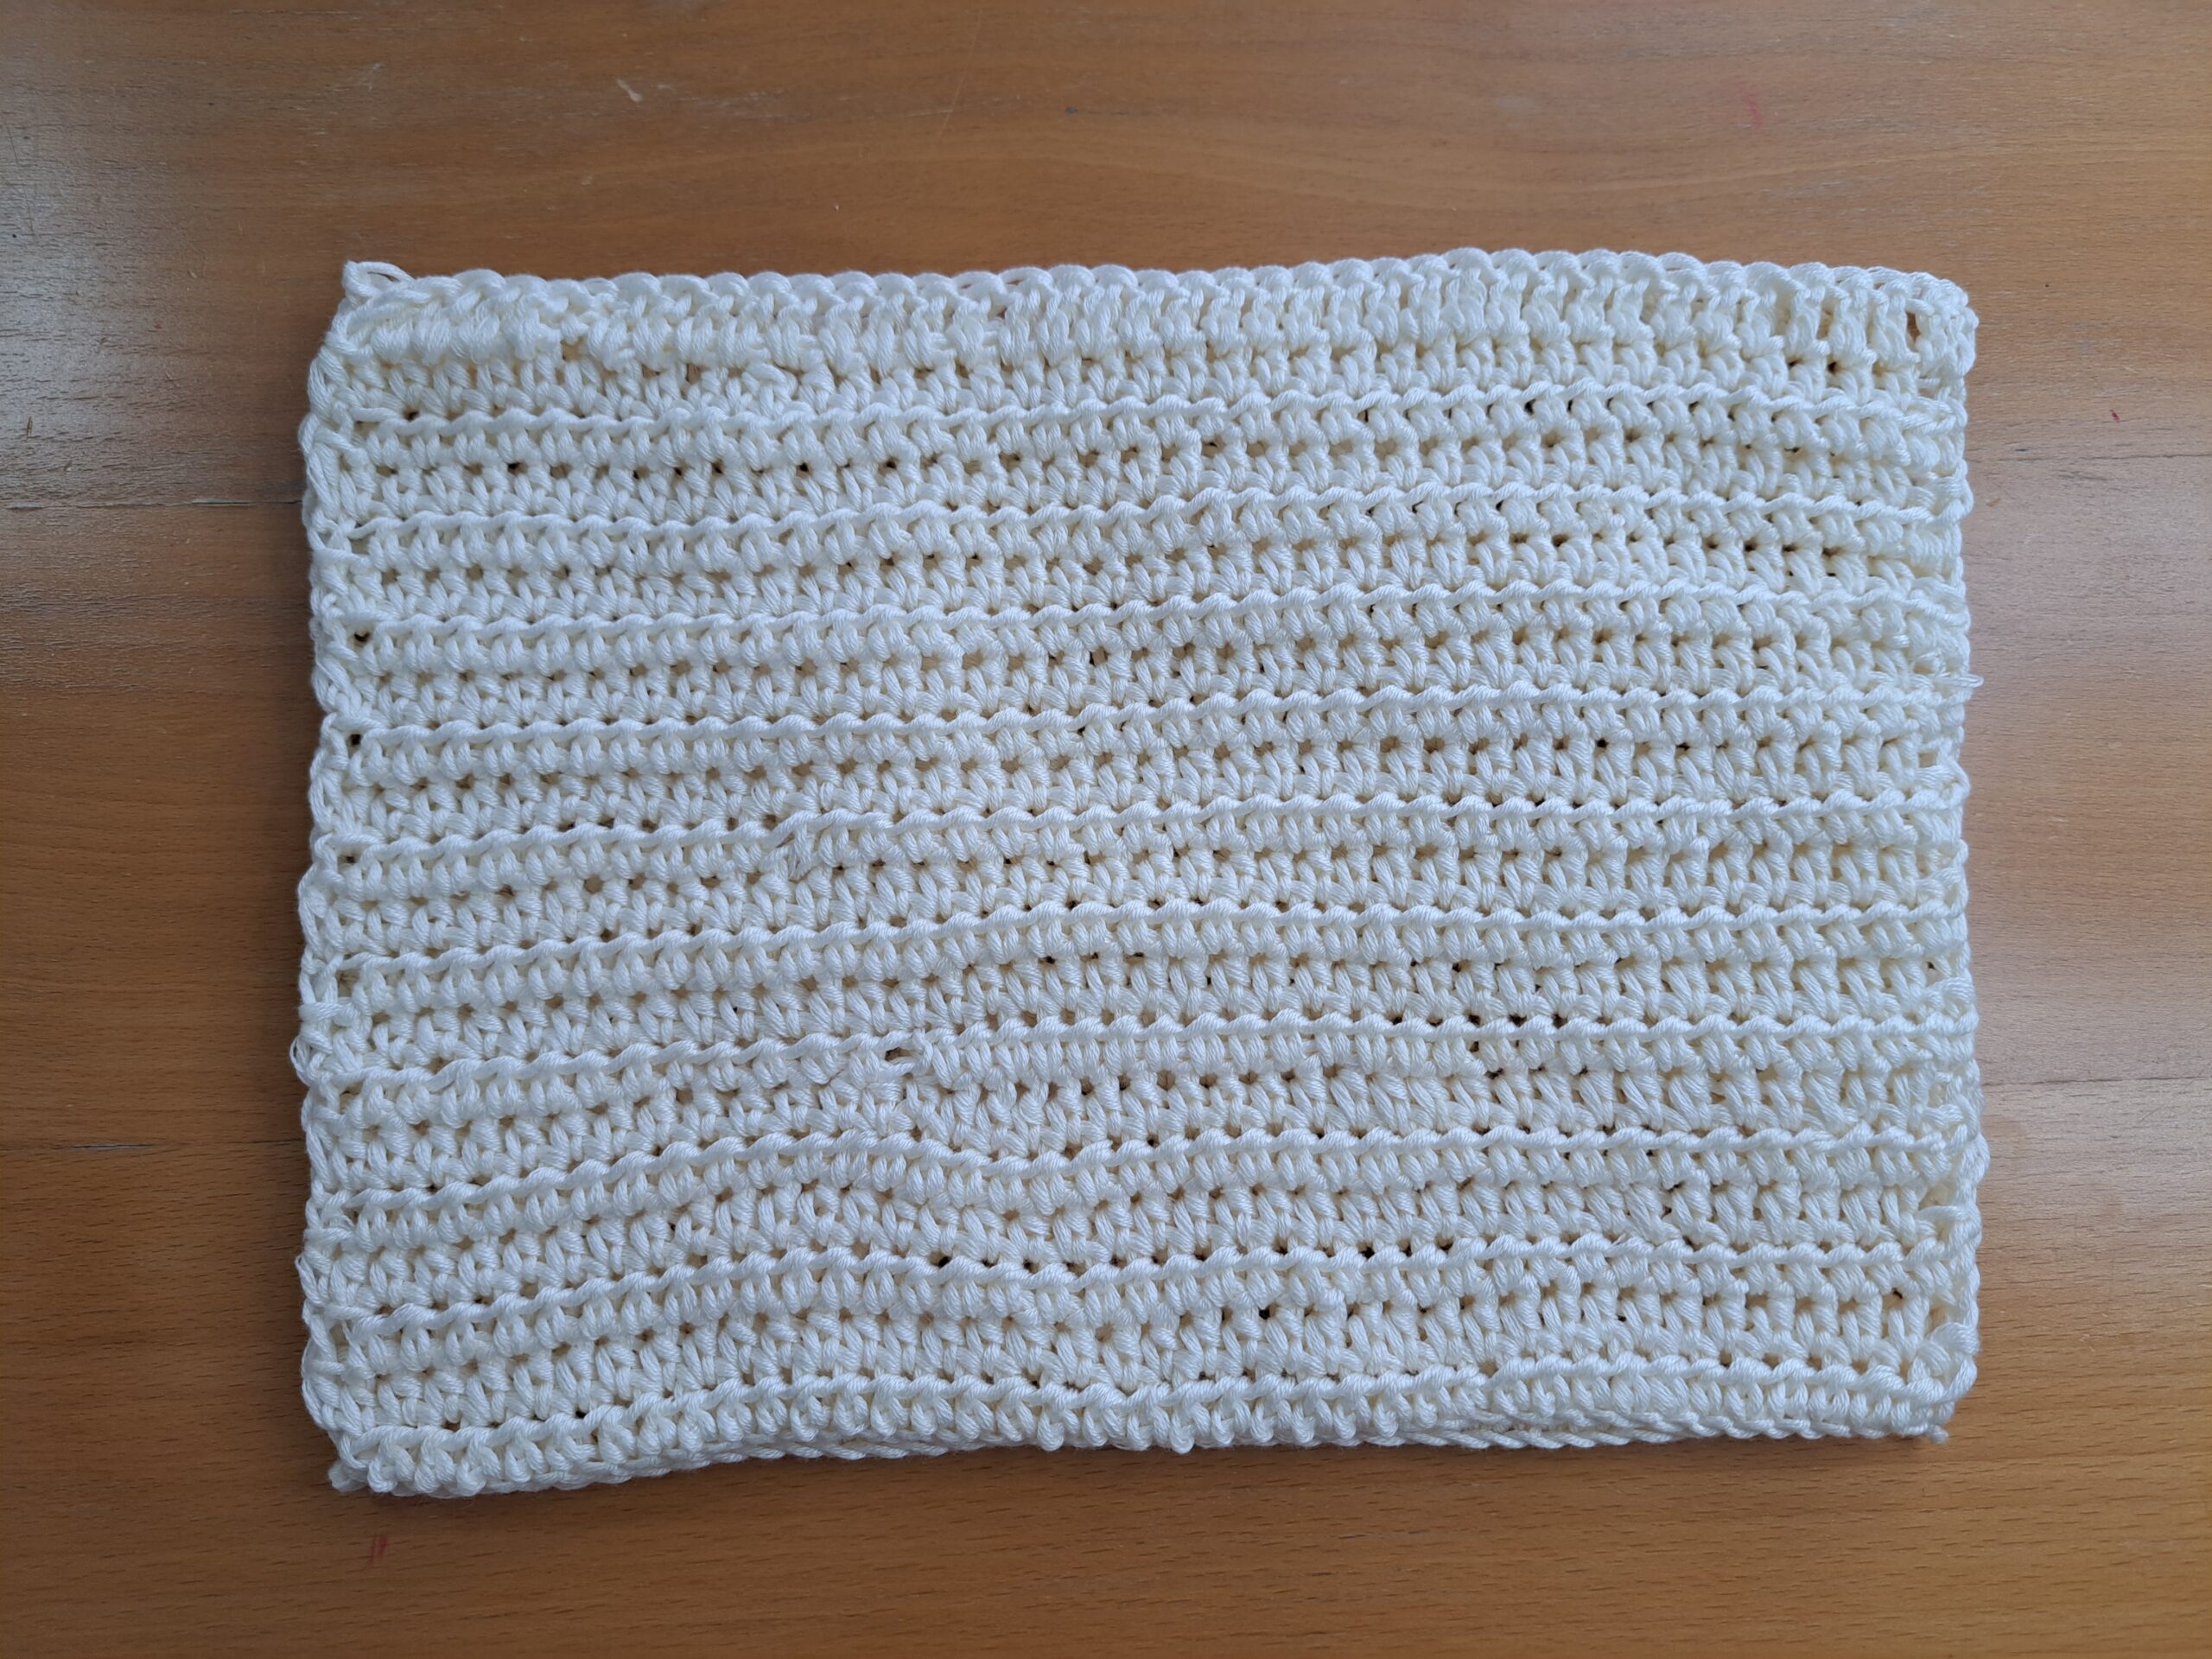
With shade Off White, make a slip knot.
Ch 40
1: HDC in 3rd ch from hook (first ch 2 counts as a HDC), HDC into each ch until eor.
2: Ch 2 (=HDC), turn your work, HDC into 2nd HDC from previous row, and into each HDC until eor (including ch 2 from previous row).
3-20: Repeat row 2.
Row 21: Ch 3 (=DC), turn your work, DC into 2nd HDC from previous row, and each HDC until eor (including ch 2 from previous row).
Fasten off, leaving long tail for sewing.
Create rectangular piece
This rectangular piece will be sewed later on in this tutorial. This crochet piece will become the sides and bottom of bag.
Still with shade Off White, ch 6.
1: HDC in 3rd ch from hook (first ch 2 counts as a HDC), HDC into each ch until eor.
2: Ch 2 (=HDC), turn your work, HDC into 2nd HDC from previous row, and into each HDC until eor (including ch 2 from previous row).
3-63: Repeat row 2.
Fasten off, leaving long tail for sewing.
Create 2 handles (both identical)
Still with shade Off White, ch 78.
Row 1: HDC in 3rd ch from hook (first ch 2 counts as a HDC), HDC into each ch until eor.
Fasten off, leaving long tail for sewing.
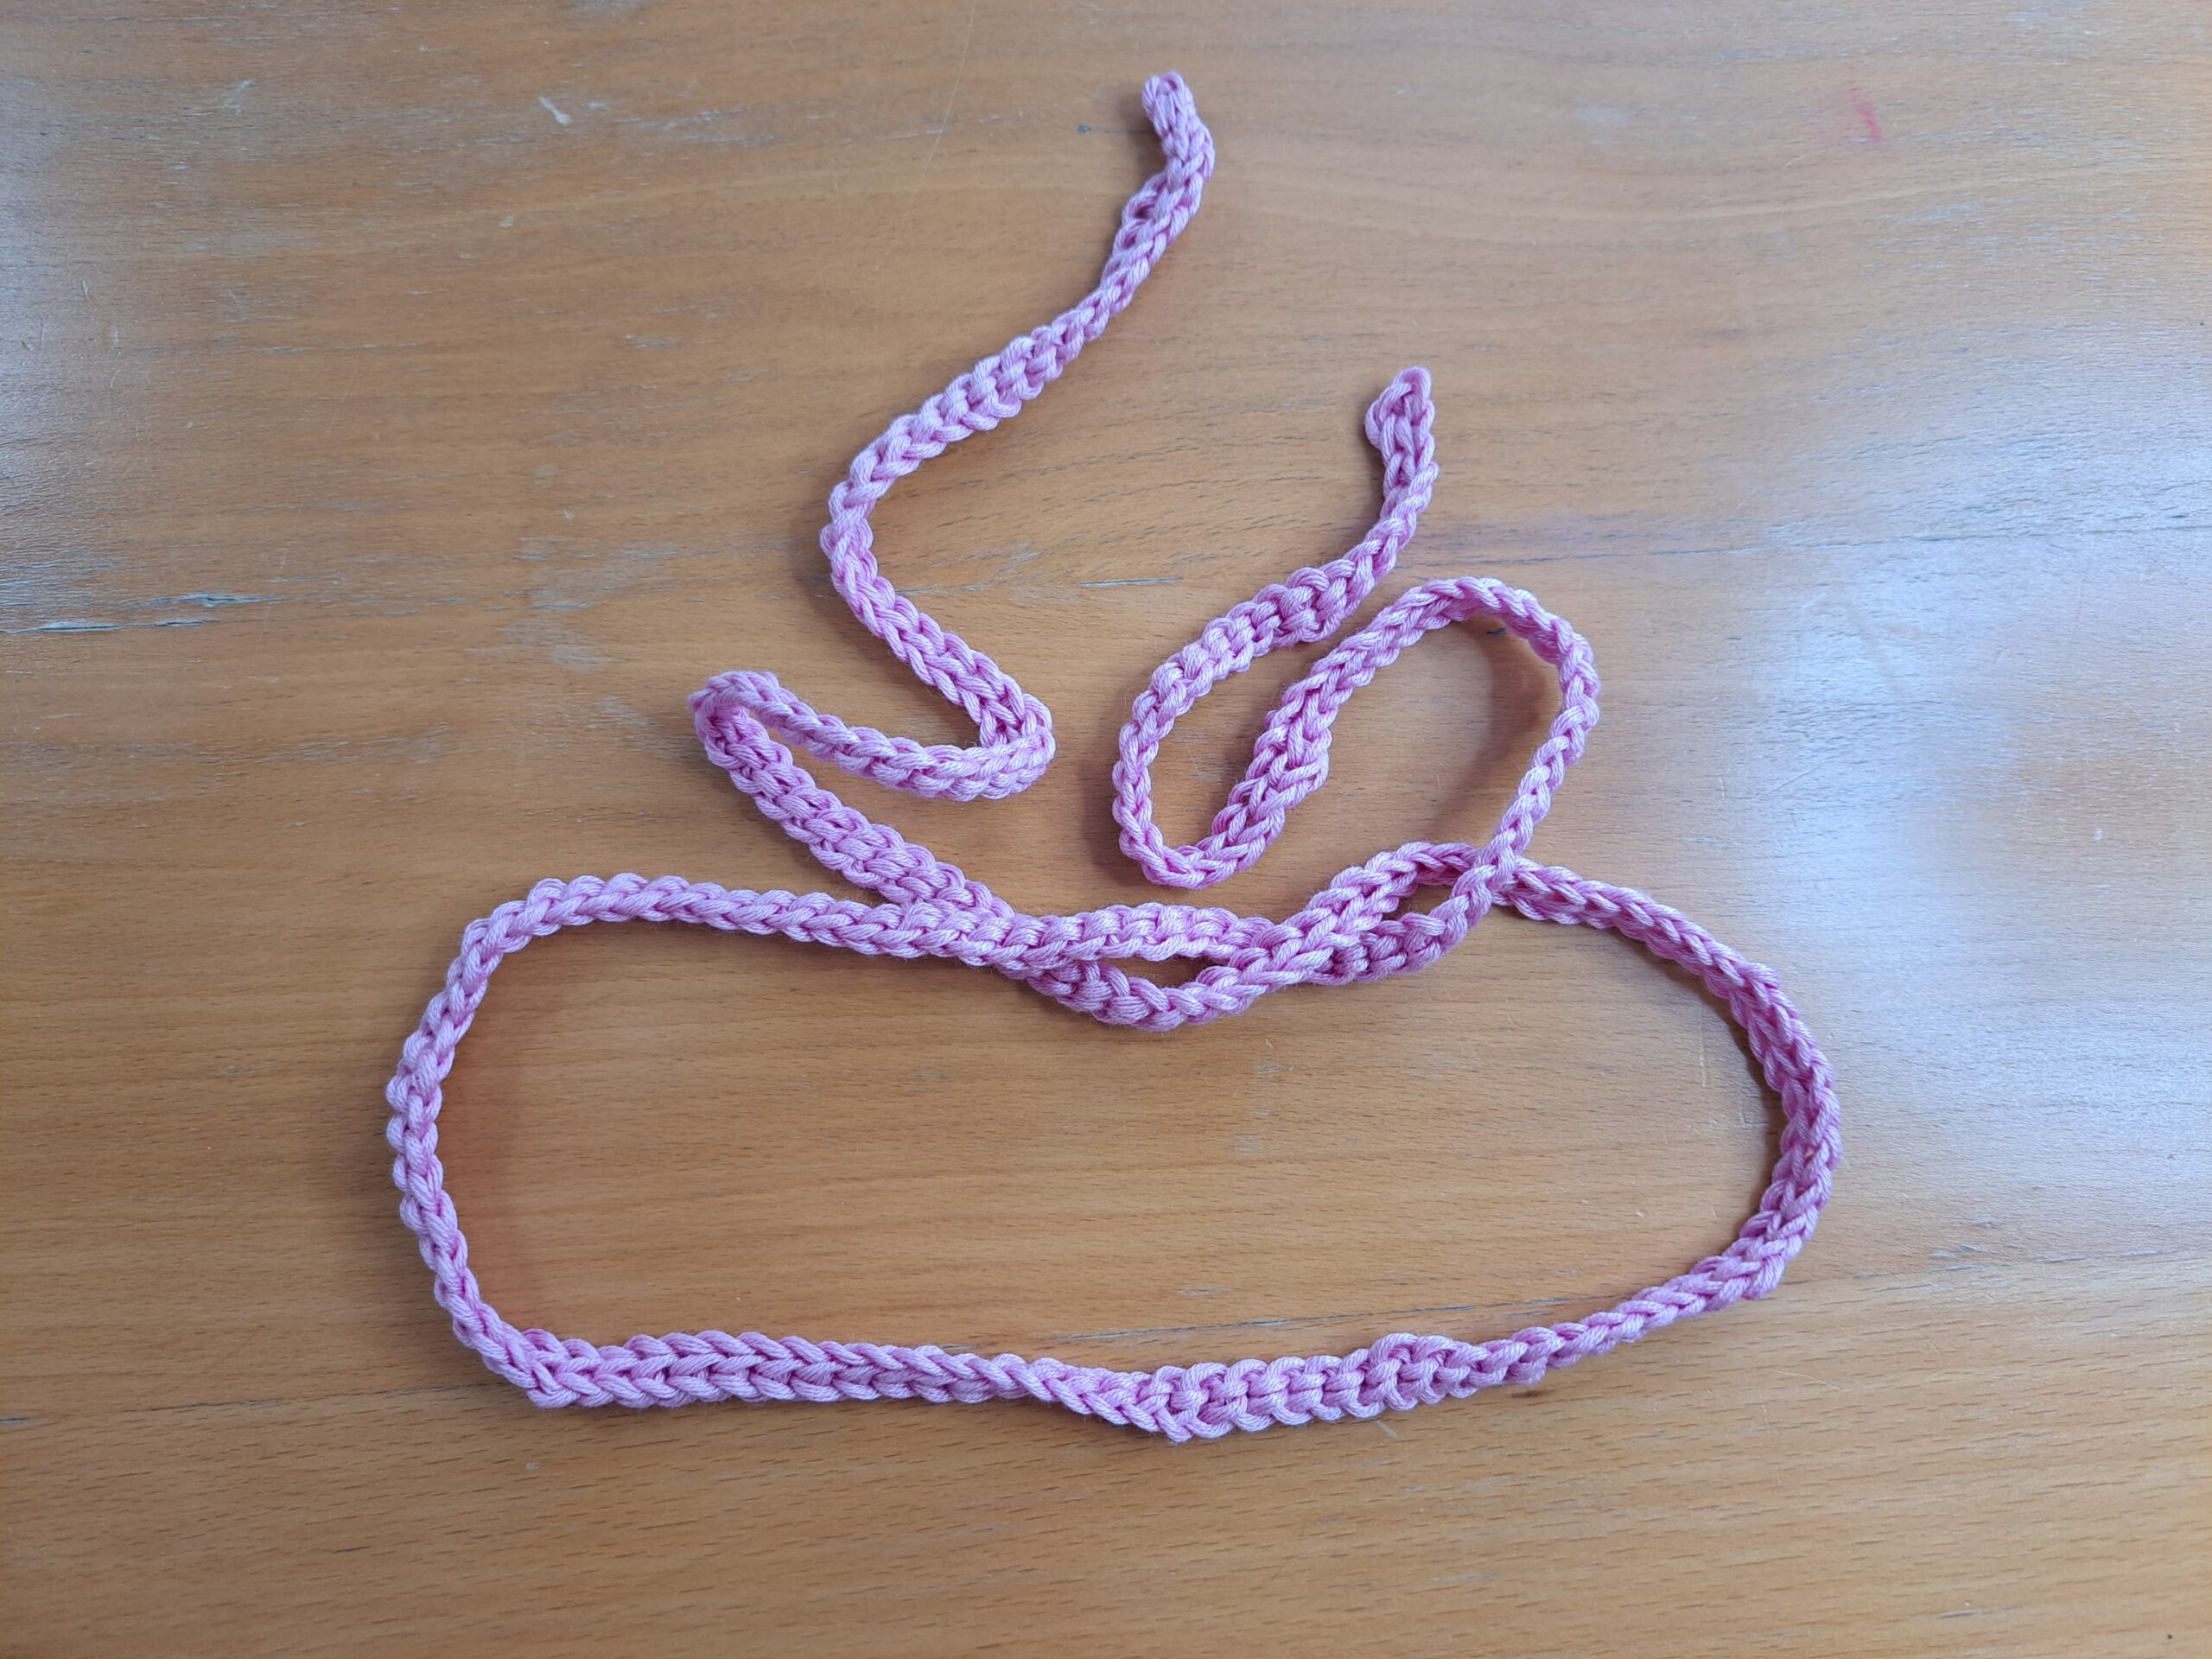
Crochet pink ribbon
With shade Desert Rose, ch 200.
Slip stitch through 2nd chain from hook, and through each chain across until end of chain.
Fasten off, tidying up all loose ends.
Sew bag together
For this part, please make sure that for both panels you have placed them with the last DC row facing upwards (before you start sewing your project together).
Choose your right and wrong side. The right side is the side which will be facing the outside of the bag, so this has to be the neater side of the front and back panels.
Place one panel on a flat surface.
Now place the rectangular piece around this panel, starting on the top left corner, going all the way down so that is goes underneath panel, and then all the way up (see photograph below).
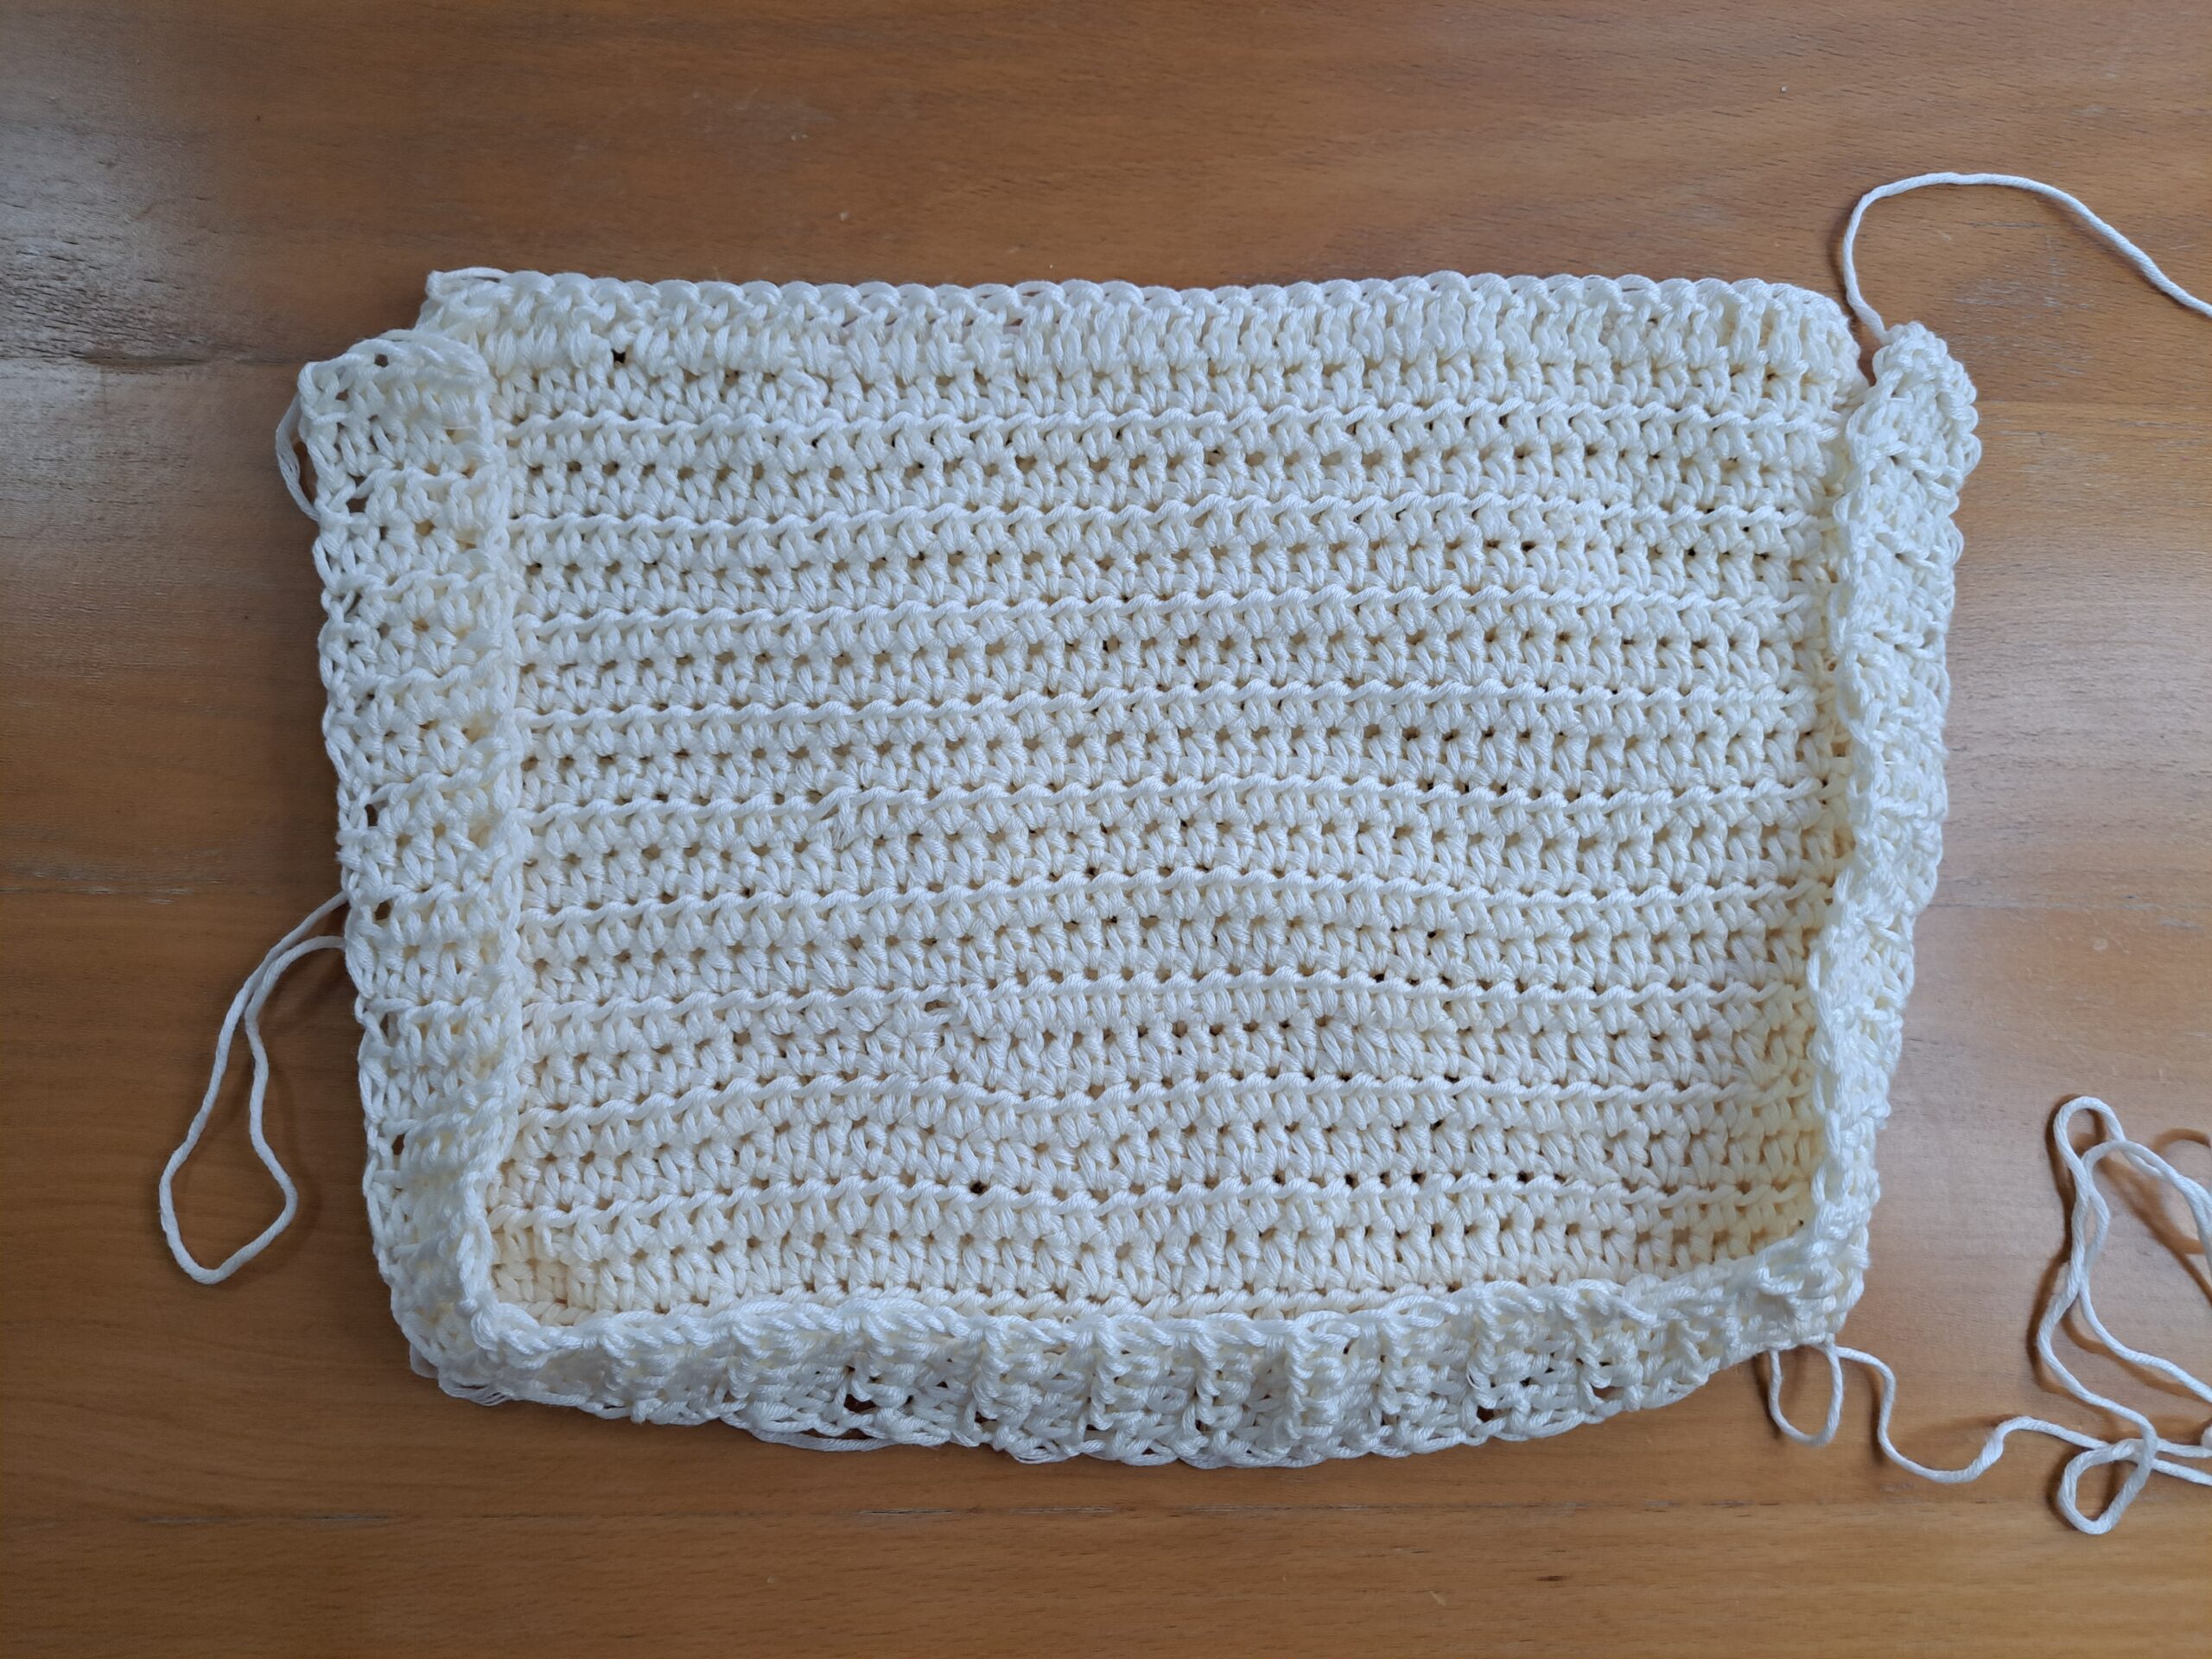
Start sewing your bag by either using the long tail left on the top corner of your bag (either corner is fine), or if you do not have a long tail left for sewing, attach a piece of yarn to any top corner of bag.
Start sewing down the first seam using the mattress stitch, and sew all the way around the bag (except the top which should be left unsewn). Sew all the way down the first side, then across the bottom, and then up the other side of the bag. Once you reach the top corner of the bag, fasten off yarn and tidy up all loose ends.
Place the back panel onto the project, and sew the back panel to the rectangular piece so as to create the bag shape. Repeat the same process you have completed for the front panel.
Fasten off and tidy up all loose ends.
Sew your straps onto the bag
Place your bag on a flat surface, and sew your straps onto your project.
Place your first strap symmetrically as seen in photograph below.
Sew your straps into the project securely, making sure your stitching will not be apparent once the bag is turned inside out so that the right side is facing (after all the sewing has been done).
Sew your straps in using tapestry needle and a loose piece of yarn, making sure you sew the straps into a HDC row (not the DC row at the top of the bag).
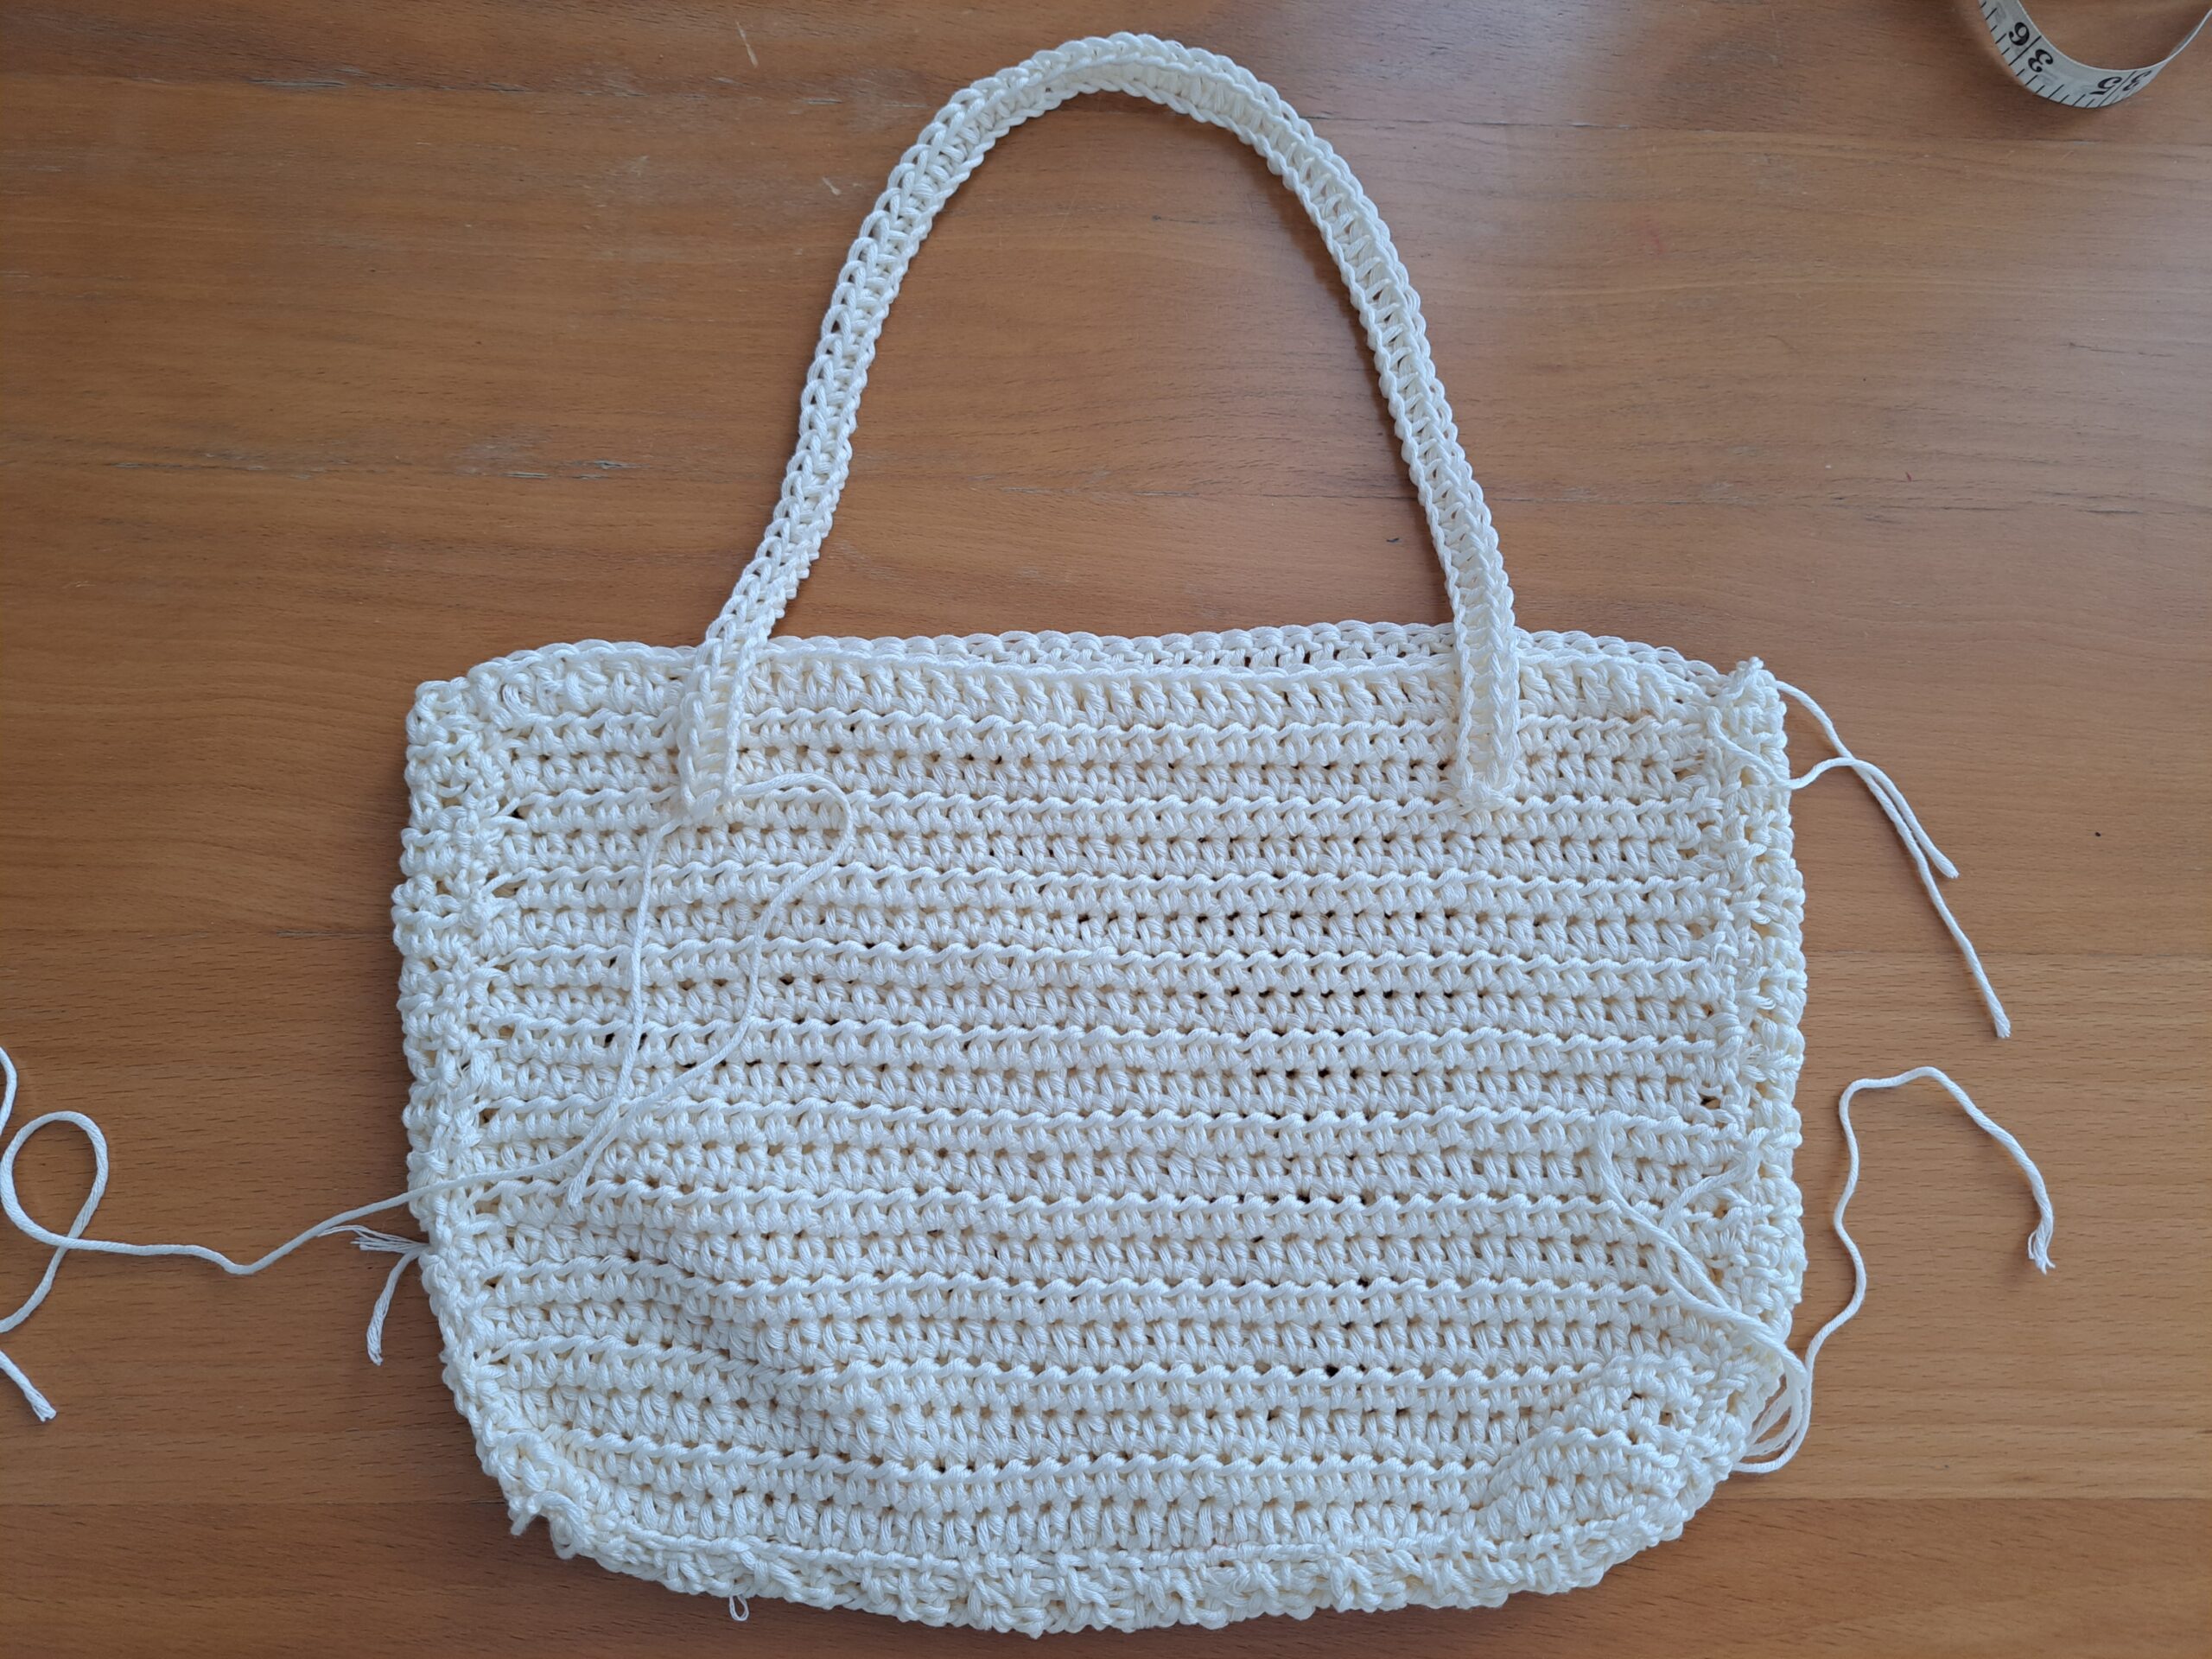
Repeat this process on the other side of the bag with the second strap.
Turn your project inside out, so that the right side is now facing out.
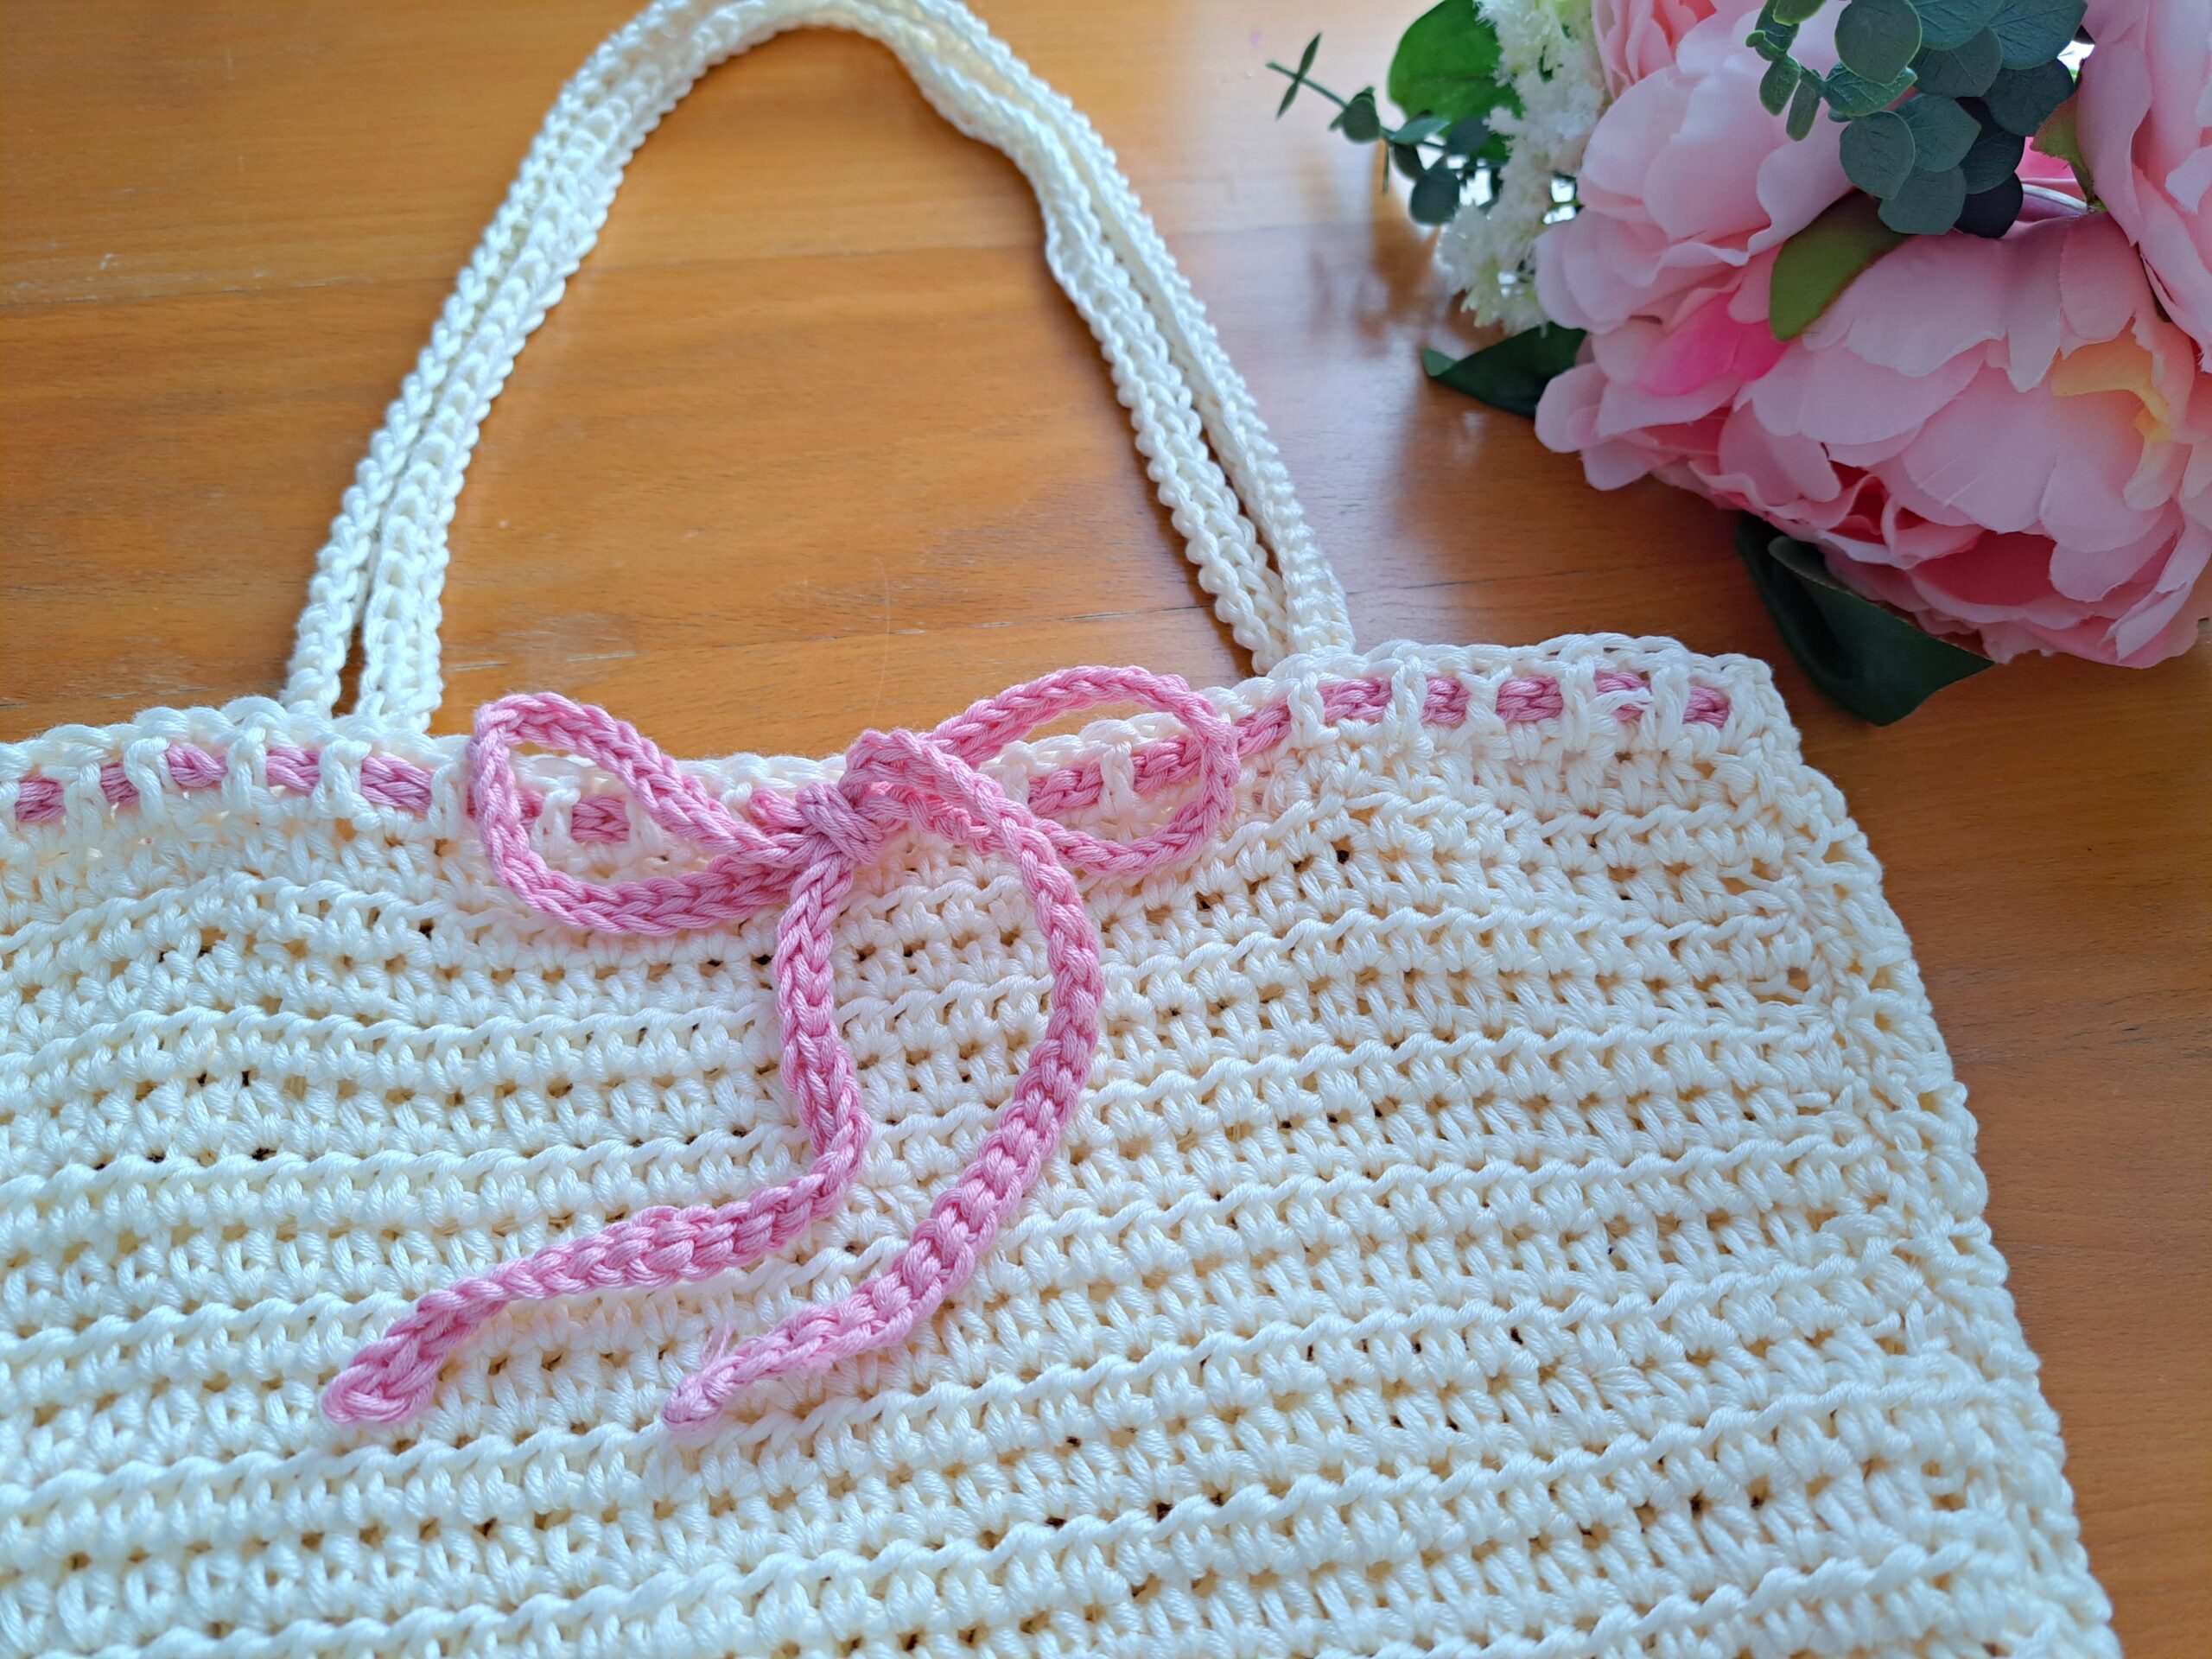
Interlace your ribbon into the top of the crochet bag
Once you have turned your bag so that the right side is facing you, you can start interlacing your ribbon into the top DC row of the bag.
Locate the center DC of the front panel; take your ribbon and pass it under one DC stitch. Go all around the top row going in and out with your ribbon, placing your ribbon through every other DC until you have gone all the way around the bag.
When you reach the sides (where there is no DC row), just do this process through HDCs.
Once you have reached the second to last DC on the front of the bag, tighten ribbon slightly and create a bow.


You May Also Like
Crochet Boho Festival Bag
Crochet Easy and Stylish Man Scarf