Crochet Suzette Boho Bag Free Pattern
Crochet Suzette Boho Bag Free Pattern
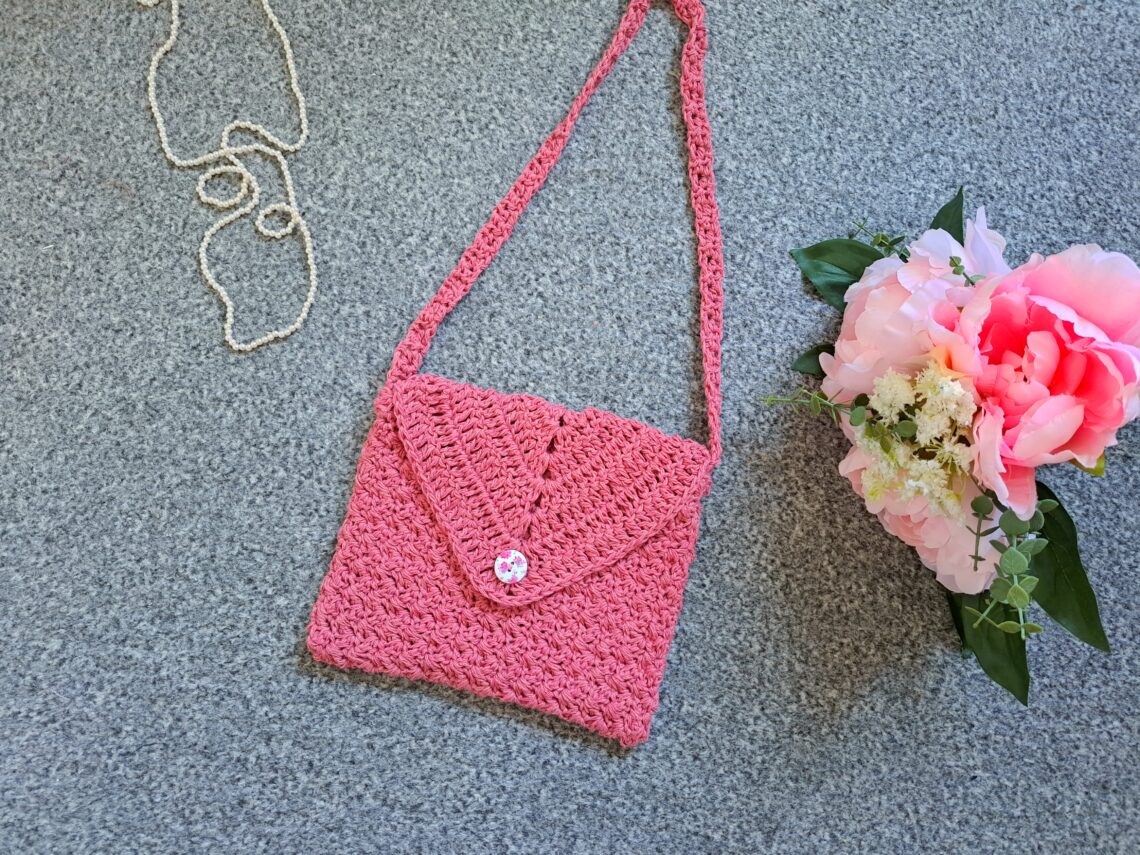
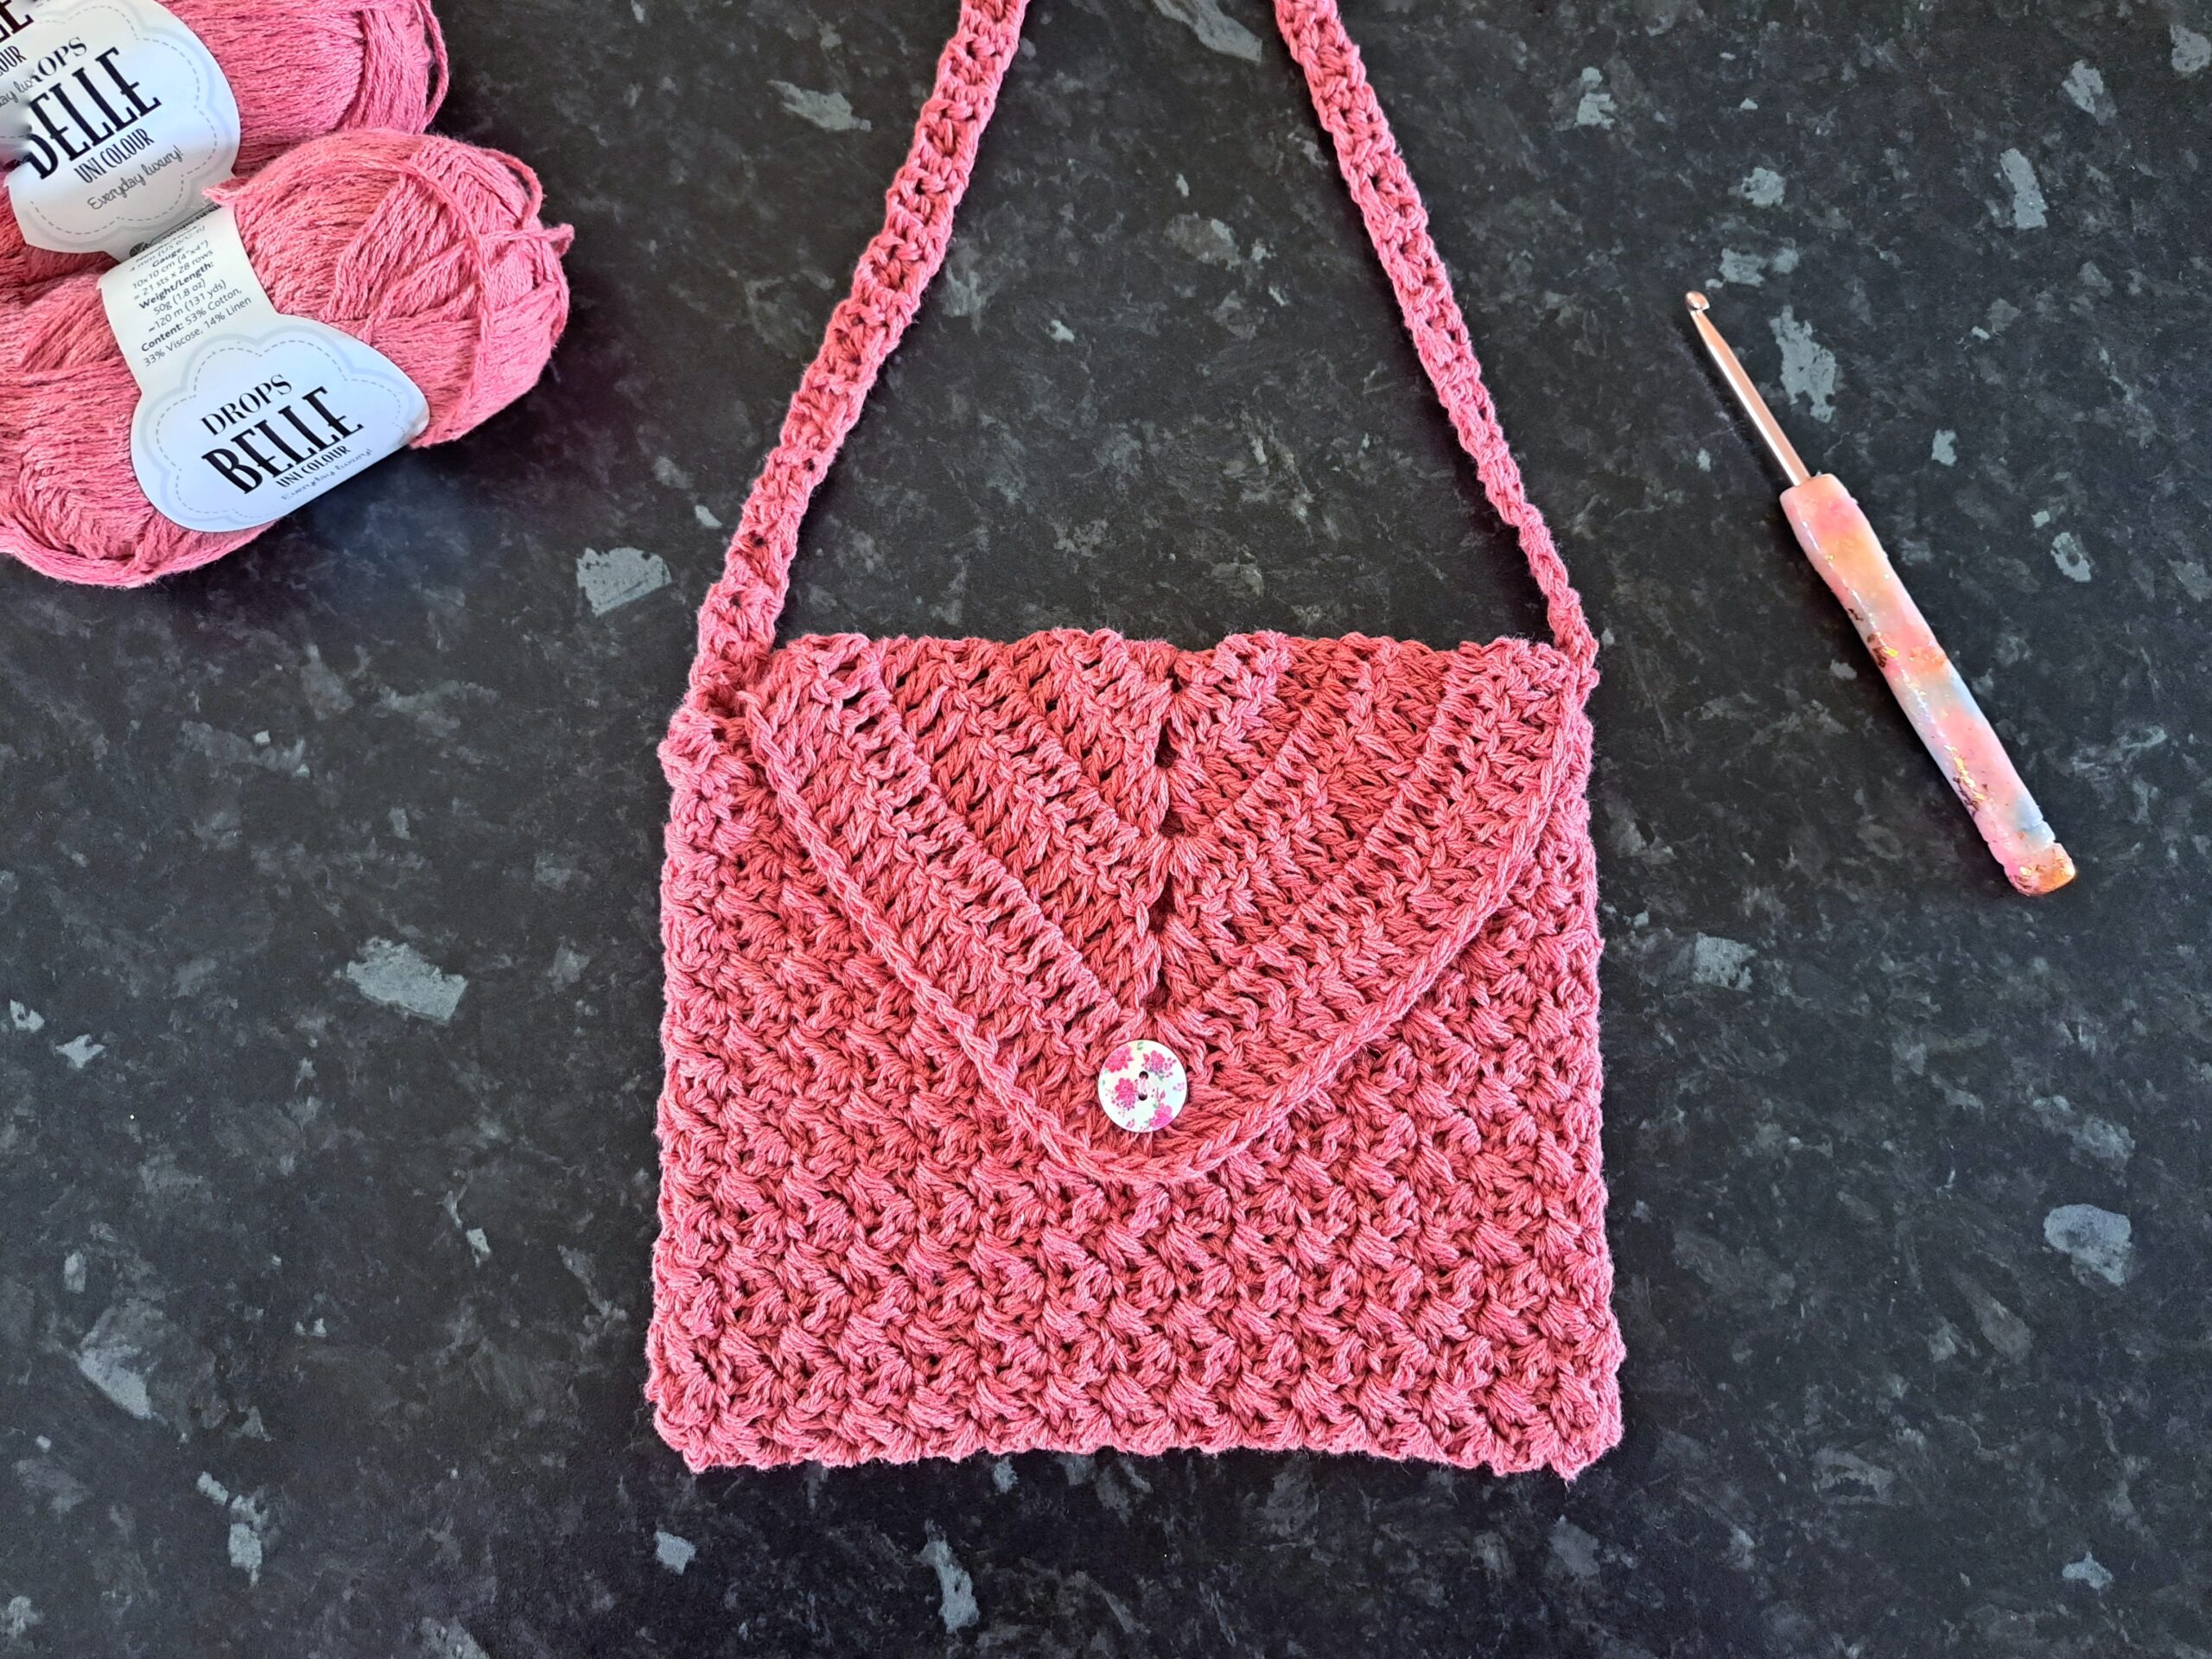
Hi everyone, this week I am bringing to you the Crochet Suzette Boho Bag (free pattern). This Coachella inspired boho bag is perfect in all seasons. It is crocheted using the Suzette stitch (also known as the Grit stitch). This sling bag is so lovely and can be crocheted by complete beginners too. It features a very cute shape and floral button too.
The video tutorial can be found here:
Crochet Suzette Boho Bag Free Pattern: The Inspiration
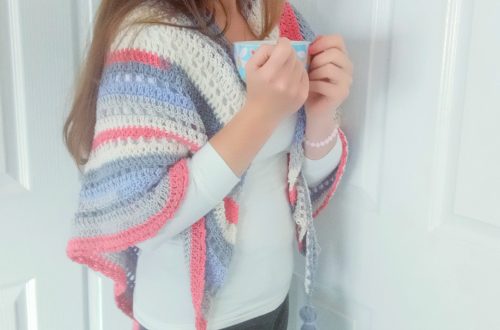
I love crocheting bags! Crochet bags are so convenient, and you can make them exactly the way you want them. I have already crocheted a few bags that I absolutely love. This boho festival bag is the first bag I ever created, and I still love it so much! This Coachella inspired bag featuring a shell stitch edging is also an all time favorite.
If you enjoy larger bags, you can check out this Sunburst Granny Square Bag which is also inspired by festival fashion. I love this design, but most of all I love the colors featured in this bright bag! If you enjoy more “wintery” style bags, this Victorian Drawstring Purse may be perfect for you. It is part of my Vintage Crochet Series.
This new design is very much a sling bag. It features a single long strap, giving this project a very Boho vibe. I also love the floral button, which really elevates the look of this otherwise simple piece.
Crochet Suzette Boho Bag Free Pattern: The Suzette Stitch
This crochet bag features the Suzette stitch. I absolutely love this stitch! I have used this stitch only once before, for The Heart Of Me Pompom Hat. Indeed, I crocheted this hat 3 years ago, so it was a real pleasure to use this stitch once again. I will definitely be using this stitch again in the near future!
This design is very simple. Indeed, the main part of the bag is crocheted as one large rectangle, which is later folded over and sewed. Then a triangle shaped flat is added to the bag; the long strap is crocheted and then sewed to the project.
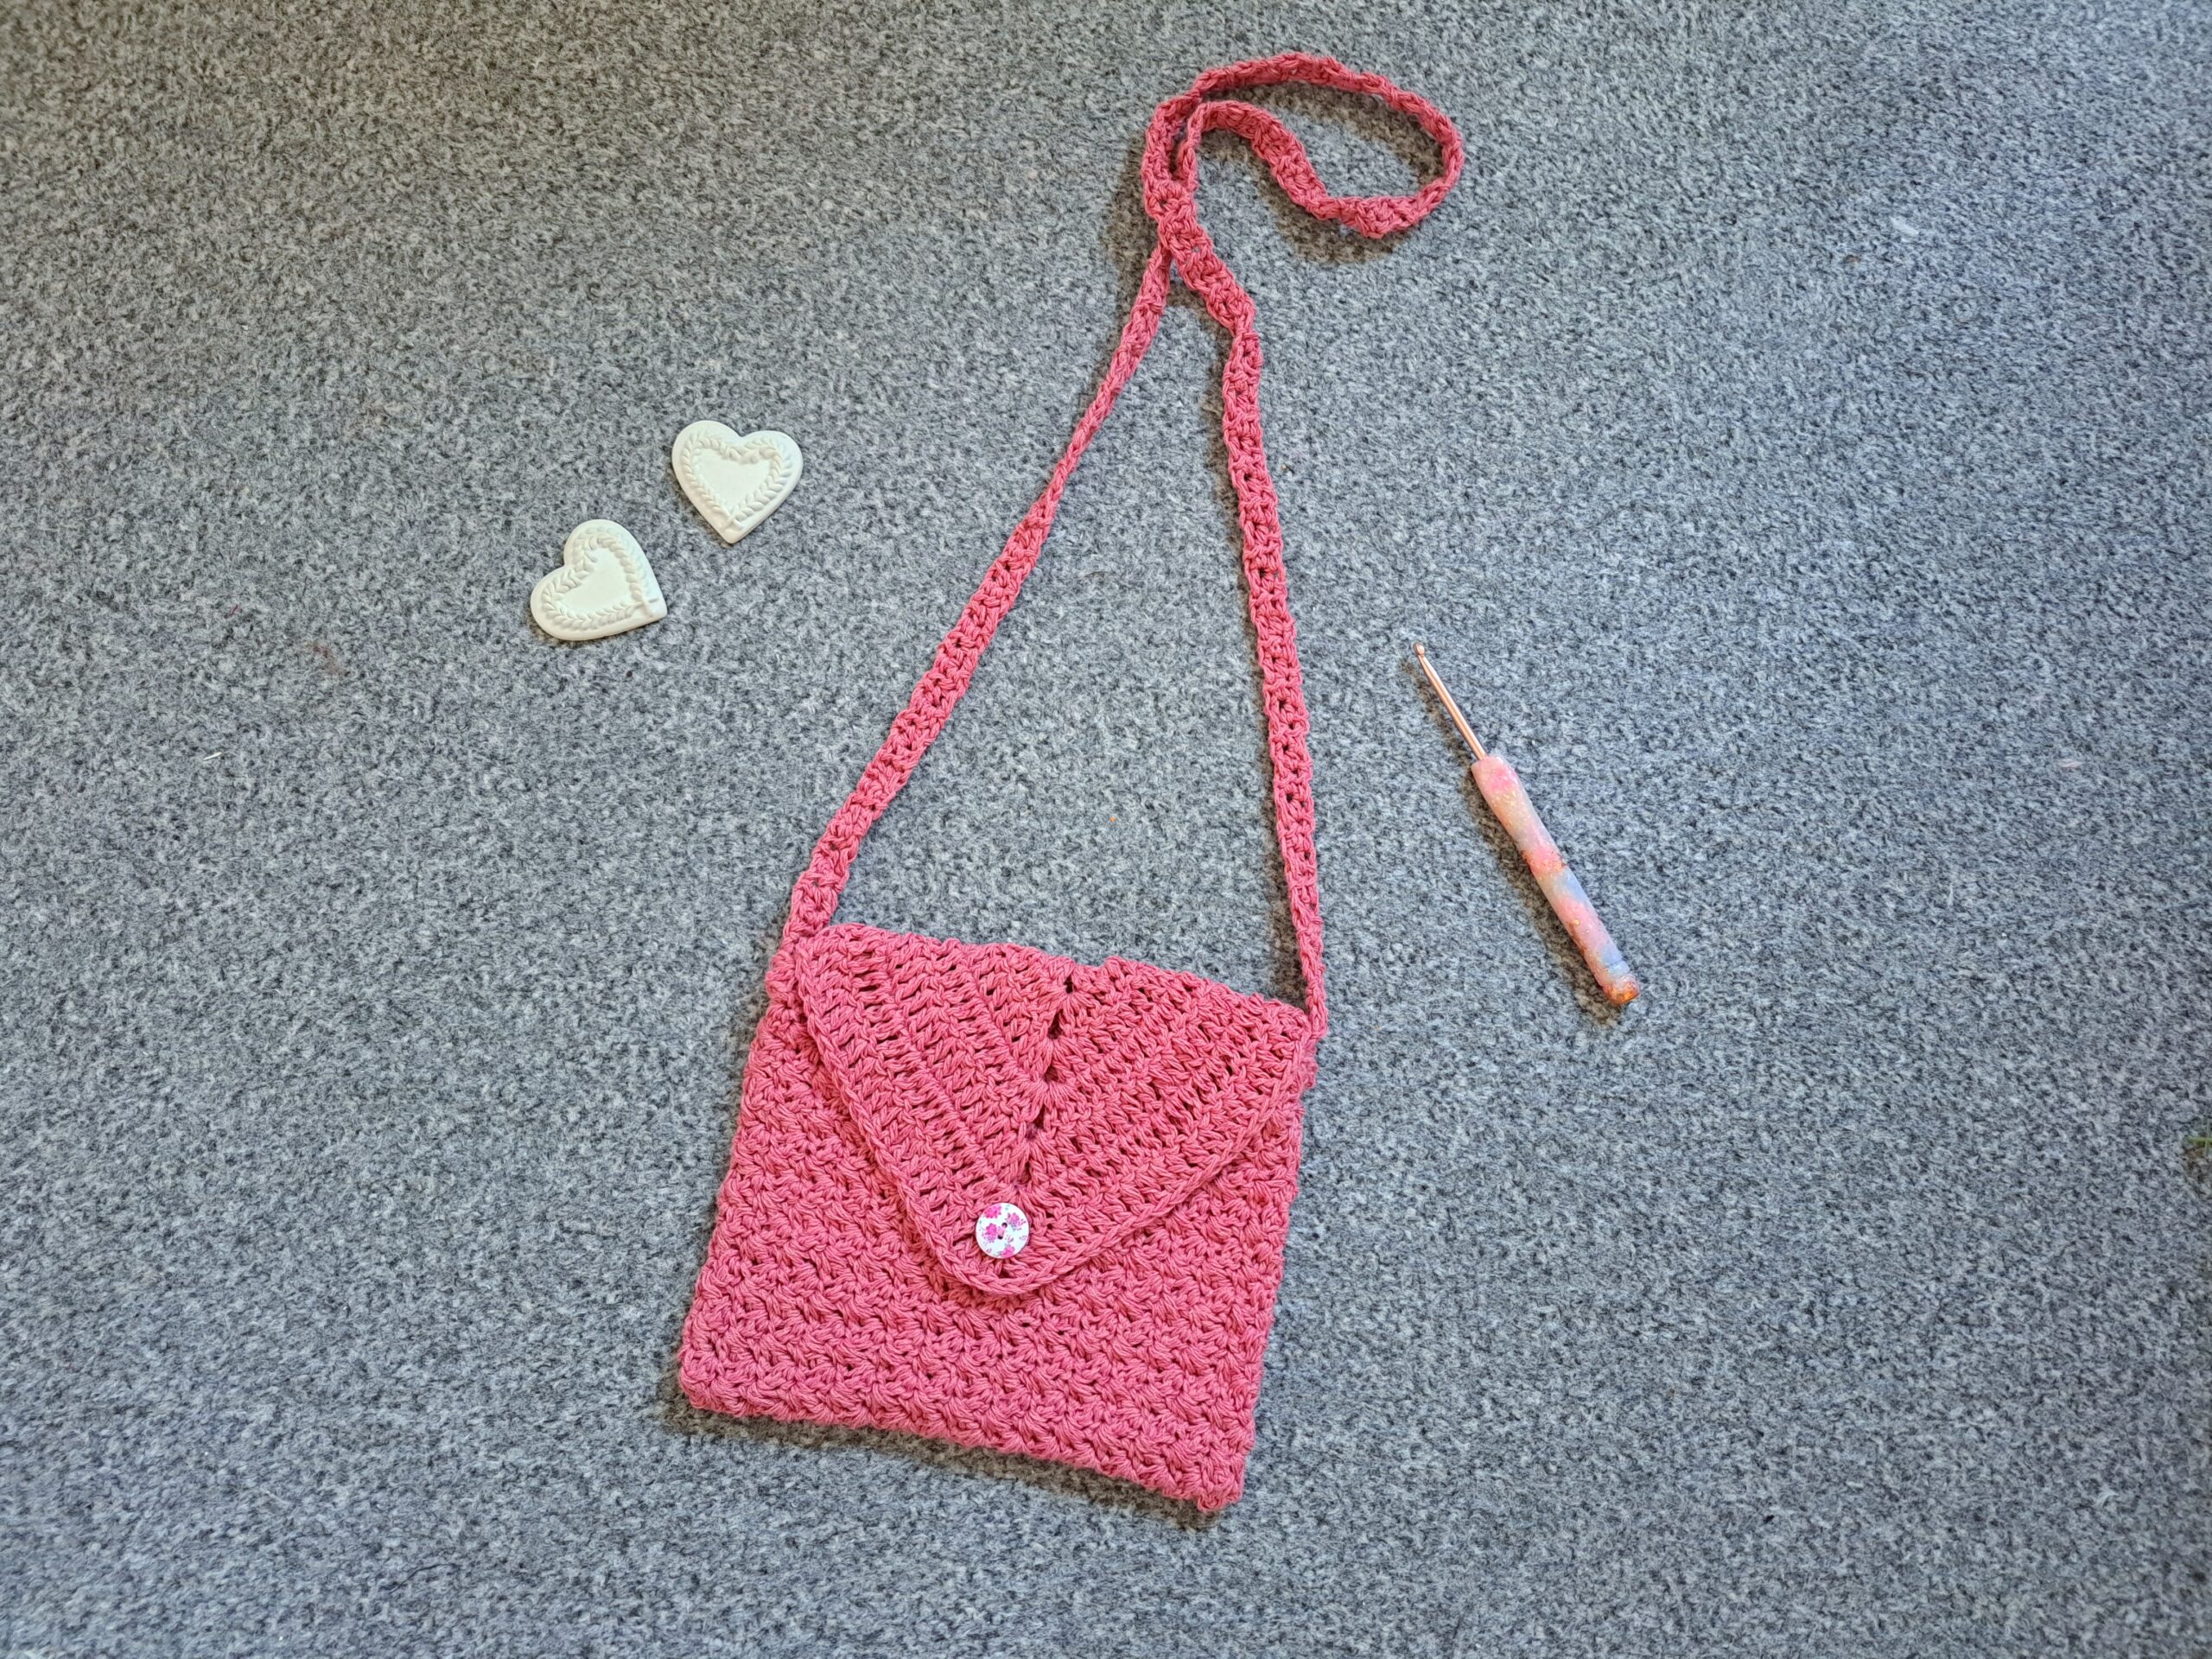
Lastly, the floral button is sewed to the front of the bag. I love how simple and cute this bag is! I will be sewing a fabric lining into the bag, which is what I always do when for crochet bags.
You can find my video tutorial on how to line a crochet bag on my Youtube channel:
Connecting with you
I would like to take a moment to thank every single one of you, for supporting me and my crochet journey. Indeed, I absolutely am so touched by all your messages, comments, and every person who has become a patron of my work through Patreon. Thank you!
I love connecting with my Crochet Community through my blog and Social Media. You can find me on Youtube, Instagram, and Pinterest. I would love to connect with you on these platforms.
You can also join my private Facebook group to connect.
Don’t forget to subscribe to my weekly newsletter so that you never miss a stitch!
Crochet Suzette Boho Bag: The Pattern
You can purchase the ad free, large print, PDF pattern from my Etsy store here: Crochet Easy Boho Sling Bag PDF Pattern
You can purchase the ad free, large print, PDF pattern from my Ravelry store: Crochet The Suzette Bag Pattern
Level: Easy
Notes
I will be using US terms (British terms in brackets).
For this project, we will be crocheting 3 different pieces to create bag.
First we will be crocheting a rectangle that will be the front and back panels (once folded and sewed); then we will be making the triangular front flap. Then we will be making the strap.
Once all these items have been made, they will be assembled and sewed as explained below. Then the simple floral button will be stitched to this project
Materials
2 skeins of Drops Belle in shade 11 (Old Pink)
A 4 mm crochet hook
A tapestry needle
A pair of scissors
A 15 mm button
Darning thread and needle
Abbreviations
Ch: chain
Sk: skip
SP: space
Sl st: Slip stitch
TC: Turning chain
SC: Single Crochet (UK Double Crochet)
DC: Double Crochet (UK Treble Crochet)
HDC: Half Double Crochet (UK Half Treble Crochet)
EOR: End of row
Gauge (for the Suzette stitch)
4” (10 cm): 16 stitches
4” (10 cm): 16 rows
Size of finished bag
7” (16,5 cm) x 7,5” (19 cm)
Pattern begins here
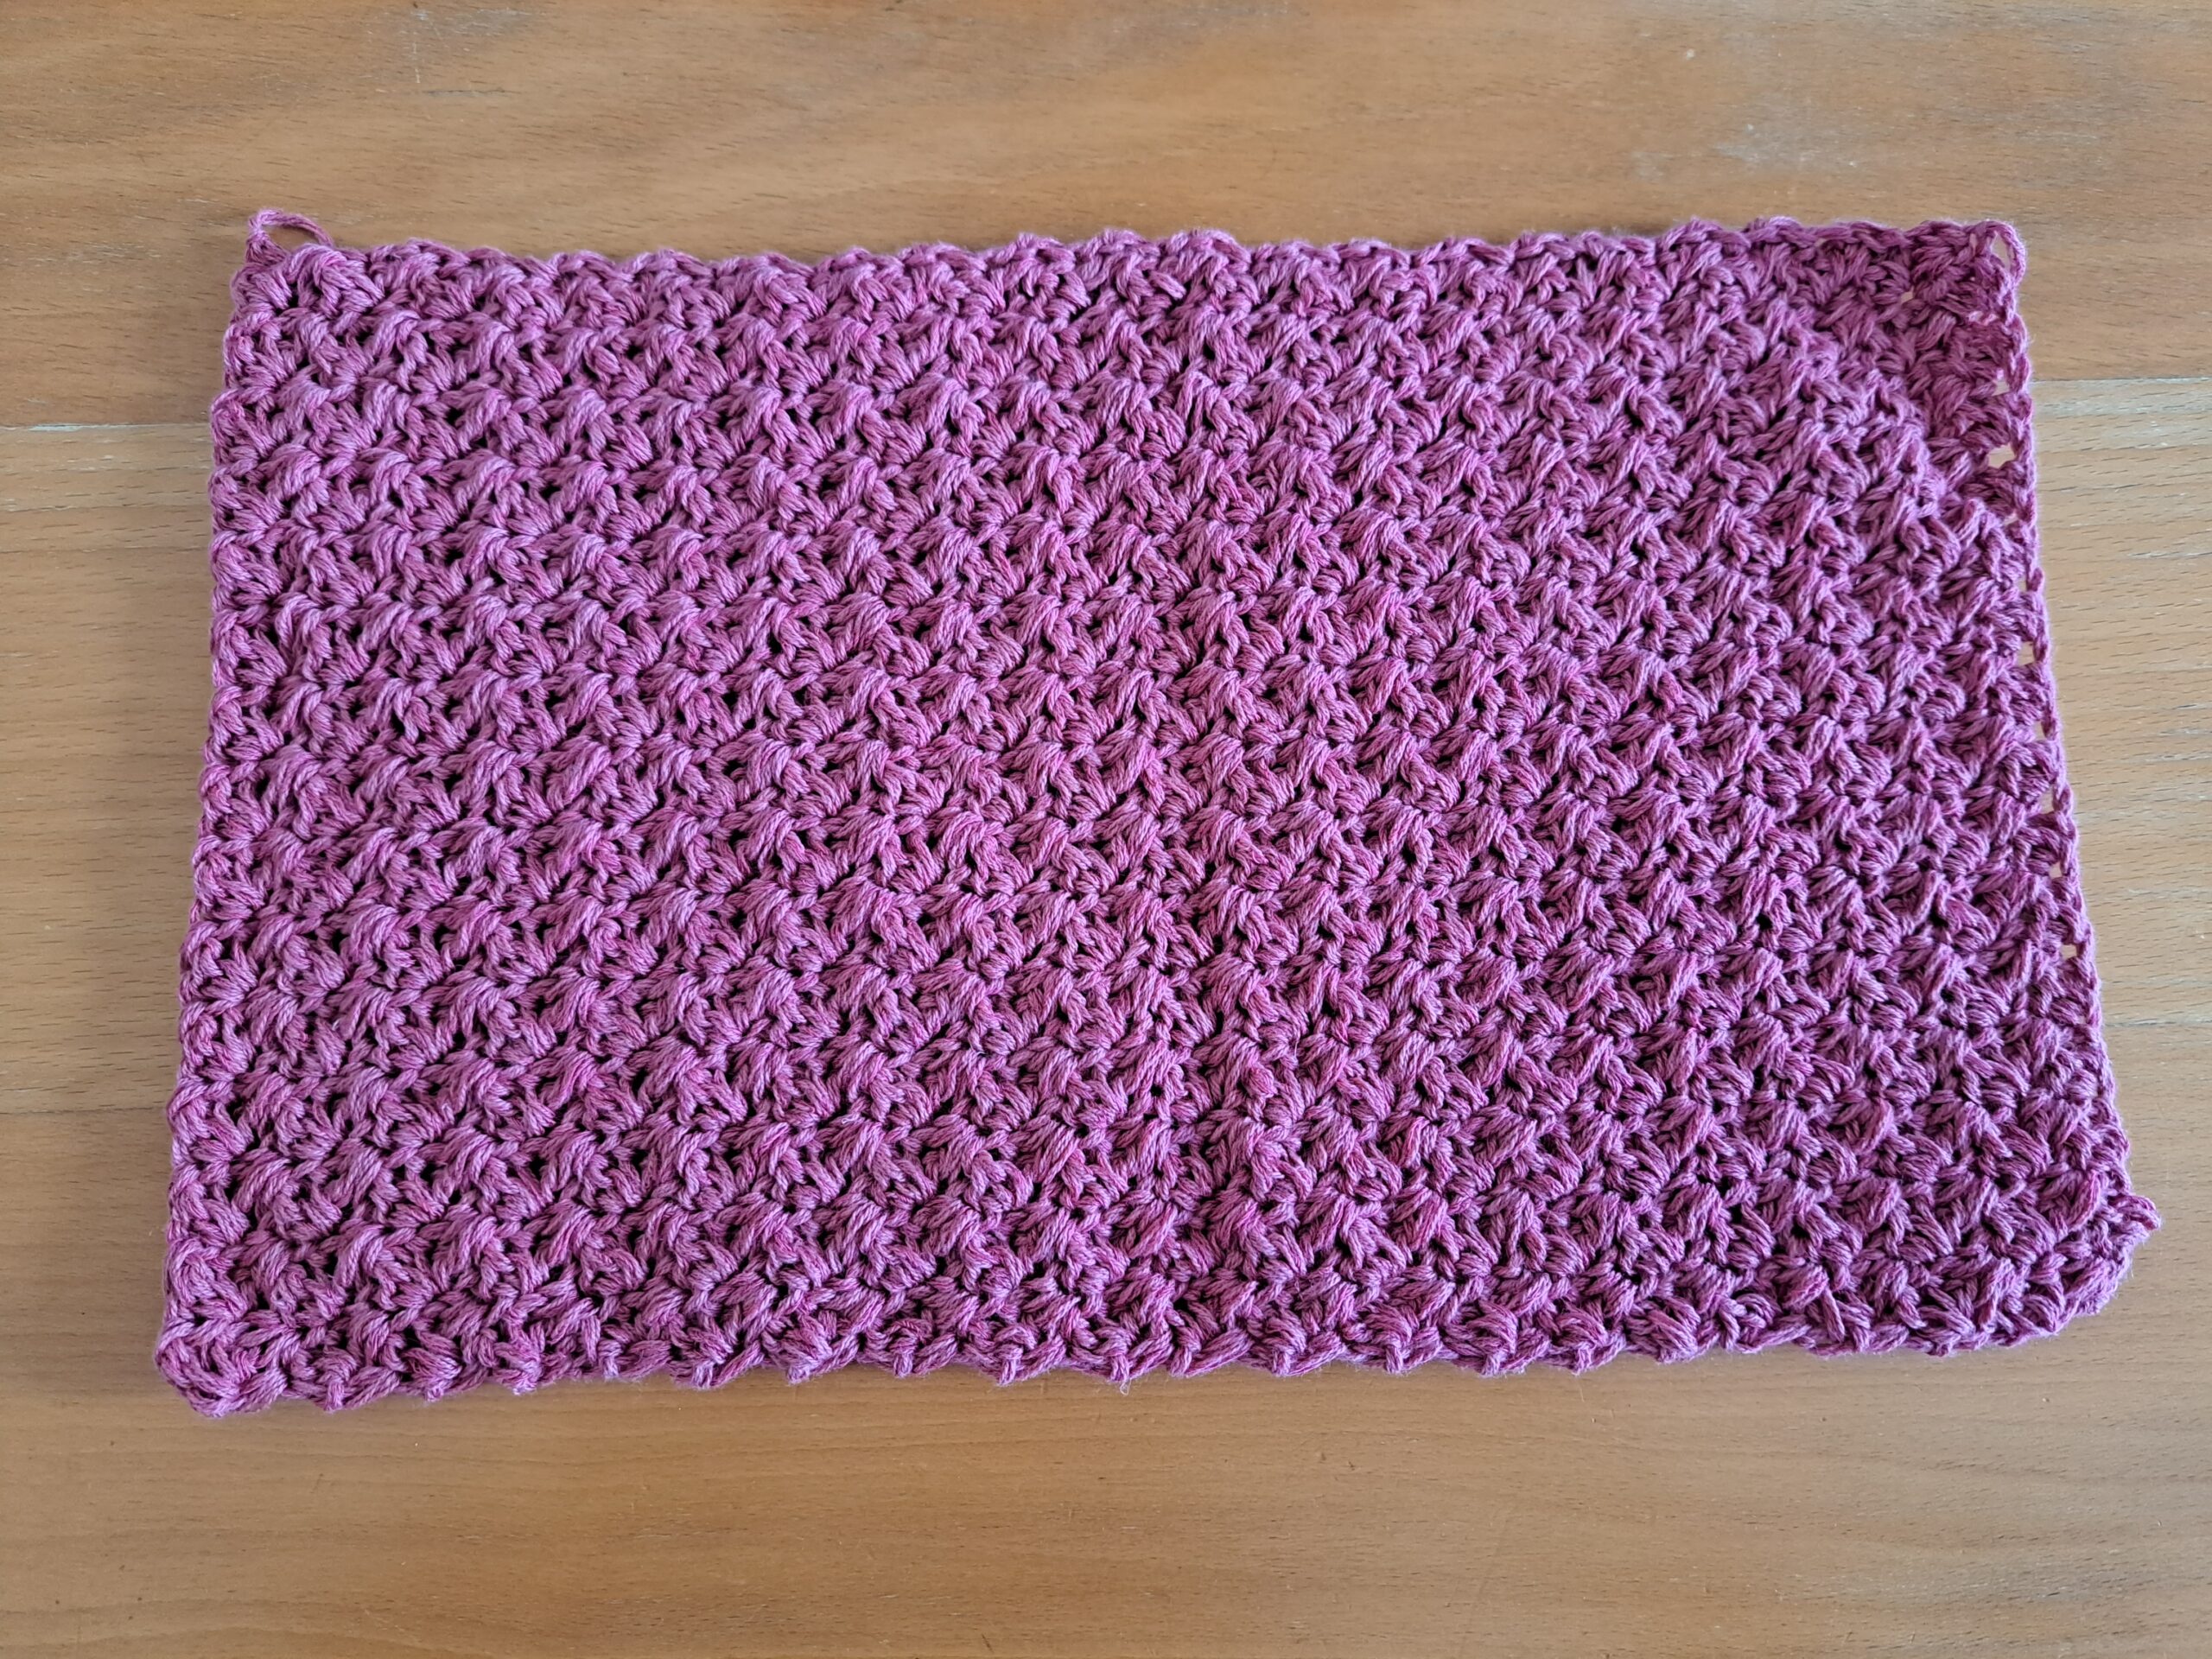
Create rectangle that will be the front and back panels once folded over and sewed.
Ch 33
Row 1: Miss 2 ch (=SC), place DC into next ch, sk 1 ch, place 1 SC and 1 DC into next ch until last 2 ch. Sk 1 ch, 1 SC into last ch.
Row 2: Ch 1 (=SC), turn your work, place 1 DC in same 1st st; *sk 1 st, place 1 SC and 1 DC into next SC from previous row*. Repeat from * to last 2 st, sk 1 st, 1 SC into last stitch.
Row 3-41: Repeat row 2.
Fasten off, leaving long tail for sewing in seam.
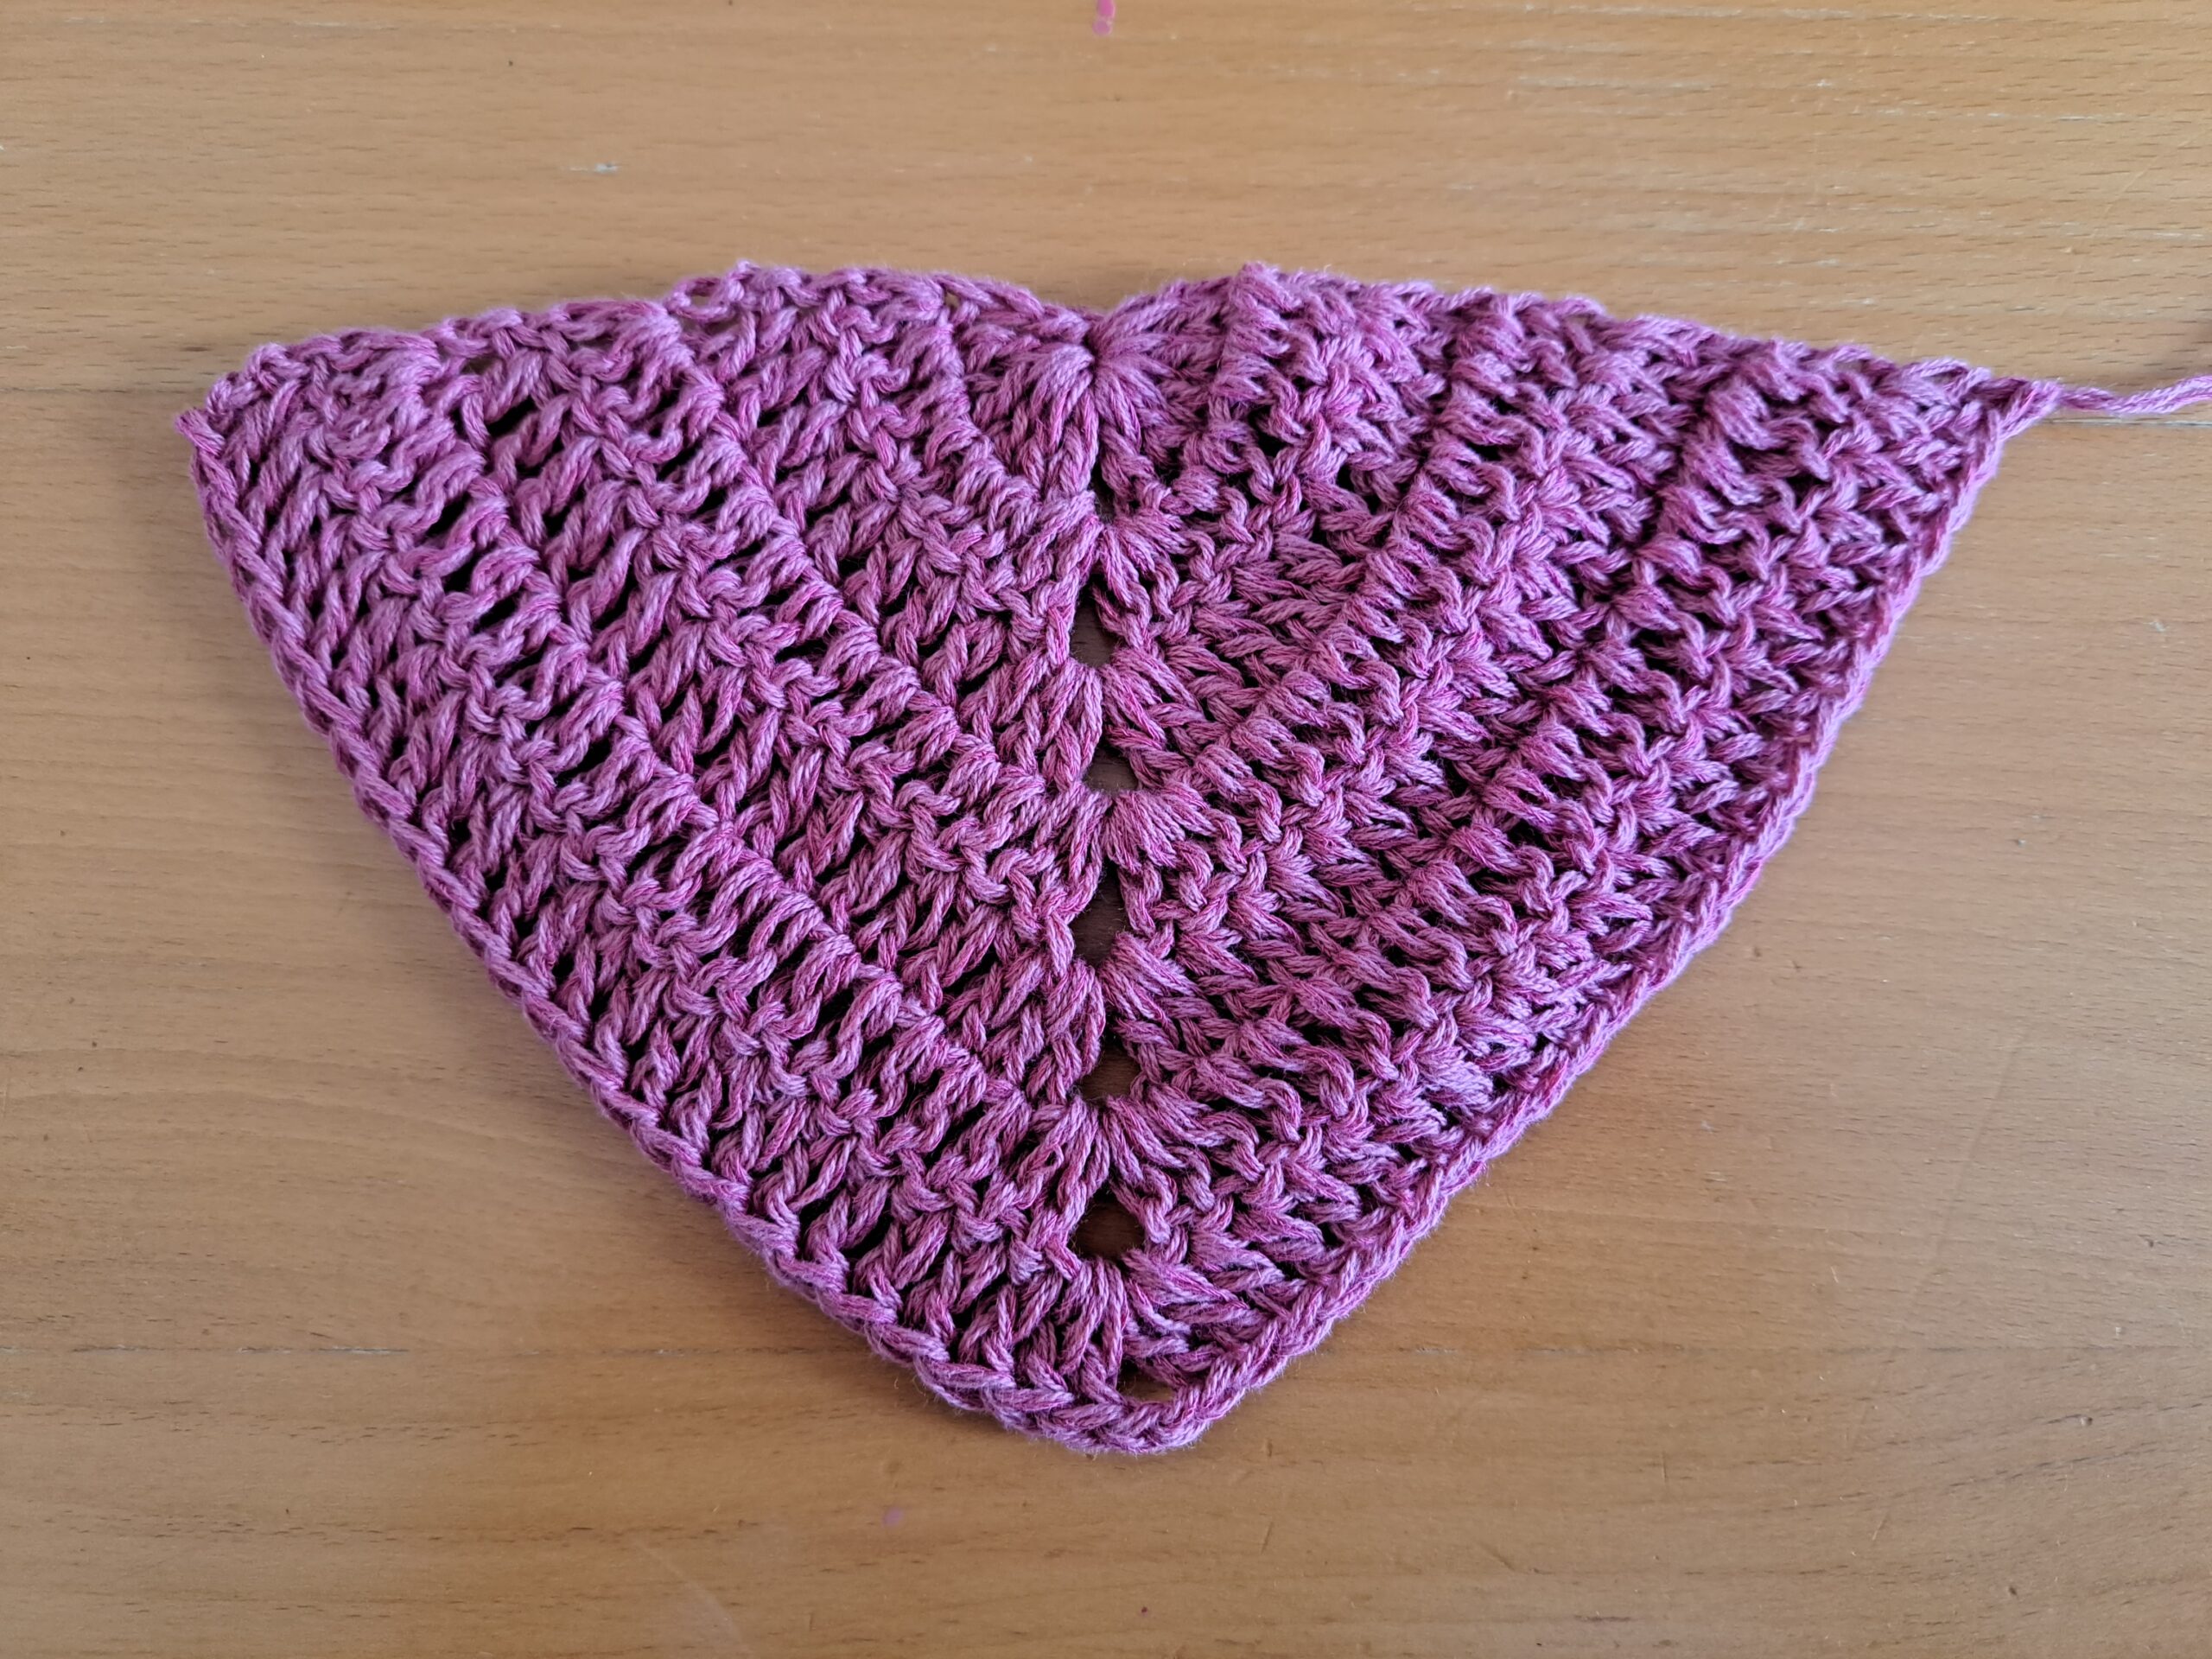
Flap
To start, make a slip knot; ch 4, sl st through 1st st to form a ring.
Row 1: Ch 3 (=DC), 5 DC in ring, ch 2, 6 DC in same ring.
Row 2: Ch 3 (=DC), turn your work, DC into same 1st stitch (=2 DC together in one stitch). DC into each DC until center ch 2 space. Place 2 DC, ch 2, 2 DC into center space. DC into every DC until eor, and place 2 DC together in last stitch (ch 3 from previous row).
Row 3-7: repeat row 2.
Strap
Ch 3
1: HDC into 3rd ch from hook (2 ch at beginning=HDC).
2: Ch 1 (=TC), turn your work, HDC into HDC from previous row until eor (=2 HDC total).
3-122: Repeat row 2.
Sewing project together
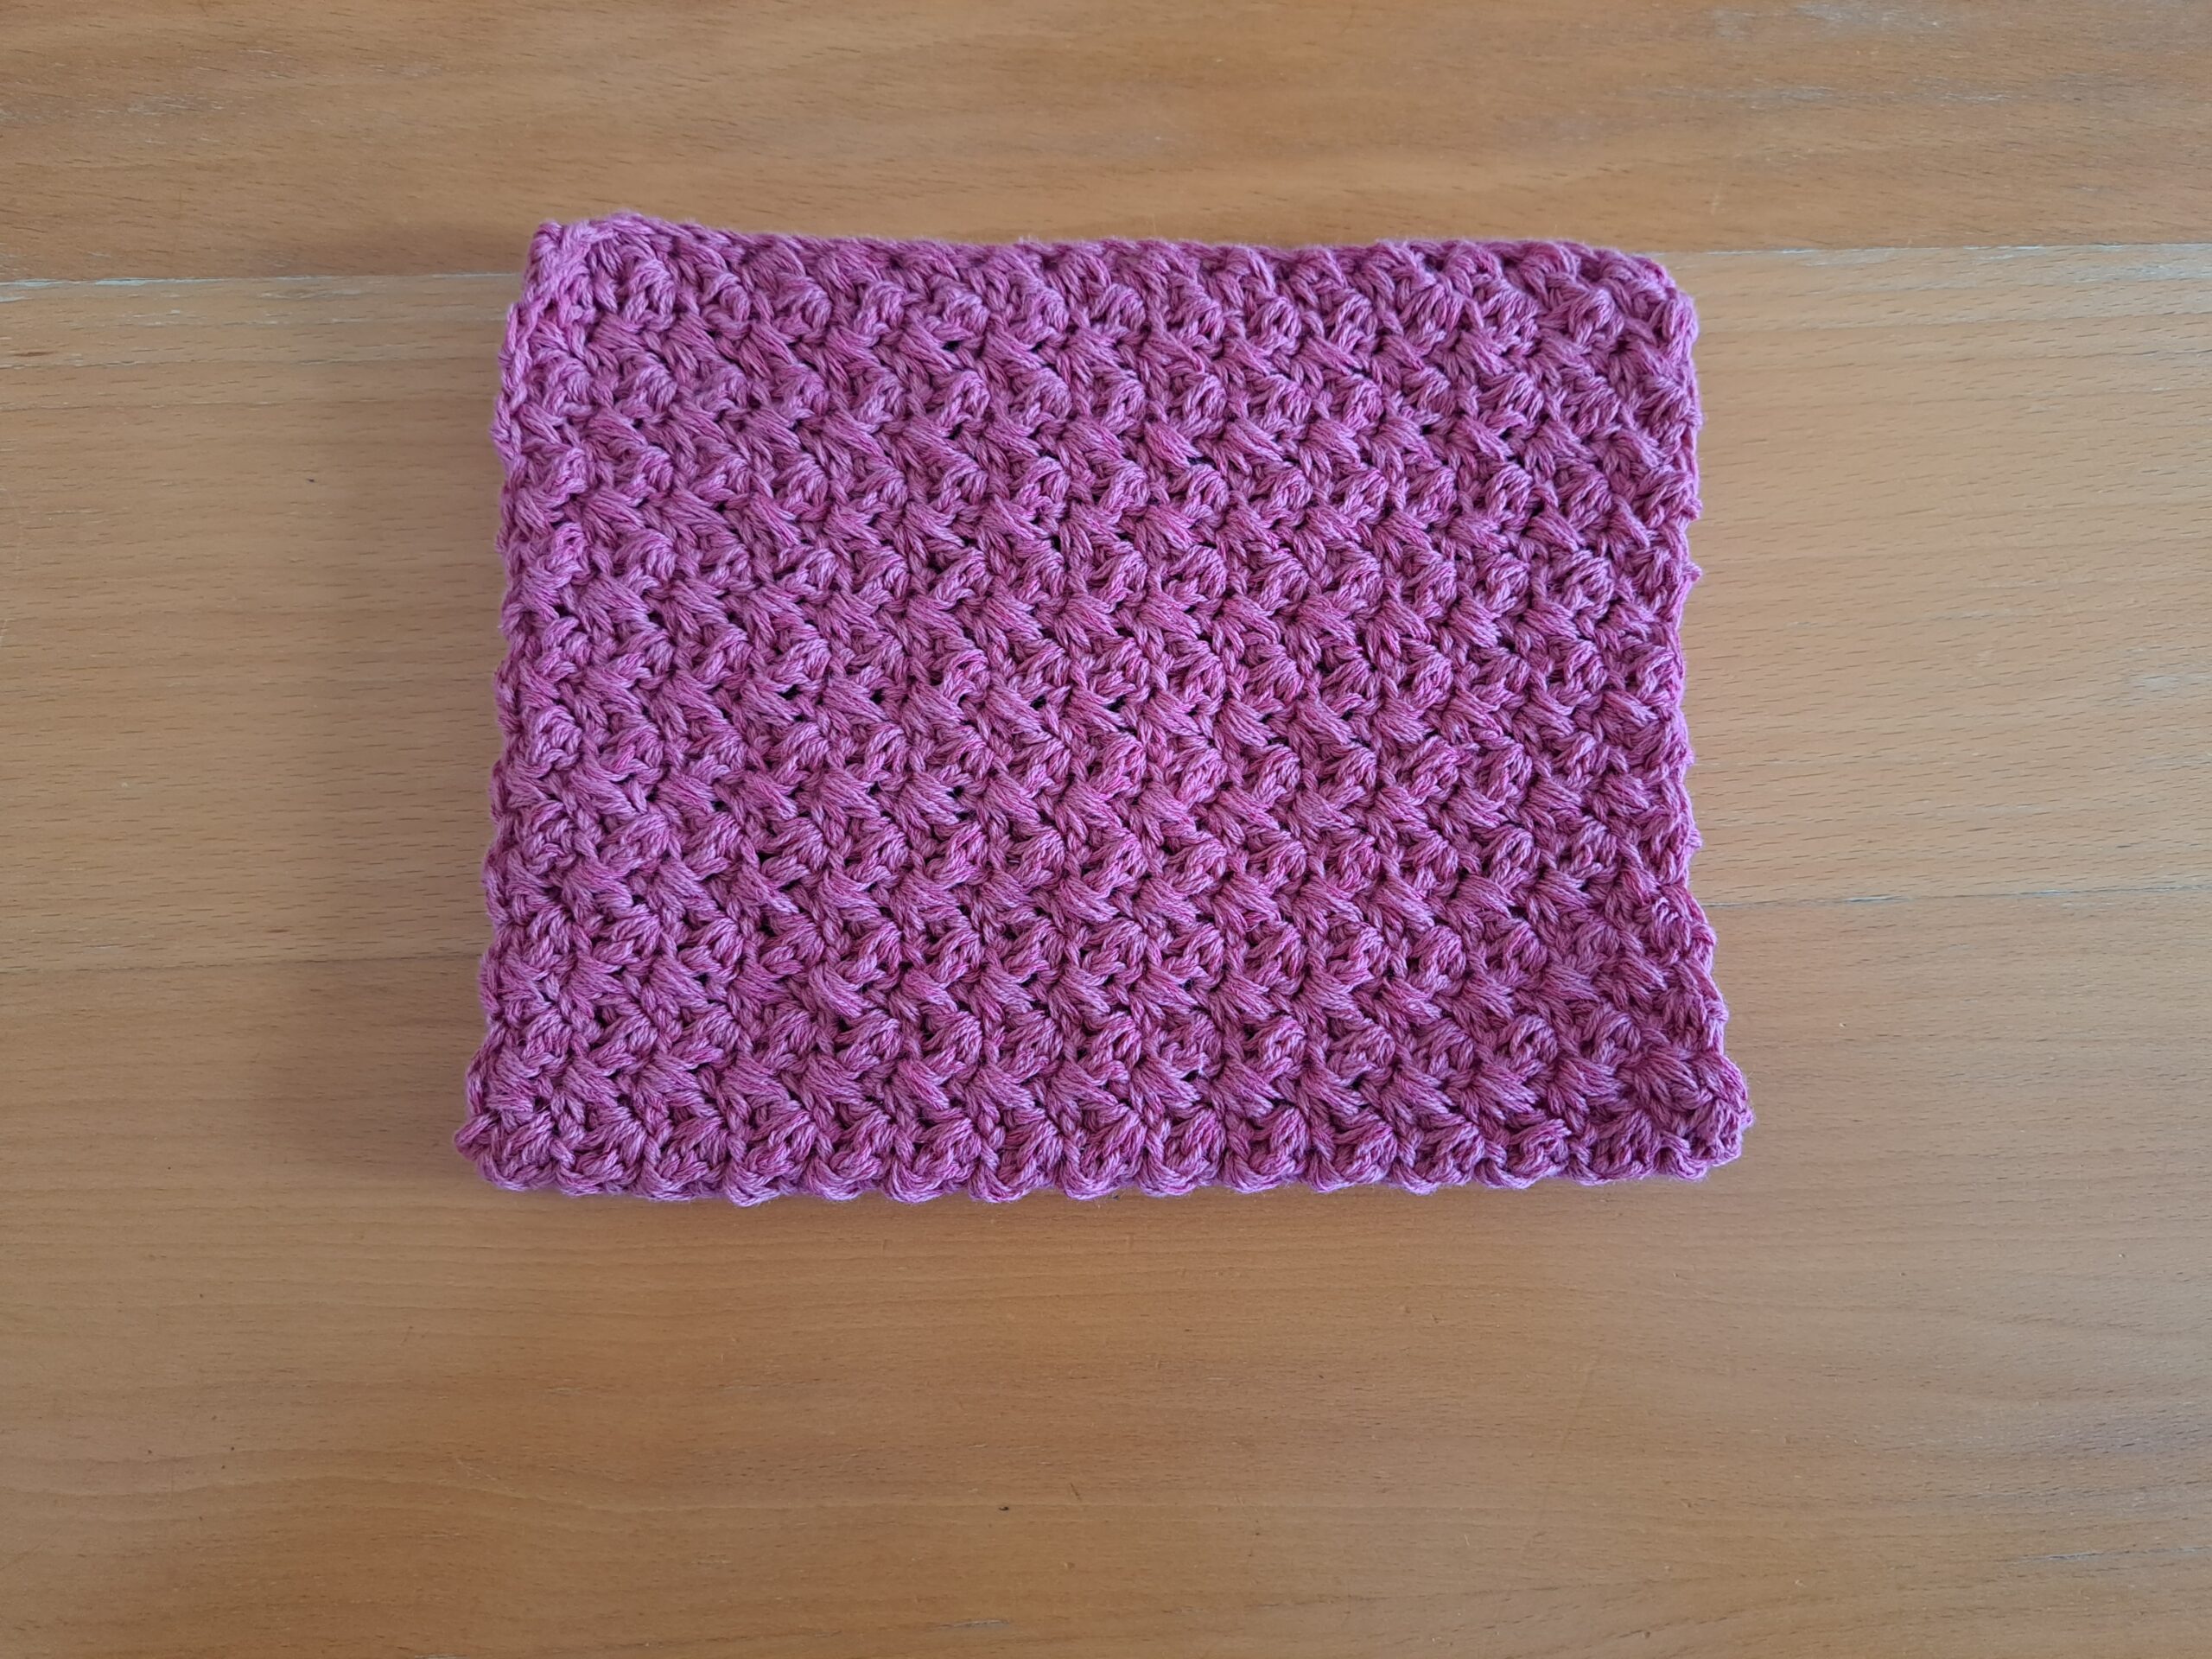
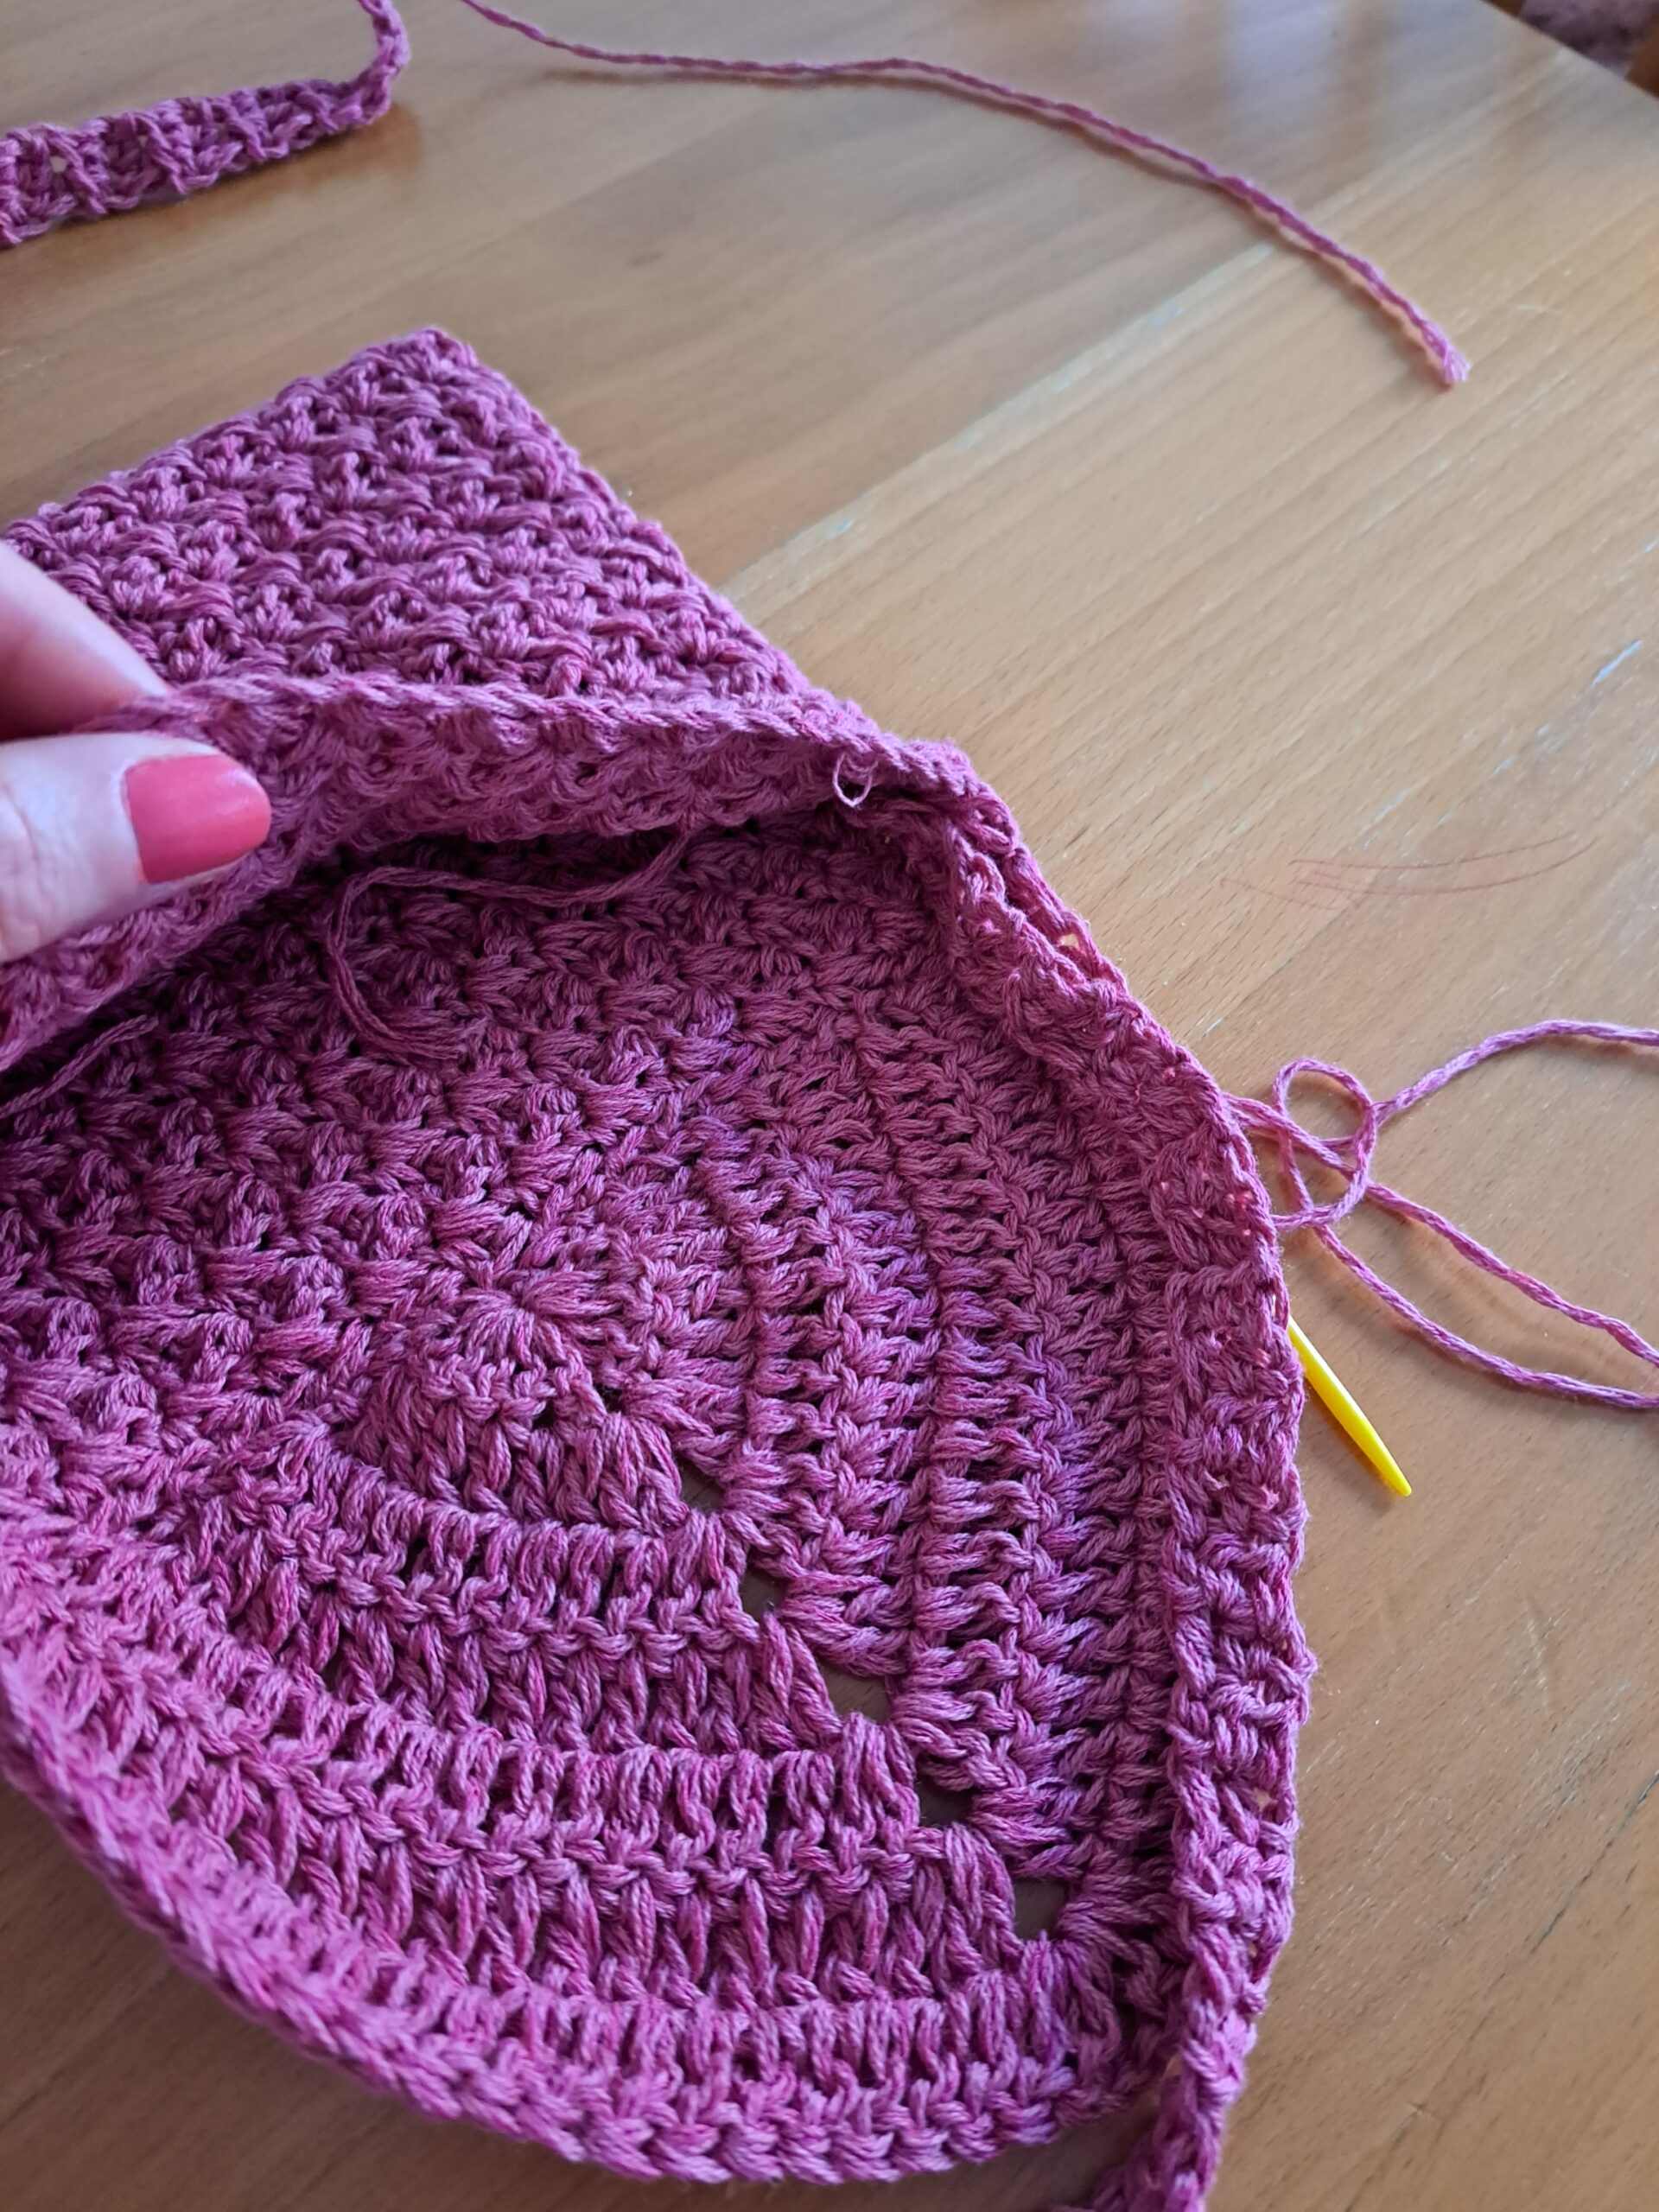
Create your front and back panels:
Place your rectangle on a flat surface, and fold one side over so as to create the front and back panels as seen in photograph below:
You will now be sewing the two sides of the project so as to create bag.
Firstly, using long tail and tapestry needle, start sewing one side up using the mattress stitch. Once you have reached the top of the project, tie a knot and fasten off, sewing in all loose ends.
Next, repeat the same thing on the other side (attach a loose piece of yarn for seaming as there is no long tail on that side of project).
Sew on the flap to the back panel: turn your project inside out, and secure your flap onto the back panel with sewing pins (optional). Sew the flap onto back panel, fasten off and tidy up loose ends.
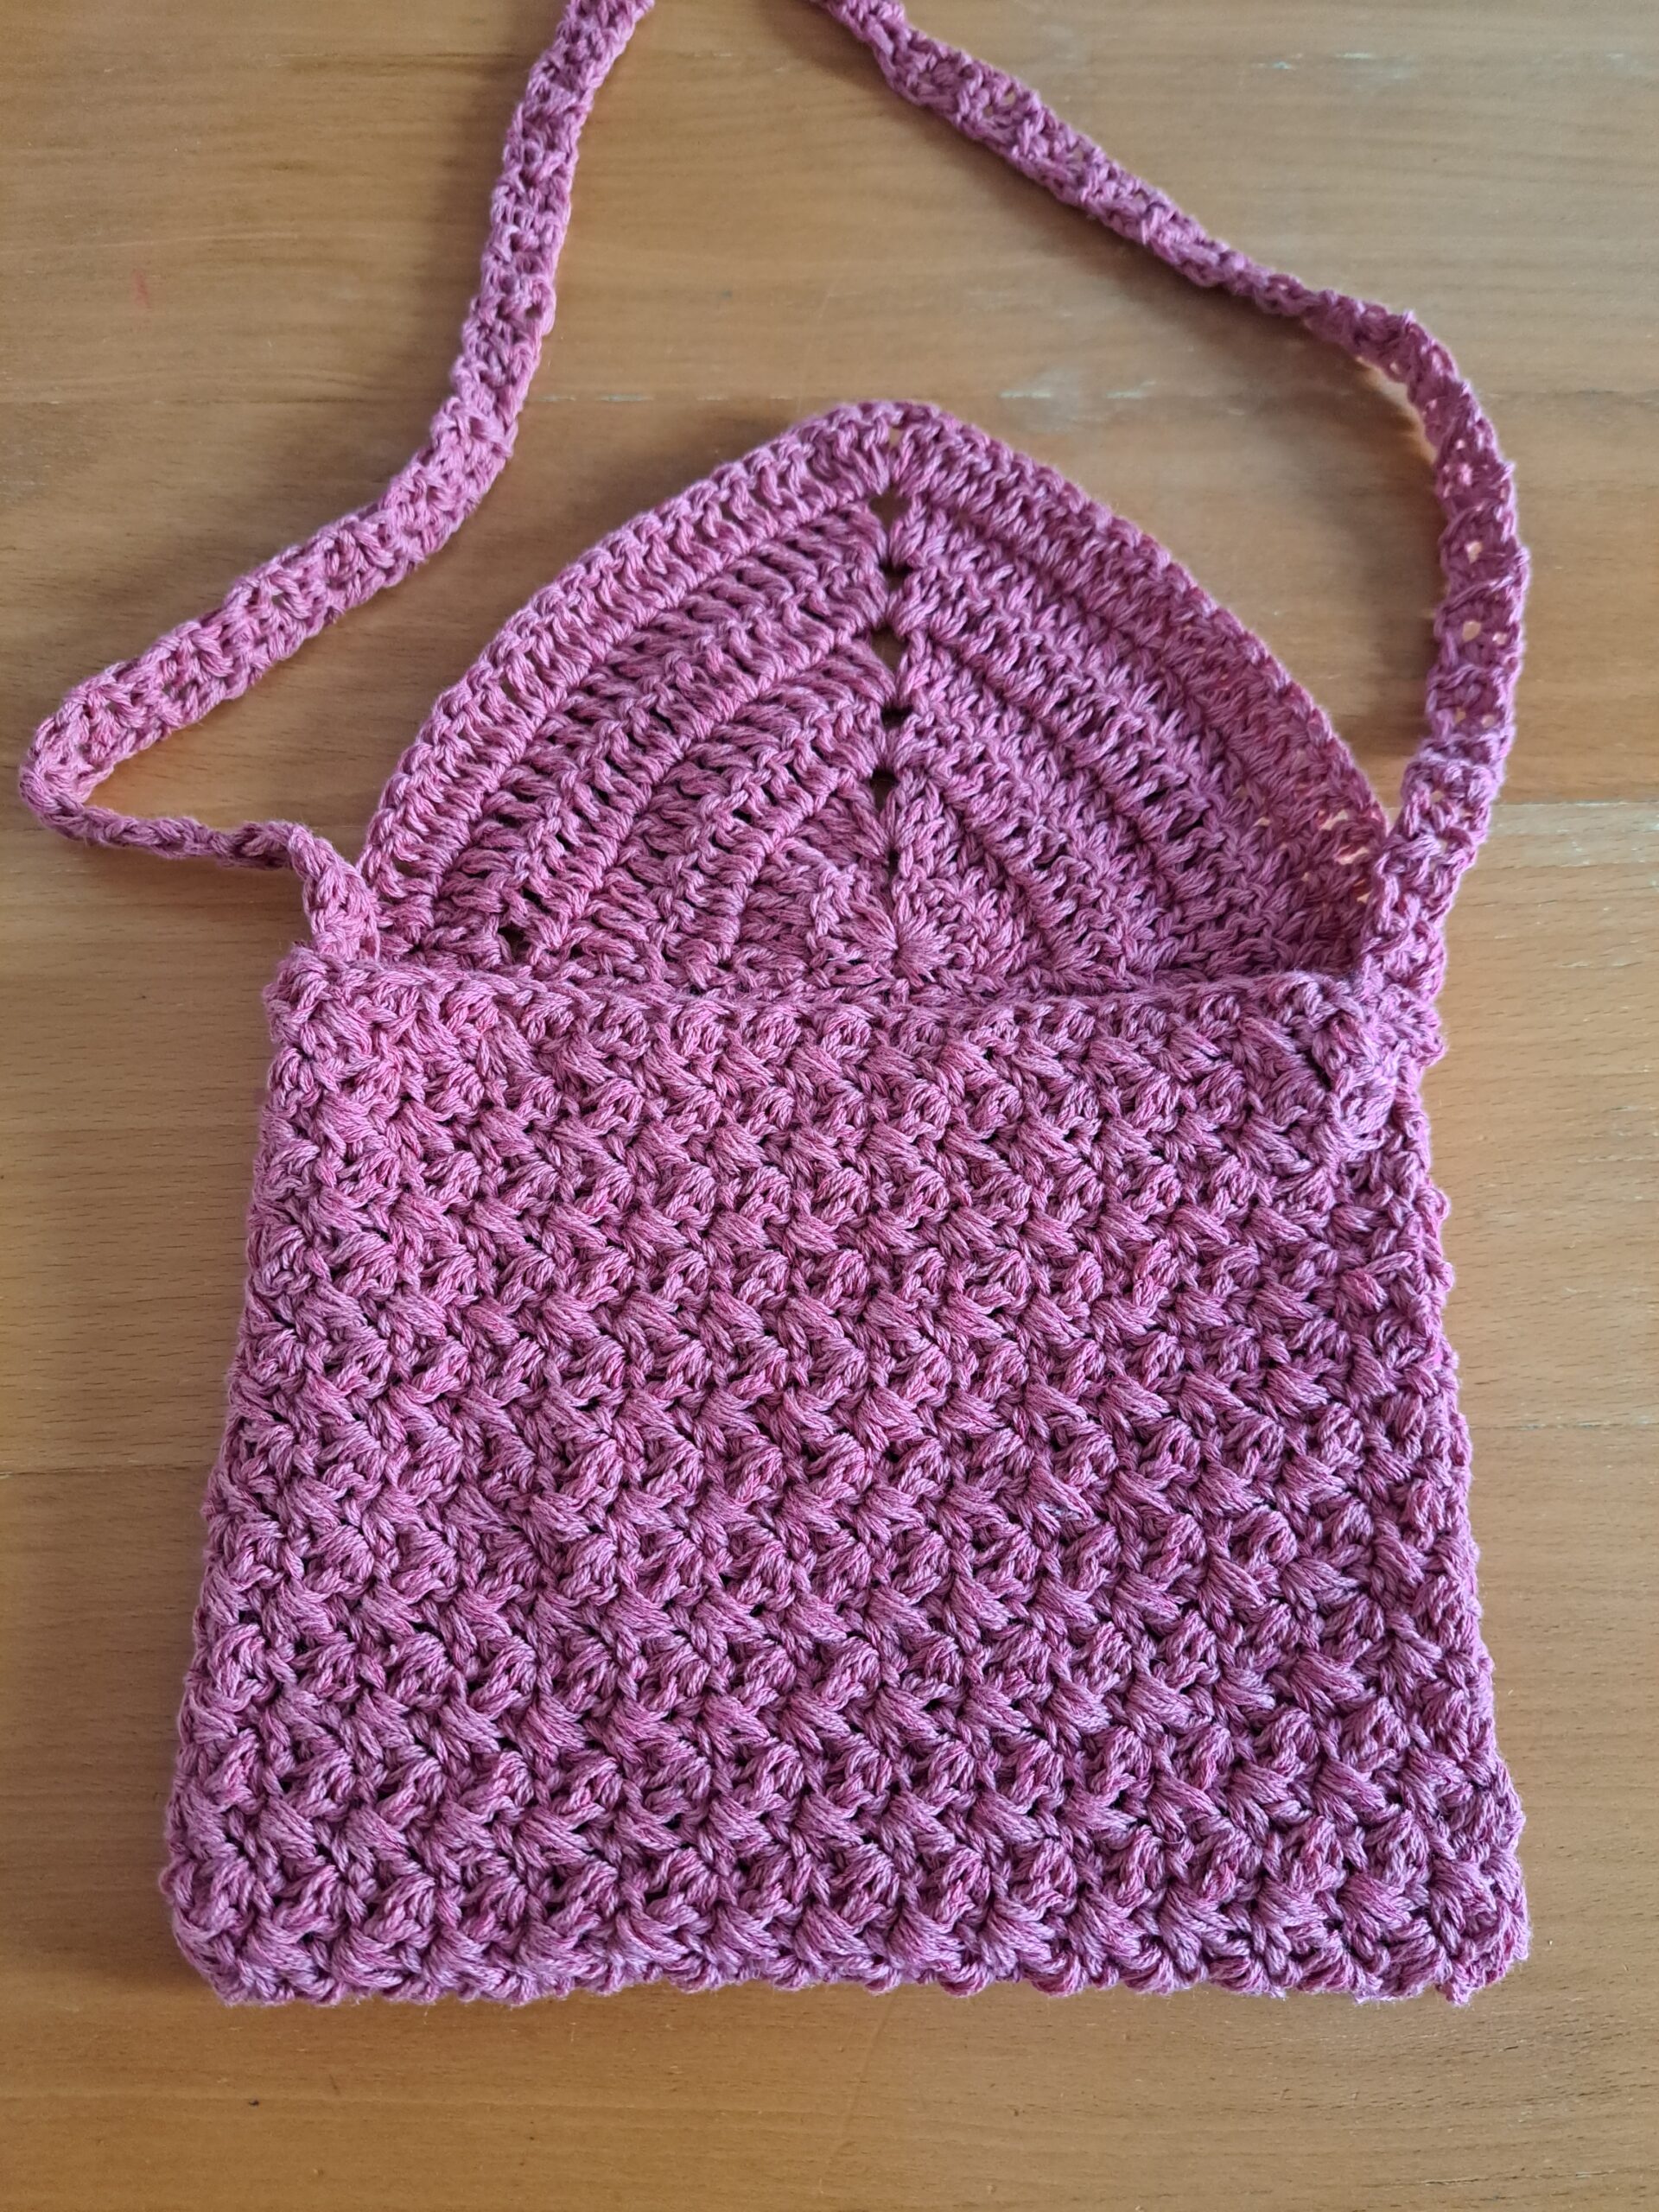
Place strap into bag, inside the side of each side of the project, making sure you have 4 cm (=1,5 inches) of strap inside the bag.
Sew into project with yarn, making sure you do not twist strap when sewing it onto both sides of project.
Sew your button onto the project
Now you will be sewing your button onto the front panel of the project (so that it can fasten the bag closed once you close it using the flap).
Lifting the flap up and out of the way, place your button onto the front panel so that when the flap is closed, it can be fastened through the bottom chain 2 center of the flap (which is the center chain 2 of the first row of the flap).
Making sure the button is nicely centered, use darning thread and needle to secure button onto project.
Fasten off and tidy up all loose ends.


You May Also Like

Crochet A Boho Flower Slide
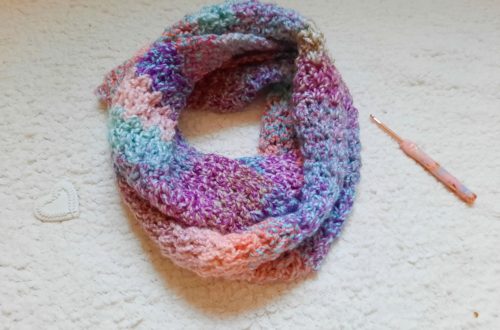
Crochet The Simple Purity Infinity Scarf