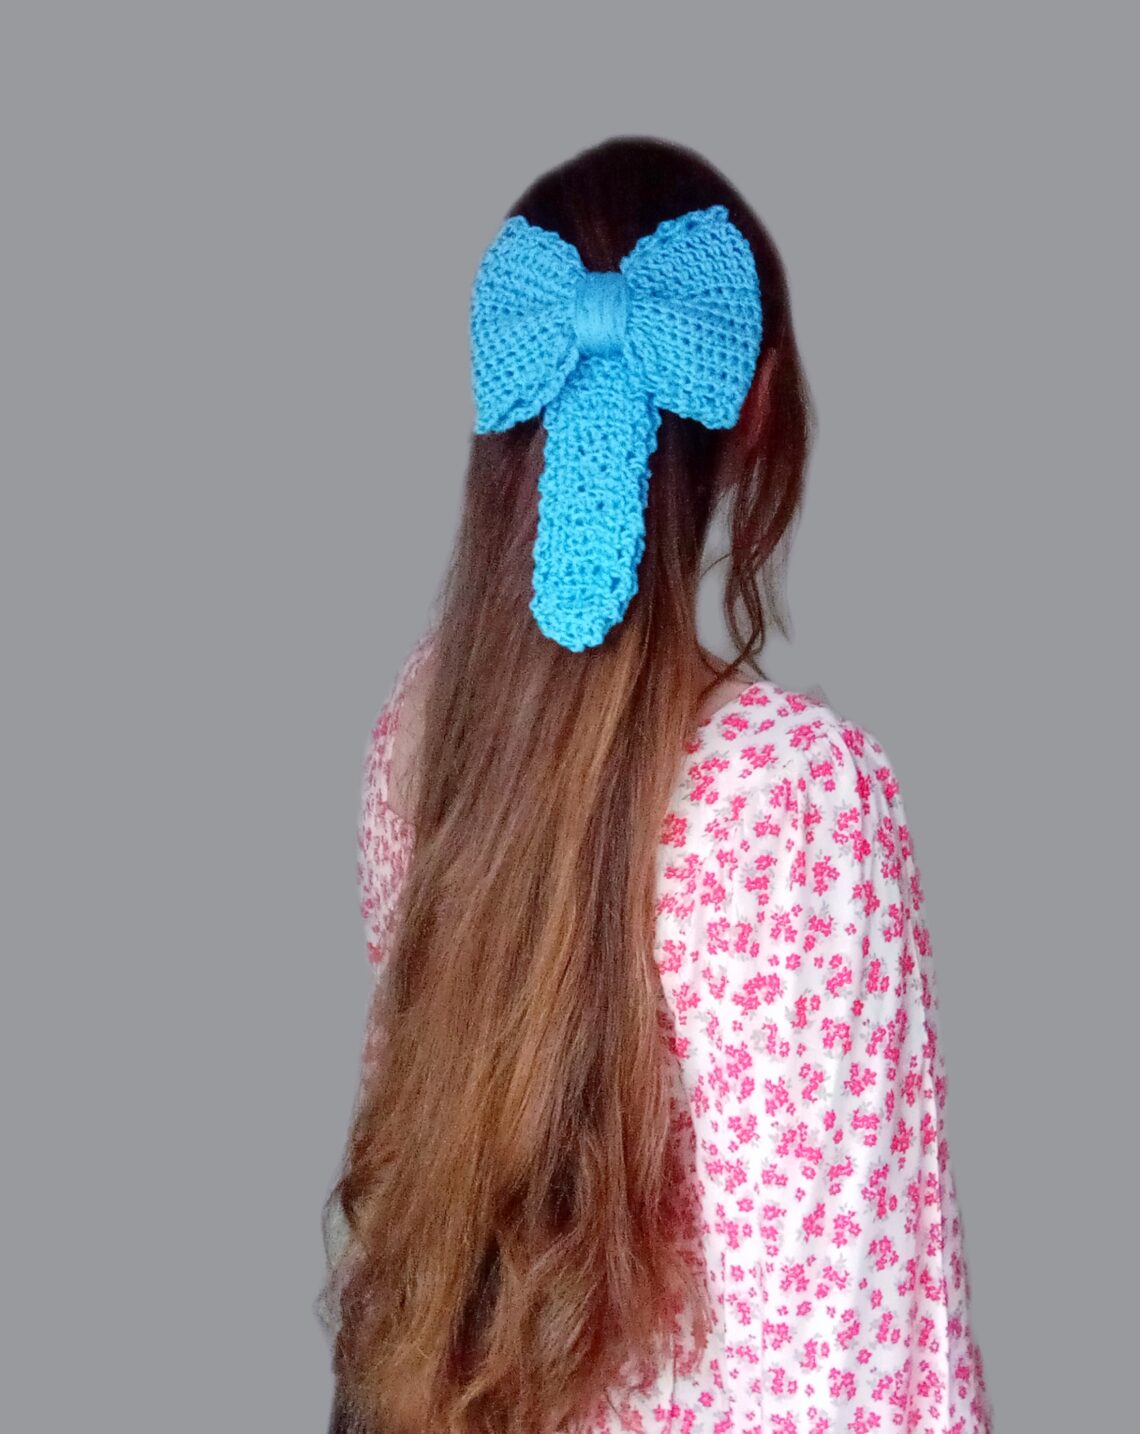
Crochet Dainty Hair Bow Free Pattern
Crochet Dainty Hair Bow Free Pattern
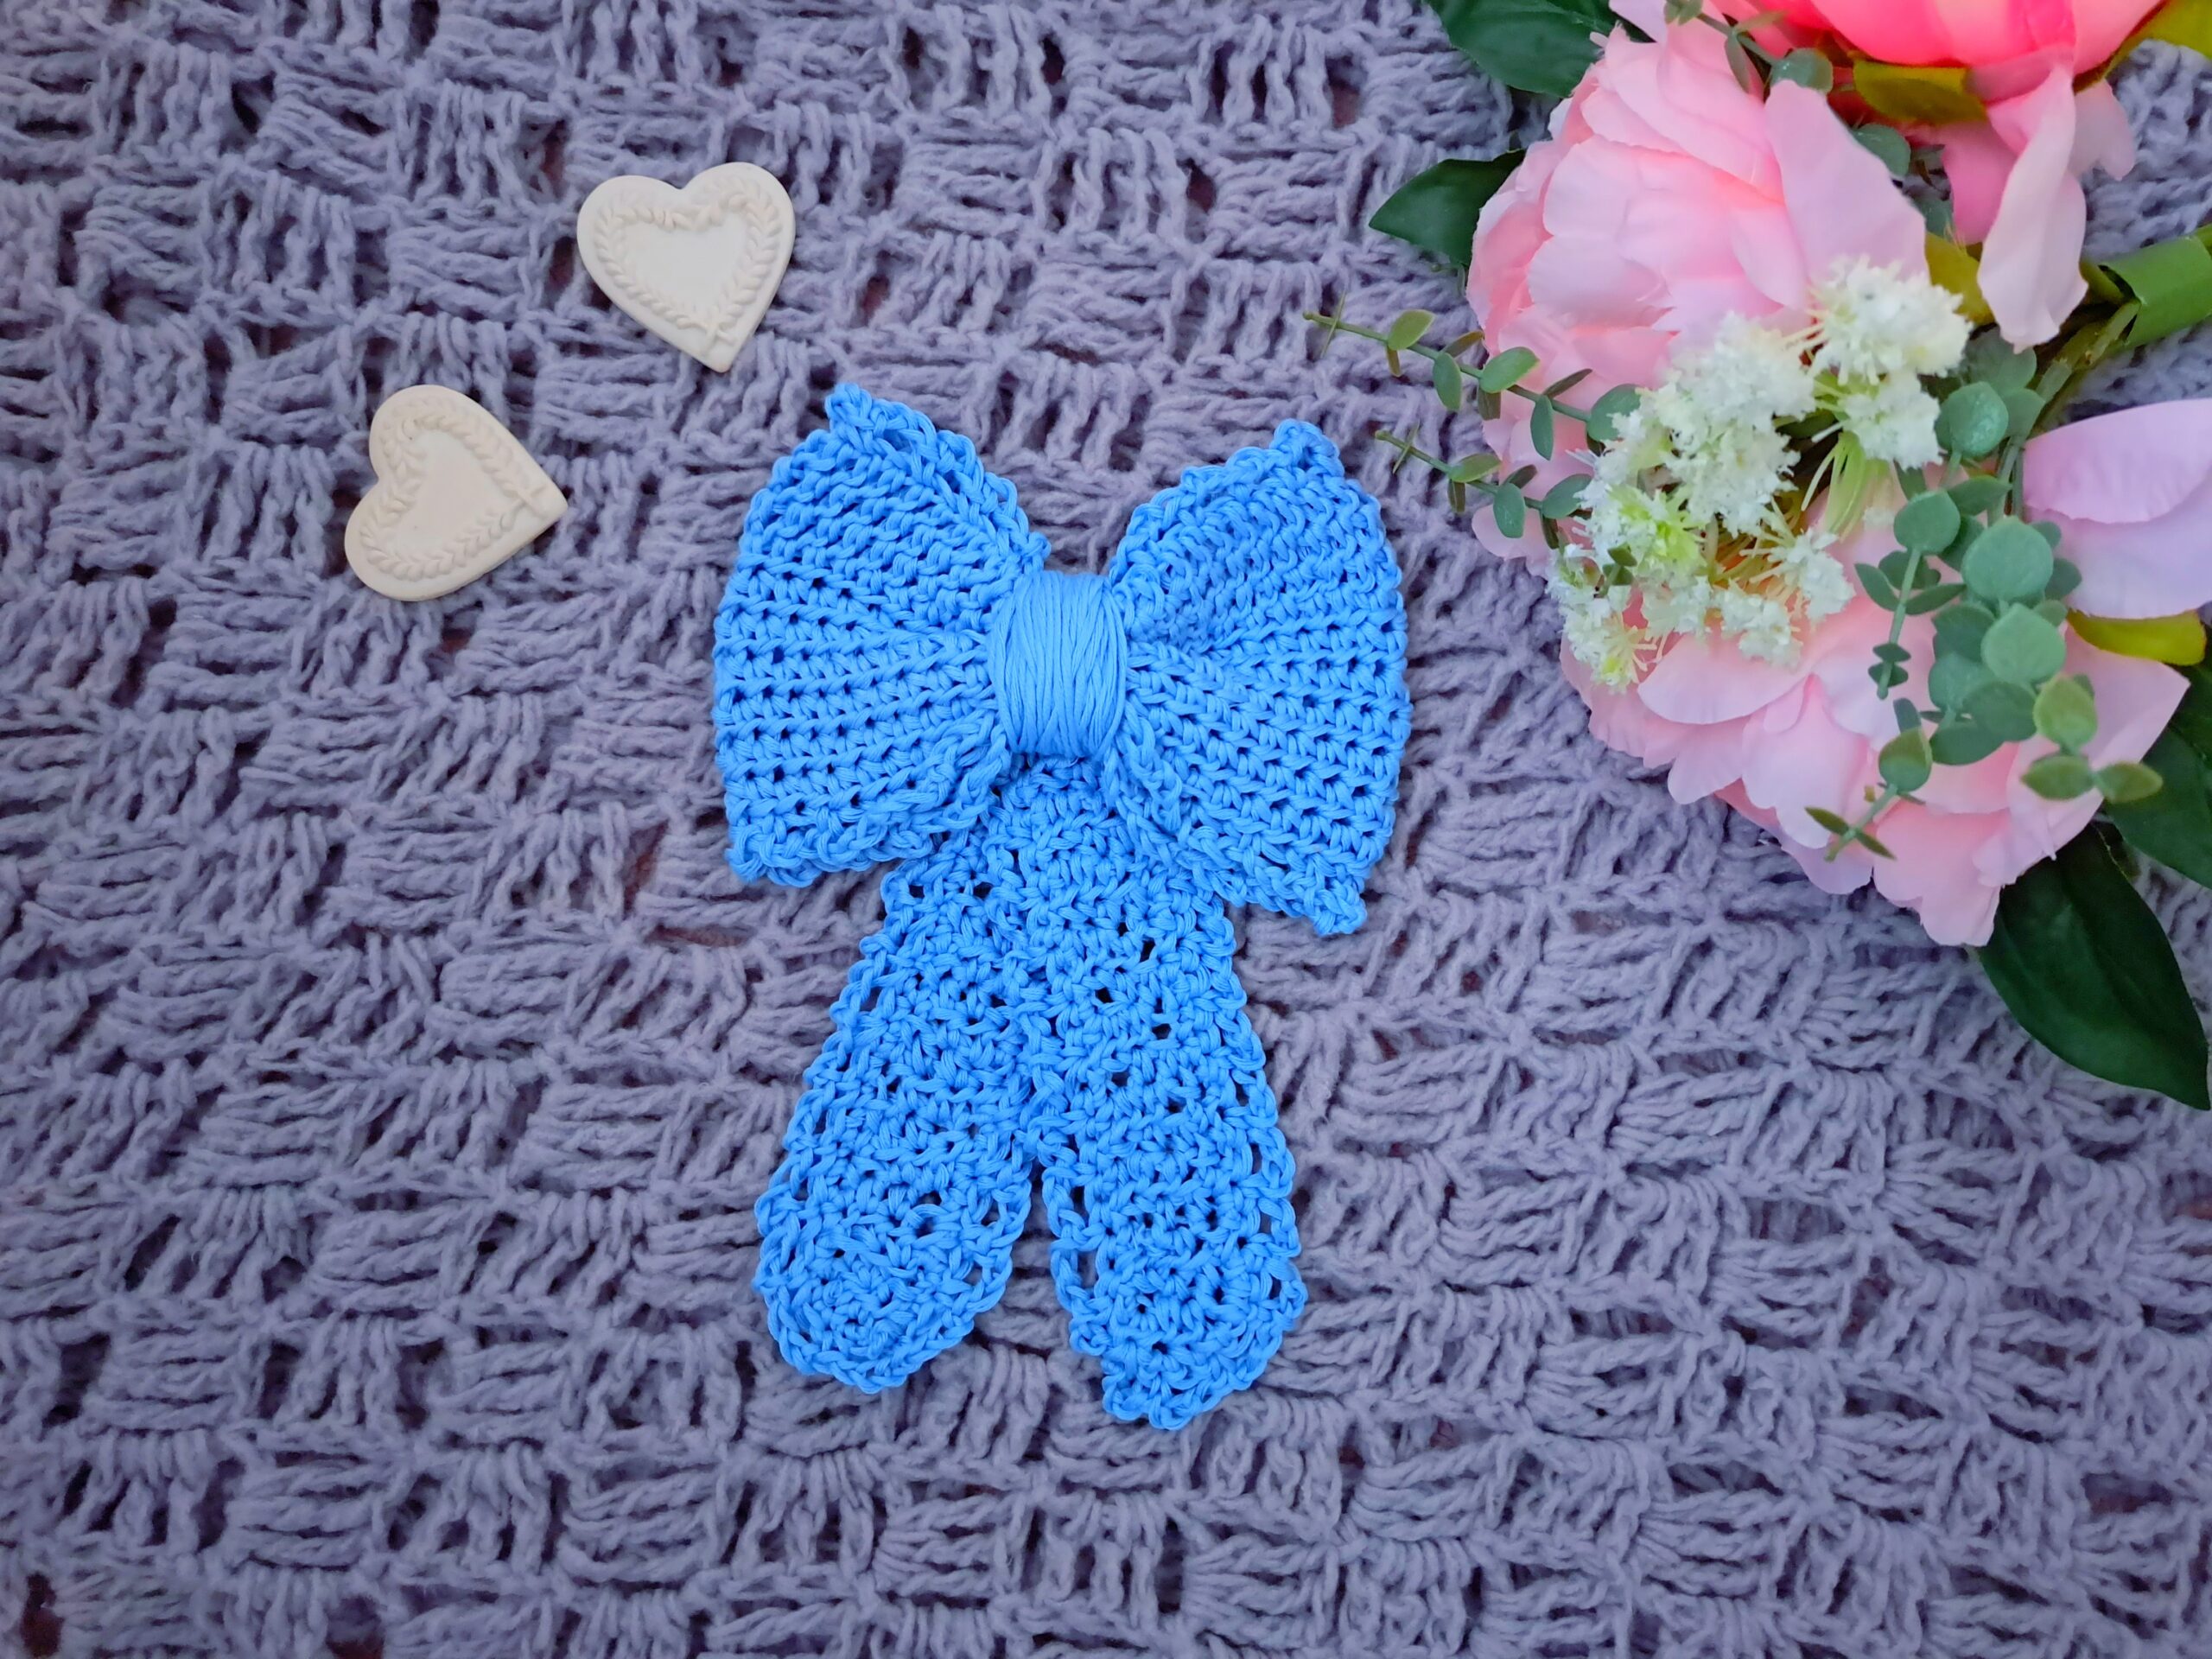
Hi everyone, today I am bringing to you this crochet dainty hair bow free pattern. It’s so pretty and I love it! It’s a really dainty and feminine crochet pattern that I really enjoyed making. This hair bow is made from 100% cotton yarn. It features a simple stitch and a very delicate chain arch edging. I hope you enjoy this new crochet design!
The video tutorial for this project can be found here:
Crochet Dainty Hair Bow Free Pattern: A Very Feminine Design
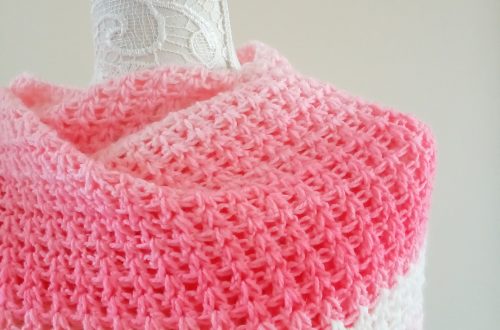
This crochet hair bow is perfect for every season. I love crochet bows. They are so dainty, perfect as an addition to any crochet project, or even on their own as hair accessories. I created a delicate hair bow a few months ago, and it is so delicate and pretty! In December, I also crocheted this Christmas hair bow which is a lovely and feminine design too.
I knew I wanted to create a new hair bow design ever since creating this hair bow. Indeed, this is such a lovely and delicate design, and I wanted to make one with a chain arch edging. And that is exactly what I created today! I hope you enjoy this new project, as it was such a pleasure to create this!
Hair accessories are so fun and pretty too. I enjoy making these so much. Recently, I crocheted this lovely flower square hairband. I love how this project turned out! It’s so pretty and can be made in a variety of colors too. This romantic headband is also a great crocheted hair accessory. All these projects are not only feminine, but they are also fast and fun to crochet.
Crochet Dainty Hair Bow Free Pattern: The Yarn And Design
For this hair bow, I used a simple metallic slide as a way to fasten it into the hair (see photo below in pattern section). This dainty hair bow is very feminine and pretty, and can be made in many different colors. I wanted to make a blue hair bow this time around.
For this pattern, I used Drops Muskat yarn. This yarn is so pretty and comes in many different colors too. It is a 100% mercerized cotton yarn, and is very lovely to use too. It glides and creates the loveliest projects. I have used this yarn multiple times, and always come back to it.
This Pinterest Inspired Purse was made using this lovely yarn. I also used this yarn to crochet this flower granny square, as well as this delicate purse pattern. This Cottagecore Inspired bandana is also an example of a hair accessory crocheted with this yarn.
Let me know if you enjoy this pattern as much as I did. I loved making this new hair bow slide, and I am hoping to make many more hair bows going forward as I find them so dainty and pretty!
Subscribe to our newsletter so that you never miss a stitch!
Crochet Dainty Hair Bow: The Pattern
You can purchase the ad free, large print, PDF pattern from my Etsy shop here: Crochet Dainty Hair Bow Slide PDF Pattern
You can purchase the ad free, large print, PDF pattern from my Ravelry shop here:
Level: Easy +
Gauge
4” (10 cm): 16 stitches
4” (10 cm): 11 rows
Size of finished project
8” (20 cm) x 6,5” (17 cm)
Notes
I will be using US terms (British terms in brackets)
Materials
1 skein of Drops Muskat in shade 02 Light Blue
4 mm crochet hook
A pair of scissors
A tapestry needle
A 5 cm (or larger) hair slide
Darning needle and thread
Abbreviations
Ch: chain
St: stitch
Sl st: slip stitch
SC: Single Crochet
HDC: Half Double Crochet (UK Half Treble Crochet)
EOR: End of round
Notes concerning this pattern
For this project, we will start by crocheting the initial rectangle shape of the bow in the rounds.
Once this is completed, the bow shape will be given to the project by adding the center piece (as explained below in the pattern).
Once this is completed, we will be crocheting the ties of the bow, and sewing them onto the project (this is a simple rectangle that will be folded in half to create the two bottom ties; this is explained in detail in the pattern).
After this part is done, we will simply be sewing the hair slide to the crocheted bow.
Begin pattern here
To start, make a slip knot.
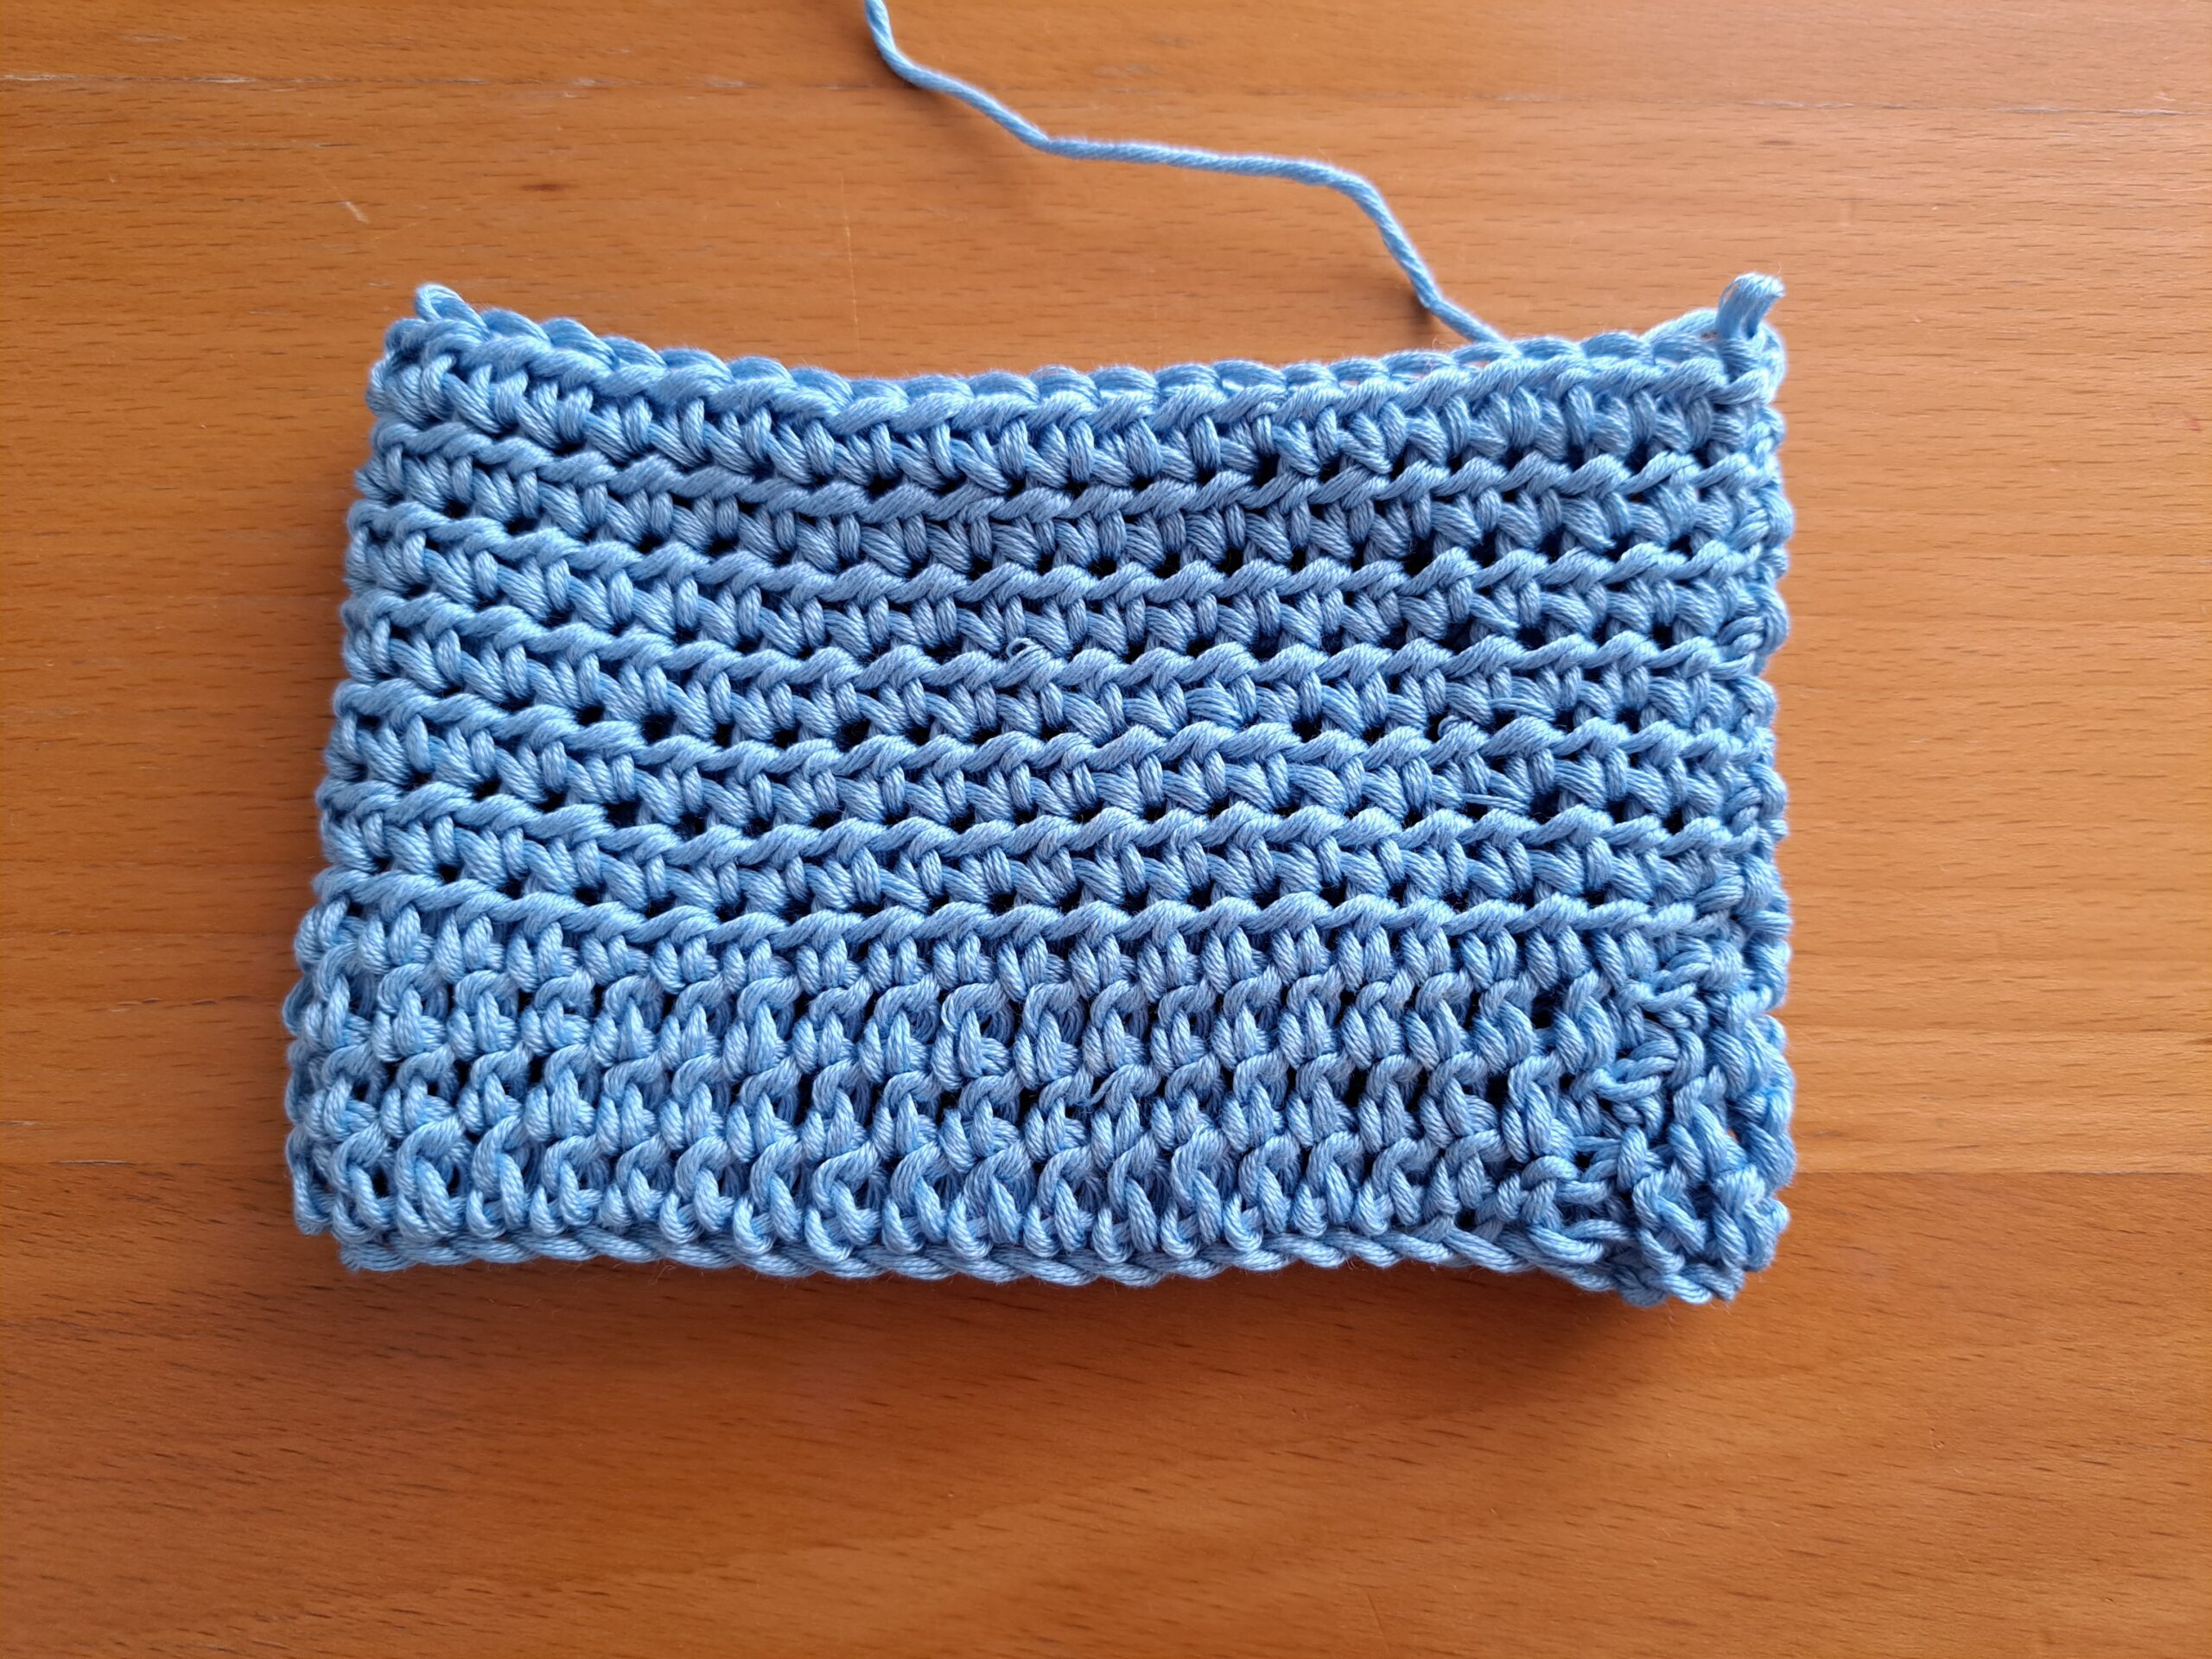
Ch 50, slip stitching to 1st ch to create a circle shape. Please make sure you are not twisting the chain when you slip stitch.
Round 1: Ch 2 (=HDC), HDC into next chain until end of chain. Sl st to 1st st to close off round.
Round 2: Ch 2 (=HDC), HDC into next stitch until eor. Sl st to 1st st to close off round.
Round 3-10: Repeat round 2.
Do not fasten off, as we will now be creating the chain arch edging all around this part.
Round 11: Ch 1 (=SC), SC into next st until eor; sl st to first ch 1 to close off round.
Round 12: Ch 3, sk 1 st, SC into next st until eor.
Fasten off.
Turn the project around so as to work on the other side of it; attach yarn to any stitch, and repeat rows 11 and 12 on this side.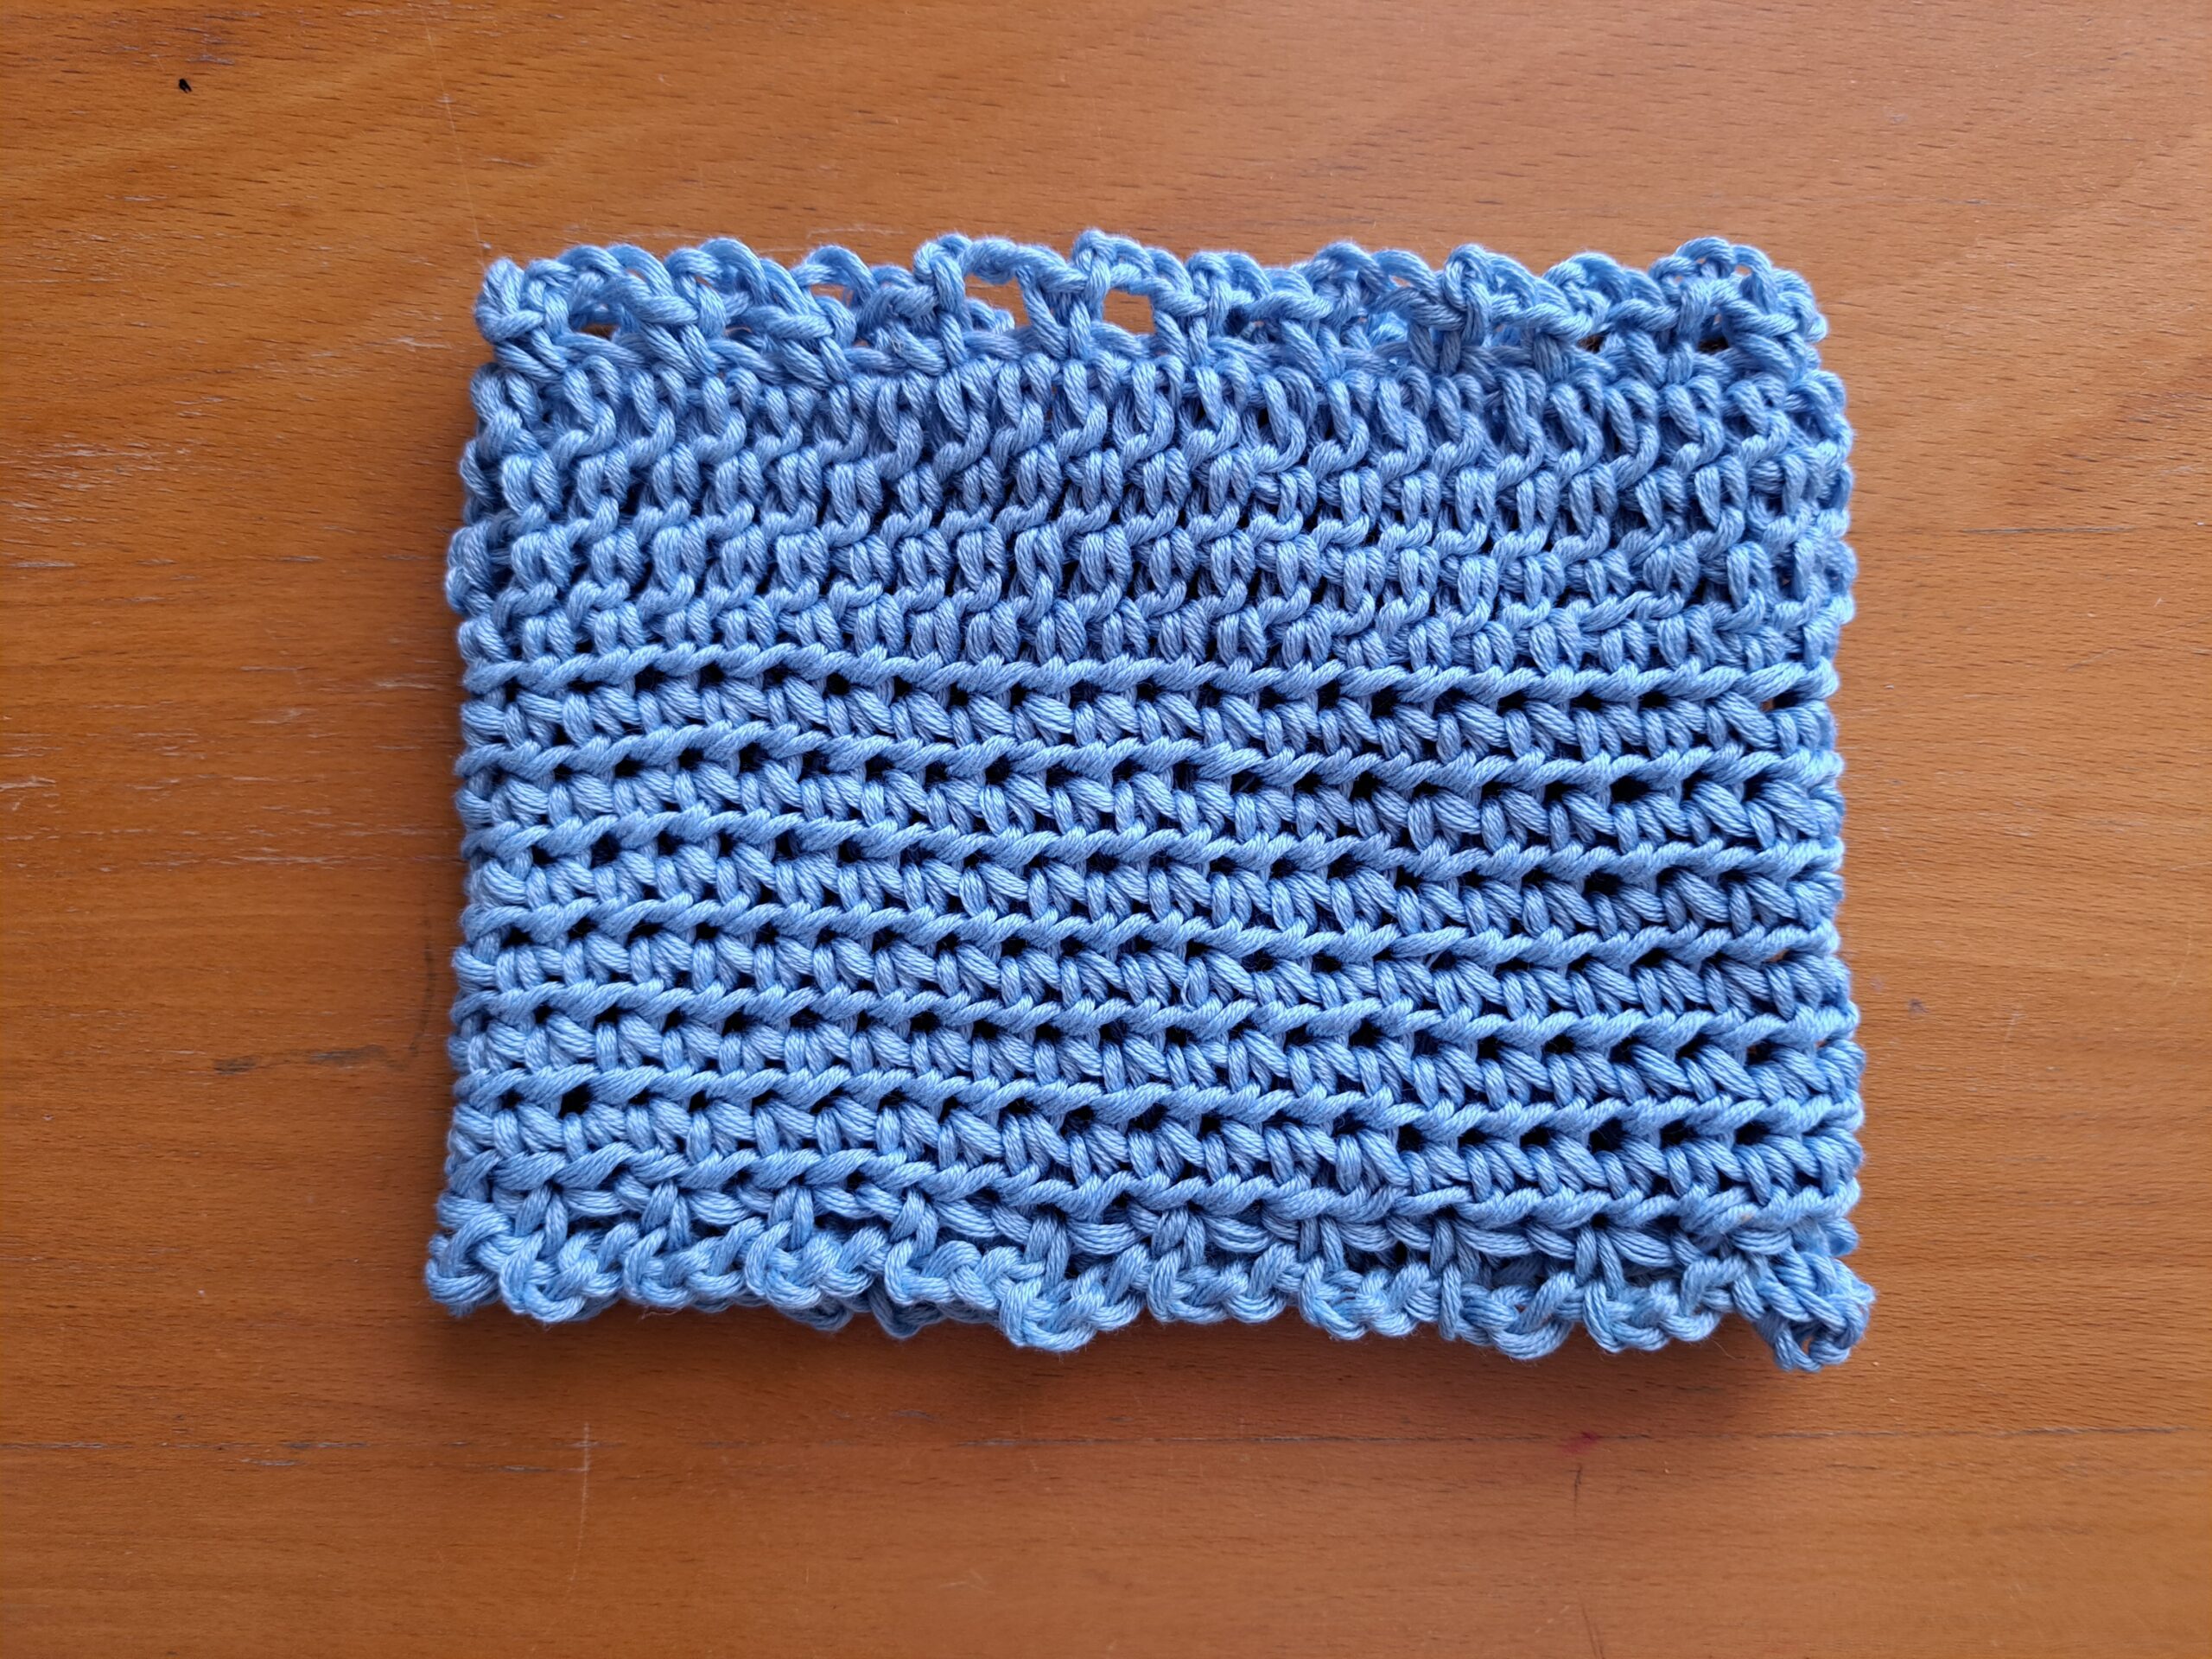
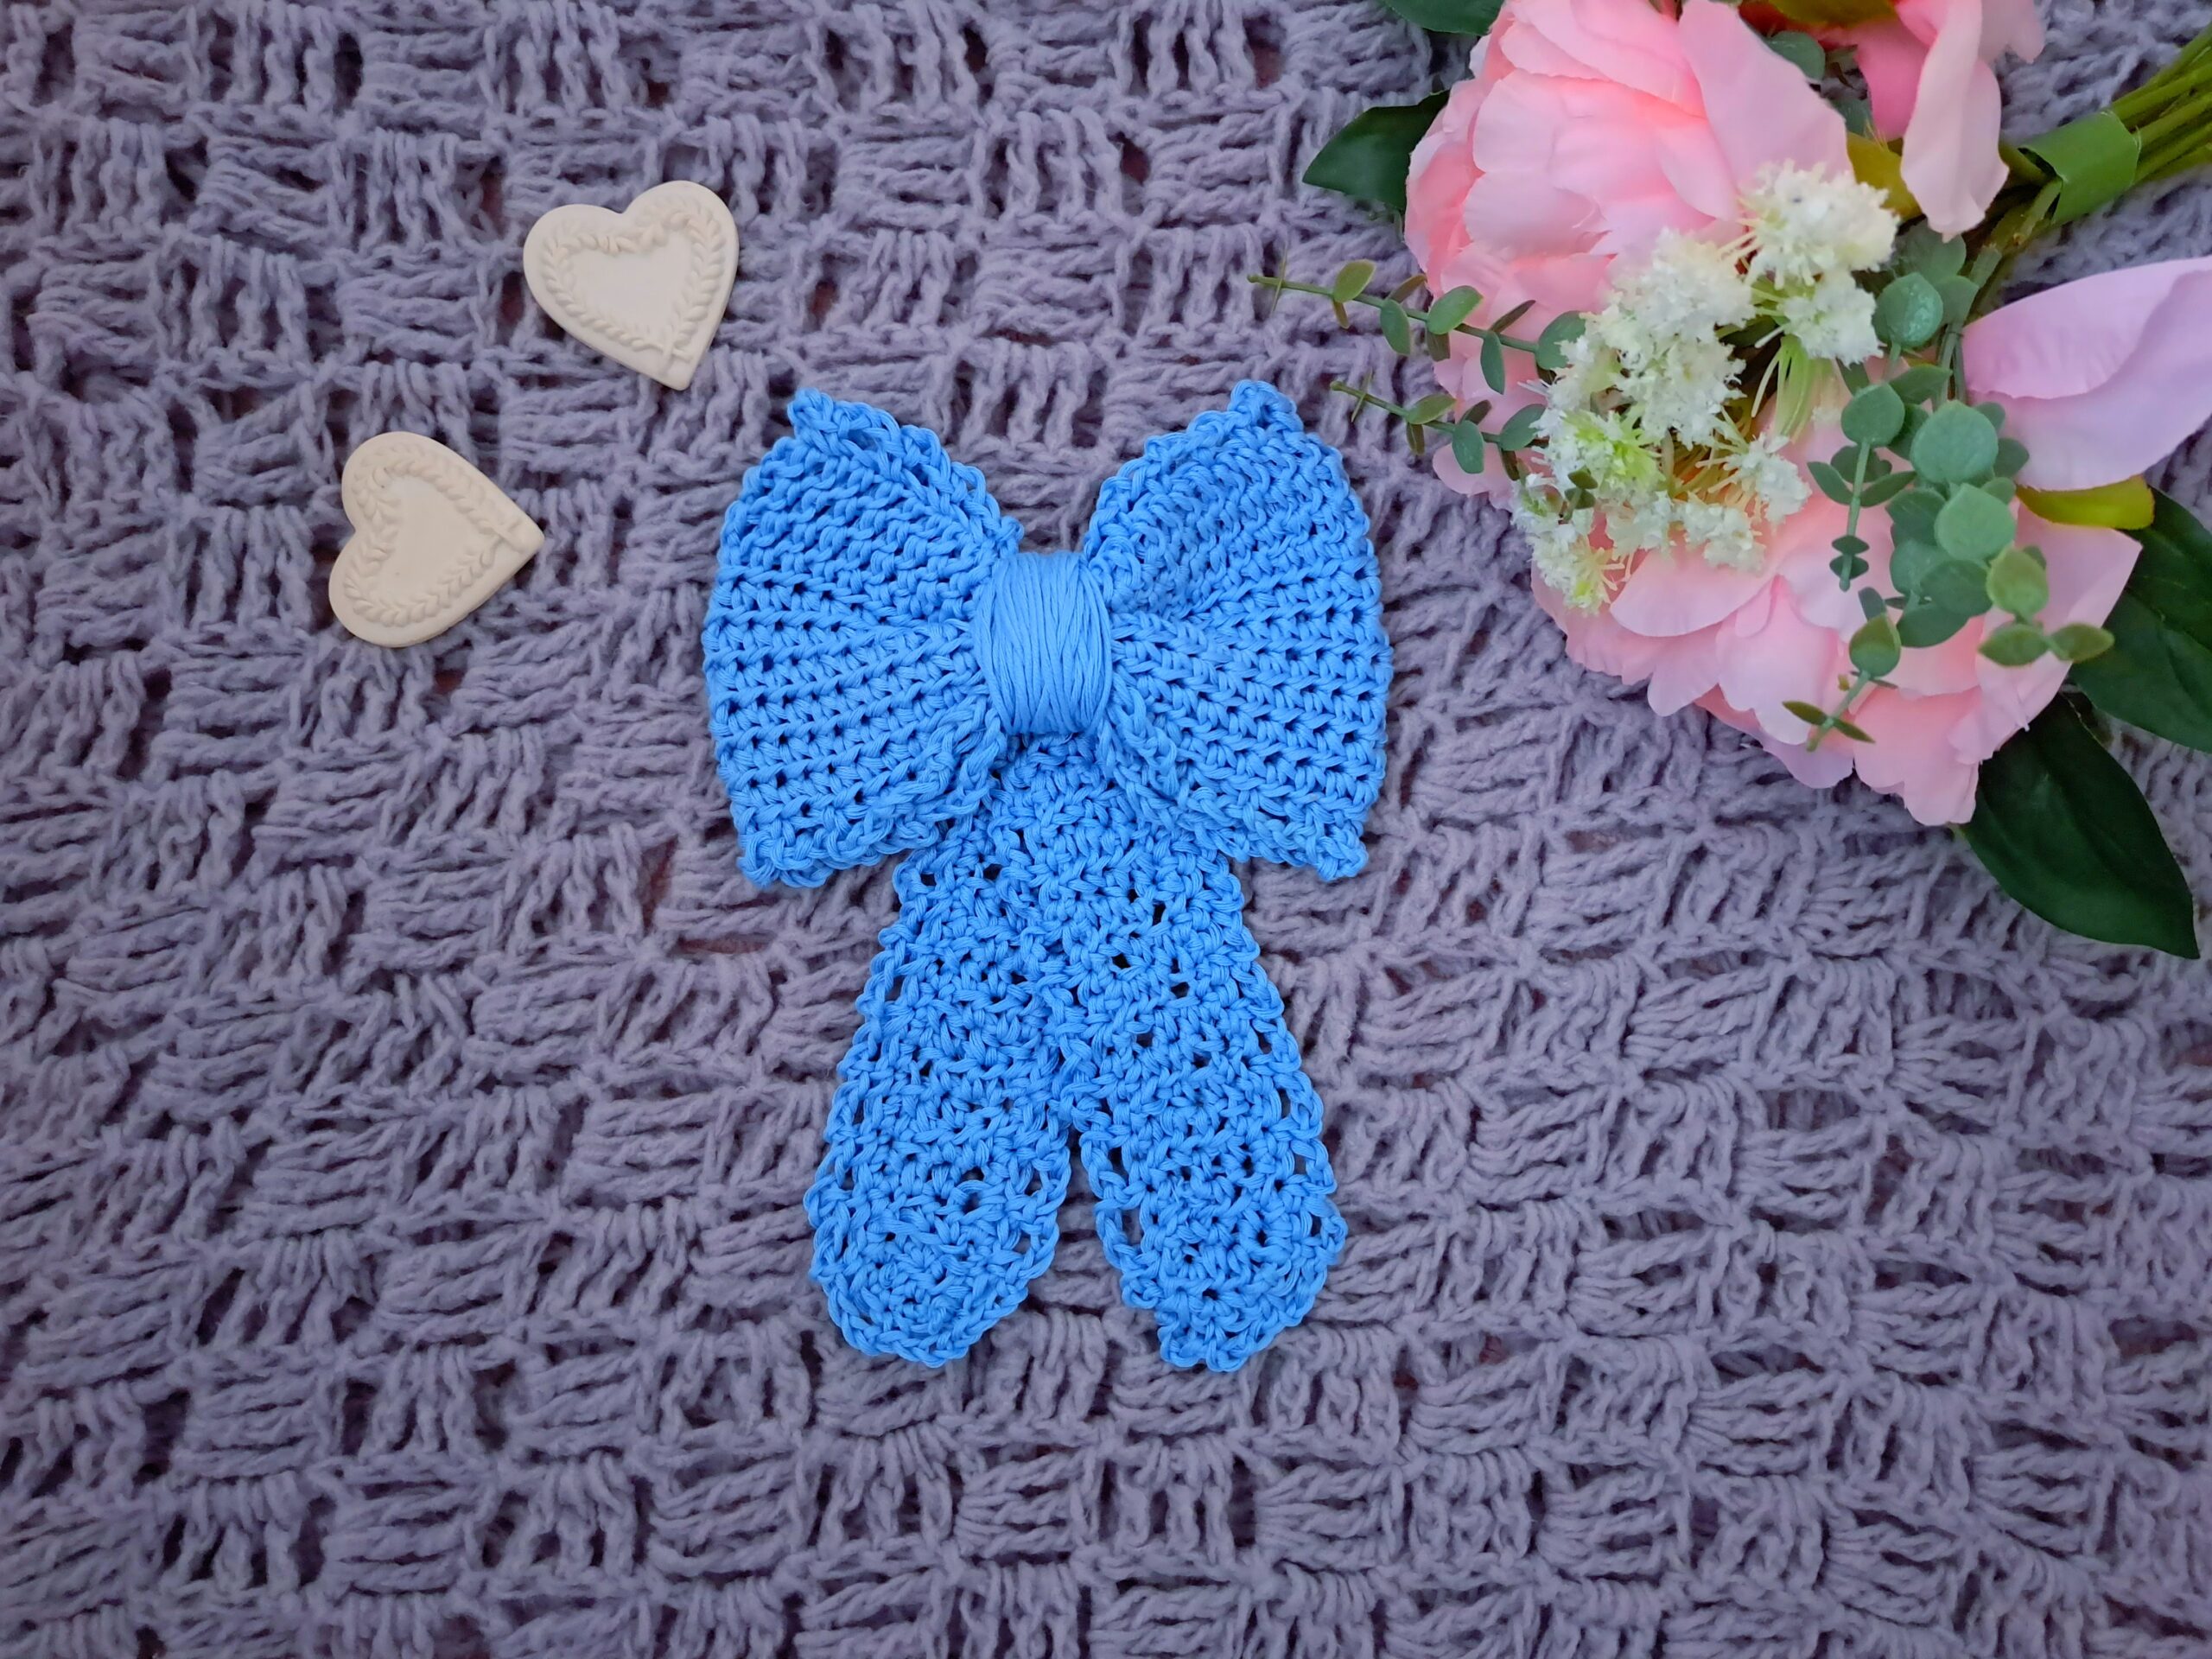
Create the center part of the bow (create shape)
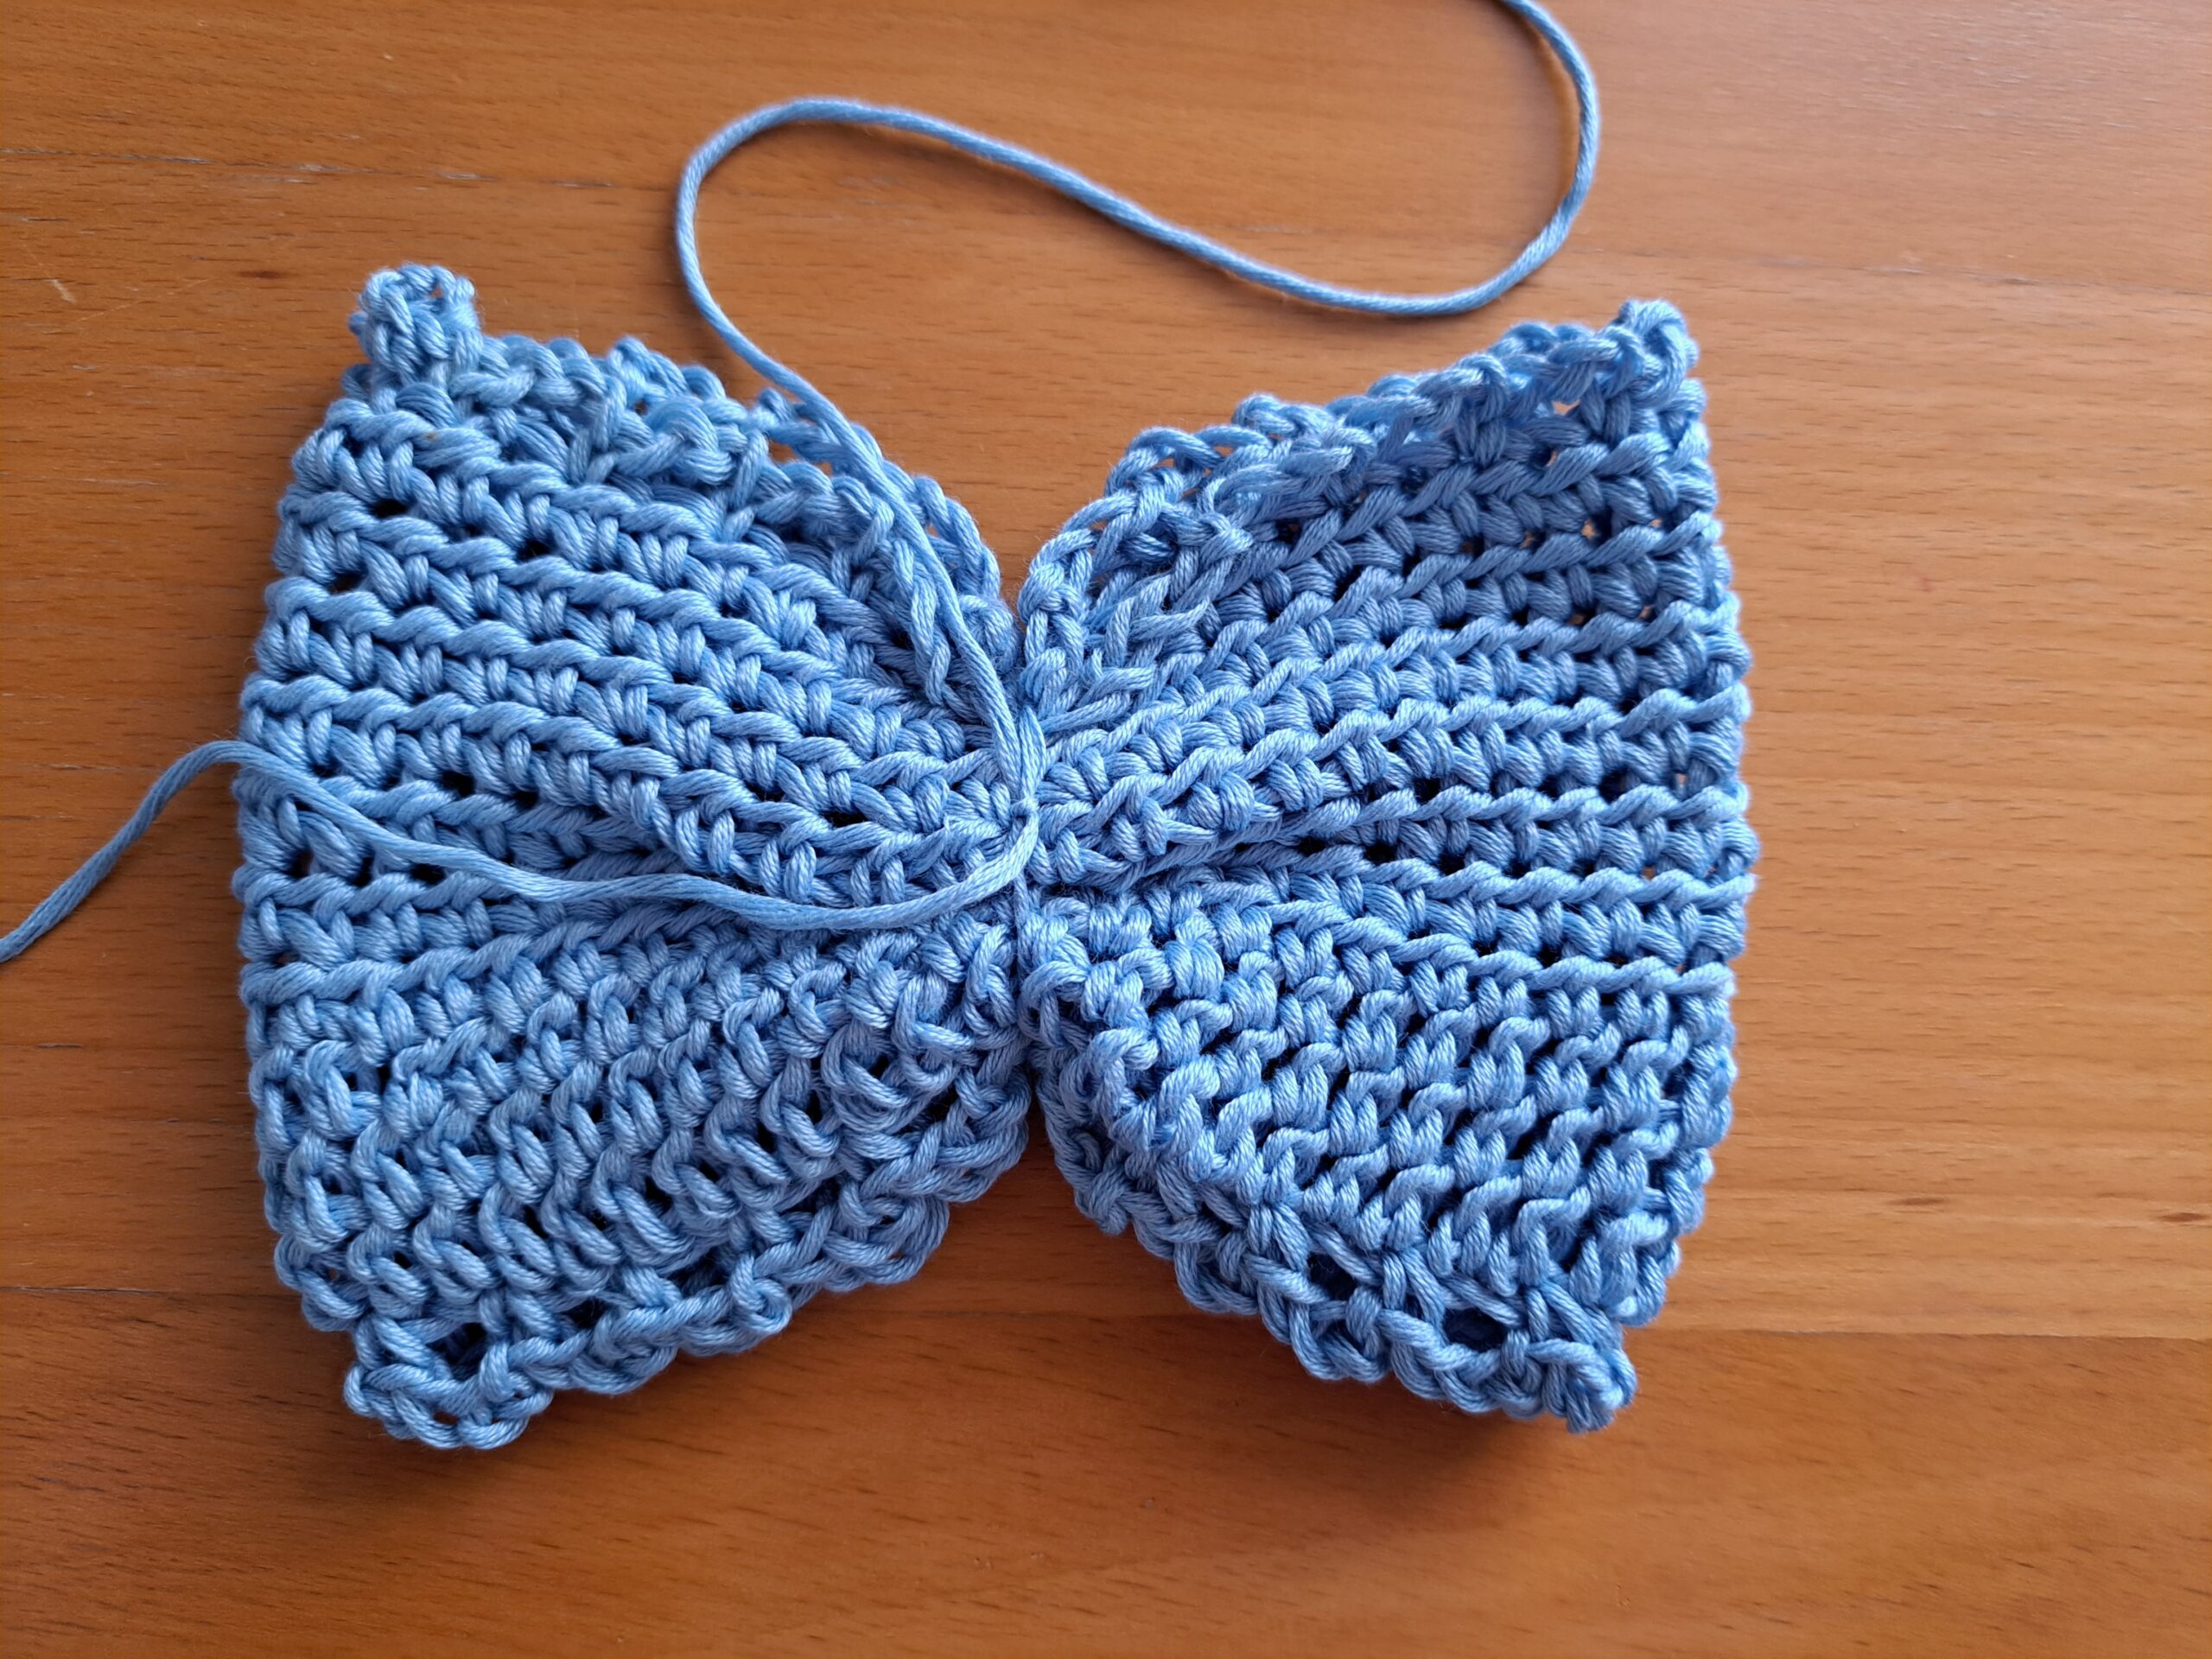
Place your project on a flat surface, with the back part facing you. Make sure the seam of the project is centered.
Take your yarn and attach it around the center of the project (see photograph below).
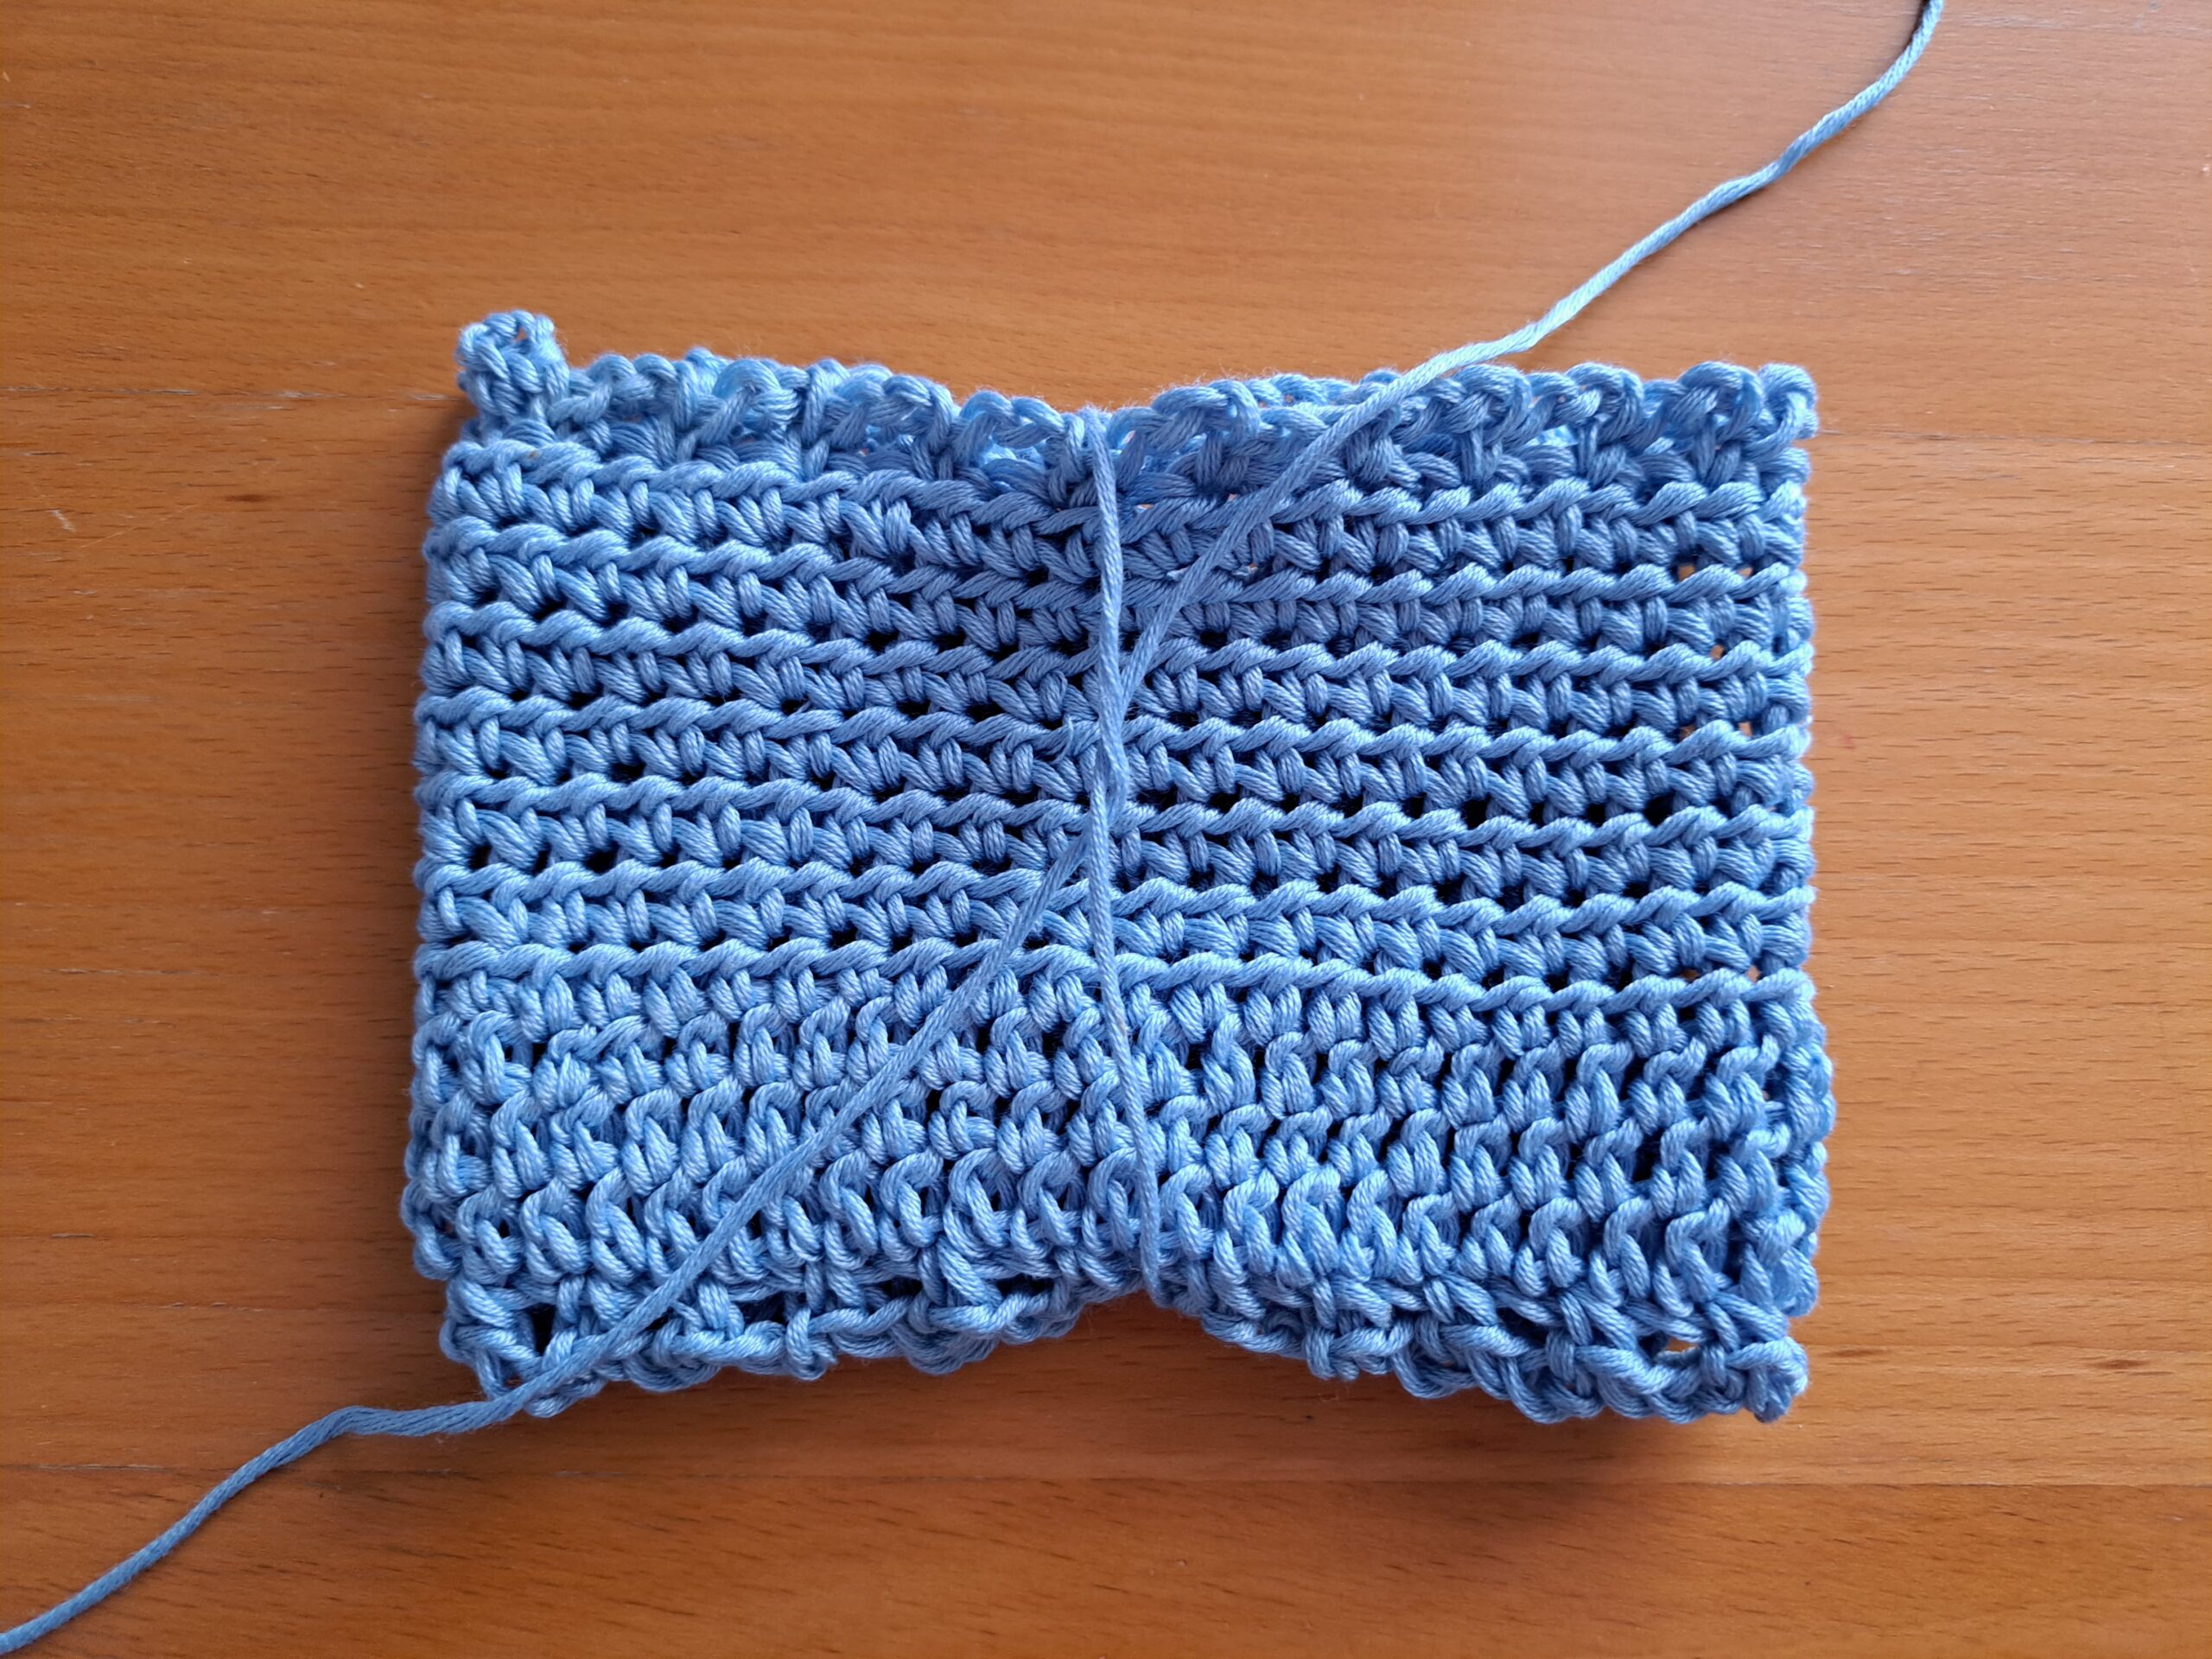
Tighten yarn gently so as to create the bow shape (see photo below).
Now wrap your yarn around center of project approximately 50 times (see photo below):
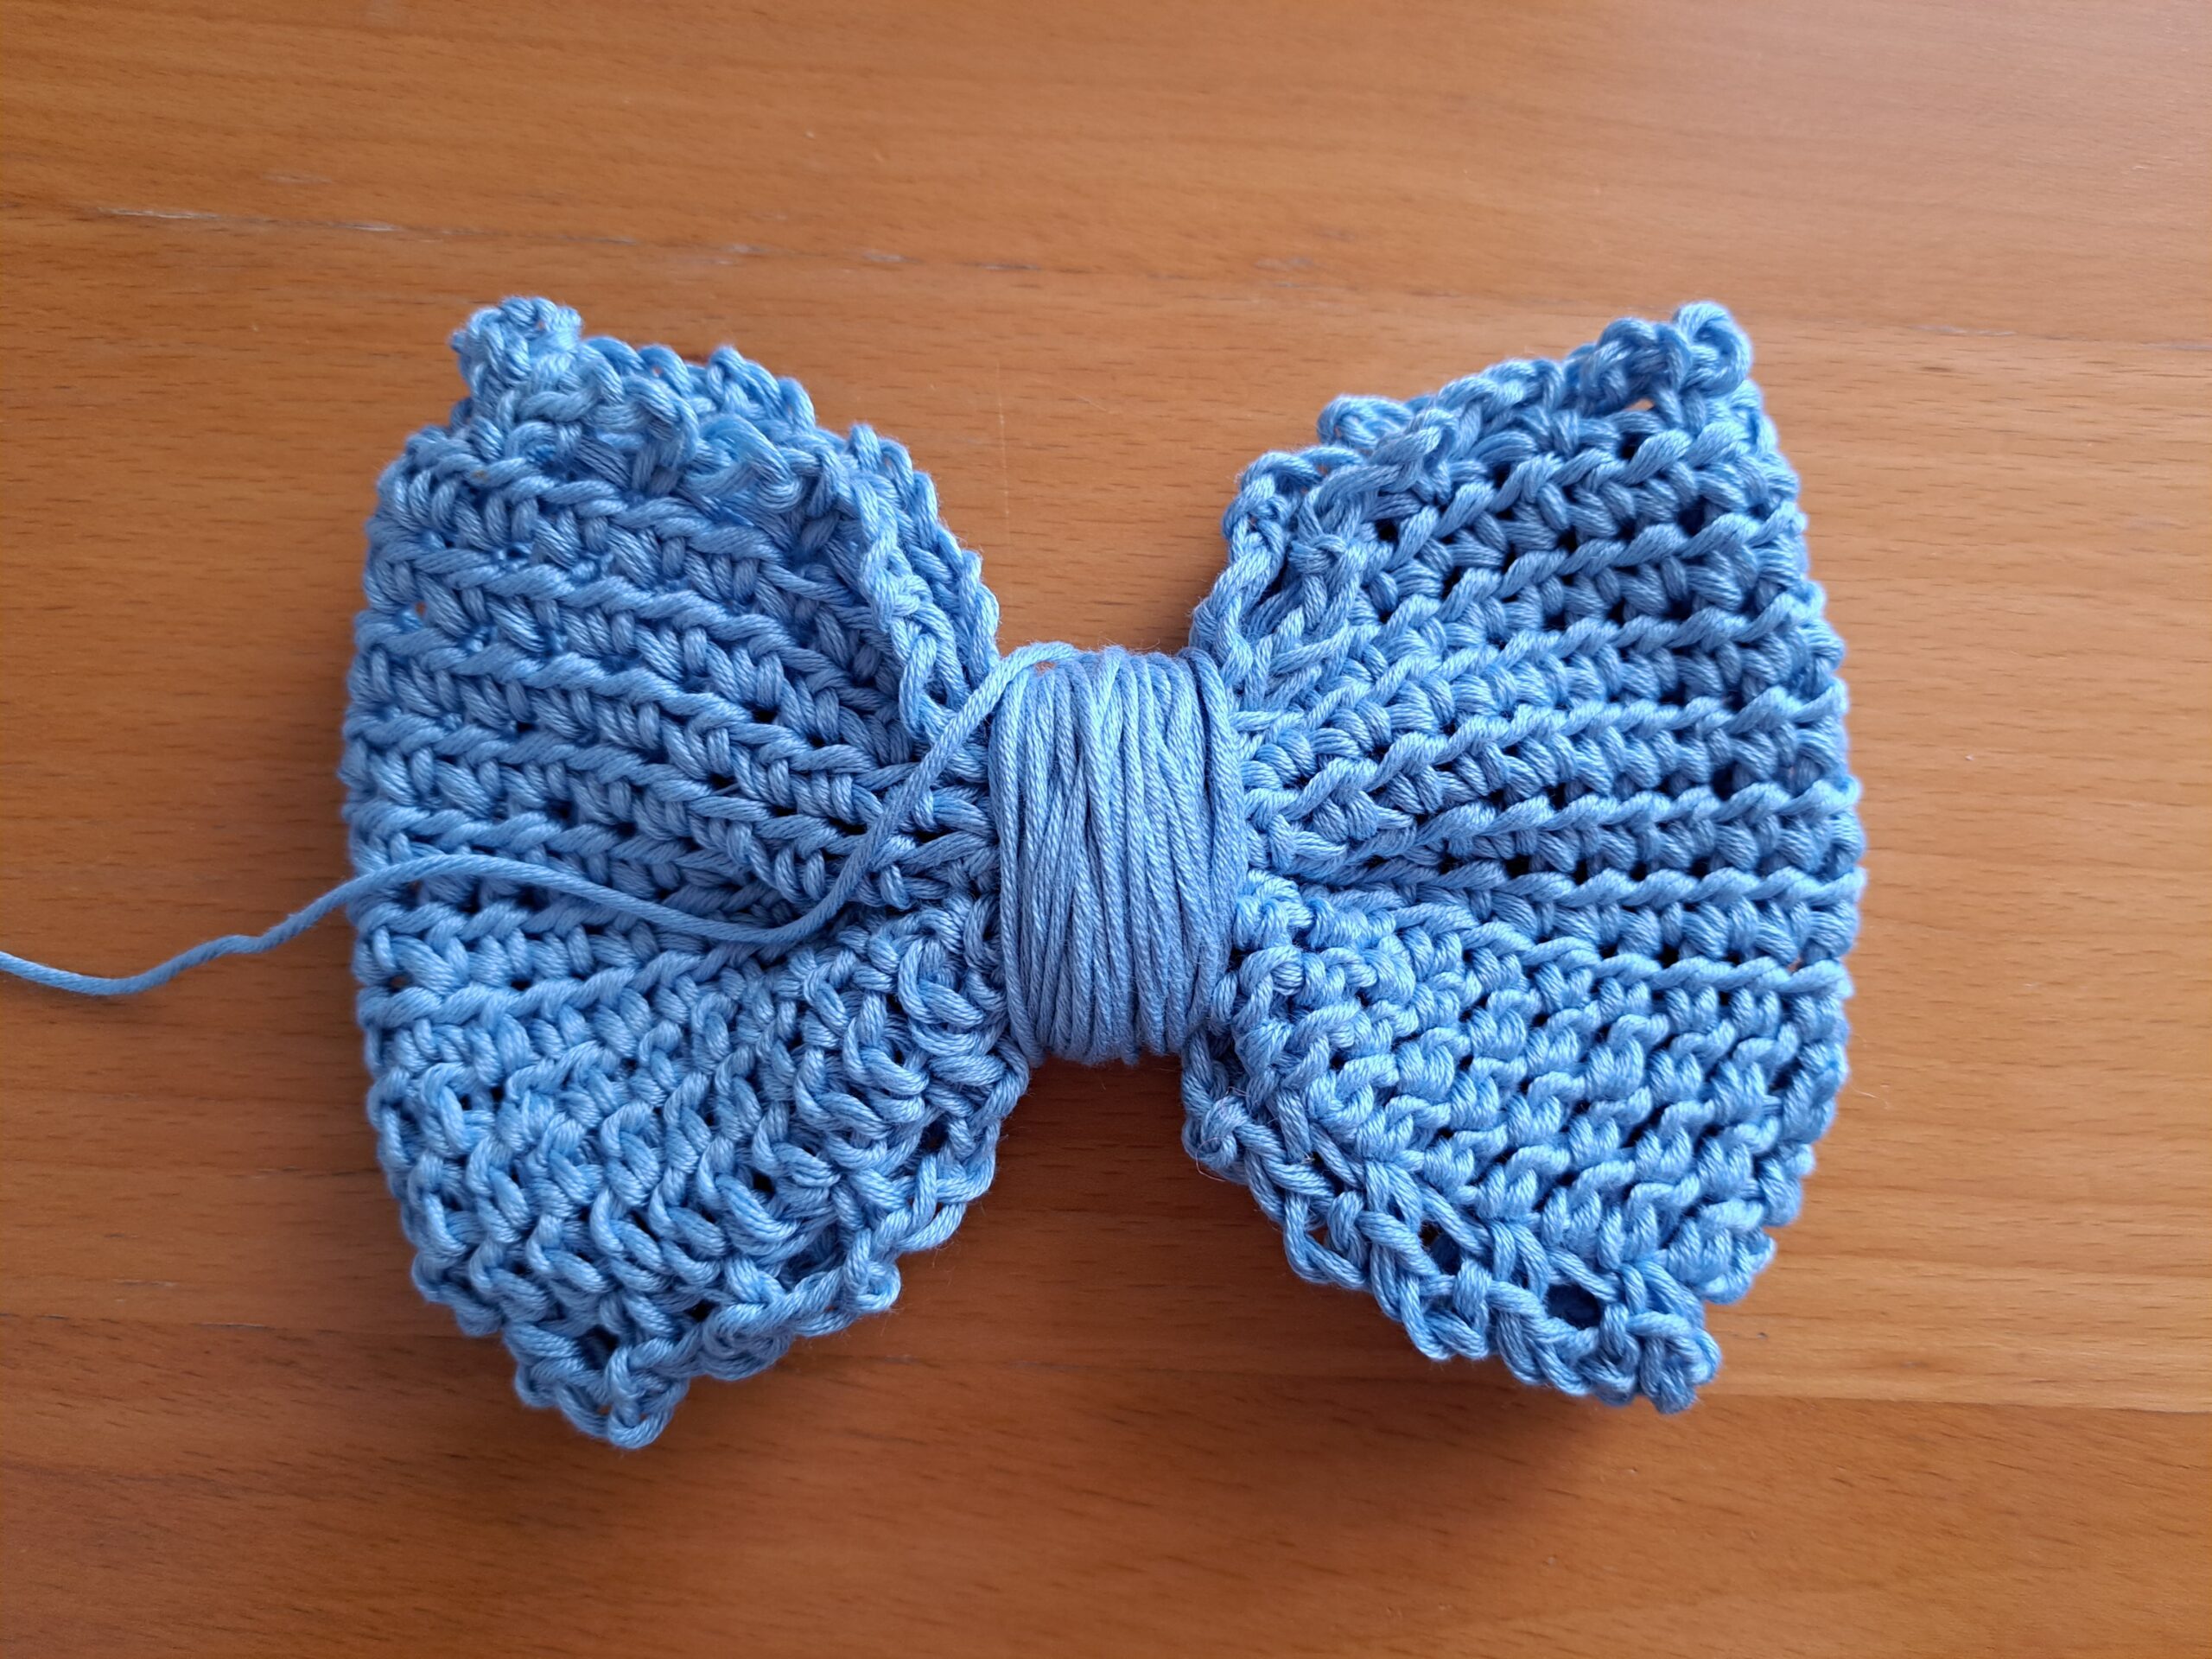
To finish off this part, tie your yarn at the back of bow. Fasten off and tidy up all loose ends.
Create your hair ties (one rectangle which is then sewed onto the back of the project to create two different ties)
To begin, make a slip knot.
Chain 6.
1: HDC into 3rd chain from the hook, and into each chain across until the end of row.
2: Ch 2 (=HDC), turn your work, HDC into each stitch across until eor (including ch 2 from previous row).
3-38: Repeat row 2.
Do not fasten off as we will now be adding a chain arch edging to this part.
Round 1: Ch 1 (does not count as a stitch), place SC all around this rectangle, making sure you space them out evenly so as to not tighten the project. Once you have gone around all 4 sides with a SC, we will be making round 2.
Round 2: Ch 3, sk 1 st, SC into next st until eor.
Fasten off, tidy up all loose ends.

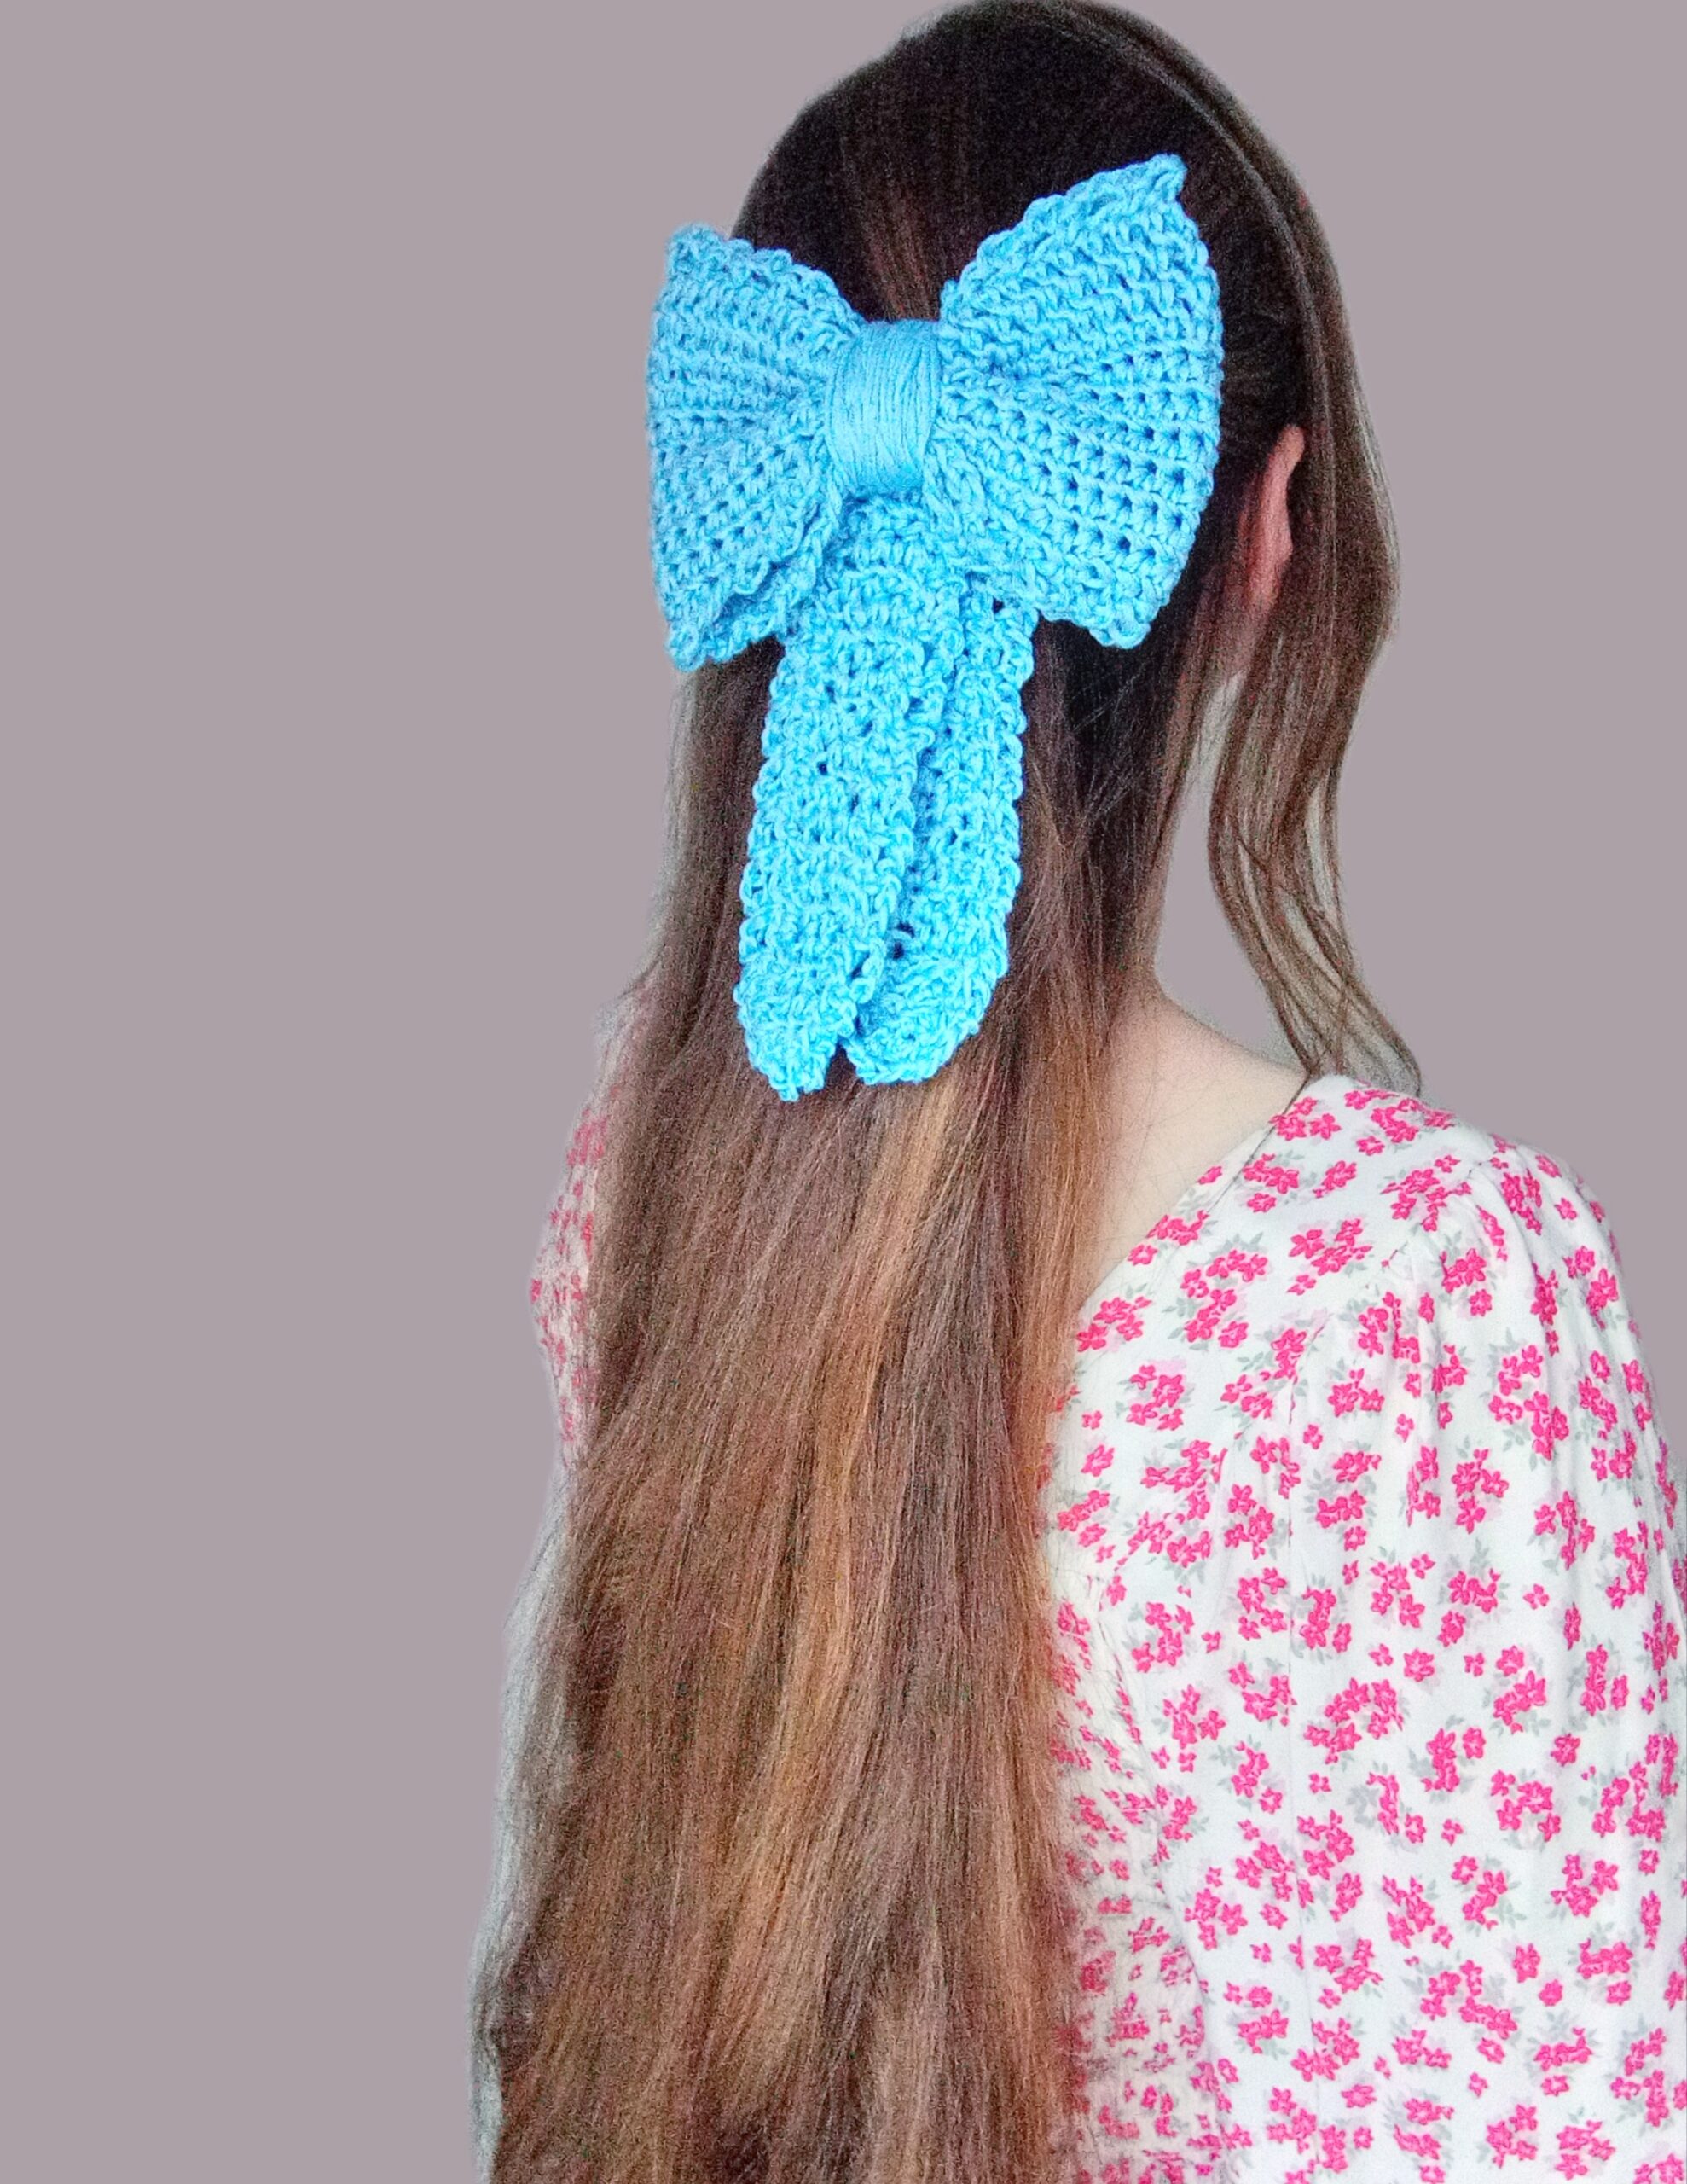
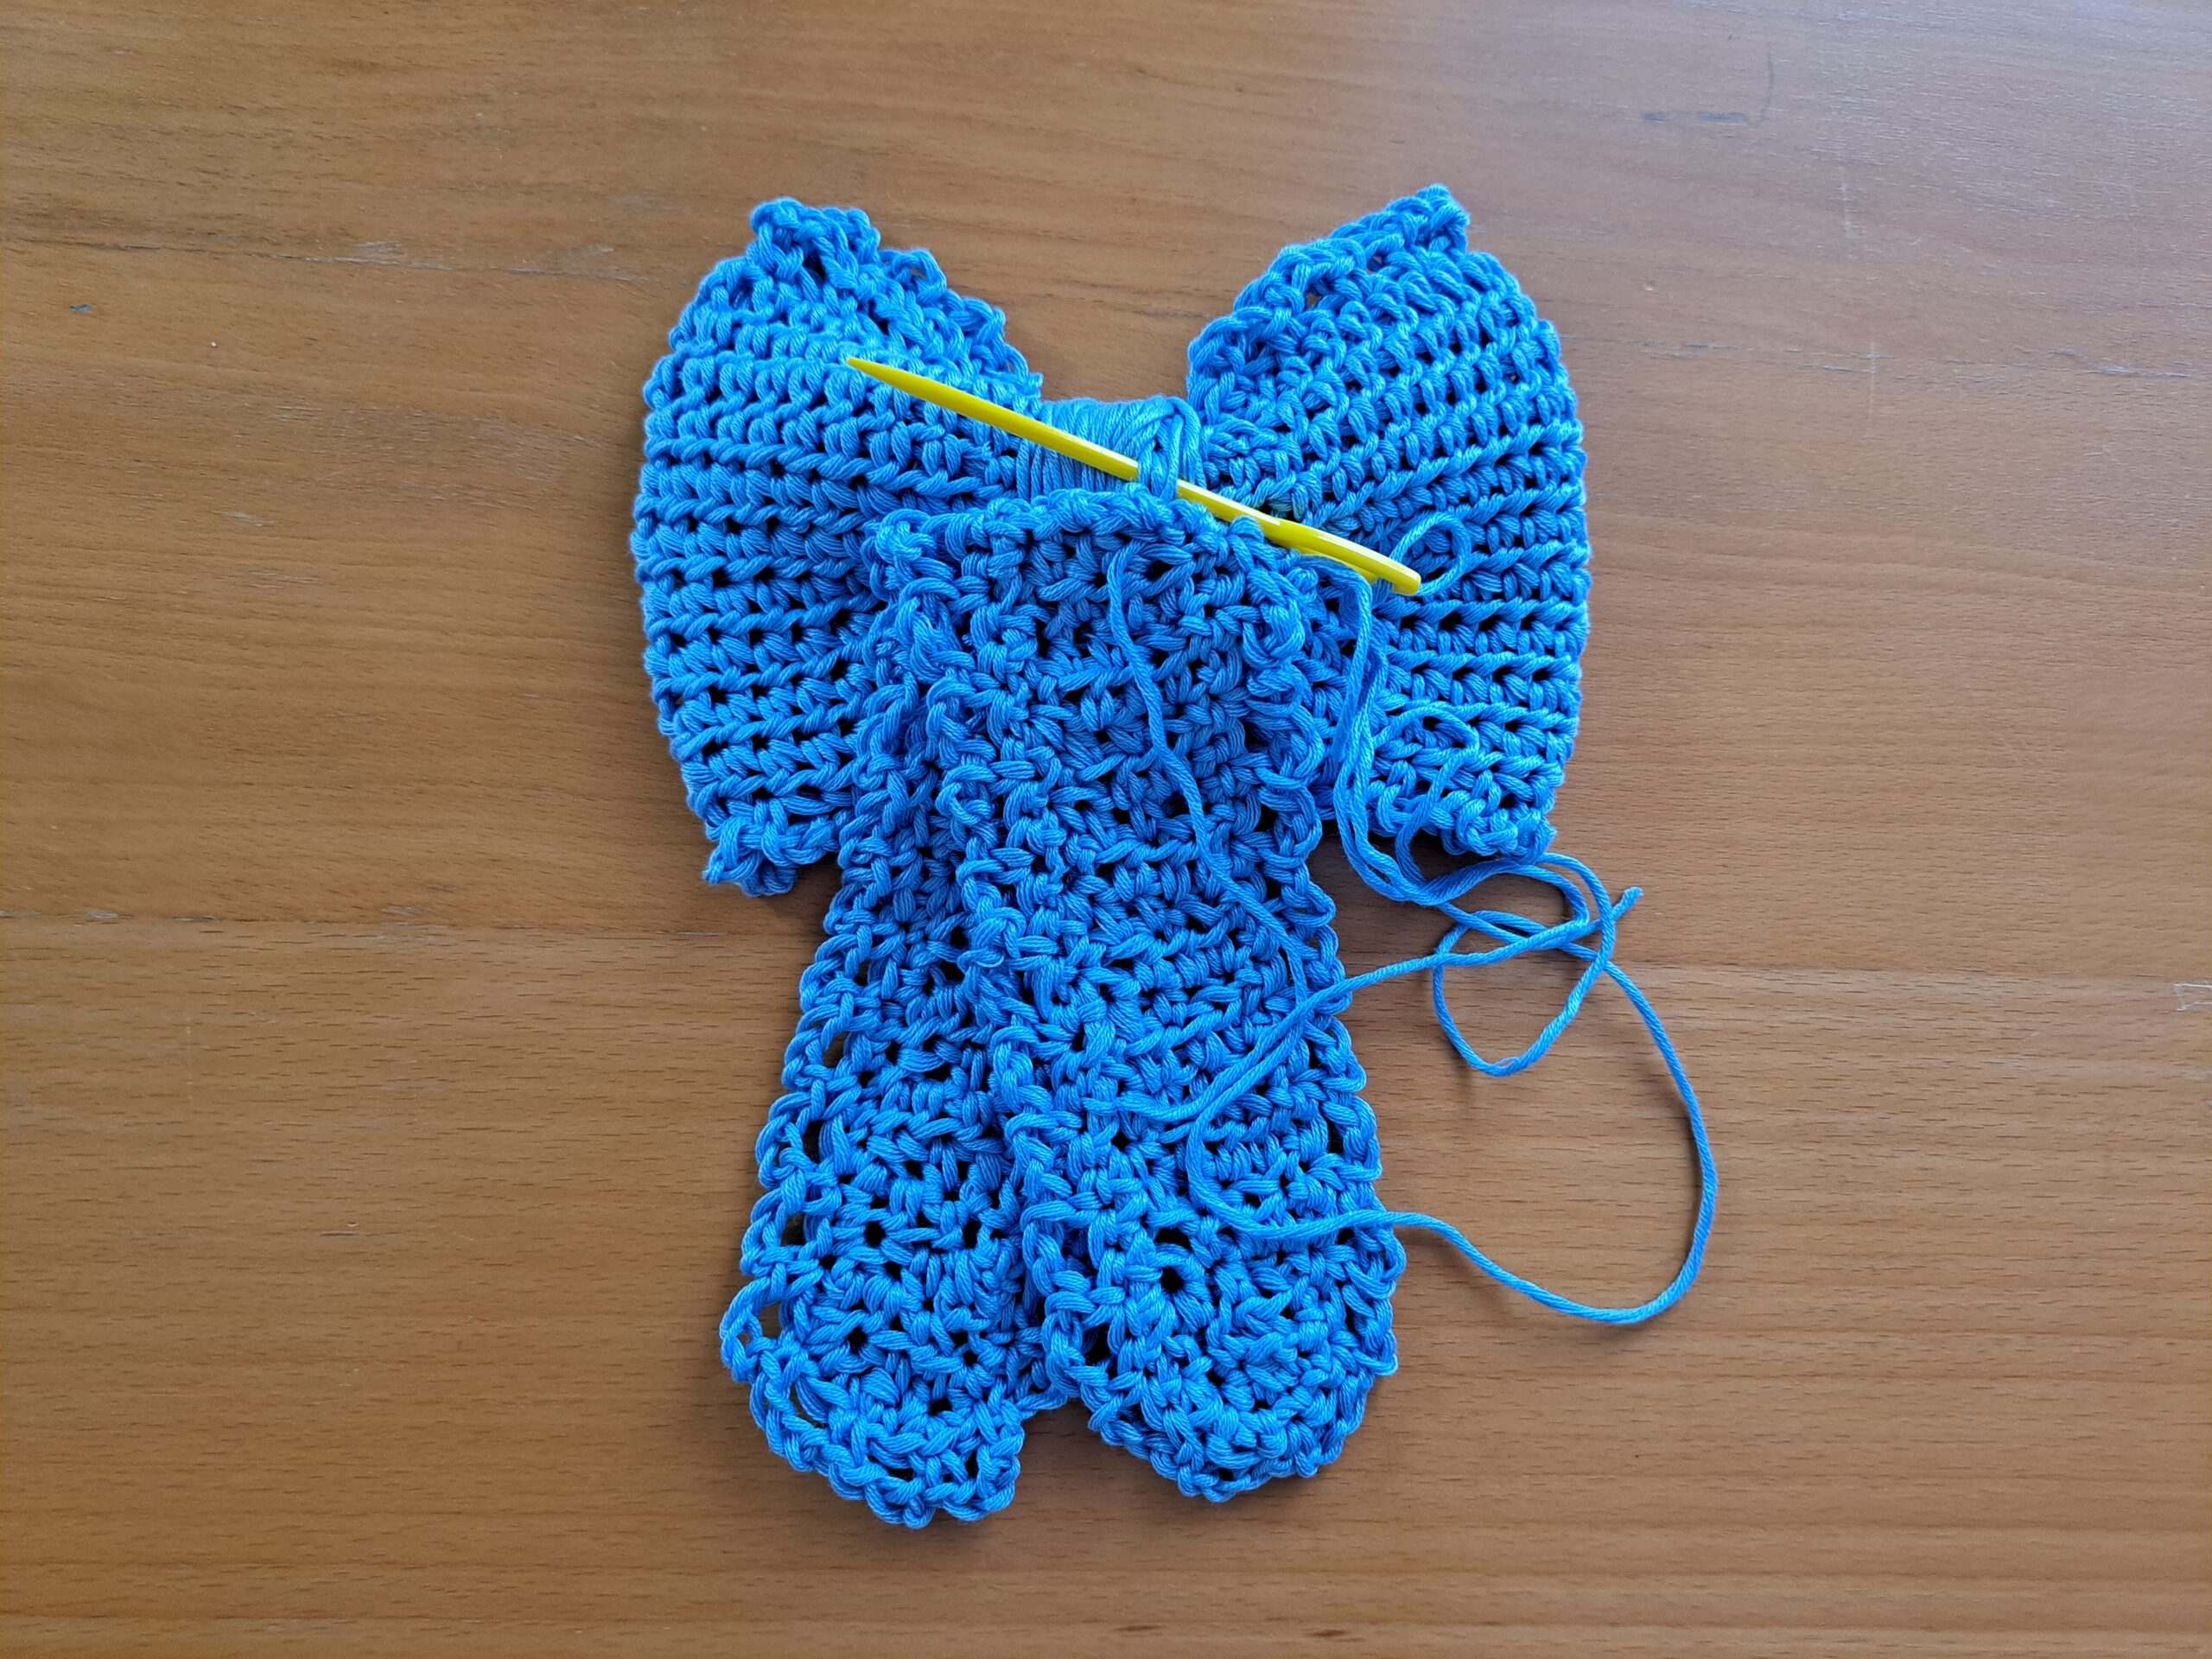
Place the ties folded onto the bow as seen in the photograph below.
Sew this part in place as seen in photograph below with tapestry needle and loose piece of yarn.
Sew the hair slide onto the back of the project
Place the hair slide at the center of the back of the project. With darning needle and thread, sew the hair slide onto the back of the project.
To finish off this project, fasten off and tidy up all loose ends.


You May Also Like
Crochet an Edwardian Era Wrap
Crochet Boho Festival Bag