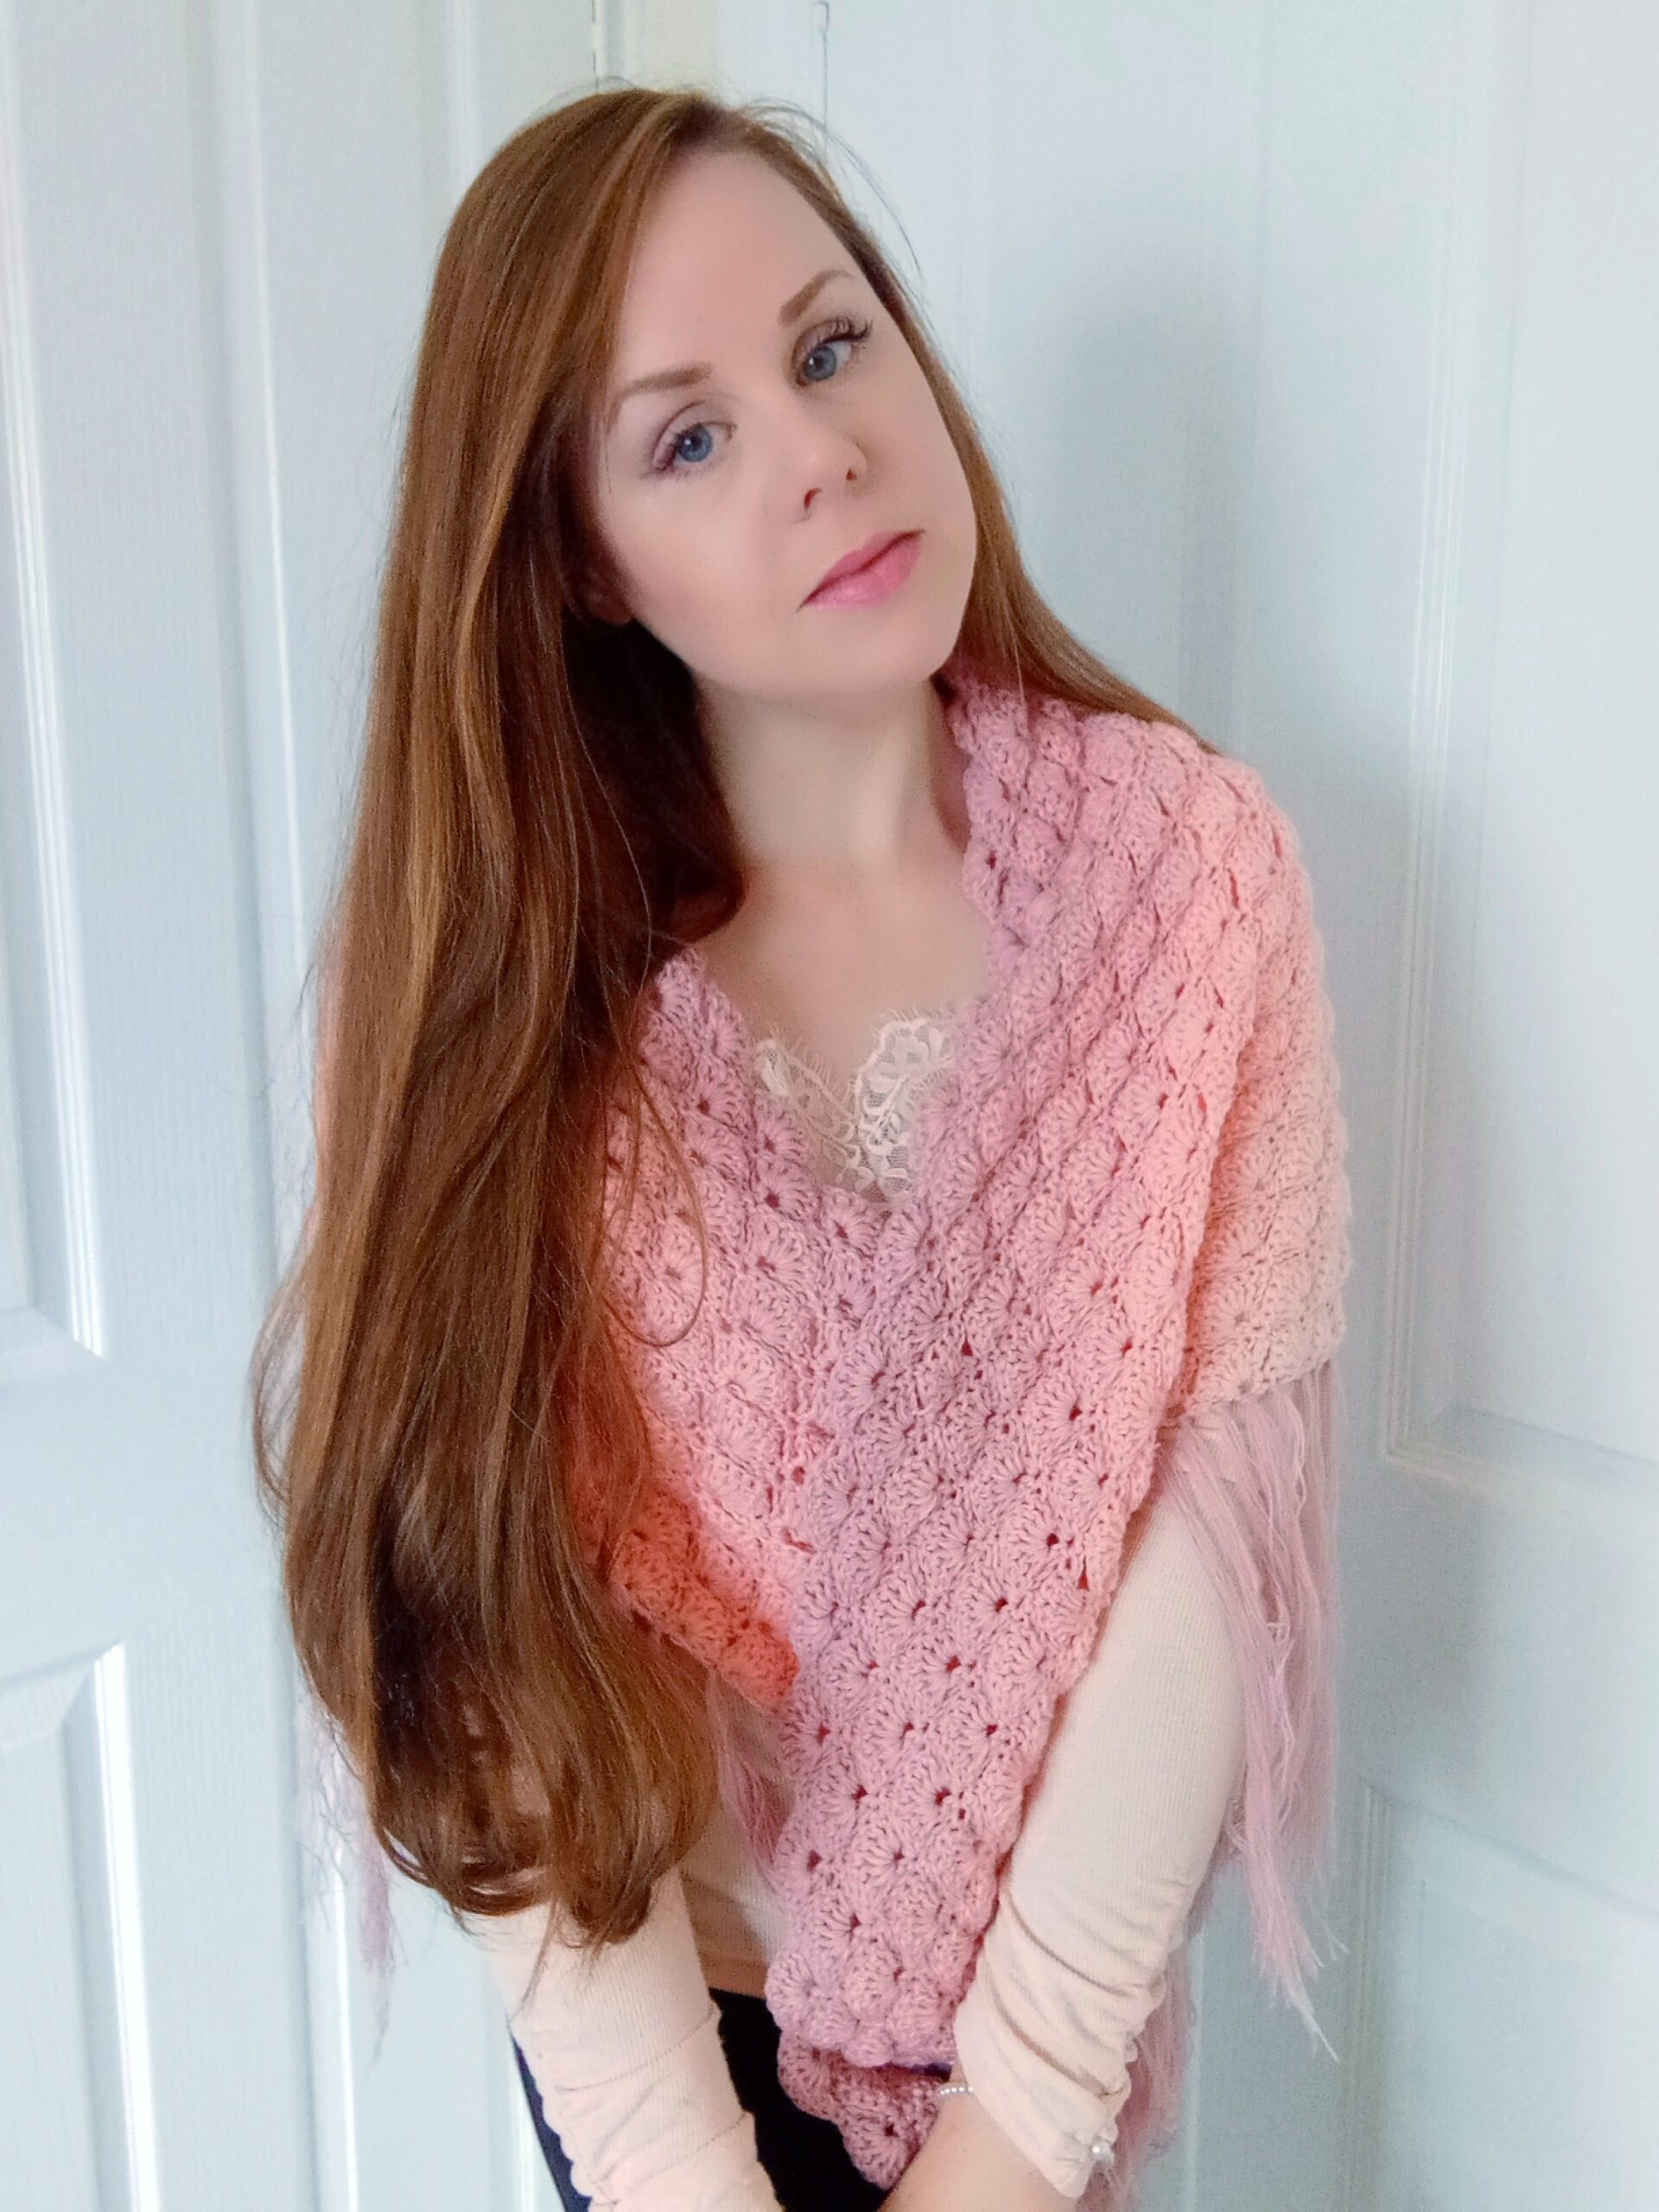
Crochet Victorian Shawl With Fringe Free Pattern
Crochet Victorian Shawl With Fringe Free Pattern
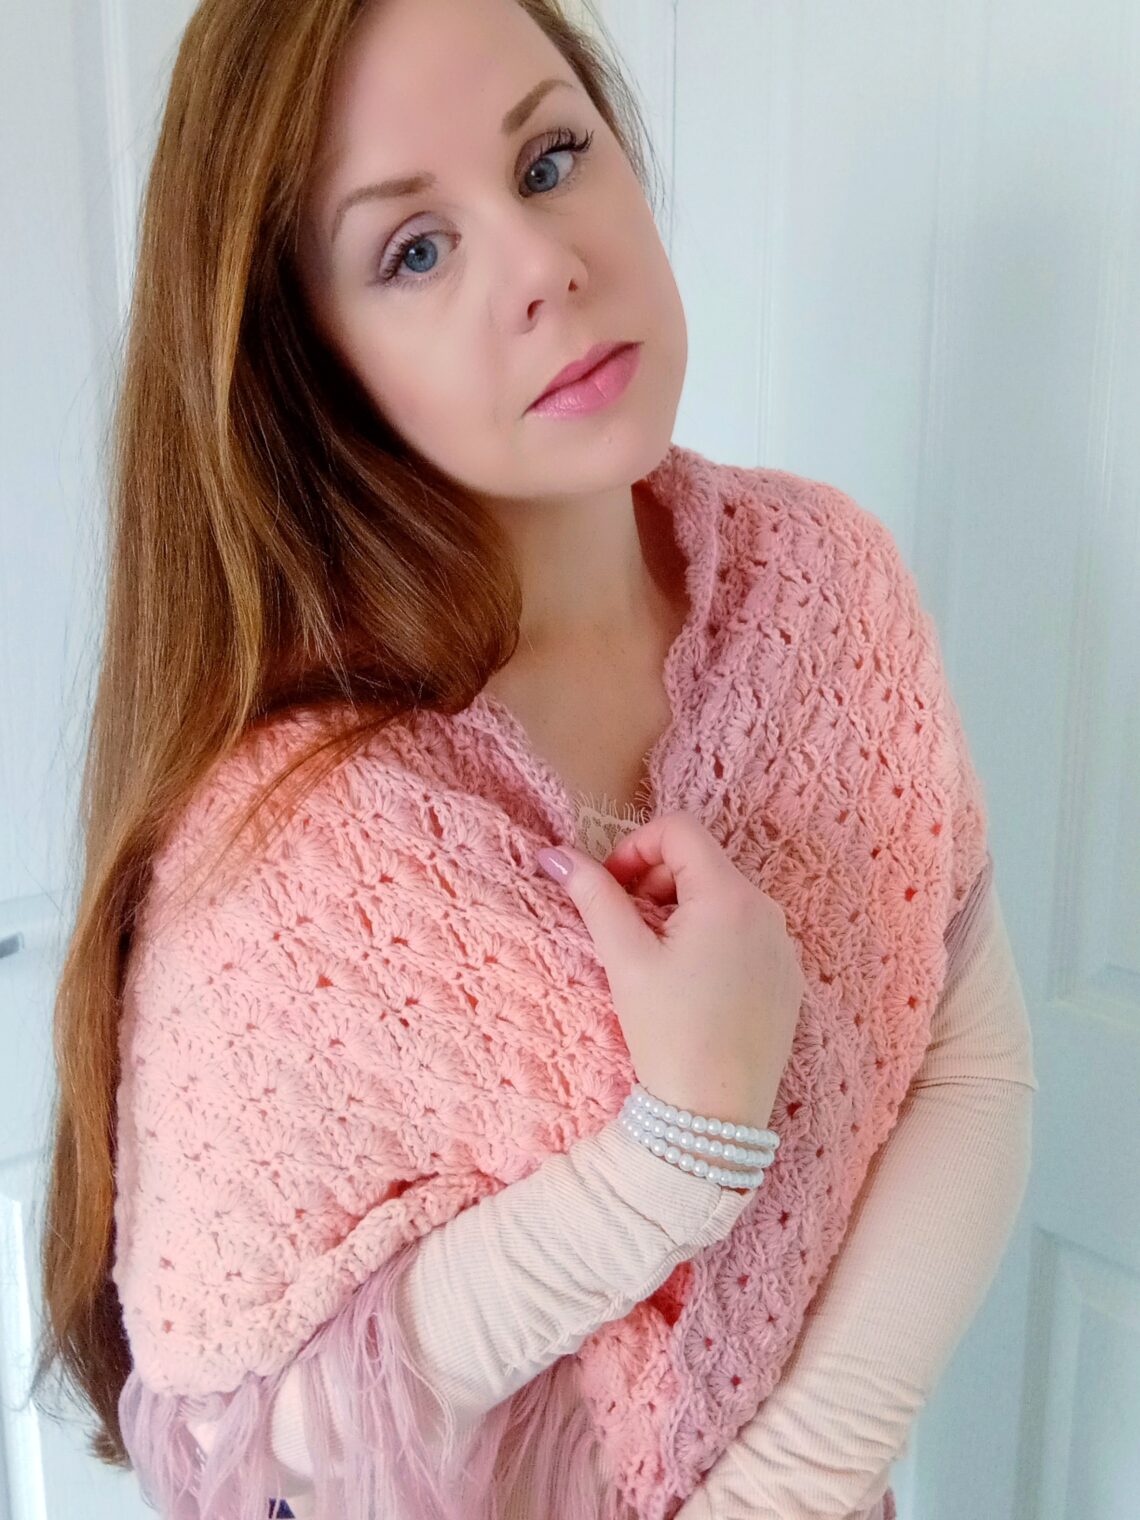
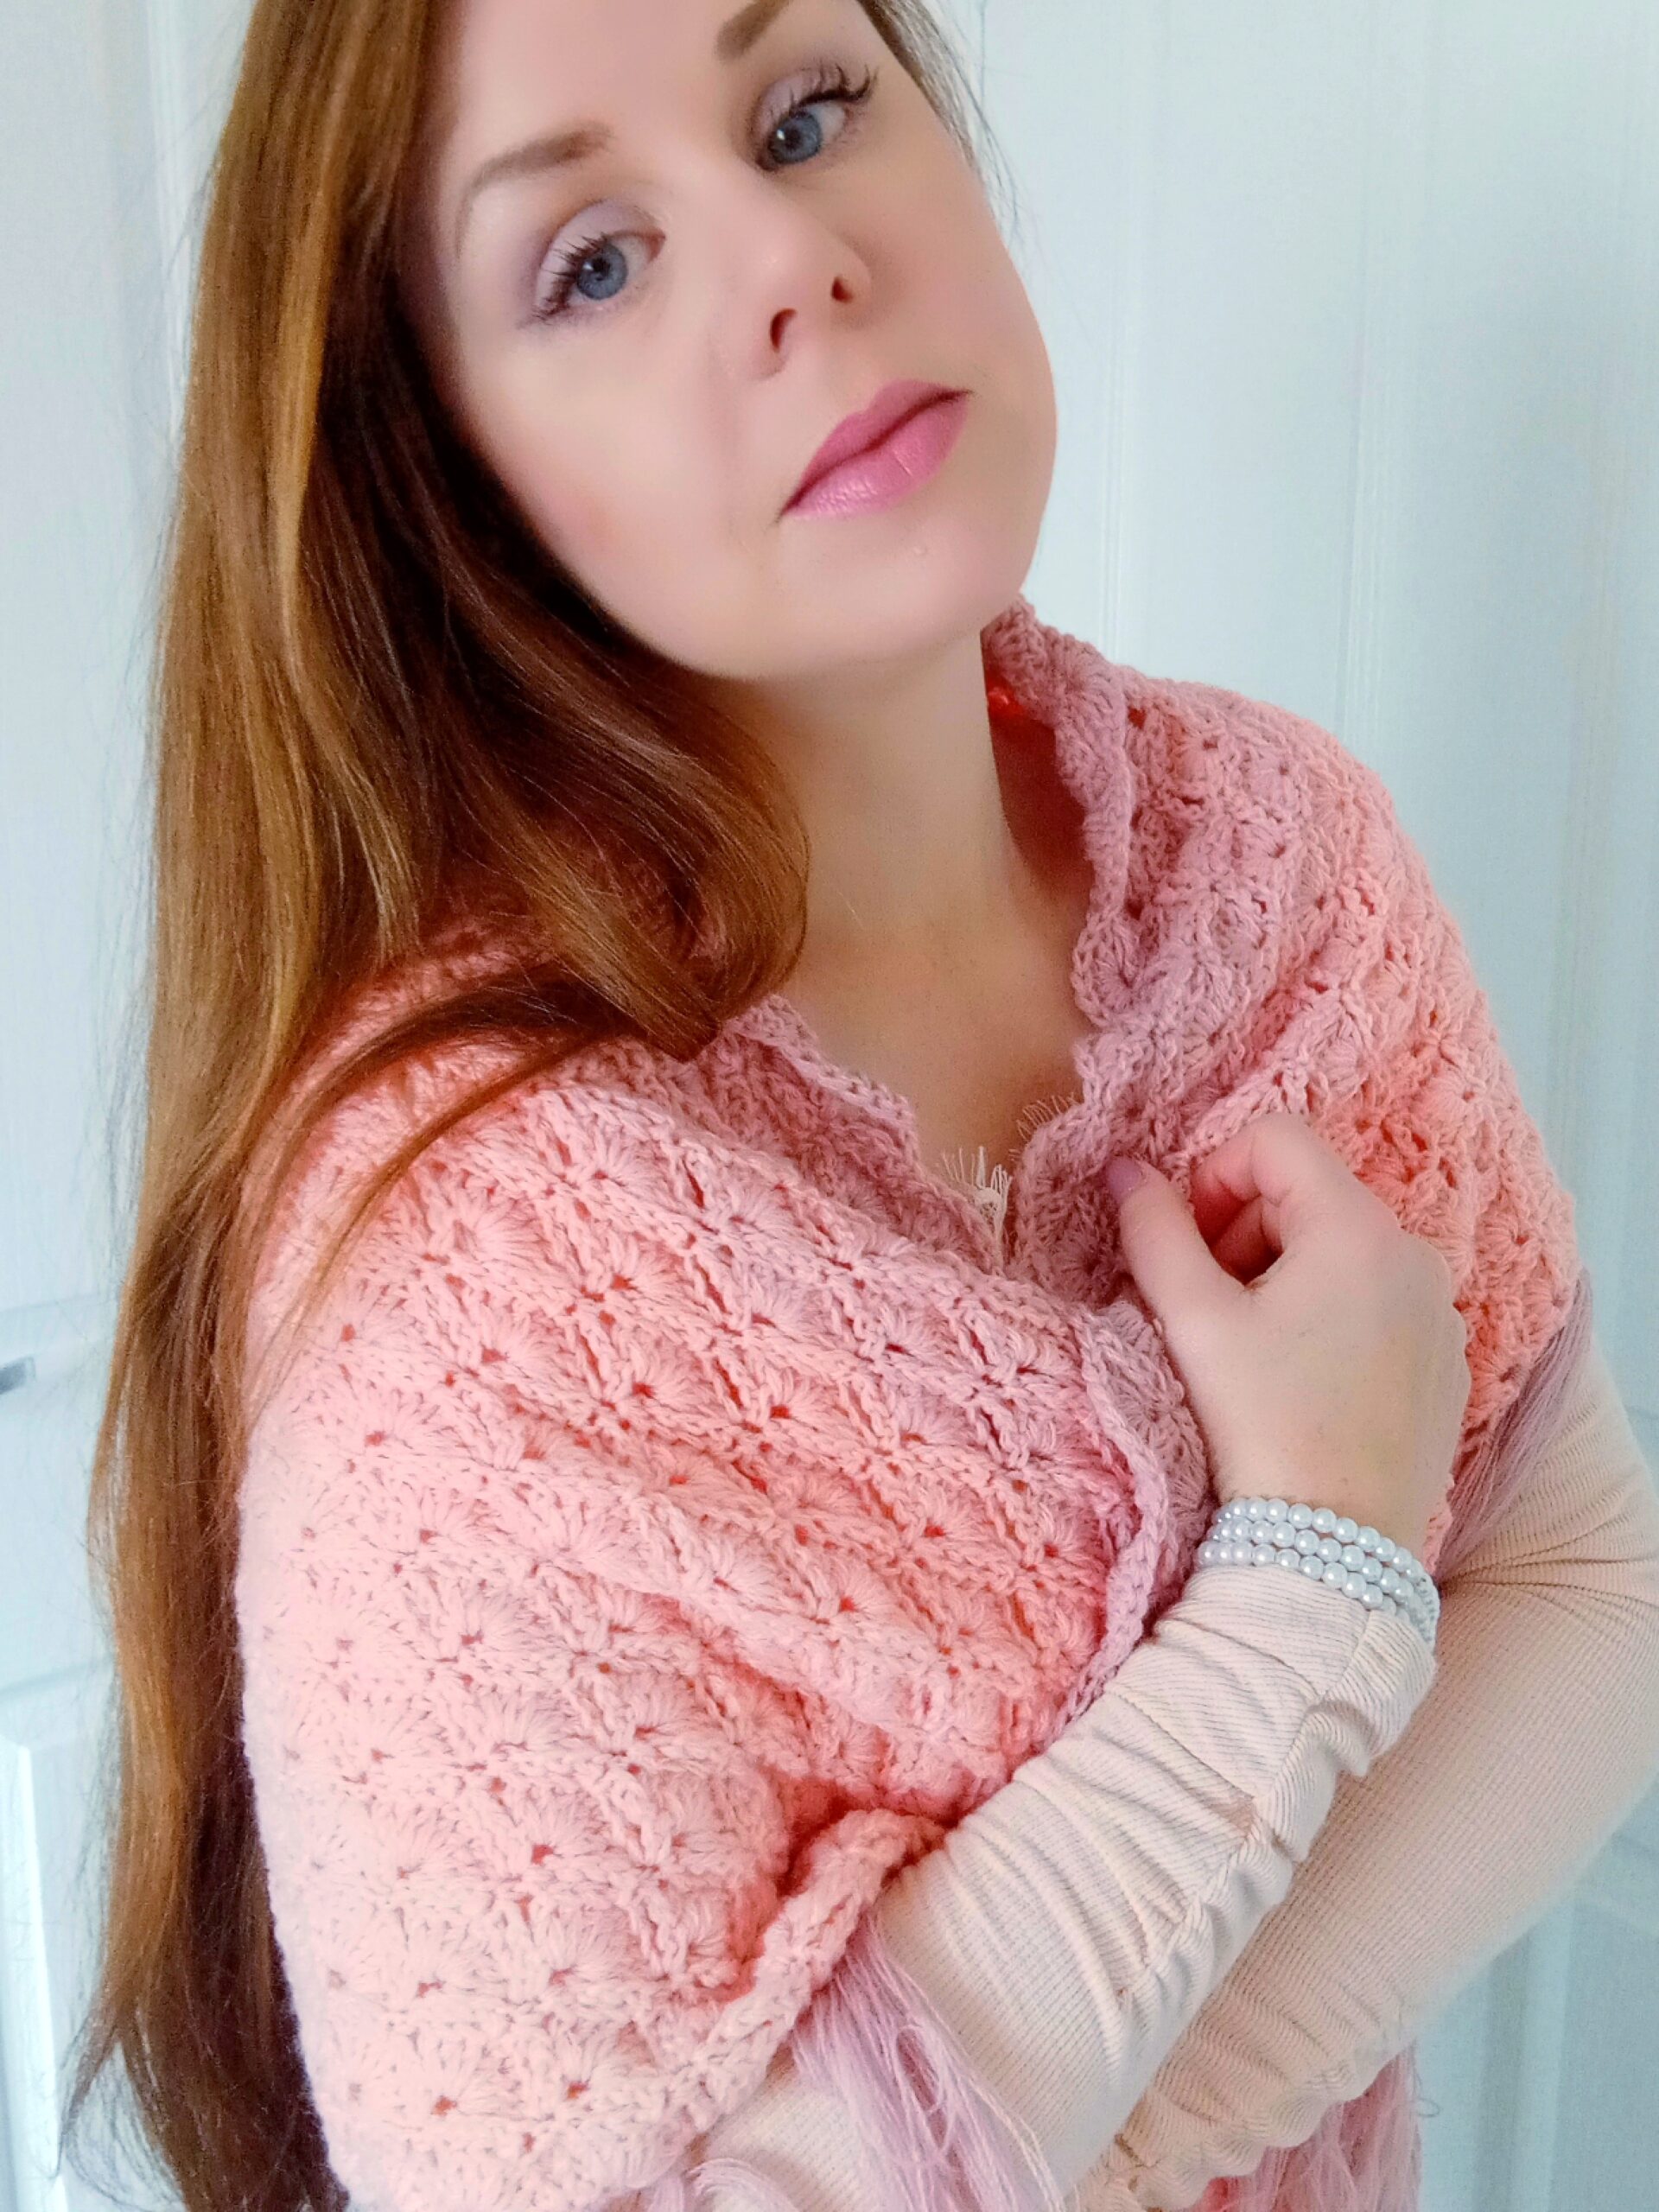
Hi everyone, this week I am bringing to you a crochet Victorian shawl with fringe (free pattern). This new crochet shawl is part of my Vintage Crochet Series. I love vintage crochet so much, and it is so much fun to share these designs with you. This new vintage crochet installment is inspired by the Victorian Era, which is one of my favorite eras in terms of fashion and crochet.
The video tutorial for this project can be found here:
Crochet Victorian Shawl With Fringe Free Pattern: A New Vintage Crochet Series Installment
My Vintage Crochet Series is definitely one of my favorite parts of designing crochet patterns. This new project is inspired by the Victorian Era. If you love vintage crochet shawls, you can check out my Fantine Shawl and The Delicate Rose Shawl.
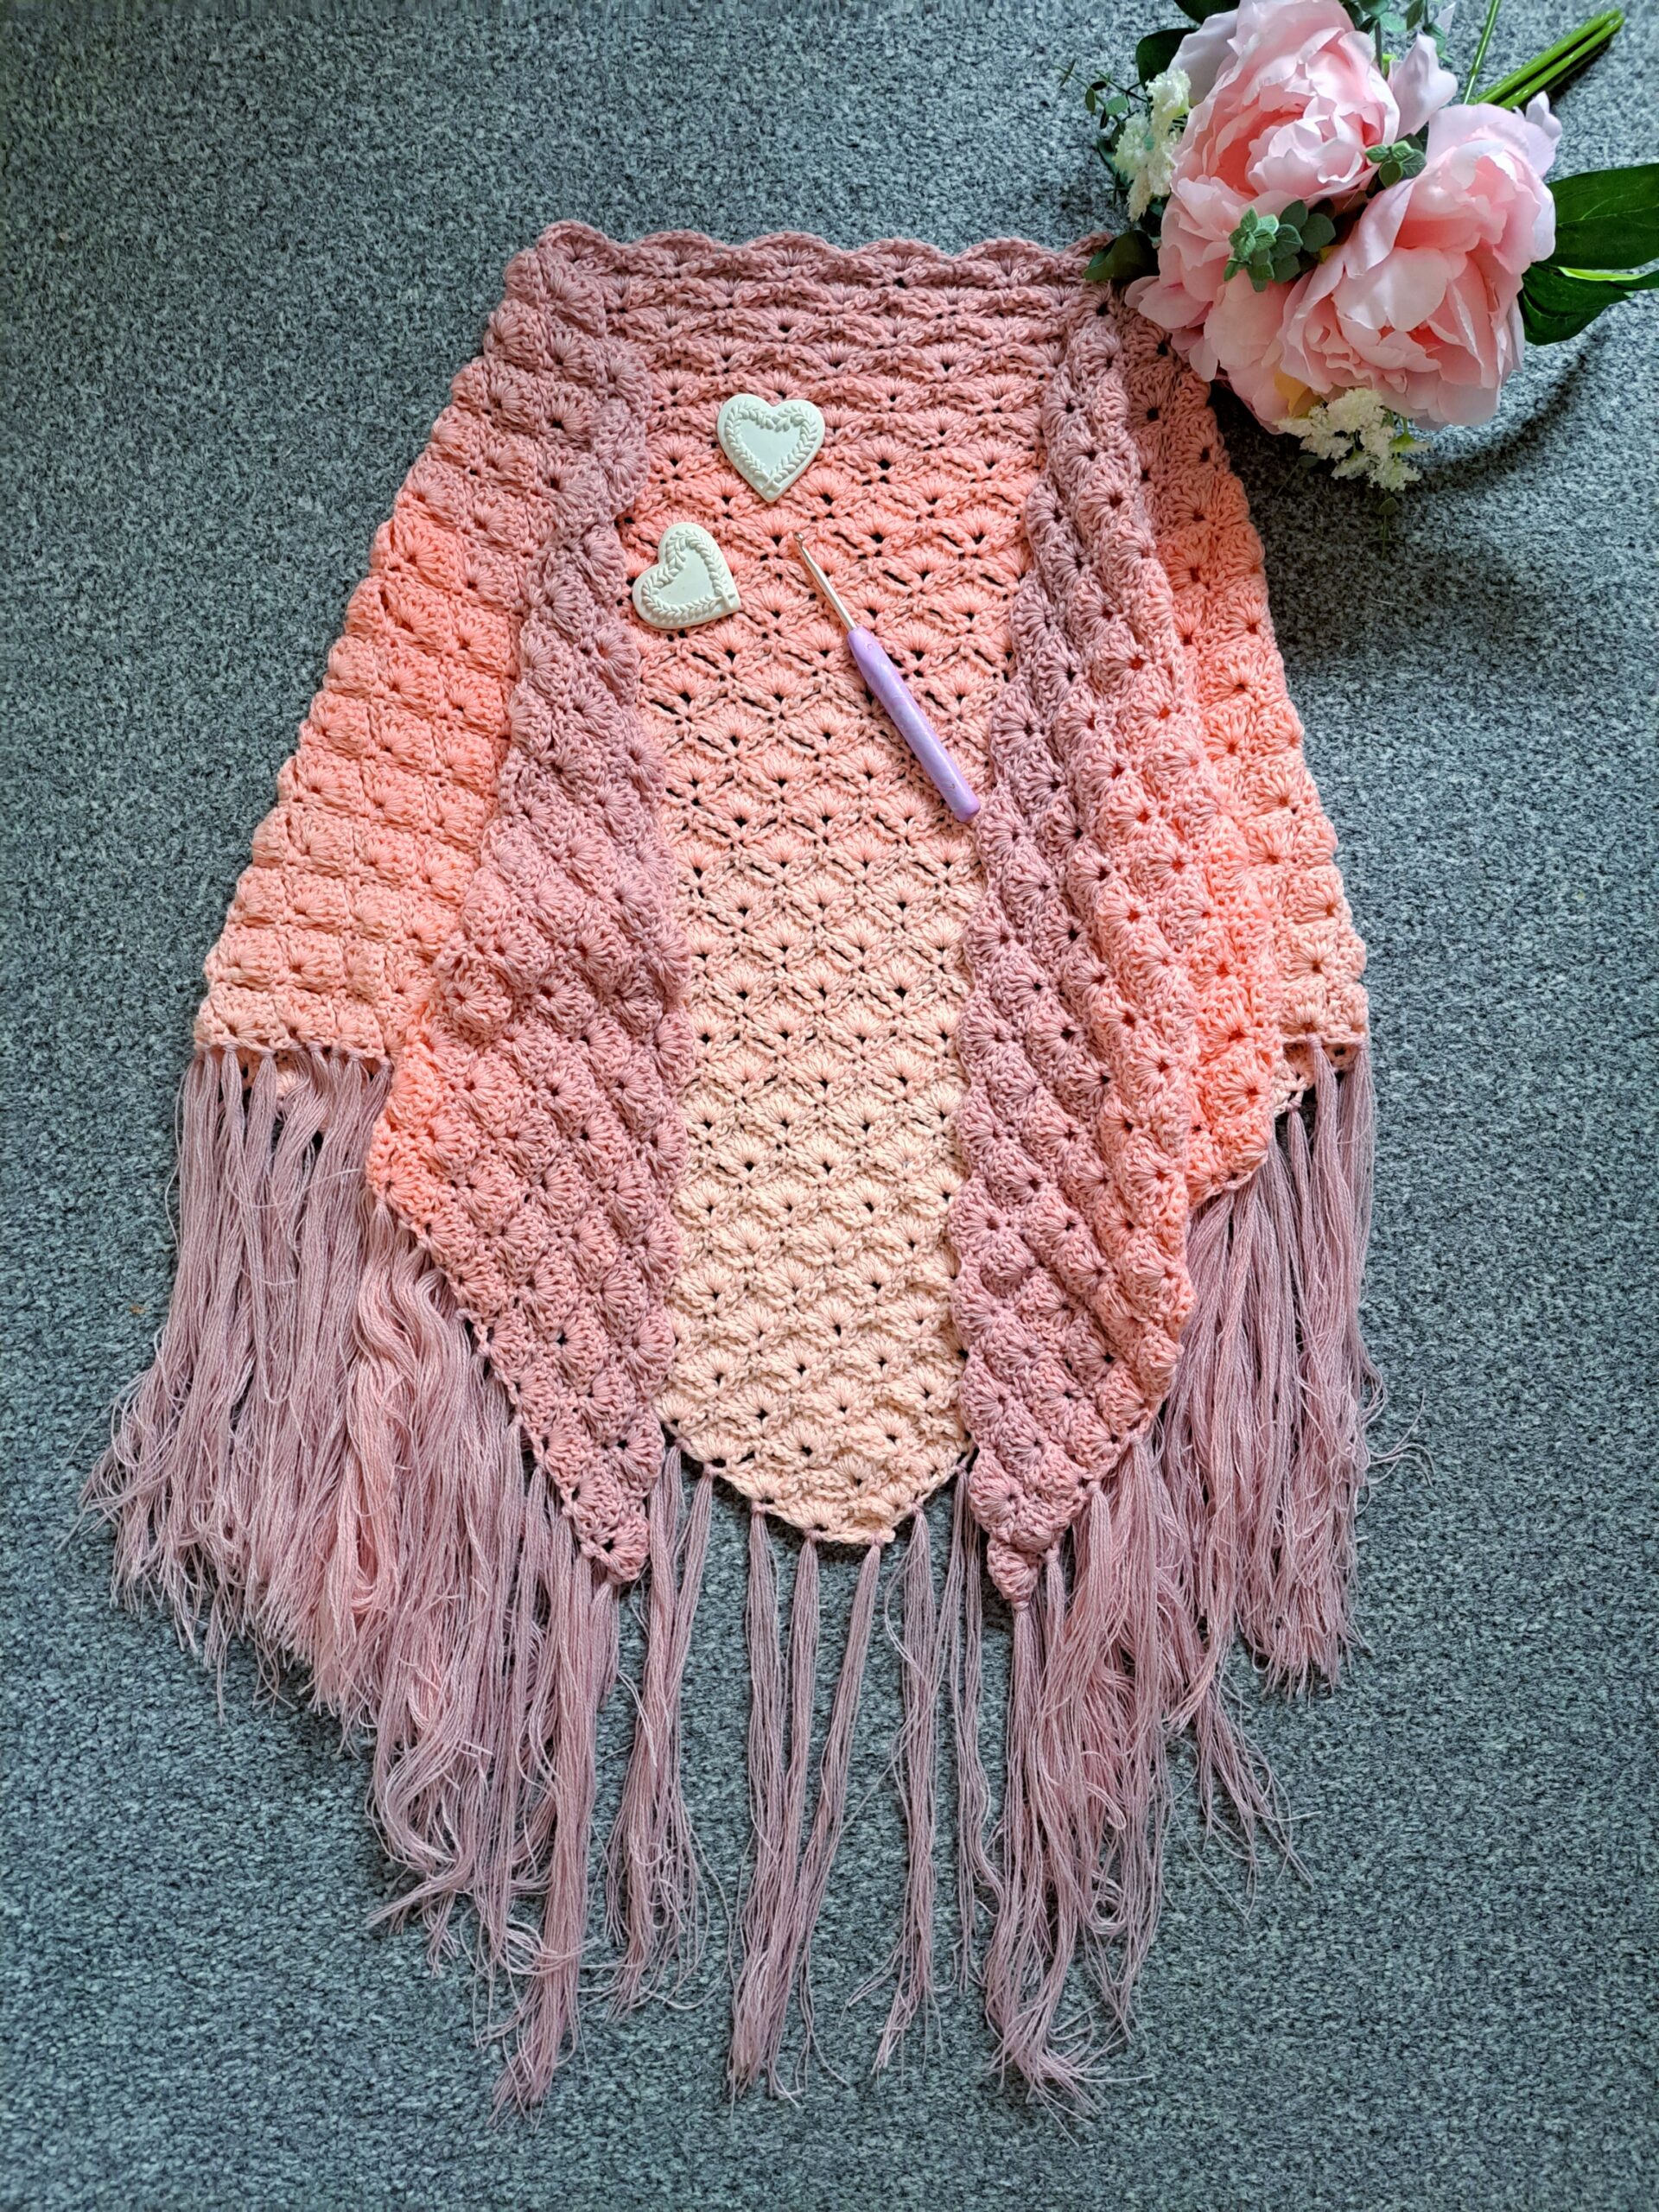
This crochet project is inspired by the Victorian Era (1837-1901). Shawls during the Victorian Era were very popular, with V shaped shawls being very popular. Fringes were also very popular at that time; this rectangular shawl with fringes is also part of my Vintage Crochet Series. This shawl also features fringes, and is so beautiful.
I wanted to recreate a shawl that reflected the beauty and delicacy of the Victorian Era. The Victorian Era is not the only era that I get inspired by. Lately, I made this Edwardian Era Shawl, and The Juliette Vintage French Wrap.
Crochet Victorian Shawl With Fringe Free Pattern: A Simple Feminine Project
This crochet project is perfect for beginners. It is so beautiful and feminine, and looks perfect in every season. I love feminine crochet designs. This romantic hair ribbon is a super feminine project that is also part of my Vintage Crochet Series.
Feminine crochet designs are so important to me. I love anything dainty and feminine, especially accessories such as shawls and hair accessories for example. This vintage hair scarf is perfect if you are looking for a delicate crochet project. This delicate hair bow is also a great feminine project to crochet.
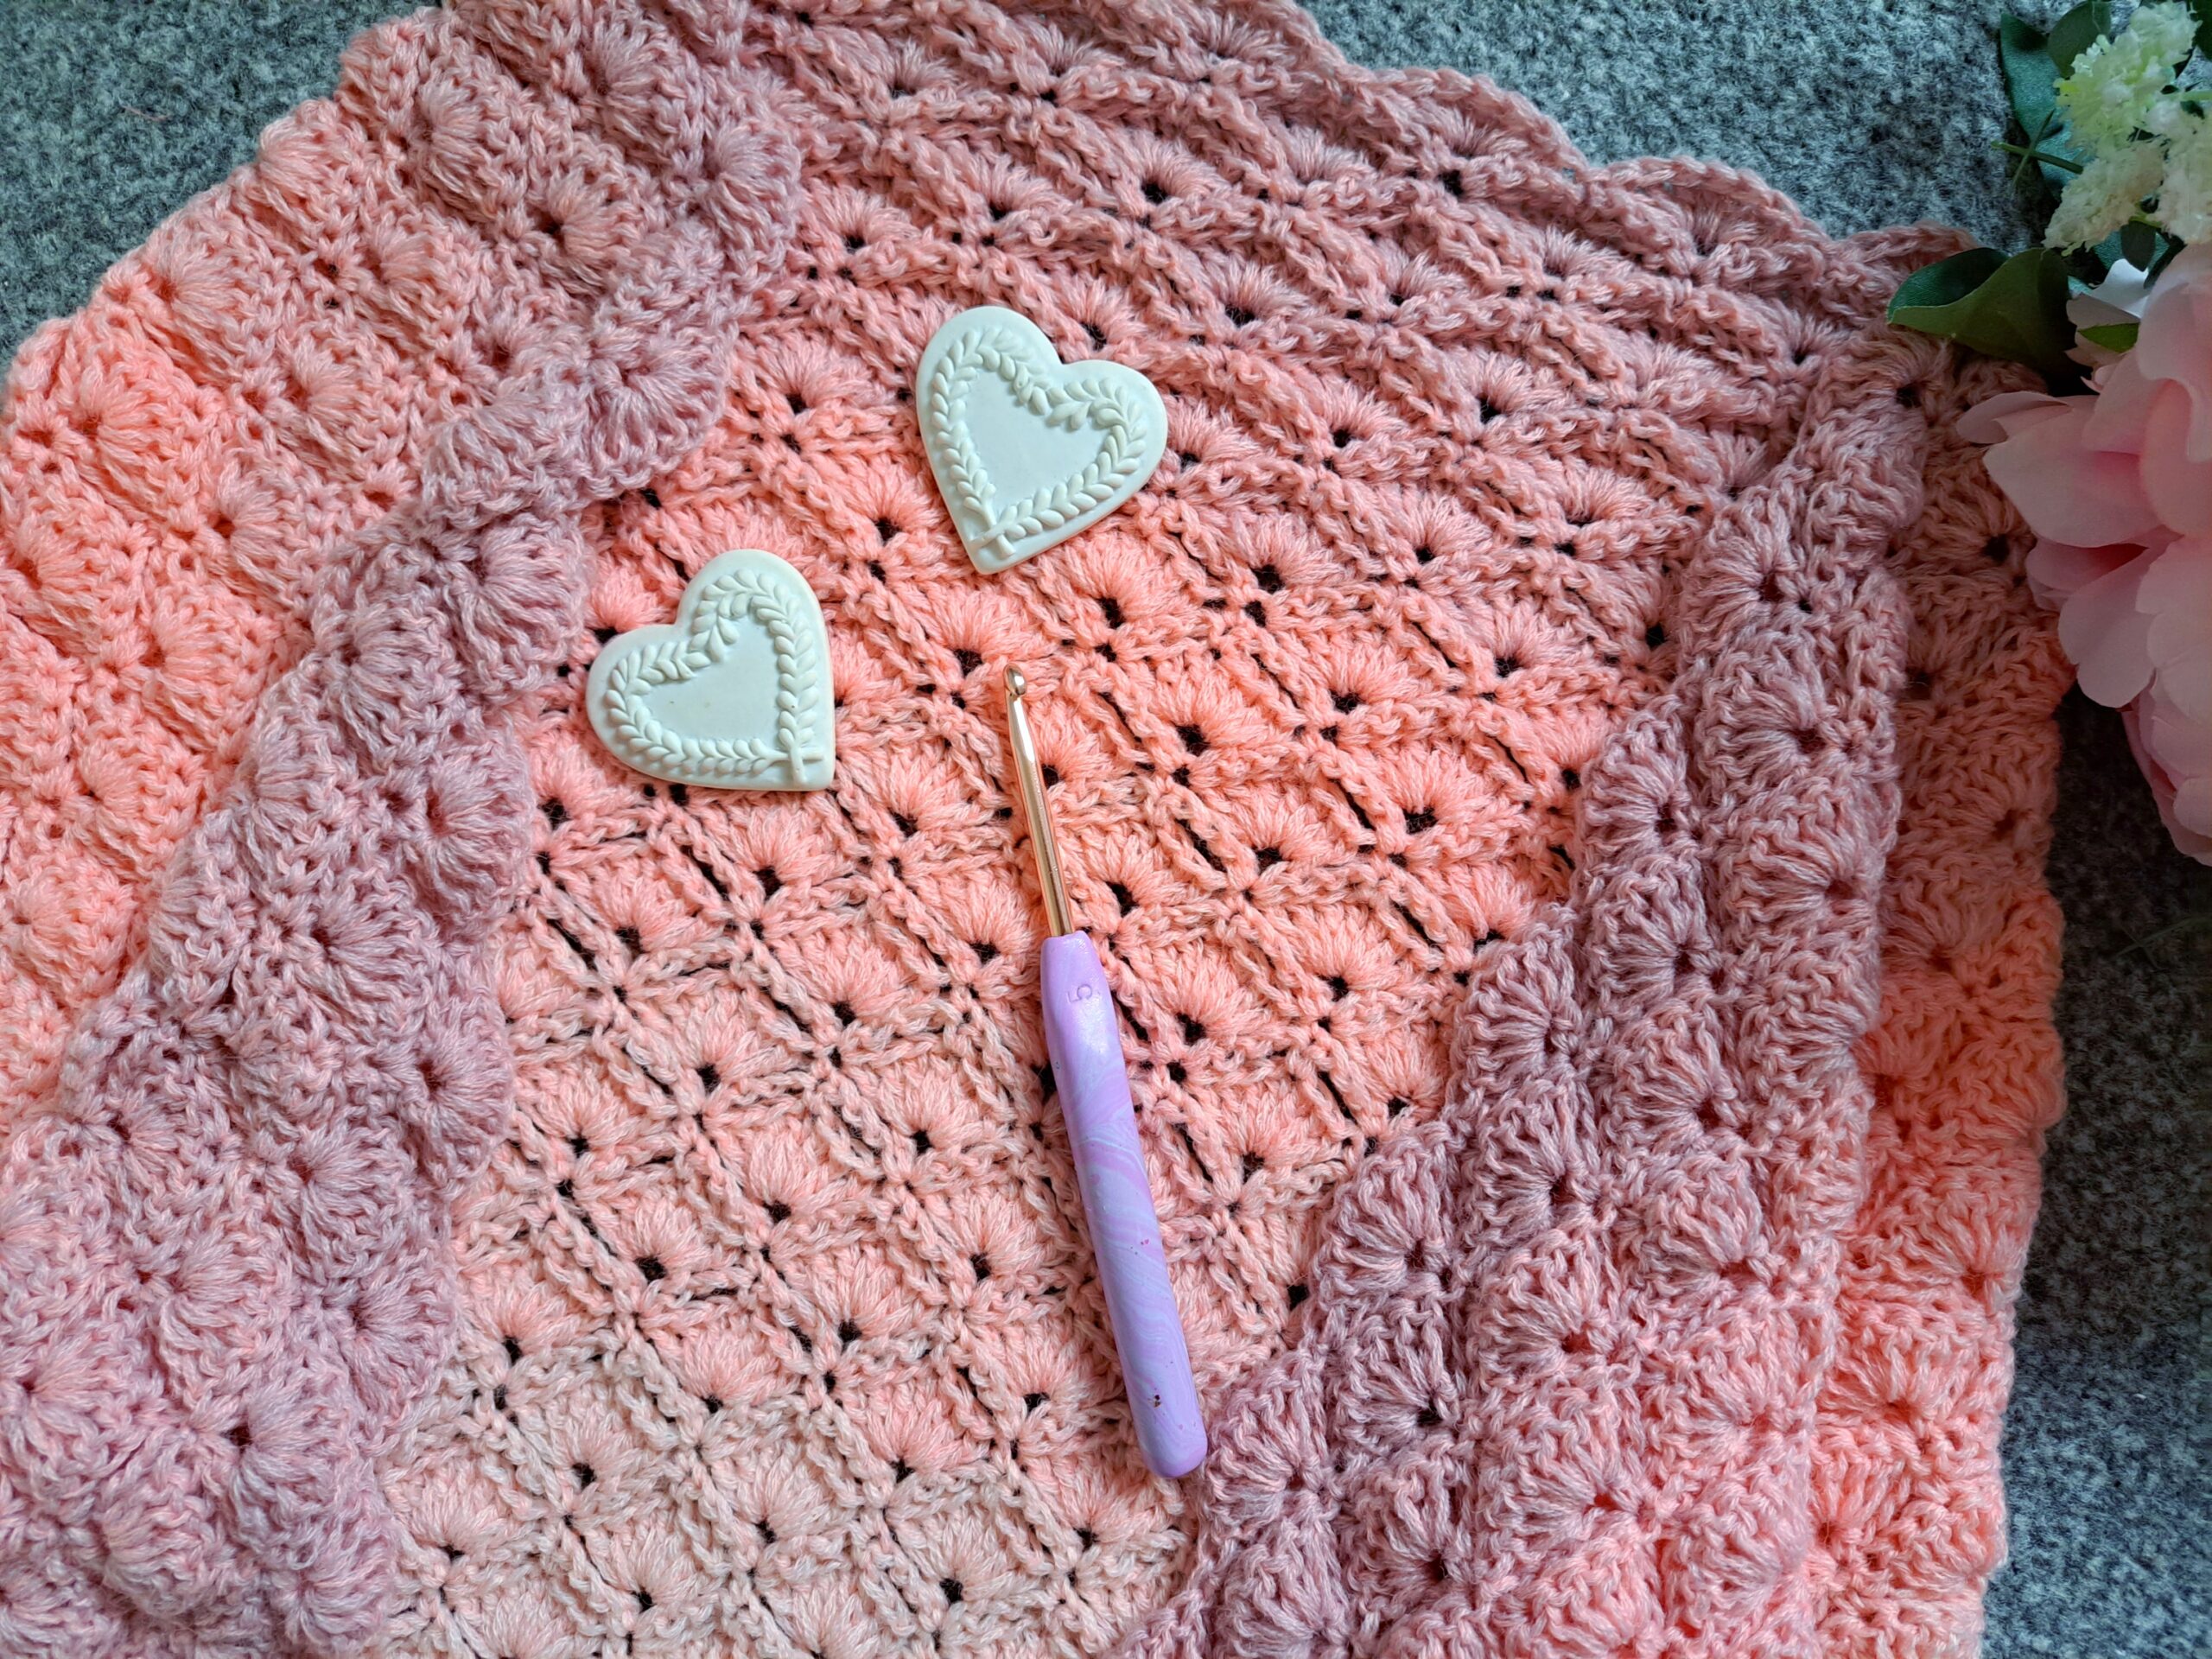
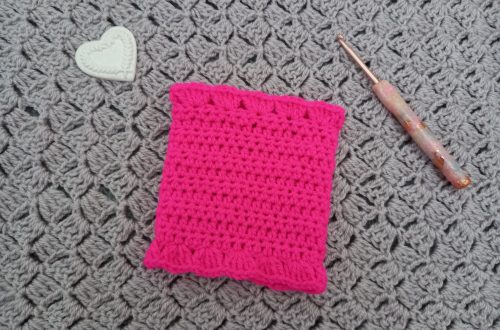
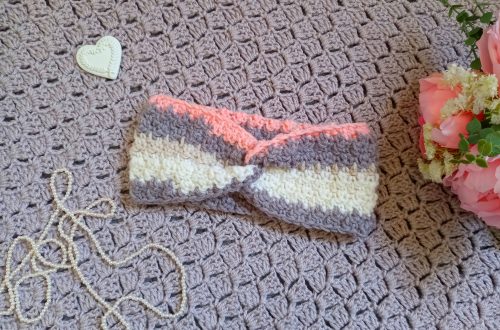
I used Rico Creative Wool Degrade in shade Powder. This yarn is so perfect, and contains 70% acrylic and 30% wool. This is such a beautiful yarn to work with! I have already used this yarn before. The Rose Petal shawl is made with this yarn, as is romantic boho shawl. These projects are so perfect to make in the Autumn and Winter time.
This yarn is soft and fine. It is considered a light 3/DK yarn, and is great to crochet with. This yarn creates a lightweight and delicate projects.
I hope you enjoy this crochet project as much as I did. Let me know in the comments what you think of this project!
Connecting with you
I would like to take a moment to thank every single one of you, for supporting me and my crochet journey. Indeed, If you want more exclusive crochet content from me, please do consider subscribing to my Patreon page. Thank you!
I love connecting with my Crochet Community through my blog and Social Media. You can find me on Youtube, Instagram, and Pinterest. I would love to connect with you on these platforms.
If you are on Ravelry, you can find my Ravelry page here. This is a great way to connect with me and have access to all of my PDF patterns. You can also find my Etsy shop by clicking here.
You can also join my private Facebook group to connect.
Subscribe to our weekly newsletter so that you never miss a stitch!
Crochet Victorian Shawl With Fringe: The Pattern
You can purchase the ad free, large print, PDF pattern from my Etsy store here: Crochet The Victorian Era Shawl With Fringes PDF Pattern
You can purchase the ad free, large print, PDF pattern from my Ravelry store here: Crochet The Victorian Era Shawl With Fringes PDF Pattern
Level: Easy/beginner
Gauge
4”x4” (10×10 cm)= 8 rows (=4 rows of shell stitches)
Size of finished shawl (excluding fringe)
22” (56 cm) high x 59” (150 cm)
Notes
I will be using US terms (British terms in brackets)
You will need
1 skein of Rico Creative Wool Degrade in shade Powder
4 mm crochet hook
A pair of scissors
Tapestry needle
A book or piece of cardboard measuring about 9” across to create fringes
Abbreviations
Ch: chain
St: Stitch
Sl st: slip stitch
Sk: Skip
SC: Single Crochet (UK Double Crochet)
DC: Double crochet (UK Treble Crochet)
EOR: End of row
Begin pattern here:
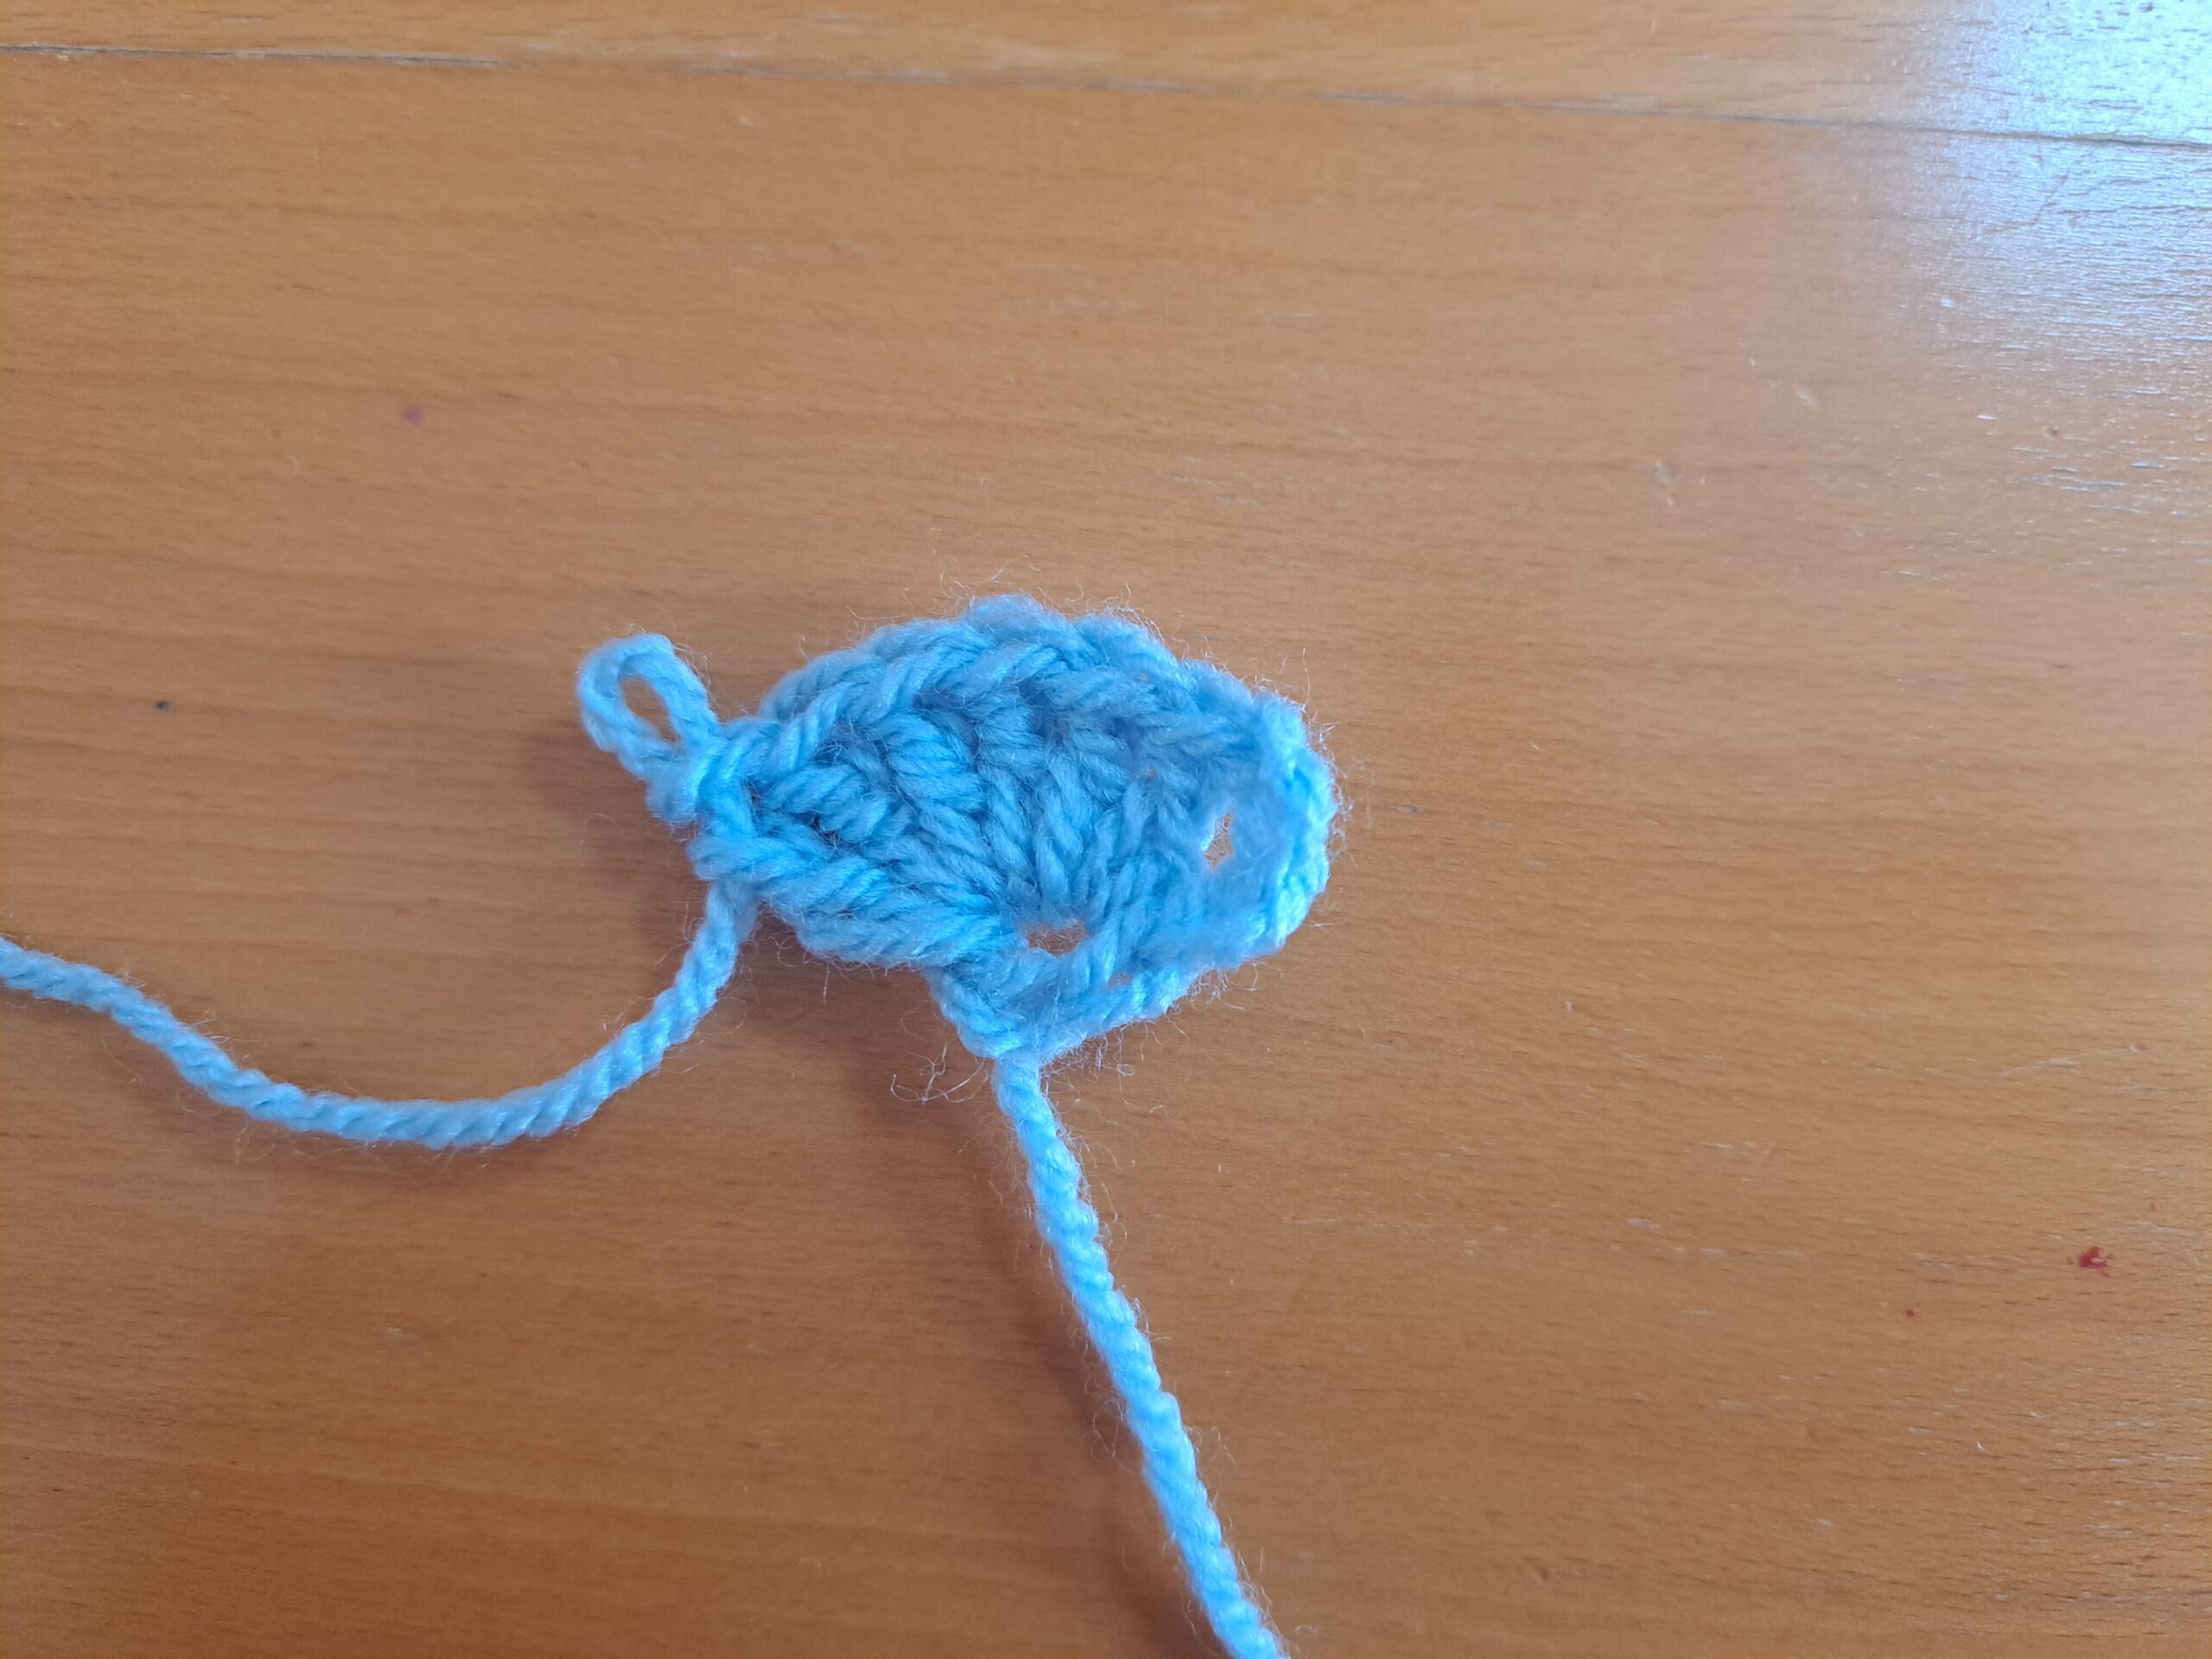
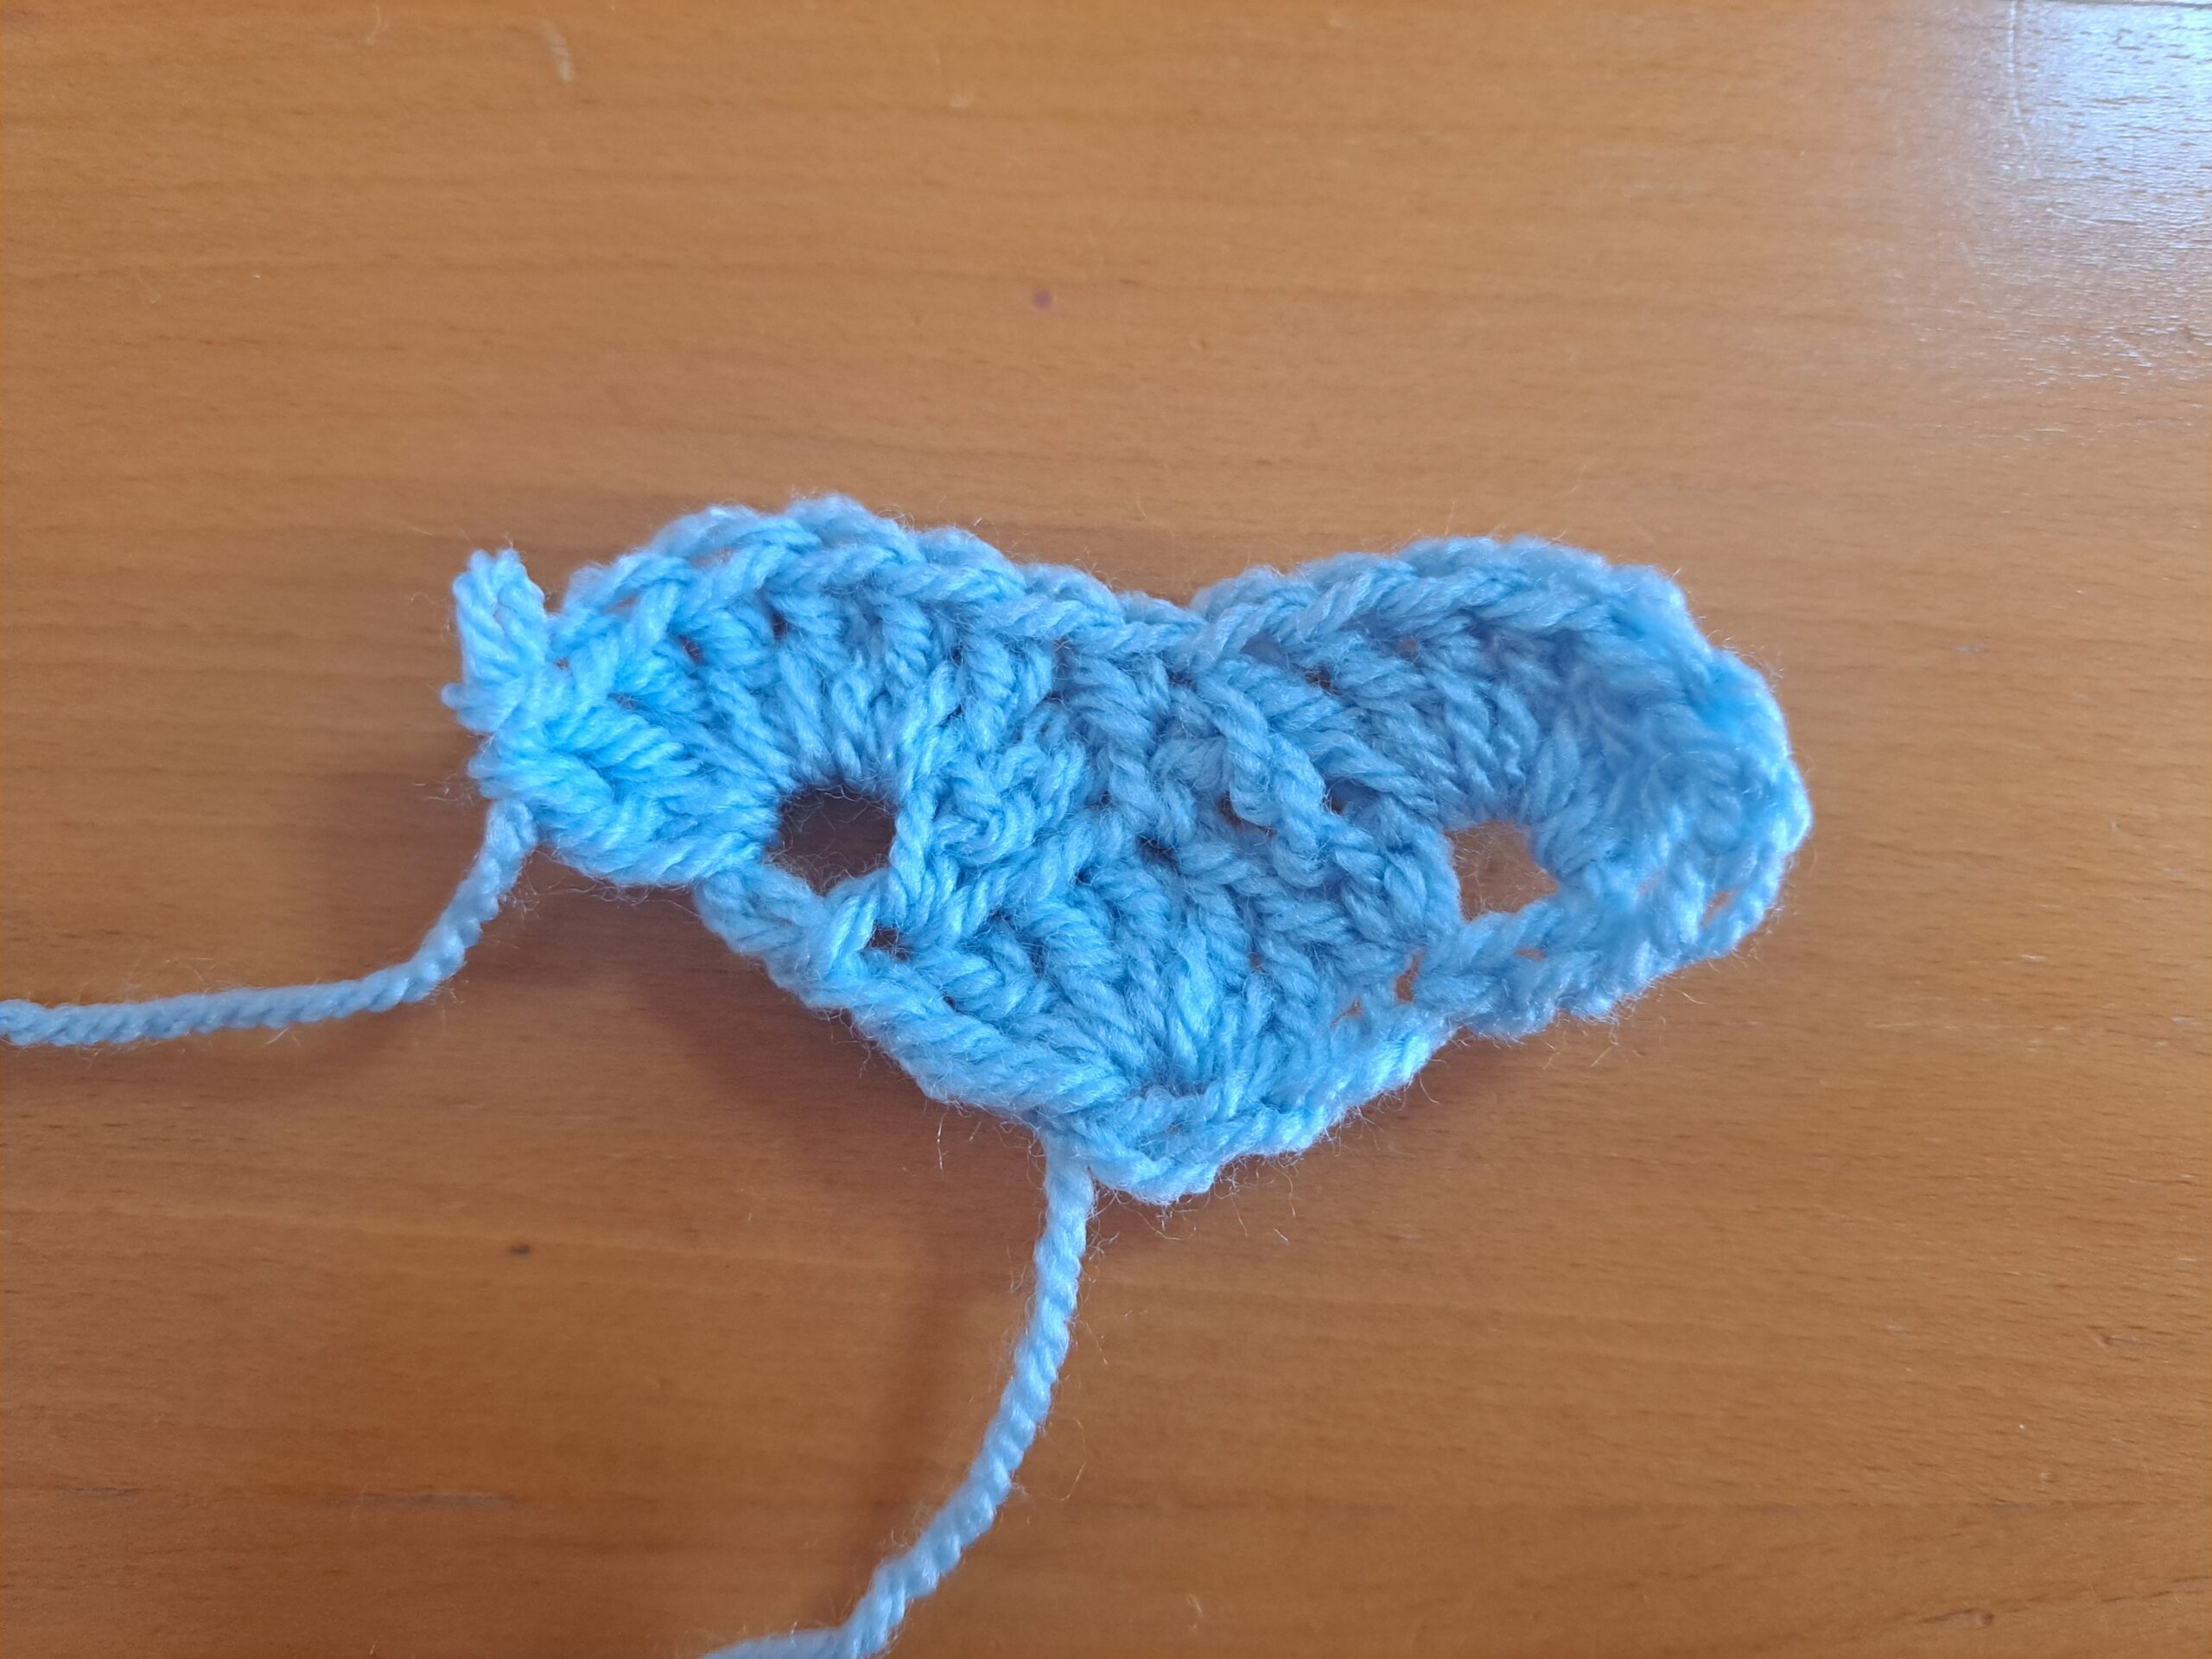
To start, make a slip knot. Ch 4, sl st through 1st stitch to form a ring.
1: Ch 3 (=DC), 6 DC into center of ring (= first shell stitch).
2: Ch 4, turn your work, SC into 1st st to form a ring; ch 3, SC into 4th stitch of shell stitch from previous row, ch 4, SC into last st (which is also the ch 3 from previous row), ch 4 and SC once again in the same stitch to form a ring.
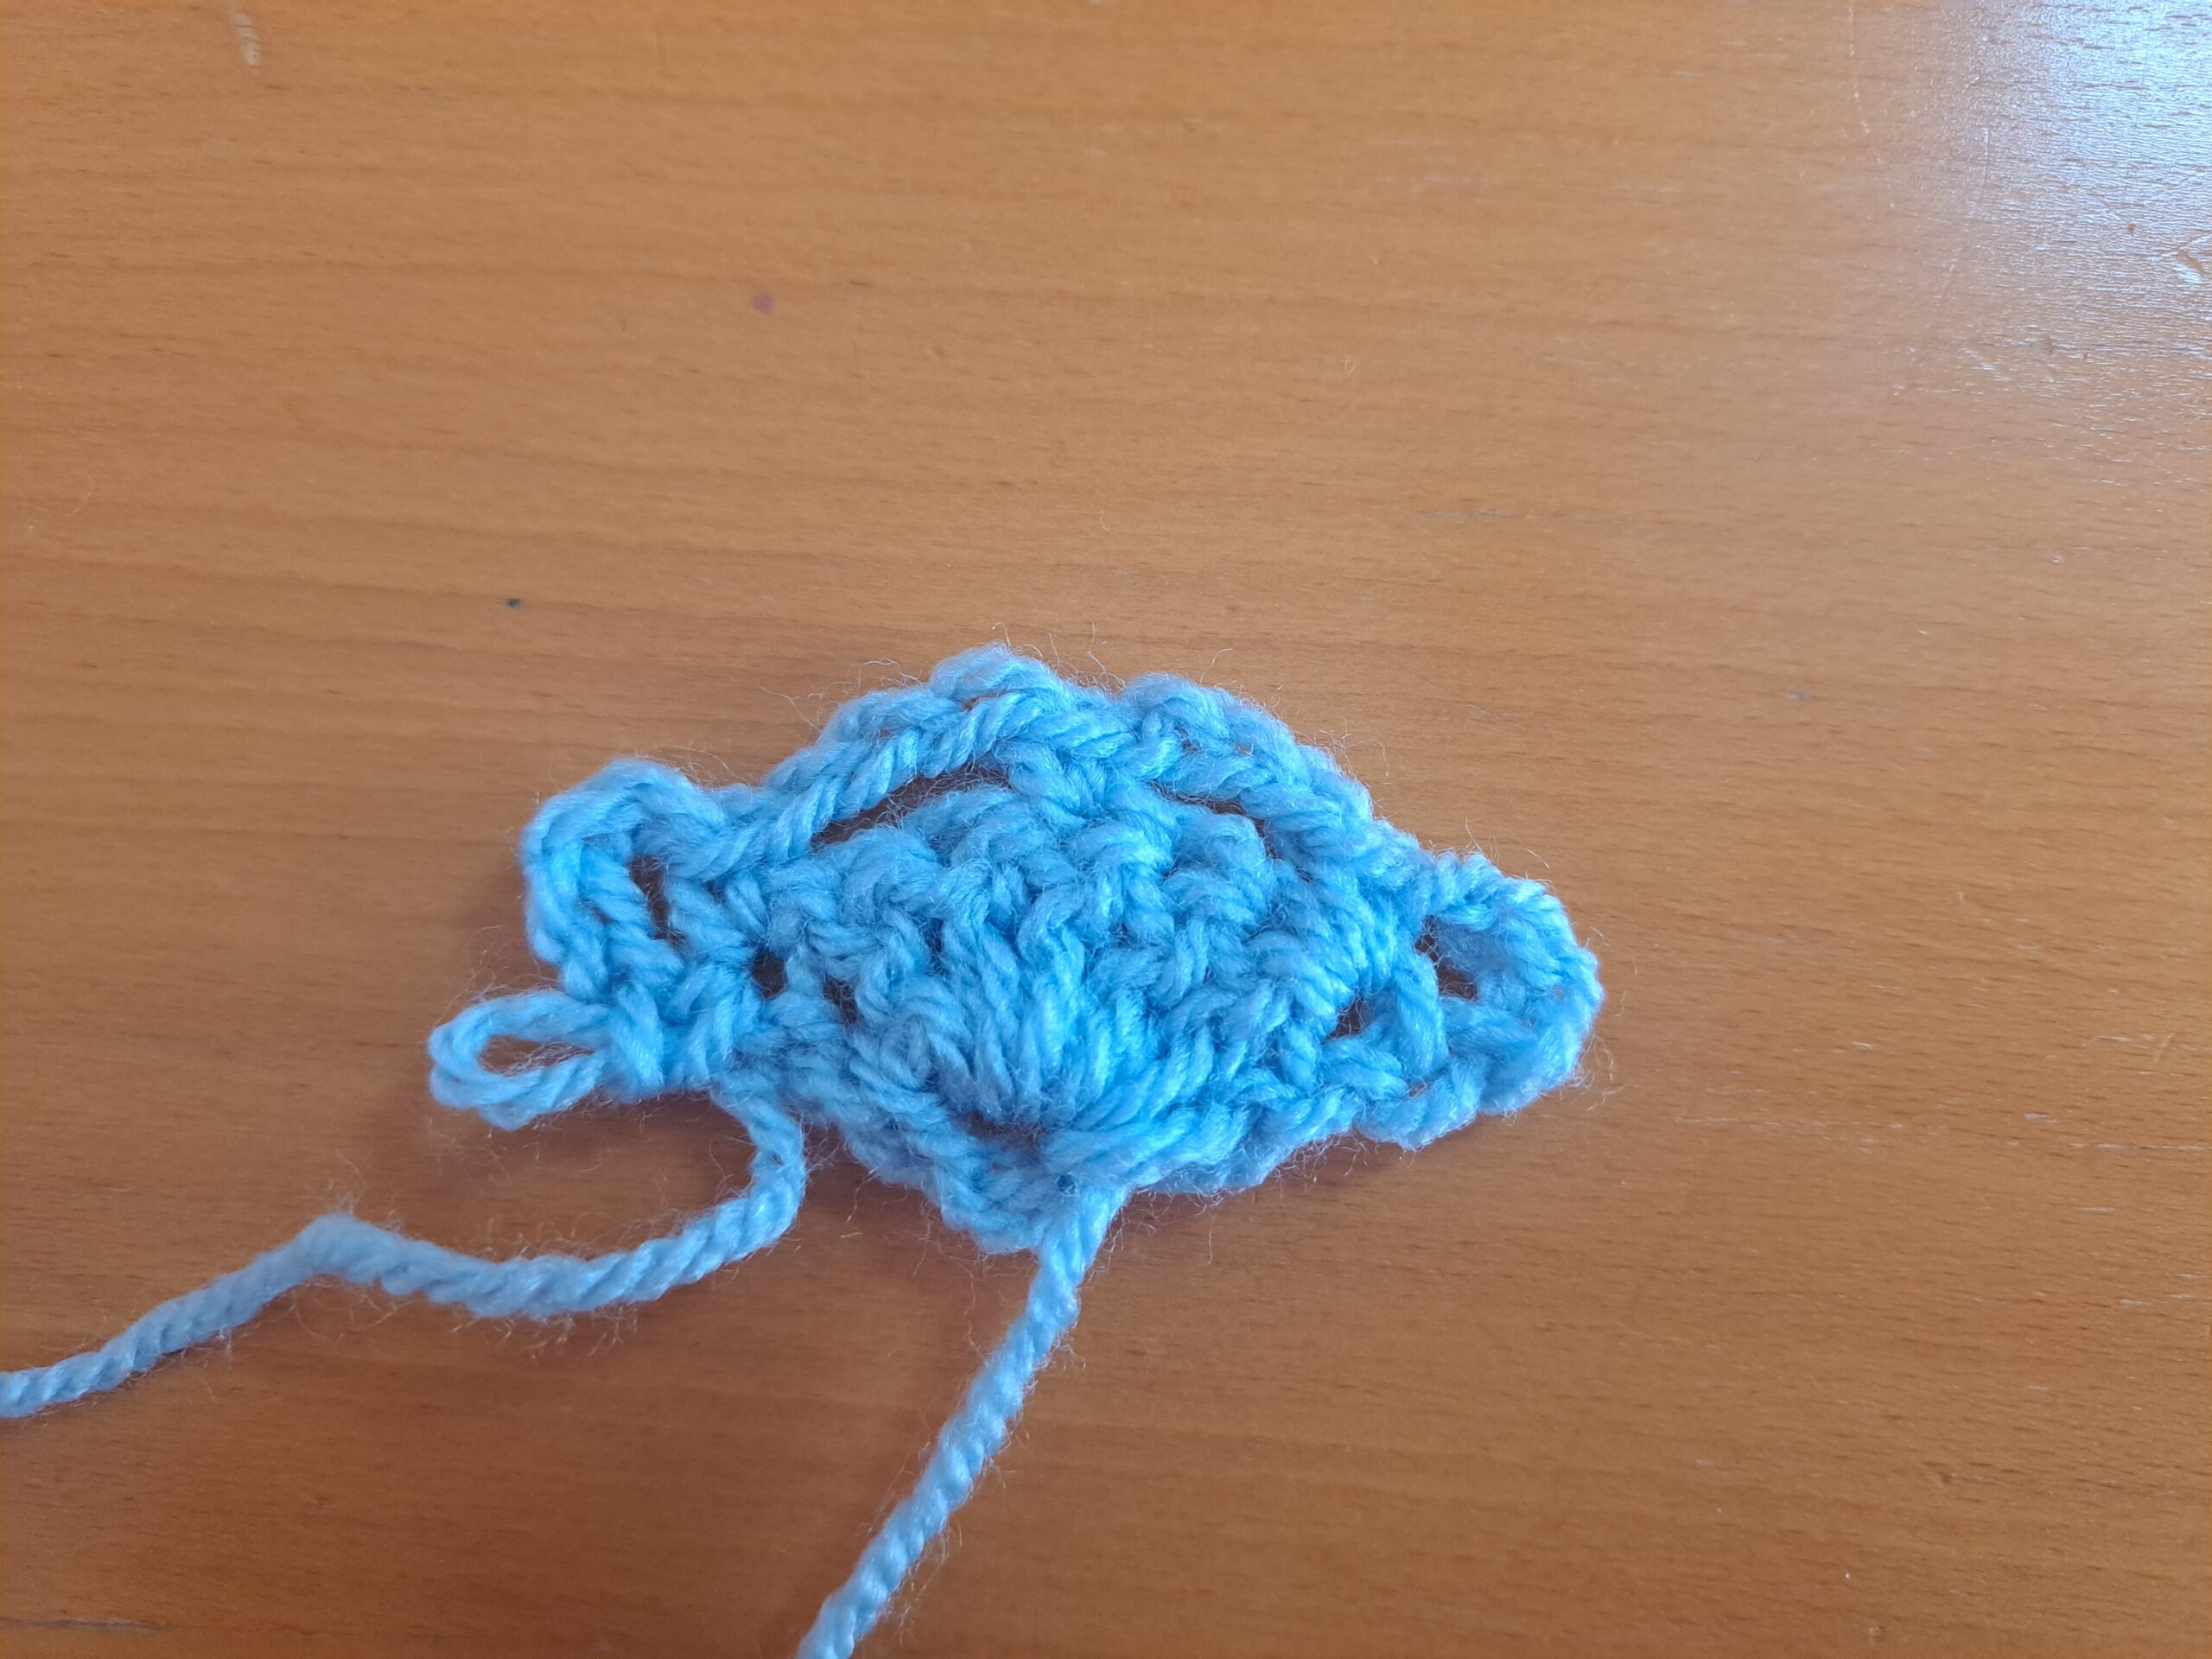
3: Ch 3 (=DC), turn your work, place 6 DC into center of chain 4 ring (=7 DC and shell stitch); sk ch 4 from previous row and SC into center SC from previous row. Skip ch 4 from previous row, and go directly into center of ch 4 ring with 7 DC (=shell stitch).
4: Ch 4, turn your work, SC into first st to form a ring; Ch 3, SC into 4th st of shell stitch from previous row, ch 3, SC into SC from previous row. Now ch 4 and SC into same stitch to form a ring, ch 3 and SC into 4th stitch of the shell from previous row, ch 3 and SC into last stitch (which is also the beginning ch 3 from previous row); ch 4, SC into this same last stitch to form a ring.

Row 5
5: Ch 3 (=DC), turn your work, place 6 DC into the center of the ch 4 ring from previous row (=7 DC). Sk ch 3 from previous row and SC into center SC from previous row; sk ch 3 from previous row once more and go directly into next ch 4 ring and place 7 DC into this ring (=shell stitch). Now sk ch 3 from previous row and SC into center SC from previous row. Sk ch 3 and place 7 DC into the last ch 4 ring center (=shell stitch).
6: Ch 4, turn your work, SC into first st to form a ring; ch 3, SC into 4th stitch of shell stitch from previous row, ch 3, SC into SC from previous row. Now ch 4, SC into same stitch to form a ring, ch 3 and SC into 4th stitch of the shell from previous row, ch 3 and SC into SC from previous row. Ch 4 and SC into same stitch to form a ring, ch 3, SC into 4th st of shell stitch from previous row, ch 3 and SC into last stitch of shell stitch from previous row (which is also the first ch 3 from previous row). Ch 4 and SC into same stitch to form a ring.
7: Ch 3 (=DC), turn your work, place 6 DC into ring (=7 DC and shell stitch). [Sk ch 3 from previous row and SC into center SC from previous row; sk ch 3 from previous row once more and go directly into next ch 4 ring and place 7 DC into this ring (=shell stitch)] twice. Sk ch 3 from previous row and SC into center SC from previous row. Sk ch 3 and place 7 DC into the last ch 4 ring center (=shell stitch).
8-34: Repeat rows 6 and 7 (alternating them), making sure you add your shells as your shawl grows wider by following this simple pattern explained above.
Fasten off and tidy up all loose ends.
Fringes
For this part of the project, you will be needing your book and yarn.
Take your yarn and wrap around your book twice. Snip off your yarn at the bottom.
With the help of your hook, attach your piece of yarn to the first corner of the shawl, securing it as seen in picture below. Place a fringe across the V side of the shawl, placing these fringes at about 2 centimeters from each other.


You May Also Like

Crochet Traditional French Beret Free Pattern
Crochet Pink Ballerina Headband Pattern